

Page 1
^ PLEASE READ AND SAVE BEFORE USE
USER MANUAL
ICE MAKER WITH WATER DISPENSER
MODEL: AI-400 SERIES
Please read this owner’s manual carefully before operating the unit.
Page 2

TABLE OF CONTENTS
INTRODUCTIONS.......................................................................................................1
IMPORTANT SAFETY INSTRUCTIONS......................................................................2
GETTING TO KNOW YOUR UNIT..............................................................................5
Unit outline...........................................................................................................3
Operation panel.....................................................................................................4
Main function........................................................................................................ 4
BEGIN OPERATING THE UNIT................................................................................... 5
Unpack the unit.....................................................................................................5
Clean your unit before use..................................................................................... 5
Prepare for use.......................................................................................................6
Operate the unit.....................................................................................................7
ELECTRICAL DIA GRAM..........................................................................................10
CLEAN YOUR UNIT DURING REGULAR USE.........................................................11
TROUBLESHOOTING GUIDE..................................................................................13
PRODUCT SPECIEICATIONS.................................................................................... IS
CONTACT AND WARRANTY.....................................................................................16
Page 3

INTRODUCTIONS
Thank you for purchasing your New Air product, designed to improve your life’s ease and
comfort. Not only can you enjoy the ice-making function, but you can also enjoy cool or hot
water. With its whisper-quiet operation and attractive design, you will enjoy convenience
and comfort for years to come.
Please read these instructions carefully before operating. When using this appliance,
always exercise basic safety precautions.
This easy-to-use manual will guide you on how to ensure the best use of your unit.
Please complete the following information for future reference, necessary to obtain warranty
service.
Model Number:____________________________________________________
Serial Number:
Date of Purchase:
Place of Purchase:
_______________________________________________
Page 4

I
IMPORTANT SAFETY INSTRUCTIONS
When using electrical appliances, basic safety precautions should be followed to reduce the risk of
fire, electrical shock, and injury to persons or property.
Read all instructions before using any appliance,
• Do not operate this or any other appliance with a damaged cord.
Connect to properly polarized outlets only. No other appliance should be plugged into the
same outlet. Be sure that the plug is fully inserted into the receptacle.
• Do not run the power cord over carpeting or other heat insulators. Do not cover the cord.
Keep cord away from traffic areas and do not submerge in water.
• We do not recommend the use of an extension cord, as it may overheat and become a fire
hazard. If you must use an extension cord, use a minimum size of No.14 AWG, and rated no
less than 1875 watts.
• If the unit is brought in from outside during the winter, allow a few hours for the unit to reach
room temperature before plugging in.
• Do not let hot water touch bare skin. Exercise caution and use supervision when the
appliance is used near children.
• Do not use your unit outdoors. Place on an even or flat surface to avoid hazard due to
instability of the appliance.
• Do not place the unit in direct sunlight and make sure that there is at least 2 inches of space
between the back of your unit and the wall. Keep a minimum distance of 4 inches on each
side of your unit.
• Do not tip the unit over.
• Do not use other liquids besides water to make ice cubes or to dispense cold drinks.
• Always him off and unplug the unit when there is no water left in the bottle or when you are
changing the bottle. Turn it back on after a new bottle has been placed inside and when the
air is purged from the water taps.
• Unplug the unit before cleaning or making any repairs/servicing.
• Do not clean the unit with flammable fluids. The fumes can create a fire hazard or
explosion.
• Disconnect the main plug from the supply socket when the unit is not in use or you are
traveling. The supply connection is through the main plug.
WARNING: This appliance must be grounded. IMPORTANT: The wires in the main lead are
colored in accordance with the following codes:
•
Green or Green with Yellow strip: Grounding
White: Neutral
Black: Live
2
Page 5
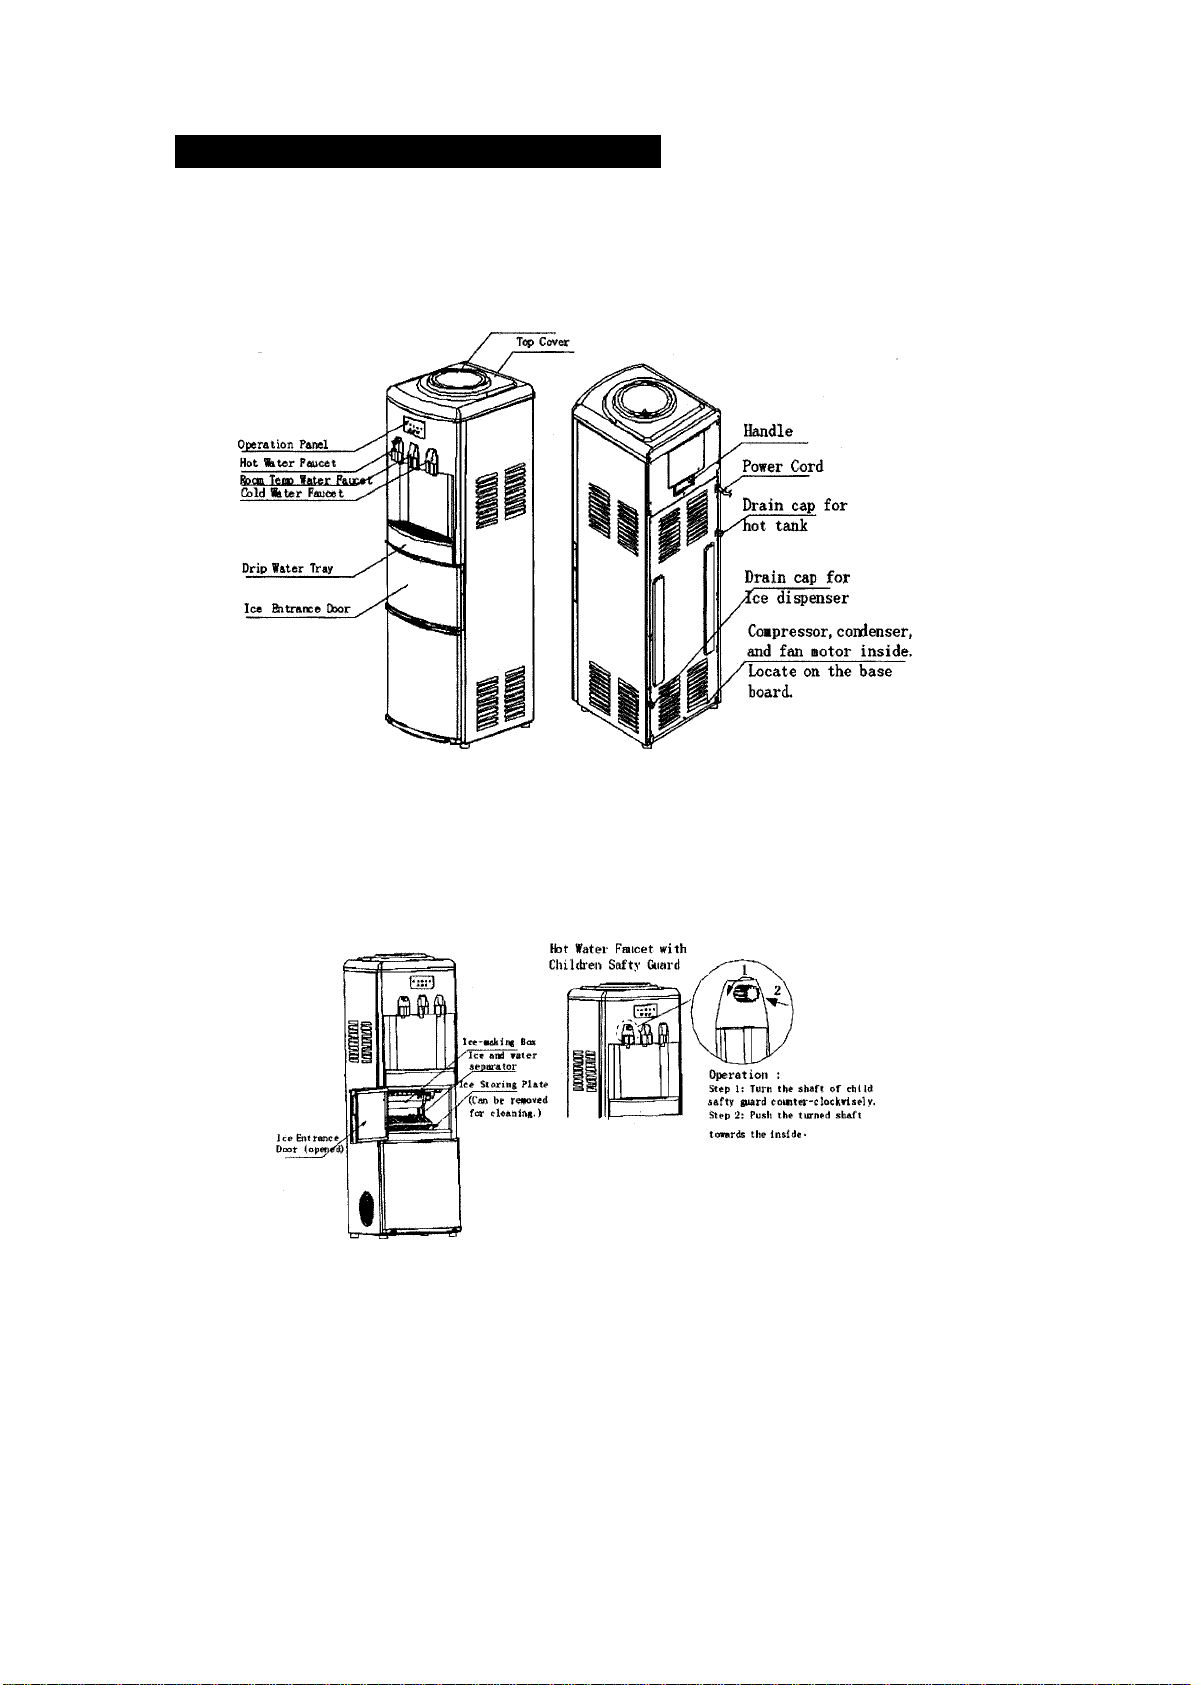
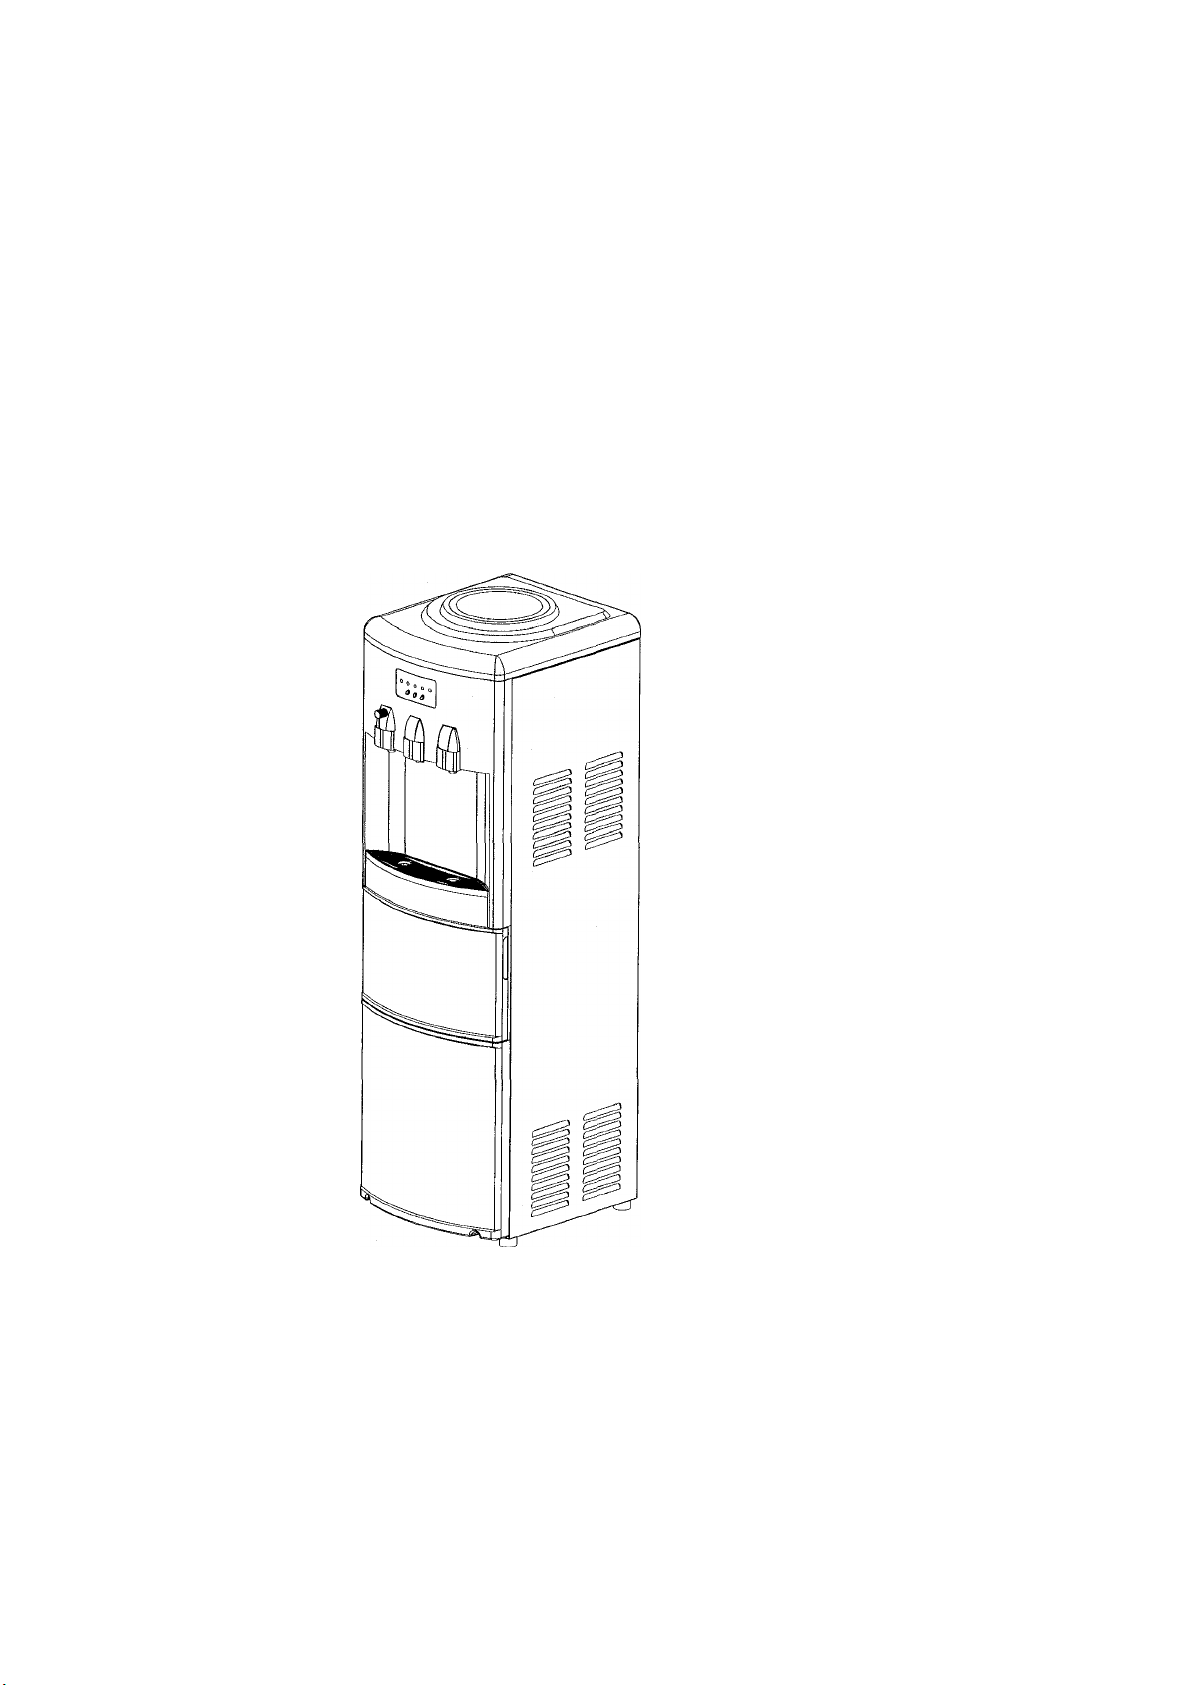
GETTING TO KNOW YOUR UNIT
Unit Outline
Snnrt D»vice for
Vat«r Bottle
Page 6
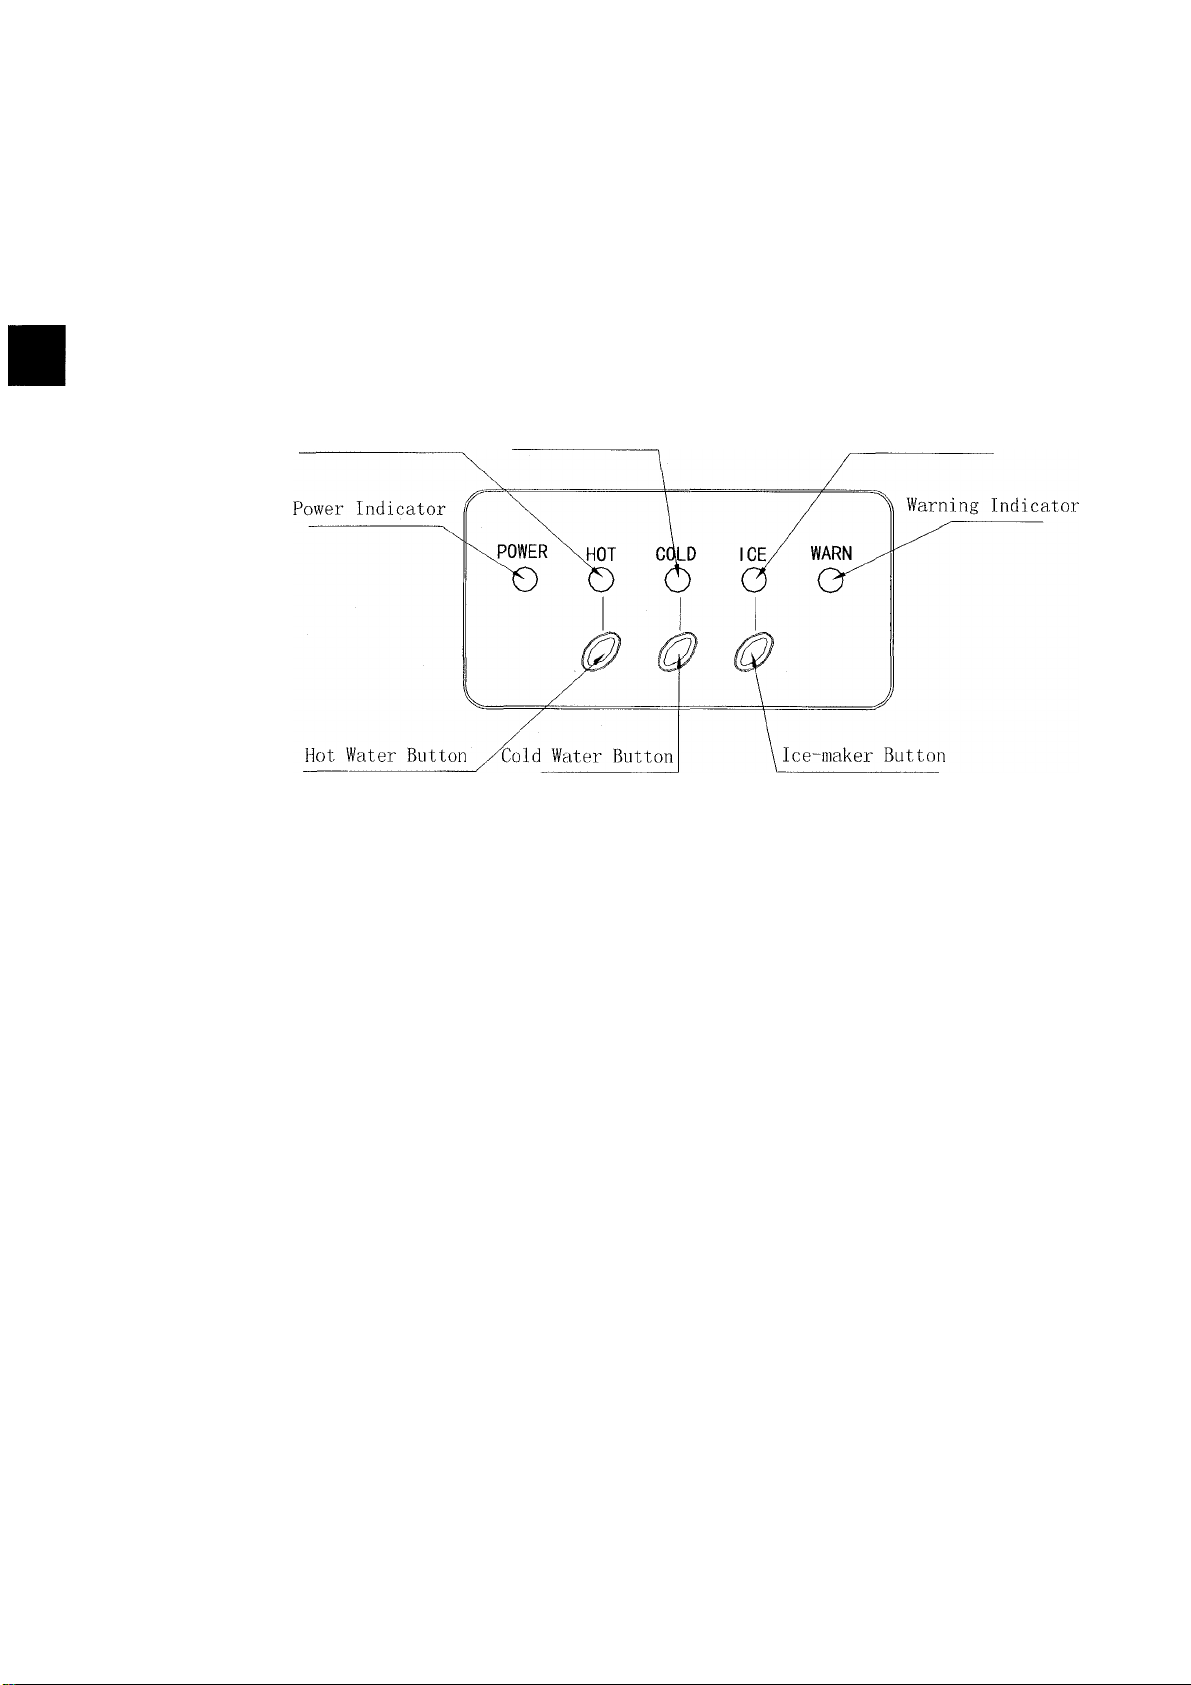
Operation Panel
Hot Water Indicator Cold Water Indicator
Main Functions
Hot water
Cold water only
Ice-making only
Cold water and ice-making at same time
Ice-Maker Indicator
Page 7

Begin Operation
UNPACKING THE UNIT
• Removing the package: Do not turn the unit upside down or lay it on its side.
a. Remove the strap.
b. Open the carton box.
c. Remove the Styrofoam packing from the box.
d. Pull the unit straight up from the box.
e. Remove the plastic bag.
The refrigeration compressor has sensitive mounts inside
of the welded shell for quiet operation.
Improper handling may damage the compressor.
• Wipe clean if necessary.
• Place the unit evenly and gently on a hard and flat surface.
The location should not be directly in the sunlight or another
source of heat.
• Place the unit where it will receive proper air circulation, and
make sure that there is at least 2 inches between the back of
the unit and the wall. Keep a minimum distance of 4 inches
between each side of the unit.
• The appliance must be positioned so that the plug is accessible.
• Fasten the drain cap tightly on the back of the unit before running, as during the shipping
process, it may be loose. If it is not fastened properly, water leakage may occur.
• Do not plug the power cord into the power socket before further reading instructions!
This unit is for indoor use only.
Room temperature should not exceed 97 Degrees F/36 Degrees C.
CLEAN BEFORE USING
Before using your unit, it is strongly recommended that it is cleaned thoroughly.
1. Take out the accessory ice shovel from the ice-making chamber.
2. The outside of the unit should be cleaned regularly with a mild detergent solution and warm
water.
3. For the first time, hold the clean water bottle vertically and upside down (over the smart device)
and place the water bottle into the smart device receptacle. After a few minutes, water will
flow into all of the faucets, and the cold and hot water tank, until the water is able to flow from
the faucet. Then, take down the water bottle and open the drain cap for the hot tank. Let all
of the water flow out and then reinstall the drain cap and tighten it.
5
Page 8

4. Clean the ice-making chamber with diluted detergent, warm water, and a soft cloth. Then use
water to rinse the inside parts. Next, drain the water by unplugging the drain cap of the ice
dispenser on the back of the unit. Reinstall the drain cap of the ice dispenser and tighten it.
5. When the machine is not in use for a period of time, open both of the water drained caps to
drain the water completely from unit.
PREPARE FOR USE
Improper use of the grounded plug can result in the risk of electrical shock. If the power
cord is damaged, please call our customer service.
1. Make sure that the unit is not plugged into the main electrical outlet.
2. Before placing a water bottle on the unit, be sure that the drain cap on the back is tightly
fastened.
3. Hold the water bottle vertically and upside down (over the smart device) and place the water
bottle into the smart device receptacle. Apply slight pressure in order to pierce the bottle cap
with the spigot. This unit accepts two, three or five gallon water bottles with sealed caps that are
able to be pierced.
4. Open the water faucet to let the air out until the water starts to flow. When this happens,
release the faucet taps.
5. Plug the unit into a grounded power outlet. Do not plug in before the water can flow out
from all of the water faucets.
DANGER:
This unit should be properly grounded for your safety. The power cord of this appliance is
equipped with a three-prong plug to be used with a standard three-prong wall outlet to minimize
the possibility of electric shock.
Plug your appliance into an exclusive, properly installed, and grounded wall outlet. Under any
circumstances, do not cut or remove the third (ground) prong from the power cord. Any
questions concerning power and/or grounding should be directed toward a certified electrician.
This appliance requires a standard 110-120 volt, 60 Hz electrical outlet with three-prong ground.
6. If the unit is brought in from outside during the winter, allow a few hours for the unit to reach
room temperature before plugging in.
Page 9

OPERATE THE UNIT
After plugging into the main power outlet, the POWER indicator on the control panel will be on.
This indicates you are ready to begin operating the hot and cold water or ice-making functions as
desired.
Hot Water Operation
Hot Water Indicator
Press the Hot Water button and the green Hot Water indicator above the button will begin blinking,
meaning that the heating element has begun to work. When this green indicator illuminates, this
means that the hot water has reached the desired temperature and is drinkable. After awhile, drain
out the hot water from the hot water faucet, and the Hot Water indicator will begin blinking again,
meaning that the heating element has been initiated.
If the hot water tank is empty after the first use, or after being drained, wait a few minutes and a
warning sound will go off ten times along with an indicator light. When the water bottle is
replaced, press the hot water button again to begin heating and to turn off the warning indicator.
If you do not want hot water, please press the Hot Water button again to save electricity and cost.
(After this, the Hot Water indicator will be off.)
Warning Indicator
Page 10

Cold Water Operation
Press the Cold Water button to begin the cold water ftinction. After this, the Cold Water indicator
will blink, meaning that the compressor has begun cooling the water. When the Cold Water
indicator changes from blinking to illuminating, the cold water has reached the desired
temperature and the cold water is ready. After awhile, or when the cold water is drained from the
cold water faucet, the cold water indicator will begin blinking again, indicating the cooling
process has begun. The Cold Water function and the Ice-making function can be operating at the
same time.
Ice-making Operation
Power Indicator
1. Press the Ice-maker button on the operation panel to begin the ice-making cycle. The
Ice-maker indicator will start to blink.
2. The ice making cycle lasts 7 to 15 minutes, depending on the ambient temperature.
3. While the ice-maker is on, the unit will verify the water level periodically. If there is not
enough water to make ice, the ice maker will stop automatically, and the Warning indicator
will turn on, meaning that the water level will not be able to reach the required level for ice
making.
Ice-Maker Indicator
8
Page 11

4. The ice maker will automatically stop working when the unit is full of ice, and the Ice-maker
indicator will switch from blinking to illuminating.
5. Make sure to keep the water in the tank clean. If the unit is not in use for a long period of
time, make sure to take down the water bottle and drain out all of the water from both the
drain port and from the back of the unit.
6. How to get the ice
Open the ice door at the front of the unit and use the ice scoop (included with your purchase)
to take the ice from the unit.
Note: When you turn on the cold water and the ice-making operations at same time, you should
wait a few minutes to allow the water temperature in the cold tank to return to normal temperature.
If the cold water temperature goes up again, use the cold water from the cold water faucet and the
unit will switch to Cold Water operation again after the present ice-making cycle finished.
Page 12

ELECTRICAL DIAGRAM
POA/ER SUPPLY
TTWeOR№L
Water\/fel ve fw
I ce- maki ng
Tl:Ebt Water Temperature Sensor
T2: Condensor Sensor for control ing fan-mot or
T3:0Dld Water Temperature Sensor
Electrical Diagram
ICE and Water Dispenser
10
Page 13

CLEAN YOUR UNIT DURING REGULAR USE
After you have used your unit for three or more months, we suggest cleaning the unit again.
Unplug your unit before doing any cleaning or maintenance!
• For the outside enclosure of the unit, wash with a soft, wet cloth and liquid dishwashing soap.
Do not use corrosive chemical solvents as this might cause color changes and hurt the
machine. Do not pour water over the whole shell when washing, and avoid getting the
electrical parts wet.
• For the hot and cold water dispenser, twist the bottle receptacle of the non-spill system (smart
device) counterclockwise and pull it up.
Take apart the non-spill system (smart device and smart core showed in above figure), and
proceed to wash it with the dishwashing fluid, rinse, and reassemble. Empty both tanks (hot and
cold) by unplugging the drain cap of the hot water tank at the back of the unit. Next, clean the
inside parts of the water dispenser system with vinegar or a 2% citric acid solution to remove
mineral scaling from the water. Rinse well, and then open the drain cap from the hot water tank to
remove all of the water. Replace all of the parts and securely fasten the drain cap. It is
important to let the unit dry for two hours before plugging it back in. When finished, reinstall the
bottle receptacle (smart device).
• For the ice-making chamber, remove the ice and water separator and the ice storing plate by
unscrewing the screw according to the following figure.
•
11
Page 14

Ice and Water
Next, you can wash the inside parts of the ice-making chamber with the dishwashing fluid, rinse,
and open the drain cap for the ice dispenser on the back. This will get the water out. Rinse
several times, and then securely return and fasten the drain cap. Immerse the removed ice, water
separator, and ice storing plate in the dishwashing fluid to clean. After rinsing and drying, install
both of these back to the original position with a screw and screwdriver.
PRECAUTION
• When cleaning, the outside of the machine can be washed with a wet, soft cloth, but do not
use corrosive chemical solvents, as this may hurt the machine and alter its color. Be careful
not to pour water over the enclosure when washing, avoiding its internal electrical parts.
These should not get wet.
• Keep the unit away from the wall with proper distance. Keep it far away from high
temperature surroundings and prevent it from being exposed to sunlight or other heat sources.
Keep the enclosure ventilated and cleared of any obstructions.
• When the unit is not in use for an extended period of time, disconnect the power cord and
drain the water from both drain caps, refastening them tightly when finished. Do not touch
the faucets at this time in case of leakage.
• Children should not touch the hot water tap as it can burn the skin.
12
Page 15

TROUBLESHOOTING GUIDE
If the unit is not working properly, please reference the following table:
PROBLEM
Hot and cold water,
ice-inaker are all not
available, and the POWER
indicator isn’t illuminated on
the control panel
Only hot water not available Hot Water Button
Only cold water not available Cold Water Button
CHECK
Main Power Supply
switch in your
home
Power plug
Circuit breaker
Main Fuse Blown out
Power breakdown Main electrical power supply Wait until the main power supply
Transformer
Fuse on the PCB
board
and Hot Water
indicator
Hot water use The preceding amount of hot
Hot water sensor
and Cold Water
indicator on the
control panel
Cold Water use The preceding mount of cold
Air clearance The apparatus is insufficiently Space the unit from the wall by
between the unit
and the wall
Water separator in The cold water separator has Replace the water isolator at the
the cold tank moved in the cold water tank correct position.
Water bottle
Ice-making Both ice-making and cold
PROBABLE REASON
At “OFF” position
Not on the power outlet Plug it.
Tripped
Unplug or breakdown the PCB
Controller
Blown out
Hot water function is not turned
on by the button on the control
panel
water is too much
Breakdown Call the serviceman to replace with
Cold water function is not
turned on
water is too much
ventilated
The temperature of water
supplied (in the bottle) is too
high. (This occurs when the
bottle is exposed to direct
sunlight for a long time)
water functions are running at
same time.
SOLUTION
Move to “ON” position
Check and reclose
Replace
resumes
Call the electrician or serviceman to
perform maintenance
Call the electrician or seiwiceman to
replace it with same rating
Press the Hot Water button
Wait for a moment until the hot
water comes out
a new unit
Press the Cold Water button
Wait for a moment until cold water
comes out
more than 15 centimeters on each
side
Put the water in a
shady, cool place
Wait a few m inutes after stopping
the ice-m aking function
13
Page 16

Only Ice-making only is not
working
Compressor is not running or
suddenly stops
Warm indicator illuminates
and buzzes
Warm indicator flashes on the
control panel
Water leaks from the taps or
the faucet
Water is dripping out of the
water dispenser and onto the
floor.
Noise occurs
Ice Button and Ice
indicator on the
control panel
Cold water function
Main power supply Voltage too low
Ventilation opening
blocked
Clearance around
the unit
Condenser
Cooling system Refrigerant over charged or
Compressor and
accessories
Water bottle There is no water.
Ice-making box in
the ice-making
chamber
Water faucet button The water faucet button may be
Water faucet
Water bottle The bottle may have small
Water drain caps on
the back
Floor
Locating position
Ice-making function is not
turned on by the button.
Both Ice-making and cold
water functions are running
together
Blocked
Too small clearance or bad air
circulation
Too dirty, produce overheated
leaked
Breakdown
The ice making box is clogged
by ice or some other
mechanism
clogged
The water faucet has been
damaged.
pinholes
Loose
The appliance is not level.
Contact with other products
Press the Ice-making button
Wait a few more minutes and stop
the Cold Water function first
Contact an electrician or the
electricity department
Remove the substance blocking the
opening
Leave enough space around the unit
(Min. 15 cm)
Clean
Contact with qualified serviceman to
repair it
Cali a serviceman to check and
repair
Replace with a new bottle full of
water
Stop the unit and allow some time
for the clogged ice to melt
Check it and let the button go out
Call your service or sales agent for
replacement information
Change to a new bottle
Tighten these completely and check
the sealing silicon material inside
the drain cap to make sure it is not
torn or damaged. If so, change to
new drain caps
Install it evenly and lock the unit
Move it away from other products
14
Page 17

PRODUCT SPECIFICATIONS
Model
Power Supply
Ice-Making Capacity
Cold Water Capacity
Hot Water Capacity
Total Electrical Rating
Ice-Making/Ice Harvest Current 2.5 A/3.5 A**
Cold Water Current
Heating Current
Refrigerant and Quantity
Design Pressure (High Side)
Design Pressure (Low Side) 88 psig
Net Weight
TEST CONDITION: (*): Water Temperature: 77°F., Room Ambient: 77"F.
(**): As UL standard requirement: 104°F. Room Ambient
AI-400
115V,60Hz
28 Lb/Day* (Ice-making only)
4 L* (Cold water only)
5 L
7.8 A**
2.5 A
4.3 A
R134a,110g
220 psig
50.5 Lb
15
Page 18

The manufacturer provides warranty in accordance with the legislation of the customer's own
country of residence, with a minimum of 1 year, starting from the date on which the appliance is
sold to the end user.
The warranty only covers defects in material or workmanship.
The repairs under wanunty may only be carried out by an authorized service centre. When making
a claim under the warranty, the original bill of purchase (with purchase date) must be submitted.
The warranty will not apply in cases of.
- Normal wear and tear
- Incomect use, e.g. overloading of the appliance, use of non-approved accessories
- Use of force, damage caused by external influences
- Damage caused by non-observance of the user manual, e.g. connection to an unsuitable mains
supply or non-compliance with the installation instructions
- Partially or completely dismantled appliances
WARNING:
- WARNING: Keep ventilation openings, in the appliance enclosure or in the built-in structure,
clear of obstruction.
-WARNING: Do not damage the refrigerant circuit.
16
 Loading...