

Page 1

R
AND
THESE
INSTRUCTIONS
EAD
AIR COOLER
AF-320
Page 2
CAUTION
Pleose read all these instructions carefully before using this
product.
' Closely supervise any chldren and pets when the unit Is In use.
' Only use the appliance for dCMTtestlc purposes and as Indioated In
these instructions.
• From lime to time, check the cord for damage. Never use the appBance If the cord or the apf^kance showany signs of damage.
• Do not place the appliance directly In front of a heater or In dt’ect
^nllght as this could damage the appBcrice.
' Do not use the appBonce outdoors.
• Use correct power voltage. Be careful not to leave the caWe loose
on floor where someone could trip and hurt themselves.
• Unplug the appliance before cleaning or replacement of any pieces.
' Keep Insecticide spray and paint spray cr any Inflammable products
away from the unit to protect the plastic casing and avoid fire.
• Do not Introduce objects Inside the appliance.
' Never use accessories that are not recommended cr supplied by the
manufacturer, ft could constitute a danger to the user and damage
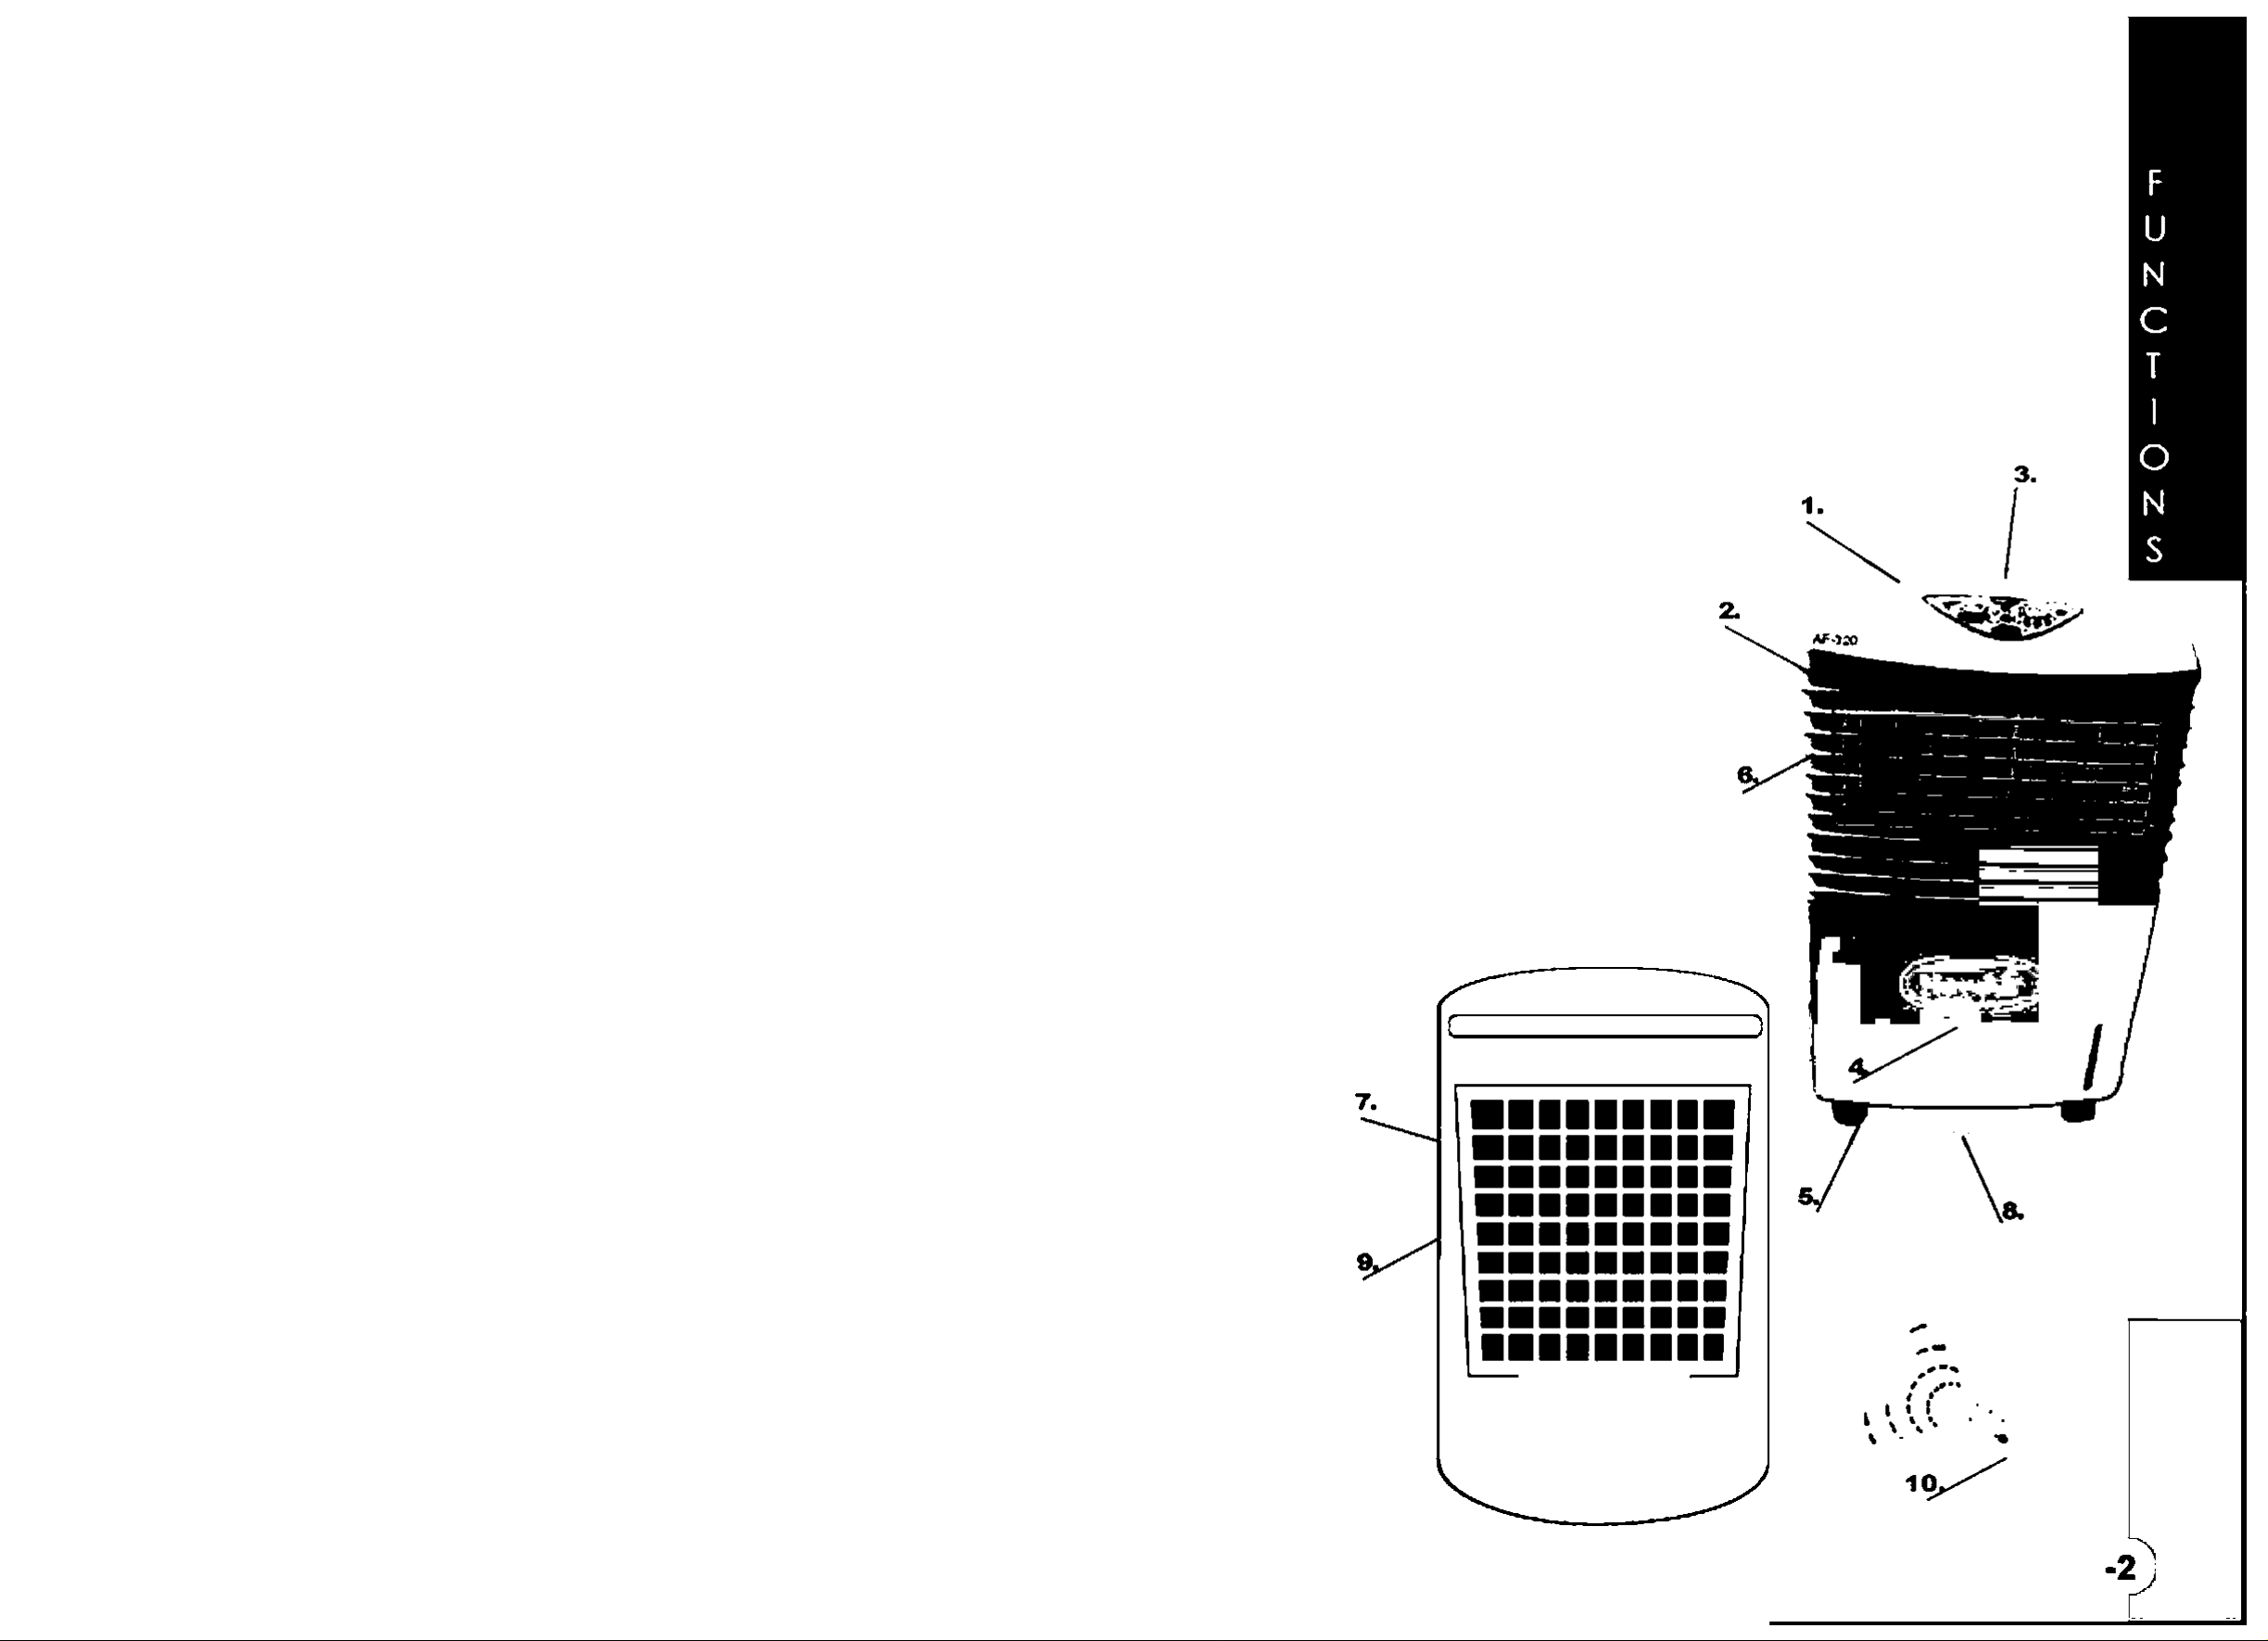
Description
1. Control panel
2. Handle (both sides)
3. Lld (opening for water or Ice)
4. Water level Indicator
5. Castors (x 4 )
6. Front louvers
7. Reis’Screen (removable)
8. Drain plug
9. Rear Panel (removable via 2 service screws)
10. Rerr>ote control
the appliance.
• All Interventions made by a norvqualifled person can be dangerous:
In this case, guarantee conditions would cancel. As wtth all electrical
products, a competent electrician must make any repaks.
' Do not place the machine on soft or uneven ground In order to
prevent It from leakhg or making noise.
' The rear of the unit can be placed close to the wal, but leave at least
a 50cm gap.
' Do not place the apllance on Its side, back or front whilst In storage
or transport. If the unit has been transported to you. leave star>ding
up-rlght for 2 hrs before starting the unit.
The Manufacturer will not assume any responsibility in the case of
non-adherence to these recommendation.
Page 3

TIMER
This air Ioniser and cooler Is equipped with an eight-hour timer.
This enables you to preset the machine to switch ott automatically at
a chosen number of hours ahead (1,2. 4 or 8 hours). To operate
simply select the number of hours aheod at which you wish the
machine to switch off. If you wish the machine to run continuously,
ensure the timer control is in the "OFF* position.
PREPARATION AND ON/OFF FUNCTION
1. RerTKDve the unit from its packaging.
2. If the humidify function is required, lift up the top cover of the
machine and fill where indicated. Do not put water into the
compartment marked 'ICE ONLY'. Only fill with cold clean water
Indicated "WATER ONLY'.
Fill according to level Indicator on the front of the machine.
DO NOT OVERFILL
1. Always use clean tap vsater and do not allow the same water to stay
in the machine for extended periods ot time. It Is recommended that
any water left In the machine for 3 or more days should be drained
away via the drain plug on the base of the unit.
2. Switch on at the mains and press the "SPEED/ON' control which starts
the appliance.
SPEED
This button switches the unit on and also controls the speed. The air
ioniser and coder has three air speeds. You can regulate the aHlow
output speed by simply selecting the speed flow (LOW. MEDIUM or
HIGH) to suit your requirements.
SWING
This control gives you the choice of having either a fixed or continuously
svA^eping air tiow. For a continuous sweeping air flow switch the
oscillation control to the "ON" position. If you require the air flow to be
delivered In a fixed direction, switch the oscillator control "OFF* when
the oscillator louvrers ore In the required direction.COOL
COOL
This function helps to remove latent heat from the atmosphere.lON
If the unit is required to be on continuously, this is automatic and the timer
control does not need to be used. The timer control is only used to
pre-set specific operating times required.
3. Operate the "COOLER" and "OSCILLATION' functions as required.
4. To switch off at any time, press the "OFF* button.
IMPORTANT
1. In coc^r furx:tlon. for a maximum efficiency, ensure the room Is well
ventilated.
2. Do not overfill with water (check water level at front).
3. Only fill halfway with water if uslr»g Ice In conjunction with water.
4. Make sure drain p^ug is tight before filling. When draining out water
ION
This control allow? you to Introduce negtlve ions to the air.
REMOTE CONTROL
Effective range: up to 6 meters.
Do not forget to Insert batteries In the remote control.
please ensure the drain plug Is refitted correctly aixJ tightly.
5. Only use cold cleon water
6. Only fill with water via the water compartment where indicated and
Ice In the Ice compartment where Indicated.
7. If the mains lead becomes damaged, pleose contact your supplier.
Page 4

CLEANING
CLEANING
Ensure the air filters are not blocked In any way as this will Impai'
the efficiency of the machine. Pushing the unit up against a wol
or operating It In very close proximity to long window crapes will
Impair the air flow ar>d efficiency.
Rear air filter
This Is easily accessible by removing the rear screen and removing
the filter. In a smoky cr dusty environment this filter becomes grey In
colour otter one or two months.
Disconnect the machine from the mains supply. Gently wash the
filter In mild soapy water, dry and replace. Be sure to refit the rear
screen securely. No special tools are required for this.
Water tank
If the unit is In regular service It Is not r>ecessary to clean the water
tank regularly. However, in hard water areas, deposits \MII build up
ar>d It is recommervded that cleaning \Mth mild soap/ water or»ce
every six months should be sufficient.
1. Disconnect the appliance from the rrvalns supply-
2. Rerr>ove the whole of the rear panel by carefully removing the
service screws. Do not remove the the rear frame completely as
the mains lead Is still connected Internally via a quick fit connector.
S.When theconnectof can be seen and reached, disconnect and
remove the panel completely.
4. Remove any deposits or dirt from within the tank with a mild soapy
detergent and cloth.
5. Flush with clean water and drain via the drain plug.
6. Reverse the procedure ond make sure the rear panel Is correctly
fitted before replacing and tightening the service screws.
Internal Humidity Screen
1. Use exactly the same procedure as for cleaning the voter tank.
2. With the rear panel separated, carefully remove the humidity
screen from Its rollers.
S.Sook the screen In worm mild soapy water until clean.
4. Replace back on the rollers.
5. Reverse the removal procedure.
6.lt Is recommended lorepeat this procedure every 6-12 months.
VOLTAGE
Voltage 120V/60HZ
Watts Cooling 85W
Water tank copacity 13 L
Ice tank capacity 4 L
Net weight 8.2 kg/181b
Selection speed 3
Electronic / Manual control Electronic
Water consumption
Ice consumption 0.35 l./h.
0.45 i./h.
Outside Cabinet
To clean the outside of the cabinet, use warm mild soapy water
and cloth. Do not use abrasive products.
Important
The control panel must r»ol be In contact with water or any other
Squids.
Maximum area threated 700m3/h.
Cooing Capoclty Up to 200 sq. ft.
 Loading...