


Neve
GENESYS
Quick Reference Guide
527-385
Issue 1
GENESYS - Quick Reference DRAFT COPY Issue 1
Health & Safety Notice
FOR YOUR OWN SAFETY AND FOR THE PROTECTION OF OTHERS PLEASE
OBSERVE THE FOLLOWING HEALTH AND SAFETY INSTRUCTIONS
• READ THESE INSTRUCTIONS AND KEEP THEM HANDY
• HEED ALL SAFETY WARNINGS
• DO NOT USE NEAR WATER
• CLEAN ONLY WITH A DRY CLOTH
• DO NOT INSTALL NEAR HEAT SOURCES
• DO NOT BLOCK VENTILATION OPENINGS
• PROTECT THE POWER CORD
• USE ONLY ACCESSORIES SPECIFIED BY THE MANUFACTURER
• UNPLUG WHEN UNUSED FOR LONG PERIODS OF TIME
• MODULES OR CARDS SHOULD NOT BE INSERTED OR REMOVED WITH THE POWER ON
• REFER ALL SERVICING TO QUALIFIED PERSONNEL ONLY
• NO USER SERVICEABLE PARTS INSIDE
• PLEASE OBSERVE THE RECOMMENDED 'POWER UP' & 'POWER DOWN' PROCEDURES
FAILURE TO OBSERVE THESE PROCEDURES
AND RECOMMENDATIONS WILL INVALIDATE
THE MANUFACTURER’S WARRANTY
- 2 -

Issue 1 DRAFT COPY GENESYS - Quick Reference
Table of Contents
Health & Safety Notice.........................................................................................................2
Introduction.........................................................................................................................4
About this document............................................................................................................4
Computer Cassettes..............................................................................................................4
Safety Notice........................................................................................................................5
Channel SEL Mode................................................................................................................6
Wiring connections for Quick Recording...................................................................................6
Power-up procedure..............................................................................................................7
Wiring connections for HUI control..........................................................................................8
GENESYS Application Scenarios.........................................................................................10
Recording...........................................................................................................................10
Mixing...............................................................................................................................11
Live Recording....................................................................................................................12
HUI Control of DAW (inc sub-mixing)....................................................................................13
Power-up State...................................................................................................................14
Recording in Stereo..........................................................................................................14
Recording in Surround......................................................................................................16
To set up Surround Routing...............................................................................................17
To set up Surround Monitoring...........................................................................................18
Monitoring.......................................................................................................................20
Saving this setup................................................................................................................20
HUI Connections................................................................................................................21
Power-down Procedure.....................................................................................................21
Quick Reference Section....................................................................................................22
Head Office:
AMS Neve
Billington Road
Burnley
Lancashire
England
BB11 5UB
Phone: +44 (0) 1282 417 011
Fax: +44 (0) 1282 417 282
London Office:
+44 (0) 2074 323 858
Email: Info@AMS-Neve.com
Web: www.AMS-Neve.com
© ® 2008 AMS Neve Ltd own the copyright of all information and figures contained in this manual which are
not to be copied or reproduced by any means or disclosed in part or whole to any third party without written
permission. As part of our policy of continual product improvement, we reserve the right to alter specifications
without notice but with due regard to all current legislation.
Disclaimer: The information in this manual has been carefully checked and is believed to be accurate at the time
of publication. However, no responsibility is taken by AMS-Neve for inaccuracies, errors or omissions nor any
liability assumed for any loss or damage resulting either directly or indirectly from use of the information
contained within.
Trademarks: All trademarks are the property of their respective owners and are hereby acknowledged.
- 3 -

GENESYS - Quick Reference DRAFT COPY Issue 1
Introduction
For more than 40 years, the designers and engineers at Neve have worked uncompromisingly to
produce the world's premier audio recording and mixing equipment. As a result, Neve products
have long exceeded the most stringent requirements for sound quality and musicality – from
countless classic albums to the vast majority of each year's blockbuster films. Traditionally, such
perfection has come at a price, meaning that only the largest and most prestigious studios could
own a Neve recording console.
Until now.
Introducing GENESYS.
A hand-built expandable analogue recording console with digital workstation control. A console
that builds upon Neve's forty years of technical heritage, including legendary mic pre-amplifiers
and highly revered analogue circuit design.
GENESYS also accommodates for the seismic changes in methods of music recording, with
extensive digital control and connectivity.
In any configuration, GENESYS offers an excellent studio control surface with comprehensive
monitoring and signal routing compatibilities. This eliminates the typical collection of awkwardly
interfaced devices, and puts a proper console back in the heart of the studio.
As with all Neve products, GENESYS offers sound and build quality beyond reproach. Even the
console stand was developed in conjunction with internationally renowned studio designer Roger
D'Arcy of Recording Architecture in London.
With GENESYS, the widest possible range of studios can legitimately claim to be a Neve facility.
The future begins here.
About this document
This Quick Reference Guide outlines all the basic procedures you need to get a signal through the
console and to start working.
> An arrowhead at the head of a sentence indicates you should do this action.
Computer Cassettes
Genesys consoles have an internal computer fitted and this will either be the OLD style or the
NEW style, depending on the particular model.
The OLD style has space for the automation option as a hardware upgrade, the NEW style is a
single complete unit.
Both versions are shown below for reference.
- 4 -
Issue 1 DRAFT COPY GENESYS - Quick Reference
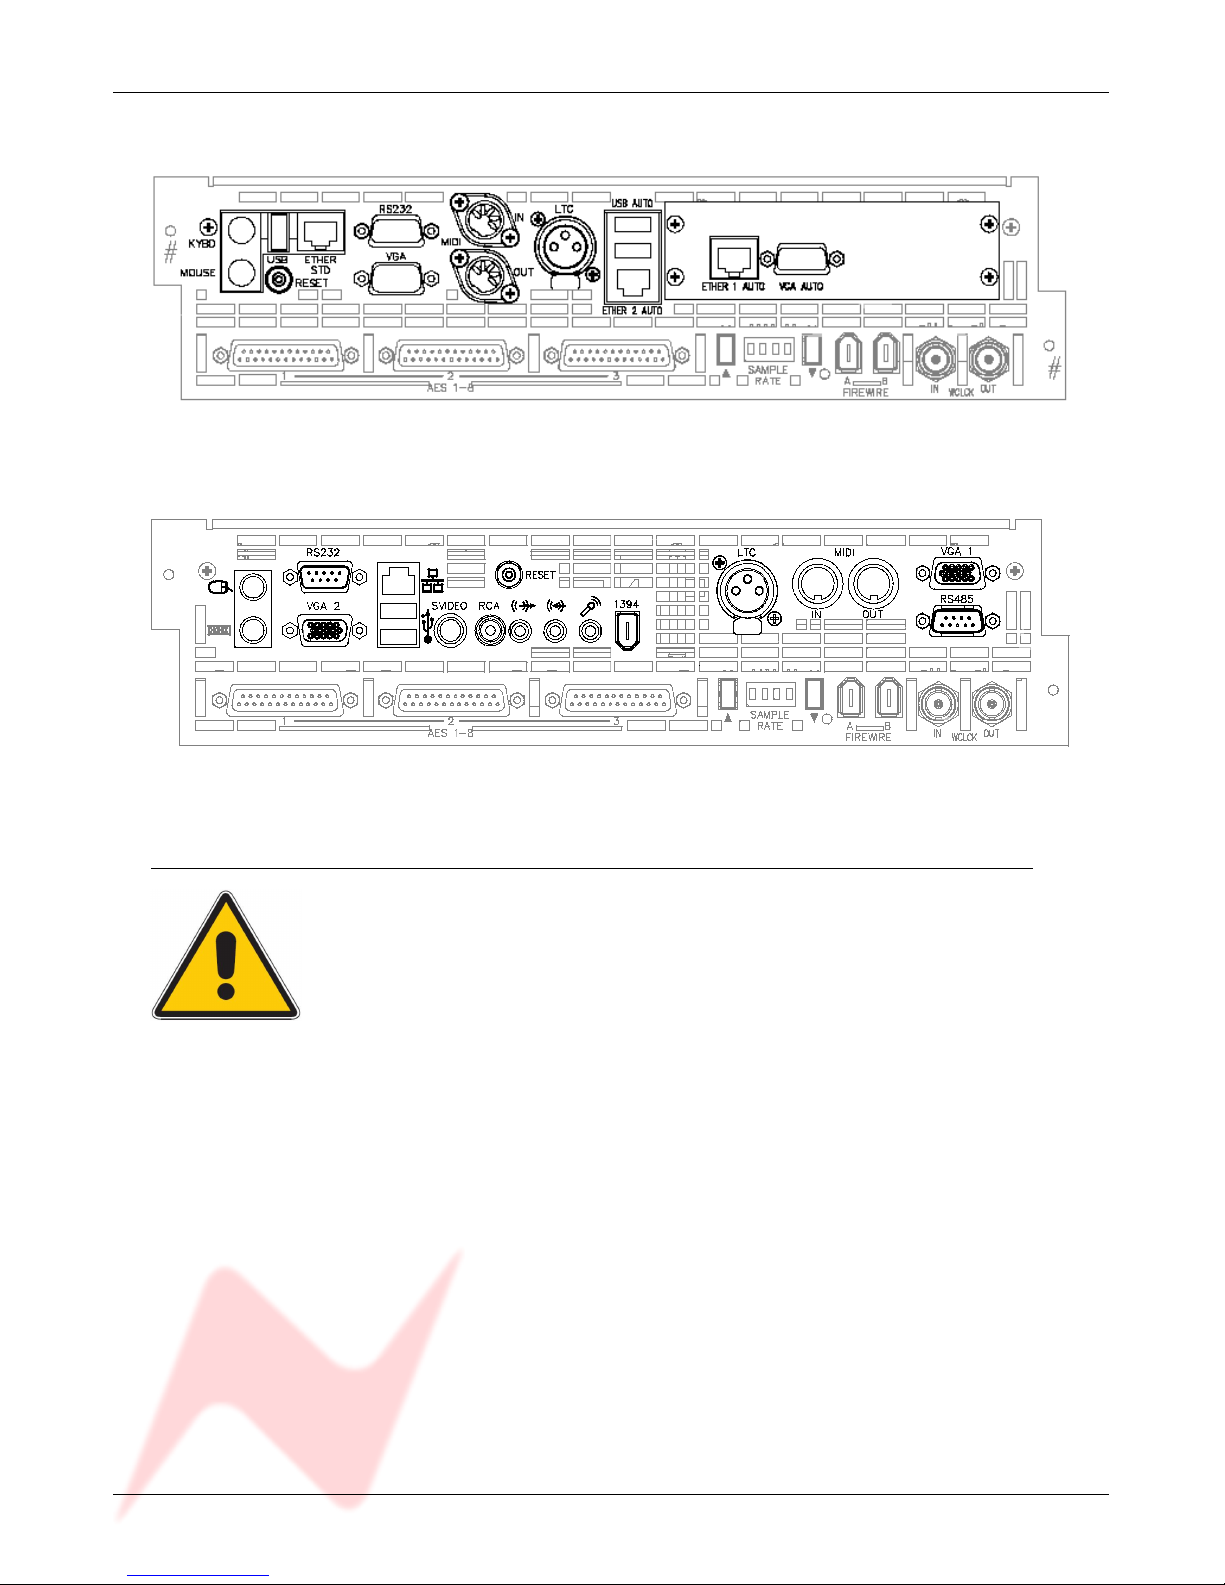
OLD style (including Automation option):
NEW Style:
Safety Notice
Before plugging Genesys into the mains supply, please observe the following
safety precautions:
> The amplifier feeding the speakers is turned off and it's volume controls
are turned fully down (or if using active speakers, ensure they are turned
down and turned off).
> All faders (including the Main Output faders) are at the bottom of their run at
the CUT (∞) position.
As a safety feature, the console will always power-up with the monitoring CUT.
- 5 -
GENESYS - Quick Reference DRAFT COPY Issue 1
Channel SEL Mode
SEL mode is a special mode where signal routing, loudspeaker setups, Pre-/Post- states and
other utilities can be defined.
The console is not designed to run in SEL mode - it is purely a configurational mode.
Channel SEL mode can be turned on by pressing any of the SEL buttons on the channels or 8T
Auxes section. All of these SEL buttons are interlocked with each other.
In the Setup screen, if the SEL Route option is ticked, whenever a SEL button is pressed
anywhere on the fader sections, the ROUTE SEL section on the Monitor panel will also go into SEL
mode, allowing you to route either the Channel or Monitor path on the chosen channel to the Mix
Outputs and 8T.
You can then press any other fader SEL button to select another channel to configure
accordingly.
To come out of SEL mode, press whichever SEL button is flashing.
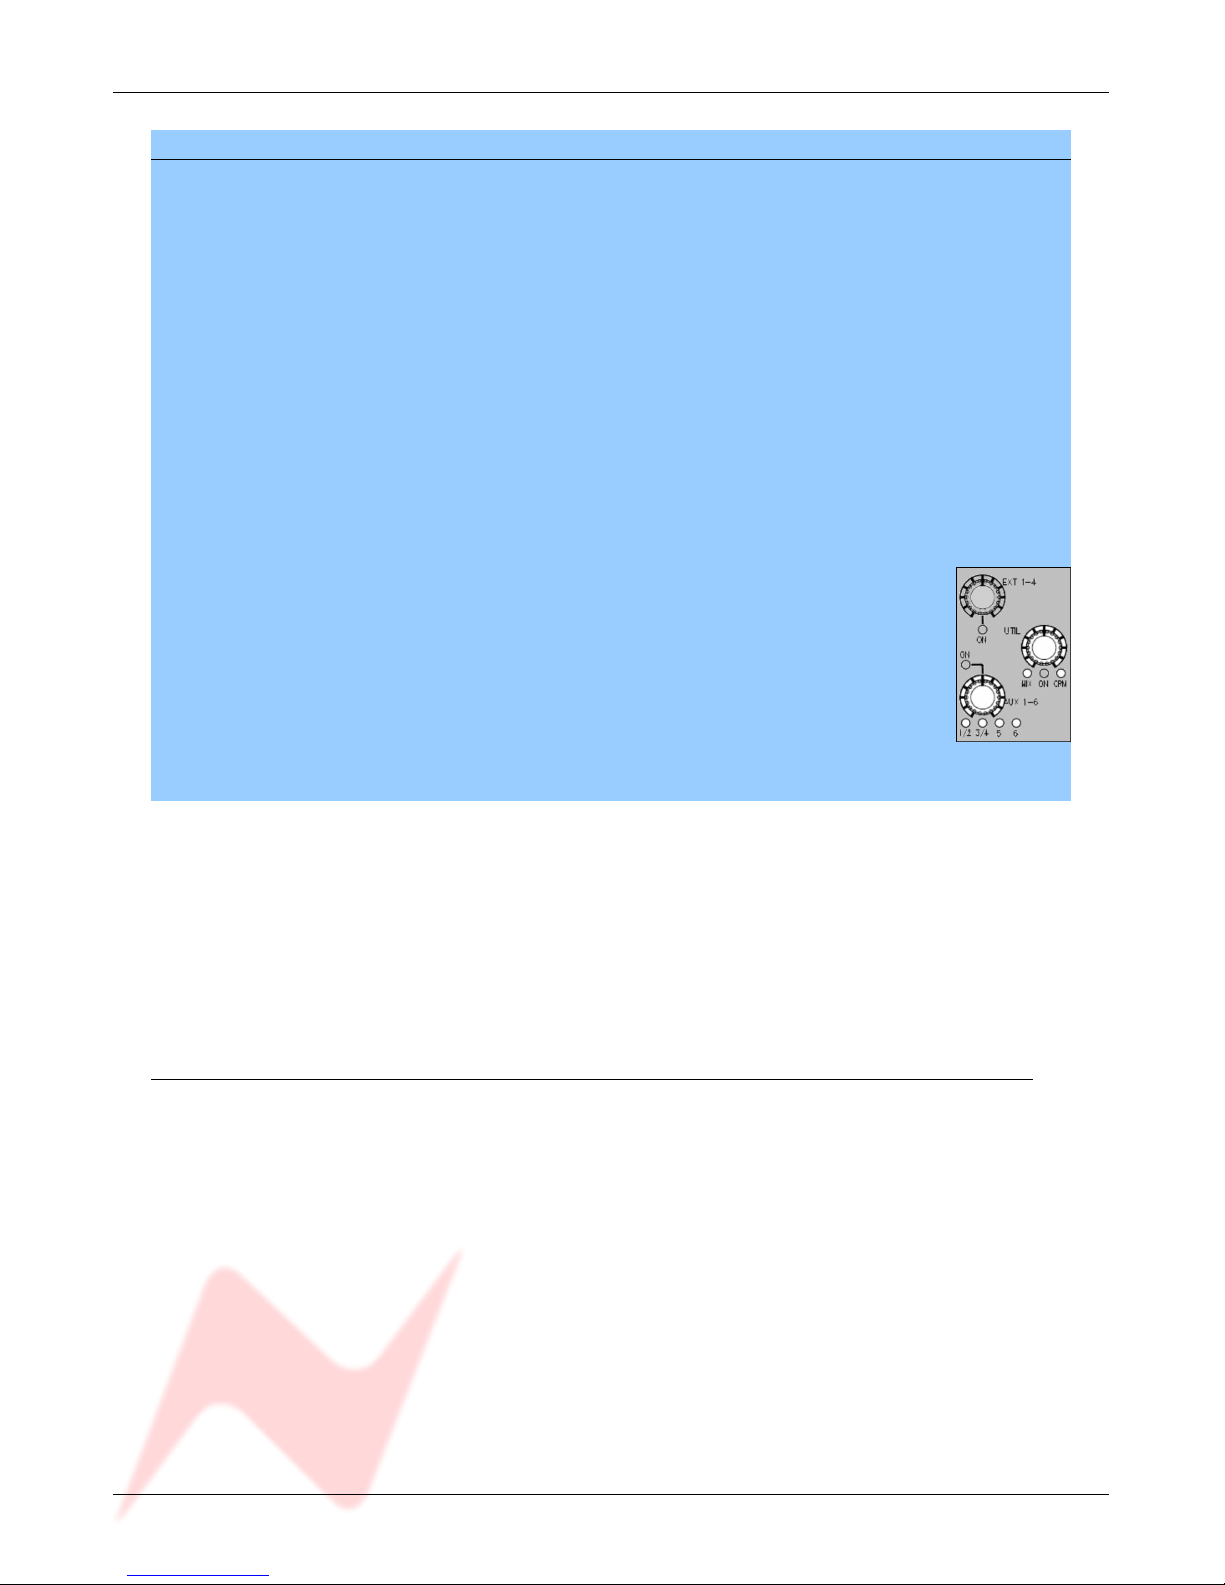
In all documentation relating to SEL mode:
• All text is shown with a blue background.
• All illustrations have unavailable buttons/leds/functions greyed out (as shown
right)
(In the tutorial below, SEL mode is briefly touched upon when mapping the 8T
paths to the loudspeakers)
For more information on SEL mode, please refer to the Genesys User Manual.
For more detailed instructions on console operation,
please refer the GENESYS User Manual.
Wiring connections for Quick Recording
> Plug Genesys into the mains supply using the single IEC connector on the right-hand rear of
the console.
> If using active speakers, plug the speakers into the IEC mains outlets on the rear of the
meterbridge, then plug the male A/C POWER DIST socket into the mains supply. This acts as
mains distribution for the speakers.
> Plug 2 XLRs into the Left and Right M1 LS O/P connectors on the rear of Monitor Board 2
(labelled M1 LS O/P L and M1 LS O/P R) and connect these to the speakers.
> Plug your mics into the channels you wish to use.
- 6 -
Issue 1 DRAFT COPY GENESYS - Quick Reference
Power-up procedure
> For Old style computer cassettes only, check that the Ethernet link cable is plugged
between ETHER STD and ETHER AUTO if you are not using a hub system to control a DAW
via HUI (see Hui Setup for more information about Old-style & New-style computer Ethernet
connections).
> Check that the mouse pad is plugged into the mouse socket and also that the console TFT
screen is plugged into VGA AUTO (on Old style computer cassettes) or VGA 1 (New style
cassettes).
> Turn on the power to Genesys.
> The TFT screen should boot with Windows XP after about 20-30 secs. If not, then:
• Reset the computer by pressing the RESET button near ETHER 1 AUTO [on OLD style
computer cassettes)
• Reset the computer by pressing the RESET button just above the RCA connector [on
NEW style computer cassettes)
This will restart the computer and Windows.
> Once the Windows desktop is up & running, double-click the Genesys
application on the Desktop (left).
This will then launch the console software in about 20 secs.
You are now ready to use the console features.
> Switch the amplifier on (or the speakers if you are using active speakers).
> Turn the amp (or speakers) to the desired level.
> Turn the Control Room level down and un-cut the monitoring (as a safety feature, the
monitoring system will always be CUT when first switching the system on).
> Move the Channel faders to the desired levels, and put the Main mix fader up to 0dB.
> Turn the Control Room Monitoring level up.
You should now be able to start working.
Failure to follow this procedure correctly
could invalidate the manufacturers warranty
- 7 -
 Loading...