

Nevadent DAZD 3.7 Li A1, 108262 Operating Instructions Manual
IAN 108262
ELECTRIC TOOTHBRUSH DAZD 3.7 Li A1
ELECTRIC TOOTHBRUSH
Operating instructions
ELEKTRISK TANDBØRSTE
Betjeningsvejledning
ELEKTRISK TANDBORSTE
Bruksanvisning
SÄHKÖHAMMASHARJA
Käyttöohje
ELEKTRISCHE ZAHNBÜRSTE
Bedienungsanleitung
ELEKTRISCHE TANDENBORSTEL
Gebruiksaanwijzing
GB / IE Operating instructions Page 1
FI Käyttöohje Sivu 15
SE Bruksanvisning Sidan 25
DK Betjeningsvejledning Side 37
NL / BE Gebruiksaanwijzing Pagina 47
DE / AT / CH Bedienungsanleitung Seite 57
Before reading, unfold the page containing the illustrations and familiarise yourself with all functions of
the device.
Käännä ennen lukemista kuvallinen sivu esiin ja tutustu seuraavaksi laitteen kaikkiin toimintoihin.
Vik ut bildsidan och ha den till hands när du läser igenom anvisningarna och gör dig bekant med
apparatens / maskinens funktioner.
Før du læser, vend siden med billeder frem og bliv bekendt med alle apparatets funktioner.
Vouw vóór het lezen de pagina met de afbeeldingen open en maak u vertrouwd met alle functies van
het apparaat.
Klappen Sie vor dem Lesen die Seite mit den Abbildungen aus und machen Sie sich anschließend mit
allen Funktionen des Gerätes vertraut.
1
DAZD 3.7 Li A1
GB
IE
Contents
Introduction . . . . . . . . . . . . . . . . . . . . . . . . . . . . . . . . . . . . . . . . . . . . . . . . . . . . . . . . . . 2
Proper use . . . . . . . . . . . . . . . . . . . . . . . . . . . . . . . . . . . . . . . . . . . . . . . . . . . . . . . . . . . 2
Package contents . . . . . . . . . . . . . . . . . . . . . . . . . . . . . . . . . . . . . . . . . . . . . . . . . . . . . 2
Appliance description . . . . . . . . . . . . . . . . . . . . . . . . . . . . . . . . . . . . . . . . . . . . . . . . . . 2
Technical details . . . . . . . . . . . . . . . . . . . . . . . . . . . . . . . . . . . . . . . . . . . . . . . . . . . . . . 2
Safety instructions . . . . . . . . . . . . . . . . . . . . . . . . . . . . . . . . . . . . . . . . . . . . . . . . . . . . 3
Set-up/wall bracket . . . . . . . . . . . . . . . . . . . . . . . . . . . . . . . . . . . . . . . . . . . . . . . . . . . 4
First use . . . . . . . . . . . . . . . . . . . . . . . . . . . . . . . . . . . . . . . . . . . . . . . . . . . . . . . . . . . . . 5
Fitting/removing brush heads . . . . . . . . . . . . . . . . . . . . . . . . . . . . . . . . . . . . . . . . . . . 5
Operation . . . . . . . . . . . . . . . . . . . . . . . . . . . . . . . . . . . . . . . . . . . . . . . . . . . . . . . . . . . 5
Brushing teeth . . . . . . . . . . . . . . . . . . . . . . . . . . . . . . . . . . . . . . . . . . . . . . . . . . . . . . . . 6
Cleaning and care . . . . . . . . . . . . . . . . . . . . . . . . . . . . . . . . . . . . . . . . . . . . . . . . . . . . . 7
Travelling case . . . . . . . . . . . . . . . . . . . . . . . . . . . . . . . . . . . . . . . . . . . . . . . . . . . . . . . 7
Warranty and service . . . . . . . . . . . . . . . . . . . . . . . . . . . . . . . . . . . . . . . . . . . . . . . . . 8
Disposal . . . . . . . . . . . . . . . . . . . . . . . . . . . . . . . . . . . . . . . . . . . . . . . . . . . . . . . . . . . . . 8
Importer . . . . . . . . . . . . . . . . . . . . . . . . . . . . . . . . . . . . . . . . . . . . . . . . . . . . . . . . . . . . 9
2
DAZD 3.7 Li A1
GB
IE
ELECTRIC TOOTHBRUSH
Introduction
Congratulations on the purchase of your new
appliance.
You have selected a high-quality product.
The operating instructions are a constituent of this
product. They contain important information about
safety, use and disposal. Before using the product,
familiarise yourself with all operating and safety
instructions. Use this product only as described
and only for the specifi ed areas of application.
Please also pass these operating instructions on
to any future owner(s).
Proper use
This appliance is intended exclusively for personal
dental care at home. This appliance is intended
solely for use in domestic households. The appliance
is not intended for use in industrial or medical
environments. It is not suitable for animal care.
Not to be used for commercial purposes.
Package contents
Hand element
8 brush heads
Charger
2 screws
2 plugs
Travelling case
Operating instructions
NOTE
Check contents for completeness and damage
immediately af
ter unpacking. Contact Customer
Services if necessary.
Remove all packaging materials and plastic fi lm
from the appliance.
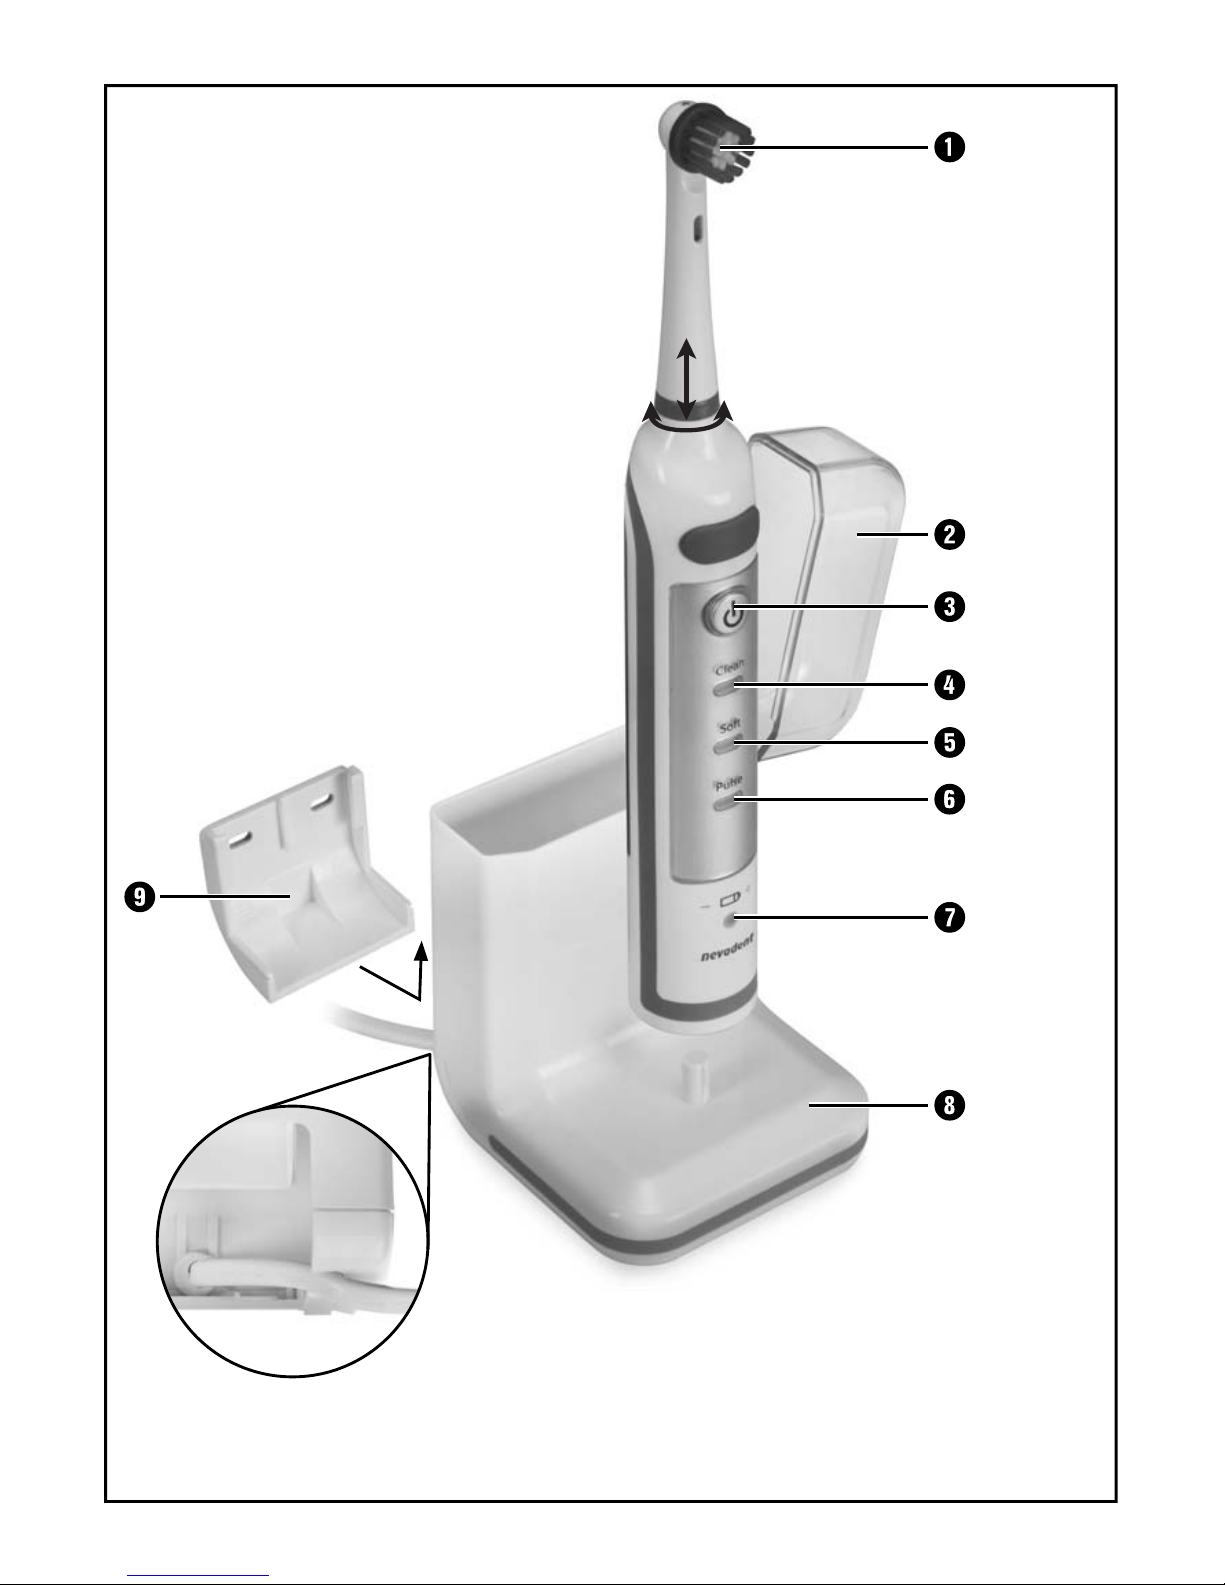
Appliance description
1 Brush head
2 Lid
3 On/Off switch
4 “Clean” LED (orange)
5 “Soft” LED (green)
6 “Pulse” LED (yellow)
7 Charge indicator
8 Charger
9 Wall bracket
Technical details
Power supply: 100 - 240 V ~,
50/60 Hz
Power consumption: 2W
Battery: Li-ion rechargeable
battery, 600mAh
Protection rating (charger): IP X7
Protection class: II /
Charging time: approx. 14 - 16
hours (initial charge)
Protection rating (handset): IP X4
3
DAZD 3.7 Li A1
GB
IE
Safety instructions
DANGER – RISK OF ELECTRICAL SHOCK!
► To avoid damage, do not allow liquids to penetrate the appliance
and do not submerge it in water.
► Ensure that no foreign objects penetrate the appliance.
► In the event of malfunctions or obvious damage, please contact
our Customer Service department.
► Ensure that the power cable can never become wet or damp
during operation. Route the power cable in such a way that it
cannot become trapped or damaged in any other way.
Risk of electric shock!
► The mains cable of this appliance cannot be replaced. In the
event of the cable being damaged, the whole appliance must
be scrapped.
► Never touch the charger if it has fallen into water. Remove the
plug from the wall socket fi rst! Risk of electric shock!
Do not submerge the handset or the charger in water or other
liquids.
WARNING – RISK OF INJURY!
► Toothbrushes may be used by children and by persons with reduced
physical, sensory or mental capabilities or lack of experience
and/or knowledge if they are supervised or have been told how
to use the appliance safely and are aware of the potential risks.
► Cleaning and user maintenance should not be performed by
children unless they are under supervision.
► Children must not use the appliance as a plaything.
4
DAZD 3.7 Li A1
GB
IE
CAUTION – PROPERTY DAMAGE!
► The electric toothbrush may only be recharged with the supplied
charger. The appliance could otherwise be irreparably damaged!
► Only operate the appliance with the original accessories supplied.
Set-up/wall bracket
NOTE
► The charger 8 may only be oper
ated free-
standing if used in dry rooms.
► In damp rooms, especially in the vicinity of
w
ater (bath), the charger 8 must be fi rmly
fi xed to the wall to protect it from falling into
water.
1) Press the small stand on the wall bracket 9
from below until this releases from the wall
bracket 9:
2) Then pull the wall bracket 9 downwards
from the charger 8:
3) Using the screw holes of the wall bracket 9,
mark the spacing for the boreholes on the
wall. Check to ensure that there is a mains
power socket in close vicinity.
4) Before drilling the holes, check to ensure that
there are no electrical cables or water pipes
behind the markings.
5) Use a 5 mm drill bit to drill the required holes
and insert the wall plugs.
6) Affi x the wall bracket 9 using the screws
provided.
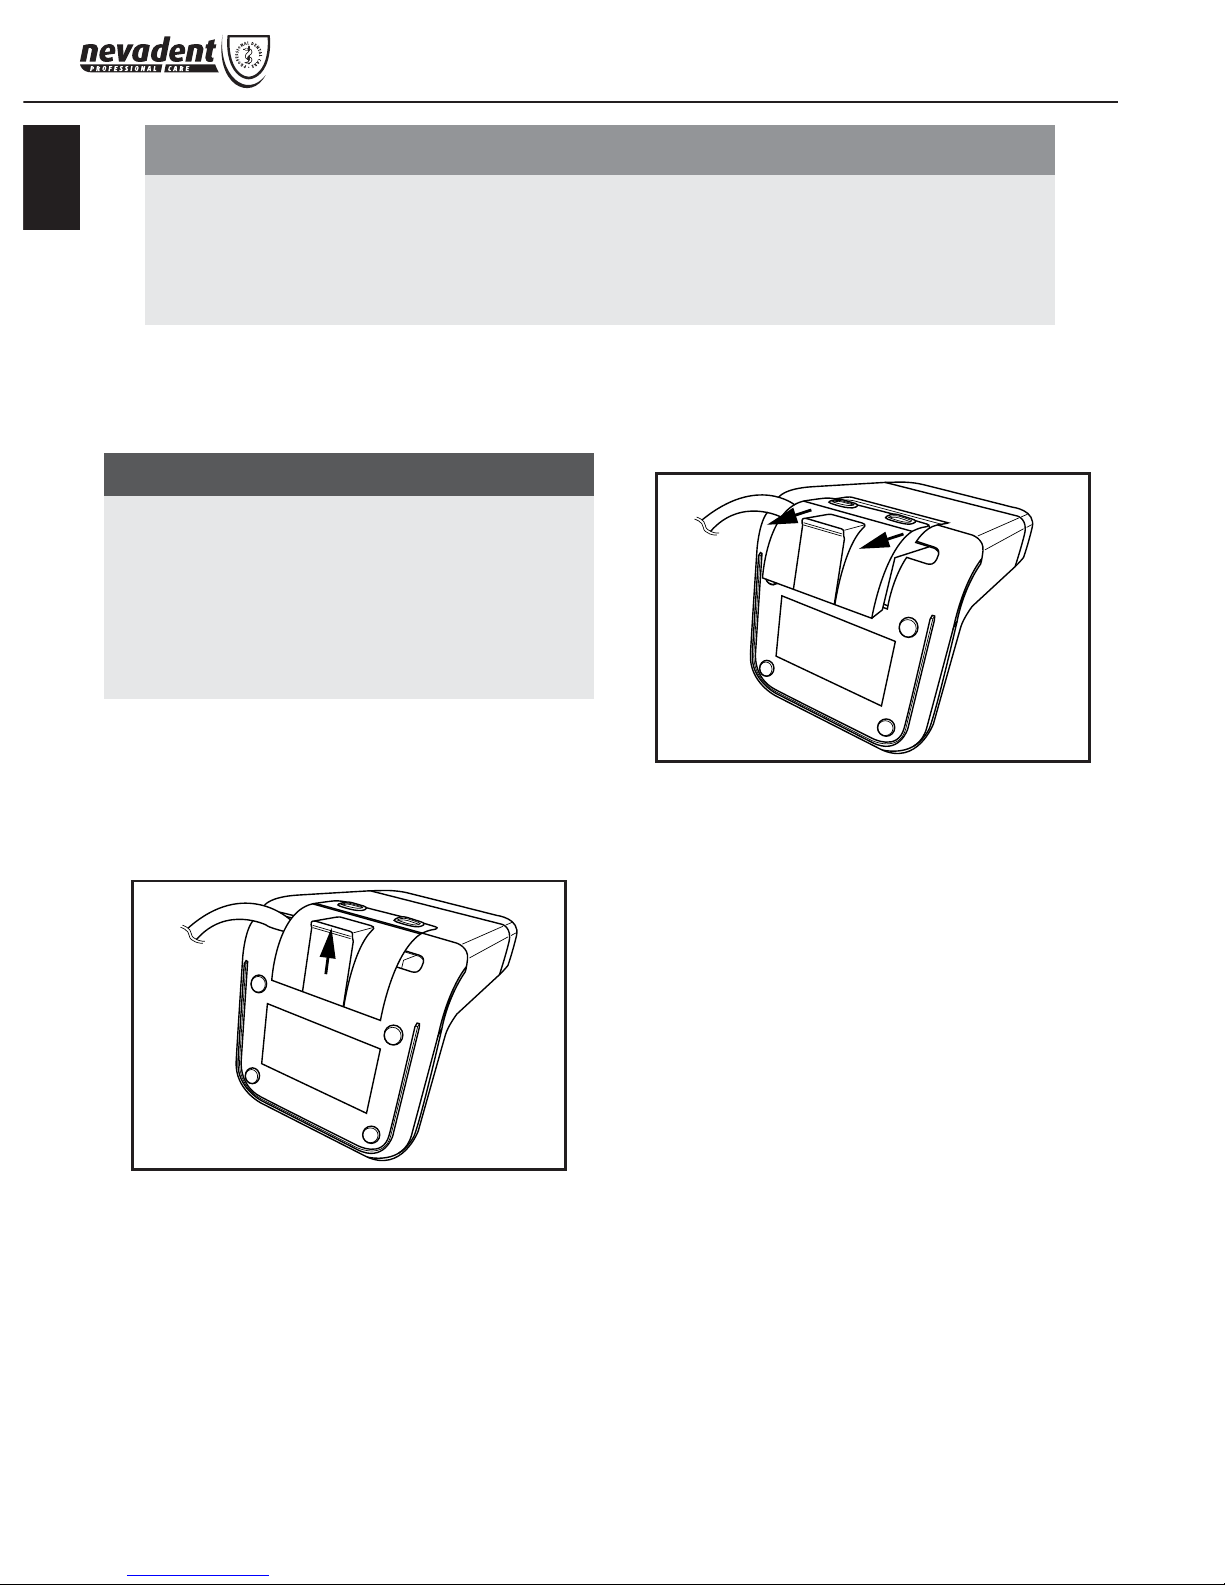
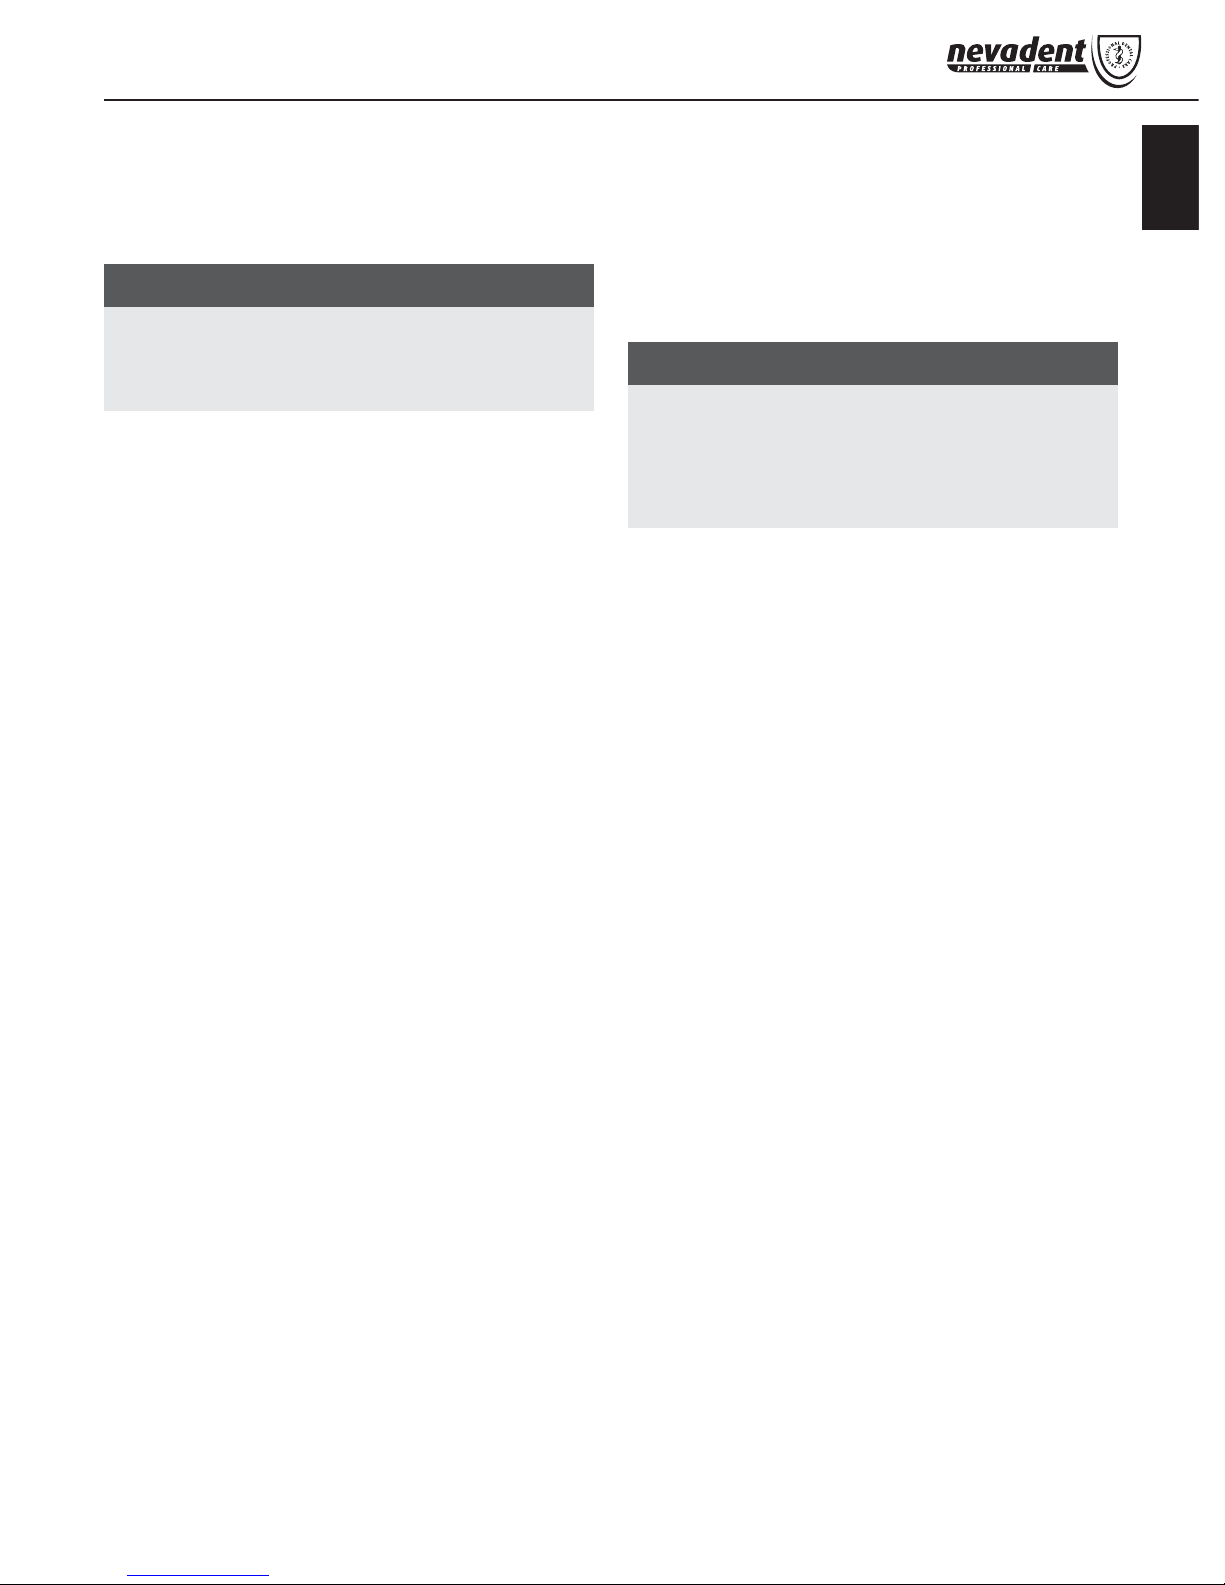
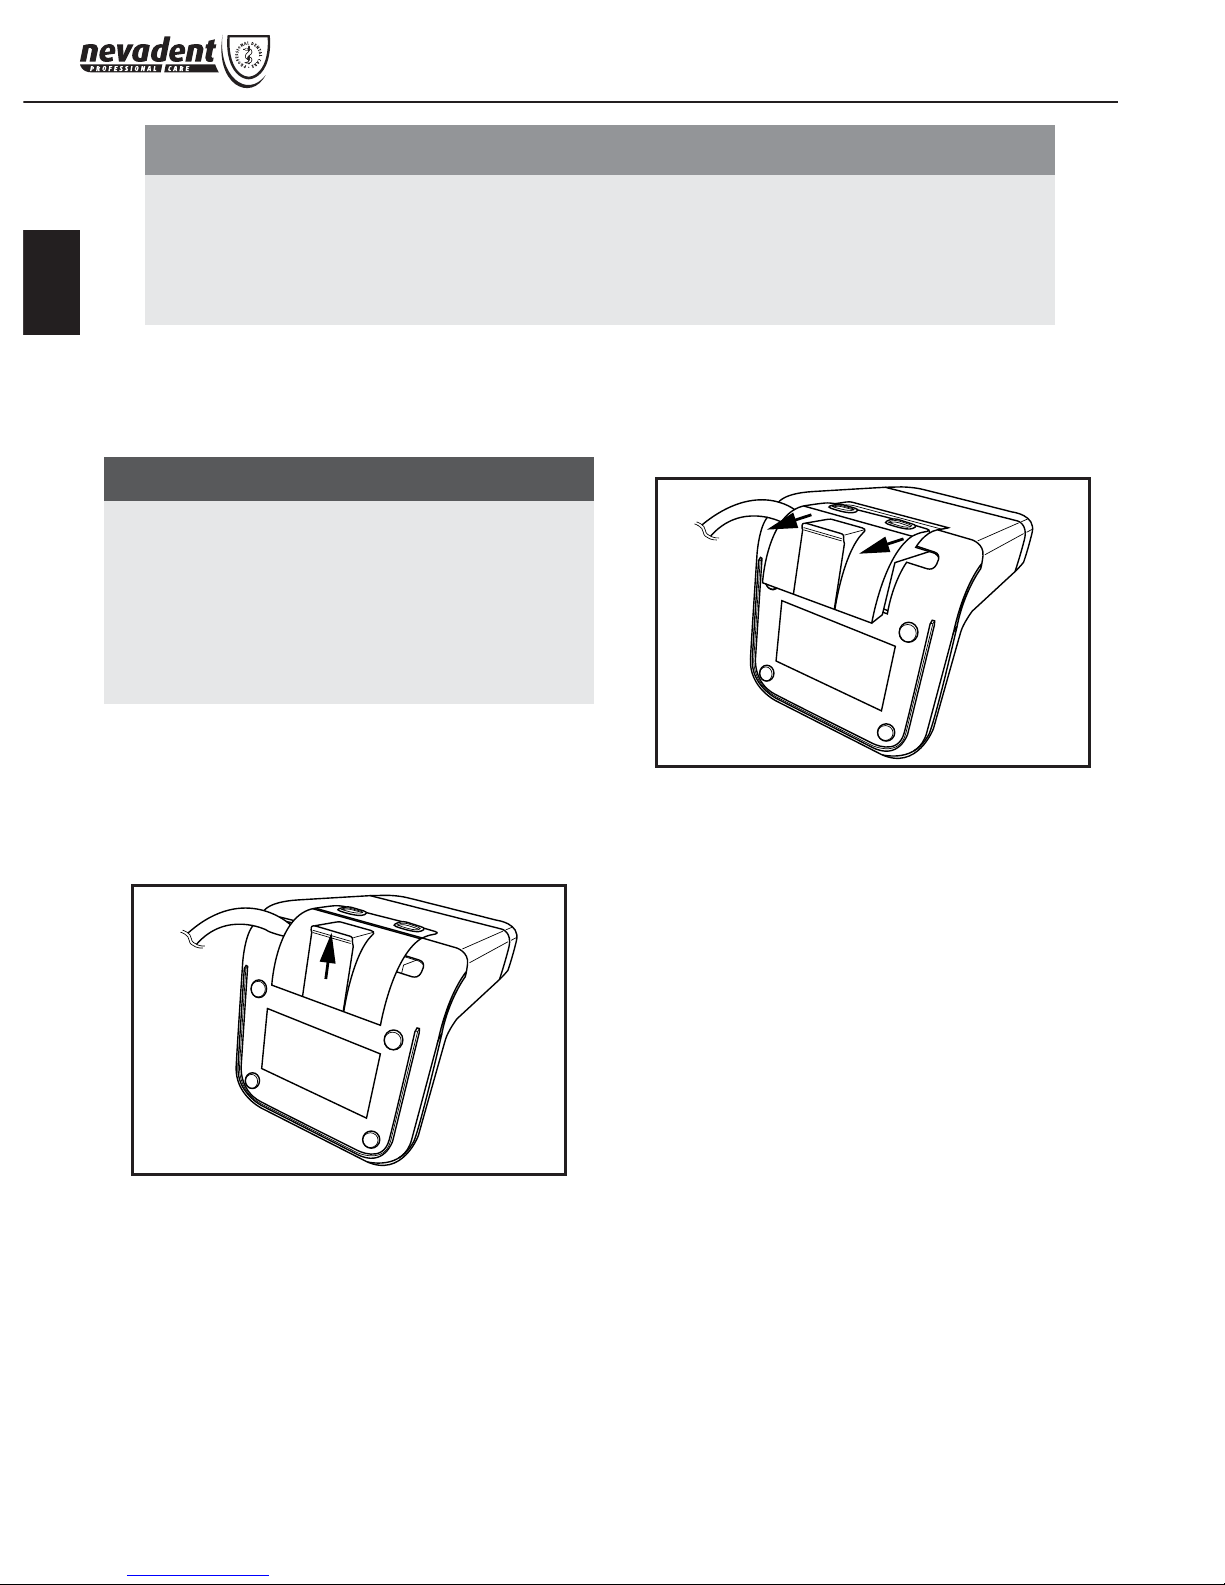
7) After you have attached the wall bracket 9,
guide the power cable through the right or
left cut-out in the wall bracket 8 (see magni-
fi cation on the fold-out page). Using the guide
rails, slide the charger 8 onto the wall
bracket 9.
5
DAZD 3.7 Li A1
GB
IE
8) Ensure that the power cable is not trapped
and that it lies properly in the cut-outs.
First use
NOTE
Before starting to use the appliance, check that
it is in fault-fr
ee condition. If it is not, it must not
be used.
1) Insert the plug into the mains power socket.
2) Before initial use, clean the new brush heads 1
with fresh water.
3) Open the lid 2 of the charger 8 and place
the replacement brush heads on the brush
holders. Re-close the lid 2.
4) Place the handset on the charger 8 so that
it slides onto the pin on the base.
5) Allow the handset to charge up for around
14 - 16 hours before using it for the fi rst
time. The charge indicator 7 on the front of
the hand appliance lights up red during the
charging process.
6) Use the handset repeatedly without charging
the battery until the performance becomes
noticeably weaker or the toothbrush stops
working and the charge indicator 7 blinks red.
Then recharge the battery for 14 - 16 hours.
When the appliance is fully charged, the
charge indicator 7 lights up green.
7) Charge and discharge the toothbrush completely 3 times. The battery will have then
reached its full capacity.
8) You can now leave the handset in the charger 8 after every use, so as to always have
full power available.
Fitting/removing brush heads
■ To remove the brush head 1, turn it clockwise
and then pull it upwards.
■ To fi t the brush head 1 place it slightly off set
on the hand element and then turn it anticlockwise.
NOTE
To avoid damage to the appliance, always use
original brush heads.
(F
or replacement brush heads, see the order
card)
Operation
This toothbrush has 3 diff erent performing levels:
– “Clean”: normal speed,
or
ange “Clean” LED 4.
For cleaning the teeth.
– “Soft”: slow speed, green “Soft” LED 5.
F
or cleaning the teeth of people with
sensitive gums.
– “Pulse”: alternating speeds,
yellow “Pulse” LED 6.
For massaging the gums.
■ Press the on/off switch 3 once to activ
ate the
“Clean” mode. The “Clean” LED 4 lights up.
■ Press once more to switch to “Soft” mode.
The “Soft” LED 5 lights up.
■ Press it a third time to switch to “Pulse” mode.
The “Pulse” LED 6 lights up.
■ To switch the toothbrush off , press the on/off
switch 3 once mor
e.
6
DAZD 3.7 Li A1
GB
IE
Brushing teeth
WARNING!
Due to the unaccustomed eff ect of the toothbrush, there may be some initial gum bleeding.
This is normal. If this continues for more than
two weeks, you should consult your dentist.
1) Place the brush head 1 on the handset.
2) Moisten the brush under fl owing water.
3) Put a little toothpaste onto the wet brush.
NOTE
To avoid spray, do not switch on the appliance
until it is in y
our mouth
4) Use the on/off switch 3 to select the desired
operating mode.
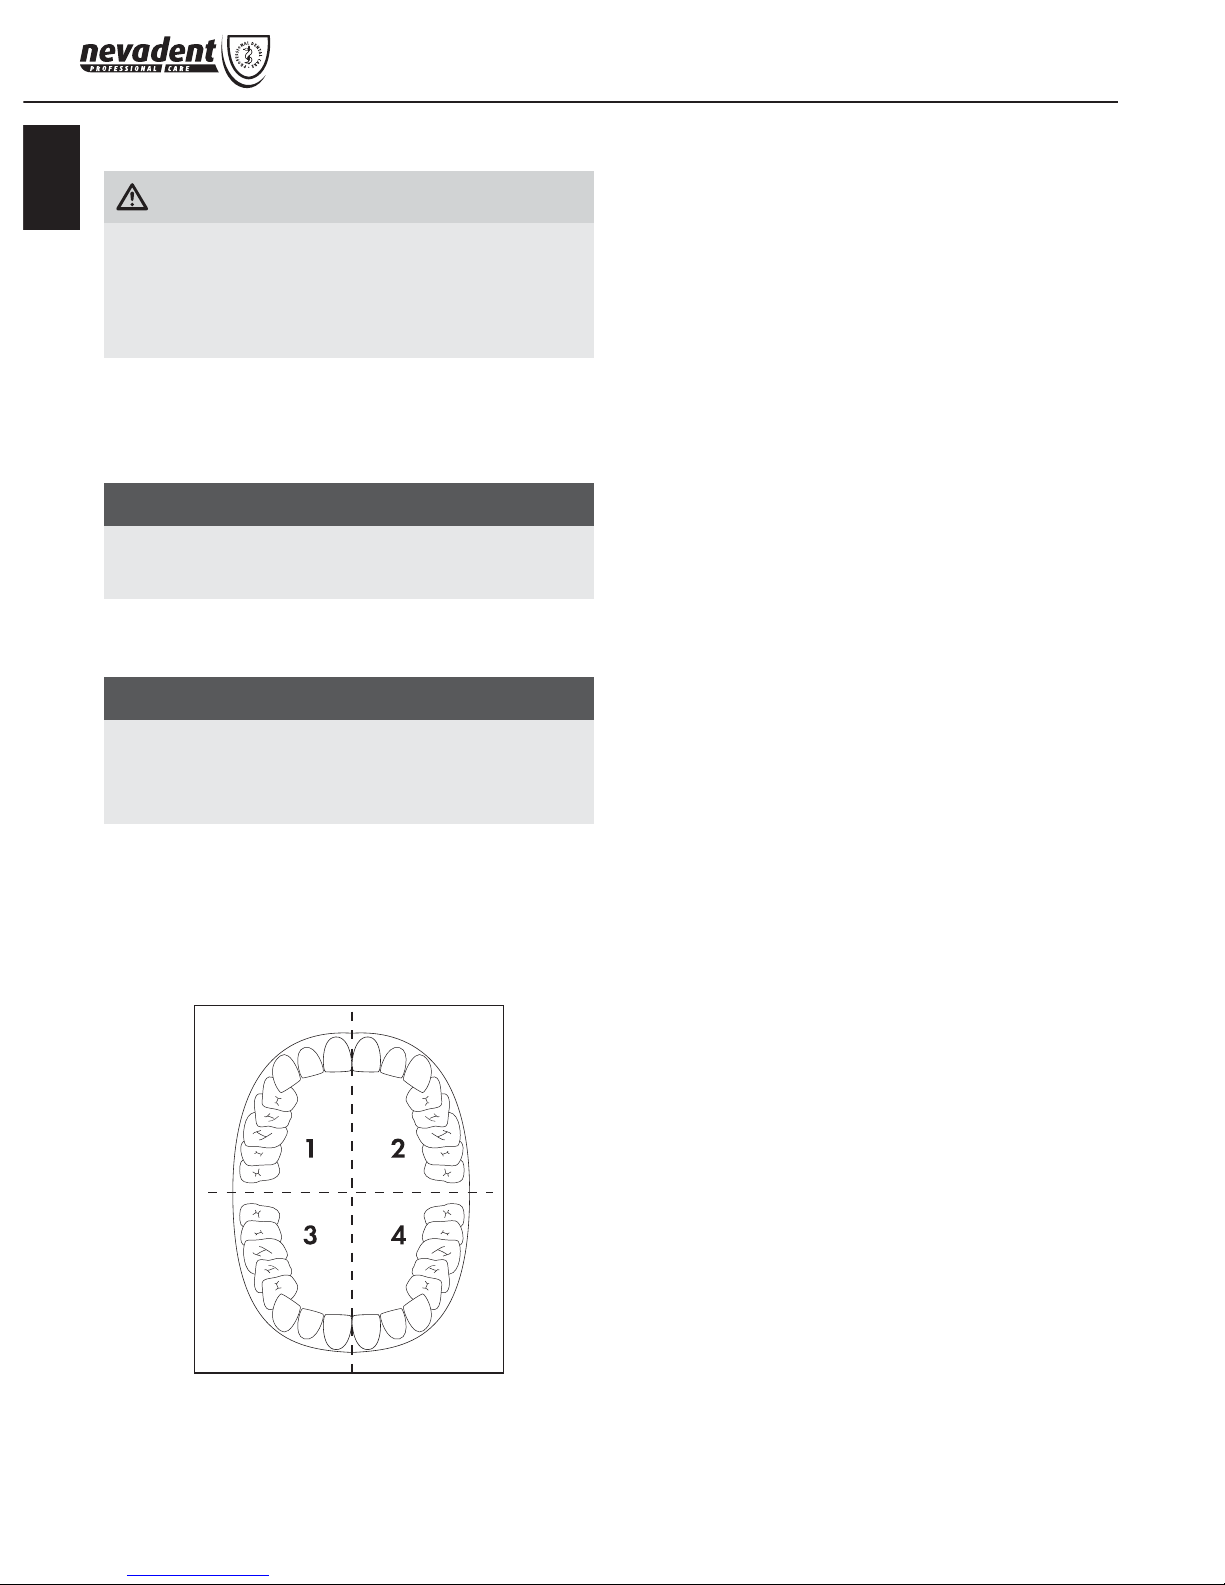
NOTE
This toothbrush has a 30-second interval timer,
so that all four jaw quadr
ants can be cleaned
evenly.
5) Divide your mouth into four parts (quadrants):
upper left, upper right, lower left and lower
right.
6) Start in one quadrant:
Start with the brush head 1 on your gums,
and move the brush upwards/downwards
from the gums to the crown of the tooth.
Proceed in this manner on both the inside and
the outside of the tooth. Start again at the gums
for each individual tooth.
Do not forget to brush the back of the rear
molars.
To clean the chewing surfaces, guide the
rotating brush head over the chewing surfaces with a little pressure.
7) After 30 seconds, the toothbrush stops briefl y
to signal that you should start cleaning the
next quadrant. Clean each jaw quadrant
using the same technique.
8) After two minutes the toothbrush stops its
operation briefl y 4 times. This informs you that
you have complied with the dental recommendation of two minutes cleaning.
9) Press the on/off switch 3 repeatedly until the
toothbrush stops.
10) Then take the toothbrush out of your mouth.
11) After use, rinse the brush head 1 thoroughly
under running water.
12) Remove the brush head 1 from the handset.
To clean the drive shaft and the handset, allow
a little water to fl ow over them. Hold the handset so that the drive shaft is pointing downwards. Make sure that no water gets into the
handset. Hold the handset so that water only
fl ows over the drive shaft and the upper part
of the handset.
7
DAZD 3.7 Li A1
GB
IE
NOTE
Regularly massage your gums. This promotes
blood cir
culation and helps to keep them healthy.
Set the mode to "Pulse" and guide the moistened
brush over your gums with a light pressure.
Cleaning and care
DANGER – ELECTRIC SHOCK!
►
Always remove the plug of the charger 8
fr
om the power socket before cleaning the
appliance! Risk of electric shock!
Never submerge the handle or the
charger 8 in water or other liquids.
NOTE
Never open the housing of the charger 8 or
the toothbrush! The
y cannot be resealed in a
water-tight manner.
1) Clean the charger 8 only with a soft, lightly
moistened cloth. Do not use detergents or solvents. They can damage the plastic surfaces.
2) Remove the brush head 1 from the handset.
After use, clean the brush heads 1 thoroughly
under running water.
We recommend cleaning the brush heads 1
in a standard commercial denture cleaning
fl uid every 2 - 4 weeks. A new brush head 1
should be fi tted after about 3 months, and the
brush head must always be replaced when
the bristles start to bend outwards.
3) To clean the drive shaft and the handset,
allow a little water to fl ow over them. Hold
the handset so that the drive shaft is pointing
downwards. Make sure that no water gets
into the handset. Hold the handset so that
water only fl ows over the drive shaft and the
upper part of the handset.
Travelling case
If you wish to take the toothbrush with you on a
trip, you can pack both the hand element and two
brush heads 1 in the travelling case. When the
battery is fully charged, you can use the toothbrush
for 60 minutes without recharging. This is a guideline value only. Depending on the pressure used
when brushing your teeth, the maximum operating
time may vary.

8
DAZD 3.7 Li A1
GB
IE
Warranty and service
The warranty provided for this appliance is 3 years
from the date of purchase. This appliance has
been manufactured with care and inspected
meticulously prior to delivery. Please retain
your receipt as proof of purchase. In the event
of a warranty claim, please contact your
Customer Service by telephone. This is the only
way to guarantee free return of your goods.
The warranty only covers claims for material and
manufacturing defects, not for transport damage,
wearing parts or for damage to fragile components
such as switches or batteries. This appliance is
intended solely for private use and not for commercial purposes.
The warranty is deemed void if this product has
been subjected to improper or inappropriate
handling, abuse or modifi cations which were
not carried out by one of our authorised service
centres.
Your statutory rights are not restricted in any way
by this warranty.
The warranty period is not prolonged by repairs
made under the warranty. This also applies to replaced and repaired parts. Damage and defects
present at the time of purchase must be reported
immediately after unpacking, or no later than two
days after the date of purchase. Repairs made after
expiry of the warranty period are chargeable.
Service Great Britain
Tel.: 0871 5000 720 (£ 0.10/Min.)
E-Mail: kompernass@lidl.co.uk
IAN 108262
Service Ireland
Tel.: 1890 930 034
(0,08 EUR/Min., (peak))
(0,06 EUR/Min., (off peak))
E-Mail: kompernass@lidl.ie
IAN 108262
Hotline availability:
Monday to Friday 08:00 - 20:00 (CET)
Disposal
Under no circumstance should
the appliance be disposed of
in the normal domestic waste.
This product is subject to the
provisions of European Directive 2012/19/EU.
Dispose of the appliance via an approved disposal
company or your municipal waste facility. Please
observe the currently applicable regulations.
Please contact your waste disposal centre if you
are in any doubt.
9
DAZD 3.7 Li A1
GB
IE
Disposal of batteries
To dispose of the appliance in an environmentally
friendly way, you must remove the battery from
the appliance:
CAUTION – PROPERTY DAMAGE!
►
Remove the battery from the appliance only if
y
ou want to scrap/dispose of the appliance!
The appliance is permanently defective after
you have removed the battery!
1) To remove the battery from the handset,
remove the small screw from the bottom of the
handset with a Phillips screwdriver.
2) Lever out the bottom plate of the handset, for
instance with a screwdriver.
3) Press the two tabs that hold the contents of
the handset in place inwards and pull out the
contents using a pair of pliers.
4) Snip the cables from the battery and remove
it from the holder.
5) Dispose of the battery in an environmentally
friendly manner.
Used batteries may not be disposed of in
the household waste. All consumers are
statutorily obliged to dispose of batteries
at a collection site of his community/city
district or at a retail store. The purpose of
this obligation is to ensure that batteries
are disposed of in a non-polluting manner.
Only dispose of batteries when they are
fully discharged.
The packaging is made from environ-
mentally friendly material and can be
disposed of at your local recycling plant.
Importer
KOMPERNASS HANDELS GMBH
BURGSTRASSE 21
44867 BOCHUM
GERMANY
www.kompernass.com

10
DAZD 3.7 Li A1
GB
IE
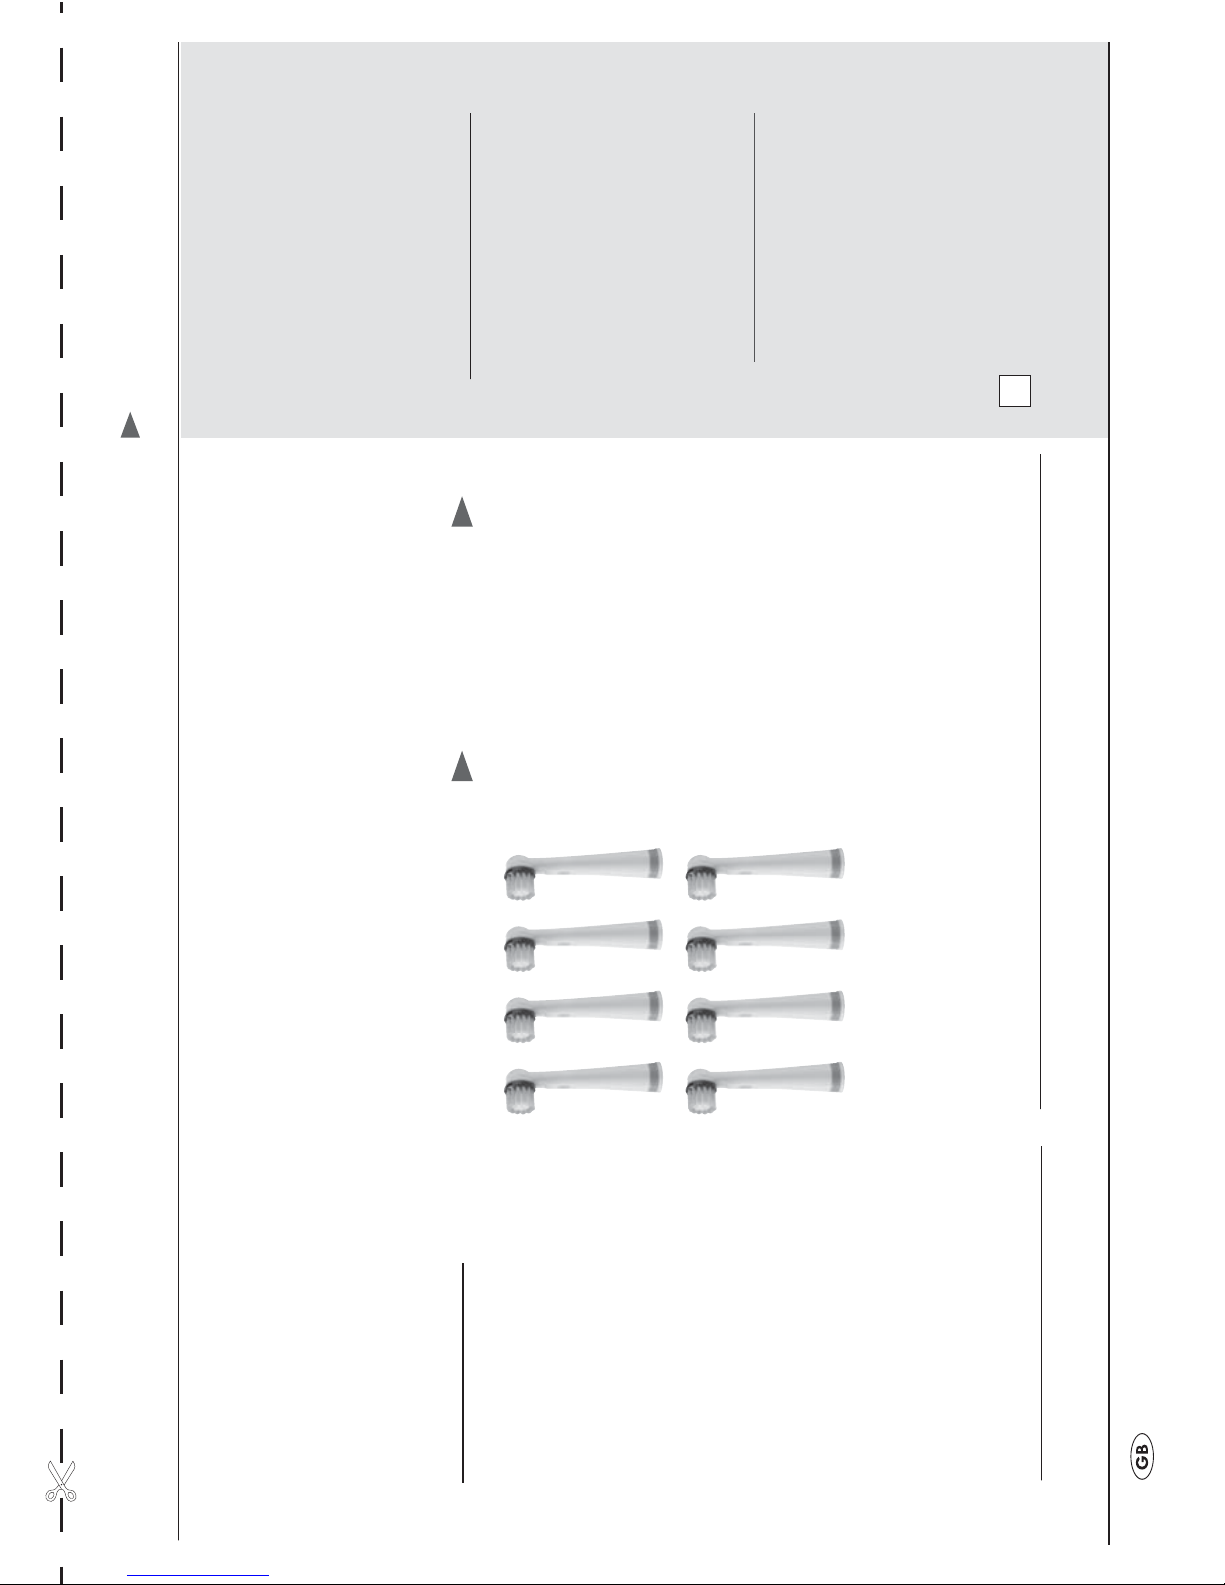
► Set of 8 Toothbrush heads
£
6
(Location, Date) (Signature)
ORDER CARD DAZD 3.7 Li A1
QUANTITY ORDERED
(max. 3 sets per order)
NAME OF ARTICLE COST P. UNIT
TOTAL SUM
www.kompernass.com
£
=
£
Postage and packaging
£ 3
+
PAYMENT METHOD
Bank Transfer
1) Enter under “Sender/orderer”your name, address and telephone number (for possible
queries) in block capitals.
2) Please transfer the complete amount to our account below:
Commerzbank AG, London
IBAN: GB96 COBA 4062 0130 4531 70
SWIFT (BIC): COBAGB2XXXX
Sort Code: 40-62-01
Account No: 30453170
Account Name: Kompernass Handelsgesellschaft mbH
■ On your transfer, please provide the article(s) you ordered as well as your complete name
and address. Then post your completed order card to our postal address below.
Our postal address:
Kompernaß Handelsgesellschaft mbH
Burgstrasse 21
44867 Bochum
Germany
IMPORTANT
►
Please affi x suffi cient postage to the letter.
► Write your name as the sender on the envelope.
SENDER / ORDERER
(please complete in block captals)
(Surname, fi rst name)
(Street)
(Post code, town)
(Country)
ORDER CARD DAZD 3.7 Li A1
(Telephone)
Order conveniently over the Internet
www.kompernass.com
www.kompernass.com
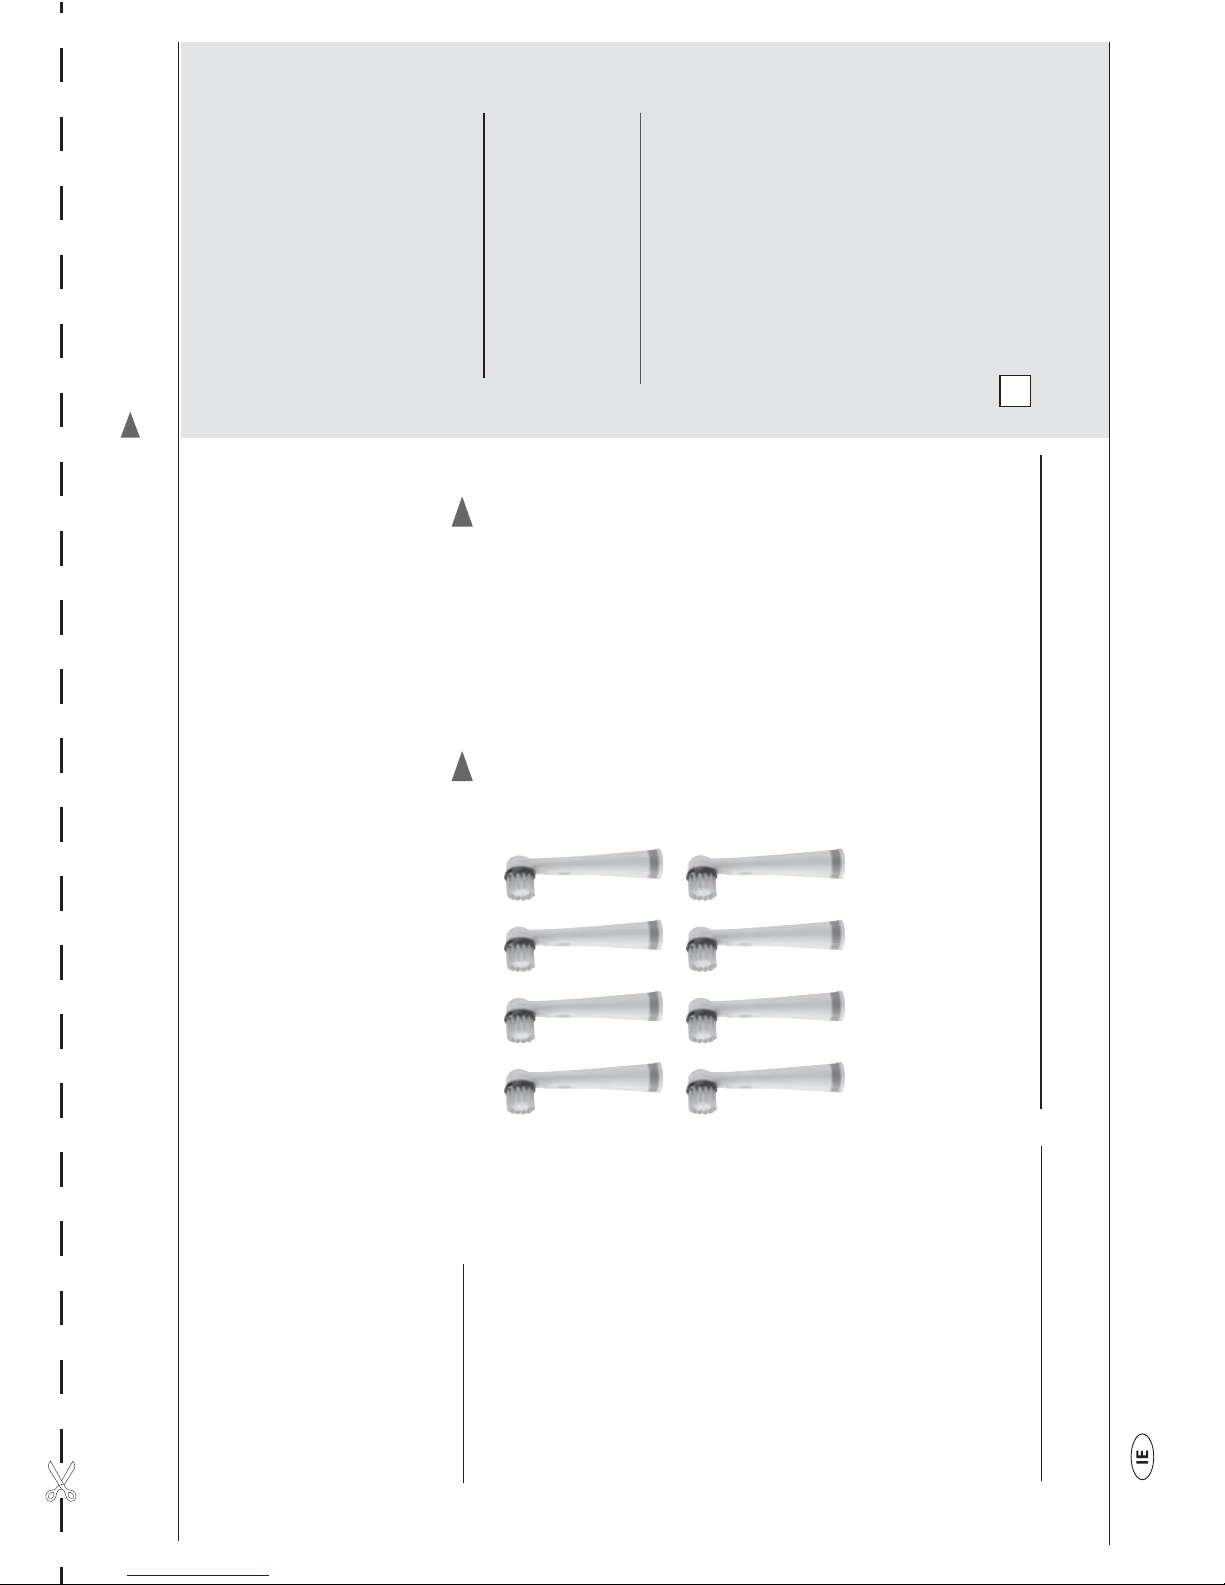
► Set of 8 Toothbrush heads
5,50 €
(Location, Date) (Signature)
ORDER CARD DAZD 3.7 Li A1
QUANTITY ORDERED
(max. 3 sets per order)
NAME OF ARTICLE COST P. UNIT
TOTAL SUM
www.kompernass.com
PAYMENT METHOD
Bank Transfer
€
Postage and packaging
3 €
+
=
€
1) Enter under “Sender/orderer”your name, address and telephone number (for possible
queries) in block capitals.
2) Transfer the whole amount in advance to our account:
Kompernaß Handelsgesellschaft mbH
IBAN: DE03440100460799566462
SWIFT (BIC): PBNKDEFF 440
Bank: Postbank Dortmund AG
If you pay by bank credit transfer, on the remittance form please tick „shared“ (shared
costs) in the box under the item `Costs´. Otherwise, we can not process your order.
Our postal address:
Kompernaß Handelsgesellschaft mbH
Burgstraße 21
44867 Bochum
Germany
IMPORTANT
►
Please affi x suffi cient postage to the letter.
► Write your name as the sender on the envelope.
SENDER / ORDERER
(please complete in block captals)
(Surname, fi rst name)
(Street)
(Post code, town)
(Country)
ORDER CARD DAZD 3.7 Li A1
(Telephone)
www.kompernass.com
15
DAZD 3.7 Li A1
FI
Sisällysluettelo
Johdanto . . . . . . . . . . . . . . . . . . . . . . . . . . . . . . . . . . . . . . . . . . . . . . . . . . . . . . . . . . . 16
Määräystenmukainen käyttö . . . . . . . . . . . . . . . . . . . . . . . . . . . . . . . . . . . . . . . . . . 16
Toimituslaajuus . . . . . . . . . . . . . . . . . . . . . . . . . . . . . . . . . . . . . . . . . . . . . . . . . . . . . . 16
Laitteen kuvaus . . . . . . . . . . . . . . . . . . . . . . . . . . . . . . . . . . . . . . . . . . . . . . . . . . . . . 16
Tekniset tiedot . . . . . . . . . . . . . . . . . . . . . . . . . . . . . . . . . . . . . . . . . . . . . . . . . . . . . . . 16
Turvallisuusohjeet . . . . . . . . . . . . . . . . . . . . . . . . . . . . . . . . . . . . . . . . . . . . . . . . . . . . 17
Sijoittaminen / Seinäpidike . . . . . . . . . . . . . . . . . . . . . . . . . . . . . . . . . . . . . . . . . . . . 18
Ensimmäinen käyttö . . . . . . . . . . . . . . . . . . . . . . . . . . . . . . . . . . . . . . . . . . . . . . . . . . 19
Harjapään kiinnittäminen / irrottaminen . . . . . . . . . . . . . . . . . . . . . . . . . . . . . . . . . 19
Käyttö . . . . . . . . . . . . . . . . . . . . . . . . . . . . . . . . . . . . . . . . . . . . . . . . . . . . . . . . . . . . . 19
Hampaiden harjaus . . . . . . . . . . . . . . . . . . . . . . . . . . . . . . . . . . . . . . . . . . . . . . . . . . 19
Puhdistus ja hoito . . . . . . . . . . . . . . . . . . . . . . . . . . . . . . . . . . . . . . . . . . . . . . . . . . . . 21
Matkakotelo . . . . . . . . . . . . . . . . . . . . . . . . . . . . . . . . . . . . . . . . . . . . . . . . . . . . . . . . 21
Takuu ja huolto . . . . . . . . . . . . . . . . . . . . . . . . . . . . . . . . . . . . . . . . . . . . . . . . . . . . . . 21
Hävittäminen . . . . . . . . . . . . . . . . . . . . . . . . . . . . . . . . . . . . . . . . . . . . . . . . . . . . . . . 22
Maahantuoja . . . . . . . . . . . . . . . . . . . . . . . . . . . . . . . . . . . . . . . . . . . . . . . . . . . . . . . 22

16
DAZD 3.7 Li A1
FI
AKKUHAMMASHARJA
Johdanto
Onnittelut uuden laitteen hankinnasta.
Olet valinnut laadukkaan tuotteen. Käyttöohje on
osa tätä tuotetta. Se sisältää tärkeitä turvallisuutta,
käyttöä ja hävittämistä koskevia ohjeita. Tutustu
ennen tuotteen käyttöä kaikkiin käyttö- ja turvallisuusohjeisiin. Käytä tuotetta vain kuvatulla tavalla
ja vain mainittuihin käyttötarkoituksiin. Kun luovutat
tuotteen eteenpäin, liitä mukaan kaikki tuotetta
koskevat asiakirjat.
Määräystenmukainen käyttö
Tämä laite on tarkoitettu yksinomaan henkilökohtaiseen hampaiden hoitoon yksityistalouksissa.
Tämä laite on tarkoitettu ainoastaan yksityiskäyttöön. Sitä ei ole suunniteltu teollisiin eikä lääkinnällisiin tarkoituksiin eikä eläintenhoitoon. Älä käytä sitä
ammattitarkoituksiin.
Toimituslaajuus
Käsilaite
8 harjapäätä
Latauslaite
2 ruuvia
2 tulppaa
Matkakotelo
Käyttöohje
OHJE
Tarkista toimituksen täydellisyys ja mahdolliset
v
auriot heti, kun olet purkanut laitteen pakkauk-
sesta. Käänny tarvittaessa huollon puoleen.
Poista kaikki pakkausmateriaalit ja muovit
laitteesta.
Laitteen kuvaus
1 Harjapää
2 Kansi
3 Virtakytkin
4 "Clean"-merkkivalo (oranssi)
5 "Soft"-merkkivalo (vihreä)
6 "Pulse"-merkkivalo (keltainen)
7 Latauksen merkkivalo
8 Latauslaite
9 Seinäpidike
Tekniset tiedot
Jännite: 100 - 240 V ~, 50/60 Hz
Tehontarve: 2 W
Akku: Li-ioni-akku, 600 mAh
Kotelointiluokka
(latauslaite): IP X7
Suojaluokka: II /
Latausaika: n. 14 - 16 tuntia
(ensimmäinen lataus)
Kotelointiluokka
(käsilaite): IP X4
17
DAZD 3.7 Li A1
FI
Turvallisuusohjeet
VAARA - SÄHKÖISKU!
► Varo, ettei laitteen sisään pääse nestettä, äläkä kasta laitetta
veteen, sillä se voi vaurioittaa laitetta.
► Vältä vierasesineiden joutumista laitteen sisään.
► Jos tuotteessa ilmenee toimintahäiriöitä tai vaurioita, käänny
valtuutetun huoltoliikkeen puoleen.
► Varmista, ettei virtajohto pääse käytön aikana kastumaan, eikä
altistu kosteudelle. Vedä virtajohto niin, ettei se voi jäädä puristuksiin
tai vaurioitua muuten. Sähköiskun vaara!
► Tämän laitteen virtajohtoa ei voida vaihtaa. Jos johto vaurioituu,
laite on poistettava käytöstä ja romutettava.
► Älä koskaan koske latauslaitteeseen, jos se on pudonnut veteen.
Irrota ehdottomasti ensin verkkopistoke pistorasiasta! Sähköiskun
vaara!
Älä kasta käsilaitetta tai latauslaitetta veteen tai muihin nesteisiin.
VAROITUS - LOUKKAANTUMISVAARA!
► Hammasharjaa voivat käyttää henkilöt, joiden fyysiset, aistilliset tai
henkiset kyvyt ovat rajalliset tai kokemus ja/ tai tiedot puutteellisia,
kun heitä valvotaan tai heitä on ohjeistettu laitteen turvalliseen käyttöön, ja he ovat ymmärtäneet laitteen käyttöön liittyvät vaarat.
► Lapset eivät saa suorittaa puhdistusta ja käyttäjähuoltoa, paitsi
jos heitä valvotaan.
► Lapset eivät saa leikkiä laitteella.
18
DAZD 3.7 Li A1
FI
HUOMIO - AINEELLISET VAHINGOT!
► Sähköhammasharjan saa ladata vain mukana tulevassa latauslait-
teessa. Muuten laite voi vaurioitua käyttökelvottomaksi!
► Käytä laitetta vain mukana tulevien alkuperäistarvikkeiden kanssa.
Sijoittaminen / Seinäpidike
OHJE
► Latauslaitetta 8 v
oidaan käyttää asentamatta
sitä kiinteästi vain kuivissa tiloissa.
► Kosteissa tiloissa, erityisesti veden lähettyvillä
(
kylpyamme) latauslaite 8 on asennettava
kiinteästi, jotta se ei vahingossa pääse
putoamaan veteen.
1) Paina seinäpidikkeessä 9 olevaa pientä ulo-
ketta alhaalta päin, kunnes kuulet napsahduksen ja uloke irtoaa seinäpidikkeestä 9:
2) Irrota seinäpidike 9 latauslaitteesta 8 vetä-
mällä sitä alaspäin:
3) Merkitse seinään porausreikien oikea etäisyys
seinäpidikkeessä 9 olevien reikien lävitse.
Varmista tällöin, että lähellä on verkkopistorasia.
4) Varmista ennen poraamista, ettei merkitsemiesi
porausreikien takana kulje sähkö- tai vesijohtoja.
5) Poraa merkityt reiät 5 mm:n poralla ja työnnä
mukana tulevat kiinnitystulpat reikiin.
6) Kiinnitä seinäpidike 9 ruuvien avulla.
7) Kun olet kiinnittänyt seinäpidikkeen 9, vie
virtajohto latauslaitteessa 8 olevan oikean
tai vasemman loven kautta (ks. kääntösivun
suurennettu kuva). Työnnä sitten latauslaite 8
ohjainkiskojen avulla seinäpidikkeeseen 9.
8) Varmista, ettei virtajohto jää puristuksiin, ja
että se kulkee asianmukaisesti lovien kautta.
 Loading...