

Page 1
TRIANGULA T E D UPPER R EAR TI E -BAR – P A RT #80. 1 0 .91 FI T S : 2006- U P VW MK V & VI GTI , R32, RA B B I T & G O L F VI
PARTS LIST: TOOLS REQUIRED:
1 – MAIN TIE-BAR 1 – DIAGONAL TIE-BAR 1 – DRIVER SIDE MOUNT 1 – UTILITY KNIFE 1 – CENTER PUNCH 1 – 1/8” DRILL BIT
1 – PASSENGER SIDE MOUNT 1 – UPPER REAR MOUNT 1 – LOWER REAR MOUNT 1 – 25/64” DRILL BIT 1 – DRILL MOTOR 1 – 4mm HEX KEY WRENCH
4 – M10 BALL-JOINTS 4 – M10 JAM NUTS 2 – M6x18mm FLAT HEAD BOLT 1 – RATCHET 1 – 10mm SOCKET 1 – 9/16” WRENCH
2 – M6x20mm SOCKET CAP BOLT 2 – M6x25mm SOCKET CAP BOLT 2 – M10x20mm SHOULDER BOLT 1 – 17mm WRENCH 1 – RULER 1 – MARKING PEN
1 – M10x40mm SHOULDER BOLT 3 – M6 THREADED INSERT 1 – INSERT TOOL w/M6 THREADED INSERT
1 – 5mm HEX KEY WRENCH
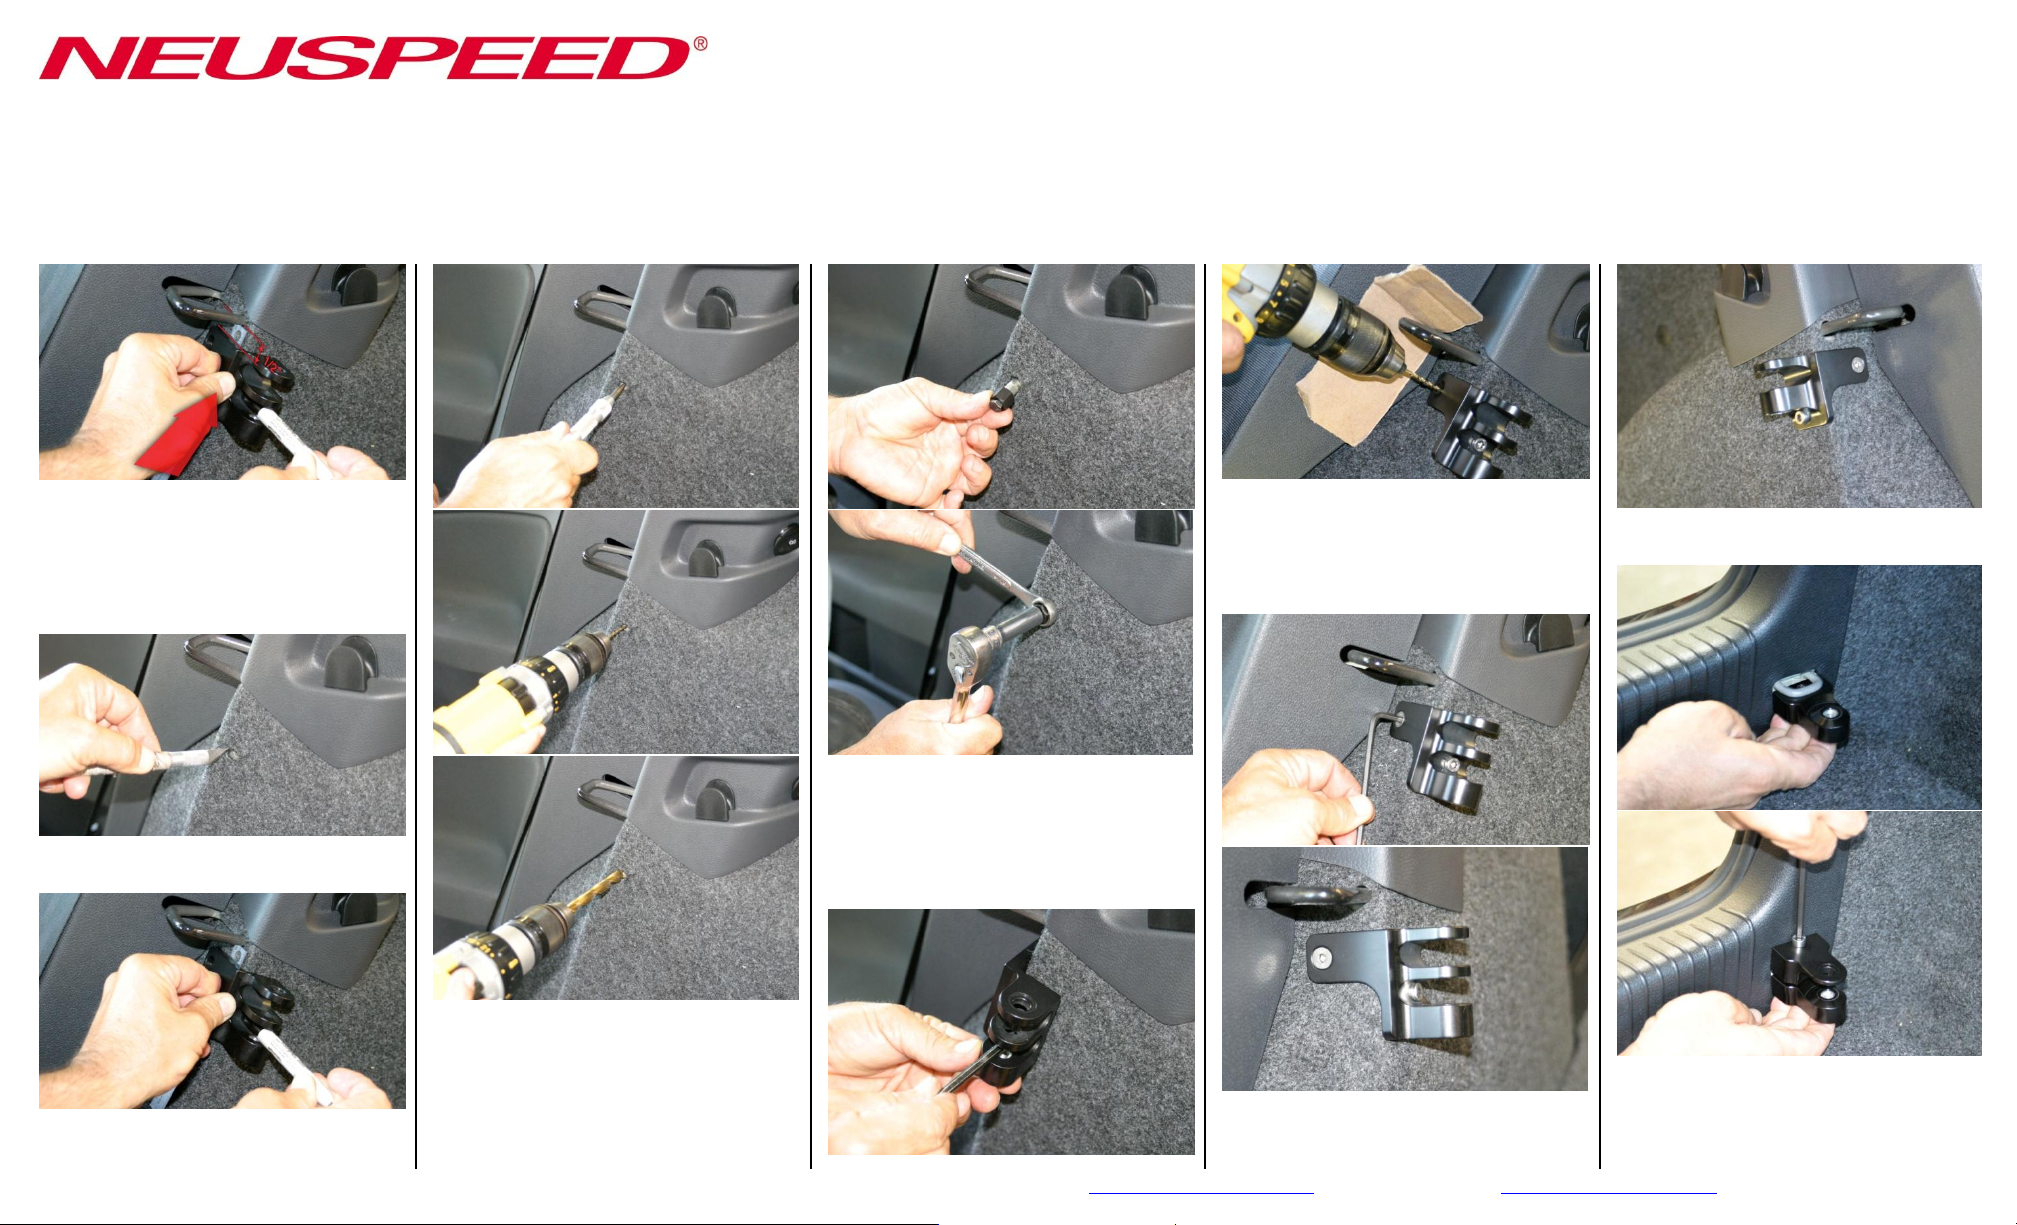
1. Fold down rear seats. Measure ½”
down from bottom side of metal seat
latch to top of mounting bracket and
push mounting bracket firmly onto
corner. Mark carpet through holes with
marking pen. NOTE: Passenger side
shown
2. Using a sharp utility knife, cut a ½”
diameter hole around pen mark.
3. Once again, place mounting bracket
firmly onto corner and mark sheet metal
facing towards inside of vehicle.
NEUSPEED® • 3300 Corte Malpaso • Camarillo, CA 93012 • 805.388.7171 • 805.388.0030 FAX • [email protected] • Visit us on the web…http://www.neuspeed.com
4. Use caution as accuracy is important
when drilling. Use center punch on
mark. Drill pilot hole with smaller drill
bit first. Then drill final hole using
25/64” drill bit. NOTE: Use cardboard
to protect plastic panel when
drilling forward hole.
5. Supplied tool has a threaded insert pre-
installed onto it. Insert in hole and hold
black body from turning with a 9/16”
wrench. While pushing in, turn setting
bolt with a 10mm socket until insert is
crimped into hole. Undo setting bolt
and tool.
6. Temporarily mount and tighten
mounting bracket using M6x20mm
socket cap bolt and mark forward
mounting hole. Remove bracket and
repeat steps 4 and 5 for forward
mounting hole.
7. Install and tighten mounting bracket
using M6x20mm socket cap bolt and
M6x18mm flat head bolt.
8. Repeat steps 1 thru 7 to mount driver
side mounting bracket.
9. Loosely mount rear leg mount to drivers
side rear tie-down hook using
M6x25mm socket cap bolt.
Page 2
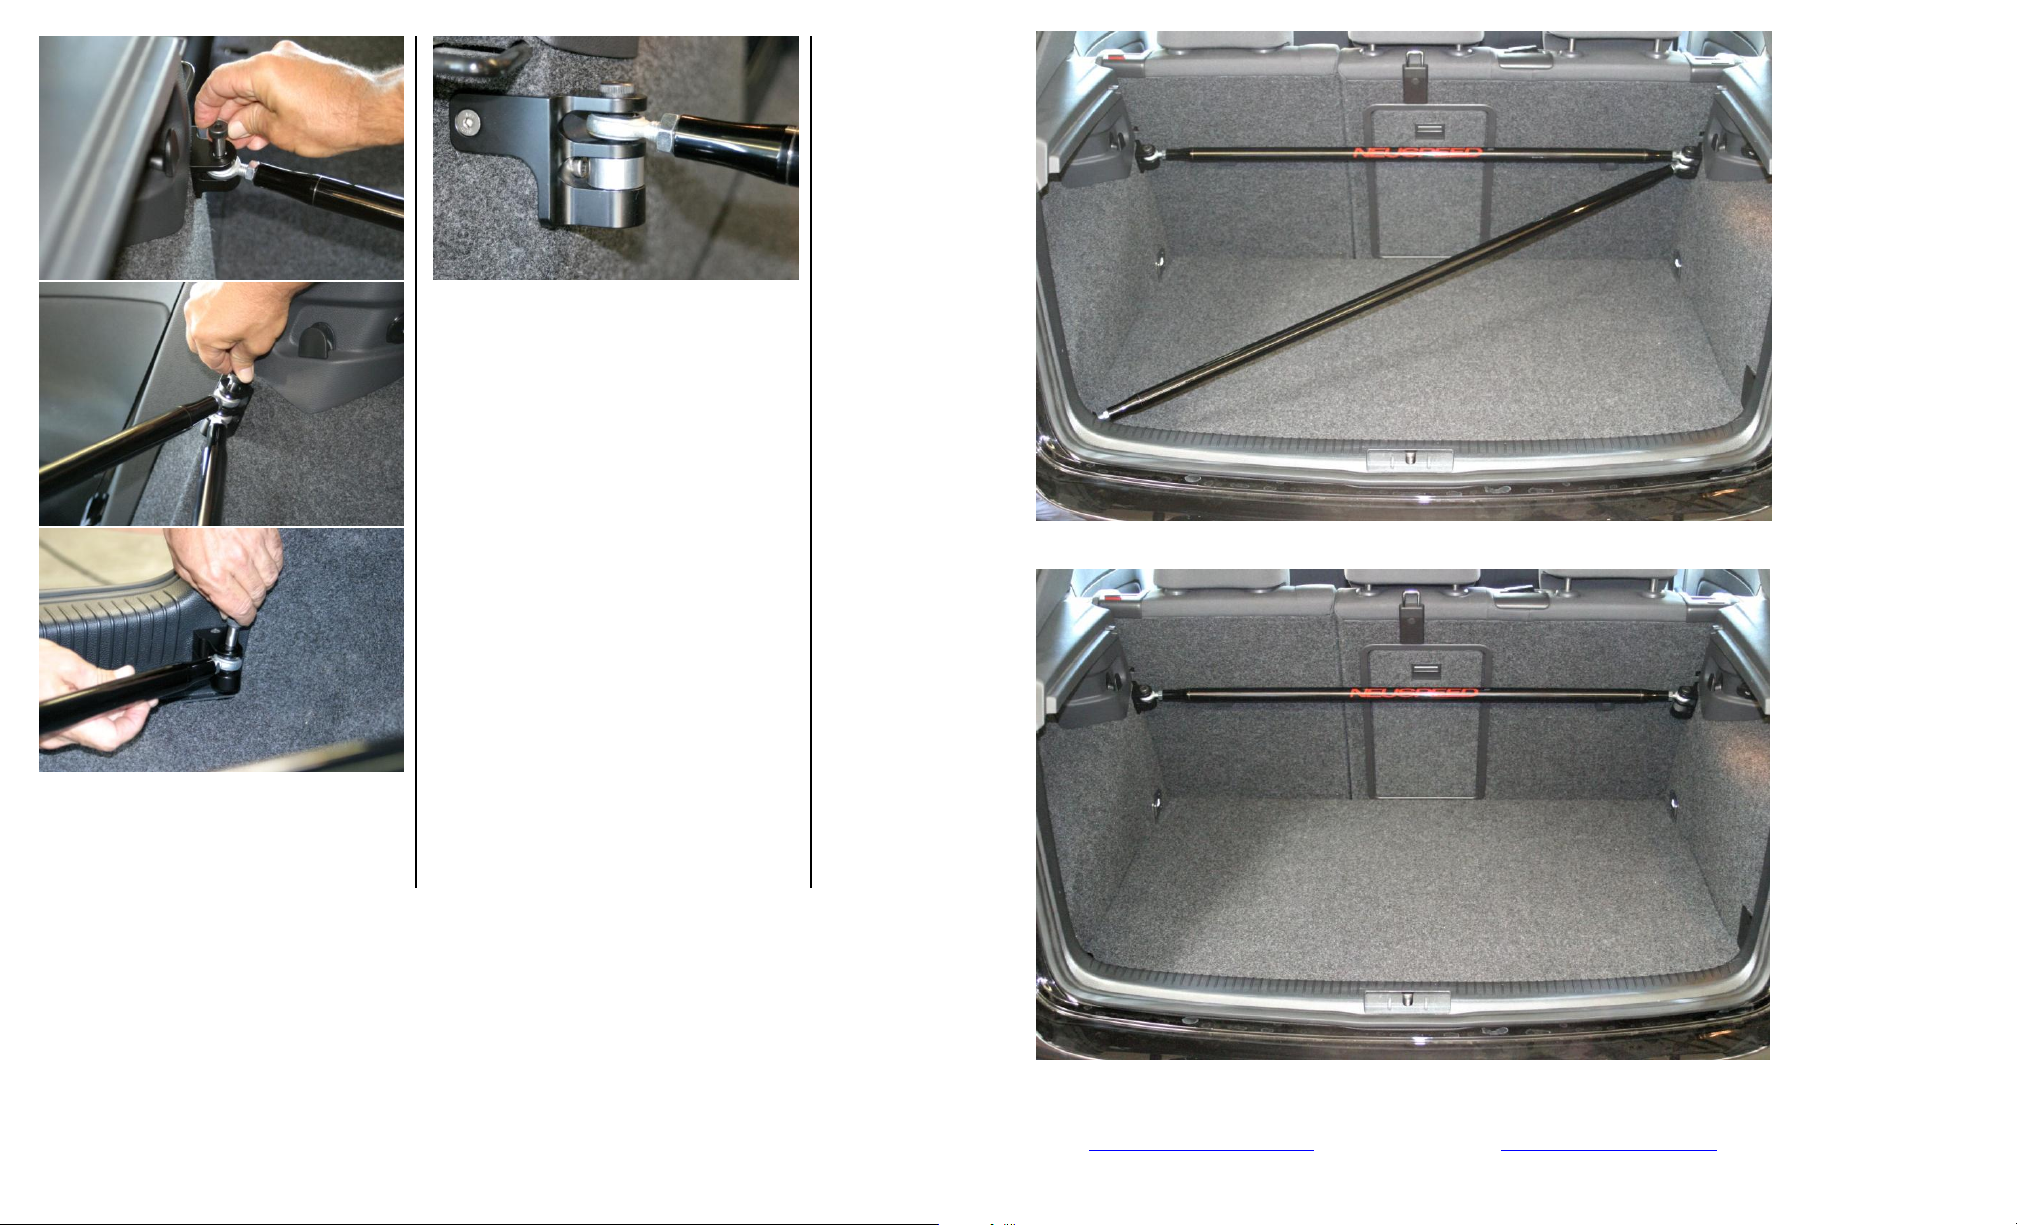
FINISHED INSTALLATION WITH DIAGONAL BAR
FINISHED INSTALLATION WITHOUT DIAGONAL BAR
©2008, NEUSPEED®. All rights reserved. Reproduction in whole or in part prohibited. DOC.80.10.91 Rev. 08.01.08
11. Diagonal bar can be removed to
increase cargo space with supplied
spacer.
10. Thread M10 jam nuts onto ball-joints
and screw into tie-bars. Loosely mount
cross-bar and diagonal bar using
supplied shoulder bolts. Now tighten
ALL bolts and ball-joint jam nuts.
NEUSPEED® • 3300 Corte Malpaso • Camarillo, CA 93012 • 805.388.7171 • 805.388.0030 FAX • [email protected] • Visit us on the web…http://www.neuspeed.com
 Loading...