

Page 1
User Guide
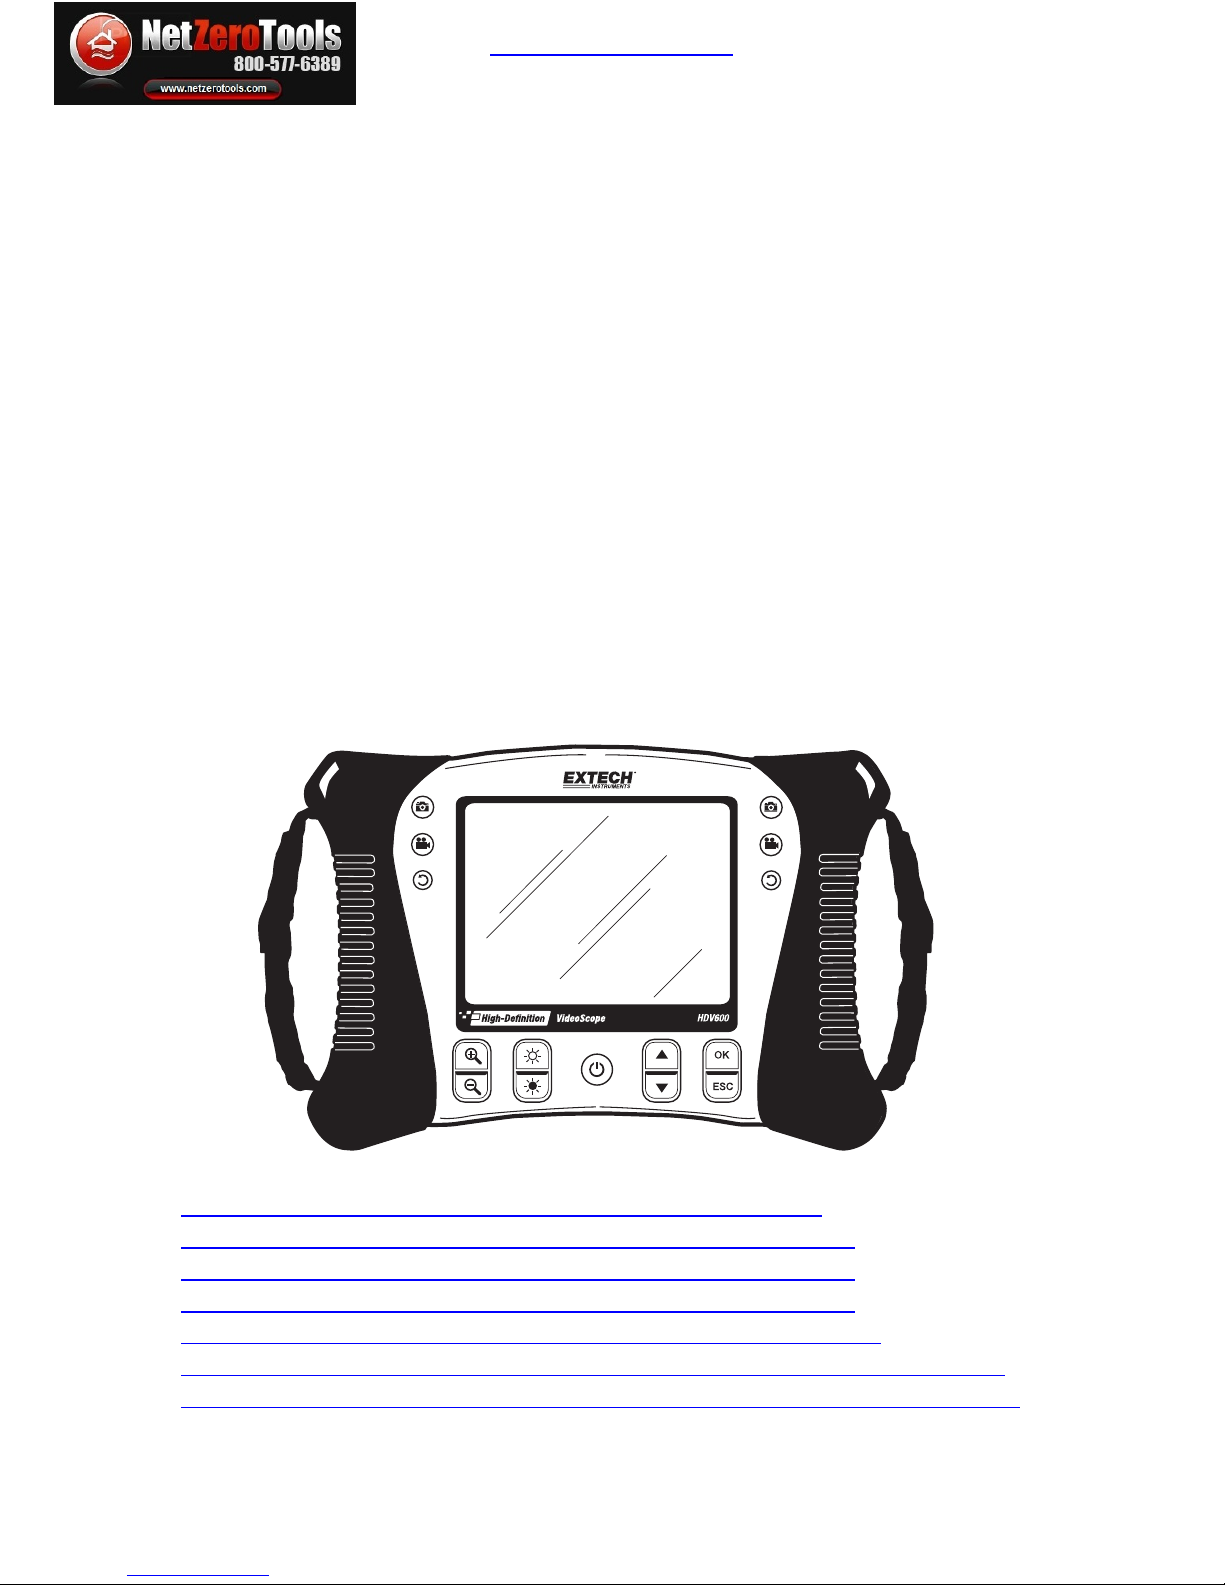
High Definition VideoScope
Model HDV600
netzerotools.com
netzerotools.com
netzerotools.com
Extech HDV600 Borescope Video Scope Inspection Camera
Extech HDV610 Borescope VideoScope Inspection Camera Kit
Extech HDV620 Borescope VideoScope Inspection Camera Kit
Extech HDV640 Borescope VideoScope Inspection Camera Kit
Extech HDV640W Borescope VideoScope Inspection Camera Kit
EXTECH BR200 VIDEO BORESCOPE WIRELESS INSPECTION CAMERA
EXTECH BR250 VIDEO BORESCOPE / WIRELESS INSPECTION CAMERA
Page 2
HDV600-EU-EN-V2.7 10/12
2
Introduction
Congratulations on your purchase of this Extech HDV600 series Video Borescope. This instrument
is designed for use as a remote inspection device. It can be used to peer into tight spots, record and
playback real-time video and images. Typical applications include HVAC inspection, automotive
inspection, cable routing, and automotive/boat/aircraft inspection. The monitor is designed with dual
left or right handed controls for maximum flexibility and is available with a full line of accessories.
This meter is shipped fully tested and, with proper use, will provide years of reliable service.
Models and Descriptions:
HDV600 VideoScope (Mo
nitor only)
HDV610 VideoScope w/1m flexible cable, 5.5mm diameter
HDV620 VideoScope w/1m semi-rigid cable, 5.8mm diameter
HDV640 VideoScope w/1m Articulating semi-rigid cable, 6mm diameter
HDV640W VideoScope w/1m Wireless Articulating semi-rigid cable, 6mm diameter
Note: Additional probe lengths and configurations are available. A list is available at the end of this
guide.
Cautions
The IP67 waterproof rating does not apply when the bottom panel access cover is removed.
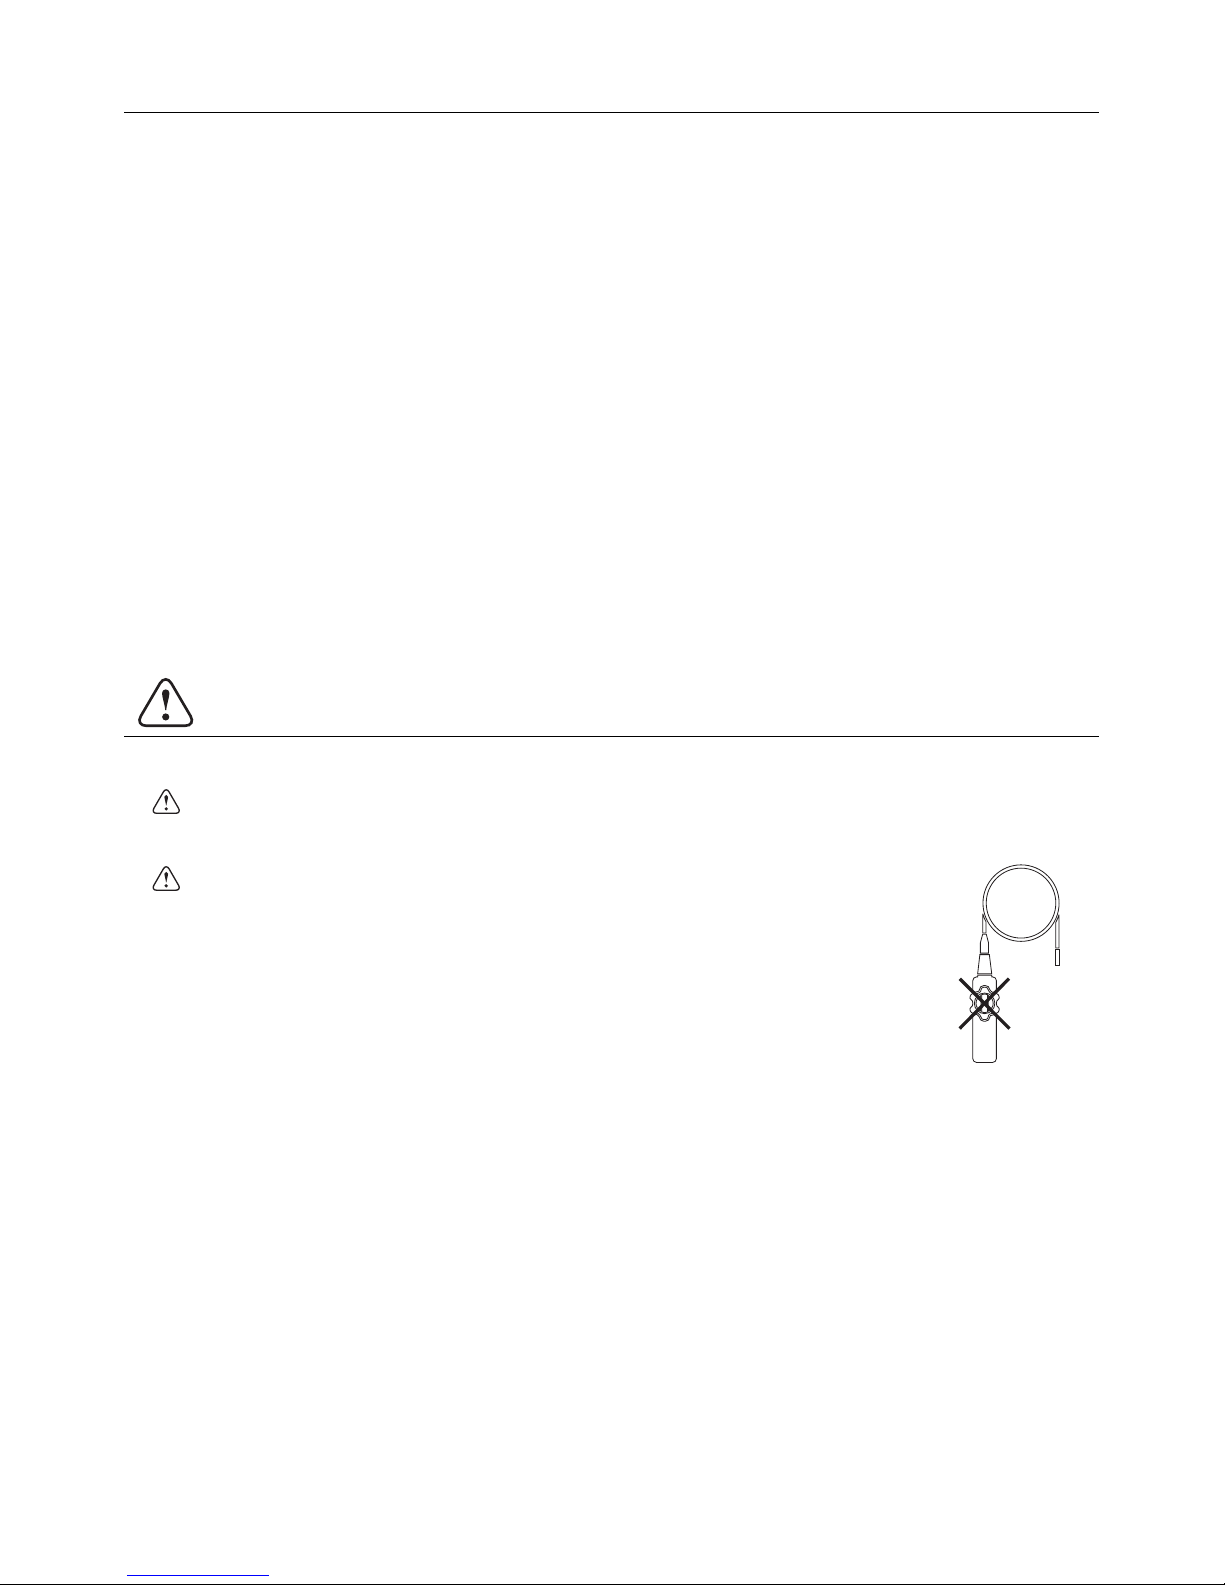
For the Articulating Probe, do not operate the articulation knob with the probe
in a coiled configuration. This will damage the articulation controls!
netzerotools.com
netzerotools.com
Page 3
HDV600-EU-EN-V2.7 10/12
3
Description
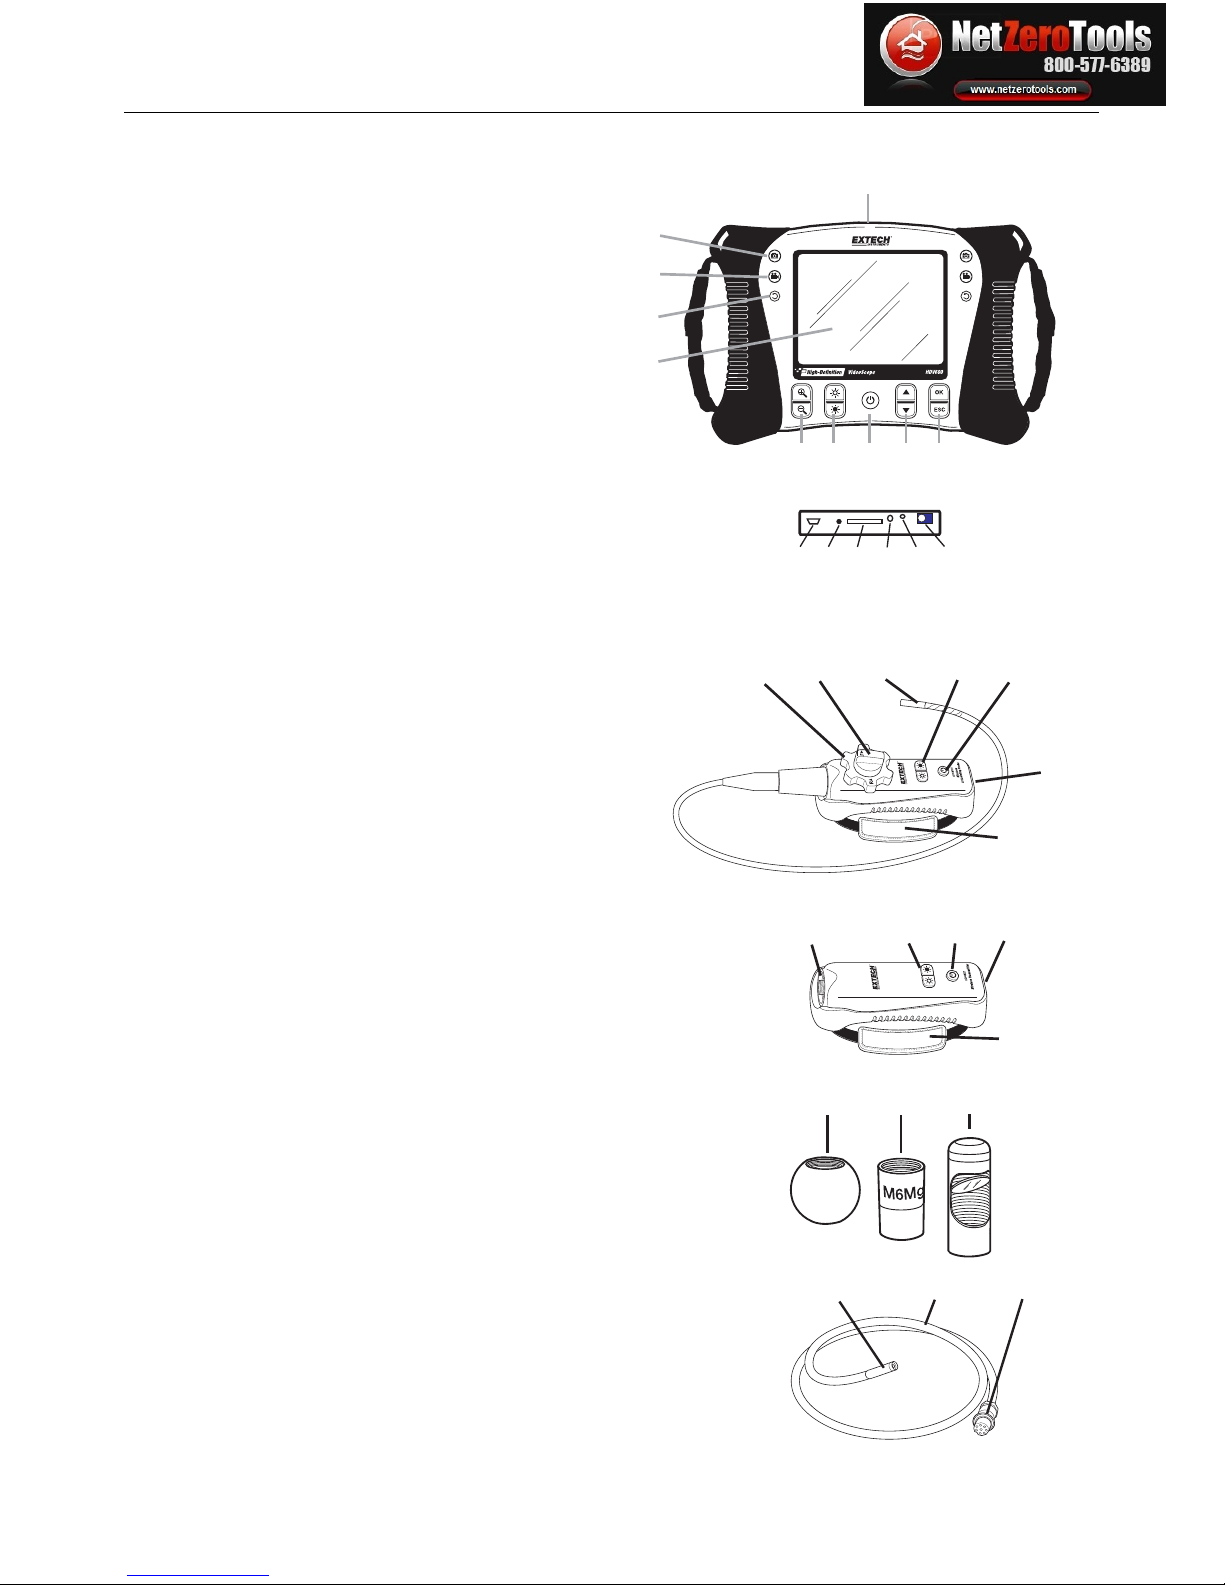
Monitor
1. Probe connector
2. Camera button
3. Video button
4.
Rotate image but
ton
5.
Display
6. Zoom
buttons
7. Light intensity bu
ttons
8. Power Button
9.
Scroll buttons
10. Selection buttons
11. USB connector
12. Microphone
13. SD card slot
14. Video output jack
15. Reset button
16.
AC adaptor conne
ctor
Articulating Probe
1. Articulation knob
2. Articulation tension knob
3. Articulating camera
4. Light intensity buttons
5. Power
button
6. AC Adaptor and extension cable sockets
7. Carrying
strap
Wireless Transmitter
1. Probe Connector
2. Light Intensity buttons
3. Power
button
4.
AC Adaptor and extension cable sockets
5. Carr
ying strap
Probe accessories
1. Anti-snag tip
2. Magnet
3. 45° Mirror
Probe
1. Camera
2. Shaft
3. Monitor connector
12
3
4
5
6
7
1234
5
12
3
1
2
3
1
2
3
4
5
6
7
8910
11 12 13 14 15 16
netzerotools.com
netzerotools.com
Page 4
HDV600-EU-EN-V2.7 10/12
4
Setup
Battery Charging and Status Indication:
Note: A fully charged battery will allow approximately 5 hours of continuous use.
1. Turn the meter off and then connect the AC adaptor to charge the meter.
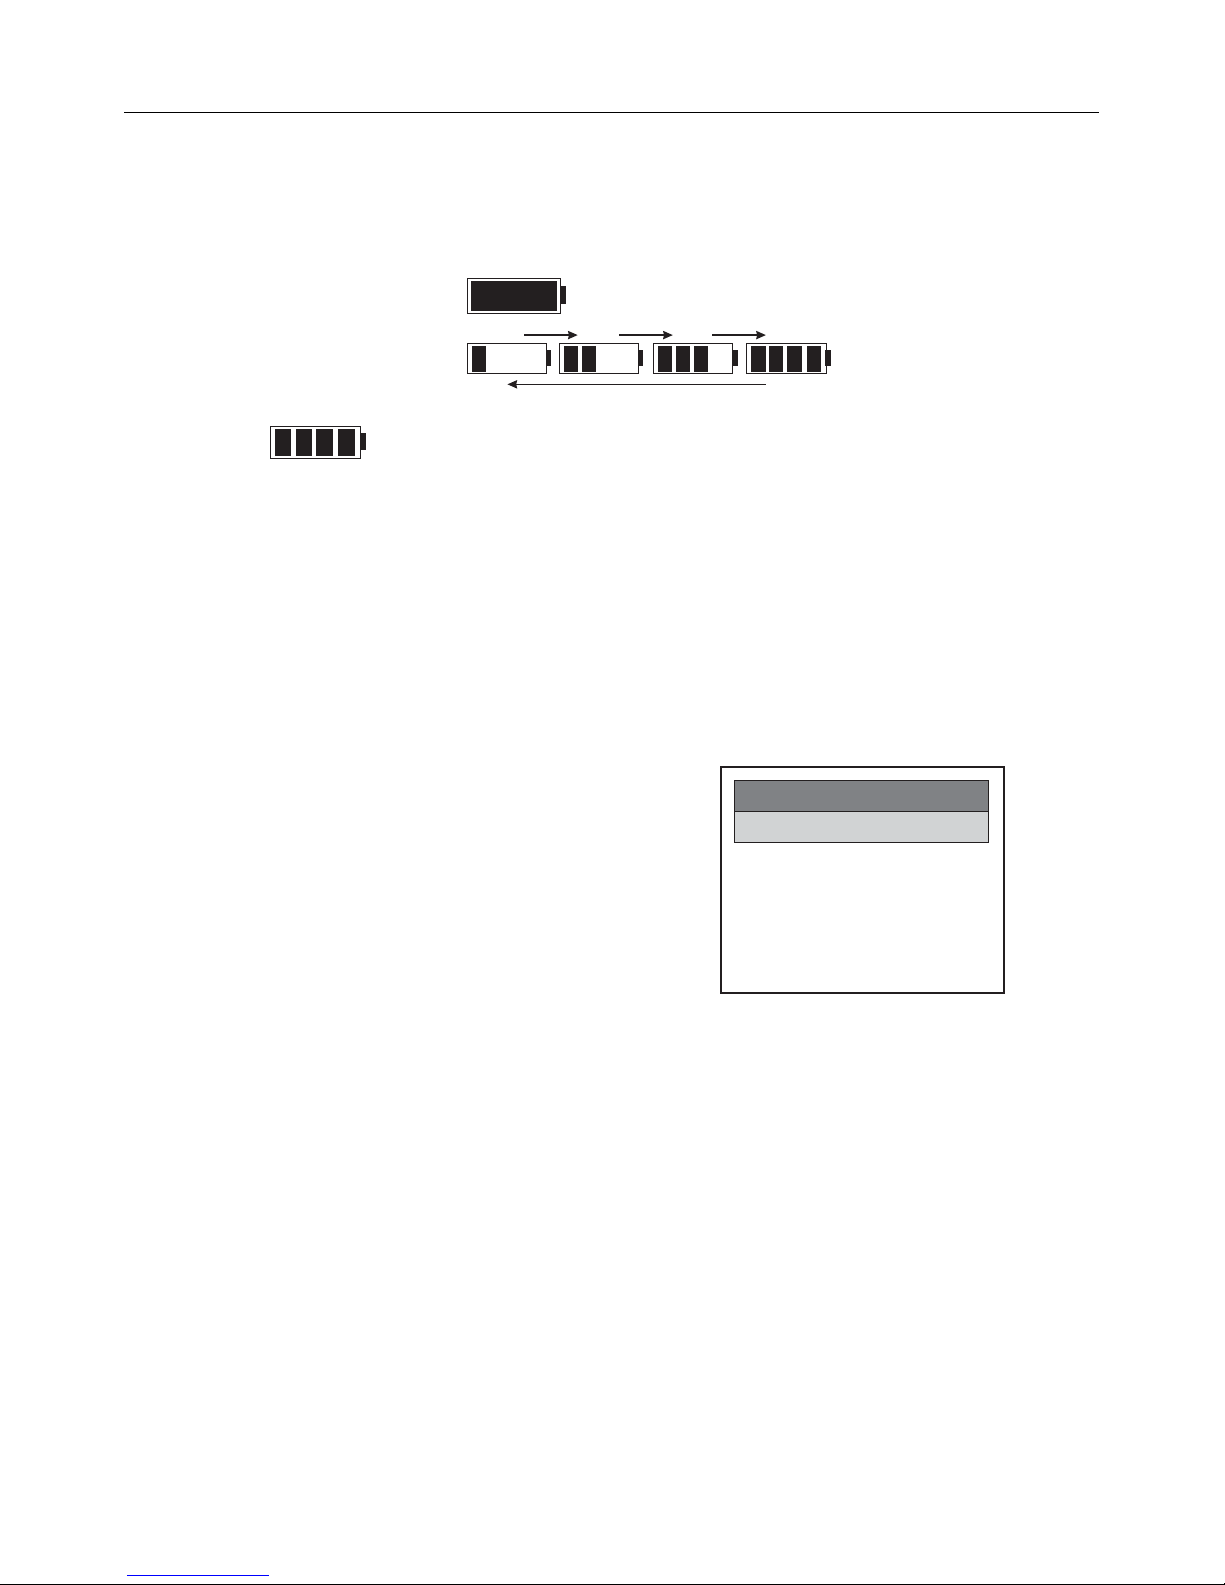
2. After several hours, turn the meter on. The battery icon will indicate either:
A: Fully charged
B: Charge in pro
g
ress
3.
If the batter
y
is charged, remove the AC adaptor and observe that the fully charged
4 bar
icon
appears.
4. If the battery icon indicates less than 4 bars, turn the meter off and continue charging.
5. Always wait for a full fully charged indication to maximize operation time and to maintain
battery health.
Note: The battery will not properly charge if the meter is on during the charging cycle.
Startup
1. Insert the SD card into the bottom SD slot
2. Press the Power button to turn the monitor on. The battery icon will briefly appear indicating
the battery condition.
3. Press OK to open the setup MENU
4. Press the ▲ or ▼ button to scroll through the
MENU selections.
5. Press OK to open the highlighted selection.
6. Press the ▲ or ▼ button to scroll through the
items in an open menu item.
7. Press
the ▲ or ▼ buttons to increase or
decrease the selected value.
8. After there has been a change, press the OK button to save the change or the ESC button to
exit without the change.
Note: After 10 seconds of inactivity, the Setup menu will exit without storing changes.
MENU Description:
DELETE ALL: Erase all stored pictures and videos
DATE/TIME SETUP: Set the date (year/month/day), time (hour:minute:second) and display
on/off
LANGUAGE: Set the menu display to any one of 21 languages.
VIDEO FORMAT: Set the video output to NTSC or PAL format.
AUTO POWER OFF: Set the APO to 5, 10, 15, 30 minutes or DISABLE.
INPUT SOURCE: Set Direct or Wireless.
MENU
DELETE ALL
DATE/TIME SETUP
LANGUAGE
VIDEO FORMAT
AUTO POWER OFF
INPUT SOURCE
netzerotools.com
netzerotools.com
Page 5
HDV600-EU-EN-V2.7 10/12
5
Operation
1. Connect the probe to the monitor.
2. Press the Power button to turn the monitor on.
3. Maneuvere the probe into position to view the area to be examined. The probe can be
bent into the shape of the area to be examined. Optimum focus distance is 2 to 6cm (0.79
to 2.3”)
4. Optimum focus distance is probe dependent, but the typical range is 2 to 6cm
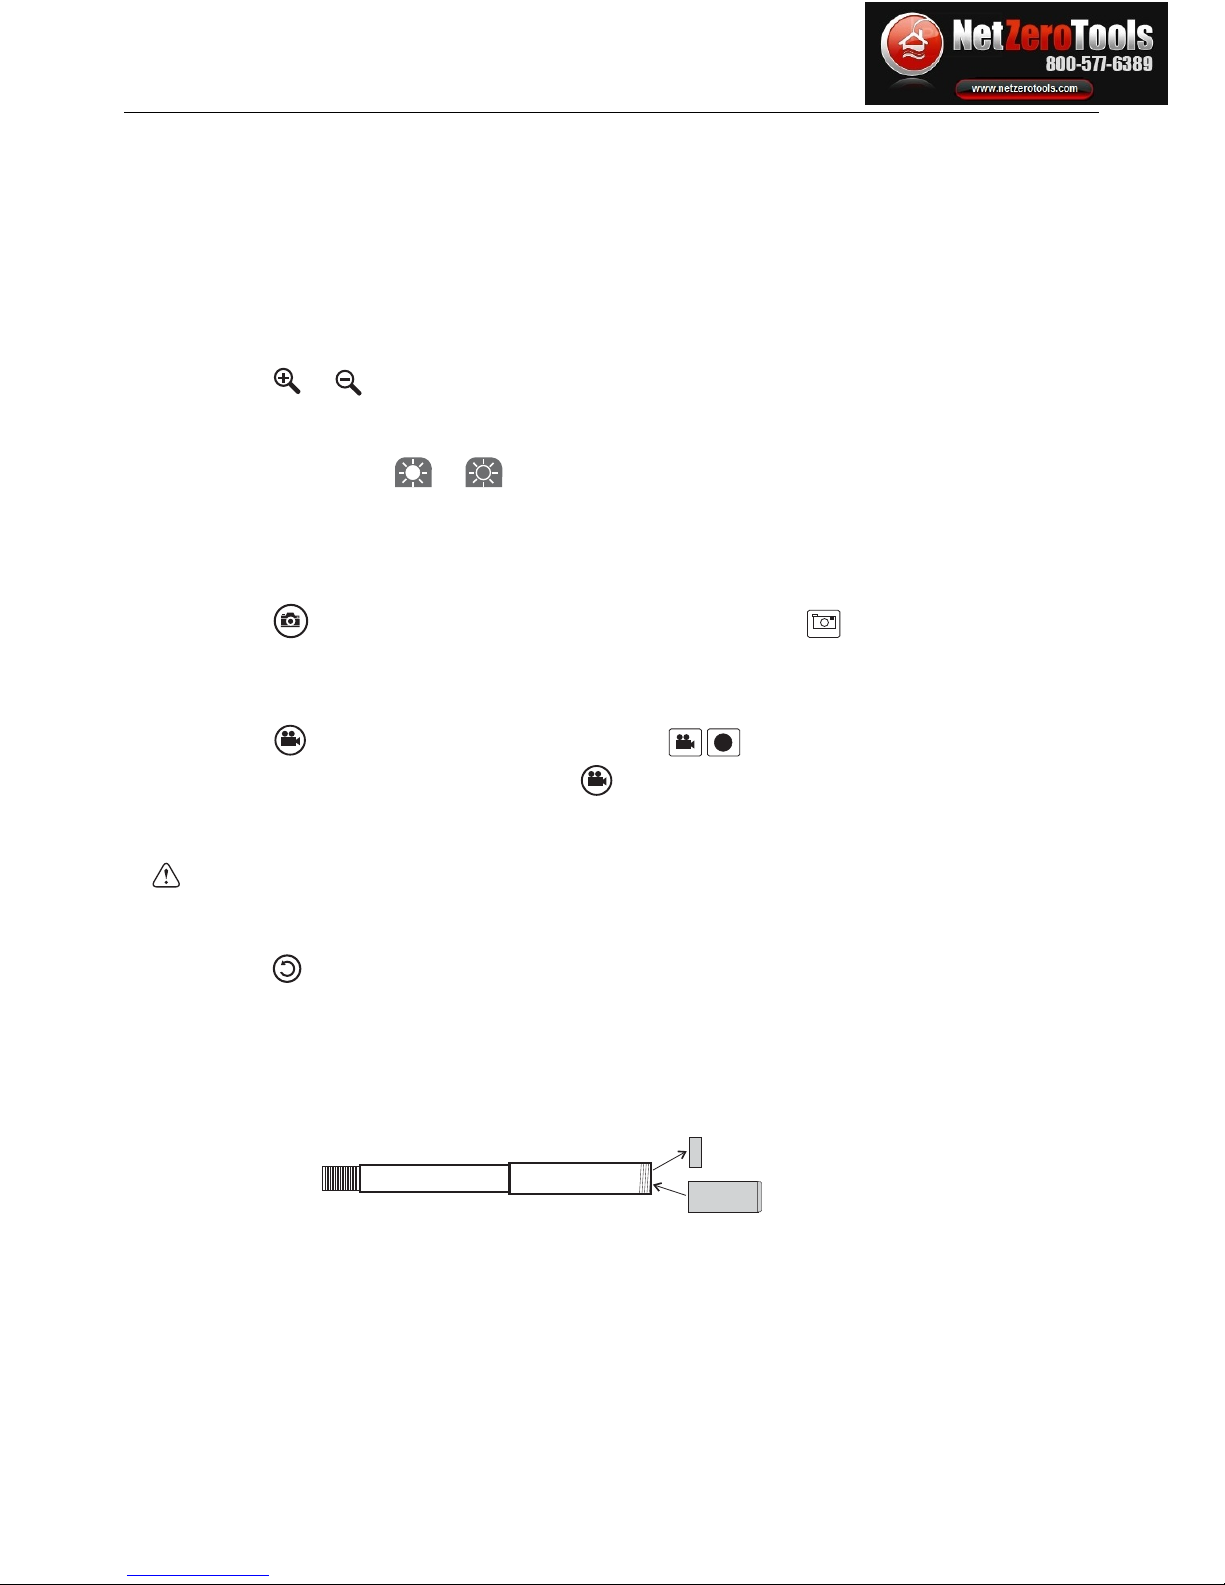
Zoom
Press the or zoom buttons to increase or decrease the display resolution from 1X to 2X.
Light Intensity
Press and release the or buttons to increase or decrease the camera LED light
intensity
Note: the camera LEDs become warm when set to maximum intensity
Taking a Picture
Press the button to take and store a picture into memory. The icon will appear on the
display when a picture is taken.
Recording a Video
Press the button to start recording a video. The
REC
icons will appear on the display
when a video is being recorded. Press the
button to stop the recording. Audio will be
recorded on the video via the microphone on the bottom of the monitor.
Note: The bottom access cover must be removed for audio recording.
The IP67 waterproof rating does not apply when the bottom panel access cover is removed.
Display Rotation
Press the button to rotate the display 90 degrees.
Installing probe accessories
Three accessories (mirror, anti-snag tip and magnet) are supplied with each probe.
Attach the accessory by unscrewing the probe ring and screwing on the attachment.
netzerotools.com
netzerotools.com
Page 6
HDV600-EU-EN-V2.7 10/12
6
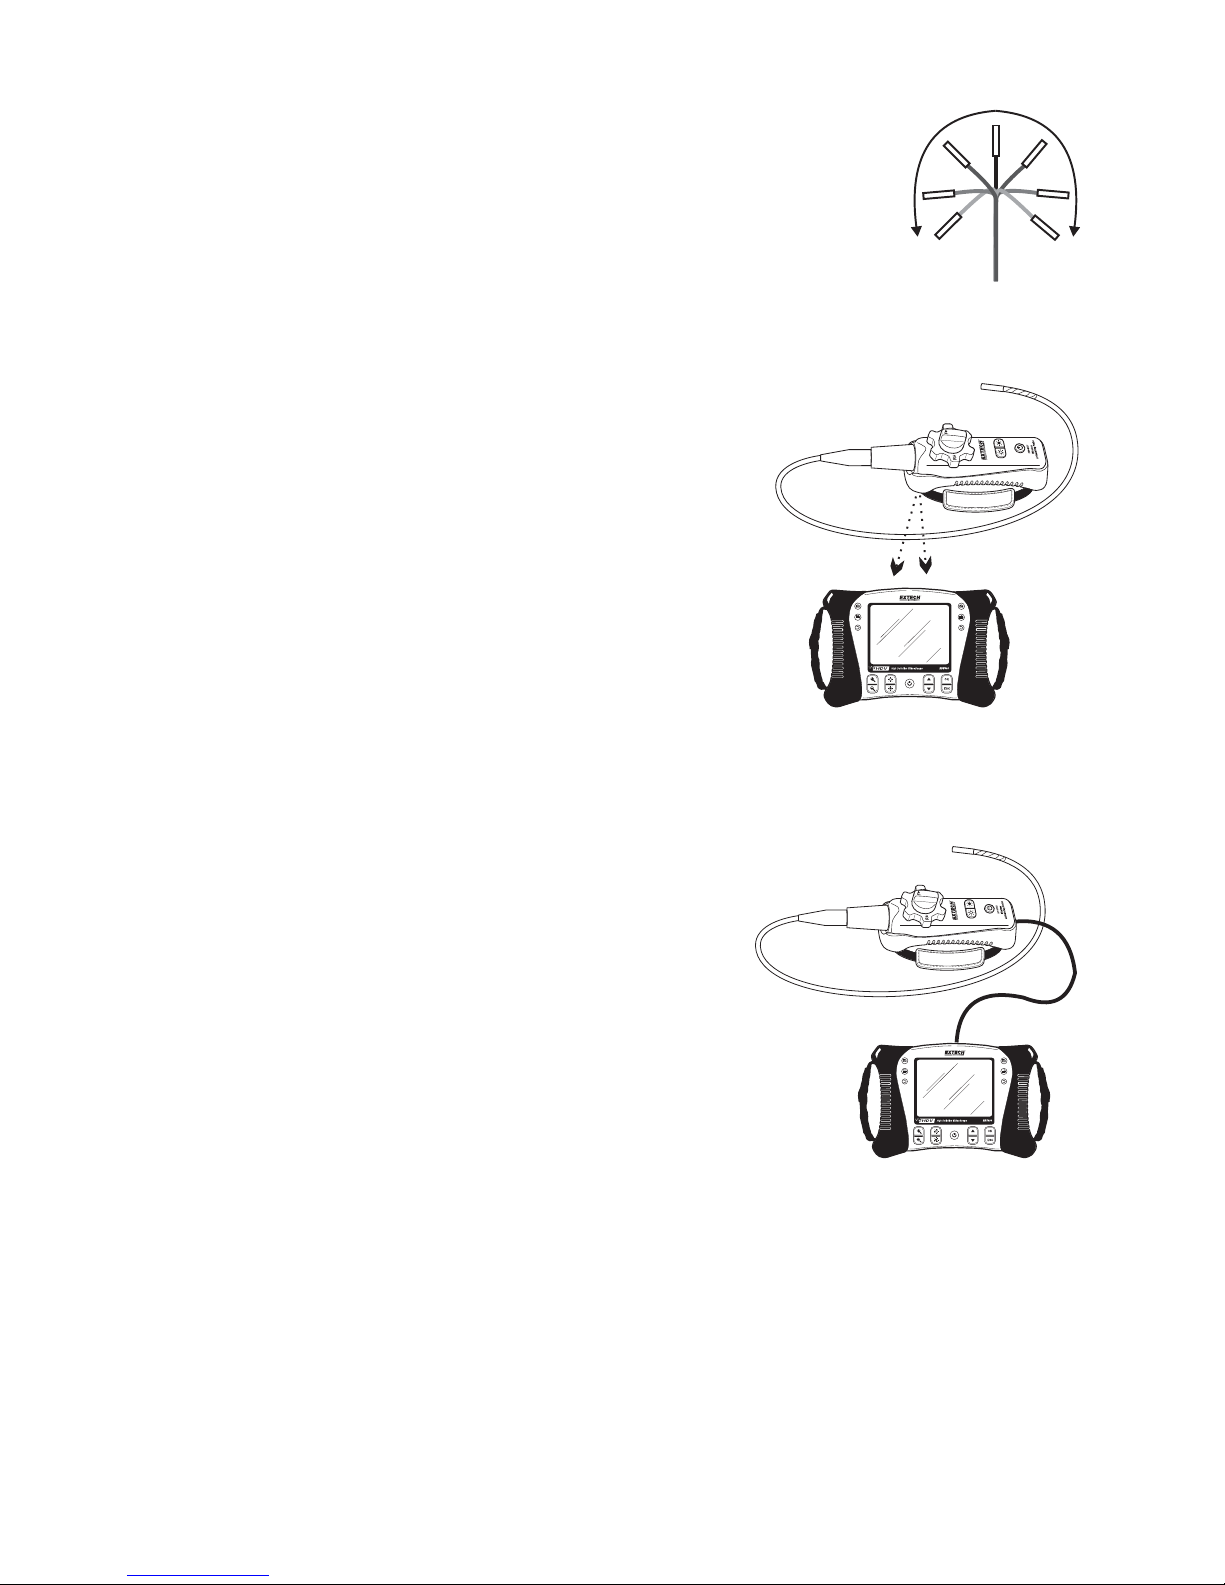
Articulating probe
The articulating probe, with adjustable tip angle, is used for improved
viewing angles and optimum inspection when the probe is inserted into the
inspection location. The articulating probe is available in a direct (wired) or
wireless version.
Wireless version
Note: The battery must be fully charged for wireless operation. A weak battery may result in meter
shut down.
1. Connect the AC adaptor to the transmitter and charge
the battery.
2. Press and hold the Power button for 4 seconds to turn
the monitor on, then select “WIRELESS” under the
INPUT SOURCE selection in the MENU screen.
3. Press and hold the Power button for 4 seconds to turn
the transmitter on. The camera video will be transmitted
to the monitor display.
4. Insert the probe into the area to be inspected.
5. Turn the probe outer knob to adjust the camera tip to
the viewing angle needed.
6. Turn the upper knob to increase or decrease the outer
knob tension
Direct version
1.
Connect the probe to the monitor
using the supplied
patch cable.
2. Press and hold the Power buttons for 4 seconds to
turn the probe and the monitor on
3. Insert the probe into the area to be inspected.
4. Turn the probe outer knob to adjust the camera tip to
the viewing angle needed.
5. Turn the upper knob to increase or decrease the
outer knob tension
6.
In this mode, light intensity is controlled by the
buttons on the monitor, not by the buttons on the
transmitter.
netzerotools.com
netzerotools.com
Page 7
HDV600-EU-EN-V2.7 10/12
7
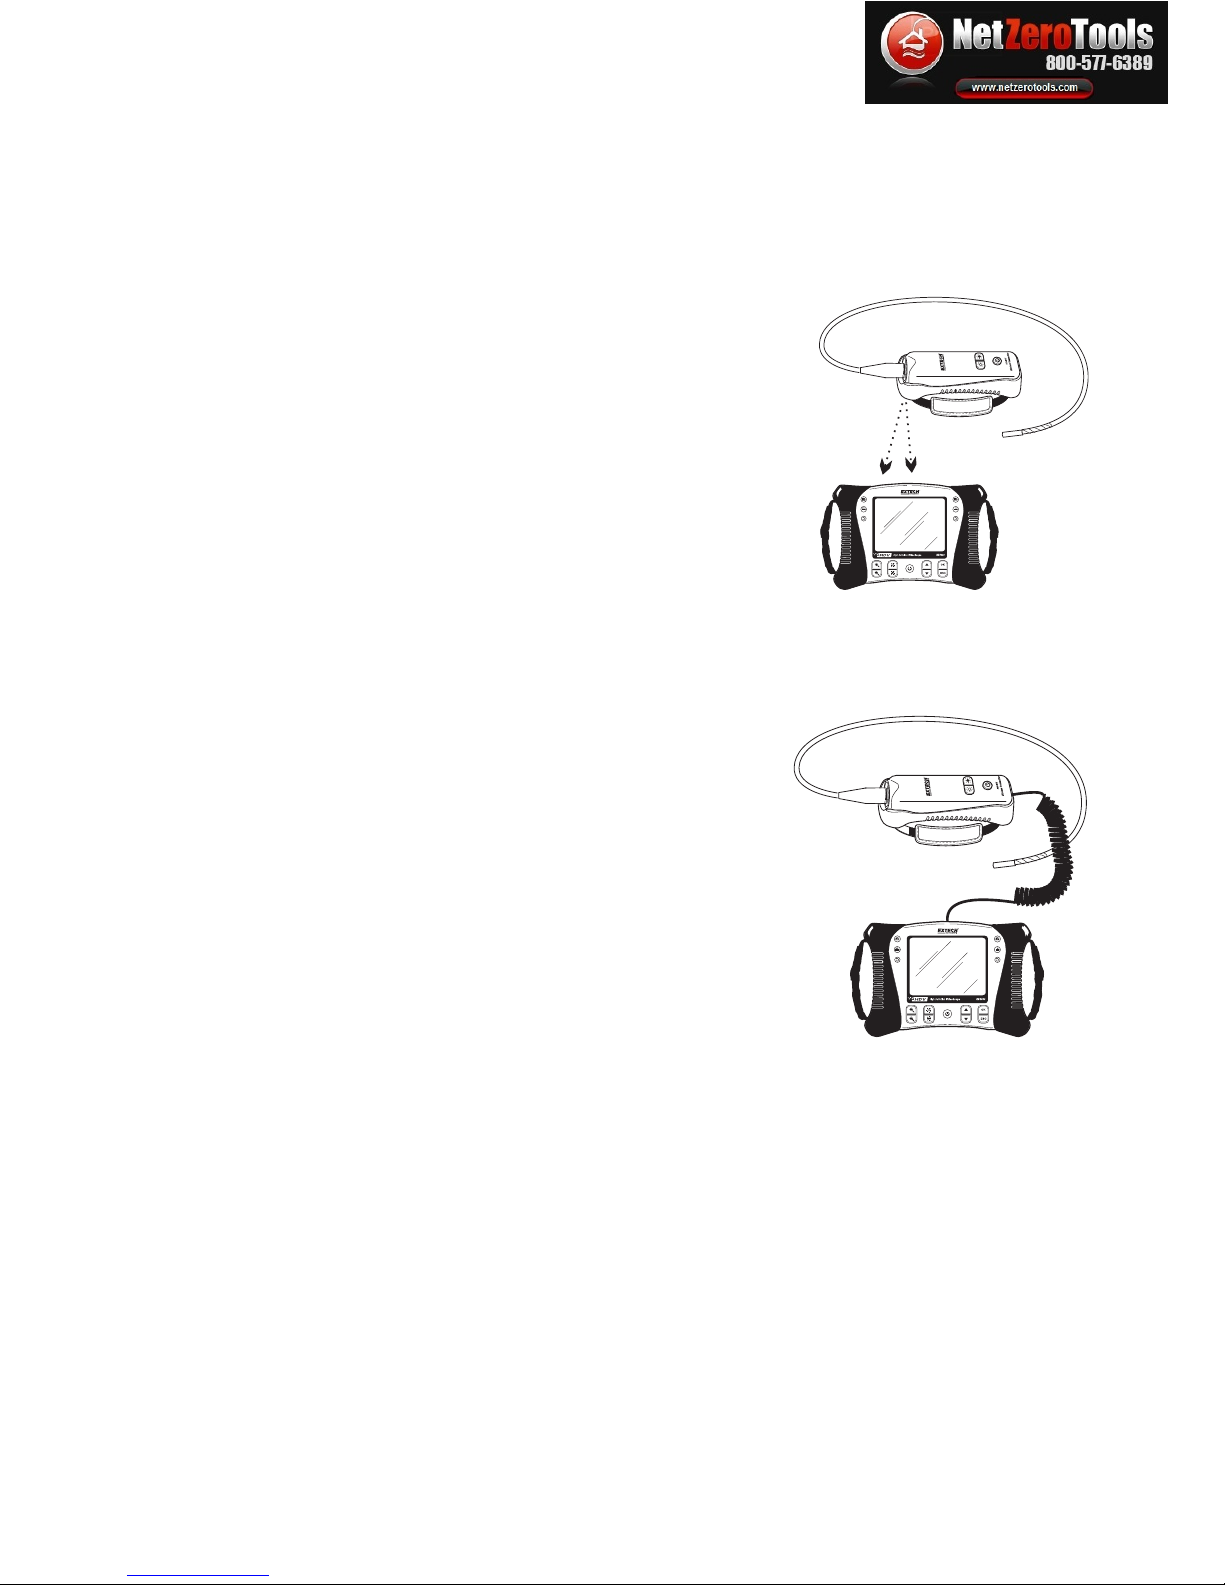
Wireless transmitter
The wireless transmitter is intended for use in areas that are difficult to access or in situations
when is hard to maneuver the probe with the display attached. The probe can also be connected
directly to the monitor using the patch cord.
Note: The battery must be fully charged for wireless operation. A weak battery may result in meter
shut down.
Wireless Mode
1.
Connect the AC adaptor to the transmitter and char
ge the
battery.
2.
Attach the probe to the transmitter.
3. Press and hold the Power button for 4 seconds to turn the
monitor on, then select “WIRELESS” under the IN
PUT
SOURCE selection in the MENU screen.
4.
Press and hold the Power button for 4 seconds to tu
rn the
transmitter on. The camera video will be transmitter to the
monitor display.
Direct Mode
1. Connect the AC adaptor to the transmitter and charge the
battery.
2. Attach the probe to the transmitter.
3. Connect the patch cord between the transmitter and the monitor probe input connector
4. Press and hold the Power button for 4 seconds to tu
rn the
transmitter on.
5.
Press and hold the Power button for 4 seconds to turn the
monitor on, then select “DIRECT” under the INPUT
SOURCE selection in the MENU screen.
6.
In the direct mode, light intensity is controled by the
buttons on the monitor, not by the buttons on the
transmitter.
netzerotools.com
netzerotools.com
Page 8
HDV600-EU-EN-V2.7 10/12
8
Viewing a Stored Photo or Video in the Display
1. Press the ▲ button to access the pictures or videos in memory. Each button press will
step through the files with the file number appearing on the screen (i.e. IMG00005)
2. Pictures will appear with the
photo icon on the display.
3. Videos will appear with the
film icon on the display.
4. To play a video, select a video file and press the
button. The play icon will appear
during pla
yback. Press the
button again to pause playback. The pause icon will
appear.
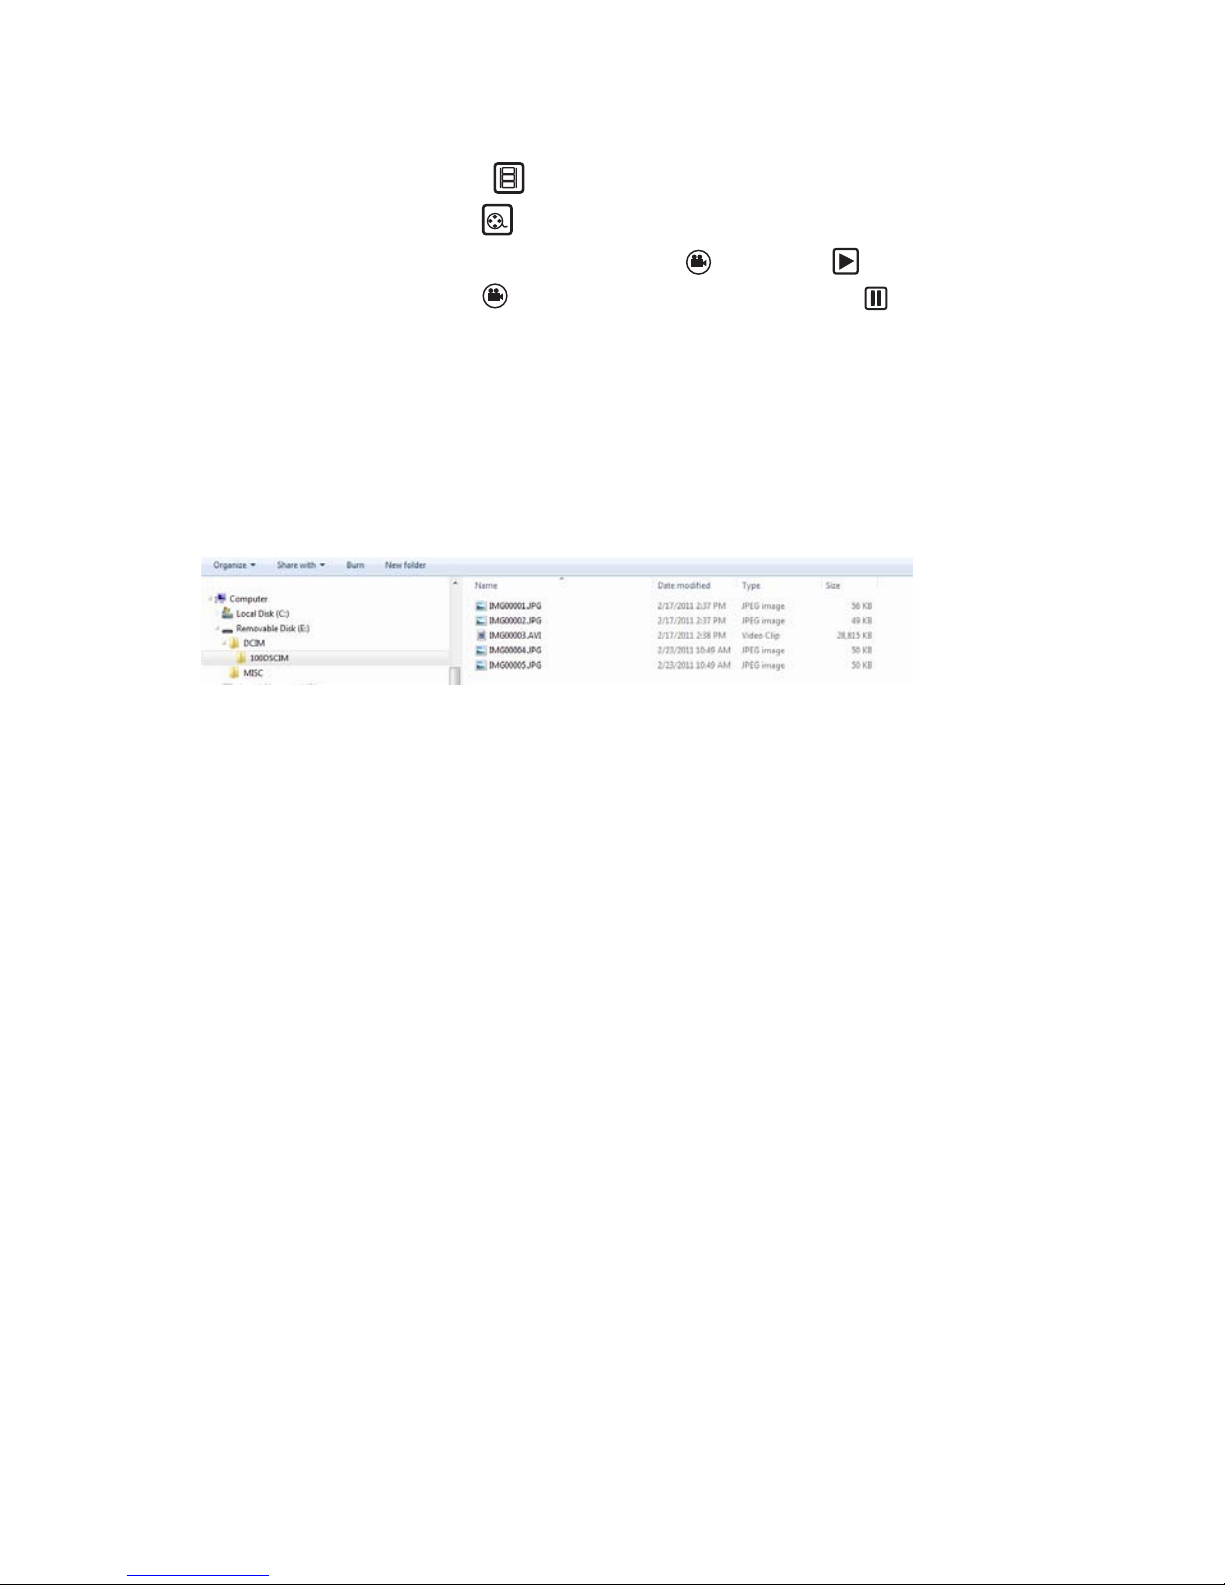
Viewing an Image or Video on a PC
There are two methods to transfer stored files to a pc.
1. Remove the SD card from the monitor and insert it into the SD reader in the pc.
2. Connect the monitor to the pc with a USB cable.
Images are save
d in *.JPG format and videos saved in *.AVI format
Deleting stored Images or Videos
1. Press the ▲ button to access the pictures or videos in memory.
2. When the file to be deleted appears, press the OK button and the DELETE YES/NO box
will appear.
3. Press
the ▲ button to highlight YES and then press the OK button to delete the file.
4. Press the ESC button to exit at any time without deleteing the file.
Video Output
1. Turn the monitor on and select “PAL” or “NTSC”, to match the video monitor to be used,
under the VIDEO OUTPUT selection in the MENU screen and press OK.
2. Insert the video cable into the VIDEO OUT socket on the bottom of the monitor. Connect the
other end of the cable into the VIDEO IN jack of a TV or other monitor.
3. The unit will output a high quality video image.
netzerotools.com
netzerotools.com
Page 9
HDV600-EU-EN-V2.7 10/12
9
Reset button
If the monitor becomes unresponsive due to an EMI field or other magnetic event, use a paper
clip or other pointed object to press the RESET button located on the bottom panel
Rear stand
The rear stand can be set to three positions. Lower (stored), middle position for bench viewing
and upper position for hanging.
FCC Information
This device complies with part 15 of the FCC rules.
Operation is subject to the following two conditions:
1. This device may not cause harmful interference
2.
This device must accept any interference received, including interference that may cause
undesired operation.
Battery Replacement
The charging circuit is designed only for the lithium battery included with the meter. The meter
should be returned to one of our repair facilities for replacement. Non-approved lithium battery could
cause damage to the instrument or hazard to the users.
You, as the end user, are legally bound (Battery ordinance) to return all used batteries
and accumulators; disposal in the household garbage is prohibited!
You can hand over your used batteries / accumulators at collection points in your
community or wherever batteries / accumulators are sold!
Disposal: Follow the valid legal stipulations in respect of the disposal of the device at the
end of its lifecycle
netzerotools.com
netzerotools.com
Page 10

HDV600-EU-EN-V2.7 10/12
10
Specifications
Monitor
LCD Screen 14.5cm (5.7”) Viewable 13.5cm (5.3”)
Active matrix, 640x480 pixels
Interface Mini USB 1.1 and AV out
Recording medium SD Card
SD memory 2GB maximum
Compression format MPGE4
Still image format JPEG (640x480)
Video Recording Format AVI (640x480)
Video output Format NTSC and PAL
Receiver
Frequency 2.4GHz
Receiver Sensitivity -87dBm (SNR = 42dB, Fmod = 15kHz)
Video System NTSC / PAL
Data Video / Audio
Audio type Stereo
Tripod mount On rear, Accepts standard tripod screw
Battery 3.7V rechargeable Li-Polymer
Power adaptor 100 to 240V input / 5VDC output
Operating/Storage Temperature -10 to 60°C(14 to 140°F) / -40 to 80°C(-40 to 176°F)
Operating Humidity (Max.) 80%
Dimensions (W x D x H) 24.1 x 17.8 x 7.0cm (9.5’x7”x2.75”)
Weight 1474g (3.25lb)
Transmitter
Frequency 2.4GHz
Data Video / Audio
Video System NTSC / PAL
Battery 3.7V rechargeable Li-Polymer
Power adaptor 100 to 240V input / 9VDC output
Unobstructed Effective Range 10m
Operating/Storage Temperature -10 to 60°C(14 to 140°F) / -40 to 80°C(-40 to 176°F)
Dimensions (W D H) 7.5’ x 2.75 x 2.5” (19 x 7 x 6.35cm)
Weight (approx) 0.95lb (431g)
netzerotools.com
netzerotools.com
Page 11

HDV600-EU-EN-V2.7 10/12
11
Camera
Imaging Sensor CMOS
Video Format NTSC
Brightness Control Manual
Lamp Type LED
Interface
Composite Video
Waterproof Capacity IP57
Operating Temperature -20°C to 70°C (-4°F to 158°F)
Probes and Cameras
Articulation 240°±20° manual tip articulation
Accessories Mirror, magnet and anti-snag Ball (excluding 25mm diameter
cables)
Part Number Description OD Length Camera Focus Distance
HDV-TX1 Articulating Semi-Rigid 6mm 1m 640x480 2 to 6cm
HDV-WTX1 Wireless Articulating Semi-Rigid 6mm 1m 640x480 2 to 6cm
HDV-TX2 Articulating Semi-Rigid Cable 6mm 2m 640x480 2 to 6cm
HDV-WTX2 Wireless Articulating Semi-Rigid 6mm 2m 640x480 2 to 6cm
HDV-4CAM-1FM Macro lens Flexible 4mm 1m 320x240 2 to 6cm
HDV-5CAM-1FM Macro lens Flexible 5.5mm 1m
640x480
2 to 6cm
HDV-5CAM-3F Long depth of field Flexible 5.5mm 3m
640x480
6 cm to ∞
HDV-5CAM-3FM Macro lens Flexible 5.5mm 3m
640x480
2 to 6cm
HDV-5CAM-10F Long depth of field Flexible 5.5mm 10m
640x480
6 cm to ∞
HDV-5CAM-1RM Macro lens Semi-Rigid 5.5mm 1m
640x480
2 to 6cm
HDV-5CAM-3R Long depth of field Semi-Rigid 5.5mm 3m
640x480
6 cm to ∞
HDV-5CAM-3RM Macro lens Semi-Rigid 5.5mm 3m
640x480
2 to 6cm
HDV-25CAM-10G Fiberglass 25mm 10m
640x480
6 cm to ∞
HDV-25CAM-30G Fiberglass 25mm 30m
640x480
6 cm to ∞
netzerotools.com
netzerotools.com
 Loading...