

Page 1
Networked Media Tank
User’s Guide
A-110
Page 2

00
Table of Contents
1.0 Safety
1.1 For Your Safety ................................................................................... 08
2.0 Product Overview
2.1 Pac kage Contents ............................................................................... 09
2.2 Introduction ....................................................................................... 10
2.3 Features ............................................................................................. 11
2.4 Minimum System Requirements .......................................................... 12
2.5 Har dware Overview ............................................................................ 13
2.5.1 Front Panel ............................................................................... 13
2.5.2 Back Panel ............................................................................... 14
2.6 Remote Control .................................................................................. 16
2.6.1 Remote Control Overview ......................................................... 16
2.7 Installation ......................................................................................... 19
2.7.1 Video Connections .................................................................... 19
2.7.2 Audio Connections .................................................................... 21
2.7.3 Network Conne ctions ................................................................ 22
// Popcorn Hour A-110
2
Page 3

3.0 Quick Start
3.1 Media Filters ....................................................................................... 23
3.2 Viewing a Video .................................................................................. 25
3.3 Basic Remote Control Buttons ............................................................. 28
3.4 Basic Video Setup ............................................................................... 29
3.5 Basic Audio Controls ........................................................................... 31
4.0 Media Sharing
4.1 Installing Media Ser vers on your PC .................................................... 32
4.1.1 myiHome .................................................................................. 32
4.1.2 UPnP AV or DLNA Server ........................................................... 33
4.1.3 Windows Media Player Network Sharing Service (WMP-NSS) ...... 34
4.1.4 Third-Party HTML-based Ser vers ............................................... 35
4.2 Setting up Network Shares on your NMT ............................................. 36
4.2.1 Samba Share Setup .................................................................. 36
4.2.2 NFS (Networ k F ile System) Shares Setup .................................. 37
// Popcorn Hour A-110
3
Page 4

4.3 Accessing your Network Shares on the NMT ........................................ 38
4.3.1 Browsing Net work Shares ......................................................... 38
4.3.2 Permanent Networ k Shar es ...................................................... 39
5.0 NMT Applications Installation
5.1 Hard Disk Drive (HDD) Installation ...................................................... 41
5.2 NMT Applications Installation .............................................................. 43
5.3 Using the USB Slave Drive Function .................................................. 45
6.0 Using your Popcorn Hour A-110 NMT
6.1 Remote Control Functions ................................................................... 50
6.2 Media Sourc e ..................................................................................... 57
6.3 Web Services ..................................................................................... 58
6.3.1 Media Ser vice Portal ................................................................ 59
// Popcorn Hour A-110
4
Page 5

6.3.2 MSP Community ...................................................................... 60
6.3.3 Torr ent .................................................................................... 61
6.3.4 SayaTV .................................................................................... 62
6.4 Setup ................................................................................................ 63
6.4.1 Prefer ences ............................................................................. 64
6.4.2 Audio/Video ............................................................................. 65
6.4.3 Net work .................................................................................. 69
6.4.4 Networ k Shar e ......................................................................... 70
6.4.5 NMT Applications ..................................................................... 71
6.4.6 DVD/Audio C D .......................................................................... 73
6.4.7 Maintenance ............................................................................ 74
6.4.8 Firmware and NMT Applications Update .................................... 75
7.0 Conguring the NMT Applications
7.1 NAS (Network-Attached Storage) Functions ....................................... 81
7.1.1 FTP Server ............................................................................... 81
// Popcorn Hour A-110
5
Page 6

7.1.2 SMB Ser ver .............................................................................. 82
7.1.3 NFS Shares (Network File System) ............................................ 83
7.1.4 Syabas CE-H TML Ser ver (myiHome) .......................................... 8 4
7.2 Torrent Setup ..................................................................................... 85
7.3 Usenet Client Setup: NZBGet .............................................................. 88
7.3.1 Setting up the NZBGet on the NMT ........................................... 89
7.3.2 Usenet: Working with NZBG et .................................................. 91
7.3.3 Downloading ............................................................................ 93
8.0 Troubleshooting
8.1 Fre quently Asked Que stions (FAQs) .................................................... 95
8.2 Technic al Support Contact Information ............................................... 101
9.0 Product Specications
9.1 Physical .............................................................................................. 102
9.2 Electrical ............................................................................................ 103
// Popcorn Hour A-110
6
Page 7

9.3 Chipset and Memory .......................................................................... 103
9.4 Ports and Connectors ......................................................................... 104
9.5 Audio/Video Output ............................................................................ 105
9.6 Supported Audio/Video Formats ......................................................... 106
9.7 Web Services ..................................................................................... 110
9.8 C onnec tivity ...................................................................................... 112
// Popcorn Hour A-110
7
Page 8

01
Safety
1.1 For Your Safety
// Popcorn Hour A-110
Message Description
This is a u seful t ip in usin g the pro duct
Tip
Reminder
Note
Caution
Warning
8
This is a r eminder in using the pro duct
This is a non-cr itic al notic e to the us er
Failure t o take or avoi d a spec ic action could res ult in dama ge
to the pr oduc t or loss o f data
Failure to take or avoid a sp ecic a ctio n could r esult in injury
Page 9
02
Product Overview
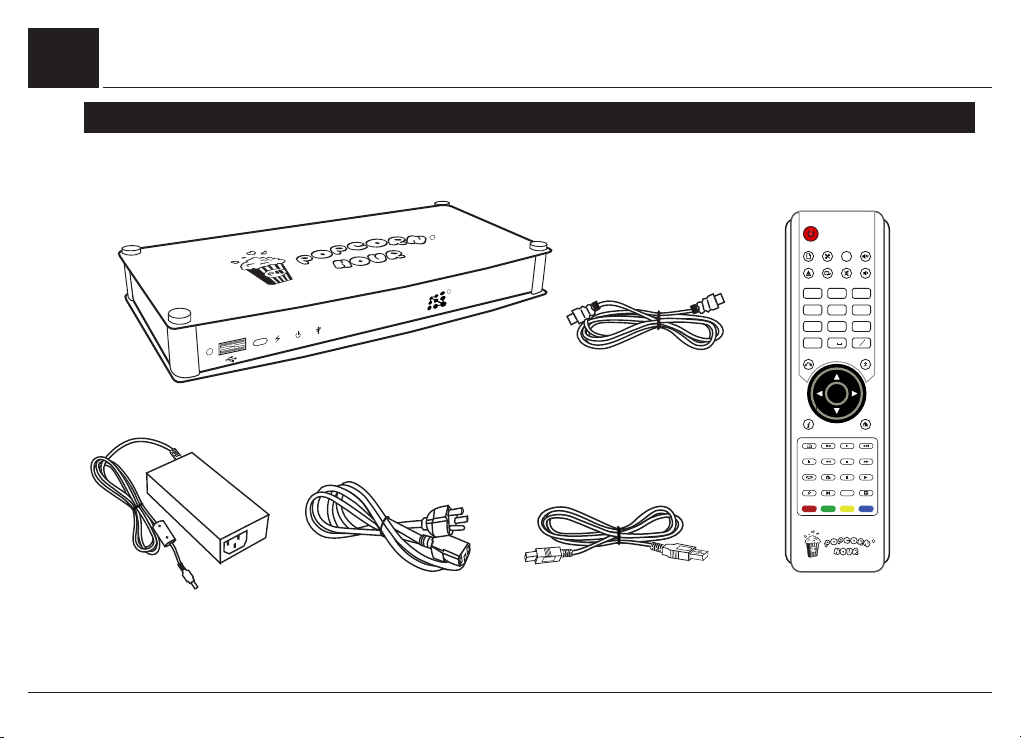
2.1 Package Contents
Reset
Popcorn Hour A-110 NMT (HDD not included)
R
R
networked media tank
Model No : A -110
HDMI cab le
R
FILE MODE
USB DVD ROM
EJECT
.:/@
1
ghi5jkl
4
pqrs
7
DELETE
RETURN
INFO
MENU PREV
TITLE
REPEAT
TIME SEEK AUDIO
SUSPEND
PAGE UP
SETUP
BT
MUTE
TV MODE
PAGE DOWN
def
3
abc
2
mno
6
wxyz
tuv
9
8
CAPS
0
NUM
SOURCE
ENTER
HOME
PLAY
NEXT
FWD
REV
STOP
ANGLE
PAUSE SLOW
ZOOM
SUBTITLE
A
A
// Popcorn Hour A-110
R
100~240V power ada pter
AC power co rd USB Slave c able
Remote Control
9
Page 10
// Popcorn Hour A-110
2.2 Introduction
Congratulations on your purchase of an award winning product that will enhance your home
multimedia experience.
The Popcorn Hour A-110 Networked Media Tank (NMT) allows you to stream digital video, audio and
photos from various sources for your enjoyment on your HDT V or Home Theater setup. You can
stream or playback your digital media content from a variety of sources, such as your PC, Network
Attached Storage (NAS), digital camera, USB mass storage devices (Flash drive, HDD, DVD drive),
internal SATA HDD and even directly from the Internet via the Media Service Portal.
Your NMT also ser ves as an NAS, suppor ts Usenet downloading, and is also a BitTorrent peer-to-peer
downloader to eliminate the need to switch on a PC or other devices for this purpose.
Feel free to browse through this user guide to know your NMT better and we hope that you, your
family and friends have a great time with this amazing product.
10
Tip: To start using your NMT immediately, skip to Chapter 3 for the Quick Start.
Page 11

// Popcorn Hour A-110
2.3 Features
The Popcorn Hour A-110 NMT is an enhanced version of the popular A-100 NMT model. It adds
support for 2.5”/3.5” SATA HDD and USB Slave functionality to improve connectivity and transfer
rates. The HDMI inter face has been updated to the 1.3a specications, allowing full support of HD
Audio pass-through for DTS HD-HR, DTS HD-MA, Dolby Digital Plus and Dolby TrueHD. The ports on
the A-110 have also been relocated, with a USB port moved to the rear panel, an optical S/PDIF port
to replace the co-axial S/PDIF port, and a hardware reset button for easy use of the device.
The Popcorn Hour A-110 supports the latest high bitrate video formats (MPEG2 MP@HL, H.264 HP
@L4.1, VC-1 AP@L3 in TS of at least 40Mbps) to give you up to 1080p high-denition videos.
In line with the advances in Internet T V, the A-110 supports peer-to-peer Internet TV streaming
technology from SayaTV, as well as popular unicast Internet TV such as YouTube, Revision 3 and
Vuze via the Media Service Portal.
The A-110 rmware is upgradeable to support future media containers, codecs and features.
For detailed specications of your NMT and suppor ted audio/video formats, refer to
Chapter 9: Product Specications.
11
Page 12

2.4 Minimum System Requirements
High-Denition (HD) or standard television (TV) with HDMI, S-Video, Component Video, • or
Composite Video input
TV, Ster• eo, or HD Audio receiver with Optical Digital, Coaxial Digital, or Composite Audio input
Wir• ed or wireless network (wired 100Mbps or better network is recommended for networked
video streaming)
Connection to the Internet • (for use with Web Services)
Listed below are the minimum requirements for installation of the myiHome Media Server
software application on your PC.
Pentium 233(MHz) or higher processor • (Pentium III or higher recommended)
Microsoft Windows® 2000, XP, Vista (32 or 64-bit); Mac OS X or Linux operating systems•
512MB of RAM•
100MB of available hard disk drive (HDD) space•
// Popcorn Hour A-110
12
Page 13
2.5 Hardware Over view
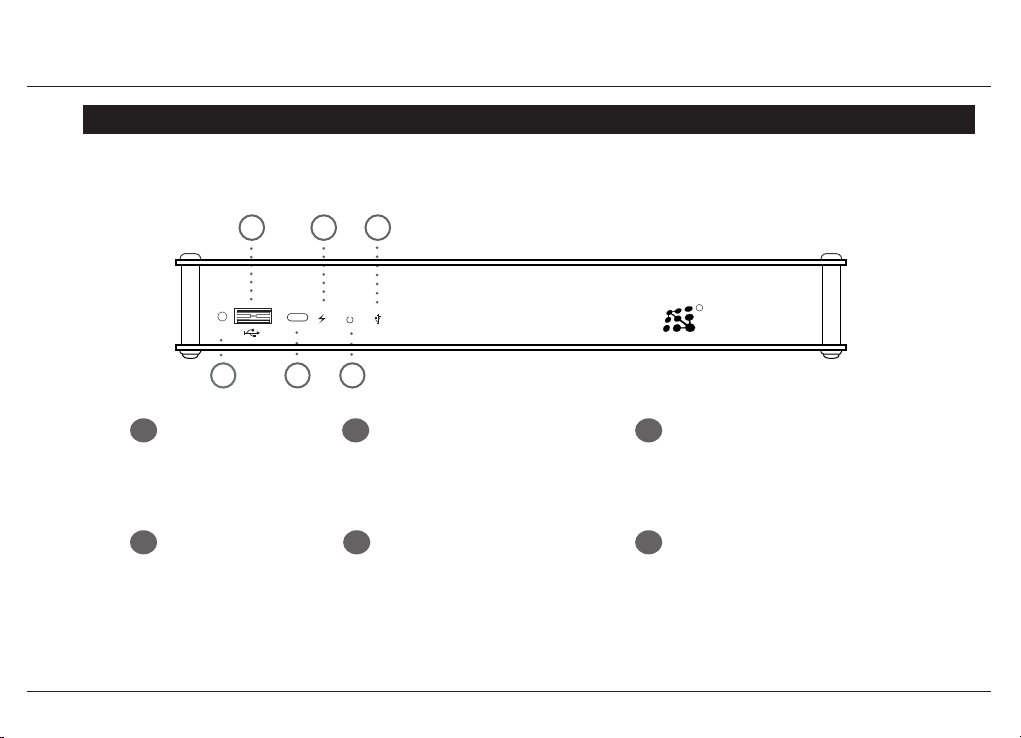
2.5.1 Front Panel
// Popcorn Hour A-110
6
4
R
networ ked media t ank
Model No: A-110
5
3
IR (Infrared) Rec eiver
The IR rec eiver re ceives sig nals fro m the
remote c ontrol.
Avoid bloc king the IR re ceiver as t he remot e
contro l needs a dir ect line o f sight to the I R
receiv er for pro per func tion.
4
Standby Indicator
Displays a R ED indica tor when your N MT is on
Standby mode.
5
Power Indicator
Displays an A MBER indi cator whe n your NMT
has been t urned ON an d while it is op erating.
6
USB (Slave) Indica tor
Displays a G REEN indi cator whe n your NMT is
being use d as a USB slave dr ive.
Reset
1
1
Reset But ton
Press t o reset you r NMT.
2
USB Por t
Connec t a USB stor age device
to this por t to acce ss its me dia
content.
2
3
13
Page 14
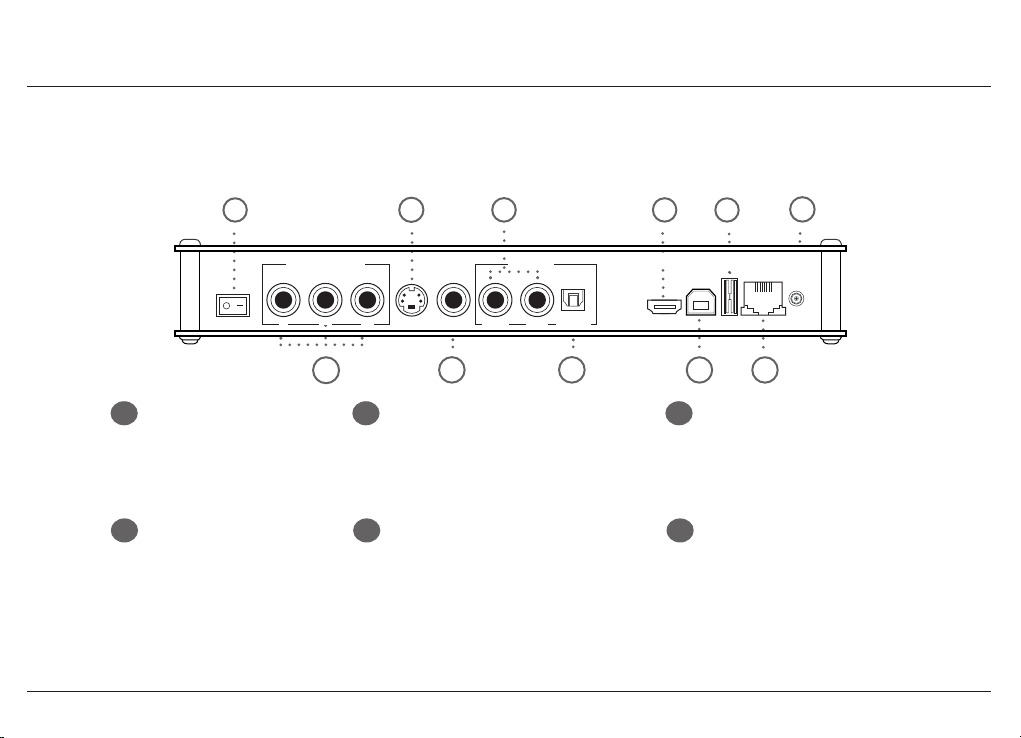
2.5.2 Back Panel
// Popcorn Hour A-110
1
ON
OFF
1
Power ON/OFF Switc h
Use this sw itch to tur n on or turn o ff
your NMT.
Compo nent Video
2
Connectors
Use thes e connec tors to c onnect
your NMT to yo ur TV set u sing
compone nt video c onnect ors. The
connec tors ar e usually gr een, blue,
and red in c olor. (Video o nly)
COMPONENT VIDEO
Pb
Y
2
Pr
3
S-VIDEO CVBS
RIGHT
5
AUDIO OUT
LEFT
4
3
S-Video Connector
Use this to c onnec t your NMT to you r TV usin g the
S-Video co nnecto r. (Video only)
CVBS (Composite Vide o)
4
Connector
Use this c onnect or to conne ct your NMT t o your TV
using the ye llow Comp osite Vid eo connec tor. The
Compos ite Video c able usua lly comes a ttach ed to
Compos ite Audio co nnecto rs (red and whi te
connec tors). (Vid eo only)
OPTICAL
6
USB-PC
9
USB
7
HDMI
8
5
Compo site Aud io Connectors
Use thes e connec tors to c onnect yo ur NMT to
your TV us ing the re d and white Co mposite
Audio conn ector s. Thes e connec tors usu ally
come att ached wi th the Comp osite Vi deo
connec tor (yellow c onnect or). (Audio only)
S/PDIF Optical Digital
6
Audio Co nnec tor
Use this c onnect or to conne ct your NMT t o
your home aud io syste m using the S/P DIF
audio conn ector. (Audio on ly)
ETHERNET
10
11
POWER
12V3A
14
Page 15

// Popcorn Hour A-110
HDMI (High- Denition Multimedi a
7
Inter face) Connector
Use this to c onnec t your HD TV
(High Deni tion TV ).
(Video a nd Audio)
8
USB Slave Connec tor
Connec t your NMT to yo ur PC using t he supplie d
USB cable t o enable you r NMT to func tion as a
slave drive f or your PC.
9
USB Por t
Connec t a USB stor age device t o this
port to a ccess it s media co ntent.
10
Ether net (R J-45) Port
Connec t an Ether net cabl e (RJ-45) to
the Ethe rnet por t and att ach the ot her
end to a rou ter or hub on you r LAN
(Local Ar ea Netw ork).
11
Power Sup ply Por t
Connec t the suppl ied power ad apter to th e
Power Supp ly port in o rder to pow er your
NM T.
15
Page 16
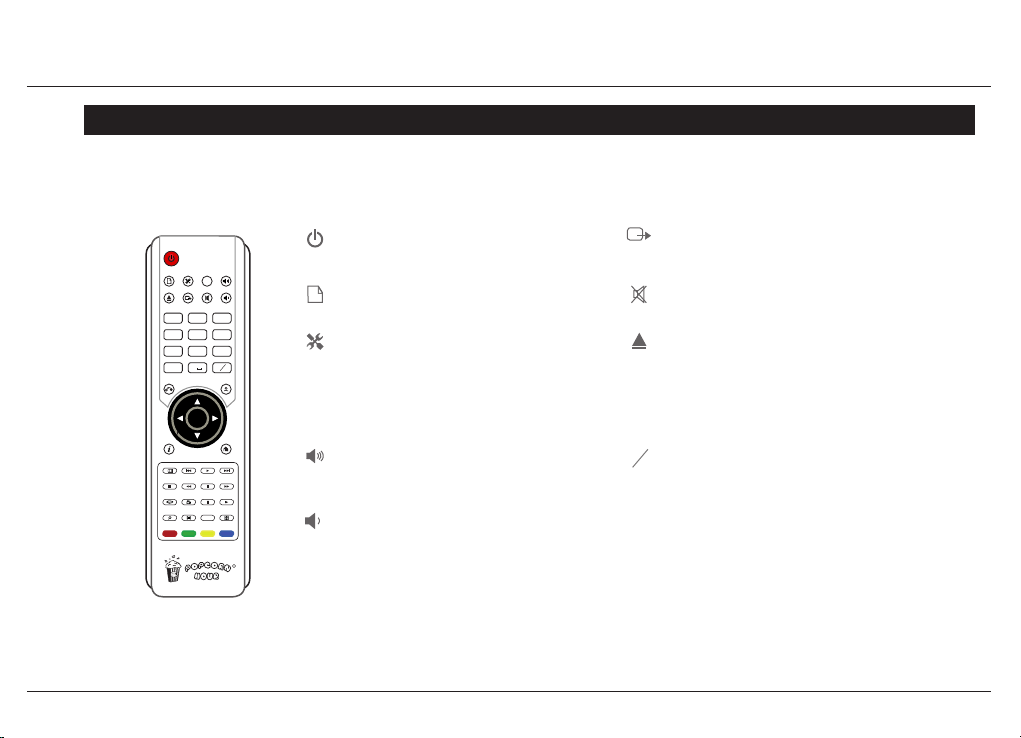
2.6 Remote Control
2.6.1 Remote Control Overview
R
FILE MODE
USB DVD ROM
EJECT
.:/@
1
4
pqrs
7
DELETE
RETURN
INFO
MENU PREV
TITLE
REPEAT
TIME SEEK AUDIO
SETUP
TV MODE
ghi5jkl
REV
ANGLE
2
8
0
ENTER
SUSPEND
abc
tuv
SUBTITLE
BT
MUTE
PAGE DOWN
3
6
9
CAPS
PLAY
STOP
PAUSE SLOW
A
A
PAGE UP
def
mno
wxyz
NUM
SOURCE
HOME
NEXT
FWD
ZOOM
R
Power
Switche s the NMT ON or to St andby mode.
FILE MODE
Displays F ile and Fold er custo mization o ptions.
SETUP
Jumps to the S etup menu s creen. D uring vid eo
playback , this but ton allows c ustomiz ation of
the displ ay output.
SUSPEND
BT
This but ton is res erved f or futur e use.
PAGE UP
Moves up a pag e on a list of me dia les.
Increa ses the volu me during me dia playba ck.
PAGE DOWN
Moves down a pa ge on a list of m edia les.
Decre ases the vo lume during m edia playb ack.
DELETE
CAPS
0 - 9
TV MO DE
Quick-acc ess butt on to sele ct a TV ou tput res olution.
See Video M ode Optio ns for mor e informat ion.
MUTE
Mutes the a udio outpu t.
USB DVDROM EJEC T
Eject s an atta ched ex ternal DVD -ROM drive o r end a
media playb ack.
DELETE
To erase alpha numeric va lues durin g input.
CAPS/NUM
NUM
To switch bet ween cap italized, nu meric and n on-
capita lized let ters dur ing alphanu meric valu e input.
Alphanumeric Keypad
Allows us ers to inpu t alphanume ric char acter s.
// Popcorn Hour A-110
16
Page 17
// Popcorn Hour A-110
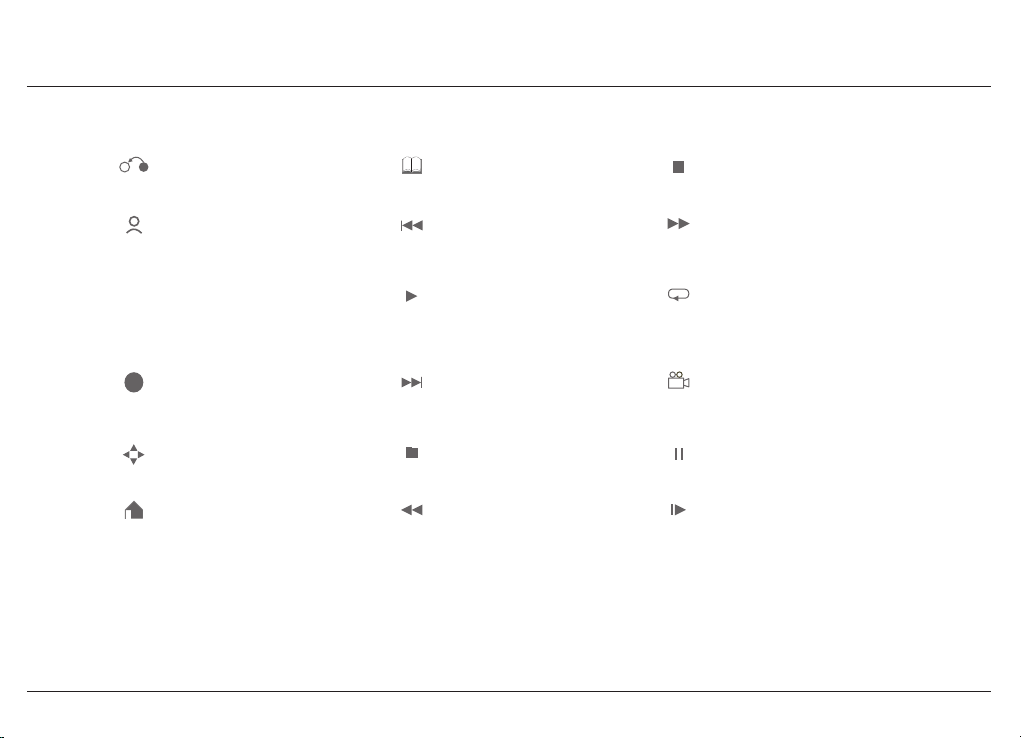
RETURN
Returns t o the previ ous menu sc reen.
SOURCE
Returns t o the Media S ource sc reen.
INFO
i
Displays t he timelin e bar during m edia
le playba ck. Pres s again to dis play the
media le in formati on such as t he title,
format, a nd so on.
ENTER
ENTER
Selec ts the cur rently hi ghlighted s elect ion
or plays the hi ghlighte d media le.
(single le play back only)
Direc tional Keypad (D-Pad)
Allows you to n avigate and h ighlight op tions
or media le s.
HOME
Returns t o the Media F ilters m enu scre en
of your curr ently se lecte d Media Sour ce.
MENU
Jumps to the D VD Menu sc reen duri ng
DVD playbac k.
PREV
Skips bac kward to t he previo us le/tr ack.
PL AY
Plays the se lecte d le/tra ck and cont inues
to the nex t le/tra ck on the lis t.
NEXT
Skips for ward to th e next le /track .
TITLE
Opens th e text inpu t box for URL i nput
while in a menu s creen.
REV
Rewinds th e current m edia playb ack.
STOP
Stops play back and re turns to t he menu scr een.
FWD
Fast-forw ards thro ugh the cur rent med ia
playback , continu e pressi ng to toggle 2 x,
4x and 8x fast-fo rwardi ng.
REPE AT
Repeat th e curren t select ed media l e.
ANGLE
Switche s the camer a or viewing a ngle durin g
playback . (only applica ble for sup porte d
multiangl e playbac k format s)
PAUSE
Pauses t he curre nt media play back.
SLOW
Slows down th e playback o f the curr ent media
playback.
17
Page 18
// Popcorn Hour A-110
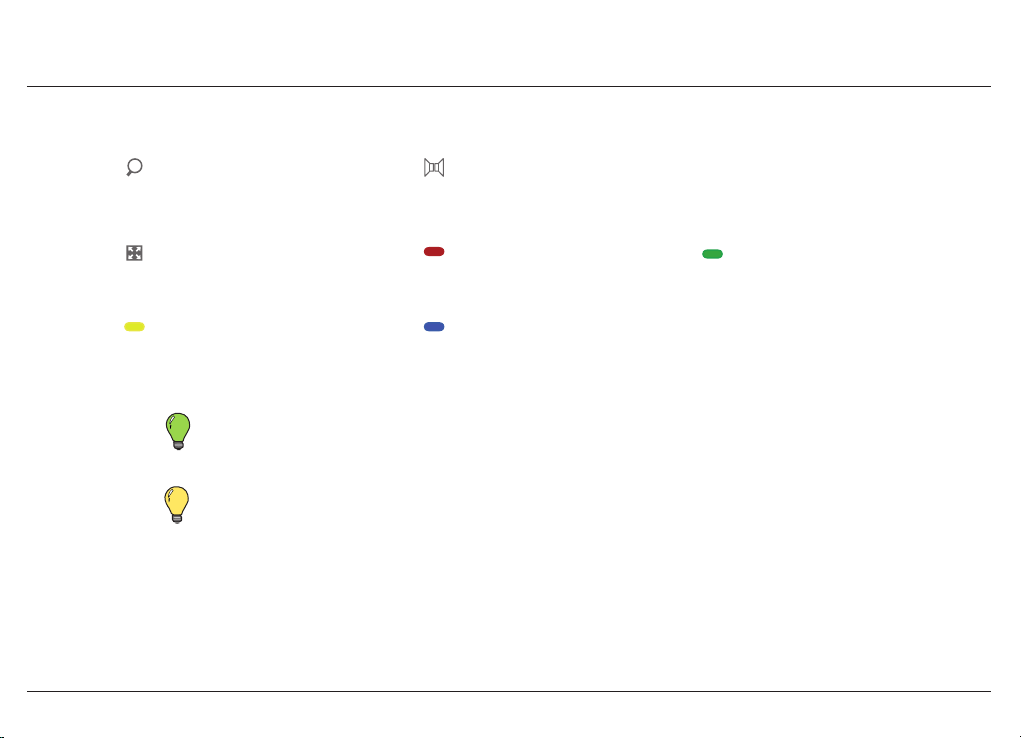
TIME SE EK
Allows you to t ime-se ek the curr ent sele cted
media for a j ump to a part icular pl ayback tim e;
hour:mi nute:second = 00:00:0 0 (use numer ic button s
to input the d esired p layback t ime)
ZOOM
Toggles bet ween availa ble viewing o ptions.
See Remot e Contr ol Functi ons for mor e
information
YELLOW BUT TON
Jumps to the Ph otos media lt er.
respond or does not respond at all.
Reminder: Replace the bat ter ies with two new AAA batteries if the remote control is slow to
AUDIO
Toggles bet ween the ava ilable audi o modes.
RED BU TTO N
Jumps to the V ideo media lte r.
BLUE BU TTON
Jumps to the O thers media lter.
SUBTITLE
A
A
Turns ON the sub titles an d toggles
through i ts optio ns.
(if availabl e with your vid eo playbac k)
GREEN BUT TON
Jumps to the Mu sic media lte r.
Tip: For the comprehensive guide to your NMT remote control, see Remote Control Functions.
18
Page 19
2.7 Installation
2.7.1 Video Connections
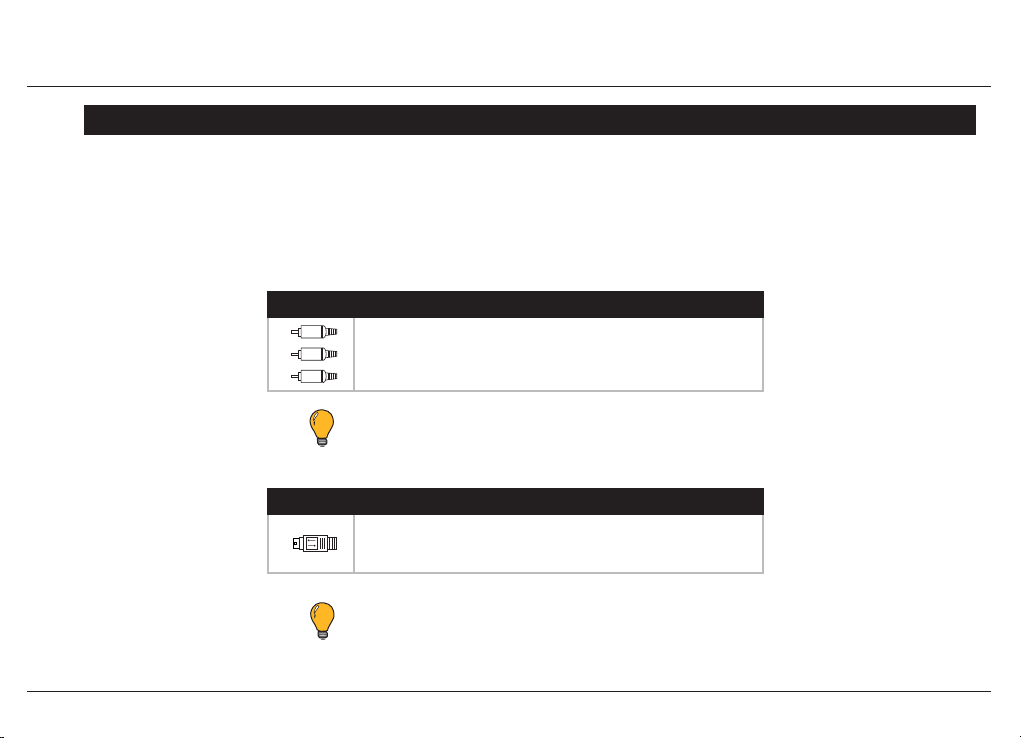
To connect your NMT to your television (T V) for video output, use one of the following options
available on your NMT. All the video connectors are located at the rear panel of your NMT.
Compo nent Video
Attac h the COMP ONENT vid eo cable t o the COMPO NENT con nector s of your NMT
by matchin g the color c oded con nector s and ensu re that the s ame is done f or
the oppos ite end int o your TV inp ut.
Note: This c able is not supplied with your NMT.
S-Video
Attac h the S-VIDE O cable to th e S-VIDEO co nnecto r of your NMT an d ensure th at
the same is d one for the o pposite e nd to your T V input.
// Popcorn Hour A-110
19
Note: This c able is not supplied with your NMT.
Page 20
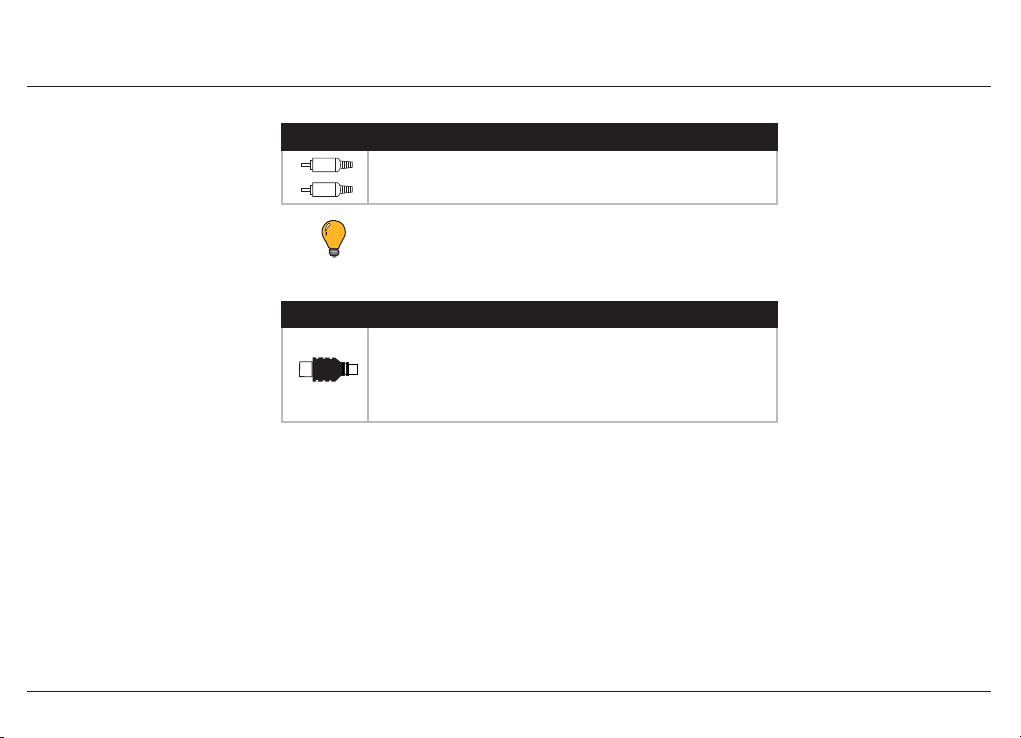
Compo site Vi deo
Attac h the yellow C OMPOSIT E video c able to the C OMPOSIT E connec tor of your
NMT and en sure that th e same is don e for the opp osite en d to your TV in put.
Note: This c able is not supplied with your NMT.
HDMI
Attac h the suppli ed HDMI cab le to the HDMI c onnect or of your NMT a nd ensur e
that the sa me is done fo r the oppos ite end to you r TV input .
HDMI provi des the be st inter face for yo ur NMT and you r High Deni tion TV a s it
is able to su pport a vi deo mode of u p to 1080p, with au dio output a s well.
// Popcorn Hour A-110
20
Page 21
2.7.2 Audio Connections
To connect your NMT to your TV or audio system for audio output, use one of the following options
available on your NMT.
Note: T he HDMI cable also c arr ies your audio output on the same cable, t hus a
separate audio connection from your NMT to your TV is not required.
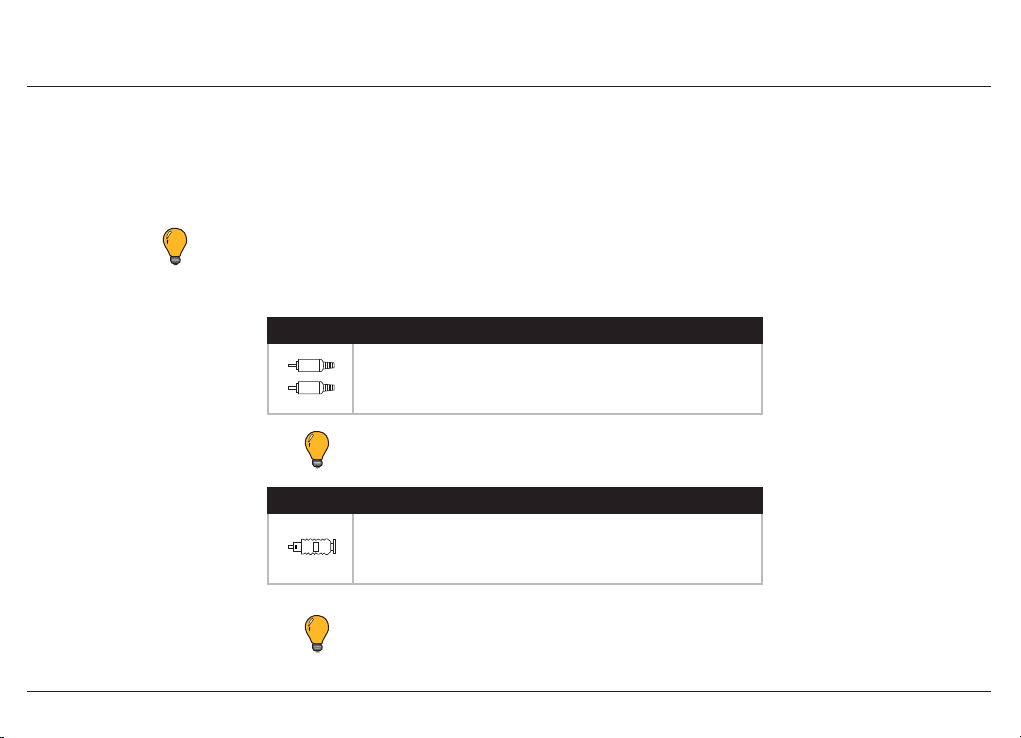
Compo site Aud io
Attac h the COMP OSITE aud io cable to t he red and wh ite COMPO SITE
connec tors of yo ur NMT and en sure that th e same is don e for the
opposit e end to your T V input.
Note: This c able is not supplied with your NMT.
Optic al Digit al Audio
Attac h the optic al audio co nnecto r into the OP TICAL c onnec tor on your NM T
and ensur e that the sa me is done fo r the oppos ite end to th e audio inpu t of
your audio sy stem.
// Popcorn Hour A-110
21
Note: This c able is not supplied with your NMT.
Page 22
2.7.3 Network Connections
Your NMT allows you to connect the unit to your network to expand its functionality and enhance
your multimedia experience. Use one of the following connections to connect your NMT to your
network.
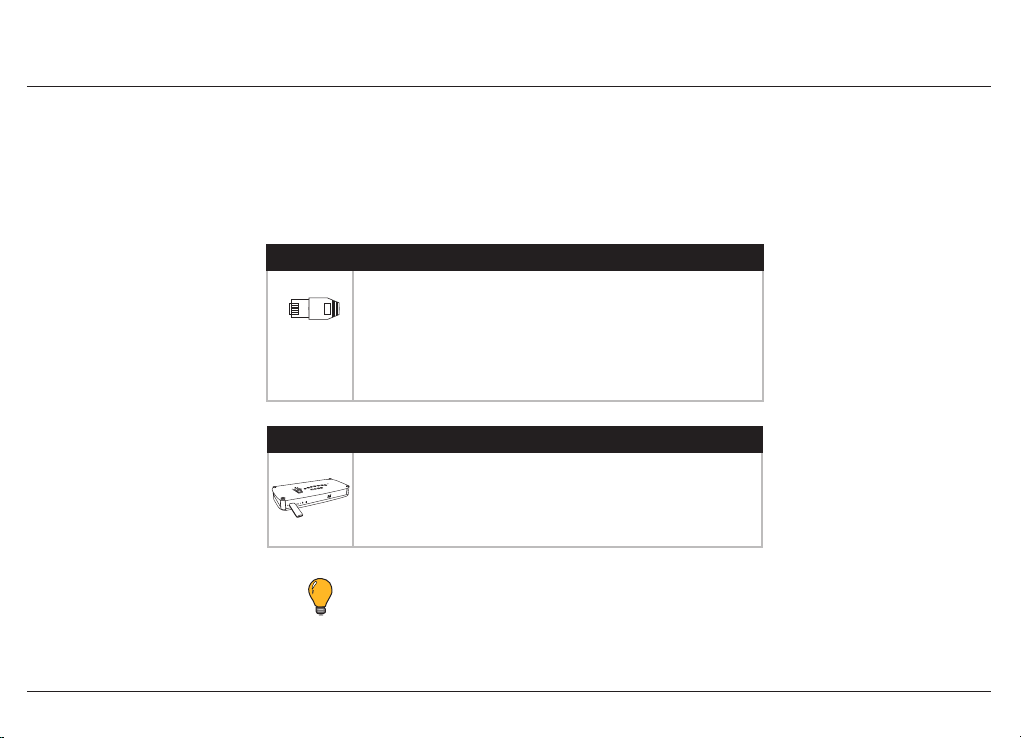
LAN (R J-45 E ther net)
Attac h the LA N connec tor to the E THERNE T conne ctor at th e rear of your N MT
and conne ct the opp osite en d of the LA N cable to a r outer on your n etwork .
The LA N (RJ-45 E therne t) cable conn ection i s the reco mmended c onnec tion
method as i t allows fas ter acce ss to and fr om your NMT.
For more in formati on about th e Ethern et funct ions on your N MT, refer to
Chapte r 7.1: Network.
Wireless Adapter
The WN-100 802.11n (draft 2.0) USB Wi-F i adapter a dds out-of-the -box wirel ess
acces s capabili ty to your Po pcorn Ho ur A-110 NMT.
For fur ther info rmation o n settin g up your WN-100 USB Wi-F i adapter, refe r to
the user gu ide suppli ed with the w ireles s adapter un it.
// Popcorn Hour A-110
22
Note: The wireless adapter is not supplied with your NMT.
Page 23
03
Quick Start
This Quick Start chapter will guide you on how to set up your Popcorn Hour A-110 NMT to play your
rst video on your TV.
Movies, videos, music, photos, and other media stored on external storage devices such as ash
memory drives or external hard disk drives (HDD) can be easily connected to your NMT via the
available USB interface and played back on your TV.
3.1 Media Filters
To ease the selection of media les on your NMT, Media Filters will assist you by ltering the media
content according to their media type. The NMT Media Filters are divided into four lter categories.
Video Media Filter
This lt er will only d isplay le s with vide o forma ts such a s .avi, .mpg , .mkv,
.m2ts, and other suppor ted vi deo form ats.
Remote co ntrol key: b utton
// Popcorn Hour A-110
23
Page 24
Music Media Filter
This lt er will only d isplay le s with audi o format s such as . mp3, .ac, . ogg,
.m3u, and oth er suppor ted au dio form ats
Remote co ntrol key: b utton
Photo Media Filter
This lt er will only d isplay le s with imag e format s such as .jp g, .png, .gi f,
.bmp, and other s uppor ted imag e format s.
Remote co ntrol key: b utton
Others Media Filter
This lt er will only d isplay le s with for mats suc h as .html , .pls, and o ther
suppor ted fo rmats.
Remote co ntrol key: b utton
For more information on other formats supported by the Media Filters, see
Chapter 9.6: Supported Audio/Video Formats.
// Popcorn Hour A-110
24
Page 25
3.2 Viewing a Video
Once the power supply and the appropriate cables have been connected to your NMT and TV,
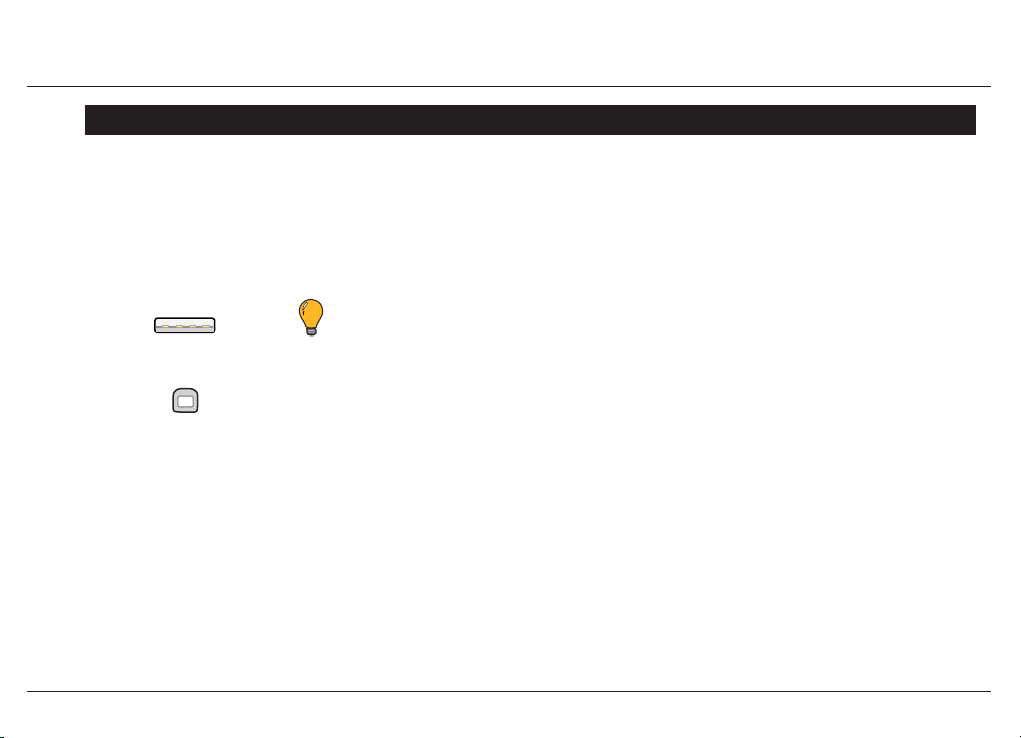
connect your USB external storage device to your NMT using the USB port
(available on the front and rear of your NMT).
Note: Connect your USB external storage devices to your Popcorn Hour
4
Type A
Type B
using the Type A connector available at the front and rear panel of
your Popcorn Hour.
8
Slave drive function. Refer to the diagram below to identify the t ypes
of USB interface available.
Do NOT use the USB Type B inter face as it is only used for the USB
Follow the steps below to play a video:
1. Power ON your NMT (may take up to 2 minutes). The loading screen may icker as the unit
congures its video output to suit your TV.
// Popcorn Hour A-110
25
Page 26
// Popcorn Hour A-110
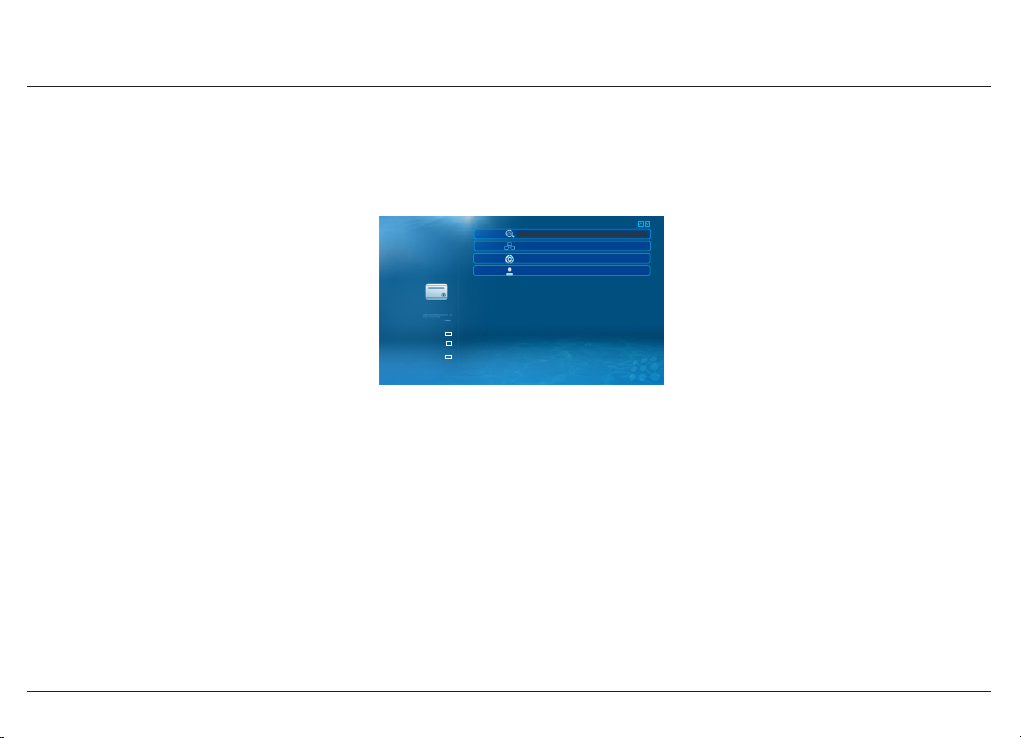
2. Once the loading has been completed and the Media Source screen appears, use the remote control
to select the USB external storage device that you have connected to the unit, as shown below.
01 Network Browser
02 smb
03 HSLEE: 1 : Windows Media Connect
Media Source
Web Services
Setup
04 HSLEE-PC
1 - 4 / 4 items
3. Press ENTER to conrm your selection. Your external storage device is now selected for use by
your NMT.
4. Select the Video media lter, browse to the location of your video le using the directional
keypad and ENTER button on your remote control.
26
Page 27

// Popcorn Hour A-110
5. Highlight the desired video le. Press PL AY or ENTER to start the playback of the video le.
The video playback on your NMT should begin.
6. Press the STOP button to end the video playback.
7. To play any other compatible media le, select the proper media lter, and repeat the steps above.
27
Page 28
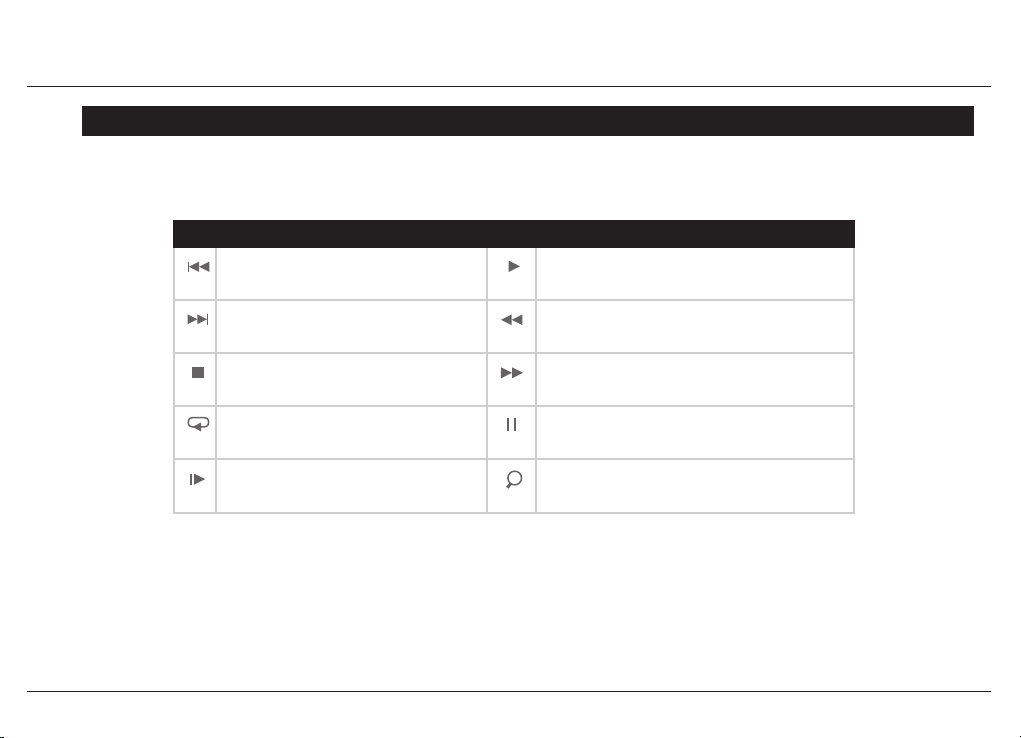
3.3 Basic Remote Control Buttons
Here are some basic remote control buttons and their functions.
Playback controls
PREV
Plays the pr evious le i n the media li st
PL AY
Plays the cu rrent se lectio n and the oth er les in th e media list
// Popcorn Hour A-110
NEXT
Plays the ne xt le in the m edia list
STOP
Stops the c urrent a ctive play back le
REPE AT
Repeats t he curre nt active p layback l e
SLOW
Reduces t he playbac k speed
REV
Rewinds th e current a ctive play back le
FWD
Forwar ds the cur rent act ive playbac k le
PAUSE
Pauses t he curre nt active p layback l e
TIME SE EK
Allows you to s kip to an exa ct playba ck time
For a comprehensive list of the remote control functions, refer to Remote Control Functions.
28
Page 29
3.4 Basic Video Setup
The video output resolution can be customized to t your TV properly. To identify the best viewing
resolution for your TV, refer to the user guide supplied with your TV.
To select the best video output resolution for your T V, follow the steps below.
1. At any menu screen, press Setup on your remote control.
2. At the Setup Screen, select the Audio/Video option to access the display options screen.
3. Select the Video Output option to choose a video output resolution for your TV.
4. Press ENTER to conrm your selection and save your selection by selecting SAVE
(the SAVE button is located at bottom-right side of the Audio/Video menu).
// Popcorn Hour A-110
29
Page 30
// Popcorn Hour A-110
Below is a list of some common output resolutions and their quick-access remote control buttons:
Remote C ontro l quick-access button Video r esol ution
TV Mo de -> 0 Auto (default)
TV Mo de -> 1 Compo nent/Composite NT SC 480i
TV Mo de -> 2 Compo nent/Composite PAL 576i
TV Mo de -> 4 Compo nent 720p 60
TV Mo de -> 5 Compo nent 1080i60
TV Mo de -> 6 Compo nent 1080p60
TV Mo de -> 7 HDMI/Co mponent 720p60
TV Mo de -> 8 HDMI/Co mponent 1080i60
TV Mo de -> 9 HDMI/Co mponent 1080p6 0
Note: To use the quick-access buttons, press and release the TV Mode button, followed by
pressing and releasing the corresponding numeric button.
For example, to get the output of HDMI 1080i60, press and release TV Mode, followed
by pressing and releasing the numeric 8 but ton on the remote contr ol.
For further information regarding the Video Setup of your NMT, see Chapter 6.4.2.1:
Video Mode Options.
30
Page 31
3.5 Basic Audio Controls
The audio volume output of your NMT can be controlled using the Page Up and
Page Down buttons on the remote control during playback.
For the most natural sound output from your NMT, leave the volume at 0 (no signal boost).
For volume control, increase or decrease the volume of your audio system to obtain a
comfortable audio volume output.
// Popcorn Hour A-110
31
Caution: Boosting the output volume of your NMT may cause audio distortion.
Page 32

04
Media Sharing
4.1 Installing Media Servers on your PC
4.1.1 myiHome
When it comes to digital content, there is always the hassle of organizing and presenting your
content for playback. Showcasing your digital content is made simpler by having an organized
media library.
The fundamental concept behind the myiHome Media Server has always been an easy to use,
simple to navigate and quick to access method to showcase your contents.
myiHome is updated automatically when it detects new content. It also allows transcoding, which
means that if the NMT does not support the reproduction of some form of native multimedia le
for lack of proper codec, myiHome transcodes it on the computer to reproduce such content via
network streaming. This way, you do not have to re-encode the le to another compatible format
for use on the NMT.
To set up myiHome on your PC, follow the steps below.
1. Download the latest version of myiHome from:
http://www.popcornhour.com/download/myihome/myihome.html
// Popcorn Hour A-110
32
Page 33

2. Once the download is complete, launch the installation program.
3. Follow the onscreen instructions to install the myiHome program.
4. Once the installation is complete, launch the program and follow the onscreen instructions to
set up the myiHome program.
4.1.2 UPnP AV Server
Your NMT will automatically detect all available UPnP AV compliant content servers on starting up
and will list them on the Media Source screen. No additional setup is required on the unit itself.
It is possible to access attached USB storage devices remotely using your NMT. Browse to
Setup > Network Share on your NMT to see the USB storage devices attached to your PC.
The attached USB storage devices must be formatted with Ext2 / Ext3 or FAT16 / FAT32 in order
to be compatible with your NMT. This will enable you to upload, change or execute les
(NTFS and HFS format ted drives are read-only).
// Popcorn Hour A-110
problem for large media les such as a DVD ISO with minimal compression.
33
Note: FAT16 and FAT32 formats have a le size limitation at 4 GB, which may pose a
Page 34

Some servers may require additional authorization conguration on the ser ver-side, such as the
Windows Media Player Network Sharing Service (WMP-NSS) described below.
4.1.3 Windows Media Player Network Sharing Service (WMP-NSS)
WMP-NSS allows you to playback your PC’s media les using your NMT when both units are
connected to your home LAN network.
To enable WMP-NSS playback on your NMT, the NMT has to be authorized using the WMPNSS
application on your PC. Follow the steps below to set up the WMP-NSS.
1. Ensure that both your PC and NMT are connected to your LAN and switched on.
2. On your PC, launch the WMPNSS application, select the following menu options:
Options > Library > Congure Sharing
3. Select the checkbox next to the Share my media to menu item. You should now have a list
of detected devices to choose from on the menu (right-clicking a selected device listed on it
will show you a list of options).
// Popcorn Hour A-110
34
Page 35
4. Select Properties to view details about each device. Find the device that matches the MAC
address of your NMT and select Allow in the menu item for that device.
Note: To identify the MAC address of your NMT on the networ k, refer to
Setup > Network on your NMT. The MAC address will be listed
under Ethernet Conguration.
4.1.4 Third-Party HTML-based Servers
Your NMT supports HTML-based media stream extensions. User-developed media streaming
servers are compatible with your NMT and you will be able to access media content from
these streaming servers over the internet.
These open-source third-party streaming servers are available at:
WiZD for NMT ht tp://jhue.users.sonic.net/
SwissCenter http://swisscenter.co.uk
Llink http://www.lundman.net/wiki/index.php/Llink
GB-PVR http://jhue.users.sonic.net/
// Popcorn Hour A-110
35
Page 36
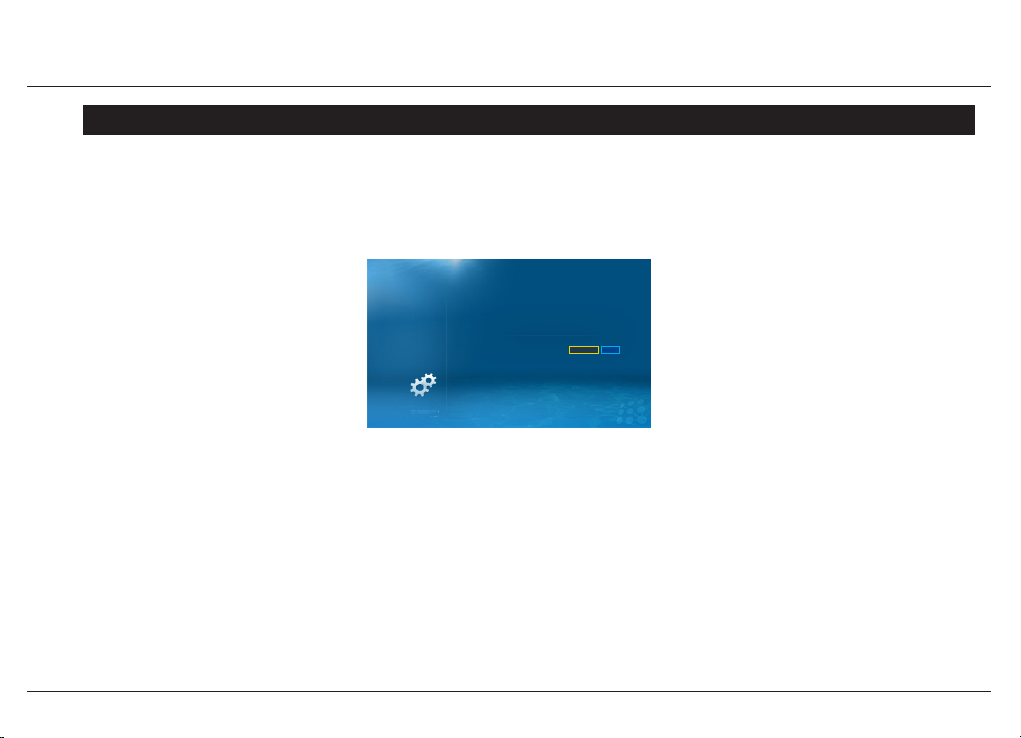
4.2 Setting up Network Shares on your NMT
A network share allows the NMT to stream media stored on external devices that are connected
to the same network. Currently, the NMT suppor ts network shares through Samba (SMB), File
Transfer Protocol (FTP), and Network File System (NFS).
// Popcorn Hour A-110
Home
Preferences
Audio / Video
Network
Network Share
DVD / Audio CD
Maintenance
setup
/
/
.
.
.
.
.
.
.
browse
add
4.2.1 Samba Share Setup
To set up your NMT for Samba Sharing, navigate to Setup > Network Share. You can browse
your SMB network and add the path to the list, or manually input the path to your SMB share by
selecting the add but ton:
smb://<hostname or ipaddr>/foldername
36
Page 37

4.2.2 NFS (Network File System) Shares Setup
To set up your NMT for NFS sharing, navigate to Setup > Network Share, and type in the full
path to your NFS share, as shown below.
smb://<hostname or ipaddr>/foldername (colon after hostname is required)
With rmware 01-15-080330-14-POP-402 or newer you can select the protocol (TCP or UDP)
used for the NFS connection:
nfs:// (UDP)
nfs-tcp:// (TCP)
Some rewalls, including the Microsoft® Windows XP rewall will block critical par ts of UDP
NFS ser ver connections, even if correctly congured. If you experience a No content found
error when using UDP, try switching to the TCP mode.
Some gigabit switches have problems with UDP, thus preventing data streaming (viewing les
may appear to be unaffected). If you encounter this problem, try switching to the TCP mode.
// Popcorn Hour A-110
37
Page 38
// Popcorn Hour A-110
4.3 Accessing your Network Shares on the NMT
4.3.1 Browsing Network Shares
01 WORKGROUP
/
/
Network Browser
Media Source
Web Services
Setup
02 NFS Server
1 - 2 / 2 items
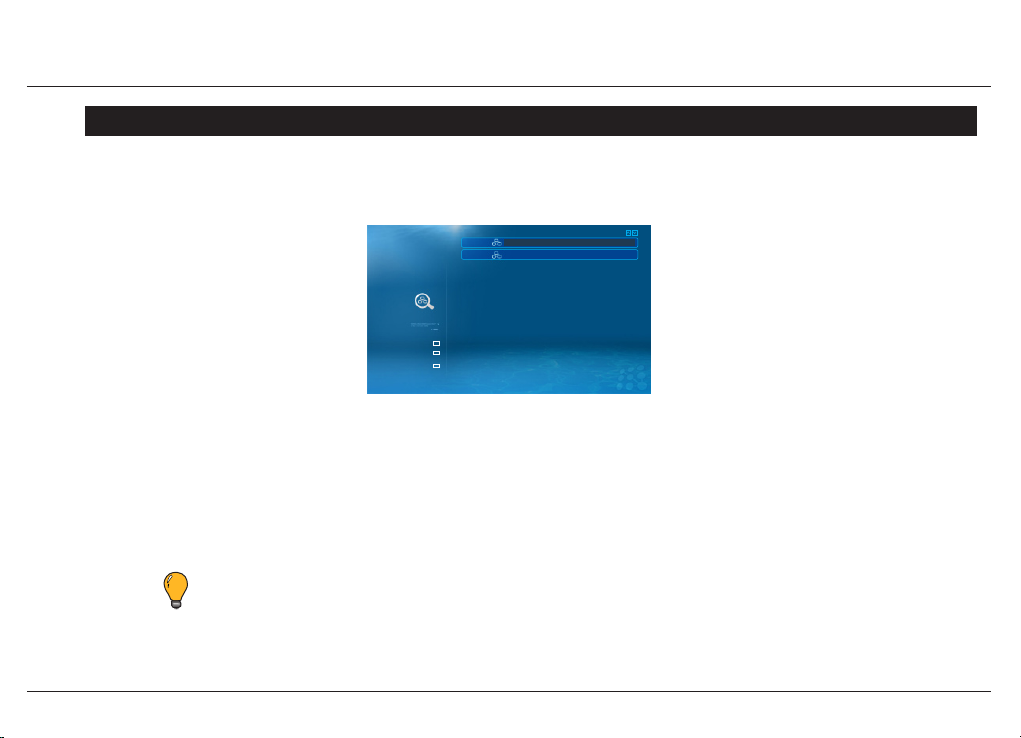
To browse your connected Network Shares, go to Media Source > Network Browser and select
WORKGROUP to see the available Network Shares on your network.
Various shared media servers on your network and Permanent Network Shares may also appear on
the Media Source screen for easy selection.
Note: Ensure that your NMT is connected to your network properly and the desired media servers
or folders have been congured to allow sharing before browsing for Network Shares.
38
Page 39
4.3.2 Permanent Network Shares
.
Home
Please leave us er name and passwor d entry blank if i t is not
.
Preferences
Audio / Video
Network
Network Share
NMT Applications
DVD / Audio CD
Maintenance
available.
.
Share Name
.
URL
.
User Name
.
Password
.
.
/
/
setup
Test
:
smb://pcname/share
:
:
:
add
cancel
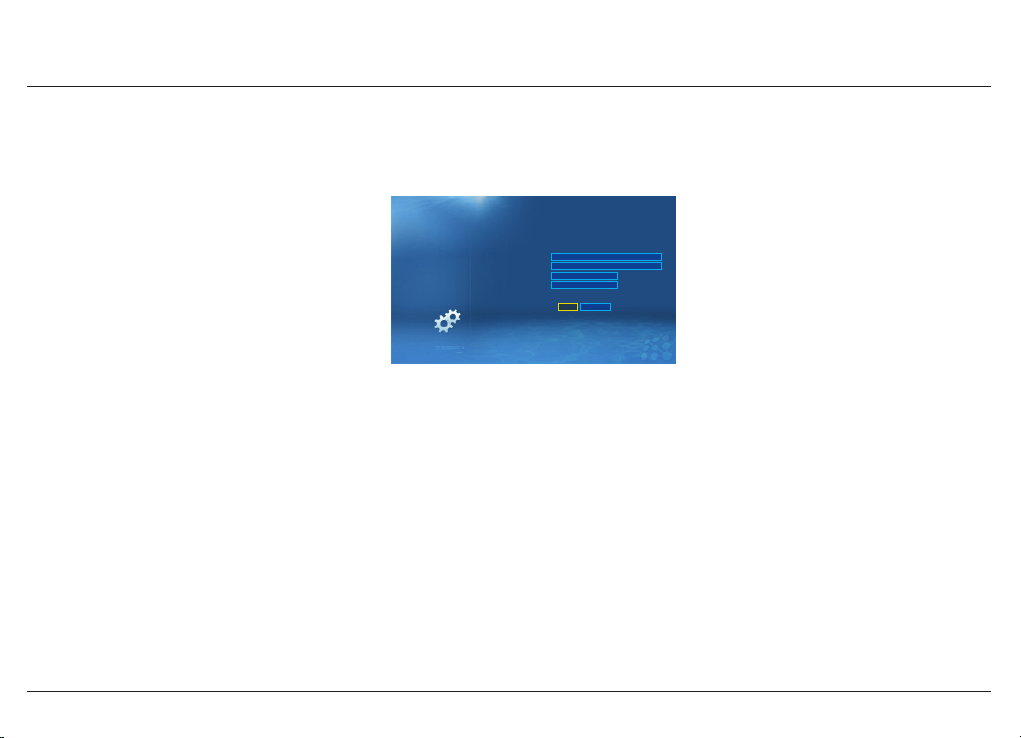
To ease the search of specic Network Shares on your network, you may bookmark them on your
NMT. Follow the steps below to add Permanent Network Shares to your NMT.
1. Go to Setup > Network Share and select the add button.
2. Enter the information into each category according to the type of Network Share that you want
to add:
Share Name• – Enter a name for your Permanent Network Share. The name will be displayed
on the Media Source screen if the Permanent Network Share is active.
// Popcorn Hour A-110
39
Page 40

// Popcorn Hour A-110
URL• – Enter the path of the Permanent Network Share. Refer to Section 4.2 to obtain the
correct paths according to the type of Network Share.
User Name• – Enter the login username of the Network Share that you want to access
(if required).
Password• – Enter the login password of the Network Share that you want to access
(if required).
Note: Network Shares are mounted and active after it has be en selected in the Media Source
or Network Browser screens. Only one Permanent Network Share can be active at a time.
40
Page 41
05
NMT Applications Installation
Your NMT allows you to install an internal hard disk drive (HDD) to expand its capabilities.
A HDD is required for installation of media applications on your NMT.
Note: If you do not wish to use the NMT Applic ations on your P opcorn Hour A-110 NMT,
you may skip this chapter.
Refer to the Hard Disk Drive (HDD) Installation below to install a HDD into your NMT.
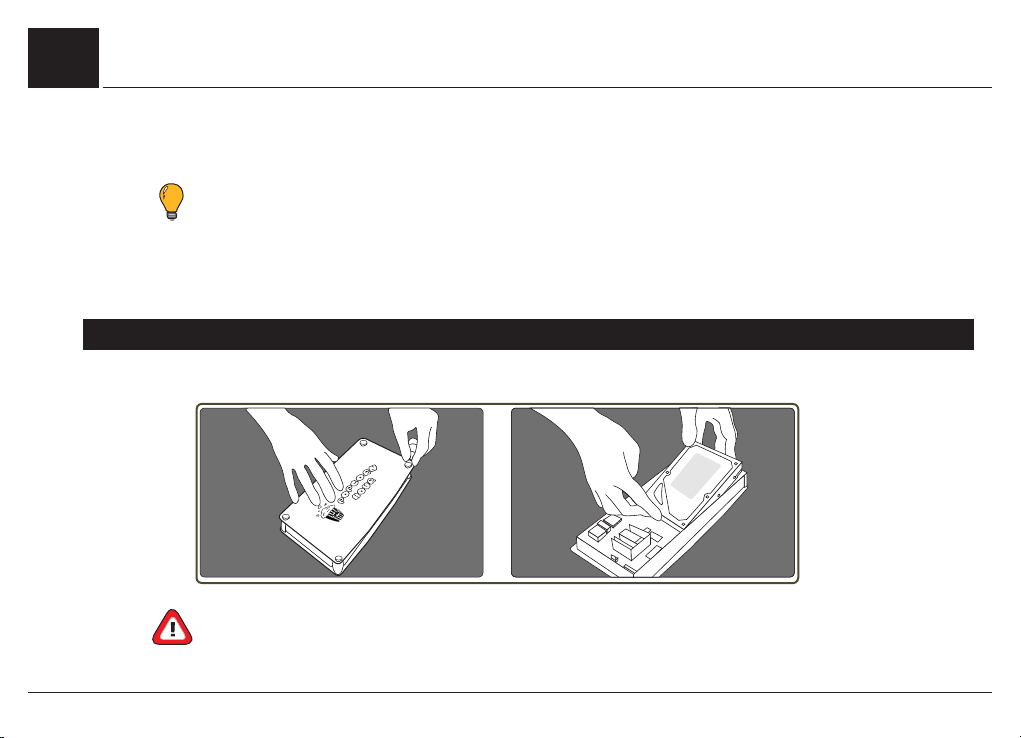
5.1 Hard Disk Drive (HDD) Installation
1 2
Warning: Ensure that the power supply c able has been disc onnected from your NMT
before attempting to dismantle the unit.
// Popcorn Hour A-110
41
Page 42
// Popcorn Hour A-110
42
3
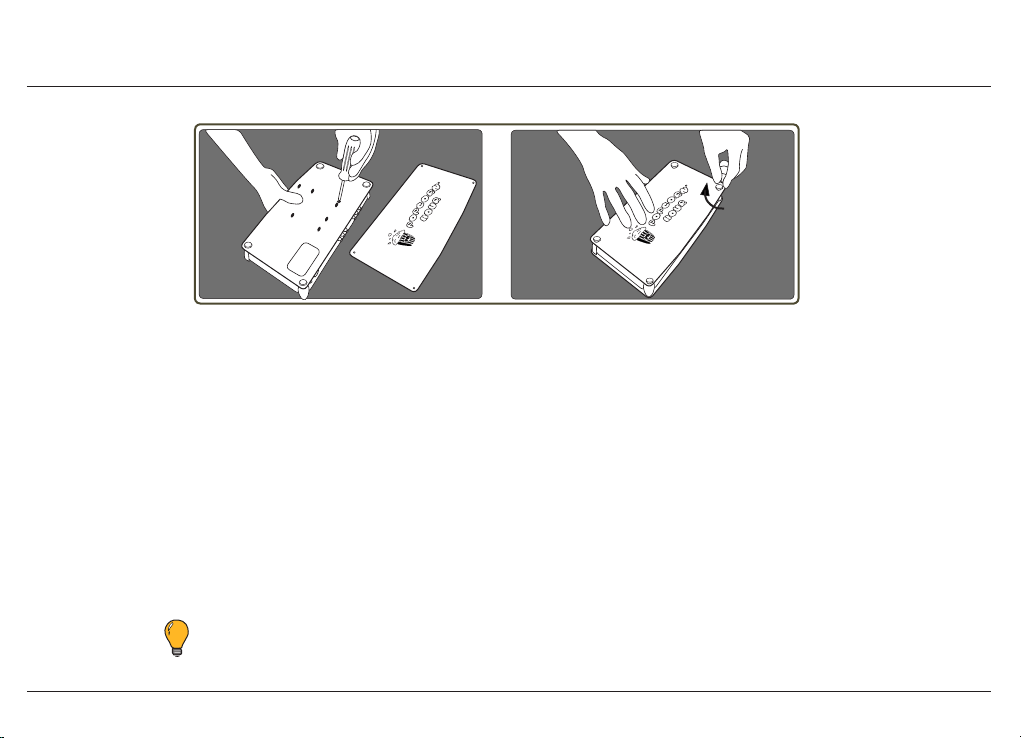
1. First, unscrew the four screws on the top panel of your NMT to remove the panel.
2. Insert the HDD into the NMT carefully and make sure the HDD is properly connected to the
SATA connector.
3. Turn the NMT unit over and use the supplied screws to secure the HDD onto the unit.
4. Reattach the top panel that was removed in Step 1 with the four screws. To format your HDD
and install the NMT Applications into your newly added HDD, refer to the NMT Applications
Installation section below.
Note: Disconnec t all attached cable s on your NMT to ease the HDD installation.
4
Page 43
5.2 NMT Applications Installation
1. Connect your NMT to your TV using the HDMI cable or a suitable connector.
2. Switch ON your NMT and allow it to start up (this may take up to 2 minutes).
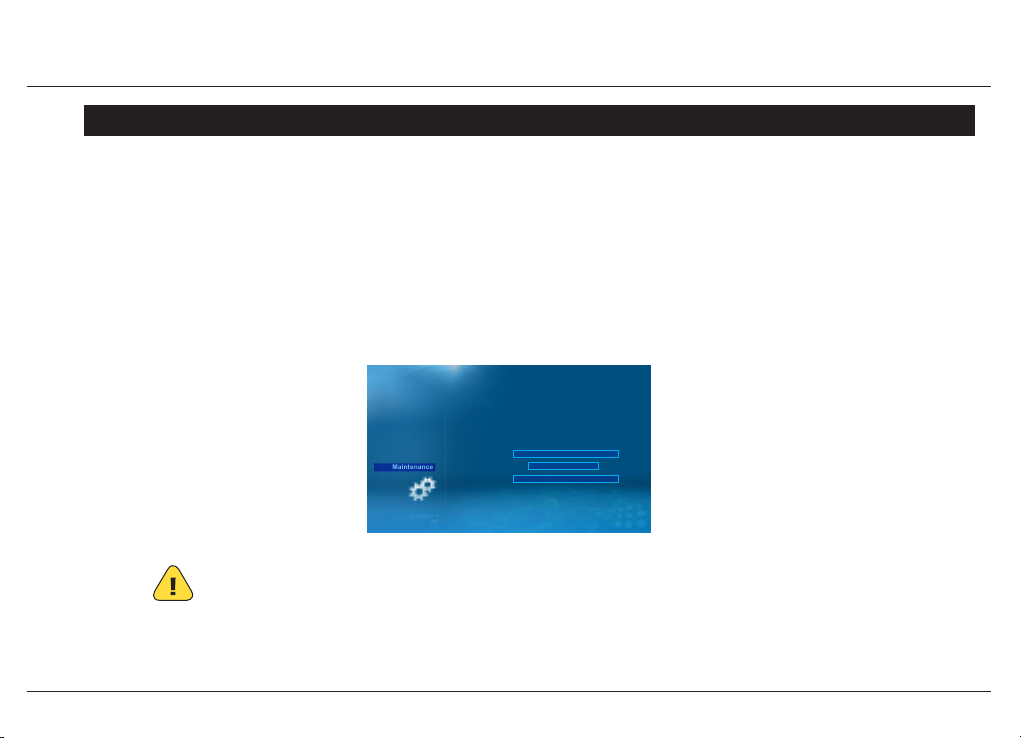
3. Navigate to the Setup screen and select Maintenance.
4. At the Maintenance screen, select the NMT Setup Wizard.
.
Home
Preferences
Audio / Video
Network
Network Share
NMT Applications
DVD / Audio CD
Maintenance
/
/
setup
.
.
.
.
.
.
.
Firmware Version
Kernel Version
NMT Version
Cardea License
check for rmware update
reset to factory settings
:
01-17-090125-15-POP-403-000
:
15-POP
:
00-17-090115-15-POP-403
:
Not Available
NMT setup wizard
// Popcorn Hour A-110
Ensure that you backup all the data on the HDD into a separate
Caution: The next step in this procedure will ERASE ALL DATA on your HDD.
storage media.
43
Page 44
// Popcorn Hour A-110
5. At the NMT Setup Wizard screen, select Next to conrm the Fresh Setup option.
6. In the next screen, select Next to conrm the HDD selection.
7. Select Next to format your HDD using the ext3 format.
8. At the warning notice screen, read the message and ensure that the correct selections
have been made. Select Next to go to the NMT Setup Source screen.
9. At the NMT Setup Source screen, select Online or USB according to the source of the update
NMT Applications le. To begin the NMT installation process, select Next.
(ensure that your NMT is connected to the internet).
To pe rf orm a manual NMT Application s ins tallation, download the latest rmware package
from the NMT website and unzip the les into the root drive of a USB ash memor y device.
For more information, see Chapter 6.4.8: Firmware and NMT Applic ations Update.
Note: For an automated installation procedure, sele ct O nline at the NMT Setup Source scr een
10. Your NMT will restart when the installation is completed. Your NMT is now ready for use.
44
Page 45
// Popcorn Hour A-110
5.3 Using the USB Slave Drive Function
To set up your NMT (with HDD installed) for use as a USB Slave drive, follow the steps below.
Note: For the HDD installation, refer to Chapter 5.1: Hard Disk Drive (HDD) Installation.
This installation applies to PCs running Microsoft(R) Windows Vista. For installation on other
operating systems, refer to our Help and Support webpage at http://support.popcornhour.com.
1. Prepare your personal computer (PC) rst before connecting the NMT by installing a .ext driver
available for download at:
http://www.fs-driver.org
2. Download and install the .ext driver onto your PC by following the instructions below:
a. Double-click the downloaded .exe le to launch the installation.
b. Perform the installation with the following options selected:
45
Page 46

i. Enable the read-only option (option box unchecked)
ii. Enable UTF-8 encoding (option box checked)
iii. Enable the large le feature (option box checked)
c. Complete the installation by clicking Finish at the nal window.
d. A popup window prompting you to format your HDD or device may appear after you
click Finish. Click Cancel, as you are not required to format the HDD or device.
3. To ensure that the installation was completed successfully, look for the IFS Drives Control
Panel Item in your PC’s Control Panel (Start > Control Panel ).
4. Turn ON your NMT and connect the USB Slave connection to your PC using the provided
USB cable.
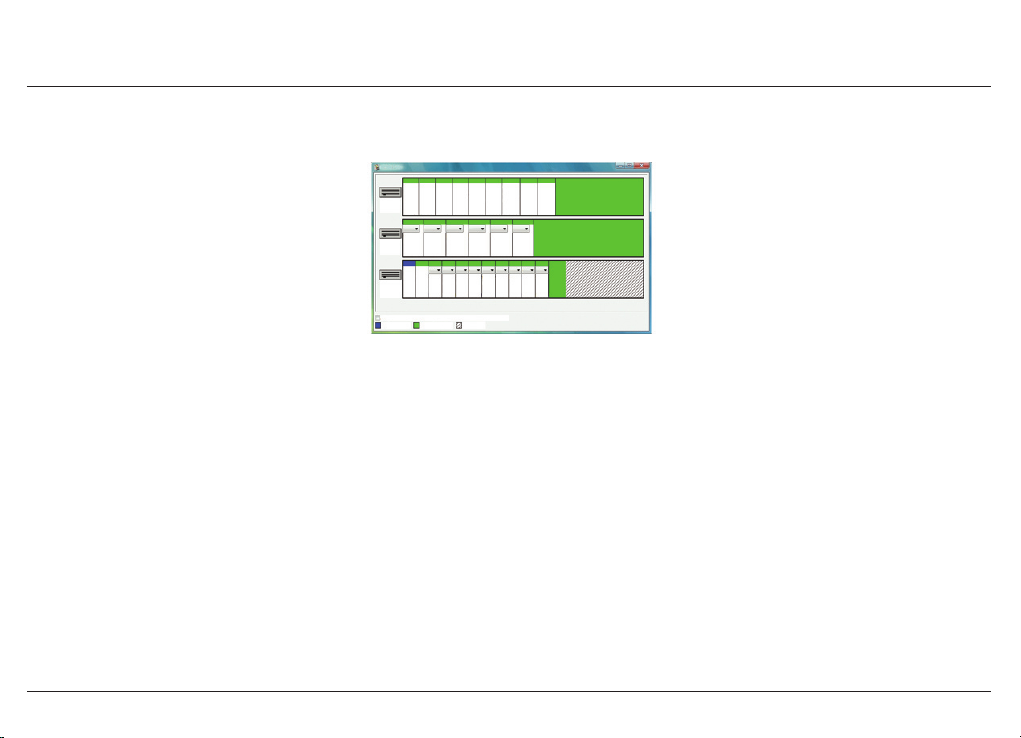
5. Double-click the IFS Drives Control Panel Item icon in your PC’s Control Panel to launch
the storage device formatting window, as shown below.
// Popcorn Hour A-110
46
Page 47
F: G: H: I: J: K: C: L: M:
W2KPR W2KAS WXPPR WXPPR VISTA32 VISTA64
NTFS NTFS NTFS NTFS FAT FAT NTFS FAT NTFS
Drive 1
298.1 GB
2.0GB 2.0GB 7.8GB 7.8GB 15.6GB 15.6GB 31.3GB 31.3GB 31.3GB
O: (none (none (none (none (none
tvol1 tvol2 tvol3 tvol4 tvol5 tvol6
Ext2 Ext2 Ext2 Ext2 Ext2 Ext2
Drive 2
298.1 GB
29.8 GB 29.8 GB 29.8 GB 29.8 GB 29.8 GB 392.2 MB
(no (no (no (no (no (no (no (no (no
D: E:
NT4W NT4S / /home tvol 1_ tvol2_ tvol3_ tvol4_ tvol5_ tvol6_
FAT FAT Linux Ext2 Ext2 Ext2 Ext2 Ext2 Ext2 Ext2 Ext2
Drive 3
swap
298.1 GB
2.0GB 2.0GB 2.0GB 15.6G 1.6GB 9.3GB 9.3GB 9.3GB 9.3GB 29.8G 392.2
Assign drive letter automatically upon plugging in a device the rst time
primary partition extended partition free space
6. Identify your NMT (usually identied by the drive space of the HDD that you have installed
into your NMT or the drive with three partitions) and select the partition with the largest
storage space available. The selected partition will be displayed as an Ext2 partition.
7. Look for the dropdown window button displaying the word (none) and assign a drive letter
to that partition; making sure that your computer or any other external storage devices do
not currently use the drive letter. Close the window once done.
8. Now, browse to My Computer on your PC and you should be able to see the newly assigned
Local Disk with the drive letter you selected earlier in Step 7.
// Popcorn Hour A-110
47
Page 48

// Popcorn Hour A-110
9. Browse into the drive and you should be able to see some folders created by the installation
process earlier.
10. Transfer your les into the appropriate folders for them to work in your NMT. For example,
video les into the Video folder, photos into the Photo folder and so on.
11. Once the le transfers are completed, remove the USB connection by using the Safely
Remove Hardware icon on your Windows Taskbar, then unplug the USB Slave connector
from your PC and NMT.
your PC, reinstall the E xt2IFS software and rep eat t he pr ocedures above.
If unsucce ssful, refer to our helpful online community forum at
http://www.networkedmediatank.com.
48
Note: If your NMT does not appear as a connected external storage device on
Page 49
06
Using your Popcorn Hour A-110 NMT
// Popcorn Hour A-110
Please ensure that your Popcor n Hour A-110 NMT has been updated
with the late st rmwar e. Firmware updates will ensure that your
Popcor n Hour is compatible with the latest hardware and sof tware
available today.
This user guide is written f or the Popcor n Hour A-110 NMT with
rmware version:
01-17-090125-15-POP-403-000 or newer.
Refer to Chapter 6.4.7: Maintenance section below for a guide
on updating your rmwar e.
49
Important:
Page 50
6.1 Remote Control Functions
Button Functions
Press o nce to put th e NMT into Sta ndby mode or to awake n the NMT fr om the Stan dby mode
POWER
FILE MODE
SETUP
Press Po wer > Eject t o reboot t he NMT
Press Po wer > Delet e to turn of f the NMT
Press o nce to disp lay three op tions:
Add le to lis t•
Create Fo lder•
Rename Fil e•
If you alread y have a le list ed then you ha ve furth er option s:
Add to list•
Remove fro m list•
Copy list ed items he re•
Move liste d items her e•
Create f older•
Clear lis t•
Delete li sted ite ms•
Rename le•
Press Enter on t he highligh ted le to co nrm the s electi on.
Press o nce to acce ss the Set up menu sc reen
During vi deo playba ck, pres s this but ton once to s ee the vid eo display op tions
Press S etup > Play to d isable th e Setup Pag e Lock opti on
// Popcorn Hour A-110
50
Page 51
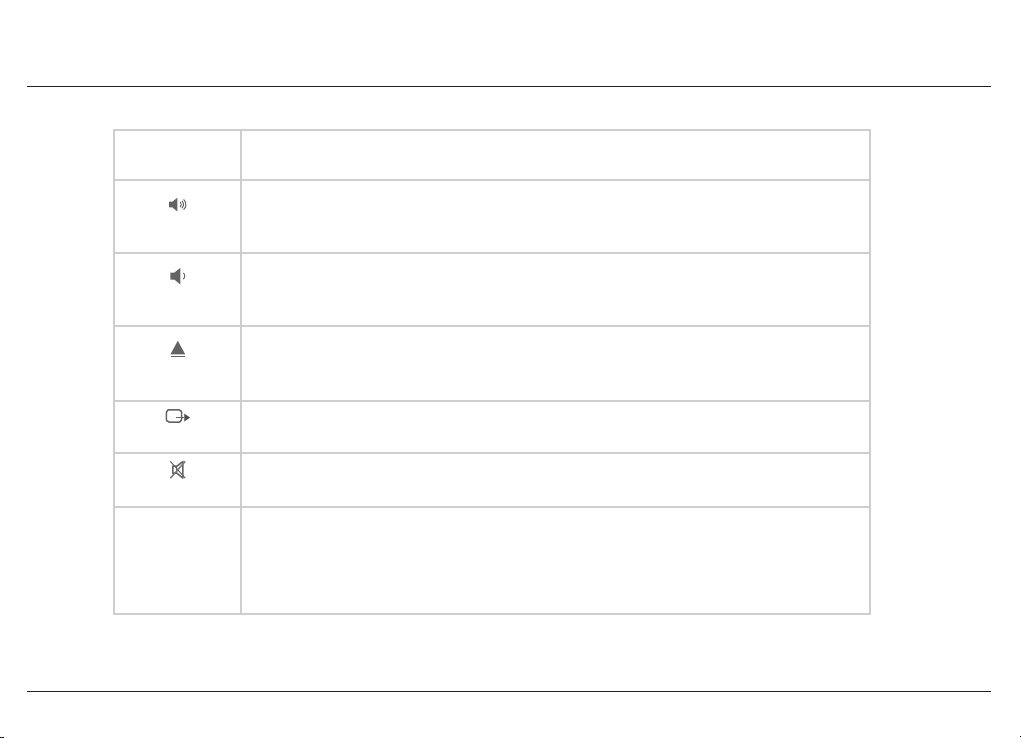
// Popcorn Hour A-110
BT
SUSPEND
PAGE UP
PAGE DOWN
USB DVDROM/
EJECT
This but ton is res erved f or futur e use
Moves up a pag e on a list of me dia les
Increa ses the volu me during me dia playba ck
Moves down a pa ge on a list of m edia les
Decre ases the vo lume during m edia playb ack
Eject s an atta ched ex ternal CD/D VD-ROM dri ve
Ends a medi a playback
Quick-acc ess butt on to sele ct a TV ou tput res olution. S ee Video M ode Opti ons for mor e inform ation
TV MO DE
MUTE
Mutes the a udio outpu t
0 - 9
Alphanumeric
Keypad
Quick se lectio n of media co ntent acc ording to t heir numbe red list ing on the men u scree n
Allows us ers to inpu t alphanume ric value s
During me dia playbac k, pres sing a numbe r on the keypad w ill skip to a ce rtain p ercent age of the t otal playb ack time
of the medi a le. For exam ple, pres sing 3 will sk ip to 30% of th e media le and s tart t he playbac k from the re
51
Page 52
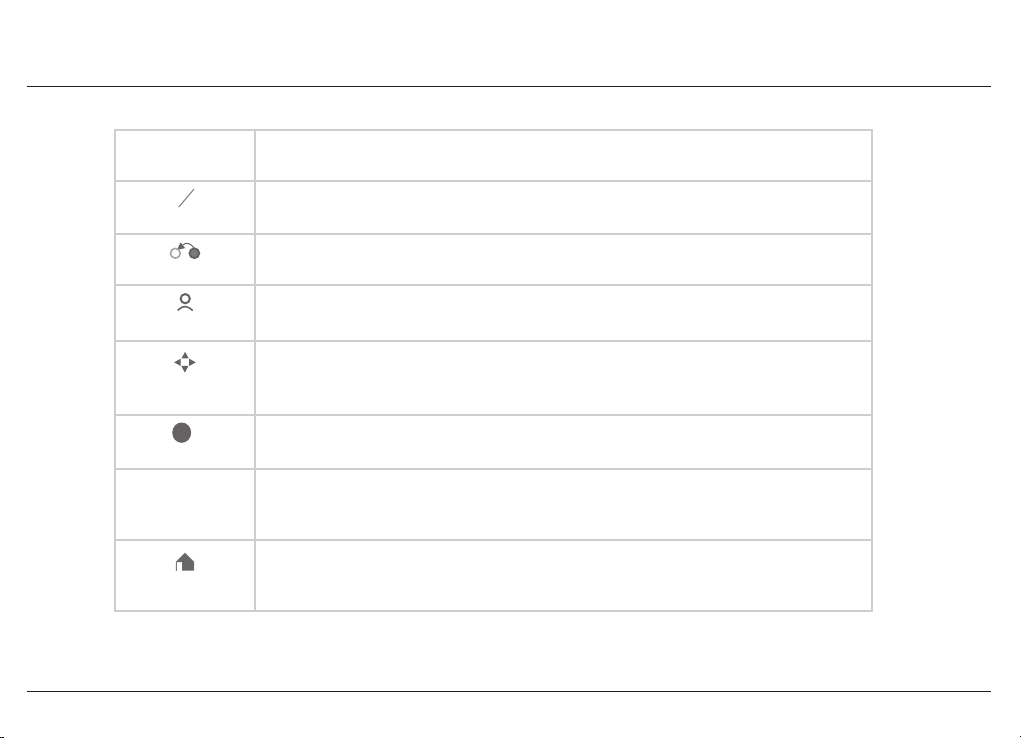
// Popcorn Hour A-110
DELETE
DELETE
CAPS
NUM
To erase alpha numeric va lues durin g input
To switch bet ween cap italized, nu meric and n on-capi talized l etter s during alp hanumeri c value input
CAPS/NUM
RETURN
Return to t he previo us menu scr een
Returns t o the Media S ource sc reen
SOURCE
Allows you to n avigate and h ighlight op tions or me dia les
Directional
Keypad (D- Pad)
ENTER
Partia l time seek d uring movi e playback (l eft and r ight direc tional key s only)
Selec ts the cur rently hi ghlighted s elect ion or plays t he highlight ed media l e (single le playb ack only)
ENTER
i
INFO
HOME
Displays t he timelin e bar during m edia le play back.
Press ag ain to displ ay the media l e informa tion suc h as the title , format, an d other det ails
Returns t o the Media F ilters m enu scre en of your cur rently s elect ed Media So urce
During a DVD p layback, t his butt on enable s or disabl es Repea t A/B
52
Page 53
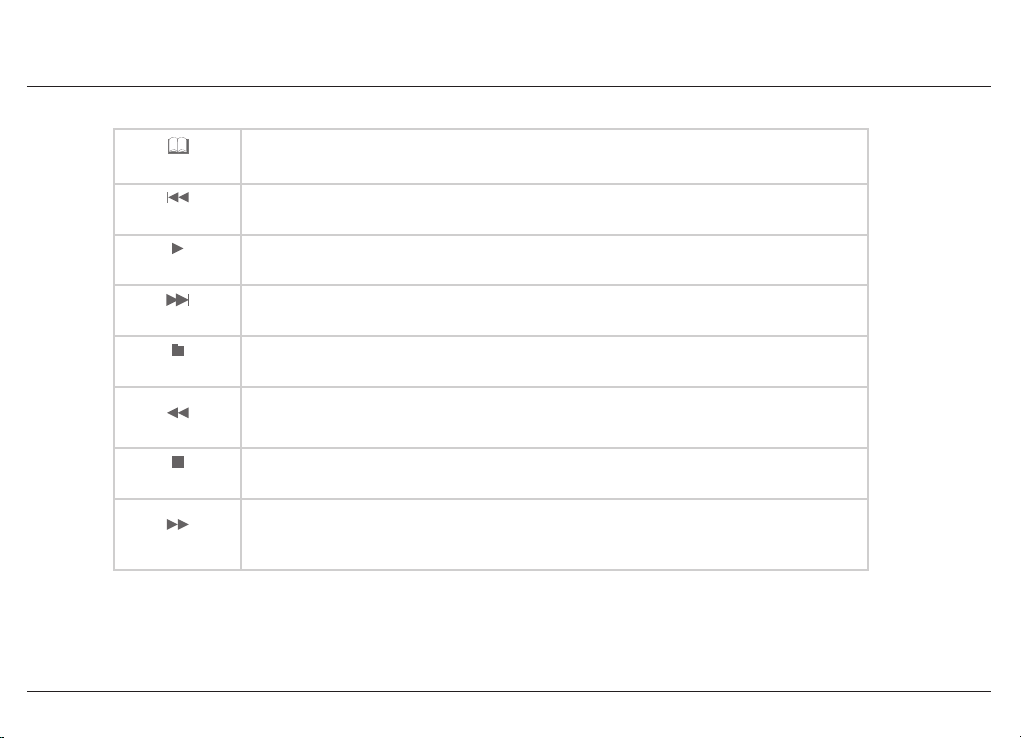
MENU
// Popcorn Hour A-110
Jumps to the D VD Menu sc reen duri ng DVD playba ck to allow pl ayback cu stomiza tion
PREV
PL AY
NEXT
TITLE
REV
STOP
FWD
Skips bac kward to t he previo us le/tr ack
Plays the se lecte d le/tra ck and cont inues to th e next le /track on t he list
Skips for ward to th e next le /track
Opens th e text inpu t box for URL i nput while in a m enu scre en
Rewinds th e current m edia playb ack
Stops play back and re turns to t he menu scr een
Fast-forw ards thro ugh the cur rent med ia playbac k, continu e pressi ng to toggl e 2x, 4x and 8x fas t-forwar ding
53
Page 54
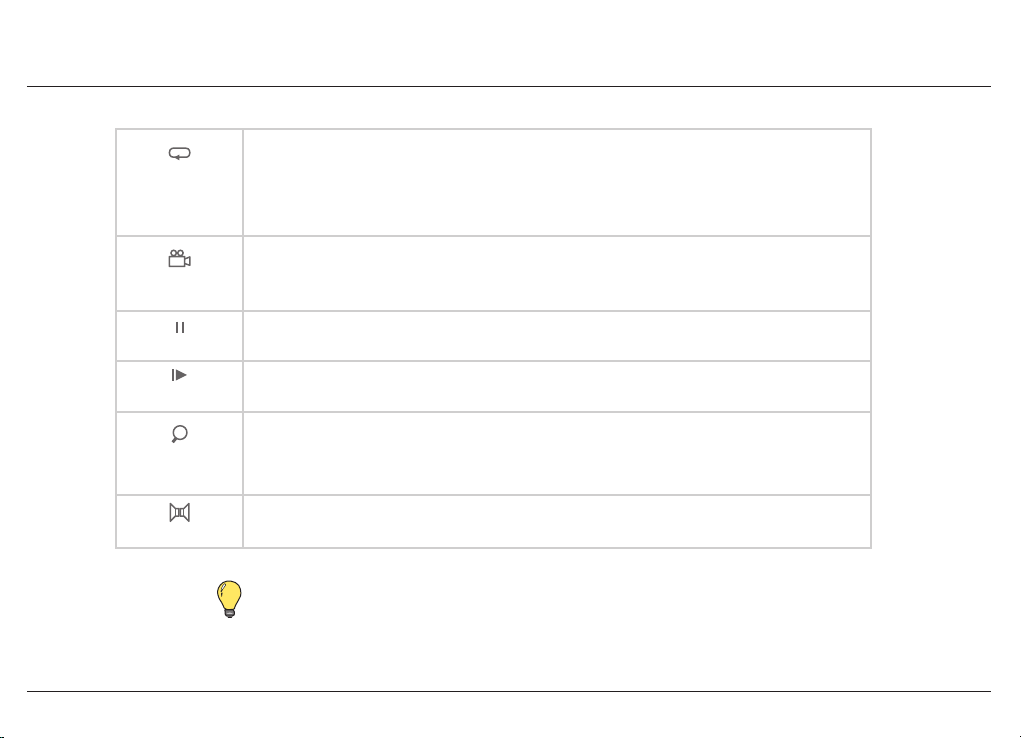
REPE AT
ANGLE
Repeats t he curre nt selec ted medi a le.
During mu sic playbac k, this but ton of fers thr ee playba ck modes:
Press o nce: Chose n song is playe d repeat edly.•
Press t wice: Playb ack will re start a t the top of th e list once t he nal song o n the list is d one playin g.•
Press t hree time s: Disable s the Repeat m odes.•
Switche s the camer a or viewing a ngle durin g DVD playbac k (only applic able for sup porte d multiangl e DVD playba ck format s)
(Switches th e PMT for T S with multip le-PMT s upport)
// Popcorn Hour A-110
PAUSE
SLOW
TIME SE EK
Pauses t he curre nt media play back
Slows down th e playback o f the curr ent media p layback
Allows you to t ime-se ek the curr ent sele cted me dia for a jump t o a partic ular playb ack time;
hour:minut e:secon d = 00:00:0 0
(use numeric b uttons t o input the de sired pl ayback tim e)
Toggles bet ween the ava ilable audi o modes
AUDIO
Tip: Replace the bat ter ies with two new AAA batteries if the
remote control is slow to respond or does not respond at all.
54
Page 55
// Popcorn Hour A-110
A
A
SUBTITLE
ZOOM
RED but ton
GREEN button
YELLOW button
BLUE button
Turns ON the sub titles an d toggles t hrough it s option s (if available w ith your vide o playbac k)
More fun ctions o f the Subtitle but ton:
Press o nce for timi ng offs et. Use th e Left /Right D- Pad butt ons to set th e timing of fset•
Press t wice to dis play the lang uage used . Use the Lef t/Right D-Pad bu ttons to t oggle bet ween lang uages •
or turn sub titles OF F
Press t hree time s to change t he color of t he subtit les. Use th e Left /Right D- Pad butt ons to chan ge the colo rs•
Press f our times t o display the s ubtitle s ize. Use the L eft/ Right D-P ad butto ns to chang e the size•
Press ve times to ch ange subti tle posi tion. Use th e Left /Right D- Pad butt ons to lower/ra ise the sub title pos ition on th e •
screen
Press t he • Subtit le button o n the Media S ource sc reen to di splay the ti me
Toggles bet ween the ava ilable view ing option s
During si ngle le playb ack, the Zoom bu tton fun ctions:
Press o nce and use t he Left /Right D -Pad but ton to togg le betwe en Actual S ize, Fit To Scre en, Crop or Fu ll Scree n•
Press t wice to Mag nify the s creen s ize. Use the L eft/ Right D-P ad butto ns to reduc e or zoom by 1% incr ements•
Press t hree time s to Pan/Sc an. Use the Le ft/R ight and Up/D own D-Pad bu ttons t o move the disp lay scree n on the •
X-axis/Y-axis
During DVD P layback;
During pl ayback of a DVD/ ISO le, pr ess • Zoom onc e, then use L eft/ Right D-P ad butto ns to zoom in/ou t
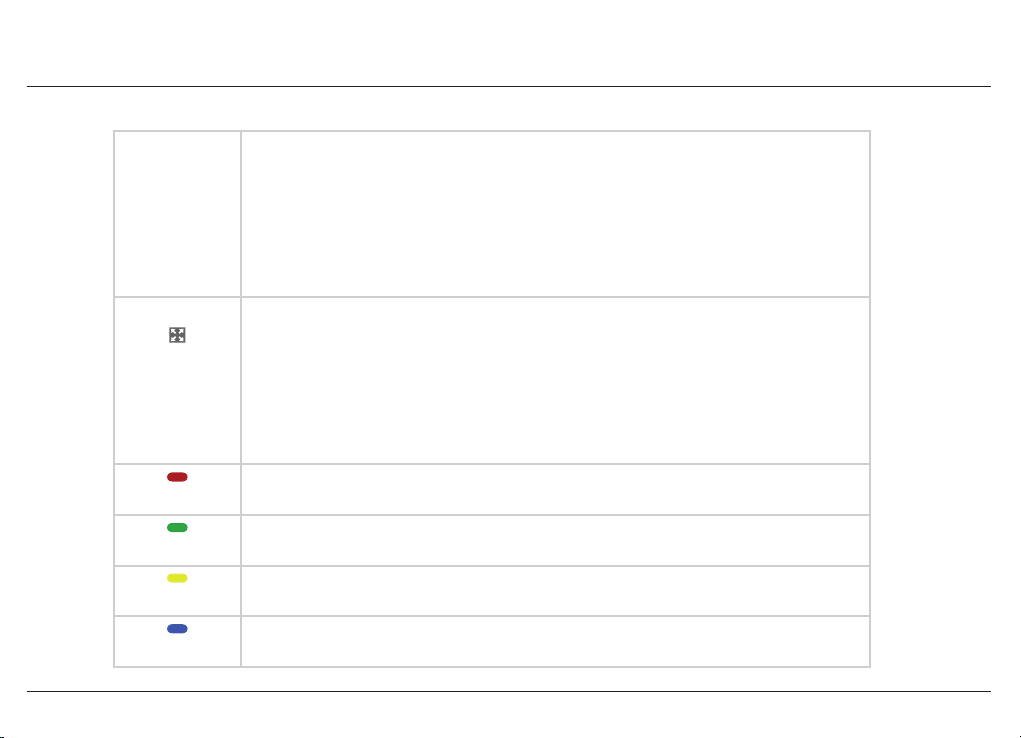
Jumps to the Vide o media lter
Jumps to the Mu sic media lte r
Jumps to the Ph oto media lte r
Jumps to the O thers media lter
55
Page 56

Tip: The four media lter buttons may have extr a functions depe nding on the
applications used, such as third-part y HTML servers and when browsing
MSP portals. T he extra functions will be displayed onscreen for easier
reference when available.
// Popcorn Hour A-110
56
Page 57
// Popcorn Hour A-110
6.2 Media Source
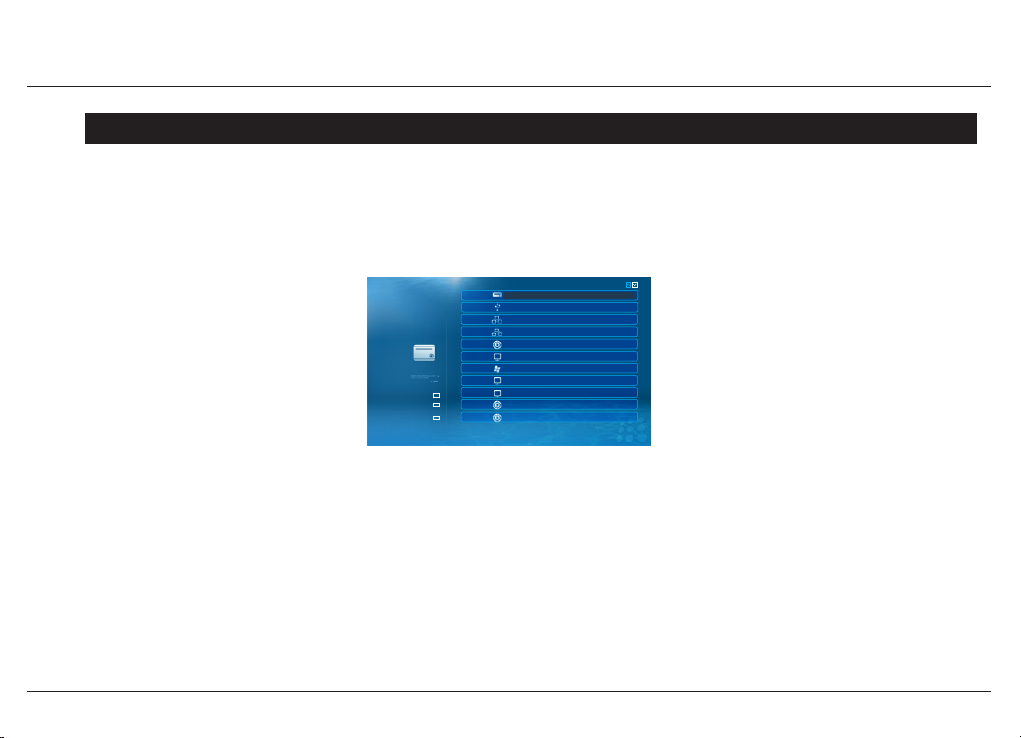
This option is used to select the desired source of media to playback on your NMT. If an external HDD
is connected to your NMT via USB, it will appear on the screen as an option for you to select. All the
storage devices that are successfully connected to your NMT will appear on this screen.
01 HARD_DISK
02 USB_DRIVE_A-1
03 Network Browser
04 Network
05 BEMYGUEST2: BC2: (Unauthorized)
06 bemyyon2 : Testie Media Server
/
/
SM-LAPTOP:smith
Media Source
Web Services
Setup
07 SM1551 : Windows Media Connect
08 SyNAS
09 SMP1551: UPnP AV Server
10 SMSTOP-MCE: Smith
11 SM-LAPTOP:smith
1 - 11 / 21 items
57
Page 58
// Popcorn Hour A-110
6.3 Web Ser vices
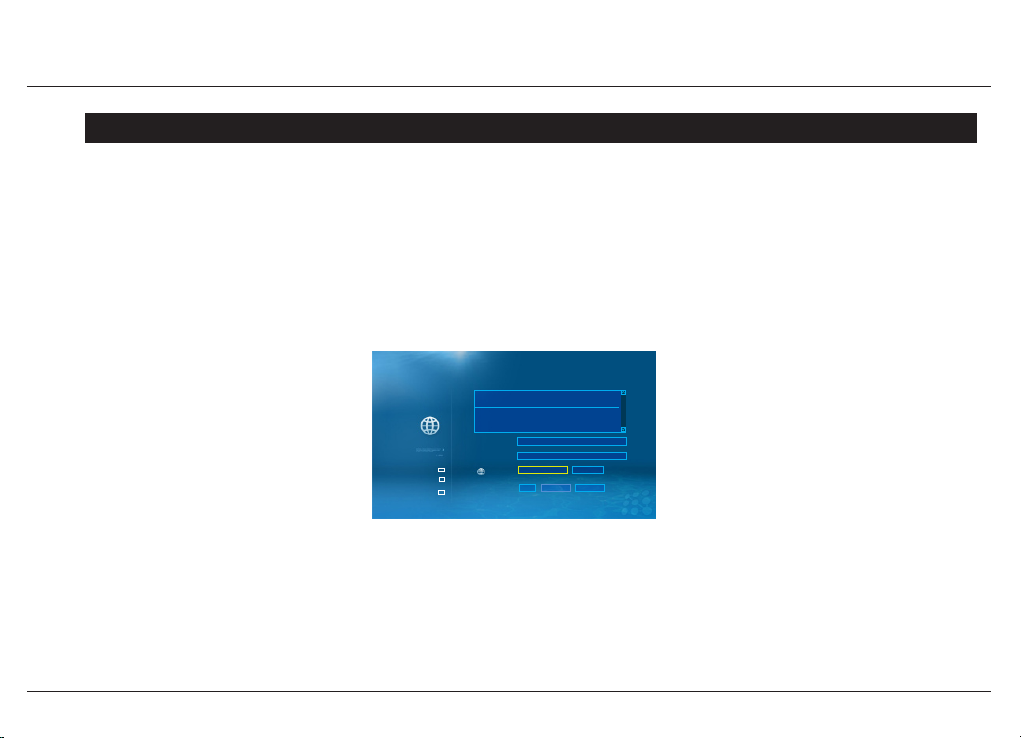
This option allows you to connect to Internet-based services such as the Media Service Portal (MSP),
view the BitTorrent status screen, and access URLs from your most frequently visited web ser vice
sites.
By selecting the Add/Edit option on the top left side of the Web Service menu page, you may add
and/or edit web services to your NMT, as shown below.
Please select ONE of the following services
*Add New Service
*Edit Saved Service(s)
Setup
Name
URL::
Change icon
:
add
remove
Default
cancel
/
/
Web Services
Media Source
Web Services
58
Page 59
6.3.1 Media Service Portal
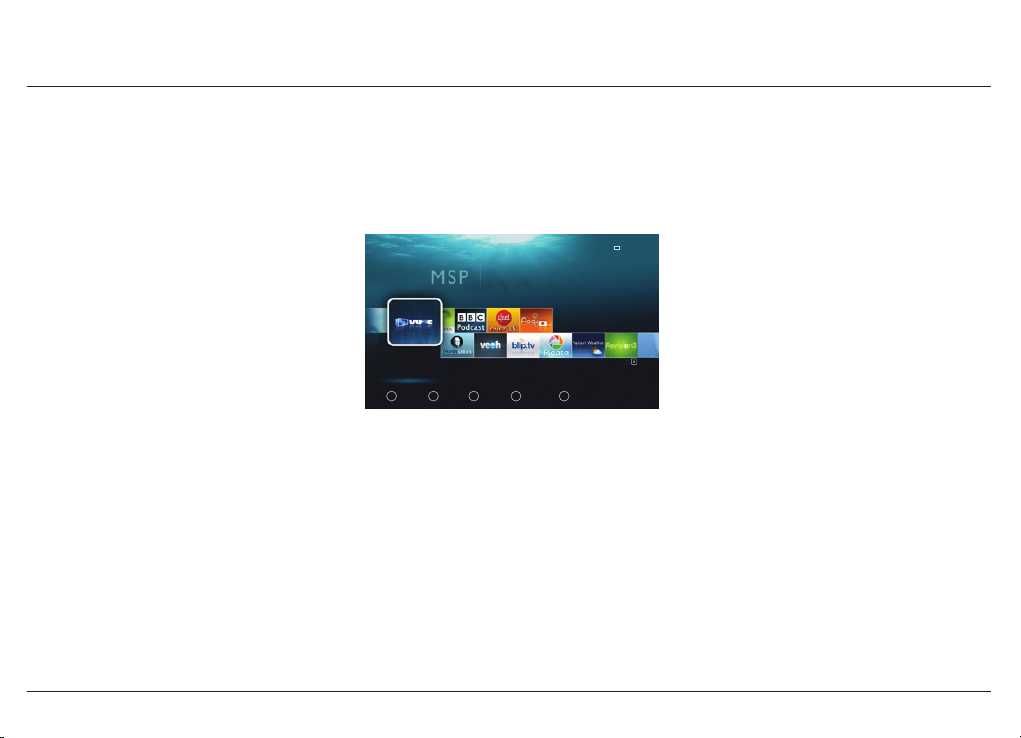
The Media Service Portal allows you to access popular unicast web-based media content such
as YouTube, Picasaweb and Flickr using your NMT.
login
Vuze (video)
Get ALL your podcasts from ONE place delivered ANYWHERE
// Popcorn Hour A-110
press number key to switch channel mode
video audio photo rss what’s new
1 2 3 4 5
3 /40
59
Page 60
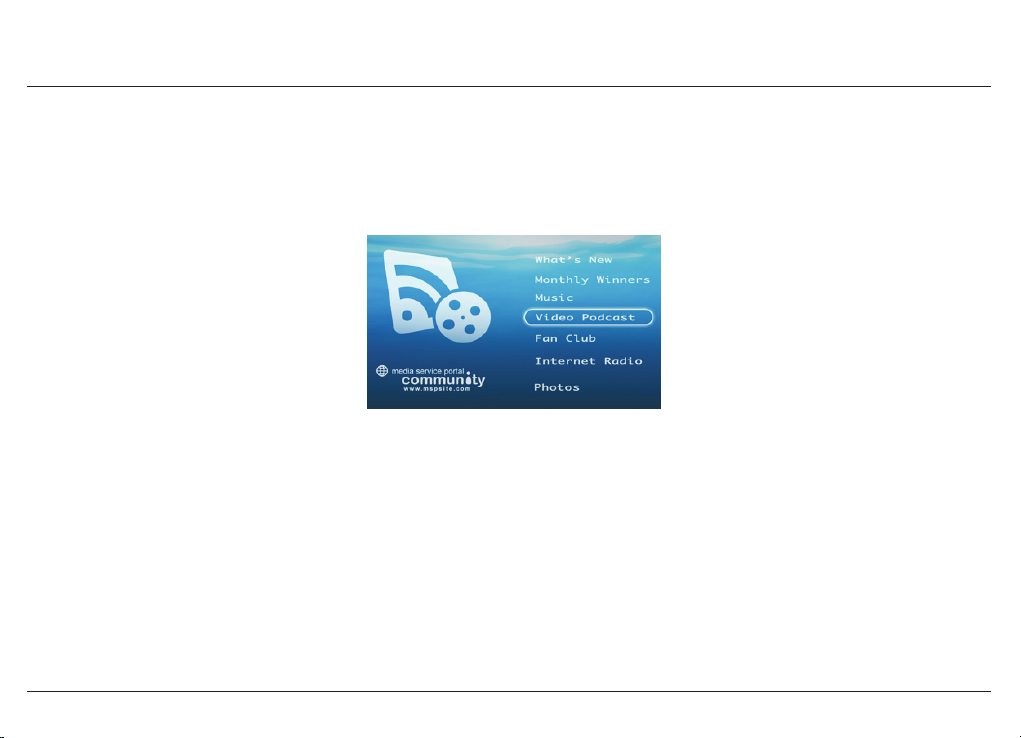
6.3.2 MSP Community
The MSP Community is a web communit y containing user-developed plugins.
// 20 items
For more information about the MSP Communit y, kindly refer to:
http://www.networkedmediatank.com/wiki/index.php/Web_Services
// Popcorn Hour A-110
60
Page 61
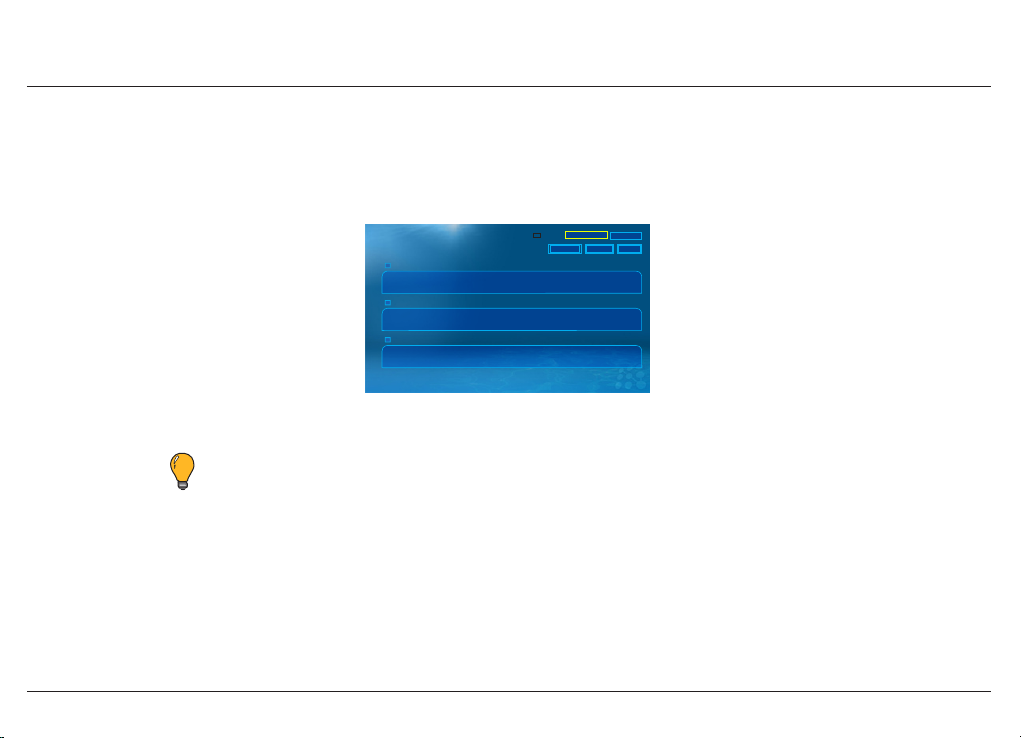
6.3.3 Torrent
The Torrent screen allows you to view and control the status of your BitTorrent downloads.
Scheduler
Torrent
/
/
Video 1 (816.74M)
DL: 495.70M (60.8%)
Video 2 (513.2M)
DL: 0.00M (0.0%)
Video 3(233.8M)
DL: 99.93M (100.0%)
Free space: 726GB Used: 0% Refresh
Rx: 9.90kB/s
Tx: 10.00kB/s
Rx: 0.00kB/s
Tx: 0.00kB/s
Rx: 1.43kB/s
Tx: 62.05kB/s
Peer(s) : 2
Ratio
Peer(s) : 0
Ratio
Peer(s) : 3
Ratio
Setting
stopstartdelete
Downloading
Seeding
Downloading
1 - 3 / 5 items
// Popcorn Hour A-110
For more information about BitTorrent downloads, see Torrent Setup.
Note: This option requires the installation of a HDD and the NMT Applications.
61
Page 62
// Popcorn Hour A-110
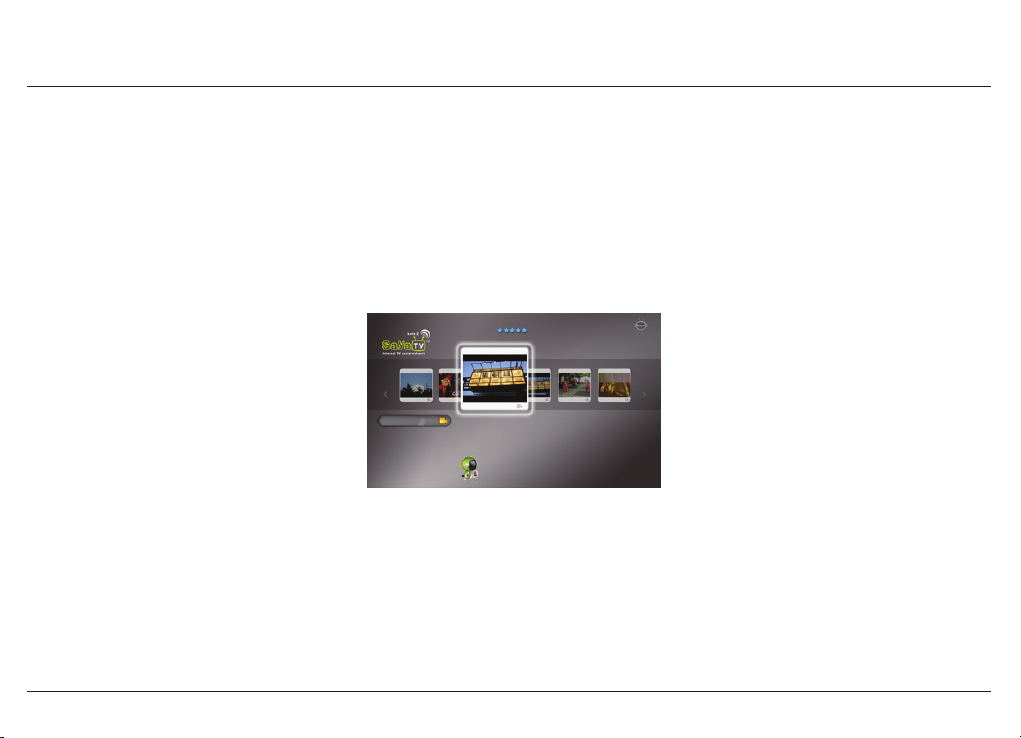
6.3.4 SayaTV
SayaTV is a peer-to-peer (P2P) Internet T V streaming technology that allows you to view media
content using your NMT.
You can create and broadcast your own Internet T V Channel easily by using SayaTV Broadcaster
and watch it on your PC with Internet Explorer or with your NMT.
To k y o N i p p o n T V
Hot On Air
Most Recent
Most Viewed
Top Rated
Search
By tokyonippon
215,230 views
visit www.sayatv.com to broadcast your own channel now.
Watch
Watch Internet TV Channels created
by SayaTV broadcasters now.
SayaTV uses P2P Mesh Network Broadcasting Technology that enables thousands of concurrent Viewers.
Broadcast
Create & broadcast your own Internet TV
Channel easily by using SayaTV Broadcaster.
4 / 20
62
Page 63
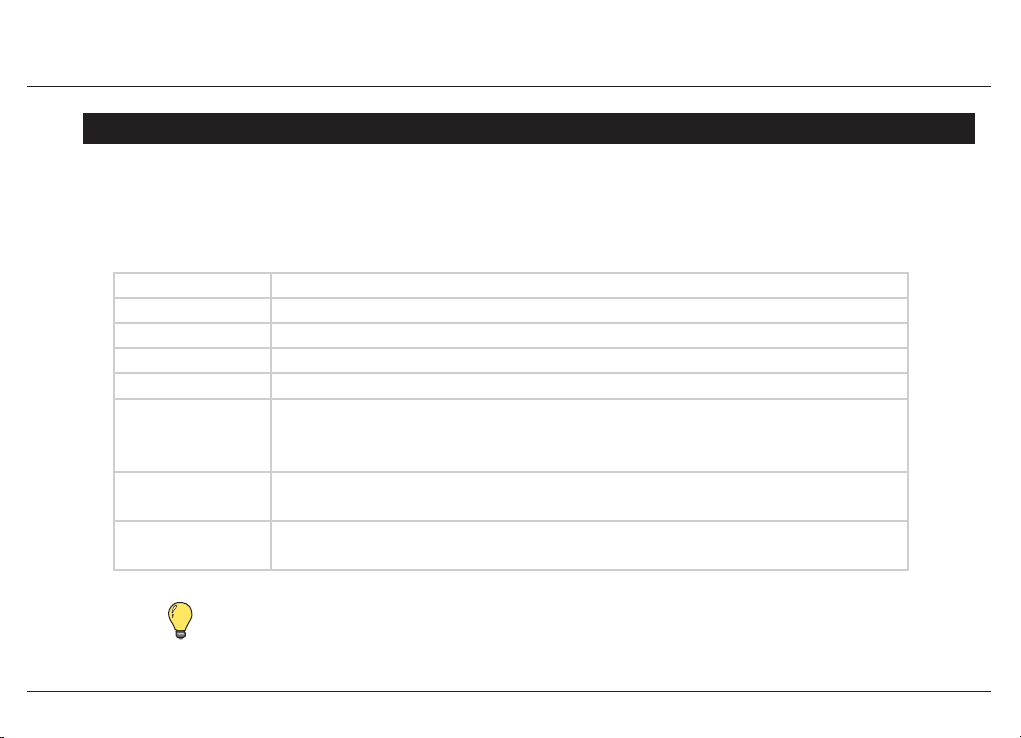
6.4 Setup
The Setup screen allows you to congure various options of your NMT.
A description of the available options on the Setup screen is listed below.
Home Return s to the Me dia Sour ce screen or the media list of the curr ent media source.
Preferences Allows yo u to con gure general settings for your NMT.
Audio / Vi deo Displays settings fo r video o utput as well as vid eo aspect ratio control.
Network Displays cu rrent IP infor mation and allows t he con gurati on of net work settin gs.
Netwo rk Shar e Allows you to c ongur e the media ser vers .
NMT App licat ions Allow s you to con gure t he set tings f or the BitTorrent c lient and other i nstalled app lications.
This sc reen will only b e enable d when a HDD has been insta lled int o your NMT and the NMT
Applications have bee n installed.
DVD / Audio C D Allows you to congure th e conte nt pare ntal co ntrol l evels, th e Autopl ay func tion, the audio
output a nd subtitles used when a DVD or CD pl ayer is connect ed to your N MT.
Maintenance Displays the cur rent device r mware inf ormat ion and al lows you to c heck f or rmwa re updates.
The NMT Setup Wizard is also available on this scr een.
// Popcorn Hour A-110
63
Tip: Remember to select S AVE when your customization is complete to conrm your selections.
Page 64
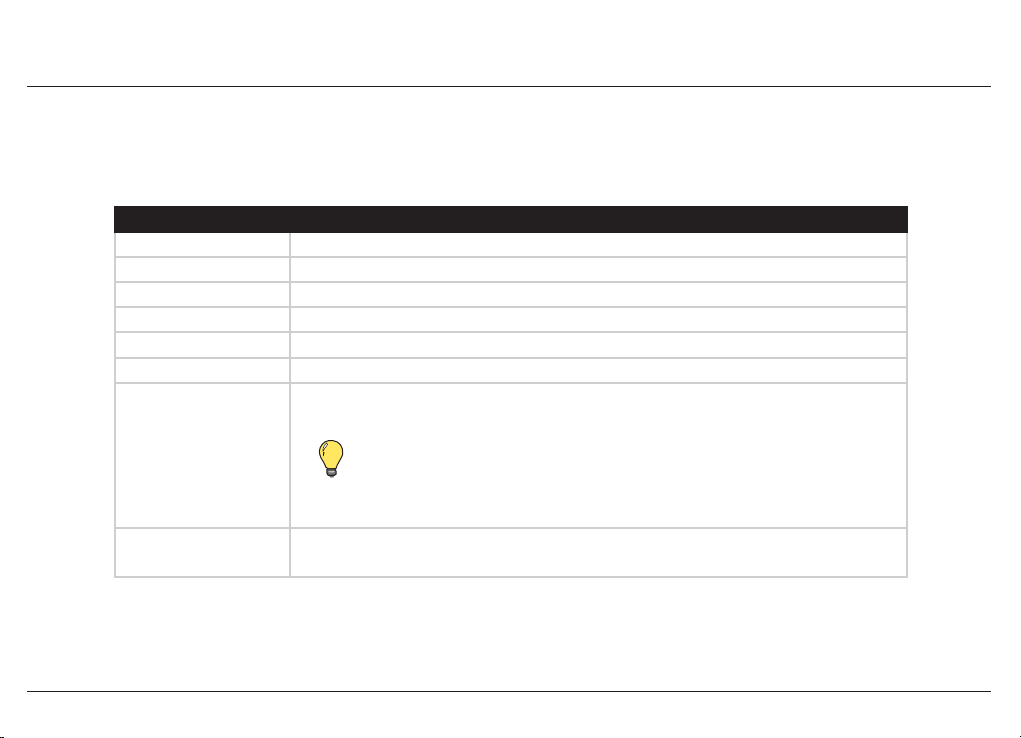
6.4.1 Preferences
This setup screen allows you to set your preferences for some features of the NMT.
Options Description
Language Allows yo u to set th e display language of your NMT.
Subtit le Language Displays the subtitle language (if availabl e) during video playback.
Play Mode Allows yo u to set th e repetition mode of you r media during play back.
Photo Transition Al lows you to s et the tr ansit ion ty pe when vi ewing photos in a fo lder.
Photo Interval Allows yo u to set th e time length that a photo wil l be displayed (up to 120 sec onds).
Scre en Saver Allows yo u to set th e idle tim e length befor e the sc reen saver dis plays.
Setup Page Loc k Allows yo u to lock t he set tings made on the S etup pa ge to prevent acc ident al changes in
the set tings.
Tip: To disable the Setup Page Lo ck, pr ess Se tup > Play
on your re mote co ntrol. Remembe r to SAV E your set tings
to conrm your se lect ion
RC Key Repeat All ows you to select the option to enable or dis able th e remot e contr ol key repeat.
When set to On, the key r epeat is enabled
// Popcorn Hour A-110
64
Page 65

6.4.2 Audio/Video
This option allows you to congure your NMT to produce the best possible audio and visual
experience for your enjoyment.
6.4.2.1 Video Mode Options
This setup screen allows you to customize the video output modes of your NMT to suit your TV
or projector.
Options Description
Video O utput A llows you t o select the video out put mod e and res olution of your NM T. Kindly re fer to you r
TV or projec tor us er manual t o deter mine the best output resolution for the vide o display.
Ther e are thr ee vide o modes availabl e:
Compo site Mo de•
Compo nent Mode•
HDMI Mod e•
For the C omponent and HDMI modes, you will be ab le to sel ect th e output resolution t o
bett er suit your TV. Shown below is a compari son of th e reso lution s izes.
// Popcorn Hour A-110
65
Page 66
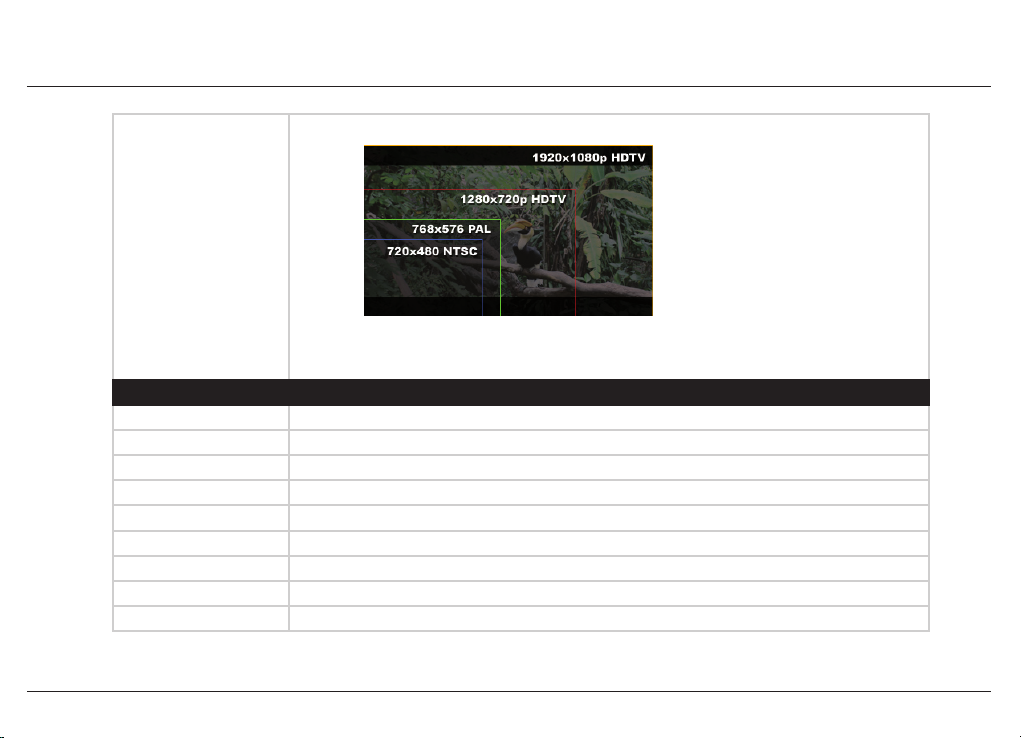
Listed below are the r emote c ontro l quick-access bu tton s for some of the co mmon T V res olutio ns.
Quick-access button Vi deo re solution
TV Mo de -> 0 Auto (default)
TV Mo de -> 1 Component /Composite NTSC 480i
TV Mo de -> 2 Component /Composite PAL 576i
TV Mo de -> 4 Component 720 p60
TV Mo de -> 5 Component 1080i60
TV Mo de -> 6 Component 1080p60
TV Mo de -> 7 HDMI/Component 720p6 0
TV Mo de -> 8 HDMI/Component 1080i60
TV Mo de -> 9 HDMI/Component 1080p 60
// Popcorn Hour A-110
66
Page 67
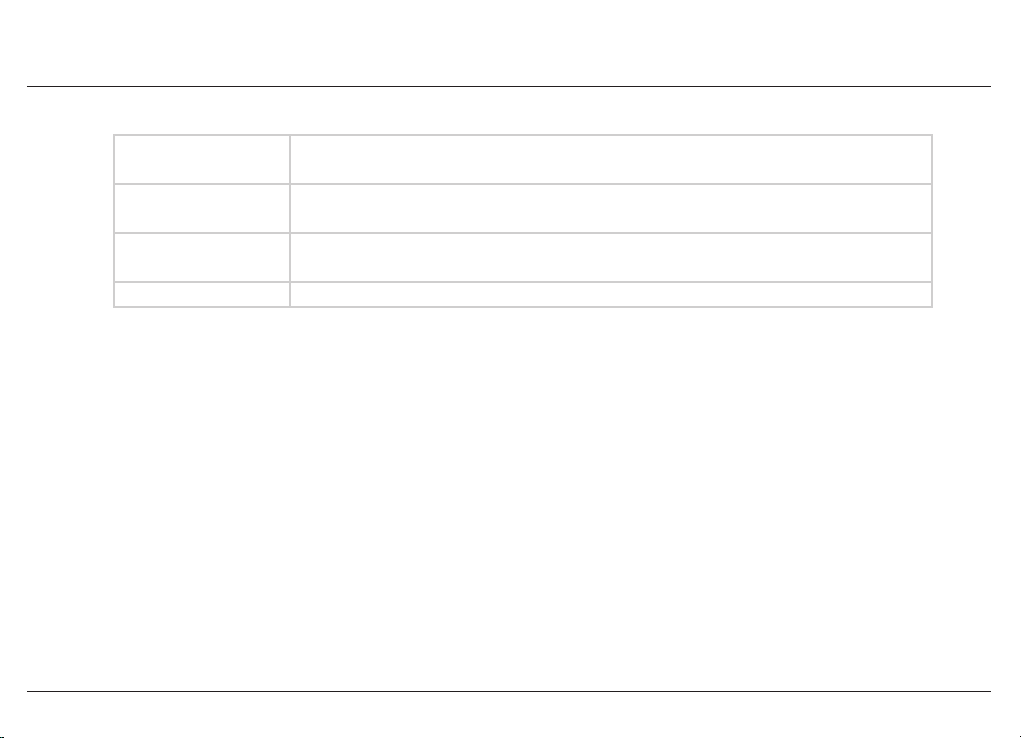
Framer ate Sync Selec t a framerate sync for the vide o output if the play back sh ows an inconsis tent or
poor sy nc rate.
Video Zoom Allows yo u to sele ct the d efault video zo om output of your NM T.
Zoom opt ions: Ac tual Size, Fit to Sc reen, C rop View and Full Scree n View.
TV Type Allows you to set the viewin g aspec t rati o to suit your TV or p rojec tor. Pleas e refe r to
the use r manual supplied with your T V to determine the best viewing aspect ratio.
Colorspace Allows you to cho ose a suitable c olorspace f or the NM T display output .
// Popcorn Hour A-110
67
Page 68
// Popcorn Hour A-110
6.4.2.2 Audio Mode Options
This setup screen allows you to customize the audio output modes to suit your TV or audio system.
Options Description
HDMI Audio Allows you to enable or disable the HDMI audio when us ing a HDMI c able to connec t
your NMT and TV.
Surro und Mode Allows you to ch oose the audio ou tput mo de of your NM T. Choose f rom eit her Ste reo or
5.1 audio output depending on your audio s etup. (Only s elec t 5.1 audio whe n using HDMI)
DTS Allows yo u to con gure your N MT DTS au dio outp ut as analog, digit al, or DTS- HD.
AC3 (Dolby Digital) Allows you to congure yo ur NMT Do lby Digit al audio o utput a s analog or digita l.
AAC Allows yo u to congure your N MT AAC audio out put as analog or digital.
WMA Pro Allows yo u to con gure your N MT WMA Pro audio o utput as a nalog or d igital.
output options. If there is no audio output after an audio setting has been
Note: Please ensure that your audio system is f ully comp atible with the selected
changed, kindly reset the audio to the previous working option.
68
Page 69
6.4.3 Network
This setup screen allows you to customize your NMT to work with your network.
Options Description
Mode Allows yo u to sele ct the w ired or W i-Fi IP address assign ment mode (auto or manual).
Time Zon e Allows you to sel ect th e time zon e in which yo ur NMT is l ocate d.
Time Se rver Allows yo u to input t he URL of t he ser ver that your NMT r etrieves the day and time information.
The def ault UR L is set to p ool.ntp.o rg.
Daylight S aving Allows you to enable or disable Day light Sav ing Time
(only applic able to c ountr ies that practice daylight saving time).
MAC Addr ess The MAC addres s of your NM T is displayed her e.
IP Addre ss Displays IP address of your NMT on your network.
Selec t the Co ngure IP option to cong ure an IP ad dress for your NMT on your networ k
// Popcorn Hour A-110
69
Page 70

// Popcorn Hour A-110
6.4.4 Network Share
Network Shares allow the NMT to stream media content stored on external devices connected
together within the same local network. The NMT supports Samba (SMB), File Transfer Protocol
(FTP), and Network File System (NFS) shares.
This setup screen allows you to congure the various media ser vers available for use on your NMT.
For more information about the settings and options available, see Media Sharing.
70
Page 71
// Popcorn Hour A-110
6.4.5 NMT Applications
This screen allows you to set your NMT device name and workgroup for use on a Samba Workgroup
as a Samba server. The Samba server allows your PC to access media or les stored on your NMT.
This screen also allows you to stop or start an application that has been installed and congured
on your NMT. Press ENTER on your remote control to stop a running application or start a stopped
application.
NMT Applications are network ser vices that can be installed onto your NMT to further extend its
functionality. The added network ser vices are such as:
UPnP AV Ser ver This functi ons as UPnP AV server to shar e your NMT media to o ther UPnP AV client s.
myiHome Serve r Allows you to acc ess media les o n your NMT over HT TP with a H TML-base d UI.
FTP S erve r File Transfer ser ver.
Samba Server Samba re mote le sharing ser ver.
NFS Ser ver NFS remote leshar ing ser ver.
Tor r en t Allows you to perform and maintain B itTorre nt downlo ads.
Usene t Client Allows you to use the Usenet downlo ading servi ce.
Casgl e iDVR Enab les you to v iew Video Podc asts on your NMT (require s HD TV )
71
Page 72

For NMT Applications installation, see NMT Applications Installation.
To set up the NMT Applications to function on your network, see Conguring the NMT
Applications.
// Popcorn Hour A-110
72
Page 73
6.4.6 DVD/Audio CD
This setup screen allows you to congure the DVD and Audio CD settings of an attached
external USB CD/DVD-ROM drive.
Options Description
Parental Control Allows you to turn the parental contro l on or of f.
Autoplay A llows you t o turn Autoplay on o r off when a CD or DVD is inserted into the external USB
CD/DVD- ROM drive .
Audio Allows yo u to sele ct the d efault languag e for your au dio outp ut fro m a DVD or CD.
Subtit le Language Allows yo u to sele ct the d efault languag e for the s ubtitl es to be di splayed when playing a
DVD movie f rom th e exte rnal DVD -ROM drive.
// Popcorn Hour A-110
73
Page 74
6.4.7 Maintenance
This setup screen allows you to view and perform maintenance of your NMT.
Options Description
Firmware Vers ion Displays your curr ent NM T rmwar e versi on.
Kernel Version Displays the cur rent NMT kerne l version.
NMT Version Displays the cur rent of your NMT Applications ve rsio n.
Check for rmware update Select this o ption to allow your N MT to check for the late st rmwa re availa ble.
Your NMT has to be connecte d to the int ernet to use this func tion.
NMT setup wizar d Selec t this option to setup your NMT whe n a new HDD is installed into your NMT. This option
will for mat your HD D to work wi th your NM T and install the requir ed NMT A pplic ations.
// Popcorn Hour A-110
if a Fresh Setup is s elec ted.
Reset to factory settin gs Resets yo ur NMT to i ts fac tor y defaul t settings.
Note: T his setu p wizard wi ll er ase a ll dat a in yo ur HD D
74
Page 75
6.4.8 Firmware and NMT Applications Update
There are two methods to update the rmware of your NMT. Choose one of the procedures below.
// Popcorn Hour A-110
perf orming a rmware update, a s doing so will damage your unit .
Online Method
Caution: Do NOT at tempt t o turn of f or re star t your NM T when the unit is
Note: Bot h the rmware and NMT Applications updates are i ncluded in the r mware up date le.
1. On your NMT, stop all torrents from uploading and downloading.
2. Stop all le copying/transferring and all network shares.
75
Note: Unpl ug all USB devices connected to your NMT.
Page 76

3. Restart the unit.
// Popcorn Hour A-110
adapte r. Wait fo r 60 secon ds befor e re conn ecting t he po wer adapte r and swit chin g the unit o n using the
On/O f f swit ch. Onc e the Med ia Source scr een app ears on your TV, the restart is c ompleted.
You may also tr y the fo llowing:
Pr ess the P ower b utt on, th en th e USB DVDRO M Eje ct button. The re d Sta ndby i ndic ator and amber P ower
indica tor will di splay while the u nit is res tar tin g. Once the Media Sou rce scr een a ppears o n your TV, the
rest art is comple ted.
Note: To rest art the unit, switch th e unit of f using t he On/Of f s witc h at the re ar panel an d unp lugging th e powe r
4. Ensure that your NMT is connected to the Internet.
5. Go to Setup > Maintenance > Update and select Check for Firmware Update.
6. Allow the unit to check for updates and perform them if there are updates available
(this may take up to a few hours depending on your Internet connection speed and bandwidth).
7. Your NMT will restar t when the update is completed.
76
Page 77

USB Method (Ofine)
To update your NMT without using the Check for Firmware Update function, follow the steps below.
// Popcorn Hour A-110
1. Using your PC and an Internet connection, download the latest rmware updates from the link below.
http://www.popcornhour.com/download/rmware_update.html
2. Once the download is complete, unzip the les into the root folder of a USB ash memory device.
Please ensure that the le usbupdate.html is present on the USB ash memory device.
3. On your NMT, stop all torrents from uploading and downloading.
4. Stop all le copying/transferring and all network shares.
77
Note: Bot h the rmware and NMT Applications updates are i ncluded in the r mware up date le.
Note: Unpl ug all USB devices connected to your NMT.
Page 78
5. Restart the unit.
// Popcorn Hour A-110
adapter. Wait f or 60 sec onds before r eco nnectin g the power adap ter a nd switch ing the uni t on us ing t he
On/O f f switch . Onc e the Media Sour ce s cre en ap pears on your T V, the r estar t is c ompl ete d.
You may also tr y the fo llowing:
Press th e Powe r but ton, then the USB DVD ROM Eject but ton. The r ed St andby indicat or an d amber Power
indic ato r will disp lay while th e unit is re start ing. O nce t he Me dia S ourc e sc ree n app ear s on your T V, the
rest art is completed.
Note: To rest art the unit, switch th e unit of f using t he On/Of f s witc h at the re ar panel an d unp lugging th e powe r
6. Plug the USB ash memory device into a USB port on your NMT. Use the Media Source screen to
select the USB ash memory device.
7. Select the Others option lter to view the contents of your USB ash memor y device.
8. Locate the le usbupdate.html and press ENTER on the remote control to select it.
9. You will see a blue or white screen with the rmware version displayed. Press ENTER again to
start the rmware update.
10. Do NOT turn off your NMT while the update is running, as it will cause your NMT to stop working.
78
Page 79

// Popcorn Hour A-110
11. Your NMT will restar t when the update is completed.
NMT Applications Update
To update or reinstall the NMT Applications on your NMT, follow the instructions below.
1. Using your PC and an Internet connection, download the latest update le from the
link below.
http://www.popcornhour.com/download/rmware_update.html
2. Once the download is complete, unzip the les into the root folder of a USB ash memory device.
Rename the le syb8634.nmt to apps.nmt.
3. On your NMT, stop all torrents from uploading and downloading.
4. Stop all le copying/transferring and all network shares.
79
Note: Unpl ug all USB devices connected to your NMT.
Page 80

5. Restart the unit.
// Popcorn Hour A-110
adapter. Wait f or 60 sec onds before r eco nnectin g the power adap ter a nd switch ing the uni t on us ing t he
On/O f f switch . Onc e the Media Sour ce s cre en ap pears on your T V, the r estar t is c ompl ete d.
You may also tr y the fo llowing:
Press the Power butto n, then th e USB DVDRO M Ejec t butt on. The r ed Stan dby indic ator an d amber Power
indic ato r will disp lay while th e unit is re start ing. O nce t he Me dia S ourc e sc ree n app ear s on your T V, the
rest art is completed.
Note: To rest art the unit, switch th e unit of f using t he On/Of f s witc h at the re ar panel an d unp lugging th e powe r
6. Plug the USB ash memory device into a USB port on your NMT.
7. On your NMT, browse to Setup > Maintenance > NMT Setup Wizard.
8. Select Typical Setup, press Next, then select USB as the setup source. Press Next to
reinstall or update the existing NMT Application on your NMT.
9. Do NOT turn off your NMT while the update is running, as it will cause your NMT to stop working.
10. Your NMT will restart when the update is completed.
80
Page 81
07
Conguring the NMT Applications
7.1 NAS (Network-Attached Storage) Functions
7.1.1 FTP Server
The FTP ser vice allows for simple and convenient le transfer to and from your NMT.
1. Connect with an FTP client, such as FileZilla.
2. Use the following settings and credentials:
Host : IP address of your NMT
Port : 21
Username : ftpuser
Password : 1234
// Popcorn Hour A-110
81
Page 82

7.1.2 SMB Server
Samba Share (SMB) is one of the most common ways to share les over a network. SMB can
be used for streaming your media les as well.
1. Connect to the NMT with the unit’s IP address or browse to the SMB host name;
for example \\PCH-A110\.
2. Use the following credentials:
Username : nmt
Password : 1234
7.1.3 NFS Shares (Network File System)
7.1.3.1 haneWIN NFS Server
For information on the haneWIN NFS Server, visit http://www.hanewin.net/
// Popcorn Hour A-110
82
Page 83

7.1.3.2 Setting up NFS Shares on Linux OS
Follow the steps below to set up a NFS share on Linux OS.
1. Congure the kernel to include the NFS le-system and server suppor t.
2. Edit the /e t c /e x p o r ts le and add the following commands as a new line:
<access path> <allowed IP address range+permissions>
For example: /home/share 192.168.0.0/24(rw)
This will share the /hom e/shar e folder to everyone in the 192 .16 8.0.x network with Read
and Write (r w) permissions.
3. Run /usr/sbin/exportfs -a to update the changes.
// Popcorn Hour A-110
83
Page 84

// Popcorn Hour A-110
7.1.4 Syabas CE-HTML Server (myiHome)
Showcasing your digital content is made simpler by having an organized media library.
The myiHome Media Server is a proprietary server software designed for your PC to ease
the sharing of your media with your NMT.
Popcorn Hour provides the myiHome software for use with your NMT, and it can be downloaded from:
http://www.popcornhour.com/download/myihome/myihome.html
Once the myiHome software is installed on your PC, it should be automatically detected by your NMT,
and added to the list on your Media Source screen.
84
Page 85
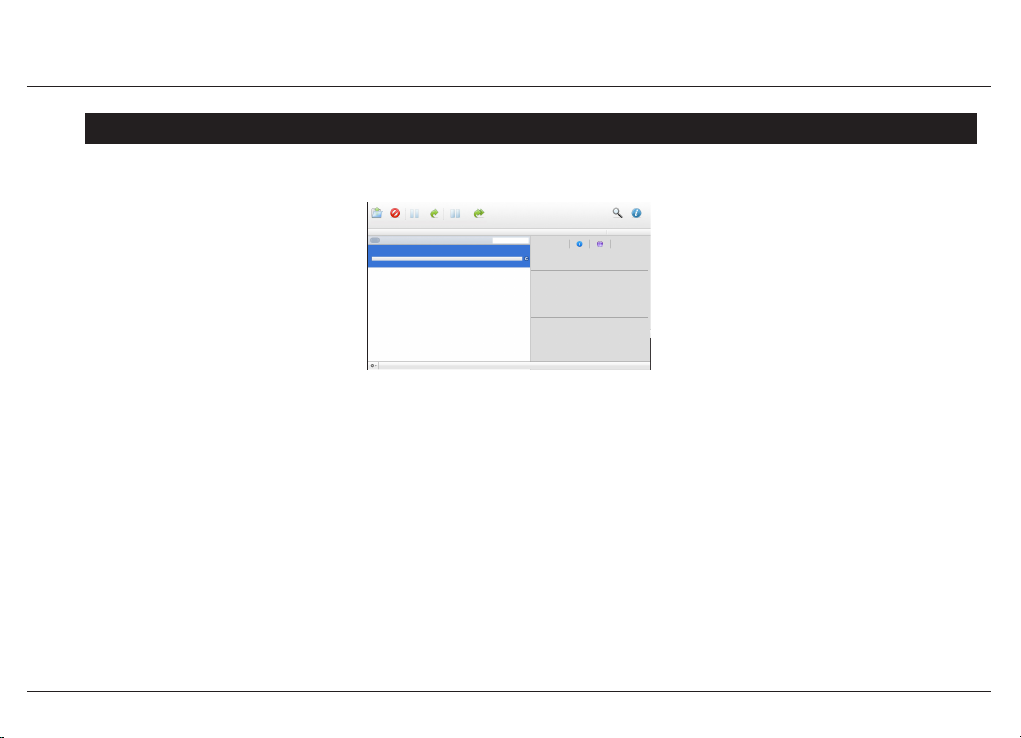
7.2 Torrents Setup
Open Remove Pause Resume Pause All Resume All Filter Inspector
1 Transfers Total DL: 0 bytes/s Total UL: 0 bytes/s
All
Downloading Seeding Paused
Video 1_h264_850x362.mkv
0 bytes of 30.8 MB (0.00%)
Pause
filter
Video 1_h264_850x362.mkv
30.8 MB
Torrent Information
Tracker: undened:undenedhttp://abc.aaauiop
Hash: ajjfjfhuv1182125gfgkfkj8455k455k5j
Secure: Public Torrent
Comment: Provided by abc
Created By
Creator: BitComet/1.0
Date: Wed, 30 April 200815:43:18 GMT
Free Space: 2.05 GB (90.9%)
To setup your NMT to perform BitTorrent downloads, you must rst have the NMT Applications
installed on your NMT. The supplied BitTorrent client is accessible using your PC connected to
the NMT via network. Follow the steps below to access the BitTorrent client:
1. On your PC, use a web browser to access the BitTorrent client on the NMT. Type the following
address in the URL address bar of the web browser:
http://NMT-IP:8883/torrent/bt.cgi
(where NMT-IP is the IP address of your NMT on your network, for example 192.168.2.2.)
// Popcorn Hour A-110
85
Page 86

// Popcorn Hour A-110
2. At the BitTorrent client GUI, click on Browse and select the torrent le that you have downloaded
to your PC earlier.
3. Once the torrent le is selected, click on Upload to add the torrent le to the torrent list on your
NMT. The BitTorrent client will start the torrent download if the Torrent option on your NMT is
enabled.
4. Other functions available such as the Scheduler can be used to schedule torrent downloads and
set their upload/download limits, or the Setting screen to customize the BitTorrent client.
downloa d time in or der for the Bit Torrent c lient to d ownload the req uired les.
86
Note: T he NMT ha s to be swit che d ON an d proper ly conne cte d to the Int ernet dur ing t he sc hed uled
Page 87

// Popcorn Hour A-110
7.2.1 Enable/Disable BitTorrent Downloading
The BitTorrent client runs as a ser vice on the NMT and installed together with the NMT Applications
package.
To enable or disable the BitTorrent service, follow the steps below:
1. Go to Setup > NMT Applications.
2. In the list of installed NMT Applications, locate the Torrent application and notice its status.
3. If the status is labeled Start, it means that the BitTorrent client is currently disabled.
Select Start to enable it or Stop to disable the BitTorrent client.
87
Page 88
7.3 Usenet Client Setup: NZBGet
NZBGet is a command-line based binary newsgrabber that downloads les from Usenet servers
based on information given in NZB les. NZBGet can be installed on the NMT and the les can
be downloaded straight into the NMT.
To run the NZBGet application you need access to a Usenet provider. Your ISP may have a news
server that you can access, or you can have a separate Usenet account on a pay-server. Usenet
accounts vary in prices from a few dollars up to $35 a month depending on your needs. There are
many Usenet servers to choose from, and here is a list provided by Google:
http://www.google.co.uk/search?q=usenet+provider+comparison
Once you have a Usenet account, you can congure NZBGet on your NMT to access the account.
Your Usenet provider will provide you with the information required, such as:
1. User ID and Password.
2. News-ser ver name and port to connect (usually at port 119).
3. Number of concurrent connections allowed.
// Popcorn Hour A-110
88
Page 89

7.3.1 Setting up the NZBGet on the NMT
In the root of your hard disk you will nd a folder called .nzbget. Inside this folder you will
nd two les: nzbget.conf and unpak.sh.
Note: Some F TP clients may hide this folder because it begins with a dot .. On UNIX
systems, les or folder s that begin with a dot are hidden from normal directory
listings. If you cannot see the folder, nd an option on your client that will show
hidden les or try to type in the folder name.
You can open and edit nzbget.conf with a text editor.
Note: To edit the nzbget.conf le, use a UNIX-format capable text editor.
In the text editor, ll in the information you got from your Usenet provider:
# Host-name of news ser ver:
server1.host=news.yourserver.com
(Put the server name behind the = )
// Popcorn Hour A-110
89
Page 90

# Port to connect to
(default should be set to 119 if not specied):
server1.port=119
# Username to use for authentication
(change USERNAME to the name supplied by your Usenet provider):
server1.username=USERNAME
# Password to use for authentication
(change PASSWORD to the password supplied by your Usenet provider):
server1.password=PASSWORD
# Maximum number of simultaneous connections to this server:
server1.connections=4
Once completed, save the le to the same place and restart the Usenet service in the NMT
Applications menu (Setup > NMT Applications).
// Popcorn Hour A-110
90
Page 91
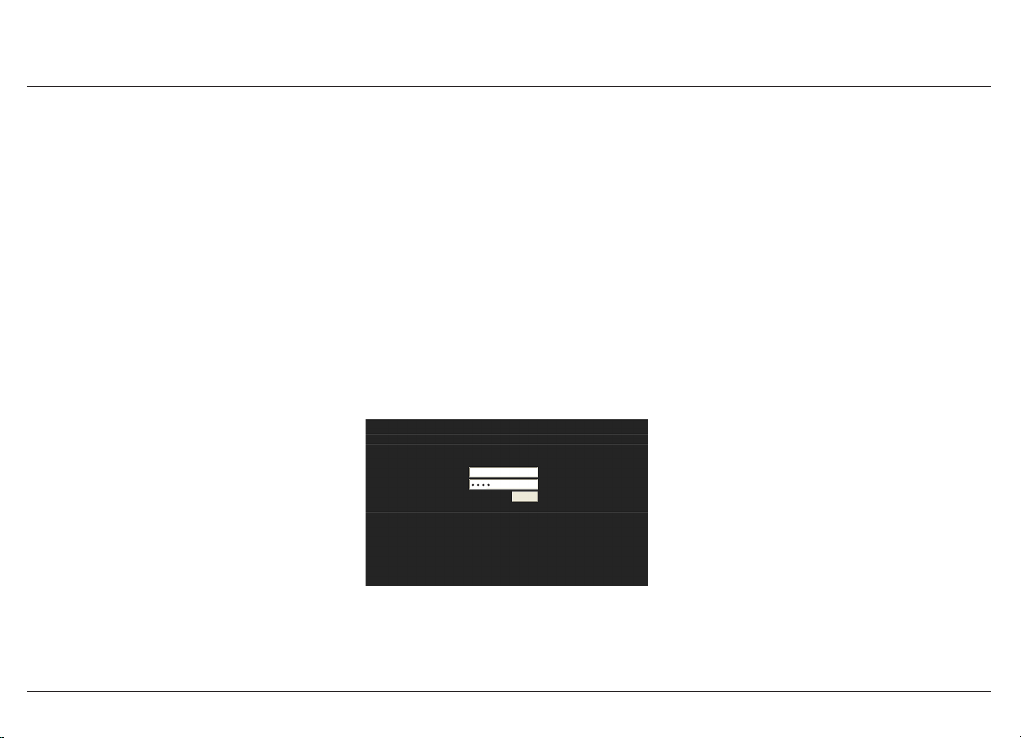
7.3.2 Usenet: Working with NZBGet
Working with NZBget is simple and quick. Connect to the NZBGet web GUI from a browser
via http://ip.of.your.nmt:8066.
Note: If the IP address of your NMT is 192.168.1.100, t ype
http://192.168.1.100:8066 in the address bar of your web browser.
To log in, use the following access username and password:
User ID : nmt
Password : 1234
NZBGet Web Interface
Please login
nmt
Username:
Password:
Login
// Popcorn Hour A-110
91
Page 92
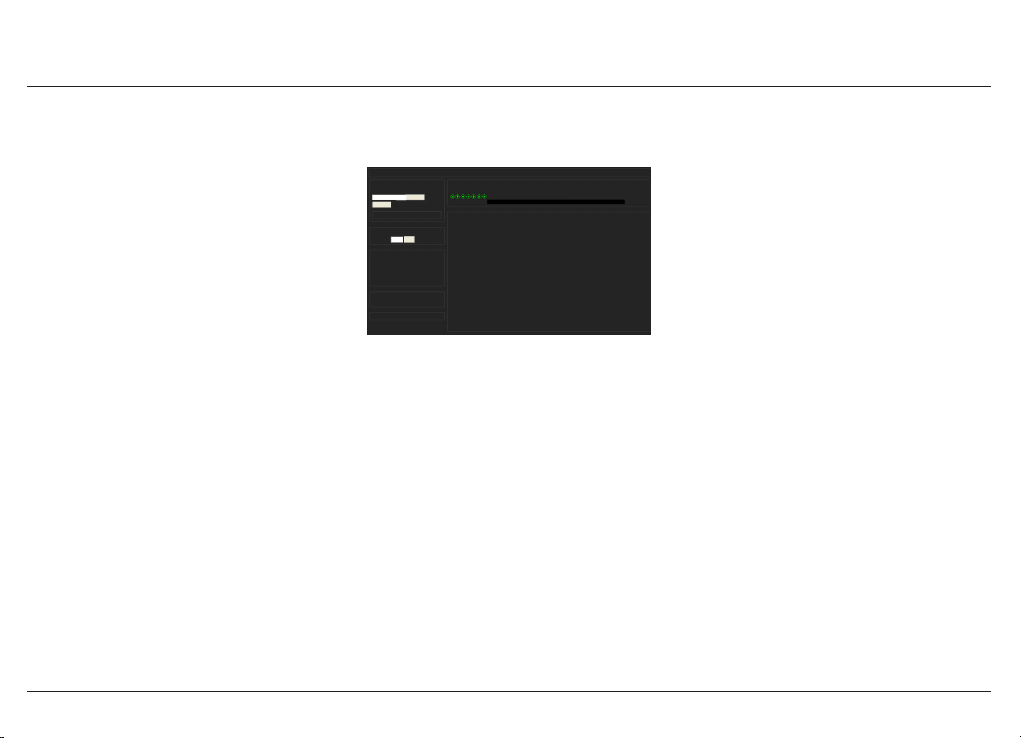
You will now see the NZBGet web GUI, as shown below:
// Popcorn Hour A-110
Upload NZB le
Choose a le to upload:
Browse...
Upload File
upload status
Max download rate
Set
0
New rate:
NZBGet version 0.4.1
uptime: 0:36:21
download time: 0:36:21
average download rate: 0KB/s
total downloaded: 0 MB
free disk space: 2.06 GB
pause resume refresh logout
view mode: groups les
Next updates in 6 seconds
NZBGet Web Interface v 1.0
Currently downloading
name download rate left remaining time
My Kids Performance Day 0KB/s 4.52 GB
DETAIL
DETAIL
DETAIL
DETAIL
DETAIL
DETAIL
DETAIL
DETAIL
DETAIL
DETAIL
DETAIL
DETAIL
DETAIL
DETAIL
DETAIL
DETAIL
DETAIL
DETAIL
2 3 4 5
1
Waiting 10 sec to retry
Waiting 10 sec to retry
Waiting 10 sec to retry
Waiting 10 sec to retry
Waiting 10 sec to retry
Waiting 10 sec to retry
Waiting 10 sec to retry
Waiting 10 sec to retry
Waiting 10 sec to retry
Waiting 10 sec to retry
Waiting 10 sec to retry
Waiting 10 sec to retry
Waiting 10 sec to retry
Waiting 10 sec to retry
Waiting 10 sec to retry
Waiting 10 sec to retry
Waiting 10 sec to retry
Waiting 10 sec to retry
Messages
0%
92
Page 93
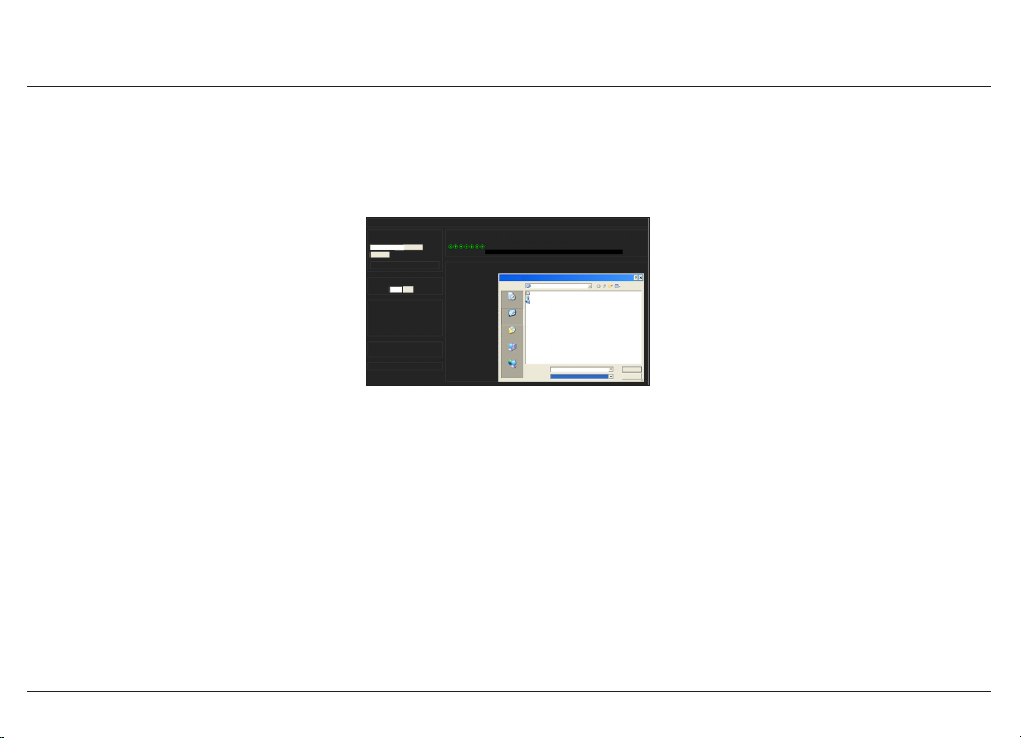
// Popcorn Hour A-110
7.3.3 Downloading
To perform a download, upload your NZB le by clicking on the Choose… button and browsing
to the NZB le, as shown below.
Upload NZB le
Choose a le to upload:
Browse...
Upload File
upload status
Max download rate
Set
0
New rate:
NZBGet version 0.4.1
uptime: 0:36:21
download time: 0:36:21
average download rate: 0KB/s
total downloaded: 0 MB
free disk space: 2.06 GB
pause resume refresh logout
view mode: groups les
Next updates in 6 seconds
NZBGet Web Interface v 1.0
Currently downloading
name download rate left remaining time
My Kids Performance Day 0KB/s 4.52 GB
File Upload
My Recent
Documents
My Documents
My Computer
My Network
Places
Messages
Look in:
Desktop
My Documents
My Computer
My Network Places
Desktop
File name:
Files of type:
All Files
DETAIL
DETAIL
DETAIL
DETAIL
DETAIL
DETAIL
DETAIL
DETAIL
DETAIL
DETAIL
DETAIL
DETAIL
DETAIL
DETAIL
DETAIL
DETAIL
DETAIL
DETAIL
1
2 3 4 5
Waiting 10 sec to retry
Waiting 10 sec to retry
Waiting 10 sec to retry
Waiting 10 sec to retry
Waiting 10 sec to retry
Waiting 10 sec to retry
Waiting 10 sec to retry
Waiting 10 sec to retry
Waiting 10 sec to retry
Waiting 10 sec to retry
Waiting 10 sec to retry
Waiting 10 sec to retry
Waiting 10 sec to retry
Waiting 10 sec to retry
Waiting 10 sec to retry
Waiting 10 sec to retry
Waiting 10 sec to retry
Waiting 10 sec to retry
0%
Open
Cancel
Next, click the Upload File button and begin the download.
The le will be uploaded to your NMT and added to download queue.
(This process does not upload any les to the Internet).
After uploading the NZB le, it will take a minute before the program commences the download.
There is a safety interval of 1 minute to allow NZBGet to ensure that the NZB le is completely
on the HDD before commencing the download. You may adjust the safet y inter val in nzbget.conf,
option NzbDirFileAge. The progress of the download is displayed on the web GUI for your
convenience.
93
Page 94

// Popcorn Hour A-110
After a download is nished and the NZB le set contains par2 les, your download will be checked
and repaired if necessary. The unpack script in .nzbget will be called and your download will be
unpacked. The unpack script of the NMT is able to unpack .R AR packed les and also unpack .RAR
les nested inside of .RAR packs.
With the GUI you will be able to pause, delete, and move your downloads. You may set the le
download priority of important le by moving them to the top of the queue with the buttons in
front of the le set.
If you want to pause all downloads, you can do that via the pause button on the bottom left of
the web GUI, and restart it again with the resume button.
All downloads will be downloaded and unpacked to the folder Download on your NMT’s HDD and
will be in a folder that has the same name as the NZB le you uploaded, so be sure to give your
NZB les descriptive names to ease identication.
For more information and download optimization tips, kindly refer to:
http://www.networkedmediatank.com/wiki/index.php/Nzbget
94
Page 95

08
Troubleshooting
8.1 Frequently Asked Questions (FAQs)
This collection of frequently asked questions (FAQs) provides brief answers to many common
questions about the Popcorn Hour A-110 NMT.
Q1: Why are there scratches on the front panel of my Popcorn Hour A-110 NMT?
The front panel of your NMT comes factory-tted with a protective plastic wrap. Peel off the thin
transparent plastic wrap from front panel to remove the scratched plastic wrap (the top panel of
your NMT may have to be removed to get to the plastic wrap).
Q2: Why can’t I playback my DVD .iso le using myiHome?
myihome does not support DVD playback. Please use the SMB/NFS functions for DVD .iso playback.
Q3: My Popcorn Hour A-110 NMT will not start after resetting it using the factory default
settings function.
The factory default setting function will reset your video display to the Auto mode, which may not
be compatible with your T V or projector. Refer to Video Mode Options to change your display
mode to suit your TV or projector.
// Popcorn Hour A-110
95
Page 96

// Popcorn Hour A-110
Q4: There is no display or video output after waking up the Popcorn Hour A-110 NMT
from Standby mode.
This is because the Video output mode has been changed using the TV MODE key and the settings
were not saved. Go to Setup > Audio/Video to congure the Video Output mode again and save
the settings using the SAVE button.
Q5: (HDMI Mode) During initial setup, no display or video signal detected.
1. Disconnect the HDMI connection and connect your NMT to your T V using a Composite Video
connection
2. Restar t the NMT and wait for the loading screen to appear
3. Wait until the screen goes blank
4. Press TV MODE -> 1 for NTSC or TV MODE -> 2 for PAL on your remote control to force a
video output mode.
5. Once the menu screen is visible, go to Setup > Audio/Video and set up the proper HDMI
output mode for your TV and then SAVE the selec tion.
96
Page 97

// Popcorn Hour A-110
6. Remove the Composite Video connections and reconnect the HDMI connectors to the NMT and
your TV.
7. Restart the NMT.
Q6: Can I plug in an external CD/DVD-ROM drive?
Yes, the USB port can support an external CD/DVD-ROM drive. However, the NMT does not support
CSS encryption. Your DVD must region-free and encryption-free in order to use the CD/DVD-ROM
drive function.
Q7: Where can I download/update the rmware for my Popcorn Hour A-110 NMT?
See Firmware and NMT Applications Update for instructions and more information.
Q8: Help, my video les are not playing. Is this a bug or a faulty Popcorn Hour A-110 NMT?
Not all codec and encoding formats are compatible with your NMT. See Supported Audio/Video
Formats or go to MediaInfo (http://mediainfo.sourceforge.net/) for more information.
For further help and information regarding video playback, kindly refer to our forum at
http://www.networkedmediatank.com for advice.
97
Page 98

// Popcorn Hour A-110
Q9: Why won’t the video subtitles appear?
Ensure that the subtitles are in a supported format •
The subtitle le must be in the same folder as the video le•
The name of the subtitle le must be the same as the name of the movie •
(except for the le format extension).
The Subtitle Language (• Setup > Preferences > Subtitle Language) must not be set to
None, as this will disable all subtitles. Remember to save the setting when done.
Q10: How do I back up my DVD so that it can be played back by the Popcorn Hour A-110 NMT ?
The DVD has to be saved into the .iso format. DVD .iso playback is only supported via NFS/SMB
network connection (it will not work with myiHome). In case of poor quality playback in SMB, use
NFS to share the le.
98
Page 99

// Popcorn Hour A-110
Q11: How do I recover the Popcorn Hour A-110 NMT from a failed rmware update with
the fail-safe kernel?
To recover the NMT if the rmware update fails and the NMT is no longer responding, visit the
following link for the latest methods and required les. (PC with internet connection required)
http://support.popcornhour.com/article.aspx?id=1053
Q12: What are the hard disk drives (HDDs) that are compatible with the Popcorn Hour
A-110 NMT?
For an updated list of compatible HDDs, please refer to:
http://www.networkedmediatank.com/wiki/index.php/HDD_Compatability
Q13: How do I x the EXT2/EXT3 lesystem in the Popcorn Hour A-110 NMT if it is corrupted?
1. Download the tools from http://les.syabas.com/networkedmediatank/scan_package.zip
and unzip them into the root folder of a USB ash storage device.
99
Note: This method is only applicable for the Popcorn Hour A-110 NMT.
Page 100

// Popcorn Hour A-110
2. Select the USB ash storage device as the Media Source and browse to the Others media lter.
Select the scandisk.html.
3. Select the Disable NMT option.
4. Then click on the Scan NMT Partition option to scan the HDD partition for damaged sectors.
Restar t the NMT when the scanning has been completed.
5. Browse to the Others media lter again and select Enable NMT.
6. Restar t the NMT and test the options or services that were affected.
7. If the problem persists, reinstall the NMT Applications or repeat steps 3 to 6 with the
Scan Content Partition option selected.
100
 Loading...