

NETOP TeachPad Quick Manual
TEACHPAD QUICK GUIDE
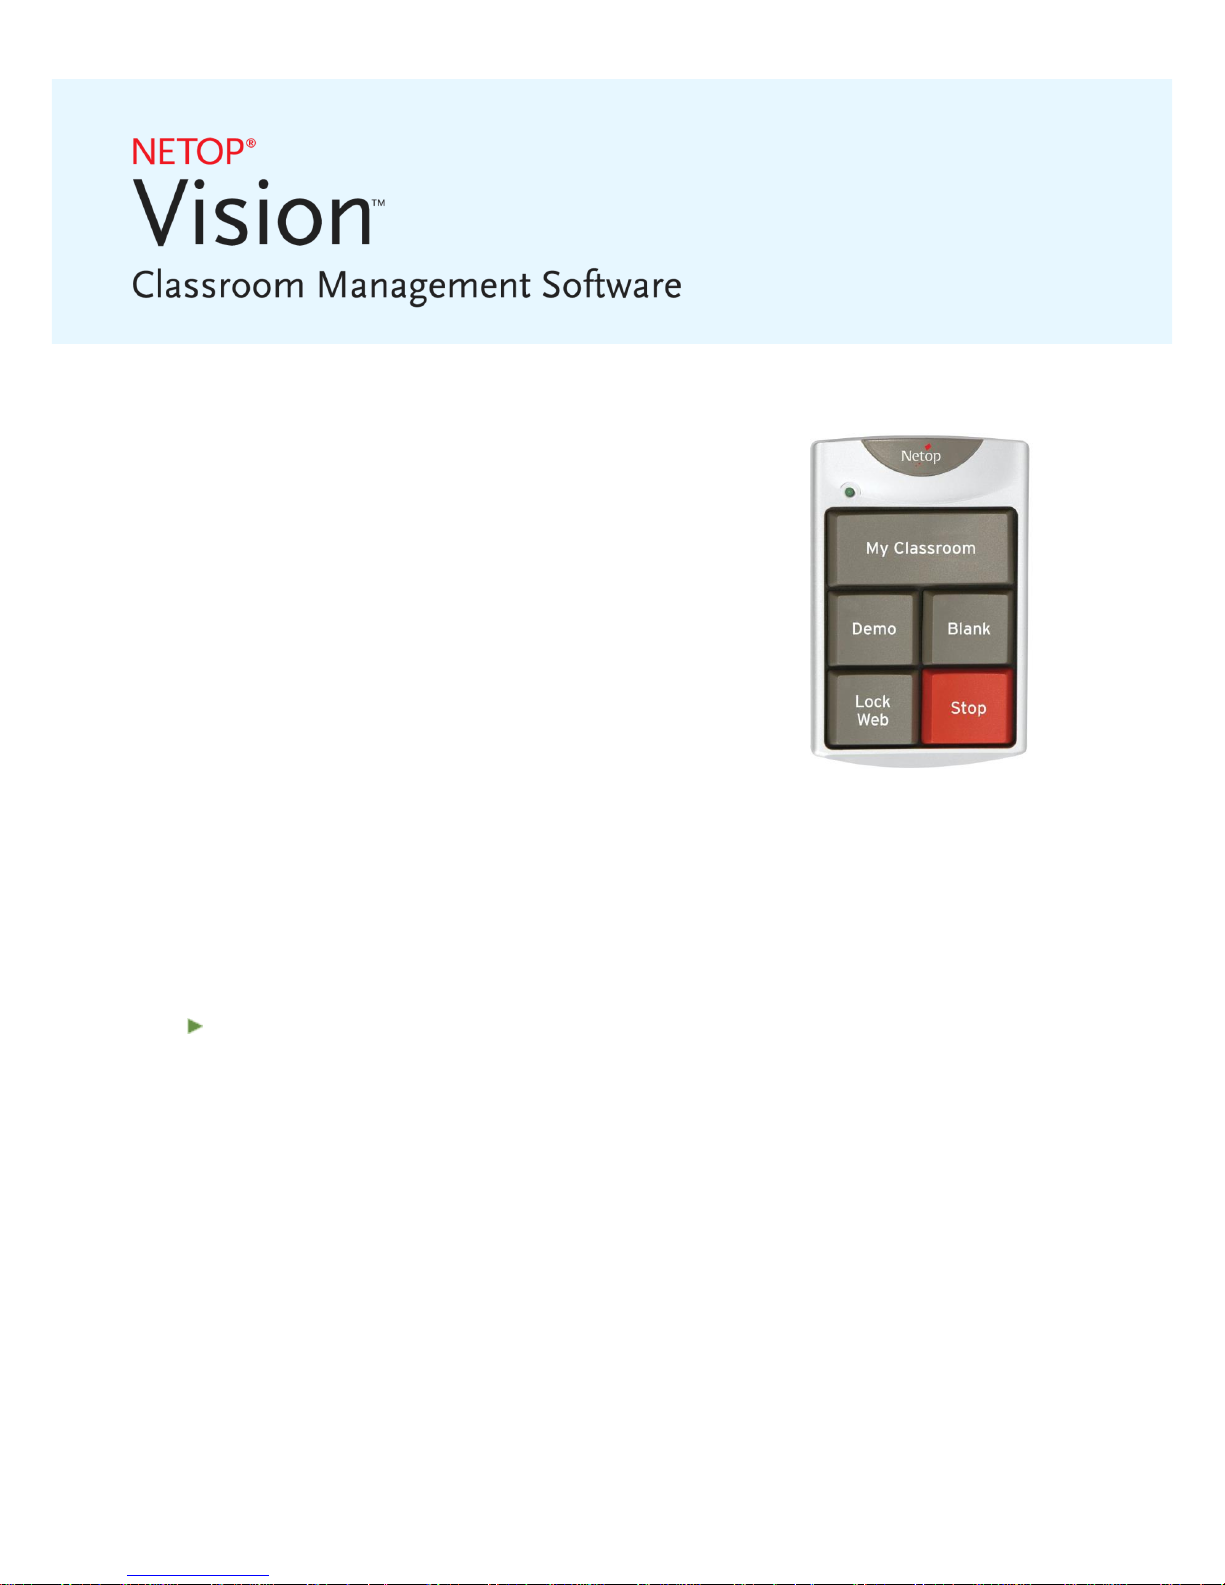
The Netop TeachPad is a hardware accessory that plugs into
the USB port on the teacher’s Mac and performs the basic
functions of Vision classroom management in any classroom
where Vision 9.3 or higher is installed.
Before plugging the TeachPad into the teacher’s Mac, Vision
classroom management software must be installed on both
the teacher’s computer and the student computers in the
classroom. You also must have a classroom set up in Vision
so the TeachPad knows which computers to interact with. If
you have not set up a classroom, refer to the Netop Vison
User’s Guide for Mac or the product help.
Once Vision has been installed successfully, simply connect the USB plug to the teacher’s
Mac.
Using the Vision TeachPad
If you have used Vision in your classroom, the functions of the TeachPad will be familiar
to you as each of the keys on the TeachPad matches a button in the teacher module.
Using the TeachPad adds to your flexibility and mobility in that you do not have to sit
down at your Mac and perform precise mouse-click.
Note that when you press a key on the TeachPad the function that you have selected
will apply to ALL of the student computers in your classroom.
Netop develops and sells software solutions that enable swift, secure and seamless
transfer of video, screens, sounds and data between two or more computers over the
Internet. For more information, see www.netop.com.
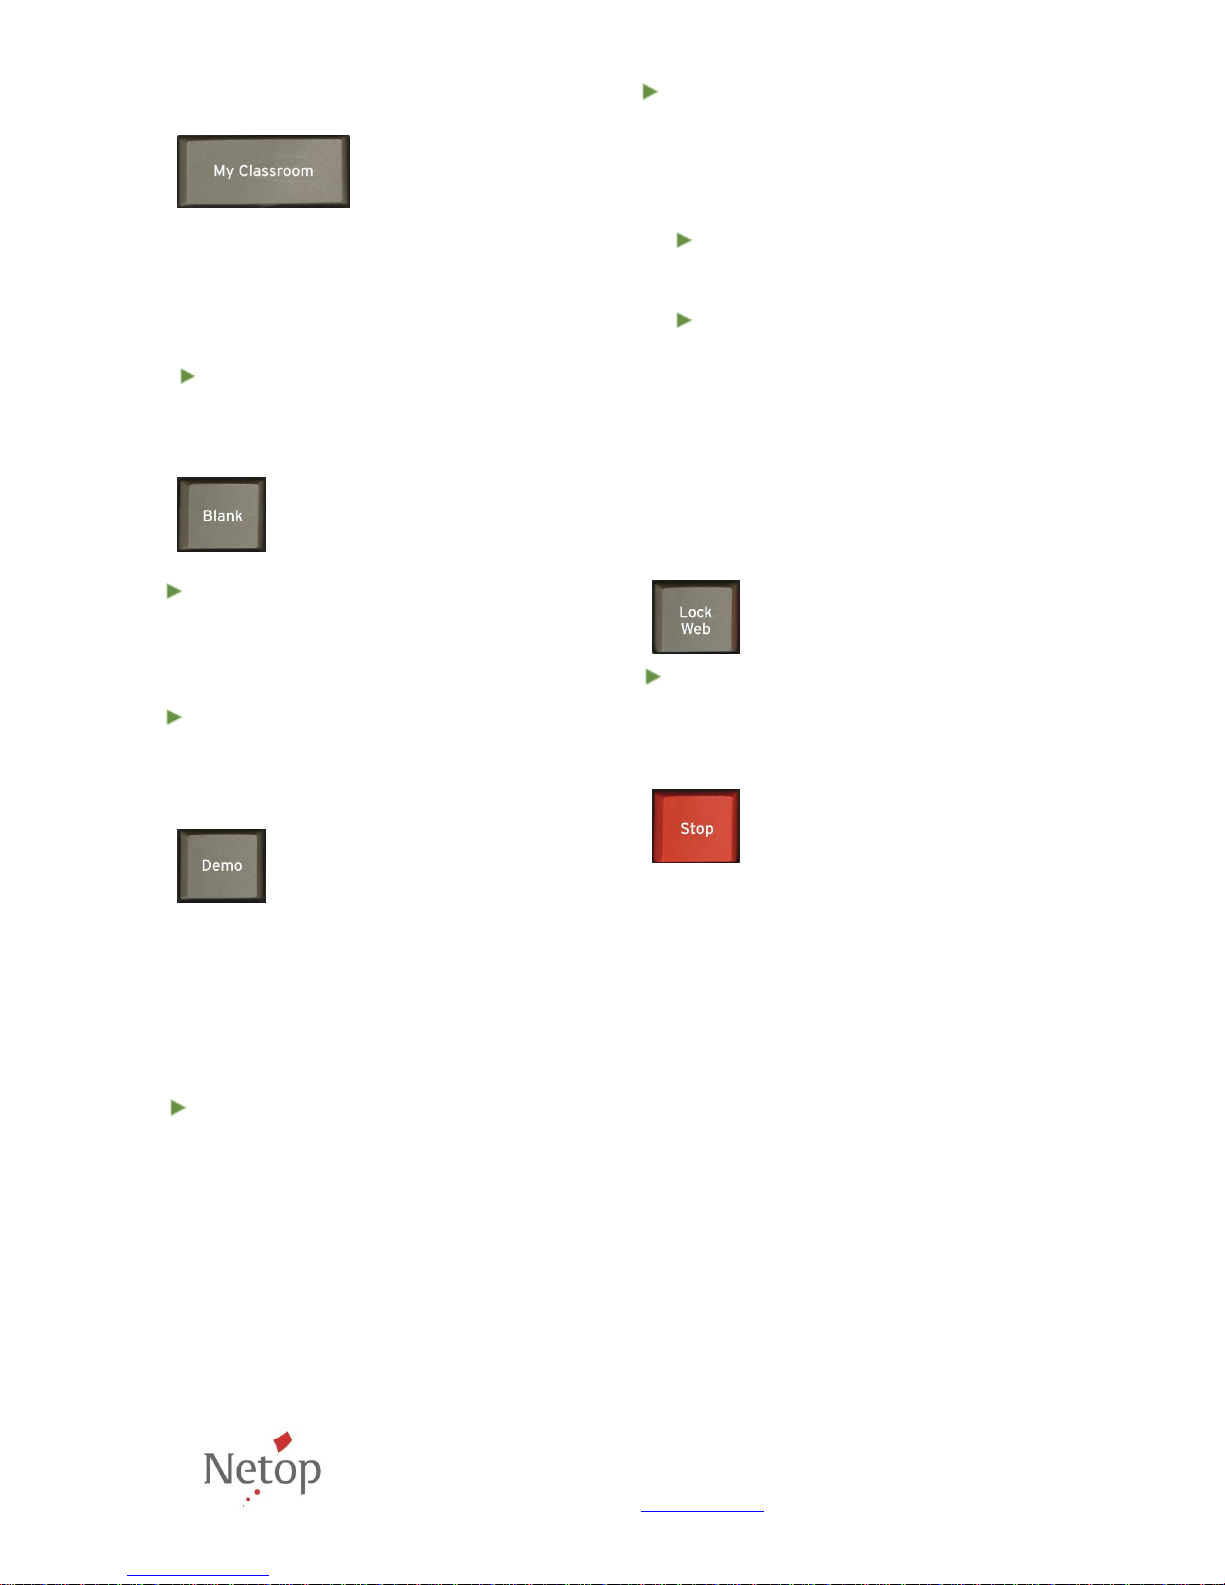
My Classroom
Press this button
when you want to
supervise the student
computers in your
classroom.
This will give you an updated thumbnail view
of all of the student computers so you can
instantly see computer activity for the entire
class.
Vision must have recognized and
connected to your classroom computers
to use this button.
Blank
Press the Blank button to
blank the student screens in
your classroom and lock the
keyboards and mice.
Blanking the student screens and locking
the keyboards and mice at the beginning
of class will get your students attention
so you can talk to the class without
distractions.
Press the Blank button a second time or
the Stop button to release the student
screens.
Demo
Use the Demo button to
share your screen with the
entire class.
Engage student attention by showing your
lesson and materials on their own computer
screens.
If you have not changed any Vision settings,
your demonstration will run in Full Screen
mode, which locks the keyboards and mice
on the student computers.
Press the Demo button a second time or
the Stop button when you are done with
your demonstration. Otherwise the students
will be able view your computer screen when
you have moved on to other tasks.
There are two modes that you can use when
you are giving a demonstration of your screen
to your students. If you would like to change
the active mode, just use the buttons in the
Vision toolbar on your desktop to switch
modes:
Full Screen mode. This is the default
setting in Vision and it locks the student
keyboards and mice.
Windowed mode. This mode shows
your screen in a window on the student
computer.
It does not lock the keyboards and
mice, so students can use your screen
as a reference while they work on their
assignment.
Lock Web
The Lock Web button will
disable web surfing for the
entire class.
Press the Lock Web button a second time
or press the Stop button to release the
students from surfing restrictions.
Stop
Press the Stop key to end all
the active features in the class
This will stop sharing your screen with the
class and return control of the student
computers back to the students. The Stop key
will also release student computers from the
Blank and Lock Web commands, releasing
their screens and unlocking their keyboards
and mice.
 Loading...