

Page 1
Safety Information
L
E
D
>All electrical work must be undertaken by
a qualied contractor to ensure compliance
with latest edition BS 7671 and IEE/IET wiring
regulations.
> Before installing an LED Slimline Flood Light or
doing any maintenance, ensure power supply is
turned off at the circuit breaker or fuse box.
> This product is designed for permanent
connection to xed wiring; the circuit should be
protected with the appropriate MCB or fuse.
Environment
> Please DO NOT dispose of electrical items or
packaging as unsorted waste. Use the recycling
facilities provided by your local authorities.
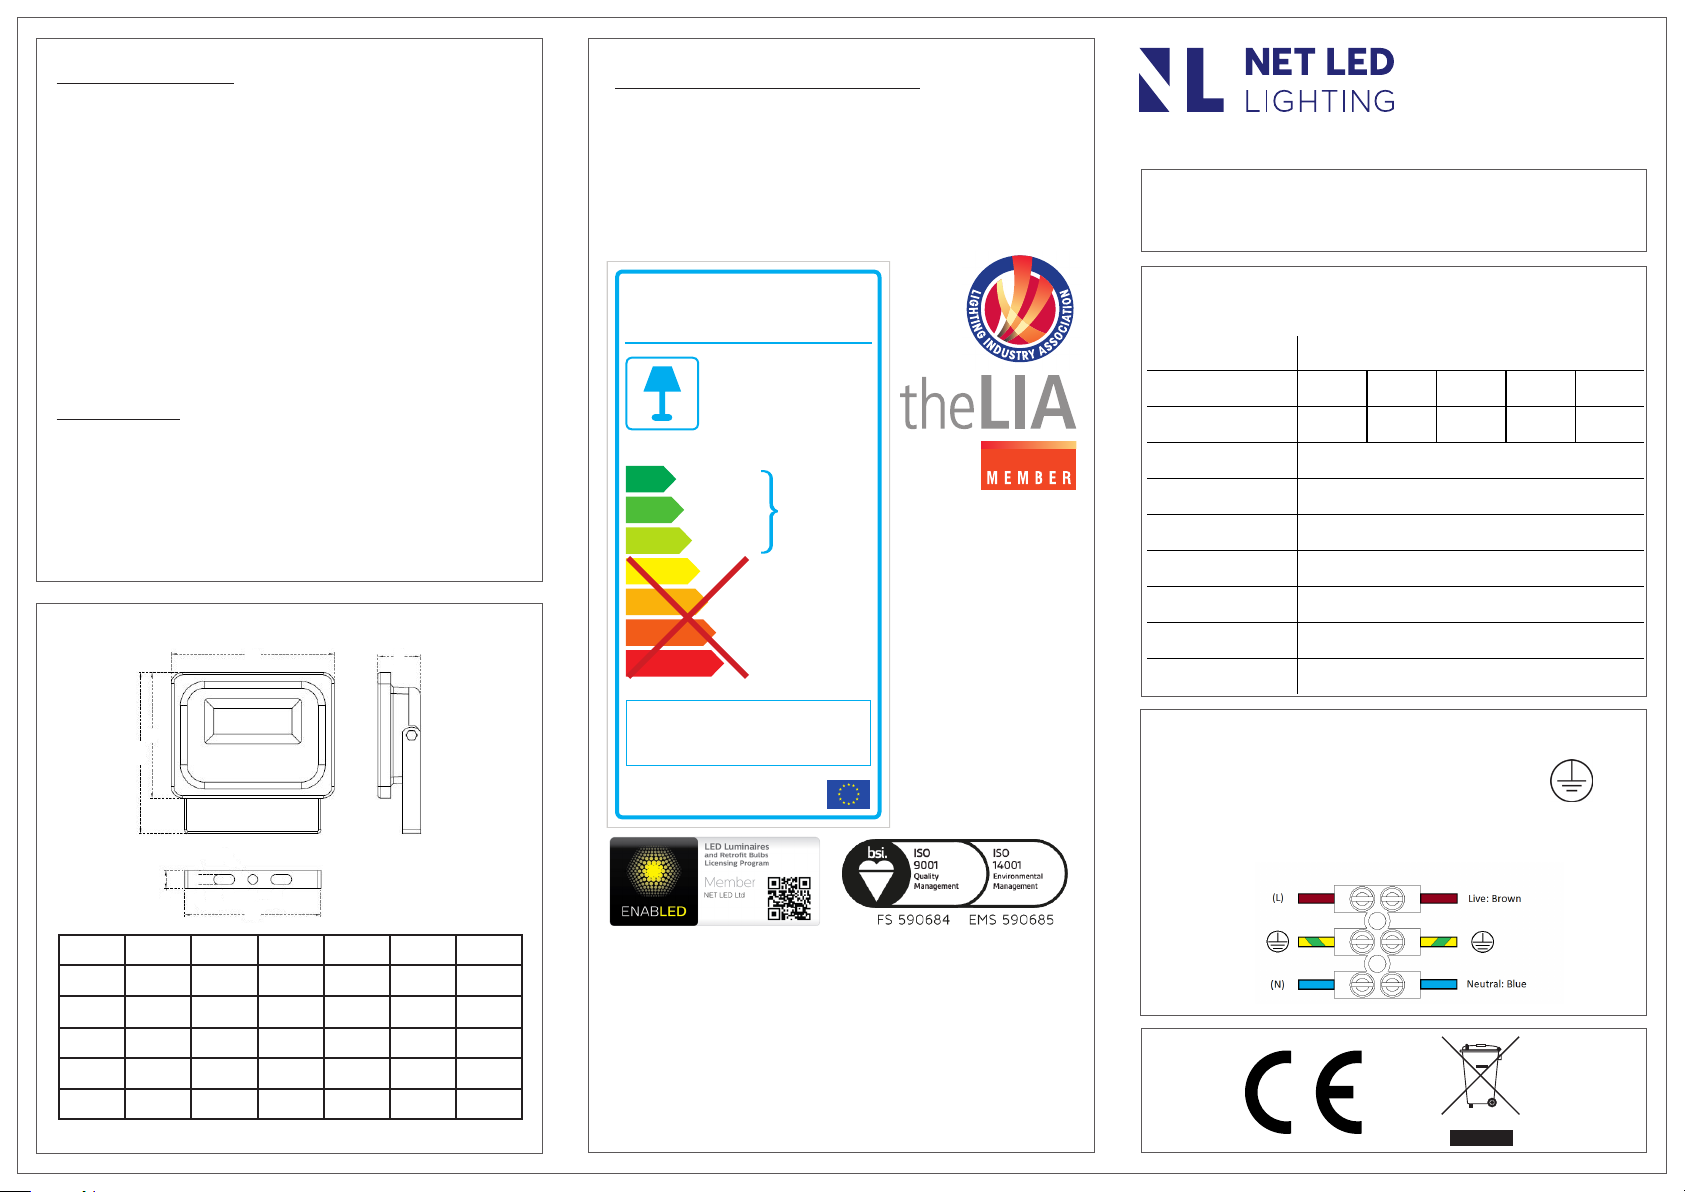
PRODUCT DIMENSIONS
A
D
Important Warranty Information
The LED Slimline Flood Light has a 3 year
warranty. To claim, you must provide the product
part number and date of manufacture, which can
be found on the label attached to the luminaire
housing along with the original purchase invoice.
Manufactured in China by
Manufactured
Leyond Lighting Co. Ltd.
in China By
NET-15-04-XX
++
A
+
A
A
NET-11-11-05
This luminaire
contains built-in
LED lamps.
B
C
D
E
Distributed by
®
LED SLIMLINE
FLOOD LIGHT
INSTALLATION
GUIDE
SLIMLINE FLOOD LIGHT NET-15-04-XX
KEY DATA
Light Source LED
Power 10W 30W 50W 80W 100W
Luminous Flux 990lm 3350lm 5590lm 8640lm 10860lm
Luminous Ecacy >100lm/W
Colour Temperature 6000K
Colour Rendering >75 CRI
Housing Material Aluminium
Diffuser Material Glass
IP Rating IP66
Manufac turer Leyond
10W
30W
50W
80W
100W
C
B
F
E
A B C D E F
143 140.9 110 37 120 16
186.5 169.8 144 37 166 20
220 198.3 173 43 187 19
270 244.3 220 46 237 23.5
320 292.3 240 46 290 30
All units are in mm
The lamps cannot be changed
in the luminaire.
874/2012
NET LED Ltd.
Buckingway Business Park
300 Anderson Road
Cambridge
CB24 4UQ
[email protected]
www.netled.co.uk
Technical Helpline: 01223 851505
Email: [email protected]
Drawing No: NET-15-04-SL-IG_V2
www.netled.co.uk/downloads
SUPPLY/EARTH CLASS
100-240V AC 50/60 Hz
Fig.1 Mains Input Termination
Luminaire Mains Supply
Class I
Page 2
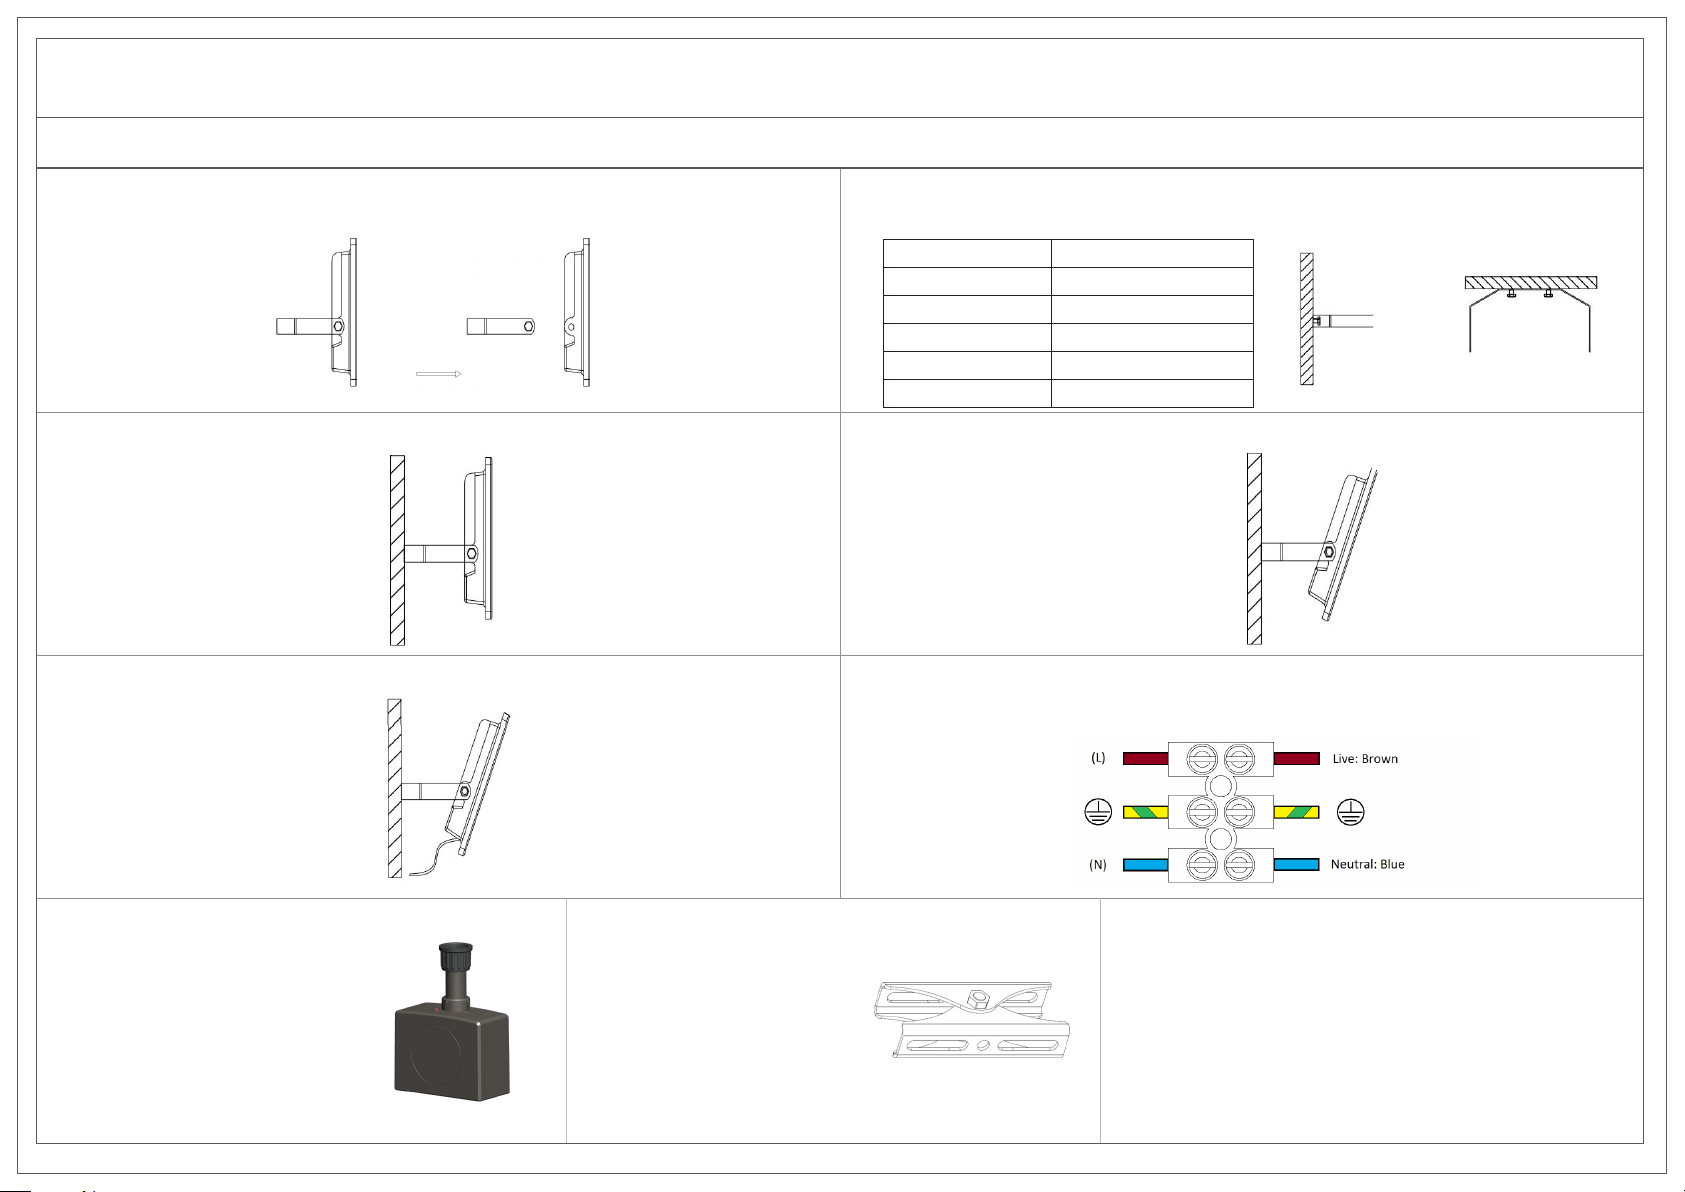
Installation procedure: Carefully read the installation instructions and ensure the mains supply is isolated before installation. Please read the safety information overleaf before carrying out any installation. Please
retain this leaet for future reference.
Flood Light Installation:
Step 1: Carefully remove the Slimline Flood Light from the packaging. Loosen the bolts on each side of the
Slimline Flood Light and remove the mounting bracket.
Step 3: Re-attach the Slimline Flood Light to the bracket. Step 4: Tilt the Slimline Flood Light to adjust it as required and tighten the bolts to lock the Slimline Flood
Step 5: Secure the supply cable to the wall using suitable clips. Ensure that the cable is not touching the
body of the Slimline Flood Light.
Step 2: Select a suitable mounting position and refer to the table below for the minimum recommended
mounting height. Drill into the mounting surface and screw the bracket onto the mounting surface using
suitable wall plugs and screws.
Power Minimum Mounting Height
10W 2m
30W 2m
50W 2m
80W 2.5m
100W
Light in position.
Step 6: Connect the cable to the mains as per the illustration below and test the LED Slimline Flood Light
for correct operation.
Luminaire Mains Supply
3m
Accessories
Motion and Photocell Sensor
Available with a motion and photocell
sensor. Ensures that the unit is switched
off during daylight hours and only
activated when motion is present.
Accessories
Bracket
Available with adjustable bracket
featuring left to right orientation.
Full product range available
Visit www.netled.co.uk for more commercial LED lighting
products, including:
Panel Lights, Downlights, T5 and T8 Tubes, Batten and Linear
Luminaires,
2D Bulkheads and retrot Gear Trays, Non-Corrosive Luminaires,
High Bays and much more.
 Loading...