

Page 1

802.11g Wireless LAN Access Point
Quick Installation Guide
The next-generation wireless LAN device – 802.11g Wireless LAN Access Point is a highspeed wireless unit that performs as a transparent Media Access Control (MAC) bridge
between wired Local Area Networks, and wireless networks. The 802.11g Wireless LAN
Access Point also provides powerful features such as the Web management, WEP security,
and more.
Package Content
802.11g Wireless LAN Access Point…….x 1 AC Power Adapter……………. .x1
Product CD…….……………….………..x 1 Quick Installation Guide……….. x1
NOTE: If any of the above items are missing or damaged, please contact your local dealer
for support.
Installing the Wireless LAN Access Point
Connect the Wireless LAN Access Point to a hub/station with a UTP Ethernet cable.
When connecting the Access Point to a PC, please use a cross-over RJ-45 cable.
Connect the power adapter to the power socket on the Access Point, and plug the
other end of the power pack into an electrical outlet.
NOTE: Use ONLY the power adapter supplied with the Wireless LAN Access Point.
Otherwise, the product may be damaged.
NOTE: The button, labeled “DEFAULT” on the back panel of the Access Point, enables
you to retrieve the Access Point’s default setting. This is used when you forget the
password. Please detach the DC power plug and press the “DEFAULT” button on the
back panel of the Access Point. Reconnect the power and keep holding the button in for a
few seconds until the “AP” LED indicator blinks. This will start the Access Point with
default settings and enable you to configure the Access Point via utility, telnet or Web
again.
1
Jan./7th/2003
Page 2
Configuring the Wireless LAN Access Point
The 802.11g Wireless LAN Access Point allows configuration either via the configuration
utility, known as Web Management, or remote access through TCP/IP (Telnet) connection.
Web Management
The built-in Web Management provides you with a set of user-friendly graphical user
interfaces (web pages) to manage your Wireless Access Point. With the assigned IP
address (e.g. http://192.168.1.1) to the Access Point, you may get access to the Access
Point Web Pages via a web browser (Netscape Navigator 3.0 ~ 4.5 or MS Internet
Explorer 4.0 and later) to monitor and configure the Wireless LAN Access Point.
1. Open your web browser.
2. Enter the IP address of your Wireless Smart Station Adapter in the Address field (e.g.
http://192.168.1.1). You will have access to the 802.11g Wireless LAN Access Point
Web Pages of the Wireless LAN Access Point.
3. Enter the password to login to the Wireless LAN Access Point. The default password is
default. The main page will show up.
NOTE: The default password to get access to the Access Point is “default”.
The Wireless LAN Access Point main page contains five items for you to manage your
Wireless LAN Access Point.
2
Jan./7th/2003
Page 3

Parameter Description
Information
Statistics
Configuration
Upgrade
Include Access Point’s MAC address, frequency domain and
firmware version.
Monitor the Ethernet and wireless network traffic.
Set the Radio mode, IEEE802.11 parameters (ESSID, channel),
password, IP address, WEP and Access Control.
Upgrade the firmware of the Wireless LAN Access Point.
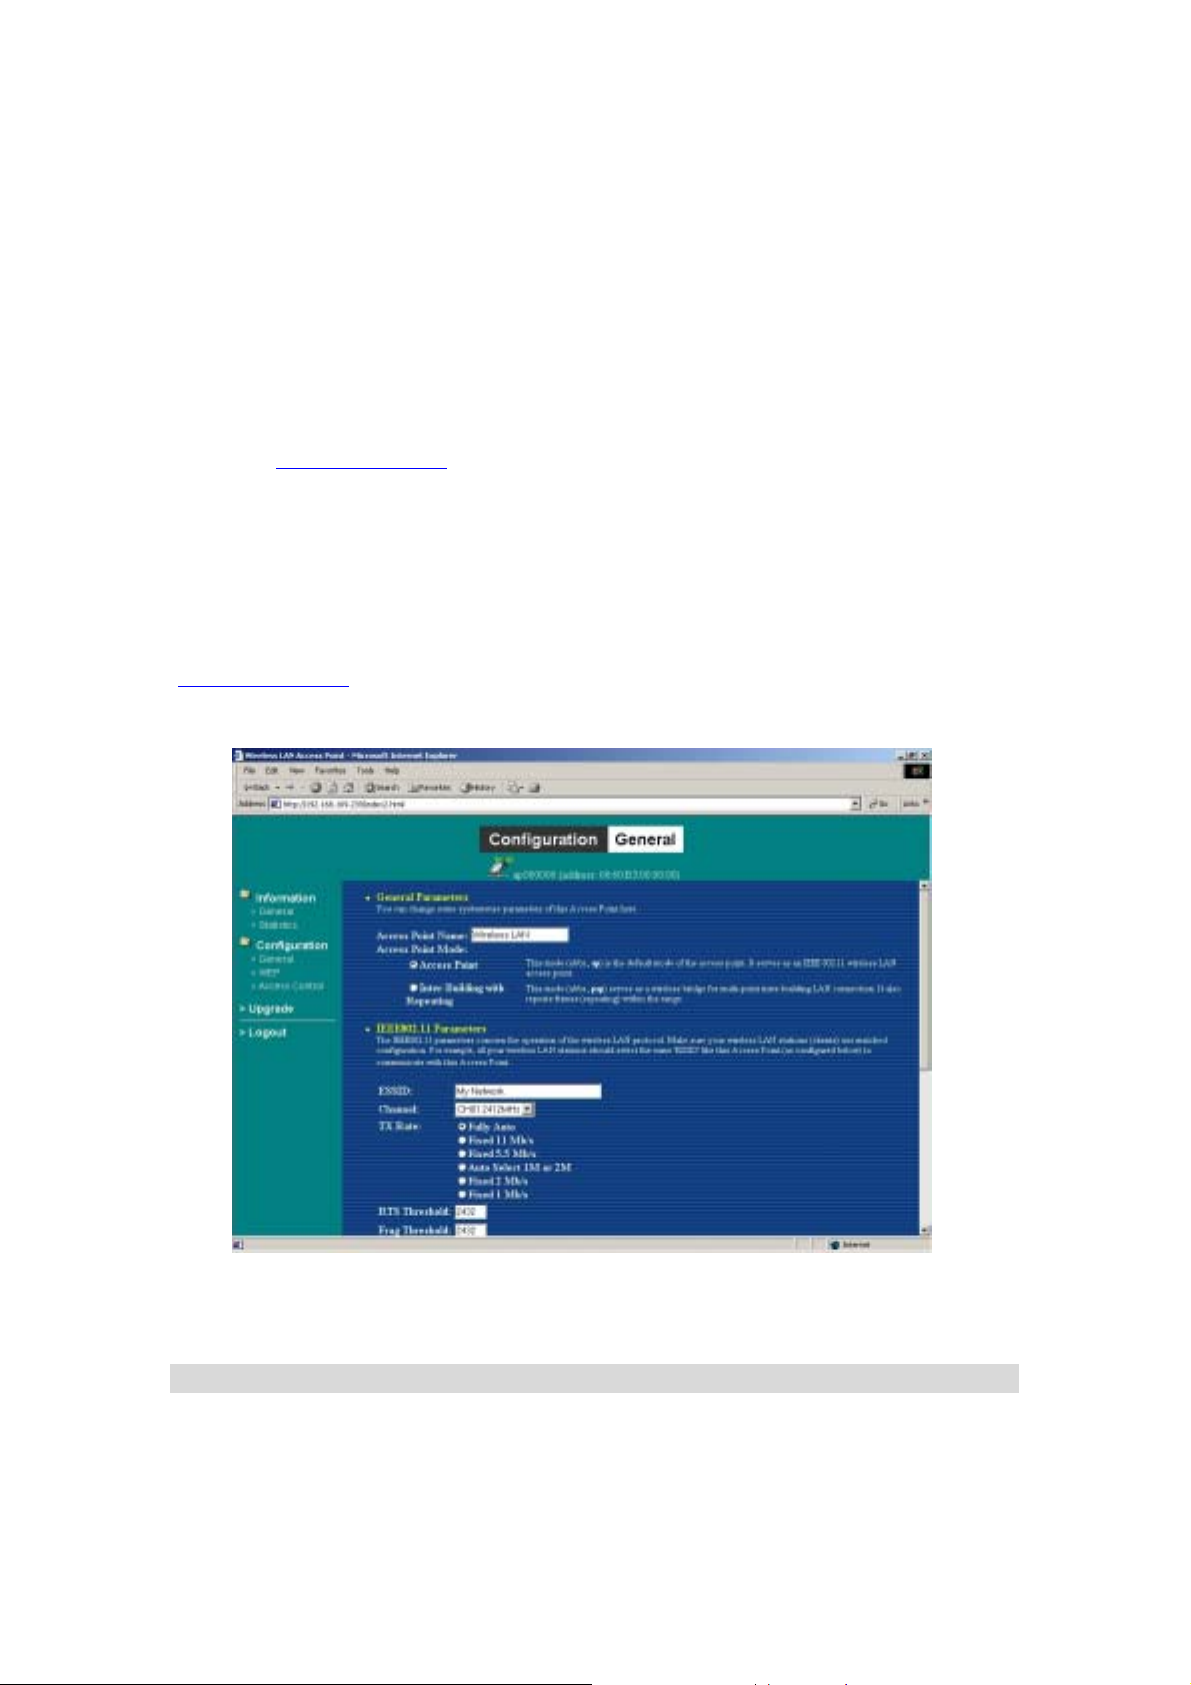
Assign Access Point Name: You may assign any name to the Access Point.
Assigning the ESSID
The ESSID is a unique ID given to the Wireless LAN Access Point. Assign an ESSID
to your Access Point (Default value: My Network). The ESSID can be up to 32
characters.
Assigning the Channel
From Configuration → IEEE802.11, select a clear channel for your Wireless LAN
Access Point. You may use the Site Survey tool came with the wireless PC Card
utility to monitor each channel and choose a channel with good quality.
Assigning IP address (optional)
Assign an IP address to your Access Point if you wish to configure the Wireless LAN
Access Point via the Web Management or Telnet. Consult your network administrator
to obtain an available IP address for your Access Point.
Using the WEP Encryption (optional)
If data transmission with high security is required on your network, it is recommended
3
Jan./7th/2003
Page 4

that the WEP encryption be used. To activate the WEP encryption, select
Configuration, go to the WEP tab, and do the following:
¾ Pull down the WEP Encryption menu and select WEP40 or WEP128.
¾ From the 4 Key entry field, enter the corresponding key value for each encryption
method.
For WEP40 data encryption:
-- 5 alphanumeric characters in the range of “a-z”, “A-Z” and “0-9” (e.g. MyKey).
-- 10 digit hexadecimal values in the range of “A-F” , “a-f” and “0-9”, preceded by
the characters “0x” values (e.g. 0x11AA22BB33).
For WEP128 data encryption:
-- 13 alphanumeric characters in the range of “a-z”, “A-Z” and “0-9” (e.g.
MyKey12345678).
-- 26 digit hexadecimal values in the range of “A-F” , “a-f” and “0-9”, preceded by
the characters “0x” values (e.g. 0x00112233445566778899AABBCC).
¾ Enter the 4 WEP keys in the Key 1, Key 2, Key 3 and Key 4 entry filed respectively.
Select one WEP key as an active key and click “Apply” to make the setting take
effect.
NOTE: The WEP key must be set up exactly the same on the Access Point as they are on
the wireless client stations. If you set “MyKey” for the Access Point, the same WEP Key
“MyKey” must be assigned to other client stations.
4
Jan./7th/2003
Page 5

Access Point Console
The Wireless LAN Access Point can be configured via the command prompt console with
Telnet (TCP/IP) connection.
z Telnet (TCP/IP) Connection: Assign an IP address to your Wireless LAN Access
Point through Access Point Utility and then telnet to the Access Point anywhere to get
access to the Access Point console. Then, you will be able to make the configuration
via the TCP/IP connection.
NOTE: The default password to get access to the Access Point is “default”.
For detailed configuration procedures under Telnet, please refer to 802.11g Wireless LAN
Access Point User’s Manual.
Technical Support
You can find the most recent software and user documentation will be updated periodically
on the supplier Web site. If you have difficulty resolving the problem while installing or
using the 802.11g Wireless LAN Access Point, please contact the supplier for support.
FCC Caution
1. The device complies with Part 15 of the FCC rules. Operation is subject to
the following two conditions:
(1)This device may not cause harmful interference.
(2)This device must accept any interference received,
including interference that may cause undesired operation.
2. FCC RF Radiation Exposure Statement: The equipment complies with
FCC RF radiation exposure limits set forth for an uncontrolled
environment. This equipment should be installed and operated with a
minimum distance of 20 centimeters between the radiator and your body.
3. This Transmitter must not be co-located or operating in conjunction with
any other antenna or transmitter.
4. Changes or modifications to this unit not expressly approved by the party
responsible for compliance could void the user authority to operate the
equipment.
5
Jan./7th/2003
 Loading...