

Page 1

Quick Start Guide
1
Page 2
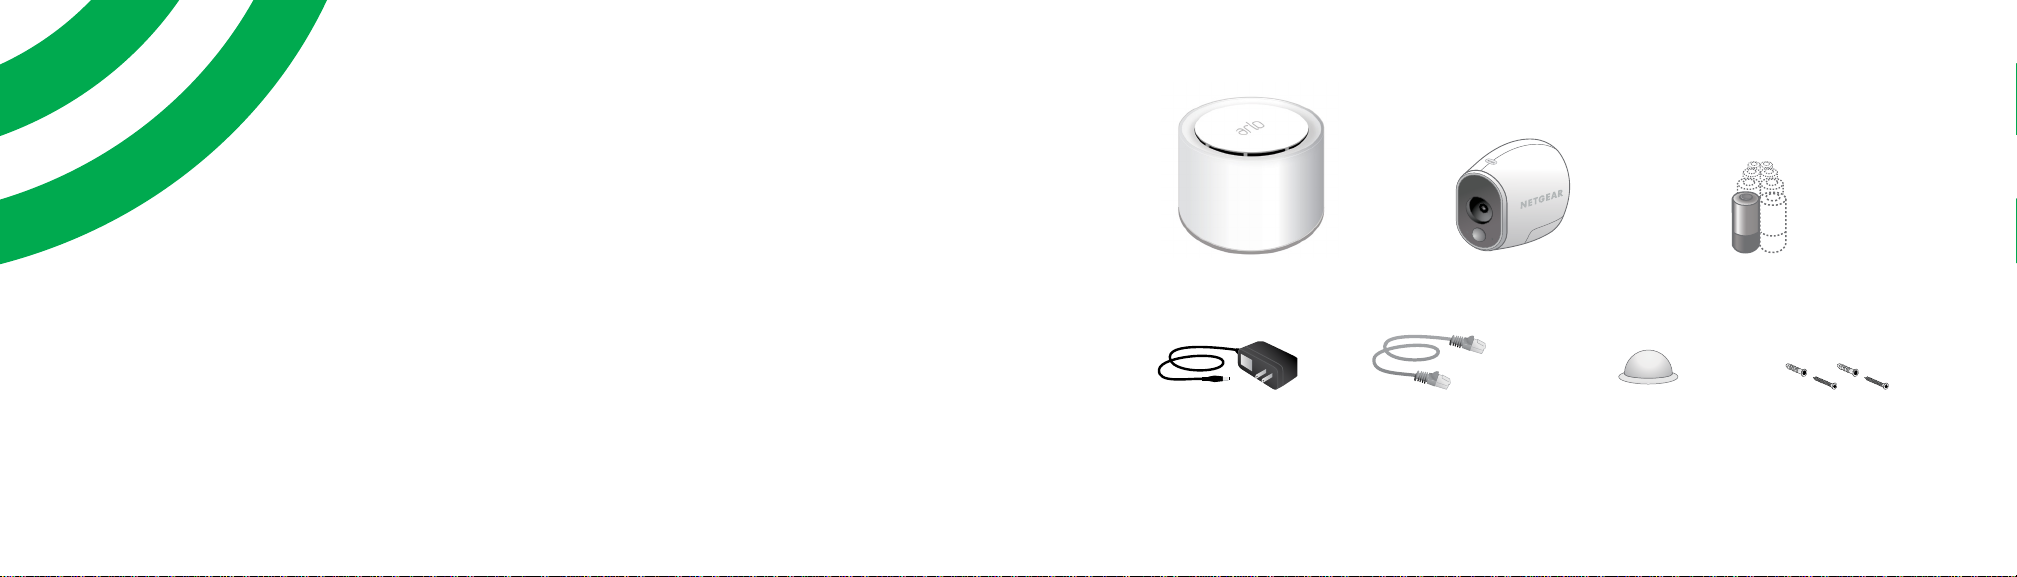
What’s Included
(VMB3500)
Welcome
Thank you for choosing Arlo.
Getting started is easy.
Base station
Base station
power adapter
* Quantity varies with number of cameras
Ethernet cable Wall mount* Mounting screws
Arlo Wire-Free
camera
Lithium CR 123 batteries*
and anchors*
32
Page 3
1
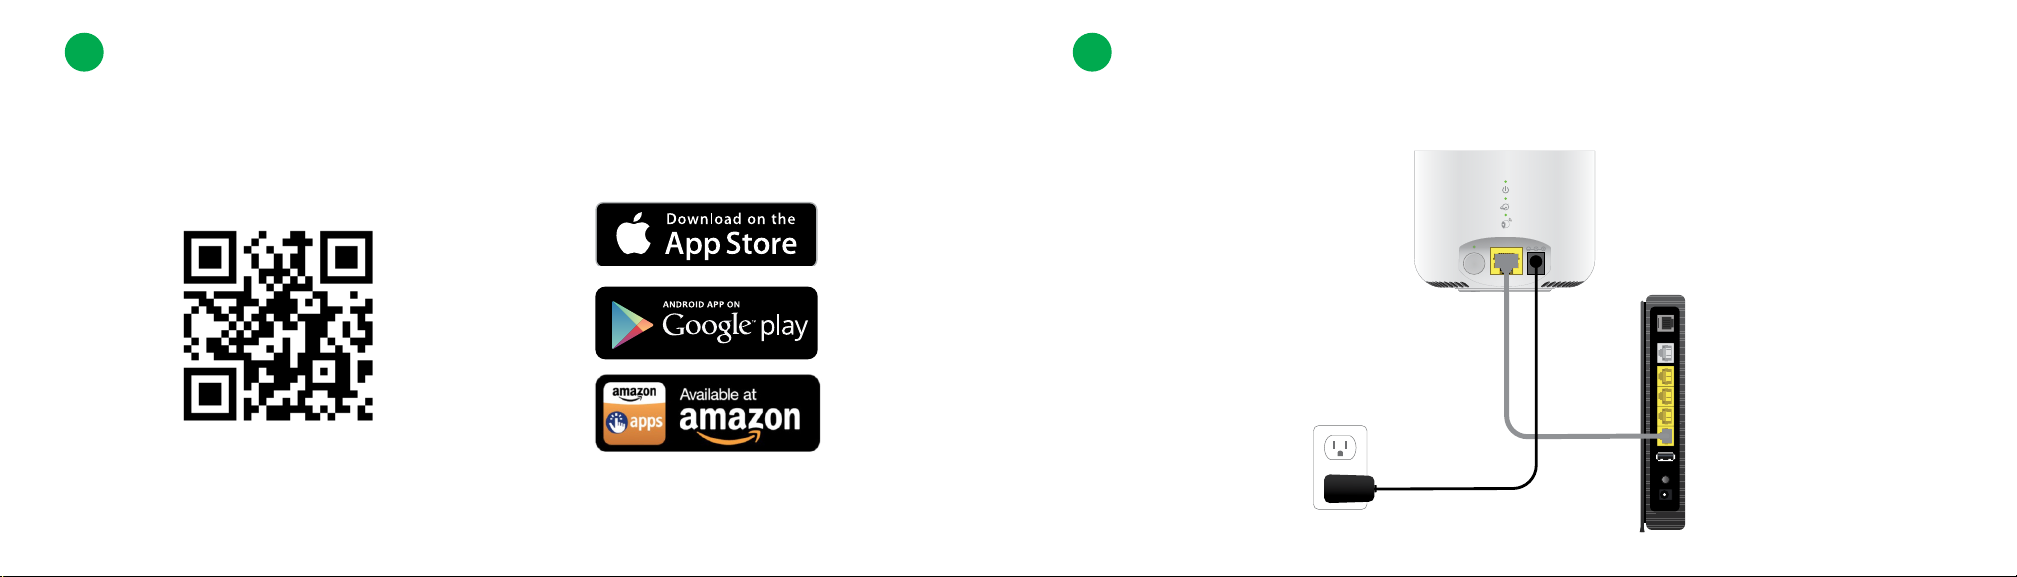
Get the App
2
Connect Your Base Station to the Internet
For the best experience, download the Arlo app for your smartphone by scanning this QR code or
searching for Arlo in the app store.
arlo.netgear.com
a. Connect the base station to your router using the Ethernet cable that is included.
Reset
SYNC
DC
Ethernet
54
Page 4
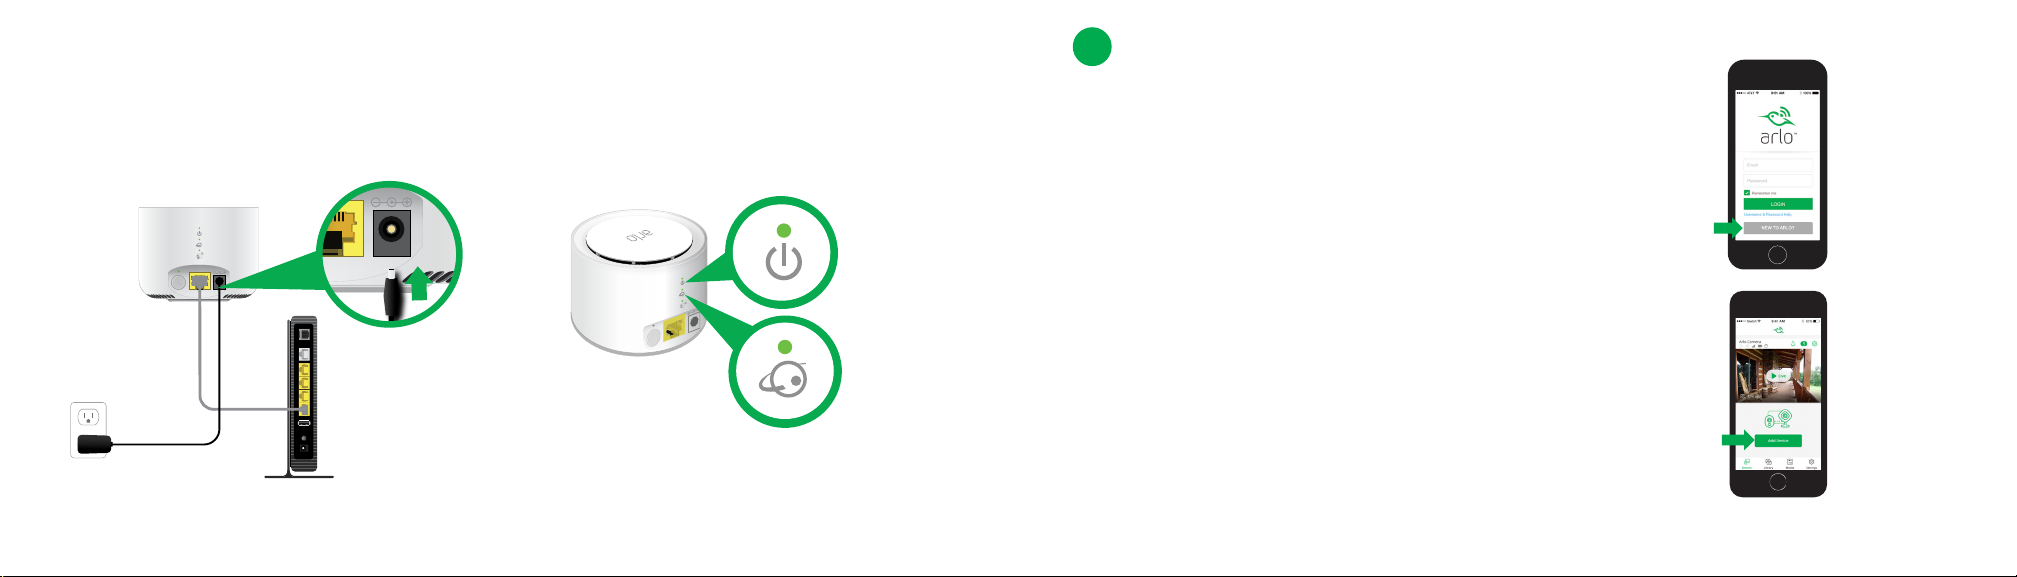
b. Connect the AC adapter to your base station and plug it in.
DC
The Power LED and Internet LED on the back of the base station light green in about two
minutes.
3
Get an Account
¾ To create a new Arlo account:
a. Launch the Arlo app from your smartphone, tap the
New to Arlo? button, and select Arlo Wire-Free.
If you are using a computer, visit arlo.netgear.com.
Reset
SYNC
DC
Ethernet
Reset
DC
SYNC
Ethernet
b. Follow the onscreen instructions.
¾ To add an Arlo camera to an existing Arlo account:
a. If you already set up an Arlo account, log in, and click or
tap Add Device.
(If this doesn’t happen, visit
arlo.com/support/ for troubleshooting tips.)
b. Follow the onscreen instructions.
76
Page 5

4
Insert Batteries Into Your Cameras
5
Sync Your Cameras With the Base Station
a. Unlock the battery
compartment by
sliding and holding the
latch.
b. Slide the battery door
back and lift it to
open the compartment.
c. Insert two batteries
near the back of the
camera.
d. Insert two batteries
near the
compartment hinge.
e. Close the
battery door.
Note: Cameras must be synced one at a time.
a. Bring the camera within 1 to 3 feet (30 to 100 centimeters) of the base station.
Reset
SYNC
Ethernet
DC
98
Page 6

SYNC
Ethernet
Reset
b. Press the Sync button on the back of
the base station for about two seconds.
Release the button.
d. Press the Sync button on top of the
camera for about two seconds. Release
the button.
A blue LED on the camera blinks slowly
when the sync process starts. The blue
LED blinks rapidly to confirm sync.
Syncing more than one camera?
Go to page 9 and repeat steps 5a
through 5d for each camera.
c. Wait for the Sync Status LED to blink
green.
Reset
DC
SYNC
Ethernet
The camera is ready for viewing.
Note: If the LED blinks amber quickly, the sync is not
successful. You must repeat the sync process.
1110
Page 7

6
Place or Mount Your Cameras
Locate a spot for your camera
You can place your camera on a shelf or
other flat surface, or you can mount it to
the wall.
Tip: Use the Arlo app in Position mode
(found in Camera Settings) to help aim the camera.
To mount your camera to the wall:
Fasten the mounting screw into the wall,
and hang the magnetic mount from
the screw.
If you’re mounting the camera to drywall,
be sure to use the plastic drywall anchors
that are provided.
Tip: You can also use double-sided tape instead
of screws.
1312
Page 8

You’re Done!
Congratulations! Your Arlo System is set up and ready to go.
To view useful tutorial videos, find troubleshooting tips, or
get support, visit arlo.com/support/.
Base Station LED Guide
Power Internet Camera
Green
The base station
is powered on.
Blinking green
A firmware update
Reset
DC
SYNC
Ethernet
is in progress. DO
NOT TURN OFF
BASE STATION OR
CAMERAS.
Amber
The base station
is booting.
O
The base station
is powered o.
Green
The base station
is connected to
the Internet.
Blinking green
The base station is
sending data over
the Internet.
Amber
The base station is
connected to the
router but did not
establish an Internet
connection.
O
The base station is
not connected to
your router.
Green
Cameras are
connected to the
base station.
Blinking green
The base station is
attempting to sync
with a camera.
Blinking amber
A camera is too
far from the base
station. Signal
strength is weak.
Amber
The base station is
not assigned to an
Arlo account.
O
No cameras are
detected.
1514
Page 9

©NETGEAR, Inc., NETGEAR, the NETGEAR Logo, and Arlo are trademarks of NETGEAR, Inc.
Compliance
For the current EU Declaration of Conformity, visit
http://kb.netgear.com/app/answers/detail/a_id/11621/.
For regulatory compliance information, visit
http://www.netgear.com/about/regulatory/.
350 East Plumeria Drive
San Jose, CA 95134, USA
February 2018
16
NETGEAR INTL LTD
Building 3, University Technology Centre
Curraheen Road, Cork, Ireland
Page 10

Federal Communication Commission Interference Statement
This device complies with Part 15 of the FCC Rules. Operation is subject to the
following two conditions: (1) This device may not cause harmful interference, and (2)
this device must accept any interference received, including interference that may
cause undesired operation.
This equipment has been tested and found to comply with the limits for a Class B
digital device, pursuant to Part 15 of the FCC Rules. These limits are designed to
provide reasonable protection against harmful interference in a residential
installation. This equipment generates, uses and can radiate radio frequency energy
and, if not installed and used in accordance with the instructions, may cause harmful
interference to radio communications. However, there is no guarantee that
interference will not occur in a particular installation. If this equipment does cause
harmful interference to radio or television reception, which can be determined by
turning the equipment off and on, the user is encouraged to try to correct the
interference by one of the following measures:
- Reorient or relocate the receiving antenna.
- Increase the separation between the equipment and receiver.
- Connect the equipment into an outlet on a circuit different from that
to which the receiver is connected.
- Consult the dealer or an experienced radio/TV technician for help.
FCC Caution: Any changes or modifications not expressly approved by the party
responsible for compliance could void the user's authority to operate this
equipment.
This transmitter must not be co-located or operating in conjunction with any other
antenna or transmitter.
Page 11

Radiation Exposure Statement:
This equipment complies with FCC radiation exposure limits set forth for an
uncontrolled environment. This equipment should be installed and operated with
minimum distance 20cm between the radiator & your body.
Industry Canada statement:
This device complies with ISED’s licence-exempt RSSs. Operation is subject to the
following two conditions: (1) This device may not cause harmful interference, and (2)
this device must accept any interference received, including interference that may
cause undesired operation.
Le présent appareil est conforme aux CNR d’ ISED applicables aux appareils radio
exempts de licence. L’exploitation est autorisée aux deux conditions suivantes : (1) le
dispositif ne doit pas produire de brouillage préjudiciable, et (2) ce dispositif doit
accepter tout brouillage reçu, y compris un brouillage susceptible de provoquer un
fonctionnement indésirable.
Radiation Exposure Statement:
This equipment complies with ISED radiation exposure limits set forth for an
uncontrolled environment. This equipment should be installed and operated with
minimum distance 20cm between the radiator & your body.
Déclaration d'exposition aux radiations:
Cet équipement est conforme aux limites d'exposition aux rayonnements ISED
établies pour un environnement non contrôlé. Cet équipement doit être installé et
utilisé avec un minimum de 20 cm de distance entre la source de rayonnement et
votre corps.
 Loading...