

Netgear orporated 08200087 User Manual
December 2007
208-10136-02
v2.0
NETGEAR, Inc.
4500 Great America Parkway
Santa Clara, CA 95054 USA
54 Mbps Wireless ADSL2+
Modem Router Setup
Manual

ii
© 2007 by NETGEAR, Inc. All rights reserved.
Trademarks
NETGEAR and the NETGEAR logo are trademarks of NETGEAR, Inc. Microsoft, Windows, and Windows NT are
registered trademarks of Microsoft Corporation. Other brand and product names are registered trademarks or trademarks
of their respective holders.
Statement of Conditions
In the interest of improving internal design, operational function, and/or reliability, NETGEAR reserves the right to
make changes to the products described in this document without notice.
NETGEAR does not assume any liability that may occur due to the use or application of the product(s) or circuit
layout(s) described herein.

54 Mbps Wireless ADSL2+ Modem Router Setup Manual
Getting to Know Your Wireless Router
Unpacking Your New Router ............................................................................................. 1
Hardware Features ............................................................................................................ 2
Front Panel .................................................................................................................. 2
Back Panel .................................................................................................................. 4
Router Side Panel ....................................................................................................... 5
Router Label ................................................................................................................ 6
Positioning Your Wireless Router ...................................................................................... 6
Installing Your Wireless ADSL2+ Modem Router .............................................................. 7
Installing Your Router Using the
Smart Wizard
Using the Smart Wizard ..................................................................................................... 9
Accessing Your Router After Installation and Checking for New Firmware ..................... 10
Installing Your Router Manually
(Advanced, Mac, and Linux Users)
Understanding ADSL Microfilters .................................................................................... 12
ADSL Microfilter ........................................................................................................ 12
ADSL Microfilter with Built-In Splitter ......................................................................... 12
Connecting Your Wireless ADSL2+ Modem Router ........................................................ 13
Verifying Your Connection ............................................................................................... 15
Setting Up Your Router for Internet Access ..................................................................... 16
Configuring Your Wireless Network
Specifying Wireless Settings ........................................................................................... 20
Using WPS to Configure the Wireless Network ............................................................... 21
Troubleshooting
Basic Functioning ............................................................................................................ 23
Power LED Not On .................................................................................................... 24
Power LED is Red ..................................................................................................... 24
LAN or Internet Port LEDs Not On ............................................................................ 24
Troubleshooting the Web Configuration Interface ........................................................... 25
Troubleshooting the ISP Connection ............................................................................... 26
ADSL link .................................................................................................................. 26
Obtaining an Internet IP Address .............................................................................. 27
iii

Troubleshooting PPPoE or PPPoA ........................................................................... 28
Troubleshooting Internet Browsing ........................................................................... 28
Troubleshooting a TCP/IP Network Using the Ping Utility ............................................... 29
Testing the LAN Path to Your Router ........................................................................ 29
Testing the Path from Your Computer to a Remote Device ...................................... 30
Restoring the Default Configuration and Password ......................................................... 30
Using the Reset Button ............................................................................................. 30
Technical Specifications and Default Configuration
General Specifications ..................................................................................................... 31
Default Configuration ....................................................................................................... 32
Related Documents
Registration and Certifications
iv

Getting to Know Your Wireless Router
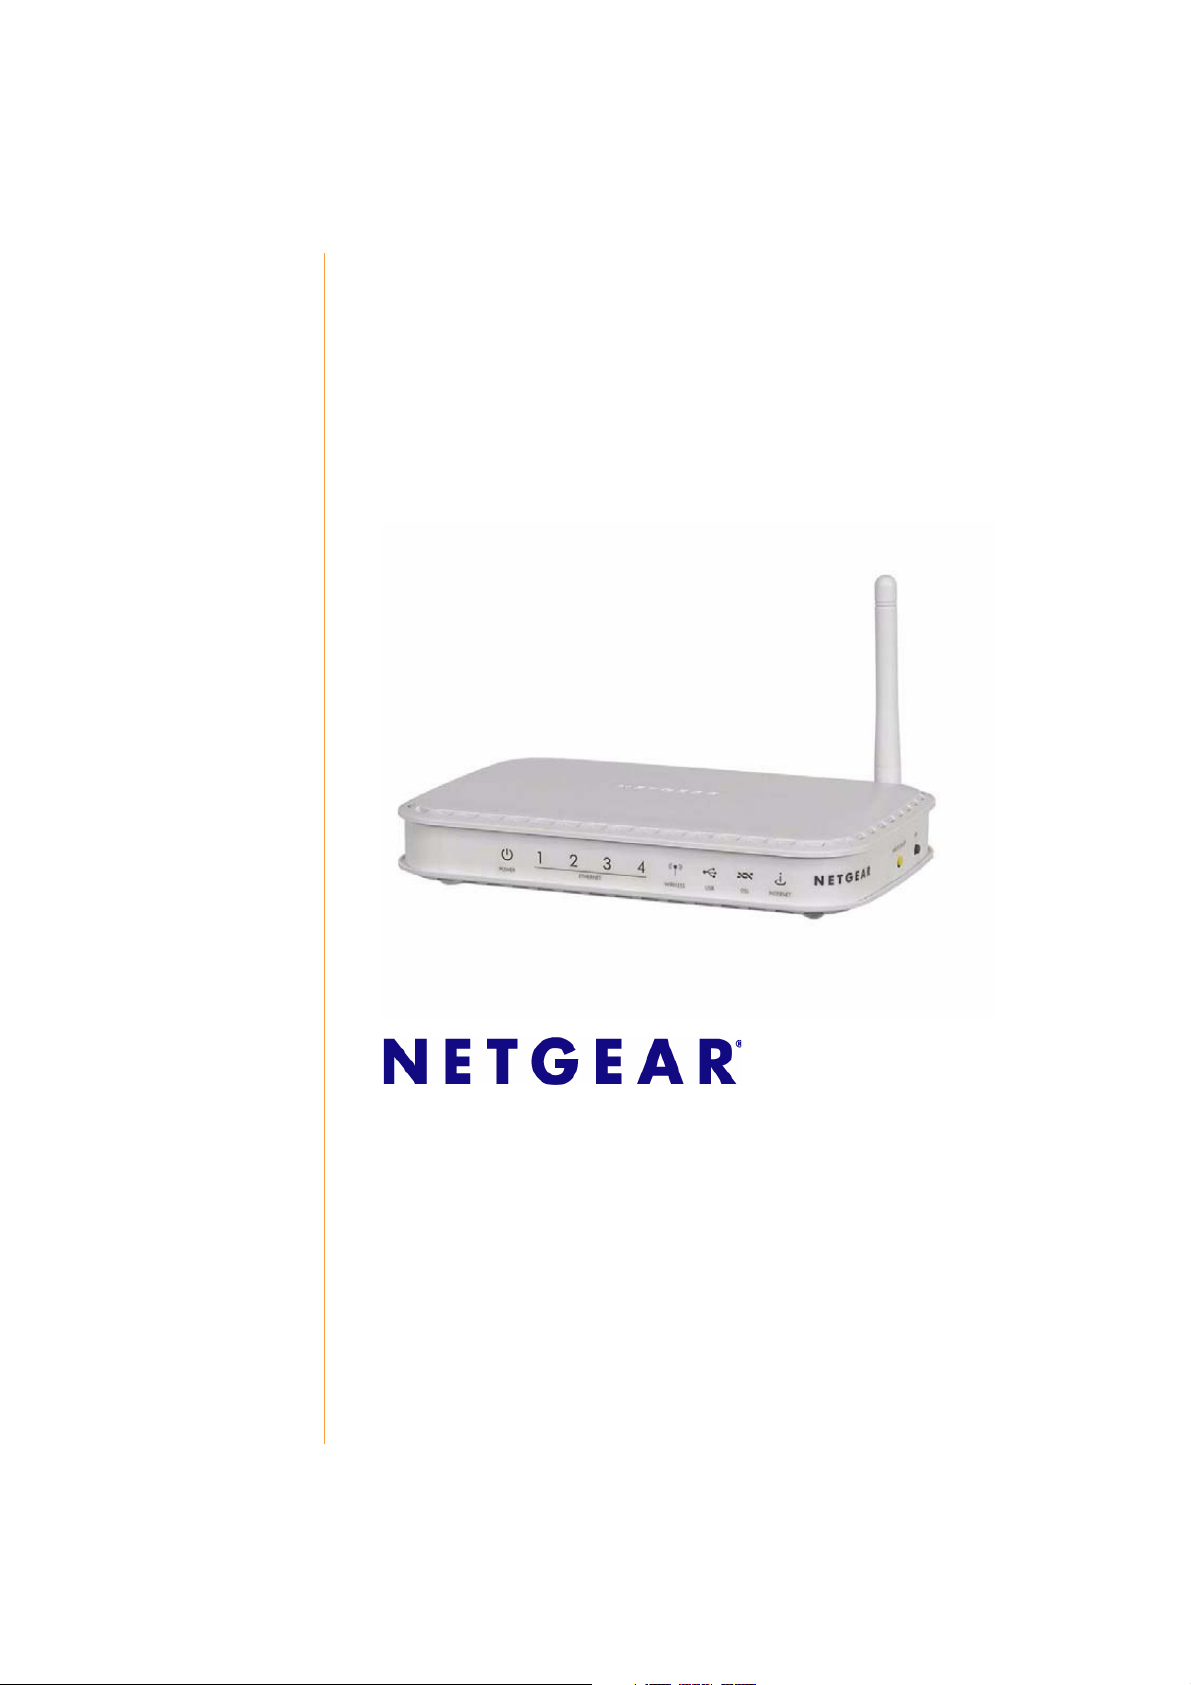
Congratulations on your purchase of a NETGEAR® high-speed wireless router, the 54 Mbps
Wireless ADSL2+ Modem Router Model DG834G.
Before you begin installing your router, check the package contents (see
Router” on page 1). Become familiar with the front and back panels of your router—especially the
LEDs—and the important information on the router label (see “Hardware Features” on page 2).
Then, read the section on
selected the best location to install your router.
This chapter describes how to set up the router on your Local Area Network (LAN) and connect to
the Internet. It describes how to set up your wireless ADSL2+ modem router for Internet access
and configure basic wireless connectivity.
“Positioning Your Wireless Router” on page 6 to ensure that you have
“Unpacking Your New
Unpacking Your New Router
Your router should contain the following items:
• Wireless ADSL2+ Modem Router
• AC power adapter (varies by region)
• Category 5 (Cat 5) Ethernet cable
• Telephone cable with RJ-11 connector
• Microfilters (quantity and type vary by region)
• Resource CD, including:
– The Smart Wizard Installation Assistant
– This manual
• Warranty and Support Information cards
If any of the parts are incorrect, missing, or damaged, contact your NETGEAR dealer. Keep the
carton, including the original packing materials, in case you need to return the product for repair.
1
Hardware Features
1 2
3 4 5
6
Before you install and connect your router, take a moment to become familiar with the front and
back panels of the router—especially the LEDs on the front panel.
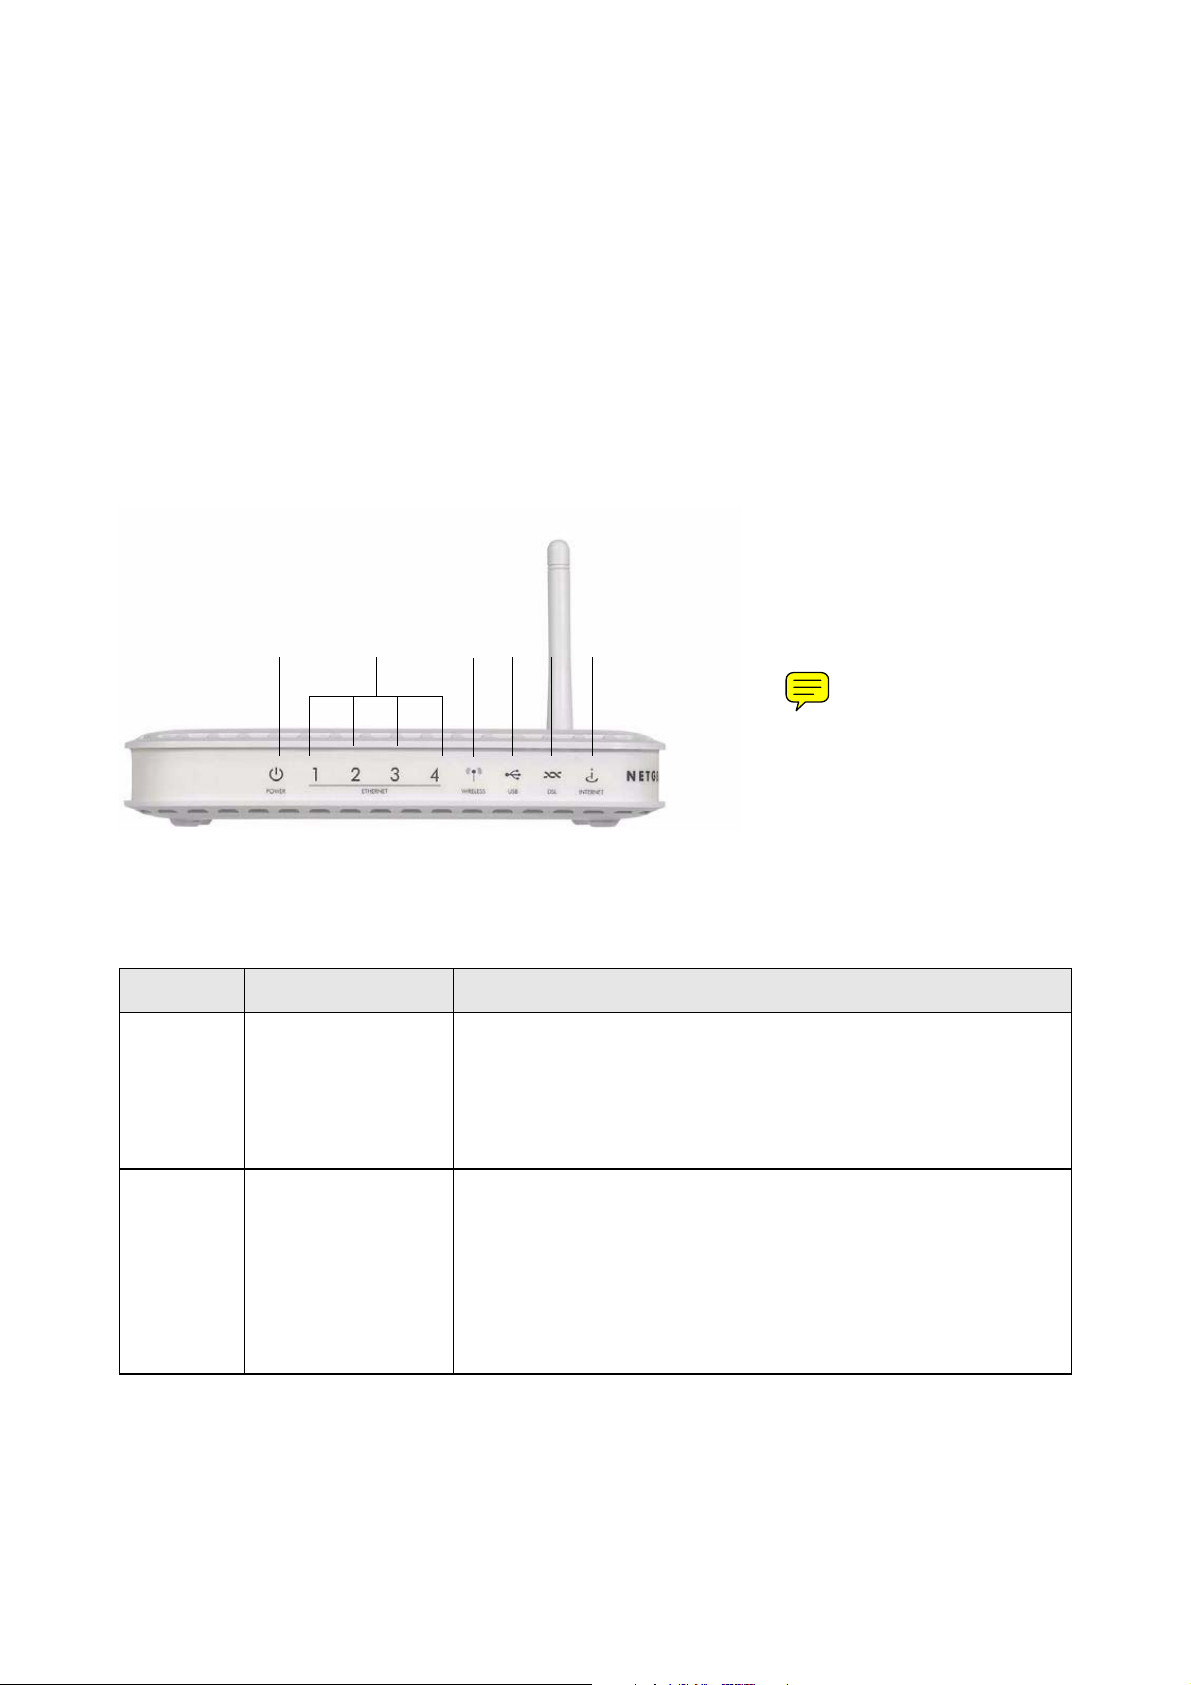
Front Panel
The wireless ADSL2+ modem router front panel shown below contains status LEDs.
Figure 1
You can use the LEDs to verify various conditions. The following table describes each LED..
Table 1. LED Descriptions
LED Activity Description
Solid green
1. Power,
factory
reset
2. Ethernet
ports 1-4
2 Getting to Know Your Wireless Router
Solid red
Off
Factory reset
Solid green
Blinking green
Solid Amber
Blinking amber
Off
Power is supplied to the router.
POST (Power-On Self-Test) failure or device malfunction.
Power is not supplied to the router.
Lights momentarily while the reset button is depressed for 6 seconds,
then blinks red three times when the reset button is released, and
then turns green as the gateway resets to the factory defaults.
The powered device is connected to the associated Ethernet Local
Area Network (LAN) port, which is operating at 100 Mbps.
Data is being transmitted or received at 100 Mbps.
The powered device is connected to the associated Ethernet Local
Area Network (LAN) port, which is operating at 10 Mbps.
Data is being transmitted or received at 10 Mbps.
No link is detected on this port, or modem powered off, or no cable or
no powered device is connected to the associated port.

Getting to Know Your Wireless Router 3
3. Wireless
Solid green
Blinking green
Off
The Wireless Access Point is enabled.
Data is being transmitted or received over the wireless link.
The Wireless Access Point is disabled.
4. USB
Solid green
Blinking green
Off
A USB device is connected to the port.
Data is being transmitted or received over the USB port.
No USB device is connected to the port.
5. DSL
Solid green
Blinking green
Off
The ADSL port is synchronized with your ISP’s DSL Access
Multiplexer (DSLAM).
The ADSL is synchronizing with the DSLAM. The LED blinks at a rate
of 2 Hz when the wireless ADSL2+ modem router is trying to detect a
carrier signal, and blinks at 4 Hz when the carrier has been detected
and the wireless ADSL2+ modem router is trying to train.
No link is detected on the ADSL port, or the wireless ADSL2+ modem
router is powered off.
6. Internet
Solid green
Blinking green
Red
Off
The wireless ADSL2+ modem router is connected to the Internet. The
LED will remain solid green if the Internet session is dropped due to
an idle time-out, but an ADSL connection is still present. If the
session is dropped for any other reason, the LED will turn off.
The wireless ADSL2+ modem router is connected to the Internet and
traffic is passing through the device.
The wireless ADSL2+ modem router attempted to connect to the
Internet but failed.
The wireless ADSL2+ modem router is powered off, or in bridged
mode, or there is no ADSL connection.
Table 1. LED Descriptions (continued)
Back Panel
122 3 4 5
The back panel of the wireless ADSL2+ modem router contains port connections.
Figure 2
The ports on the router are color-coded to distinguish your Internet port from the other four ports
that connect to the wired computer(s) on your LAN. The rear panel contains the following
elements:
1. Wireless antenna
2. Factory default reset button
3. AC power adapter input
4. USB port
5. Four local Ethernet RJ-45 LAN ports for connecting the router to the local computers
6. RJ-11 ADSL port for connecting the router to an ADSL line
4 Getting to Know Your Wireless Router
Getting to Know Your Wireless Router 5
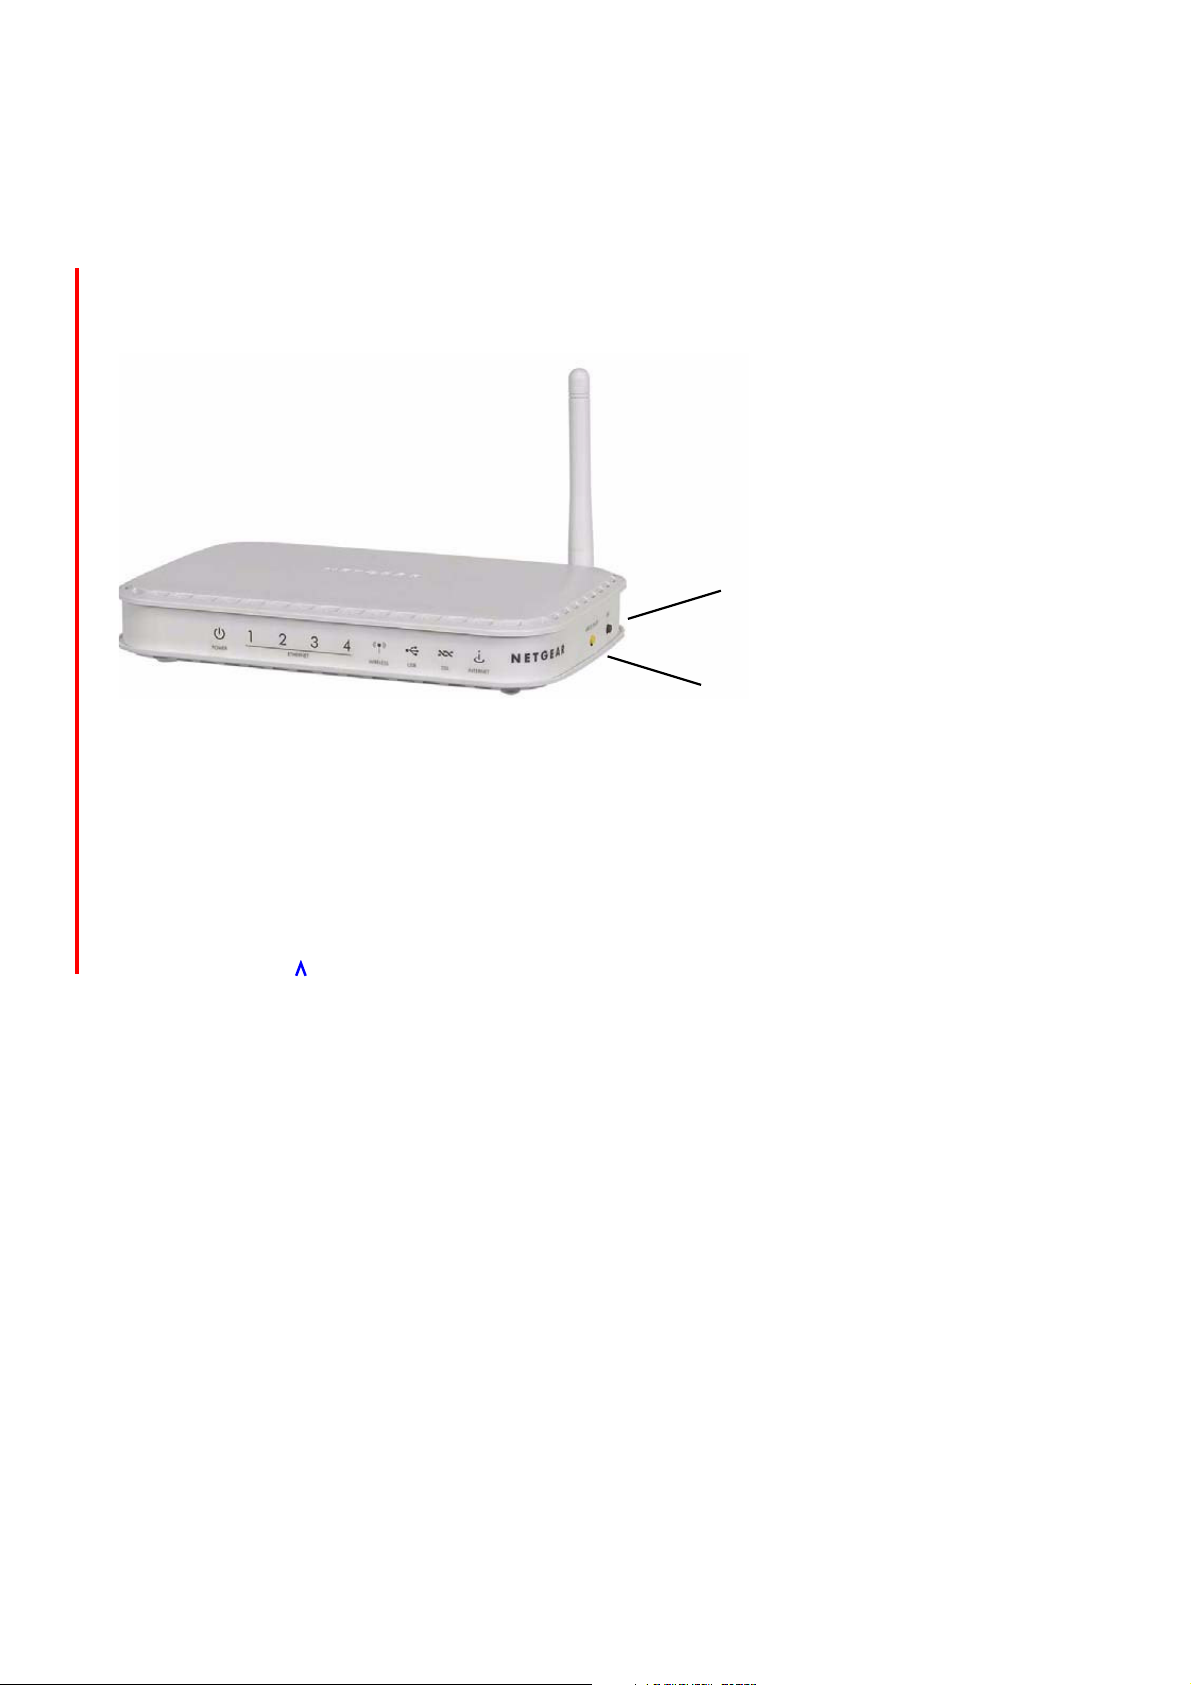
Router Side Panel
The side panel of the router has a WPS button and a Wireless button.
• WPS. To use the Wi-Fi Protected Setup (WPS) feature with clients on the network that are
Wi-Fi certified and WPA capable. See
“Using WPS to Configure the Wireless
Network” on page 21.
• Wireless. By default, the wireless ADSL2+ modem router is set up to work as a wireless
access point. Pressing this button turns the wireless access point feature off and on. You can
also do this through the Wireless Settings screen (see the link to your User Manual on the
Resource CD.)
Figure 3
WPS
Wireless
6 Getting to Know Your Wireless Router
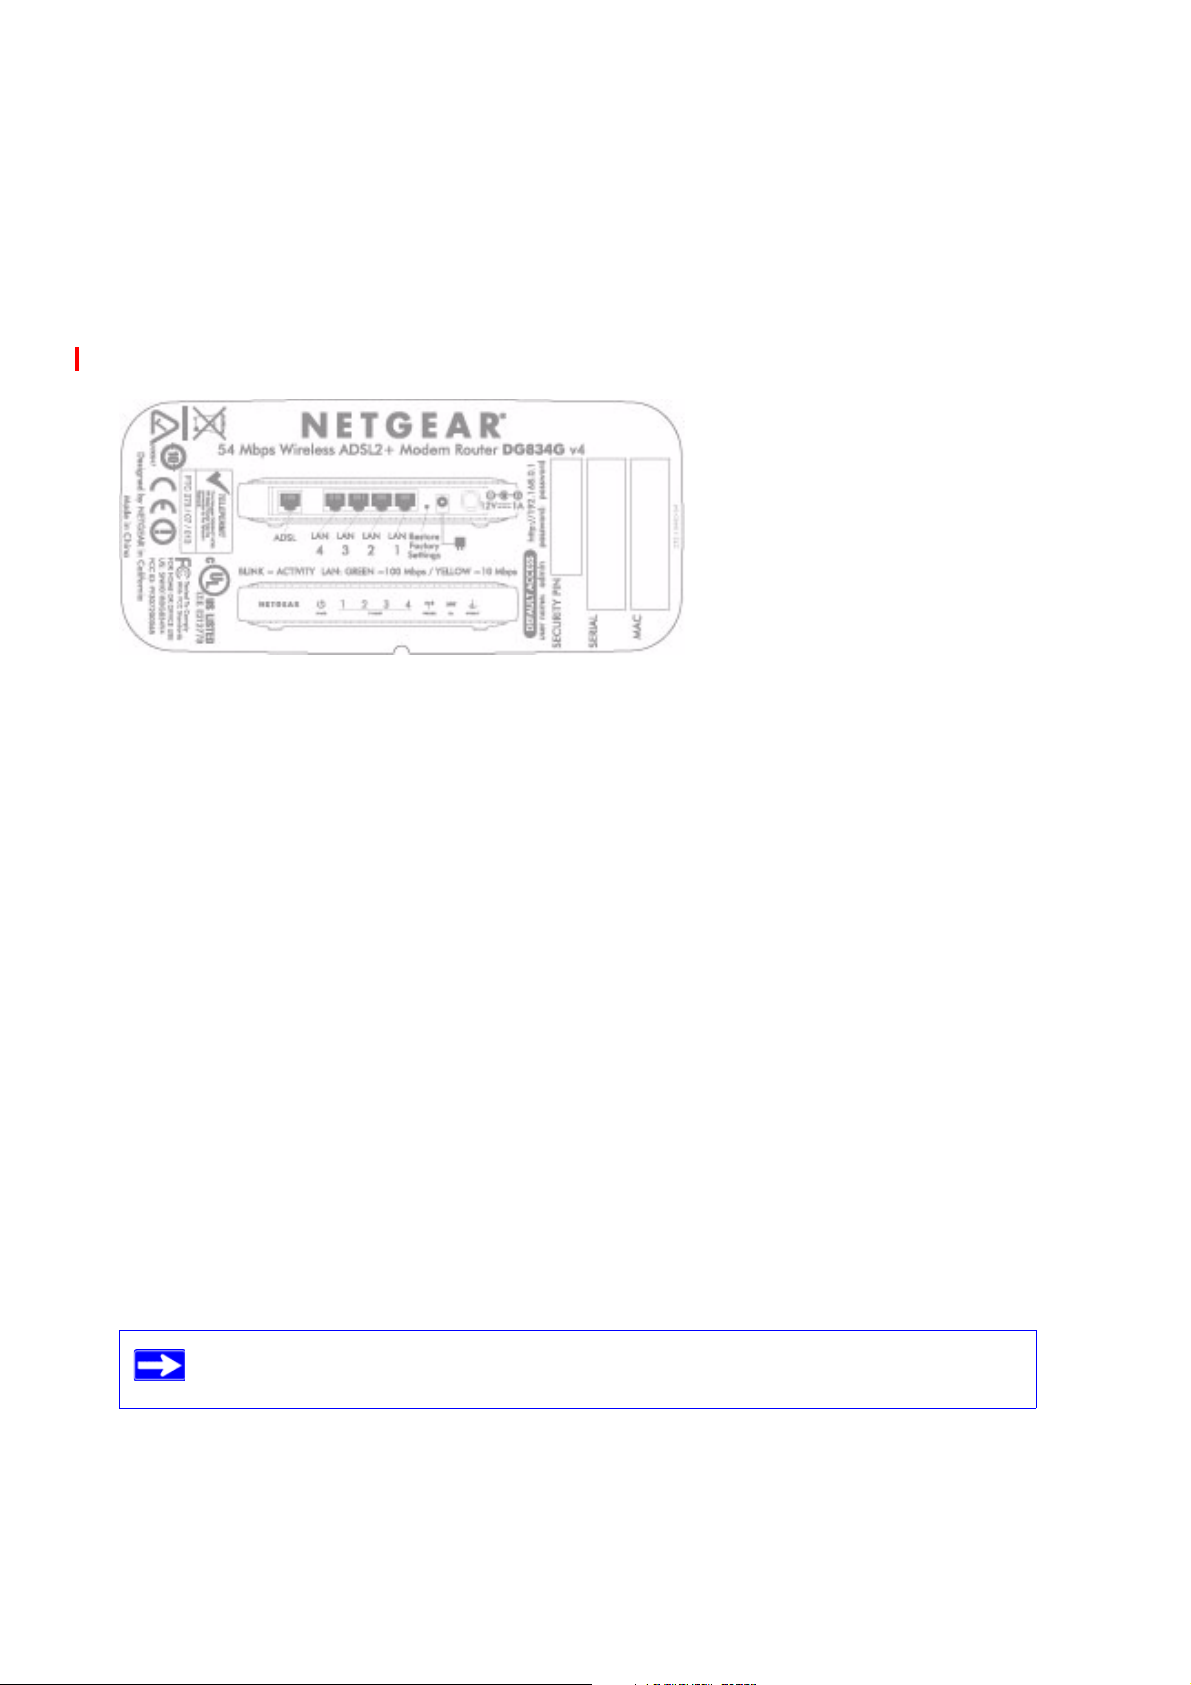
Router Label
The label on the back of the wireless ADSL2+ modem router shows the router’s MAC address,
serial number, security PIN, and factory default login information.
Positioning Your Wireless Router
The wireless ADSL2+ modem router lets you access your network from virtually anywhere within
the operating range of your wireless network. However, the operating distance or range of your
wireless connection can vary significantly depending on the physical placement of your router. For
example, the thickness and number of walls the wireless signal must pass through may limit the
range. For best results, place your router:
• Near the center of the area where your computers and other devices will operate, preferably
within line of sight to your wireless devices.
• Accessible to an AC power outlet and near Ethernet cables for wired computers.
• In an elevated location such as a high shelf, keeping the number of walls and ceilings between
the wireless ADSL2+ modem router and your other devices to a minimum.
• Away from electrical devices which are potential sources of interference, such as ceiling fans,
home security systems, microwaves, or the base for a cordless phone.
• Away from any large metal surfaces, such as a solid metal door or aluminum studs. Large
expanses of other materials such as glass, insulated walls, fish tanks, mirrors, brick, and
concrete can also affect your wireless signal.
Figure 4
Failure to follow these guidelines can result in significant performance degradation
or an inability to wirelessly connect to the Internet.
Installing Your Wireless ADSL2+ Modem Router
If you have a Macintosh or Linux system, you need to use the manual installation
method (see
“Installing Your Router Manually (Advanced, Mac, and Linux Users)”
on page 11).
Before running the Smart Wizard on a corporate PC to set up your home
router, check with your company’s network support staff. Corporate
network settings or Virtual Private Network (VPN) client software may
conflict with the default settings of a home router. If you are unsure about
whether there might be a conflict, use a different computer.
To help you set up your router and get on the Internet quickly, the Resource CD contains a Smart
Wizard™. The Smart Wizard walks you through the steps required to connect your router,
microfilters, and PC(s); configure your wireless settings; and enable wireless security for your
network. When you have finished, you will be Internet ready!
You can set up your wireless ADSL2+ modem router using one of two methods:.
• Smart Wizard Setup: The Smart Wizard setup is available on your Resource CD. See
• Manual Setup: If you cannot or prefer not to use the Smart Wizard, see
“Installing Your Router Using the Smart Wizard” on page 9 to use the Smart Wizard.
– This is the easiest option. The wizard guides you through the setup process. It automates
many of the steps and verifies that the steps have been successfully completed.
– Smart Wizard requires a PC running Microsoft Windows..
Router Using the Smart Wizard” on page 9
using a Linux operating system, or are technically knowledgeable, select this option. If you
choose to use this option and install your router manually, for best results, install and set up
your router in this order:
. For example, if you are connecting to a Mac, are
“Installing Your
1. Install and connect your wireless router to your network (see
ADSL2+ Modem Router” on page 13
2. Set up your wireless router for Internet access (see
Access” on page 16
3. Configure your wireless network and select wireless security settings to protect your
wireless network (see “Configuring Your Wireless Network” on page 19).
Getting to Know Your Wireless Router 7
).
).
“Setting Up Your Router for Internet
“Connecting Your Wireless

8 Getting to Know Your Wireless Router
Installing Your Router Using the
If the CD does not automatically start, browse the CD and double-click .
Smart Wizard
To use the Smart Wizard, you must be using a PC with Windows Vista, or Windows 2000 or
Windows XP with Service Pack 2. The Smart Wizard setup procedure should take about 15
minutes to complete. Before using the Smart Wizard to set up your router, ensure that:
• You have an ADSL Internet service connection through an Internet Service Provider (ISP).
• You have the configuration information provided by your ISP.
Using the Smart Wizard
The NETGEAR Smart Wizard takes you through the procedure to connect your router, ADSL
microfilters, and PC(s). It then helps you to configure your wireless settings and enable wireless
security for your network. The Smart Wizard guides you through the setup process by automating
many of the steps. At each step in the setup process, the Smart Wizard checks to ensure that the
steps you perform are successfully completed.
To install your router using the Smart Wizard:
1.
Locate the ADSL settings information provided by your Internet Service Provider.
2. Insert the Resource CD into your Windows PC. The CD will automatically start and detect the
language you are using on your PC. Select a different language option, if you prefer.
3. When the Welcome screen appears, click Setup to start the Smart Wizard. Follow the
instructions and prompts to complete the installation.
The Smart Wizard guides you through installing your router, connecting your router to the
Internet, configuring your wireless network settings, and selecting the optimum security
protection for your network. If you choose not to select a security option during installation,
9
 Loading...