

Page 1
NETGEAR Next 300 Mbp s
Wireless USB 2.0 Adapter
WN121T User Manual
NETGEAR, Inc.
4500 Great America Parkway
Santa Clara, CA 95054 USA
202-10209-01
August 2006
Page 2

Technical Support
For customer support see http://kbserver.netgear.com/kb_web_files/n10005.asp
NETGEAR, INC. Support Information
Phone: 1-888-NETGEAR, for US & Canada only. For other countries, see your support
information card.
E-mail: support@netgear.com
North American NETGEAR website: http://www.netgear.com
Statement of Conditions
In the interest of improving internal design, operational function, and/or reliability, NETGEAR reserves the right to
make changes to the products described in this document without notice.
NETGEAR does not assume any liability that may occur due to the use or application of the product(s) or circuit
layout(s) described herein.
© 2006 NETGEAR, Inc. NETGEAR, the NETGEAR logo, The Gear Guy and Everybody's Connecting are
trademarks or registered trademarks of NETGEAR, Inc. in the United States and/or other countries.
Microsoft and Windows are registered trademarks of Microsoft Corporation in the United States and/or
other countries. Other brand and product names are trademarks or registered trademarks of their respective
holders. Information is subject to change without notice. All rights reserved
Maximum Wireless Signal Rate Derived from IEEE Standard 802.11 Specifications
Actual data throughput will vary. Network conditions and environmental factors, including volume of network traffic,
building materials and construction, and network overhead, lower actual data throughput rate.
.
Safety and Regulatory Notices
FCC Statement
This equipment has been tested and found to comply with the limits for a Class B digital device, pursuant to Part 15 of the
FCC Rules.
These limits are designed to provide reasonable protection against harmful interference in a residential installation.
This equipment generates, uses and can radiate radio frequency energy and, if not installed and used in accordance with
the instructions, may cause harmful interference to radio communications. However, there is no guarantee that interference
will not occur in a particular installation. If this equipment does cause harmful interference to radio or television reception,
which can be determined by turning the equipment off and on, the user is encouraged to try to correct the interference by
one of the following measures:
- Reorient or relocate the receiving antenna.
- Increase the separation between the equipment and receiver
- Connect the equipment into an outlet on a circuit different from that to which the receiver is connected.
- Consult the dealer or an experienced radio/TV technician for help
FCC Caution:
Any changes or modifications not expressly approved by the party responsible for compliance could void the user's
authority to operate this equipment.
This device complies with Part 15 of the FCC Rules. Operation is subject to the following two conditions:
(1) This device may not cause harmful interference, and (2) this device must accept any interference received, including
interference that may cause undesired operation.
ii
v1.0, August 2006
Page 3

•This transmitter must not be co-located or operating in conjunction with any other antenna or transmitter.
FCC Radiation Exposure Statement:
This equipment complies with FCC radiation exposure limits set forth for an uncontrolled environment. This
equipment should be installed and operated with minimum distance 20cm between the radiator & your body.
Canadian Department of Communications Industry Canada (IC) Notice
This Class B digital apparatus complies with Canadian ICES-003 and RSS-210. Cet appareil numérique de la classe B
est conforme à la norme NMB-003 et CNR-210 du Canada.
“To prevent radio interference to the licensed service, this device is intended to be operated indoors and away from
windows to provide maximum shielding. Equipment (or its transmit antenna) that is installed outdoors is subject to
licensing.”
“Pour empêcher que cet appareil cause du brouillage au service faisant l’objet d’une licence, il doit être utilisé à
l’intérieur et devrait être placé loin des fenêtres afin de fournir un écran de blindage maximal. Si le matériel (ou son
antenne d’émission) est installé à l’extérieur, il doit faire l’objet d’une licence.”
Europe - EU Declaration of Conformity
A printed copy of the EU Declaration of Conformity certificate for this product is provided in the WN121T product
package.
Èesky
[Czech]
Dansk
[Danish]
Deutsch
[German]
Eesti
[Estonian]
NETGEAR, Inc. tímto prohlašuje, že tento NETGEAR Next 300 Mbps Wireless USB 2.0
Adapter WN121T
ustanoveními smìrnice 1999/5/ES.
Undertegnede
Mbps Wireless USB 2.0 Adapter WN121T
relevante krav i direktiv 1999/5/EF.
Hiermit erklärt
USB 2.0 Adapter WN121T
und den übrigen einschlägigen Bestimmungen der Richtlinie 1999/5/EG befindet.
Käesolevaga kinnitab
2.0 Adapter WN121T
tulenevatele teistele asjakohastele sätetele.
je ve shodì se základními požadavky a dalšími pøíslušnými
NETGEAR, Inc. erklærer herved, at følgende udstyr NETGEAR Next 300
overholder de væsentlige krav og øvrige
NETGEAR, Inc., dass sich das Gerät NETGEAR Next 300 Mbps Wireless
in Übereinstimmung mit den grundlegenden Anforderungen
NETGEAR, Inc. seadme NETGEAR Next 300 Mbps Wireless USB
vastavust direktiivi 1999/5/EÜ põhinõuetele ja nimetatud direktiivist
v1.0, August 2006
iii
Page 4

English Hereby, NETGEAR, Inc., declares that this NETGEAR Next 300 Mbps Wireless USB 2.0
Adapter WN121T
provisions of Directive 1999/5/EC.
Español
[Spanish]
Ελληνική
[Greek]
Français
[French]
Italiano
[Italian]
Latviski
[Latvian]
Lietuviø
[Lithuanian]
Nederlands
[Dutch]
Malti
[Maltese]
Magyar
[Hungarian]
Polski [Polish] Niniejszym NETGEAR, Inc. oœwiadcza, ¿e NETGEAR Next 300 Mbps Wireless USB
Por medio de la presente NETGEAR, Inc. declara que el NETGEAR Next 300 Mbps
Wireless USB 2.0 Ad apter WN121T
otras disposiciones aplicables o exigibles de la Directiva 1999/5/CE.
ΜΕ ΤΗΝ ΠΑΡΟΥΣΑ NETGEAR, Inc. ΔΗΛΩΝΕΙ ΟΤΙ NETGEAR Next 300 Mbps
Wireless USB 2.0 Adapter WN121T
ΑΠΑΙΤΗΣΕΙΣ ΚΑΙ ΤΙΣ ΛΟΙΠΕΣ ΣΧΕΤΙΚΕΣ ΔΙΑΤΑΞΕΙΣ ΤΗΣ ΟΔΗΓΙΑΣ 1999/5/ΕΚ.
Par la présente NETGEAR, Inc. déclare que l'appareil NETGEAR Next 300 Mbps
Wireless USB 2.0 Ad apter WN121T
autres dispositions pertinentes de la directive 1999/5/CE.
Con la presente NETGEAR, Inc. dichiara che questo NETGEAR Next 300 Mbps
Wireless USB 2.0 Ad apter WN121T
disposizioni pertinenti stabilite dalla direttiva 1999/5/CE.
Ar šo NETGEAR, Inc. deklarç, ka NETGEAR Next 300 Mbps Wireless USB 2.0 Adapter
WN121T
noteikumiem.
Šiuo NETGEAR, Inc. deklaruoja, kad šis NETGEAR Next 300 Mbps Wireless USB 2.0
atbilst Direktîvas 1999/5/EK bûtiskajâm prasîbâm un citiem ar to saistîtajiem
Adapter WN121T
Hierbij verklaart
USB 2.0 Adapter WN121T
relevante bepalingen van richtlijn 1999/5/EG.
Hawnhekk, NETGEAR, Inc., jiddikjara li dan NETGEAR Next 300 Mbps Wireless USB
2.0 Adapter WN121T
hemm fid-Dirrettiva 1999/5/EC.
Alulírott, NETGEAR, Inc. nyilatkozom, hogy a NETGEAR Next 300 Mbps Wireless USB
2.0 Adapter WN121T
irányelv egyéb elõírásainak.
2.0 Adapter WN121T
stosownymi postanowieniami Dyrektywy 1999/5/EC.
Português
[Portuguese]
Slovensko
[Slovenian]
Slovensky
[Slovak]
NETGEAR, Inc. declara que este NETGEAR Next 300 Mbps Wireless USB 2.0 Adapter
WN121T
1999/5/CE.
está conforme com os requisitos essenciais e outras disposições da Directiva
NETGEAR, Inc. izjavlja, da je ta NETGEAR Next 300 Mbps Wireless USB 2.0 Adapter
WN121T
ES.
v skladu z bistvenimi zahtevami in ostalimi relevantnimi doloèili direktive 1999/5/
NETGEAR, Inc. týmto vyhlasuje, že NETGEAR Next 300 Mbps Wireless USB 2.0
Adapter WN121T
1999/5/ES.
is in compliance with the essential requirements and other relevant
cumple con los requisitos esenciales y cualesquiera
ΣΥΜΜΟΡΦΩΝΕΤΑΙ ΠΡΟΣ ΤΙΣ ΟΥΣΙΩΔΕΙΣ
est conforme aux exigences essentielles et aux
è conforme ai requisiti essenziali ed alle altre
atitinka esminius reikalavimus ir kitas 1999/5/EB Direktyvos nuostatas.
NETGEAR, Inc. dat het toestel NETGEAR Next 300 Mbps Wireless
in overeenstemming is met de essentiële eisen en de andere
jikkonforma mal-tiijiet essenzjali u ma provvedimenti orajn relevanti li
megfelel a vonatkozó alapvetõ követelményeknek és az 1999/5/EC
jest zgodny z zasadniczymi wymogami oraz pozosta³ymi
spåòa základné požiadavky a všetky príslušné ustanovenia Smernice
iv
v1.0, August 2006
Page 5
Suomi
[Finnish]
Svenska
[Swedish]
NETGEAR, Inc. vakuuttaa täten että NETGEAR Next 300 Mbps Wireless USB 2.0
Adapter WN121T
koskevien direktiivin muiden ehtojen mukainen.
Härmed intygar NETGEAR, Inc. att denna [utrustningstyp] står I överensstämmelse med
de väsentliga egenskapskrav och övriga relevanta bestämmelser som framgår av direktiv
1999/5/EG.
tyyppinen laite on direktiivin 1999/5/EY oleellisten vaatimusten ja sitä
Product and Publication Details
Model Number: WN121T
Publication Date: August 2006
Product Family: Wireless USB 2.0 Adapter
Product Name: NETGEAR Next 300 Mbps Wireless USB 2.0 Adapter WN121T
Home or Business Product: Home
Language: English
Publication Part Number: 202-10209-01
v1.0, August 2006
v
Page 6

vi
v1.0, August 2006
Page 7

Contents
About This Manual
Audience, Scope, Conventions, and Formats .................................................................. ix
How to Print this Manual .................................................................................................... x
Chapter 1
Basic Setup
A Road Map for “How to Get There From Here” ............................................................1-1
What You Need Before You Begin ..................................................................................1-4
Verify System Requirements ....................................................................................1-5
Observe Wireless Location and Range Guidelines ..................................................1-5
What’s in the Box? ...................................................................................................1-6
Default Wireless Settings .........................................................................................1-6
Installation Instructions ...................................................................................................1-6
Connecting to Wireless Networks and the Internet ......................................................1-10
The Smart Wizard Status Bar .................................................................................1-10
Icon Colors ............................................................................................................. 1-11
Removing the Software ................................................................................................1-12
Upgrading the Wireless USB 2.0 Adapter Software .....................................................1-12
Chapter 2
Network Connections and Wireless Security
Understanding the Smart Wizard ...................................................................................2-1
Finding a Network ...........................................................................................................2-2
Profiles ............................................................................................................................2-3
Adding Profiles .........................................................................................................2-3
Setting up a Profile to Connect to an Access Point or Router ........................................2-3
Setting up a Computer-to-Computer (Ad Hoc) Profile ....................................................2-5
Starting a Computer-to-Computer (Ad Hoc) Network Connection ...........................2-7
Wireless Security ............................................................................................................2-8
Know Your Wireless Network Settings .....................................................................2-9
Wireless Network Name (SSID) and Security Settings ................................................2-10
v1.0, August 2006
vii
Page 8

Setting up WEP Encryption Security ............................................................................ 2-11
Setting up WPA2-PSK Security ....................................................................................2-12
Setting up WPA-PSK Security ......................................................................................2-14
Advanced Settings .................................................................................................2-15
Networks Page .............................................................................................................2-15
Statistics Page ..............................................................................................................2-17
About Page ...................................................................................................................2-18
Chapter 3
Troubleshooting
Troubleshooting Tips ......................................................................................................3-1
Frequently Asked Questions ..........................................................................................3-1
Appendix A
Default Configuration Settings and Technical Specifications
Default Configuration Settings ....................................................................................... A-1
Technical Specifications ................................................................................................. A-2
Appendix B
Related Documents
viii
v1.0, August 2006
Page 9
About This Manual
The NETGEAR® RangeMax™ 240 Wireless USB 2.0 Adapter WN121T User Manual describes
how to install, configure and troubleshoot the NETGEAR Next 300 Mbps Wireless USB 2.0
Adapter WN121T. The information in this manual is intended for readers with intermediate
computer and Internet skills.
Conventions, Formats and Scope
The conventions, formats, and scope of this manual are described in the following paragraphs:
• Typographical Conventions. This manual uses the following typographical conventions:
Italics Emphasis, books, CDs, URL names
Bold User input
Fixed Screen text, file and server names, extensions, commands, IP addresses
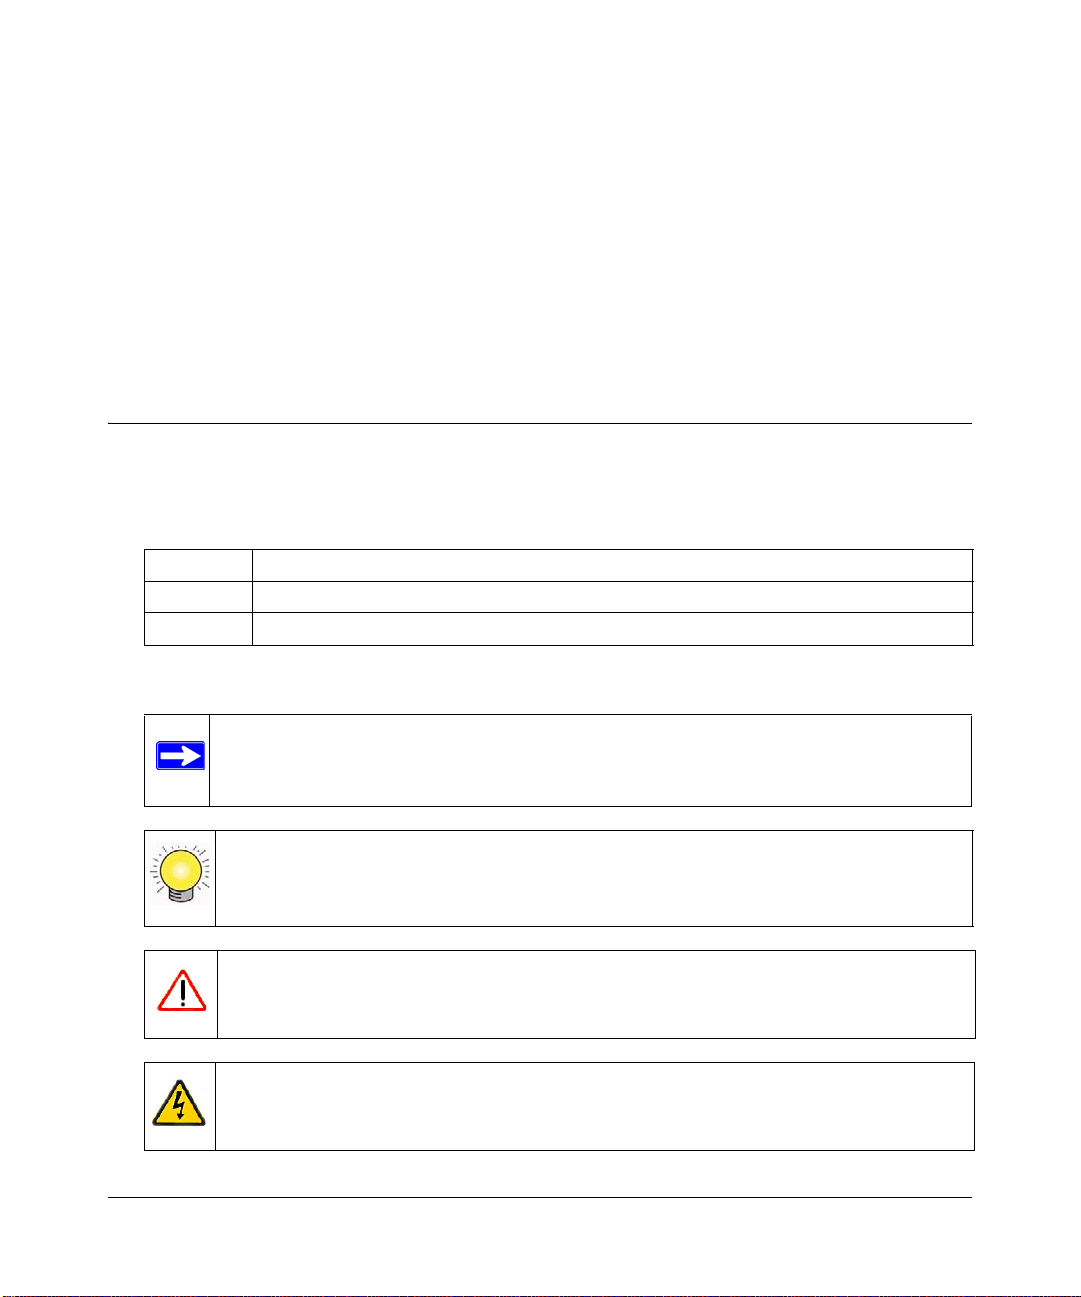
• Formats. This manual uses the following formats to highlight special messages:
Note: This format is used to highlight information of importance or special interest.
Tip: This format is used to highlight a procedure that will save time or resources.
Warning: Ignoring this type of note may result in a malfunction or damage to the
equipment.
Danger: This is a safety warning. Failure to take heed of this notice may result in
personal injury or death.
v1.0, August 2006
ix
Page 10
NETGEAR Next 300 Mbps Wireless USB 2.0 Adapter WN121T User Manual
• Scope. This manual is written for the Next 300 Mbps WN121T Wireless USB 2.0 Adapter
according to these specifications:
Product Version NETGEAR Next 300 Mbps Wireless USB 2.0 Adapter WN121T
Manual Publication Date August 2006
For more information about network technologies, see the links to the NETGEAR website in
Appendix B, “Related Documents”.
Note: Product updates are available on the NETGEAR, Inc. website at
http://kbserver.netgear.com/products/WN121T.asp.
How to Print this Manual
To print this manual you can choose one of the following several options, according to your needs.
• Printing a Chapter.
Use the PDF of This Chapter link at the top left of any page.
– Click the PDF of This Chapter link at the top right of any page in the chapter you want to
print. The PDF version of the chapter you were viewing opens in a bro wser window.
– Your computer must have the free Adobe Acrobat reader installed in order to view and
print PDF files. The Acrobat reader is available on the Adobe Web site at
http://www.adobe.com.
– Click the print icon in the upper left of the window.
Tip: If your printer supports printing two pages on a single sheet of paper, you can
save paper and printer ink by selecting this feature.
• Printing the Full Manual.
Use the Complete PDF Manua l link at the top left of any page.
– Click the Complete PDF Manual link at the top left of any page in the manual. The PDF
version of the complete manual opens in a browser window.
x
v1.0, August 2006
Page 11
NETGEAR Next 300 Mbps Wireless USB 2.0 Adapter WN121T User Manual
– Click the print icon in the upper left of the window.
Tip: If your printer supports printing two pages on a single sheet of paper, you can
save paper and printer ink by selecting this feature.
v1.0, August 2006
xi
Page 12

NETGEAR Next 300 Mbps Wireless USB 2.0 Adapter WN121T User Manual
xii
v1.0, August 2006
Page 13

Chapter 1
Basic Setup
The NETGEAR Next 300 Mbps Wireless USB 2.0 Adapter WN121T lets you connect a PC
computer to wireless networks. It is designed for PC computers running Microsoft Windows. For
information about product features and compatible NETGEAR products, please see the
NETGEAR website at http://www.netgear.com.
This chapter describes how to install your Wireless USB 2.0 Adapter and set up basic wireless
connectivity on your Wireless Local Area Network (WLAN). Advanced wireless network set up is
covered in Chapter 2, “Network Connections and Wireless Security”.
A Road Map for “How to Get There From Here”
Wireless technology has removed one of the barriers to networking—running wires. Wireless
technology also adds issues such as range, interference, signal quality, and security to the picture.
The table below shows how to complete common tasks with a network: connecting to a wireless
network, using security, connecting to the Internet, exchanging files with other computers, and
using printers in the combined wireless and wired network.
Table 1-1. A Road Map for How to Get There From Here ...
If I Want to... ? What Do I Do? What Is Needed? How Do I?
Connect to a
wireless
network
1. Get the wireless
network name (SSID)
and, if used, the
wireless security
settings.
2. Set up the Wireless
USB 2.0 Adapter with
the settings from
Step 1.
1. A wireless network
2. A computer within the
operating range of the
wireless network.
v1.0, August 2006
For set up, see “Installation
Instructions” on page 1-6 and
follow the instructions.
For wireless network range,
see “Observe Wireless
Location and Range
Guidelines” on page 1-5.
For wireless networking, see
the Web link to “Wireless
Communications:” in
Appendix B.
1-1
Page 14

NETGEAR Next 300 Mbps Wireless USB 2.0 Adapter WN121T User Manual
Table 1-1. A Road Map for How to Get There From Here ...
If I Want to... ? What Do I Do? What Is Needed? How Do I?
Protect my
wireless
connection from
snooping,
hacking, or
information
theft.
Note: Secure Internet sites such as banks and online merchants use encryption security built into Web
browsers. Wireless security features that you implement are in addition to those on secure Internet sites.
Connect to the
Internet over my
wireless
network.
1. Enable wireless
security for the
wireless network.
2. Set up wireless
security for your
Wireless USB 2.0
Adapter to match the
network.
3. Use Windows
security features.
1. Activate my wireless
link and verify my
network connection.
2. Open an Internet
browser such as
Internet Explorer or
Netscape Navigator.
1. A wireless network with
authentication and WEP,
WPA-PSK, or WPA2-PSK
encryption enabled.
2. Wireless networking
equipment such as the
WN121T that supports
these security features.
1. An Internet service such as
cable modem or DSL.
2. A network with a wireless
router or access point
connected to the cable/
DSL modem.
3. TCP/IP Internet networking
software installed and
configured on your PC
based on the requirements
of the Internet service
provider
4. An Internet browser.
To use wireless security
features, see “Internet
Networking and TCP/IP
Addressing:” in Appendix B
and set up your WN121T
accordingly.
To use your Wireless USB 2.0
Adapter in Infrastructure
Mode, see “Installation
Instructions” on page 1-6.
To set up a Profile, see.
“Profiles” on page 2-3.
For TCP/IP See the Web link
to “Internet Networking and
TCP/IP Addressing:” in
Appendix B.
1-2
v1.0, August 2006
Page 15
NETGEAR Next 300 Mbps Wireless USB 2.0 Adapter WN121T User Manual
Table 1-1. A Road Map for How to Get There From Here ...
If I Want to... ? What Do I Do? What Is Needed? How Do I?
Exchange files
between a
wirelessly
connected
computer and
other computers
in a combined
wireless and
wired network.
1. Use the Windows
Network
Neighborhood feature
to browse for
computers in the
combined wireless
and wired network.
2. Browse the hard drive
of a computer in the
network to locate the
directory or files you
want to work with.
3. Use the Windows
Explorer functions to
exchange files
between the
computers.
1. The computer that
connects to the wireless
network must be
configured with:
• Windows Client and File
and Print Sharing
• The same Windows
Workgroup or Domain
settings as the other
Windows computers in
the combined wireless
and wired network.
2. When Windows prompts
for security access rights
such as login user name/
password, you must enter
them.
3. If Windows ‘peer’
Workgroup networking is
used, the drive, file system
directory, or file need to be
enabled for sharing.
Windows Domain settings are
usually managed by corporate
computer support groups.
Windows Workgroup settings
are commonly managed by
individuals who set up small
networks in their homes, or
small offices.
For TCP/IP see the Web link
to “Internet Networking and
TCP/IP Addressing:” in
Appendix B.
For assistance with setting up
Windows networking, refer to
the PC Networking Tutorial on
the NETGEAR CD and the
Help information provided in
the Windows system you are
using.
v1.0, August 2006
1-3
Page 16

NETGEAR Next 300 Mbps Wireless USB 2.0 Adapter WN121T User Manual
Table 1-1. A Road Map for How to Get There From Here ...
If I Want to... ? What Do I Do? What Is Needed? How Do I?
Use printers in a
combined
wireless and
wired network.
1. Use the Windows
Printers and Fax
features to locate
available printers in
the combined
wireless and wired
network.
2. Use the Windows
Add a Printer wizard
to add access to a
network printer from
the PC you are using
to wirelessly connect
to the network.
3. From the File menu of
an application such
as Microsoft Word,
use the Print Setup
feature to direct your
print output to the
printer in the network.
1. The computer that you are
using to connect to the
wireless network needs to
be configured with:
• Windows Client and File and
Print Sharing
• The same Windows
Workgroup or Domain
settings as the other
Windows computers in the
combined wireless and wired
network.
2. Any Windows networking
security access rights such
as login user name/
password that have been
assigned in the Windows
network must be provided
when Windows prompts for
such information.
3. If so-called Windows ‘peer’
networking is being used,
the printer needs to be
enabled for sharing.
Windows Domain settings are
usually managed by corporate
computer support groups.
Windows Workgroup settings
are commonly managed by
individuals who want to set up
small networks in their homes,
or small offices.
For assistance with setting up
Windows networking, refer to
the PC Networking Tutorial on
the NETGEAR CD and the
Help information provided in
the Windows system you are
using.
For help with setting up
printers in Windows, refer to
the Help and Support
information that comes with
the version of the Windows
operating systems you are
using.
What You Need Before You Begin
You need to verify that your computer meets the minimum system requirements and identify the
wireless network settings of the wireless network where you will connect before you can set up
your wireless USB adapter and connect.
1-4
v1.0, August 2006
Page 17
NETGEAR Next 300 Mbps Wireless USB 2.0 Adapter WN121T User Manual
Verify System Requirements
Before installing the Wireless USB 2.0 Adapter, please make sure that these minimum
requirements have been met. You must have a computer with:
• A Pentium
•A CD drive.
• 5 MB of free hard disk space.
• Windows 2000 SP4, Windows XP SP1 with KB822603 hot fix, Windows XP SP2.
300 MHz or higher compatible processor with an available USB 2.0 or 1.1 port.
Note: If you do not have a USB 2.0 port on your computer, the throughput of the
Wireless USB 2.0 Adapter is limited to the 14 Mbps of the USB 1.1 standard.
Note: Windows XP users must have SP2 installed or the KB822603 Hot fix for SP1,
which fixes the USB 2.0 Host controller driver. Go to the following link to install
the Hot fix: http://www.microsoft.com
Observe Wireless Location and Range Guidelines
Computers can connect over wireless networks indoors at a range which vary significantly based
on the location of the computer with the Wireless USB 2.0 Adapter. For best results, avoid
potential sources of interference, such as:
• Large metal surfaces
• Microwave ovens
• 2.4 GHz Cordless phones
In general, wireless devices can communicate through walls. However, if the walls are constructed
with concrete, or have metal, or metal mesh, the effective range will decrease if such materials are
between the devices.
1-5
v1.0, August 2006
Page 18

NETGEAR Next 300 Mbps Wireless USB 2.0 Adapter WN121T User Manual
What’s in the Box?
The product package should contain the following items:
• NETGEAR Next 300 Mbps Wireless USB 2.0 Adapter WN121T
• Installation Guide
• NETGEAR CD, including:
— Driver and Configuration Utility Software
— NETGEAR Next 300 Mbps Wireless USB 2.0 Adapter WN121T User Manual
• Warranty and Support information card
If any of the parts are incorrect, missing, or damaged, contact your NETGEAR dealer. Keep the
carton, including the original packing materials, in case you need to return the product.
Default Wireless Settings
If this is a new wireless network installation, use the factory default settings to set up the network
and verify wireless connectivity. If this is an addition to an existing wireless network, you need the
wireless network and wireless security settings that are already defined.
Your Wireless USB 2.0 Adapter factory default basic settings are:
• Network Name Service Set Identification (SSID): Any (First available network)
Note: In order for the Wireless USB 2.0 Adapter to communicate with a wireless
access point or wireless adapter, all devices must be set up to use the same
wireless network name (SSID).
• Network Mode (Infrastructure or Ad-hoc): Infrastructure
• Data security WEP, WPA2-PSK, or WPA-PSK encryption: Disabled
The section below provides instructions for setting up the Wireless USB 2.0 Adapter for basic
wireless connectivity to an access point.
Installation Instructions
The instructions in this chapter are for an Access Point (Infrastructure) installation. Wireless
security, advanced settings, and Computer-to-Computer (Ad Hoc) instructions are covered in
Chapter 2, “Network Connections and Wireless Security”.
1-6
v1.0, August 2006
Page 19

NETGEAR Next 300 Mbps Wireless USB 2.0 Adapter WN121T User Manual
Follow the instructions below to install the Wireless USB 2.0 Adapter.
1. First, install the software.
a. Insert the NETGEAR CD in your
computer’s CD drive.
If the CD main
page does not appear, double-click
autorun.exe on the CD.
b. Click the Install Software link and the
Smart Wizard starts.
c. Follow the Wizard steps, and click Next
to continue.
d. When the Installation Complete
message appears, click Next.
Figure 1-1
2. Now, connect the Wireless USB 2.0
Adapter.
a. Locate an available USB port on your
computer.
b. Insert the end of the cable on the
Wireless USB 2.0 Adapter into the USB
port.
Figure 1-2
1-7
v1.0, August 2006
Page 20

NETGEAR Next 300 Mbps Wireless USB 2.0 Adapter WN121T User Manual
3. For Windows XP users, choose the wizard.
If you use Windows 2000, skip to Step 4,
below.
a. Choose the NETGEAR Smart Wizard
(recommended) or the Windows XP
Configuration utility.
If you choose the Windows XP option,
then you must read the Windows XP
documentation for instructions.
b. Click Next to accept the NETGEAR
Smart Wizard.
Figure 1-3
4. Use the Smart Wizard to set up your
Wireless USB 2.0 Adapter
a. When prompted, click Next to let the
wizard help you connect to a network
(recommended).
1-8
Figure 1-4
v1.0, August 2006
Page 21

NETGEAR Next 300 Mbps Wireless USB 2.0 Adapter WN121T User Manual
b. Select the wireless network from the
drop-down list, and the wizard records
your choice.
Note: Hidden networks do not
broadcast the Network Name (SSID).
Hidden
These networks are included in the
drop-down list, but the Network Name
(SSID) is blank.
If the network uses security, then the
Smart Wizard detects it.
Figure 1-5
c. Follow the Wizard steps for Security (if used) and for saving a Profile.
d. After you have reviewed the settings, click Finish.
The icon appears in the System Tray and on the desktop. The wizard initiates your
wireless connection. It could take up to a minute for your wireless connection to be
established.
The Smart Wizard Settings page opens.
Figure 1-6
5. Use the status bar to verify your wireless connectivity. For more information about
connecting, see “Connecting to Wireless Networks and the Internet” on page 1-10.
v1.0, August 2006
1-9
Page 22

NETGEAR Next 300 Mbps Wireless USB 2.0 Adapter WN121T User Manual
Connecting to Wireless Networks and the Internet
Note: The maximum speed of a USB 2.0 port is 480 Mbps. If your computer has a
USB 1.1 port, the Wireless USB 2.0 Adapter is limited to that port’s maximum
speed, which is 14 Mbps.
The Wireless USB 2.0 Adapter has indicators that show the status of your connection to a wireless
network and to the Internet:
• Icon: After you install the software, this icon appears on the desktop and in the lower
right of the Windows task bar. It is color coded to show the status of the connection. See “The
Smart Wizard Status Bar” on page 1-10.
• Smart Wizard Status Bar: Clicking on the system tray icon opens the Smart Wizard. The
status bar at the bottom of the page shows details about your wireless and Internet connection.
The Smart Wizard Status Bar
Click the icon to open the Smart Wizard so you can view the status bar. The Smart Wizard
Settings page opens. The status bar is at the bottom of the page.
signal strength
connection
status
Figure 1-7
Router/Internet
connection indicator
Unlocked: Network does not use security
Locked: Network uses security
Connection Status: The color shows the connection status.
Signal Strength: Shows the signal strength of the wireless network. If the signal is poor, then try
moving closer to the wireless access point.
Lock icon: Shows if security is used on the network.
Router/Internet Connection Indicator: This shows the progress of
your connection. By default, this feature is on.
Figure 1-8
1-10
v1.0, August 2006
Page 23

NETGEAR Next 300 Mbps Wireless USB 2.0 Adapter WN121T User Manual
This connection indicator is useful in isolating a problem. For example, if you are connected to a
router, but not to the Internet, then check the router’s Internet connection.
Connection Indicator Description
Connected to Internet
or IP Address
Connected to Router Wireless connection to router OK but no Internet
___.___.___.___ or
169.254..x.x
Wireless Internet connection OK.
connection at router.
Wireless connection to a router OK but problem with
the router. See Chapter 3, “Troubleshooting”.
If you right-click in the System Tray icon, you can disable the Internet notification feature by
clearing check mark on this line. If you do so, then only the IP address is shown.
Figure 1-9
Icon Colors
The icon is on the desktop and in the Windows System Tray. The System Tray resides on one end
of the taskbar in the Microsoft Windows desktop.
Color Condition Description
Red The wireless USB adapter
has no connection to any
other wireless node.
Yellow The wireless USB adapter
has a connection with another
wireless node.
Green The wireless USB adapter
has a connection with another
wireless node.
The Wireless USB 2.0 Adapter can not link to any other
wireless node or the link is lost. Check your configuration or
try moving to a location where the wireless signal quality is
better.
The wireless link is weak. You may need to move to a better
spot, such as closer to the wireless access point. Also, look
for possible interference such as a 2.4 GHz cordless phone or
large metal surface.
The wireless USB adapter has established good
communication with an access point and the signal quality is
strong.
v1.0, August 2006
1-11
Page 24

NETGEAR Next 300 Mbps Wireless USB 2.0 Adapter WN121T User Manual
Removing the Software
You can remove the Wireless USB 2.0 Adapter software in these two ways:
• Navigate the Windows Start menu to the Next 300 Mbps WN121T Wireless USB 2.0 Adapter
program group, select the uninstall option, and follow the screen prompts.
• Navigate the Windows Start menu to the Control Panel Add or Remove Program item, select
the Next 300 Mbps WN121T Wireless USB 2.0 Adapter option, and follow the screen
prompts.
Upgrading the Wireless USB 2.0 Adapter Software
Upgrades may be available at the NETGEAR website. To install an upgrade, follow these steps.
1. Go to http://kbserver.netgear.com/products/wpnt121.asp
2. Click the latest version of upgrade.
3. Examine the Release Note. Make sure to read any warnings and Known Problems.
4. Download the upgrade using the link in the Release Note.
5. Follow the Release Note installation instructions.
1-12
v1.0, August 2006
Page 25

Chapter 2
Network Connections and Wireless Security
This chapter explains how to use your Wireless USB 2.0 Adapter to connect to your Wireless
Local Area Network (WLAN) and how to set up wireless security for the Wireless USB 2.0
Adapter so that it matches the wireless security settings for your network.
Understanding the Smart Wizard
Note: These instructions explain how to use the NETGEAR Smart W izard to change the
Wireless USB 2.0 Adapter wireless settings. If you use Windows XP, and chose
the Windows XP configuration utility during installation, then you must disable it
now. Open the network connections from the System Tray icon, click the
Properties button, click the Wireless Networks tab and then clear the “Use
Windows to configure my wireless network settings” check box.
When you have installed the software from the NETGEAR CD, the icon appears on your
desktop and in the Windows System Tray. The Windows System Tray is located on the Windows
taskbar. You can either double-click this icon on the desktop, or click it in the System Tray at any
time, to use the Smart Wizard. This software automatically restarts when you reboot your
computer.
The Smart Wizard provides a complete and easy to use set of tools to:
• Choose the network that you want to use.
• Configure wireless settings for your wireless USB adapter.
• Monitor wireless network connections.
• Save your settings in profiles.
• Remove or reinstall the wireless adapter software.
The following sections in this chapter explain how to use the Smart Wizard.
v1.0, August 2006
2-1
Page 26

NETGEAR Next 300 Mbps Wireless USB 2.0 Adapter WN121T User Manual
Finding a Network
During the Wireless USB 2.0 Adapter software installation, the Smart Wizard lists the available
networks. After installation you can use the Find a Network button on the Network tab at any time
to view the available networks and select the one that you want to use.
Note: Make sure that you know the security settings for the network that you want to use.
For example, if WEP is used then you need to know the WEP key. If you use
secure networks frequently, set up profiles for each network with the wireless
network and security settings.
Follow the steps below to Find a Network.
1. Use the icon to open the
Smart Wizard.
The Settings tab page opens.
2. Click Find a Network.
3. Select a network from the
drop-down list. If you select a
hidden network then you must
enter the SSID. Click Next.
4. Follow the steps of the wizard
to specify the wireless security
if used, and to create a profile.
5. Review you settings, and click
Hidden Network
Finish.
Figure 2-1
The Smart Wizard initiates your wireless connection. You can use the Status Bar to verify your
network connection. For more information, see “The Smart Wizard Status Bar” in Chapter 1.
2-2
v1.0, August 2006
Page 27

NETGEAR Next 300 Mbps Wireless USB 2.0 Adapter WN121T User Manual
Profiles
The WN121T Smart Wizard uses profiles to store all the settings for a particular wireless network.
There are two special profile names: Default and Profile.
Default: The Profile named Default automatically scans for any available network. You cannot
change this profile name.
Profile: If you do not enter a name in the Profile Name box, then the name Profile is used to save
your settings. If you do this more than once then you will be asked if you want to replace the
previous settings stored in Profile.
Adding Profiles
You can store multiple profiles and recall the one which matches the network you want to join.
If you use your computer to connect to different wireless networks, you can create a profile for
each wireless network. Then, you can easily load the profile that has all the settings that you need
to join the network you are using at the time.
There are two types of wireless network profiles that you can set up:
• Access Point (Infrastructure) — connect to an access point or router with the 802.11
infrastructure mode. For example, this mode is used when computers in a house connect to an
access point that is attached to a router, which lets multiple computers share a single cable or
DSL broadband Internet connection.
• Computer-to-Computer (Ad Hoc) — connect directly to another computer with the 802.11
ad hoc mode. For example, Ad Hoc mode is used when two Windows computers are
configured with file and print sharing enabled and you want to exchange files directly between
them.
For more information on 802.11 wireless network modes, see the wireless reference document at:
http://documentation.netgear.com/reference/enu/wireless/index.htm.
Setting up a Profile to Connect to an Access Point or Router
Follow these instructions to set up the Next 300 Mbps WN121T Wireless USB 2.0 Adapter to
connect to a wireless access point or router.
2-3
v1.0, August 2006
Page 28

NETGEAR Next 300 Mbps Wireless USB 2.0 Adapter WN121T User Manual
1. Use the icon to open the Smart Wizard. The Settings page opens.
Figure 2-2
2. Enter the network settings.
a. In the Network Type section, be sure that Access Point (Infrastructure) is selected.
b. In the Profile box, type the name of the profile.
c. In the Network Name (SSID) field select a network or enter the SSID.
Note: You will not get a wireless network connection unless the network SSID
matches exactly the SSID used by the access point.
4. Save your settings in a Profile.
a. Click Save Profile.
All the configuration settings are saved in this profile.
b. Click Apply.
c. Click Close to exit the wizard, or Cancel to return to the previous settings.
4. Verify wire less connectivity to your network.
Verify connectivity by using a browser such as Netscape or Internet Explorer to connect to the
Internet, or check for file and printer access on your network.
2-4
v1.0, August 2006
Page 29

NETGEAR Next 300 Mbps Wireless USB 2.0 Adapter WN121T User Manual
You can check the status bar in the Smart Wizard for the current connection status.
Note: If you cannot connect, see Chapter Chapter 3, “Troubleshooting. Also, for
problems with accessing network resources, the Windows Client and File and
Print Sharing software might not be installed and configured properly on your
computers. Please refer to “Internet Networking and TCP/IP Addressing:” in
Appendix B.
Setting up a Computer-to-Computer (Ad Hoc) Profile
The Computer-to-Computer setting uses Ad Hoc mode. Ad Hoc mode is an 802.11 networking
framework in which devices or computers communicate directly with each other, without the use
of an access point. For example, this mode is used when two Windows computers are configured
with file and print sharing enabled and you want to exchange files directly between them.
Note: Ad Hoc mode will not work using DHCP settings. Ad Hoc mode requires either
static IP addresses (such as
setting up static IP addresses on a Windows PC, refer to the PC Networking
Tutorial included on the NETGEAR CD.
192.168.0.1) or the IPX protocol. For instructions on
Follow the instructions below to create an Ad Hoc mode profile.
v1.0, August 2006
2-5
Page 30

NETGEAR Next 300 Mbps Wireless USB 2.0 Adapter WN121T User Manual
1. Use the icon to open the Smart Wizard. The Settings page opens.
2. Enter the network settings.
a. Select Computer-to-
Computer (Ad Hoc) for
the Network Type.
b. Select or enter the
Network Name (SSID)
for the Ad Hoc network.
c. In the Profile box, type
the name of the profile.
d. Click Apply.
Figure 2-3
5. Save your settings in a Profile.
a. Click Save Profile.
All the configuration settings are saved in this profile.
b. Click Apply.
c. Click Close to exit the Smart Wizard, or Cancel to return to the previous settings.
4. Configure the PC network settings.
a. Configure each PC with either a static IP address or with the IPX protocol.
b. Restart the PCs.
3. Verify wireless connectivity between your peer devices.
2-6
v1.0, August 2006
Page 31

NETGEAR Next 300 Mbps Wireless USB 2.0 Adapter WN121T User Manual
You can use the ping utility to verify your wireless connection:
a. On the Windows taskbar click Start, and
then click Run.
b. Assuming the target PC is configured
with 192.168.0.1 as its IP address, type
ping -t 192.168.0.1 and then click
OK.
Figure 2-4
c. This sends a continuous ping to the device with the 192.168.0.1 static IP address. The ping
response should change to “reply.”
Figure 2-5
At this point the connection is established. For more information about using ping, see
http://kbserver.netgear.com/kb_web_files/N101453.asp.
Note: If you cannot connect, see “Removing the Software” in Chapter 1. Also, for
problems with accessing network resources, the Windows Client and File and
Print Sharing software might not be installed and configured properly on your
computers. Please see the link to “Internet Networking and TCP/IP
Addressing:” in Appendix B.
Starting a Computer-to-Computer (Ad Hoc) Network Connection
1. On the Settings tab page of the Smart Wizard, select or type the Network Name (SSID).
2. Select the Computer-to-Computer (Ad Hoc) network type.
v1.0, August 2006
2-7
Page 32

NETGEAR Next 300 Mbps Wireless USB 2.0 Adapter WN121T User Manual
3. Click Initiate Ad Hoc. The Ad Hoc Setting dialog box opens:
Figure 2-6
4. In the Start Ad Hoc field, choose the wireless standard (802.1 1a, 802.1 1b, or 802.11g) for your
Ad Hoc computer-to-computer network.
5. In the Channel field, Automatic should work.
Note: If there is interference from another nearby wireless device, use the Networks
tab page to see which channels are in use in your area. Then use a different
channel. For example, if your neighbors use channel 6 and the signal strength
is strong, then channels 4-8 would probably be poor choices for you.
6. Click OK.
The Wireless USB 2.0 Adapter automatically selects the highest connection speed.
Wireless Security
Many networks use wireless security to encrypt wireless data communications. If you try to
connect to a network with wireless security the Smart Wizard detects it. Before you can use that
network you must set up the W ireless USB 2.0 Adapter with the same SSID, wireless security, and
security settings as that network. If you do not know what these are, contact the person who set up
the network.
The Wireless USB 2.0 Adapter supports the following types of wireless security:
• Wi-Fi Protected Access 2 Pre-Shared Key (WPA2-PSK)
• Wi-Fi Protected Access Pre-Shared Key (WPA-PSK)
• Wired Equivalent Privacy (WEP)
For more information about wireless security, see the Web link to “Wireless Communications:” in
Appendix B, or the wireless reference document at:
2-8
v1.0, August 2006
Page 33

NETGEAR Next 300 Mbps Wireless USB 2.0 Adapter WN121T User Manual
http://documentation.netgear.com/reference/enu/wireless/index.htm
In addition to the wireless security features, networks should use LAN network security features
such as requiring a user name and password to access the shared resources in the network.
The procedures below explain how to configure the wireless encryption settings of your Wireless
USB 2.0 Adapter.
Know Your Wireless Network Settings
You will need to know the settings for your wireless network. The form on the next page is set up
so that you can record this information. You can use either of these two methods to keep track of
these settings:
• Print the form on the next page and fill it out. If you are uncomfortable writing out secure
information, put a “hint” to yourself instead of the actual information. Put the form someplace
where it will be very easy for you to remember, or save two copies and put them in different
places.
• Save the information in a document on your computer . Later you can search for words such as
SSID to locate the information.
v1.0, August 2006
2-9
Page 34

NETGEAR Next 300 Mbps Wireless USB 2.0 Adapter WN121T User Manual
Wireless Network Name (SSID) and Security Settings
Print this form, fill in the configuration parameters and put it in a safe place for possible future
reference. For an existing wireless network, the person who set up the network will have this
information.
• Network Name (SSID): The Service Set Identification (SSID) identifies the wireless local
area network. Any
(SSID). You may customize it using up to 32 alphanumeric characters. Write your customized
wireless network name (SSID) on the line below.
Note: The SSID in the wireless access point is the SSID you configure in the wireless
Wireless network name (SSID): ______________________________
• If WEP Authentication is Used.
– WEP Encryption key size. Identify one: 64-bit or 128-bit. The encryption key size must
the wireless network settings.
(First available network) is the default WN121T wireless network name
USB adapter. For the access point and wireless nodes to communicate with
each other, all must be configured with the same SSID.
– Data Encryption (WEP) Keys. There are two methods for creating WEP data encryption
keys. Whichever method you use, record the key values in the spaces below.
• Passphrase method. ___________________________ ___
These characters are case
sensitive. Enter a word or group of printable characters and click the Generate Keys
button. Not all wireless devices support the passphrase method.
• Manual method. These values are not case sensitive. For 64-bit WEP, enter 10 hex
digits (any combination of 0-9 or a-f). For 128-bit WEP, enter 26 hex digits.
Key 1: _____________________________
Key 3: _____________________________
Key 2: _____________________________
Key 4: _____________________________
• If WPA2-PSK or WPA-PSK Authentication is Used.
– Passphrase: ______________________________
These characters are case sensitive.
Enter a word or group of printable characters. When y ou use WPA-PSK, the other devices
in the network will not connect unless they are set to WP A-PSK as well and are configured
with the correct Passphrase.
Use the procedures below to set up basic security settings in the WN121T.
2-10
v1.0, August 2006
Page 35

NETGEAR Next 300 Mbps Wireless USB 2.0 Adapter WN121T User Manual
Setting up WEP Encryption Security
Follow the steps below to configure WEP Encryption Security.
1. Run the Wireless USB 2.0 Adapter Smart Wizard.
a. Make sure the software is installed and the Wireless USB 2.0 Adapter is connected to the
USB port in your computer.
b. Use the icon to open the Smart Wizard. The Settings tab page opens.
Figure 2-7
3. Configure the Security settings.
a. In the Profile box, select the profile or type in a profile name.
b. In the Network Name (SSID) field select the network, or enter the SSID.
Note: You will not get a wireless network connection unless the network SSID
matches exactly what is configured in the access point.
c. In the Security section, select WEP.
v1.0, August 2006
2-11
Page 36

NETGEAR Next 300 Mbps Wireless USB 2.0 Adapter WN121T User Manual
4. Select the WEP encryption strength you will use.
The choices are:
• 64-bit WEP data encryption
• 128-bit WEP data encryption
Note: The 128-bit encryption keys require more processing, and slow performance
slightly.
5. Select Create with Passphrase and enter the passphrase. The configuration utility will
automatically generate the WEP keys.
Note: The characters are case sensitive. Be sure to use the same passphrase for all the
wireless devices in the network.
If the passphrase method is not available in the other devices, you must manually enter the
keys to match exactly what is in the access point and other 802.11b wireless devices.
6. Save your settings in a Profile.
a. Click Save Profile. All the configuration settings are saved in this profile.
b. Click Apply.
c. Click Close to exit the configuration utility.
Setting up WPA2-PSK Security
Follow the steps below to configure WPA2-PSK Security.
1. Run the Wireless USB 2.0 Adapter Smart Wizard.
a. Make sure the software is installed and the Wireless USB 2.0 Adapter is fully inserted in a
USB port in your computer.
2-12
v1.0, August 2006
Page 37

NETGEAR Next 300 Mbps Wireless USB 2.0 Adapter WN121T User Manual
b. Use the icon to open the Smart Wizard. The Settings tab page opens.
Figure 2-8
3. Configure the Security settings.
a. In the Profile box, select the profile or type in a profile name.
b. In the Network Name (SSID) field select the network, or enter the SSID.
Note: You will not get a wireless network connection unless the network SSID
matches exactly what is configured in the access point.
c. In the Security section, select WPA2-PSK [AES].
For more information about WPA2-PSK security, see the Web link to “Wireless
Communications:” in Appendix B.
4. Save your settings in a Profile.
a. Click the Save Profile button. All the configuration settings are saved in this profile.
b. Click Apply.
c. Click Close to exit the Smart Wizard.
v1.0, August 2006
2-13
Page 38

NETGEAR Next 300 Mbps Wireless USB 2.0 Adapter WN121T User Manual
Setting up WPA- PSK Security
Follow the steps below to configure WPA-PSK Security.
1. Run the Wireless USB 2.0 Adapter Smart Wizard.
a. Make sure the software is installed and the Wireless USB 2.0 Adapter is fully inserted in a
USB port in your computer.
b. Use the icon to open the Smart Wizard. The Settings tab page opens.
Figure 2-9
3. Configure the Security settings.
a. In the Profile box, select the profile or type in a profile name.
b. In the Network Name (SSID) field select the network, or enter the SSID.
Note: You will not get a wireless network connection unless the network SSID
matches exactly what is configured in the access point.
c. In the Security section, select WPA-PSK [TKIP].
For more information on WPA security, see the Web link to “Wireless Communications:”
in Appendix B.
2-14
v1.0, August 2006
Page 39

NETGEAR Next 300 Mbps Wireless USB 2.0 Adapter WN121T User Manual
4. Save your settings in a Profile.
a. Click Save Profile. All the configuration settings are saved in this profile.
b. Click Apply.
c. Click Close to exit the Smart Wizard.
Advanced Settings
Most people do not need to change the Wireless USB 2.0 Adapter Advanced Settings. If you
cannot connect without making changes, or if your Internet Service Provider (ISP) or network
administrator recommend changes, then some of these will be important to you.
On the Settings tab click Advanced Settings to display the dialog box shown below:
Figure 2-10
Networks Page
The Networks Page scans and displays all available wireless networks in your area.
1. Use the icon to open the Smart Wizard. The Settings tab page opens.
2. Click the Networks tab.
v1.0, August 2006
2-15
Page 40

NETGEAR Next 300 Mbps Wireless USB 2.0 Adapter WN121T User Manual
The following buttons are at the bottom of
the Networks tab:
• Help: Display online help.
• Find a Network: Use the wizard to
help you connect to a network. See
“Finding a Network” on page 2-2.
• Connect: Connect to the network that
you selected.
• Scan: Check for wireless networks.
• Close: Close the window of the Wizard.
Figure 2-11
The screen also shows the following information for each network scanned:
• Network Name (SSID): The name assigned to a wireless network. This is the same as the
SSID or ESSID configuration parameter. Note that as a security measure, some wireless
access points do not broadcast their SSID. In such cases, the SSID field will be blank even
though the rest of the information will still be displayed.
• Channel: The channel determines which operating frequency will be used.
• Security: Identifies whether the wireless network uses WEP or WPA-PSK security settings.
• Signal: Identifies the signal strength of the communications.
• MAC Address: Identifies the hardware address (MAC Address) of the wireless device
broadcasting this information.
• Mode: Identifies the type of wireless network — Access Point (Infrastructure) or Computerto-Computer (Ad Hoc).
Note: You can click Scan to see which networks are broadcasting in your area. This
refreshes the page.
2-16
v1.0, August 2006
Page 41

NETGEAR Next 300 Mbps Wireless USB 2.0 Adapter WN121T User Manual
Statistics Page
The Statistics page provides real time and historical trend information on the data traffic and
performance of your wireless adapter.
Figure 2-12
• Transmit/Receive Performance (%): A real time graph identifying the total, receive, and
transmit utilization as a percentage the total possible.
• Transmit, Receive, and Total (TxRx): Radio buttons let you select whether to display the
transmit performance, the receive performance, or both in the same graph.
• Transmit Statistics: Identifies transmit megabits per second (Mbps), transmit packets per
second (Tx Packets/s), total transmitted packets, and transmit errors.
• Receive S tat istics: Identifies receive megabits per second (Mbps), receive packets per second
(Rx Packets/s), total received packets, and reception errors.
2-17
v1.0, August 2006
Page 42

NETGEAR Next 300 Mbps Wireless USB 2.0 Adapter WN121T User Manual
About Page
The About page displays the current software version information.
The following information is displayed in the About page:
• Regional Domain: This is the region setting for the wireless adapter. The approved channels
for the region are automatically scanned. Governments regulate the channels used for wireless
transmission. Operating the wireless adapter in a different region may violate local laws.
No ! Country Code
Country Code selection feature to be disabled for products marketed to the US/CANADA
• Driver Version: The wireless adapter driver version.
• Driver Date: The wireless adapter driver date.
• MAC Address: The MAC address of the adapter. The Media Access Control address is a
unique 48-bit hardware address assigned to every network interface card. Some wireless
networks will restrict access based on a list of known MAC addresses. If you are
communicating with such a network, you would have to provide the address shown here to the
network administrator before you would be allowed to connect. Restricting access by MAC
address adds an obstacle against unwanted access to your network. However, if the only
wireless security that your network uses is MAC addressing, your data is easy for hackers to
read.
• IP Address: The IP address assigned to this adapter.
• Smart Wireless Utility: The version and date of the Smart Wizard.
v1.0, August 2006
Page 43

Chapter 3
Troubleshooting
This chapter provides information about troubleshooting your Wireless USB 2.0 Adapter. After
each problem description, instructions are given to help you diagnose and solve the problem. For
information about connecting to wireless networks and the Internet, see “Connecting to Wireless
Networks and the Internet” in Chapter 1.
Also, for problems with accessing network resources, the Windows software might not be installed
and configured properly on your computers. Please refer to the link to “Internet Networking and
TCP/IP Addressing:” in Appendix B.
Troubleshooting Tips
Symptom Cause Solution
I can connect to an
access point, but I
cannot connect to
other computers on
the network or the
Internet.
This could be a
physical layer problem
or a network
configuration problem.
Check to make sure that the access point is physically
connected to the Ethernet network.
Make sure that the IP addresses and the Windows networking
parameters are all configured correctly.
Restart the cable or DSL modem, router, access point, and
notebook PC.
Refer to “A Road Map for ‘How to Get There From Here’” on
page 2-2 for additional suggestions.
Frequently Asked Questions
Use the information below to solve common problems you may encounter. Also, please refer to the
knowledge base on the NETGEAR website at http://kbserver.netgear.com/products/wn121t.asp.
Unless you can solve a problem right away, go online and upgrade to the latest firmware for your
adapter, using the link above.
Chapter 3-1
v1.0, August 2006
Page 44

NETGEAR Next 300 Mbps Wireless USB 2.0 Adapter WN121T User Manual
The Smart Wizard keeps asking me to save my settings
This is because you have made changes to the settings and the Smart Wizard is offering you the
chance to save the changes. If you want to avoid these Profile setting prompts, simply click Apply
before you close the Smart Wizard.
Ad Hoc mode is not working correctly
You need to click the Initiate Ad Hoc button before you click Apply. Here is how you start an Ad
Hoc network:
1. Fill in the Network Name (SSID).
2. Select the Computer-to-Computer (Ad Hoc) Network Type.
3. Click Initiate Ad Hoc.
4. Accept the default settings or make your changes and click OK
5. Click Apply.
Note: Be sure all computers in your Ad Hoc network are configured with static IP
addresses in the same subnet.
How to use the wireless configuration utility that comes with Windows XP
During the software installation the wizard prompts you to choose either the NETGEAR Smart
Wizard or the Windows configuration utility. Be sure the Wireless USB 2.0 Adapter is connected
to the USB port in the computer and follow these instructions to change your selection.
1. Go to Control Panel and select Network Connections.
2. Right click on the connection and select Properties.
3. Click the Wireless Networks tab.
4. Select or clear the WN121T “Use Windows to configure my wireless network settings” check
box.
Did the Wireless USB 2.0 Adapter receive a valid IP address from the Wireless
Router/AP?
The easiest way is to click the System Tray icon to open the Wireless USB 2.0 Adapter Smart
Wizard. Then check the IP address in the About page.
Chapter 3-2
v1.0, August 2006
Page 45

NETGEAR Next 300 Mbps Wireless USB 2.0 Adapter WN121T User Manual
I cannot connect to the AP that I want from the Networks browser list.
The access point is available and there is good signal strength. There are a few possibilities:
• If the access point (AP) is WPA-PSK protected, you need the correct WPA-PSK passphrase.
Otherwise, the Wireless USB 2.0 Adapter will still be connected to the previous access point
and you will not be able to change to the WPA-PSK access point.
• If the access point is WEP protected (either 64-bit or 128-bit encryption), you will be
prompted to enter the WEP encryption security information.
The Wireless USB 2.0 Adapter is not getting an IP address
You proba bly upgraded your Wireless USB 2.0 Adapter software and did not reboot your system.
T o get an IP address assigned, you can either restart your computer or choose another access point
to connect to. If there are no additional access points for you to choose from, restart your system
and connect to your desired access point again.
Note: It does not usually help to shut down the Smart Wizard or disable/enable the
adapter.
Why do I see no more than 54 Mbps on the status bar?
The Wireless USB 2.0 Adapter can operate at 240 Mbps. You are probably connecting to a
standard 802.11g network. If you use the NETGEAR WPNT834 RangeMax™ 240 Wireless
Router you will see network speeds up to 240 Mbps.
If you are connecting to an 802.11b network, the maximum 802.11b speed is 11 Mbps.
The maximum speed of a USB 2.0 port is 480 Mbps. If your computer has a USB 1.1 port, the
Wireless USB 2.0 Adapter is limited to that port’s maximum speed, which is 14 Mbps. PC
computers can be upgraded with optional add-on USB 2.0 adapters that provide one or more USB
2.0 ports.
If you are already using a USB 2.0 controller, make sure that you are using the correct driver for
USB 2.0.For Windows XP, you need to upgrade your system to Service Pack 1 in order to utilize
the USB 2.0 port. For Windows 2000, you need to up grade your system to Service Pack 4 in ord er
to utilize the USB 2.0 port.
Chapter 3-3
v1.0, August 2006
Page 46

NETGEAR Next 300 Mbps Wireless USB 2.0 Adapter WN121T User Manual
Why do I see two Wireless USB 2.0 Adapter icons in the System Tray?
If you see two icons in the System Tray at the bottom right corner of the screen, you have an older
software version installed on your system and it needs to be removed. See “Removing the
Software” in Chapter 1 or “Upgrading the Wireless USB 2.0 Adapter Software” in Chapter 1.
Chapter 3-4
v1.0, August 2006
Page 47

Appendix A
Default Configuration Settings and Technical
Specifications
Default Configuration Settings
The following table lists the default settings of your Wireless USB 2.0 Adapter.
Feature Description
Smart Wizard Enabled
Wireless
Wireless Communication Enabled
Wireless Network Name (SSID) Any (will connect to first wireless network that responds)
Security Disabled
Network Type Infrastructure
Transmission Speed Auto
-- -Operating Mode g and b
Data Rate
*. Maximum wireless signal rate (IEEE Standard 802.11). Actual thr oughput will vary. Network conditions
and environmental factors, including volume of network traffic, building materials and construction, and
network overhead, lower actual data throughput rate.
*
Up to 300 Mbps
v1.0, August 2006
A-1
Page 48

NETGEAR Next 300 Mbps Wireless USB 2.0 Adapter WN121T User Manual
Technical Specifications
This table below describes technical specifications for the NETGEAR Next 300 Mbps Wireless
USB 2.0 Adapter WN121T.
Antennas 2 separate PCB internal antennas
Standards 802.11n Draft, 802.11g, 802.11b
Radio Data Rate • 802.11n Draft: 6, 6.5, 13, 13.5, 19.5, 26, 27, 39, 40.5, 53, 54, 58.5, 65, 78,
81, 104, 108, 117, 121.5, 130, 135, 162, 216, 243, 270, 300 Mbps
• 802.11b/g: 1, 2, 5.5, 6, 9, 11, 12, 18, 24, 36, 40, 48, 54, 72, 80, 84, 96,
108, 120, 144, 160, 168, 192, 216, and 240 Mbps
Frequency 2.4GHz to 2.5GHz CCK and OFDM Modulation
Power 5V bus powered
Emissions FCC Part 15 Class B, CE
Bus interface USB 5V
Provided drivers Microsoft Windows XP SP1, Windows XP SP2 and Windows 2000 SP4
Operating Environment Operating temperature: 0 to 45 degree C
Encryption 40-bit (also called 64-bit) and 128-bit WEP data encryption, WPA2-PSK,
and WPA-PSK
Warranty Limited 1-year warranty
A-2
v1.0, August 2006
Page 49

Appendix B
Related Documents
This appendix provides links to reference documents you can use to gain a more complete
understanding of the technologies used in your NETGEAR product.
Document Link
Internet Networking and
TCP/IP Addressing:
Wireless Communications:
Preparing a Computer for
Network Access:
Virtual Private Networking
(VPN):
Glossary:
http://documentation.netgear.com/reference/enu/tcpip/index.htm
http://documentation.netgear.com/reference/enu/wireless/index.htm
http://documentation.netgear.com/reference/enu/wsdhcp/index.htm
http://documentation.netgear.com/reference/enu/vpn/index.htm
http://documentation.netgear.com/reference/enu/glossary/index.htm
v1.0, August 2006
Appendix B-1
Page 50

NETGEAR Next 300 Mbps Wireless USB 2.0 Adapter WN121T User Manual
Appendix B-2
v1.0, August 2006
 Loading...