

Netgear XE102 User Manual
User's Guide
Wall-Plugged Ethernet Bridge
XE102
Introduction
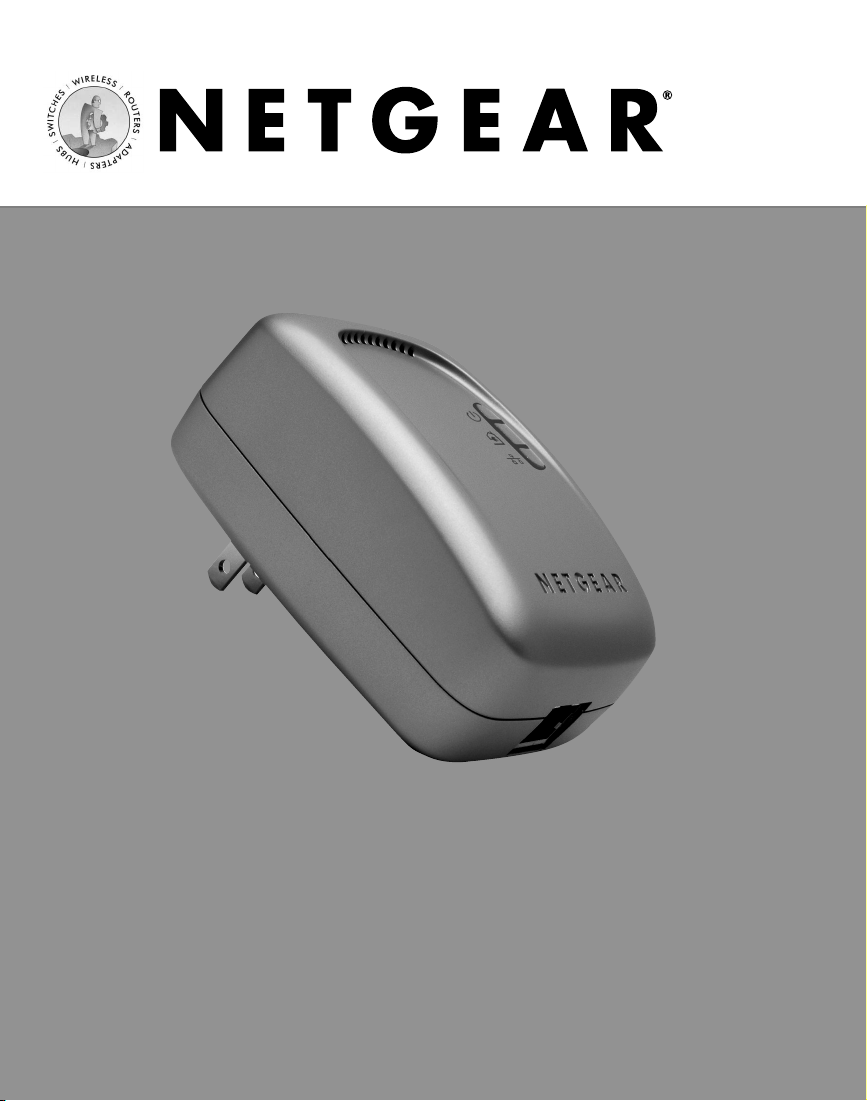
Thank you for purchasing the NETGEAR®XE102 Wall-Plugged Ethernet Bridge. This WallPlugged Ethernet Bridge lets you completely network your home by simply plugging into your
existing electrical wiring, so your network connection is as close as the nearest 110-volt electrical
outlet. Now your high-speed cable/DSL connection can be available in every room. And you can
also extend an existing Ethernet network to PCs in other rooms without any additional wiring.
Robust and rate-adaptive, the XE102 uses a state-of-art signal processing techniques that
minimizes interference from other household appliances, so that you can use common household
appliances, such as hair dryers, vacuum cleaners or microwave ovens -- and your network will still
operate at its highest data rate capability. It’s an excellent choice for web surfing, playing games or
telecommuting over the Internet. It is safe and reliable! It’s also a great way to compliment you
existing wireless network.
This User’s guide shows you how to connect your Wall-Plugged Ethernet Bridge to your PC or
Cable/DSL router. Setup is easy, just follow the instructions in this guide and your network will
be up and running in a few minutes.
If you have problems, there is a troubleshooting section on pages 14 and 15 to help you. You can
all also find the latest information online from www.NETGEAR.com. NETGEAR offers
technical support 24 hours a day and 7 days a week on the Web (www.netgear.com), by e-mail
(support@NETGEAR.com) or via phone (see the provided support information card for phone
numbers).
1
Cable/DSL
Modem
Home Office
XE102
Notebook
PC
Router
Kids' Room
XE102
Wall-Plugged Ethernet Bridge XE102
Desktop
PC
Family Room
XE102
Gaming
Console

• XE102 Wall-Plugged Ethernet Bridge
• 6-ft. (1.83m) Ethernet Cable
• Resource CD
• XE102 User’s Guide
• Warranty card
• Support information card
Preparing to Install the XE102
The NETGEAR Wall-Plugged Ethernet Bridge enables you to set up a home network
using your existing electrical outlets, and easily compliments your existing network.
Computers in different rooms can share the Internet connection, files and printers using
the electrical wiring that is already in your house. There is no need for unsightly
Ethernet cabling or any additional rewiring, and it is entirely safe.
Place an Ethernet Bridge in each room that you want to set up using an Ethernet Bridge. The
XE102 Wall-Plugged Ethernet Bridge can easily connect to any device with a 10BaseT Ethernet
capable device.
In order to share an Ethernet Bridge peer-to-peer connection between computers all you will need is:
• One (1) Ethernet Bridge device attached to each computer
Important Safety Instructions for the XE102 Wall-Plugged
Ethernet Bridge
The following precautions should be taken when using this product.
• Read all instructions before installing and operating this product.
• Common sense goes a long way – always be cautious when working around AC voltages.
• Do not open and/or alter this product in any way.
• Follow common household wiring safety practices.
If you have any questions or concerns regarding these safety measures – please contact Netgear
Customer Support.
Installation Overview
Estimated setup time is 5 to 15 minutes for each PC.
1. Unpack the box and verify the contents.
2. Connect the Ethernet port to any Ethernet device such as a PC or Cable/DSL router.
3. Set the encryption password (highly suggested).
Package Contents
When you open the box, verify that you have the following contents.
The package includes:
1
1
2
3
Wall-Plugged Ethernet Bridge
XE102
Wall-Plugged Ethernet Bridge XE102
Resource CD, User's guide,
Support information card &
Warranty card
Kids' Room
XE102
Wall-Plugged Etehrnet Bridge XE102
Desktop
PC
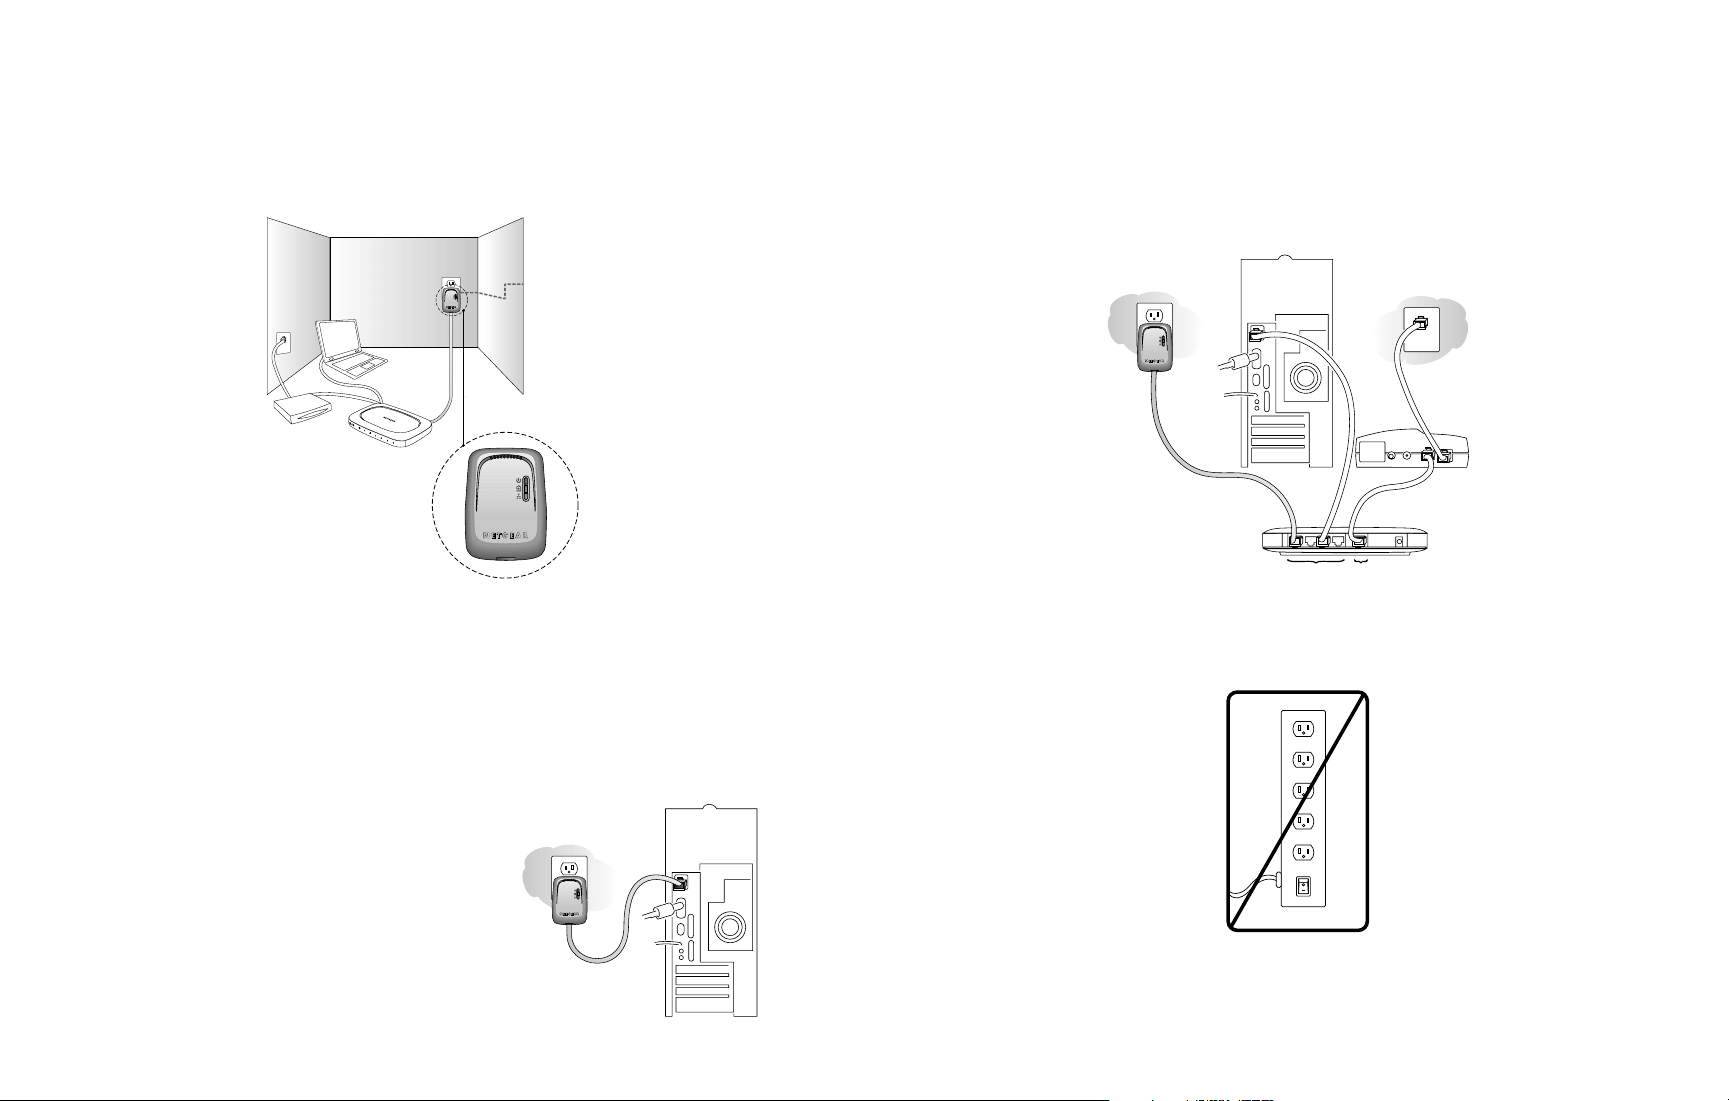
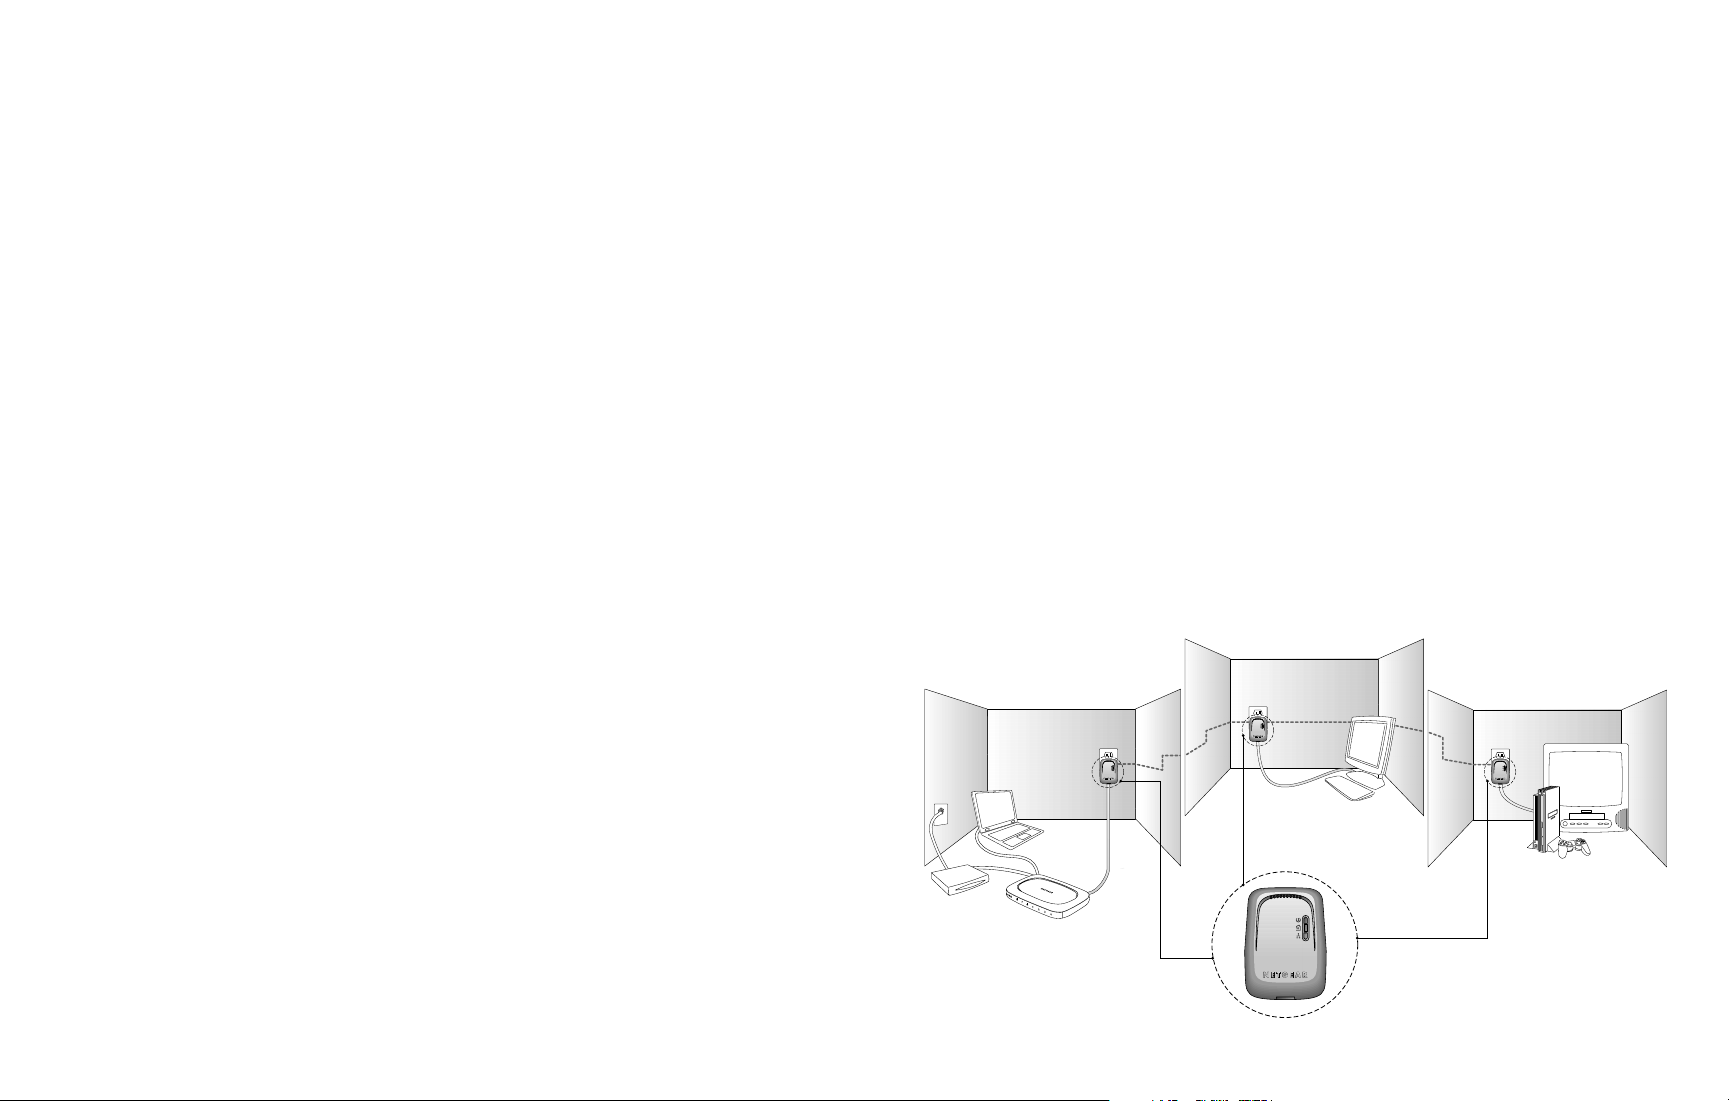
Connecting the Ethernet Bridge to a Cable/DSL router
1. Connect the XE102 Ethernet Bridge into a wall socket that is within a reasonable distance to
your computer when using the Ethernet Cable.
2. Connect the enclosed standard Ethernet Cable to the Ethernet port of the XE102 Ethernet
Bridge.
3. Connect the other end of the cable to an available Ethernet LAN port of the Cable/
DSL/Wireless Router.
Note: Do not connect the XE102 Ethernet Bridge into a power strip or surge protector as
this may prevent the bridge from working properly or degrade the network performance.
In order to share a Broadband or Dial-up Networking connection between computers using an
Ethernet Bridge you will need:
• One (1) Wall-Plugged Ethernet Bridge device attached to each computer
• Standard Cable/DSL Modem
• Standard Cable/DSL Ethernet or Wireless Router
Installing the XE102
Connecting the Ethernet Bridge to a PC
1. Connect the XE102 Ethernet Bridge into a wall socket that is within a reasonable distance to
your computer when using the Ethernet Cable.
2. Connect the enclosed standard Ethernet Cable
to the Ethernet port of the XE102 Ethernet
Bridge.
3. Connect the other end of the cable to the
Ethernet port of the PC.
5
4
2
2
Home Office
XE102
Notebook
PC
Router
Cable/DSL
Modem
Wall-Plugged
Ethernet
Bridge XE102
Cable/DSL
Modem
Wall-Plugged Ethernet Bridge XE102
Wall-Plugged
Ethernet Bridge
XE102
WAN
Port
Router
LAN
Ports
OFF
ON
WARNING!
 Loading...