

Page 1
500Mbps Powerline Kit with
Dual Band WiFi
NP508
USER GUIDE
Page 2

2
NP508 – 500Mbps Powerline Adapters User Guide
www.netcommwireless.com
Copyright
Copyright© 2014 NetComm Wireless Limited. All rights reserved.
The information contained herein is proprietary to NetComm Wireless. No part of this document may be translated, transcribed,
reproduced, in any form, or by any means without prior written consent of NetComm Wireless.
Please note: This document is subject to change without notice.
Save Our Environment
When this equipment has reached the end of its useful life, it must be taken to a recycling centre and processed separately from
domestic waste.
The cardboard box, the plastic contained in the packaging, and the parts that make up this device can be recycled in accordance
with regionally established regulations. Never dispose of this electronic equipment along with your household waste. You may be
subject to penalties or sanctions under the law. Instead, ask for disposal instructions from your municipal government.
Please be responsible and protect our environment.
This manual covers the following products:
NetComm Wireless NP508 500Mbps Powerline Kit with Dual Band WiFi
DOCUMENT VERSION
DATE
1.0- Initial document release
March 2014
Table 1 - Document Revision History
Page 3

www.netcommwireless.com
NP508 – 500Mbps Powerline Adapters User Guide
3
Table of Contents
About the Product ......................................................................................................................................................................... 4
How Does It Work? ....................................................................................................................................................................................... 4
Direct Connection .......................................................................................................................................................................................... 4
AC Passthrough ............................................................................................................................................................................................ 4
Package Contents ......................................................................................................................................................................................... 5
Interfaces and Indicators ................................................................................................................................................................................ 5
WiFi Adapter .......................................................................................................................................................................................... 5
AC Passthrough Adapter ....................................................................................................................................................................... 7
Creating a Powerline Network ................................................................................................................................................................ 8
Resetting the Private Network Password ................................................................................................................................................ 9
Joining an Existing Powerline Network .................................................................................................................................................... 9
Determining Connection Rate ...................................................................................................................................................................... 11
Power Saving Mode .................................................................................................................................................................................... 11
Getting Started ............................................................................................................................................................................ 12
Plan Your Network ....................................................................................................................................................................................... 12
The Web User Interface ............................................................................................................................................................... 14
Accessing the Web User Interface ................................................................................................................................................................ 14
Status page ......................................................................................................................................................................................... 14
Network page ...................................................................................................................................................................................... 16
Management page ............................................................................................................................................................................... 18
Upgrading the firmware of the Powerline adapter .......................................................................................................................................... 19
Restarting the Powerline adapter .................................................................................................................................................................. 19
Restoring factory defaults ............................................................................................................................................................................ 20
To change the Private Network Password .................................................................................................................................................... 20
Changing the Remote Private Network Password ......................................................................................................................................... 21
Powerline Utility ........................................................................................................................................................................... 22
Requirements .............................................................................................................................................................................................. 22
Installation ................................................................................................................................................................................................... 22
Opening Powerline Utility ............................................................................................................................................................................. 22
Powerline Utility User Interface ................................................................................................................................................... 23
Home .......................................................................................................................................................................................................... 23
Private Network Name ................................................................................................................................................................................. 24
Quality of Service ......................................................................................................................................................................................... 26
Devices ....................................................................................................................................................................................................... 27
Firmware Upgrade ....................................................................................................................................................................................... 28
Legal & Regulatory Information................................................................................................................................................... 29
Product Warranty ........................................................................................................................................................................................ 29
Limitations of Warranty ................................................................................................................................................................................ 29
Page 4
4
NP508 – 500Mbps Powerline Adapters User Guide
www.netcommwireless.com
About the Product
Powerline adapters are ready to use out of the box and do not require the installation of driver software to work. They can be
connected to computers, routers, gaming consoles, hubs, IPTV set-top boxes, and other Ethernet devices regardless of operating
system.
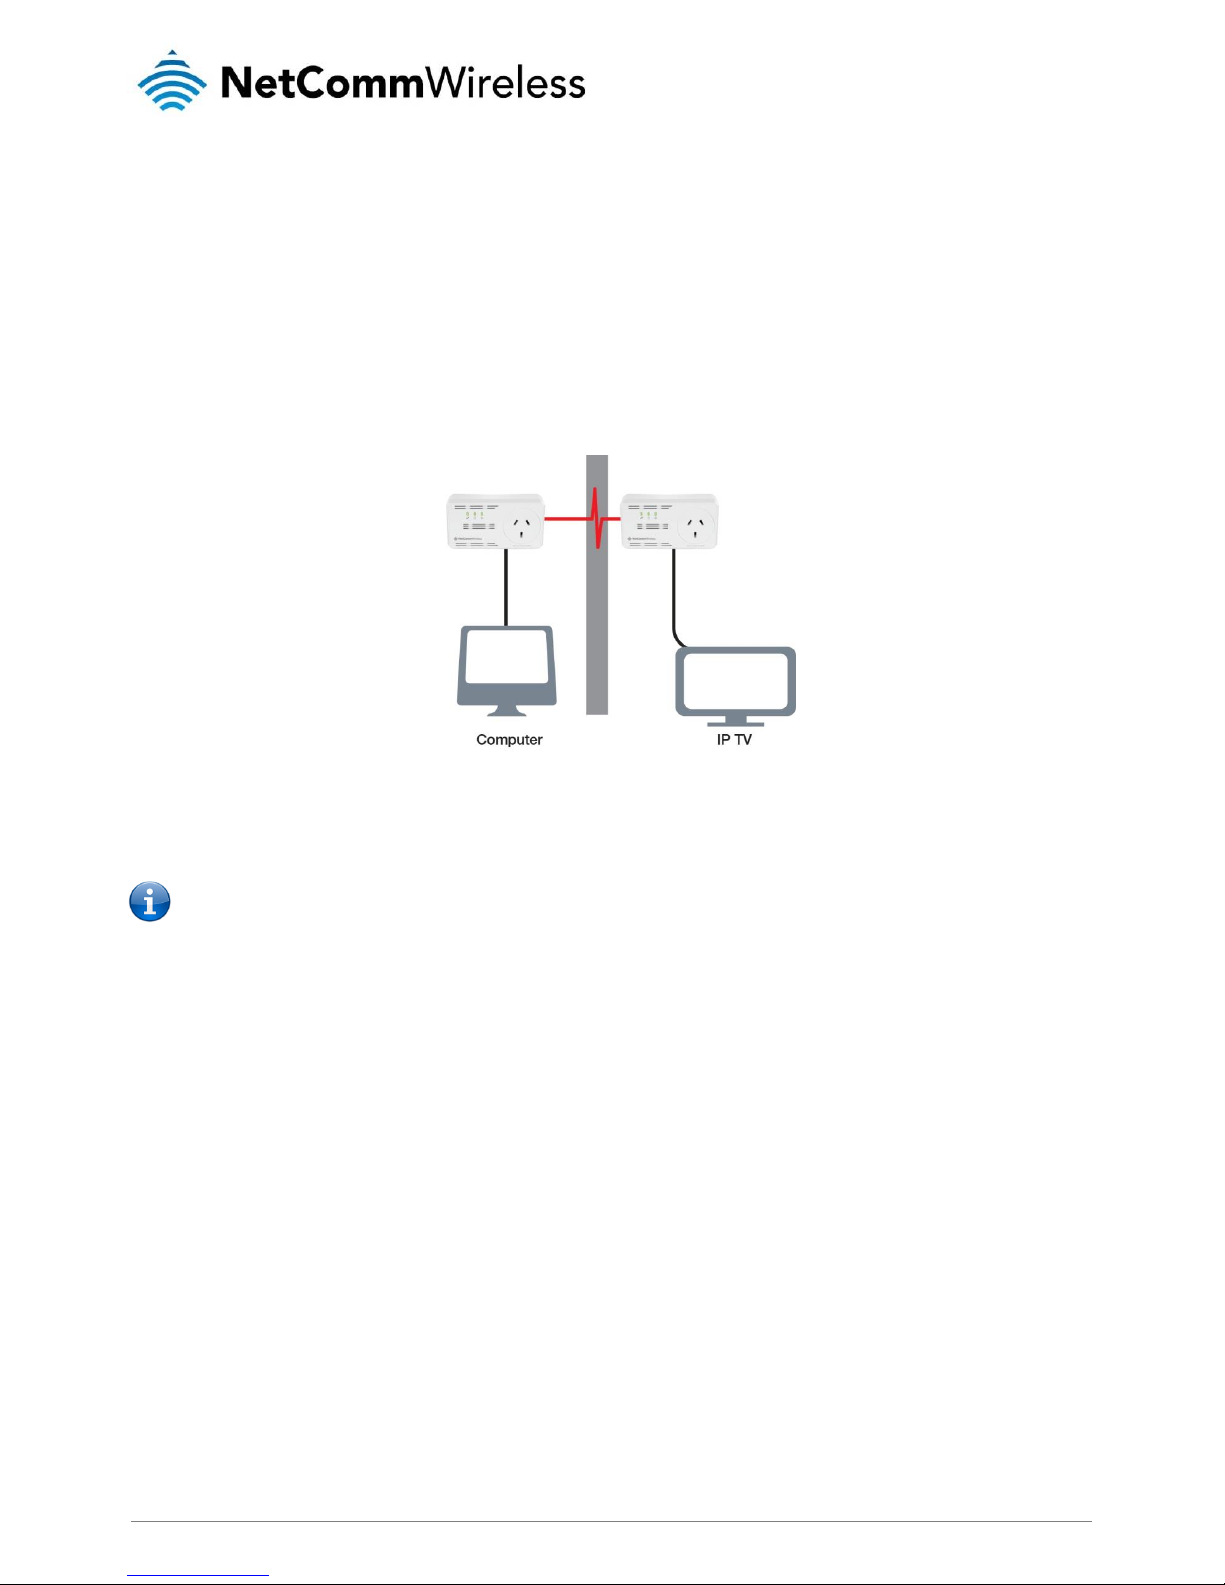
How Does It Work?
Powerline adapters utilise the existing electrical wiring in the house as a path to create a secured network of computers and
Ethernet devices. With a maximum data rate of up to 500 Mbps, Powerline adapters can reliably handle high requirement
applications like broadband Internet, high definition video streaming, and Voice over IP.
Powerline adapters convert digital signals to a complex analog signal that traverses along the electrical wires. When receiving the
analog signal, the Powerline adapters convert the analog signal back to digital. To make the signal secure, a 128-bit AES encryption
is applied.
A Powerline device can only communicate with other Powerline devices that use the same Private Network Password. The Private
Network Password can be changed manually using the Powerline adapter utility software on a computer with a Windows operating
system. When you use the software, you have to manually type the Private Network Password for the device. Another way to
change the Private Network Password is to use the Simple Connect button. Simple Connect automatically creates an encrypted
Private Network Password. It can also be used to reset the Private Network Password or to add a device into an existing Powerline
network.
Note: Powerline adapters are pre-configured to use a common Private Network Password unique for that pair and are
ready to use.
When a Powerline adapter communicates with another device, the Powerline Activity LED colour indicates the connection speed:
red means good; amber means better; and green means best.
Direct Connection
For best performance, connect Powerline adapters directly to a wall outlet. Avoid connecting them to a power strip where other
electrical devices are connected. Other devices create electrical noise that may affect the performance of Powerline adapters.
AC Passthrough
One of the Powerline adapters in the kit comes with built in AC pass-through. With this unit you are conveniently able to use the
same power point to plug in other electrical appliances. All you have to do is connect the electrical appliance into the built-in passthrough socket and it will have power as if it was connected directly into the wall. This will eliminate the need to connect your
Powerline adapter to a power board which will improve your networking performance.
Page 5

www.netcommwireless.com
NP508 – 500Mbps Powerline Adapters User Guide
5
Package Contents
The package contains the following items:
2 x Powerline adapters (1 x WiFi Adapter, 1 x AC Passthrough Adapter)
2 x Ethernet cables
Quick Start Guide
If any of these items are missing or damaged, please contact NetComm Wireless Support immediately by visiting the NetComm
Wireless Support website at: http://support.netcommwireless.com
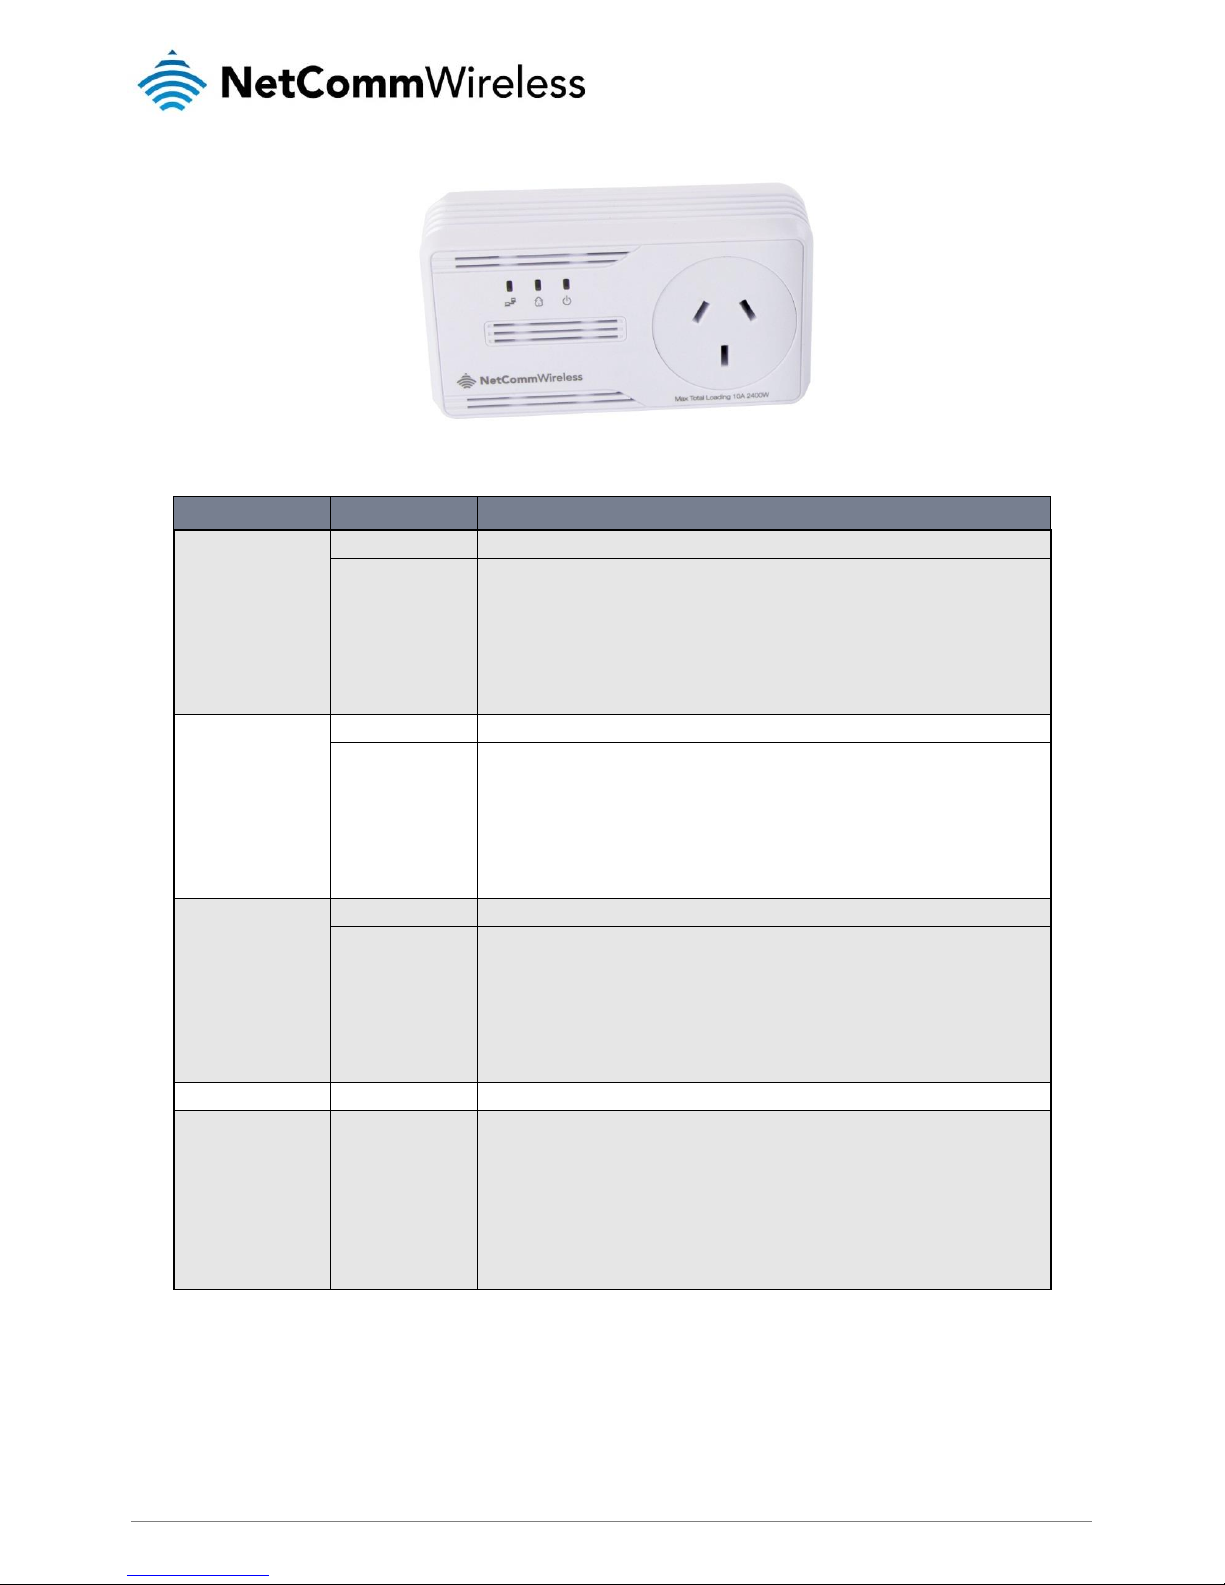
Interfaces and Indicators
WiFi Adapter
A
F
E
B
C G D
Page 6

6
NP508 – 500Mbps Powerline Adapters User Guide
www.netcommwireless.com
LABEL
STATUS
DESCRIPTION/FUNCTION
A
WPS Button / Wireless LED
Off
No power
On
Press for 2 seconds to trigger the WPS function.
Press for more than 5 seconds to reset the device.
When the wireless LED is steady it means that the Wireless Function is enabled.
B
Power LED
Off
No power
On
When Simple Connect is pressed for more than 10 seconds, this LED turns OFF and turns
ON to confirm the Private Network Password reset.
After Simple Connect is pressed for 2 seconds, this LED blinks to confirm the button press.
C
Powerline Activity
Off
An Ethernet device is not connected.
On
When Simple Connect is pressed for more than 10 seconds and PLC is enabled, this LED
turns OFF to confirm the Private Network Password reset. If PLC is disabled, this LED
remains off.
This LED is steady in colour when the device is part of a network.
The LED colours represent the connection rate within the network whether it is good (red),
better (amber), or best (green).
D
Ethernet Activity
Off
An Ethernet device is not connected.
On
This LED is steady when an Ethernet device is connected.
The LED flashes to indicate Ethernet activity.
E
Ethernet Port
Accepts either cross or straight Ethernet cable.
F
Simple Connect Button
Press to create or join a network.
When Simple Connect is pressed for more than 10 seconds, the Private Network Password is
randomized.
Then Press for 2 seconds to pair the device.
G
Dual Band Switch (2.4GHz/5GHz)
This allows you to manually switch to either 2.4 Ghz or 5 Ghz frequency band.
Page 7
www.netcommwireless.com
NP508 – 500Mbps Powerline Adapters User Guide
7
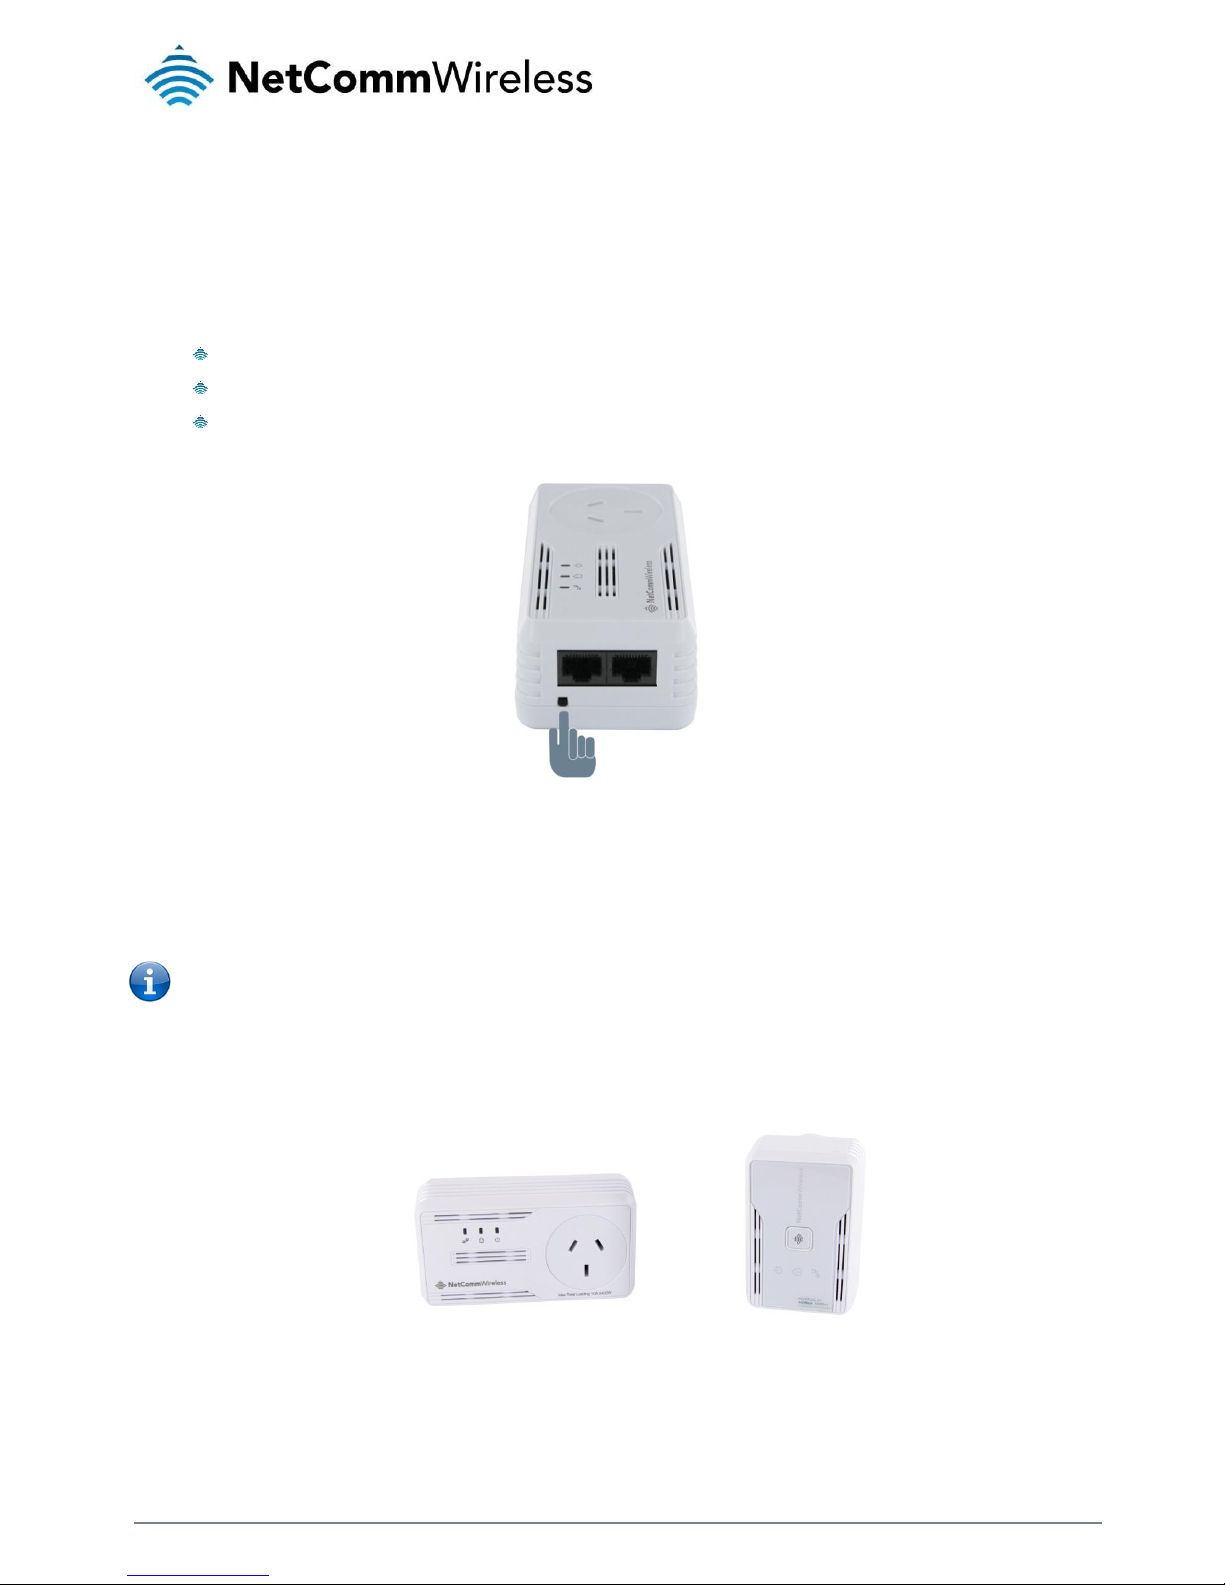
AC Passthrough Adapter
LABEL
STATUS
DESCRIPTION/FUNCTION
Power
Off
No power
On
Powerline adapter is in Power Saving Status when LED is blinking slowly.
When Simple Connect is pressed for 5-8 seconds, this LED will turn OFF and turn ON once
to confirm the Private Network Password reset.
After Simple Connect is pressed for 2-4 seconds, this LED will blink to confirm the button
press.
Powerline Activity
Off
Device is not connected to a Powerline adapter network.
On
When Simple Connect is pressed for 5-8 seconds, this LED will turn OFF to confirm the
Private Network Password reset.
This LED is steady in color when the device is part of a Powerline adapter network.
The LED colors represents the connection rate within the Powerline adapter network
whether it is good (red), better (amber), or best (green).
Ethernet Activity
Off
An Ethernet device is not connected.
On
When Simple Connect is pressed for 5-8 seconds, this LED will turn OFF to confirm the
Private Network Password reset.
This LED is steady in colour when the device is part of a Powerline adapter network.
The LED colours represent the connection rate within the Powerline adapter network
whether it is good (red), better (amber), or best (green).
Ethernet Port
Accepts either crossover or straight-through Ethernet cable.
Simple Connect Button
/ Reset Button
Press to create or join a Powerline adapter network. It can also be used to reset the Private
Network Password to a random key.
When Simple Connect is pressed for 5-8 seconds, it will randomize the Private Network
Password.
Press for 10-13 seconds to reset to the factory default settings. When you reset to the
factory default, all your configuration changes are removed.
Page 8
8
NP508 – 500Mbps Powerline Adapters User Guide
www.netcommwireless.com
How to Use Simple Connect
The Powerline Adapters that you have received are ready for use straight out of the box. They require no initial set-up or
configuration. All you need to do is connect them as detailed in the Quick Start Guide. The following instructions about using the
Simple Connect button to configure your network are only applicable if you want to change the default private network password or
add more adapters on the same Powerline network.
Simple Connect provides a more convenient way of creating your Powerline network without the need to open the Powerline Utility
software from a computer. The button has three main functions which include:
Creating a Powerline Network
Resetting the Private Network Password
Joining an existing Powerline Network
Creating a Powerline Network
To create a Powerline network, you need at least two Powerline devices using random Private Network Passwords. When you
press Simple Connect on both devices, a common Private Network Password will be automatically generated to enable them to
communicate with each other.
Note: New Powerline adapters can already communicate with each other out of the box. However, if you intend to create a
new Private Network Password using Simple Connect for both devices, you must reset their Private Network Passwords to
a random key before proceeding.
To create a Powerline network using Simple Connect:
1. Plug your Powerline adapters side-by-side where you can easily observe the LED behaviour. Upon connection, the LEDs
will blink simultaneously and then the Power LED remains on steadily.
Adapter X Adapter Y
2. Press Simple Connect for two seconds on Adapter X. After you release the button, the Power LED will blink. If the Power
LED did not blink, press Simple Connect again for two seconds.
3. Press Simple Connect for two seconds on Adapter Y. After you release the button, the Power LED will blink. If the Power
LED did not blink, press Simple Connect again for two seconds. Make sure to press Simple Connect on Adapter Y within
Page 9
www.netcommwireless.com
NP508 – 500Mbps Powerline Adapters User Guide
9
two minutes after you press Simple Connect on Adapter X. The LEDs on both devices will switch off and on twice to signify
that they are searching for another device with which to pair.
4. To confirm the connection was established, check the LEDs. If a connection is made successfully the Power LEDs and the
Powerline Activity LEDs on both adapters are on. If the Powerline Activity LED on either Adapter X or Adapter Y is off, this
means the pairing was not successful. In this case, please repeat the process as outlined from step 1.
5. Unplug the Powerline adapters and then connect them to your Ethernet devices using the Ethernet cables from the product
package. After connecting the Ethernet cable, plug the adapters directly to a wall outlet in the room to which you would like
to provide network access. Keep in mind that only the WiFi Adapter has a WiFi radio, so choose a location for it that
provides WiFi coverage for the desired area.
Note: Powerline adapters work best when connected directly to a wall socket. Avoid plugging them into a power strip or
power extension. Other electrical devices in the power strip produce electrical noise that may affect the performance of the
adapter.
Resetting the Private Network Password
The Simple Connect button allows you to reset the Powerline adapter’s Private Network Password to a random key. When a
Powerline adapter is reset to a random key, it will not be able to communicate with any other device.
Note: The Simple Connect button has multiple functions depending on the length of time it is depressed. Resetting the
Private Network Password is not the same as restoring factory default settings.
To reset the Private Network Password using the Simple Connect button:
1. On one Powerline adapter, press and hold the Simple Connect button down for 11-13 seconds, wait for the Power LED
and Ethernet LED to turn off, and then release. The Powerline Activity LEDs of both units turn OFF.
2. On the second adapter, press the Simple Connect button for 2 seconds and then press the Simple Connect button on the
first Powerline adapter to pair the devices. The Power LED blinks to indicate that the button is pressed.
Joining an Existing Powerline Network
The Simple Connect feature enables a new device to join an existing network by copying the Private Network Password of the
existing network to the new Powerline adapter.
To join an existing secured Powerline network using the Simple Connect button:
1. Plug Powerline adapter Z beside one of your existing Powerline adapter devices. Make sure you can observe the LED
behaviour. Upon connection, Powerline adapter Z’s LEDs blink simultaneously and then the Power LED remains on
steadily. If there is an Ethernet link, the Ethernet LED will be on.
2. On Powerline adapter Z, press the Simple Connect button for 5-8 seconds. When you release the button, the Power LED
and Ethernet LED will turn off and on again.
3. On the existing Powerline device, press the Simple Connect button for 1-3 seconds. When you release the button, the
Power LED blinks continuously. If the Power LED did not blink, press the Simple Connect button again for 1-3 seconds.
4. Within the next 2 minutes, press the Simple Connect button on Powerline adapter Z again for 1-3 seconds.
5. Confirm that the connection was established successfully. To do this, check that the Power LEDs and Powerline Activity
LEDs on all Powerline adapters are on. If the Powerline Activity LED on adapter Z is off, the pairing was not successful and
you must repeat the process.
Page 10

10
NP508 – 500Mbps Powerline Adapters User Guide
www.netcommwireless.com
6. Unplug Powerline adapter Z and then connect it to your Ethernet device using the Ethernet cables from the product
package. After connecting the Ethernet cable, plug adapter Z directly to a wall outlet where you intend to use it.
Note: Powerline adapters work best when connected directly to a wall socket. Avoid plugging them into a power strip or
power extension. Other electrical devices in the power strip produce electrical noise that may affect the performance of the
adapter.
Page 11

www.netcommwireless.com
NP508 – 500Mbps Powerline Adapters User Guide
11
Determining Connection Rate
Each colour of the Powerline Activity LED represents a connection rating. The connection rating can only be calculated when the
device is part of an existing network. The exact connection rate value can also be viewed using Powerline Utility.
Good (Red) – Connection rate is less than 30 Mbps
Better (Amber) – Connection rate is between 30 to 80 Mbps
Best (Green) – Connection rate is more than 80 Mbps
Power Saving Mode
After 15 minutes without Ethernet activity, the Power LED blinks slowly indicating that the adapter is in power saving mode.
Page 12

12
NP508 – 500Mbps Powerline Adapters User Guide
www.netcommwireless.com
Getting Started
Plan Your Network
Here are ideas on how you can plan your Powerline network.
Local Network
Share a high-speed Internet connection with any computer, wherever it is in the house.
Gaming Network
Connect your gaming console to the Internet and compete with other online players.
Page 13

www.netcommwireless.com
NP508 – 500Mbps Powerline Adapters User Guide
13
Entertainment Network
Experience IPTV streaming to your home entertainment system.
Media Network
Converge all your IP devices onto a single network to enjoy seamless integration.
Page 14

14
NP508 – 500Mbps Powerline Adapters User Guide
www.netcommwireless.com
The Web User Interface
The built-in Web User Interface allows you to configure Powerline adapter with WiFi. It is mainly used for Wireless Configuration,
Changing the Private Network Password, detecting other Powerline adapters in the network, and measuring the throughput of
devices. No software installation is required.
Note: The Web User Interface only applies to the WiFi Powerline adapter. To configure the AC Pass-through adapter,
please use the Powerline Utility software described here.
Note: To use the Web User Interface, you need a computer using a Windows or Mac OS operating system. The Web
interface works with various web browsers such as Internet Explorer, Firefox, Safari, and Google Chrome.
Accessing the Web User Interface
1. Connect an Ethernet cable from a desktop/laptop PC to any of the Ethernet ports on the Powerline adapter with WiFi.
2. On your computer, disable the wireless adapter (if applicable).
3. Open a web browser and enter http://192.168.1.200 in the address bar and press Enter. The login screen is displayed.
4. In the User Name and Password fields, enter
admin
and click the Login button. The Status page is displayed.
Status page
Device Information
Displays the MAC Address and Software version.
Network Information
Displays the packet information of the Powerline adapter.
Page 15

www.netcommwireless.com
NP508 – 500Mbps Powerline Adapters User Guide
15
User Information
Displays information about the Ethernet connection and the Wireless LAN interface.
Remote Device Information
Displays information about remote Powerline adapters detected in the network. Only Powerline adapters using the same Private
Network Password as the local Powerline adapter will appear in the Remote Devices list.
Remote Device Information displays the following information:
Device MAC Address - Displays the Remote Powerline adapter MAC Address.
Connection Rate (Tx/Rx) - Displays the Transmit and Receive connection rate for each active Powerline adapter.
TEI - Displays the Terminal Equipment Identifier.
Page 16

16
NP508 – 500Mbps Powerline Adapters User Guide
www.netcommwireless.com
Network page
WLAN Settings
Allows you to modify wireless radio settings.
Radio Settings
ITEM
DESCRIPTION
Mode
Allows you to change the wireless standard implemented in your Powerline adapter.
Channel
Define the Wireless Channel. The channel list can differ depending on the mode selected.
Transmission Power
Sets the value of the transmission power. The highest transmission power setting is 1 while
5 is the lowest setting.
Wireless Settings
ITEM
DESCRIPTION
Enable Wireless
Turns the wireless radio on or off.
Cancel Broadcast
When selected, the broadcast of the SSID is disabled.
SSID
The wireless network name.
BSSID
The MAC address of the wireless interface.
Wireless Security Mode
ITEM
DESCRIPTION
Network Authentication
You may configure wireless security features. The Powerline adapter supports 3
Wireless Security Mode including WEP, WPA-PSK, WPA2-PSK and EAP.
WPA Passphrase Key
The security key used to authenticate wireless clients on the network.
WPA Encryption
Select the encryption type. You may select from AES, TKIP or TKIP/AES.
Page 17

www.netcommwireless.com
NP508 – 500Mbps Powerline Adapters User Guide
17
Powerline Settings
Local Device Configuration
This function allows you to enable/disable the PLC feature of your device. It also allows you to change the Network Password or the
Private Network Password.
ITEM
DESCRIPTION
PLC Feature
Enables or disables the powerline network.
Network Password
Use this field to set the network password. Each unit must have the same password in
order to make a Powerline connection.
Local Device MAC
Displays the MAC address of the local Powerline unit.
Low Power Mode
Displays the current power mode of the adapter.
Remote Device Configuration
Allows you to add additional remote devices to your network. You can only enter the Remote MAC Address and respective
Password of your other Powerline adapters.
Page 18

18
NP508 – 500Mbps Powerline Adapters User Guide
www.netcommwireless.com
Management page
User Management
Use this page to change the administrator password used to access the web user interface of the unit.
Device Management
This page allows you to upgrade the firmware of the Powerline adapter, restart the device or restore the factory default settings.
Page 19

www.netcommwireless.com
NP508 – 500Mbps Powerline Adapters User Guide
19
Upgrading the firmware of the Powerline adapter
Use the Upgrade Firmware section to upgrade the firmware of the Powerline adapter with WiFi. After upgrading the firmware, the
Powerline adapter retains the same Private Network Password and MAC address settings. Before you proceed with the upgrade,
please visit the product’s page on the NetComm Wireless website (http://www.netcommwireless.com) to download the upgrade
files.
To upgrade the WiFi Powerline adapter’s firmware:
1. Go to the Management page and click on Device Management.
2. Click the Browse button, select the firmware upgrade file that you downloaded, then click the Start Upgrade button. The
firmware Upgrade will take about 3-5 minutes to complete.
IMPORTANT: After Firmware Upgrade, please restore to Factory Default Settings to ensure correct operation.
Restarting the Powerline adapter
You can manually trigger the adapter to restart without having to remove it from the power socket.
1. Go to the Management page and click on Device Management.
2. Under the Device Restart section, click the Restart button.
Page 20

20
NP508 – 500Mbps Powerline Adapters User Guide
www.netcommwireless.com
Restoring factory defaults
You can force the adapter to restart with the factory default settings.
1. Go to the Management page and click on Device Management.
2. Under the Restore Factory Defaults section, click the Restore Defaults button.
To change the Private Network Password
The Network Password field provides the function to manually change the Private Network Password of the local Powerline adapter.
A Private Network Password is a string of 8 to 64 characters enables Powerline devices to communicate with each other.
If you intend to create multiple networks, you can assign different Private Network Passwords among your devices. You have to,
however, make sure that at least two Powerline adapters have the same Private Network Password. A Powerline adapter that uses
a unique or random Private Network Password will not be able to communicate with other devices under a different Private Network
Password.
Page 21

www.netcommwireless.com
NP508 – 500Mbps Powerline Adapters User Guide
21
Note: In case you cannot connect into the network after changing the Private Network Password, please power cycle the device. To
power cycle, disconnect and then reconnect the Powerline adapter from the power outlet.
Changing the Remote Private Network Password
Without leaving your computer, you can change the Private Network Password of remote Powerline devices, provided they are
using the same Private Network Password as your local Powerline adapter. You cannot change the Private Network Password of
remote devices that is not currently networked with your local Powerline adapter.
Note: When changing the Private Network Password of remote devices, you will need the Device ID that appears on the label
pasted on the device. It is a good idea to list the Device ID of all your Powerline adapters to enable you to remotely change their
settings using the Powerline Web User Interface.
To change the Private Network Password of a remote Powerline adapter:
1. Open the Web User Interface, Under Network Tab, Powerline Settings
2. Go to Remote Device Configuration.
3. Enable Security
4. Type the Device Name (If any).
5. Enter the MAC Address of the other remote Powerline adapter.
6. Enter the Device Password. The Device Password can be found on the label on each respective device.
7. Click Save. When the process is complete, the message “Settings Applied” appears.
After changing the Private Network Password of the remote Powerline adapter, it will no longer be able to communicate
with your local Powerline adapter, unless you use the same Private Network Password for your local Powerline adapter.
Page 22

22
NP508 – 500Mbps Powerline Adapters User Guide
www.netcommwireless.com
Powerline Utility
Powerline Utility is a software application that allows you to configure the AC Passthrough Powerline adapter. It is mainly used for
changing the Private Network Password, detecting other Powerline adapters in the network, and measuring the throughput of
devices. Installation is straightforward and the user interface is easy to use.
The Powerline Utility is downloadable from the NetComm Wireless website. Please visit www.netcommwireless.com and locate the
product page to download.
Note: To use Powerline Utility, you need a computer using a Windows operating system with the .NET Framework installed.
If you do not have .NET installed, the Powerline installer will install it for you.
Requirements
Your computer must meet the following requirements:
Windows 98SE, ME, 2000, XP (32 and 64 bit), Vista (32 and 64 bit) or 7 (32 and 64 bit)
300 MHz Processor
128 MB of RAM
.NET Framework
Network Interface Card
128 MB of free hard disk space
Installation
To install the Powerline Utility:
1. Go to www.netcommwireless.com and locate the product page and download link for the Powerline Utility software.
2. Double-click the installation setup file and follow the on-screen instructions to complete the installation of the software.
The .NET Framework will also be installed as it is required for the Powerline Utility to function. The installer detects if the required
version of the .NET Framework is already on your computer. If the .NET Framework is not installed, a dialog box opens to ask if you
would like to install .NET Framework. Click Yes. The .NET Framework will not be installed if the required version is already in your
computer.
Opening Powerline Utility
There are two ways to open Powerline Utility:
Double-click the NetComm Powerline Adapters desktop shortcut.
From the Start menu by clicking the Start button, then Programs and navigating to the NetComm Powerline Adapters
folder. Click the NetComm Powerline Adapters icon.
Page 23

www.netcommwireless.com
NP508 – 500Mbps Powerline Adapters User Guide
23
Powerline Utility User Interface
The Powerline Utility user interface is divided into tabs. These tabs include:
Home
Private Network Name
Quality of Service
Devices
Firmware Upgrade
Home
The Home tab provides a list of all the possible tasks you can perform in the Powerline Utility. To start a task, you first need to select
the network card connected to your Powerline adapter. This is most helpful when you have more than one network card in your
computer. When you select a network card, the MAC Address of the Powerline adapter connected to your computer appears. If
there is no Powerline adapter connected to your computer, no MAC address will appear.
Page 24

24
NP508 – 500Mbps Powerline Adapters User Guide
www.netcommwireless.com
After selecting the network card, there are four possible tasks you can perform. These tasks include:
Change the Private Network Name
Change the QoS settings
View devices in the network
Update the firmware
Private Network Name
Private Network Name provides the ability to manually change the Private Network Name of local and remote Powerline adapters. A
Private Network Name is a string of 8 to 64 characters that enables Powerline devices to communicate with each other.
If you intend to create multiple networks, you can assign different Private Network Names among your devices. You have to make
sure that at least two Powerline adapters have a similar Private Network Name. A Powerline adapter that uses a unique or random
Private Network Name will not be able to communicate with other devices.
Note: In case you cannot connect to the network after changing the Private Network Name, please power cycle the device.
To power cycle, disconnect and then reconnect the Powerline adapters from the power outlet.
Note: You must change the Private Network Name (PNN) on the remote Powerline adapters before changing your local PNN. If you
change the local PNN first you will lose connectivity to the remote.
Local Private Network Name
Local Private Network Name refers to the Private Network Name of the Powerline adapter that is directly connected to the
computer where you are using the Powerline Utility.
To change the local Private Network Name:
1. Open Powerline Utility.
2. Click Private Network Name.
3. Type the new Private Network Name. This field is case sensitive. It accepts 8 to 64 alphanumeric characters including
punctuation marks but no spaces.
4. Click Apply. When the process is complete, the message “Settings Applied” appears.
Page 25

www.netcommwireless.com
NP508 – 500Mbps Powerline Adapters User Guide
25
Remote Private Network Name
Without leaving your computer, you can change the Private Network Name of remote Powerline devices, provided they are using
the same Private Network Name as your local Powerline adapter. You cannot change the Private Network Name of remote devices
that are not currently networked with your local Powerline adapter.
Note: When changing the Private Network Name of remote devices, you will need the Device ID that appears on the label affixed to
the device. It is helpful to make a list of the Device Password (P/W) of all your Powerline adapters to enable you to remotely change
their settings using the Powerline Utility software.
To change the Private Network Name of a remote Powerline adapter:
1. Open Powerline Utility.
2. Click Private Network Name.
3. Type the new Private Network Name. This field is case sensitive. It accepts 8 to 64 alphanumeric characters including
punctuation marks but no spaces.
4. Select Change Private Network Name of remote device.
5. Type the Device Password (P/W) of the remote device. This can be found on the device label.
6. Click Apply. When the process is complete, the message “Settings Applied” appears.
After changing the Private Network Name of the remote Powerline Adapter, it will no longer be able to communicate with your local
Powerline adapter, unless you use the same Private Network Name for your local Powerline adapter.
Simulate Push Button
Simulate Simple Connect Button allows you to perform functions of the Simple Connect button without manually pressing the
physical button on a Powerline device. This function only works on local devices.
FUNCTION
DESCRIPTION
Simple Connect
Select to search and pair with another device, or search and join an existing Powerline network.
NMK Randomize
Select to reset to a random Private Network Name. A Powerline adapter using a random Private
Network Name will be disconnected from the Powerline network and will not be able to
communicate with other devices until it forms a new network or joins an existing network.
AVLN Status
Displays the Powerline adapters Logical Network membership status number.
To simulate a Simple Connect function:
1. Connect the Powerline adapter to your computer.
2. Select a Simulate Simple Connect Button action:
a) Simple Connect
b) NMK Randomize
c) AVLN Status
3. Click Simulate Button Push.
Page 26

26
NP508 – 500Mbps Powerline Adapters User Guide
www.netcommwireless.com
Quality of Service
Quality of Service (QoS) gives you the capability to prioritise particular applications within your network. QoS is not enabled by
default.
QoS Modes:
Online Game/Internet – prioritises data streaming
Audio or Video – Prioritises data and multimedia streaming
Voice over IP – Prioritises voice applications
To enable QoS:
1. Open Powerline Utility.
2. Click Quality of Service.
3. Check Enable QoS.
4. Select a QoS mode.
5. Click Apply. When the process is complete, the message “Settings Applied” appears.
Page 27

www.netcommwireless.com
NP508 – 500Mbps Powerline Adapters User Guide
27
Devices
The Devices tab displays information about remote Powerline adapters detected on the network. Only Powerline Adapters using the
same Private Network Name as the local Powerline Adapter will appear in the Remote Devices list.
Devices displays the following information:
FIELD
DESCRIPTION
Remote HomePlug
MAC Address
Displays the MAC address of the remote Powerline adapter on the network.
Transmit(Mbps)
Displays the current transmit speed in Mbps i.e. the speed that data is being sent in an outbound
direction from the adapter.
Receive(Mbps)
Displays the current receive speed in Mbps i.e. the speed that data is being received in an
inbound direction from the adapter
Page 28

28
NP508 – 500Mbps Powerline Adapters User Guide
www.netcommwireless.com
Firmware Upgrade
Use this to upgrade the firmware of your Powerline adapter. After upgrading, the Powerline Adapter will retain the same Private
Network Name and MAC address settings. To upgrade, you need to have both the configuration file (.PIB extension) and firmware
file (.NVM extension). Firmware upgrades can be downloaded from www.netcomm.com.au.
To upgrade the firmware of a Powerline adapter:
1. Connect Powerline Adapter to the computer where you are using Powerline Utility.
2. Open Powerline Utility.
3. Click Firmware Upgrade.
4. Click Browse to select the location of the configuration and firmware files. The configuration file has a PIB extension while
the firmware file has an NVM extension. After you select the location of the configuration and firmware files, the upgrade will
immediately start.
To reset to factory default settings:
1. Connect the Powerline Adapter to the computer where you are using Powerline Utility.
2. Open Powerline Utility.
3. Click Firmware Upgrade.
4. Click Factory Default.
Note: You can also perform a reset to the factory default settings when you press the Simple Connect / Reset button on the device
for 11-13 seconds.
Page 29

www.netcommwireless.com
NP508 – 500Mbps Powerline Adapters User Guide
29
Legal & Regulatory
Information
This manual is copyright. Apart from any fair dealing for the purposes of private study, research, criticism or review, as permitted
under the Copyright Act, no part may be reproduced, stored in a retrieval system or transmitted in any form, by any means, be it
electronic, mechanical, recording or otherwise, without the prior written permission of NetComm Limited. NetComm Limited
accepts no liability or responsibility, for consequences arising from the use of this product. NetComm Limited reserves the right to
change the specifications and operating details of this product without notice. NetComm is a registered trademark of NetComm
Limited. All other trademarks are acknowledged the property of their respective owners.
Product Warranty
The warranty is granted on the following conditions:
1. This warranty extends to the original purchaser (you) and is not transferable;
2. This warranty shall not apply to software programs, batteries, power supplies, cables or other accessories supplied in or
with the product;
3. The customer complies with all of the terms of any relevant agreement with NetComm and any other reasonable
requirements of NetComm including producing such evidence of purchase as NetComm may require;
4. The cost of transporting product to and from NetComm’s nominated premises is your responsibility; and,
5. NetComm does not have any liability or responsibility under this warranty where any cost, loss, injury or damage of any
kind, whether direct, indirect, consequential, incidental or otherwise arises out of events beyond NetComm’s reasonable
control. This includes but is not limited to: acts of God, war, riot, embargoes, acts of civil or military authorities, fire, floods,
electricity outages, lightning, power surges, or shortages of materials or labour.
6. The customer is responsible for the security of their computer and network at all times. Security features may be disabled
within the factory default settings. NetComm recommends that you enable these features to enhance your security.
The warranty is automatically voided if:
1. You, or someone else, use the product, or attempts to use it, other than as specified by NetComm;-
2. The fault or defect in your product is the result of a voltage surge subjected to the product either by the way of power
supply or communication line, whether caused by thunderstorm activity or any other cause(s);
3. The fault is the result of accidental damage or damage in transit, including but not limited to liquid spillage;
4. Your product has been used for any purposes other than that for which it is sold, or in any way other than in strict
accordance with the user manual supplied;
5. Your product has been repaired or modified or attempted to be repaired or modified, other than by a qualified person at a
service centre authorised by NetComm; and, 6. The serial number has been defaced or altered in any way or if the serial
number plate has been removed.
Limitations of Warranty
The Trade Practices Act 1974 and corresponding State and Territory Fair Trading Acts or legalisation of another Government (“the
relevant acts”) in certain circumstances imply mandatory conditions and warranties which cannot be excluded. This warranty is in
addition to and not in replacement for such conditions and warranties.
To the extent permitted by the Relevant Acts, in relation to your product and any other materials provided with the product (“the
Goods”) the liability of NetComm under the Relevant Acts is limited at the option of NetComm to:
Page 30

30
NP508 – 500Mbps Powerline Adapters User Guide
www.netcommwireless.com
Replacement of the Goods; or
Repair of the Goods; or
Payment of the cost of replacing the Goods; or
Payment of the cost of having the Goods repaired.
All NetComm ACN 002 490 486 products have a standard 12 months warranty from date of purchase. However some products
have an extended warranty option (refer to packaging). To be eligible for the extended warranty you must supply the requested
warranty information to NetComm within 30 days of the original purchase by registering on-line via the NetComm web site at
http://www.netcommwireless.com
 Loading...