

Page 1
NETCOMM LIBERTY™ SERIES
3G WiFi Router
Quick Start Guide
Page 2
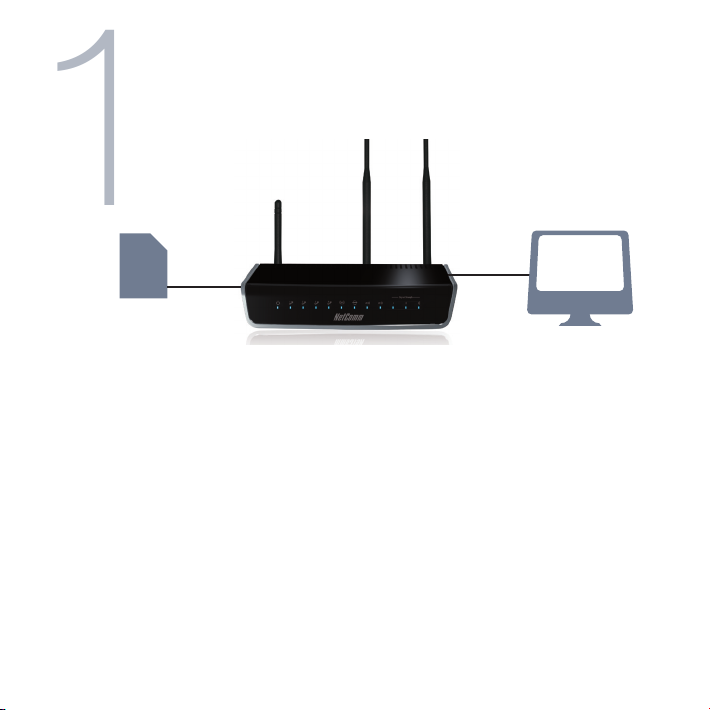
Connecting to the Router using
1
an Ethernet cable
SIM Card
Computer
1. Insert an active 3G SIM card into the USIM slot on the back of the device.
2. Connect the supplied RJ-45 Ethernet Cable into one of the Ethernet ports on
the back of the device and the other end to your computer.
3. Screw the supplied detachable antennas to the WiFi and 3G connectors on
the back of the router.
4. Connect the supplied power adapter to your router and press the on/off
button to power the router on.
1 The NetComm 3G19W is designed for a mini-SIM card and not a micro-SIM card. A micro-SIM adapter may work with
a micro-SIM, however the micro-SIM adapter may damage the 3G19W. There are currently a large number of micro-SIM
adapters in the market, and depending on its quality, these adapters can get stuck and potentially damage the SIM card slot
of the 3G19W. Damage applied by a micro-SIM adapter will therefore void warranty of your 3G19W.
Page 3

Login to the conguration
2
interface
1. Open a web browser (Internet Explorer, Firefox, and Safari) and type
http://192.168.1.1 into the address bar at the top of the web browser window
and press enter.
2. At the login screen type admin into both the username and password elds
and click OK. This will take you directly to the Basic - Home page.
Page 4
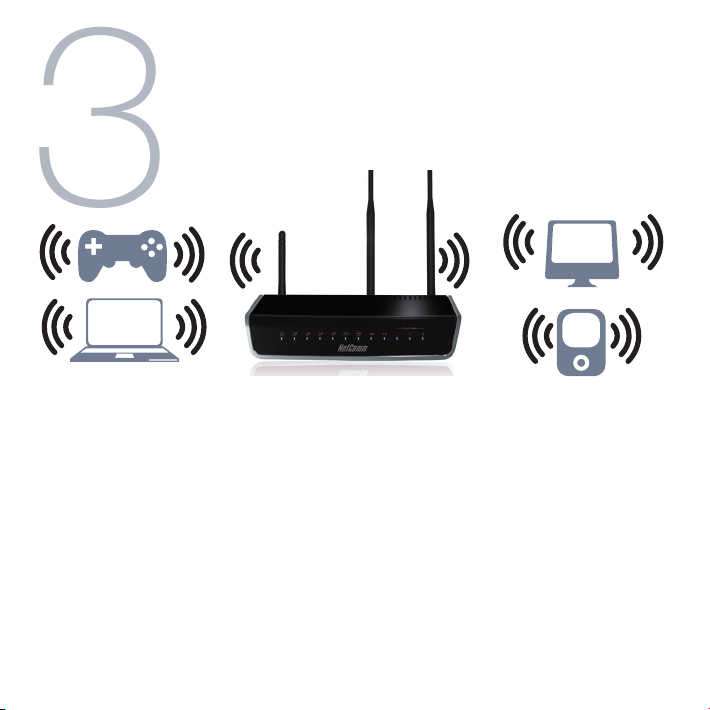
Connecting devices to
3
the router via Wireless
1. Ensure WiFi is enabled on your device (computer/ laptop/ smartphone/
gaming console).
2. Scan for wireless networks in your area and connect to the network name
that matches the Wireless network name found on the Wireless Security Card
(included in the box).
3. When prompted for your wireless security settings, enter the Wireless security
key listed on your Wireless Security Card.
4. Wait approximately 30 seconds for the connection to establish.
Page 5
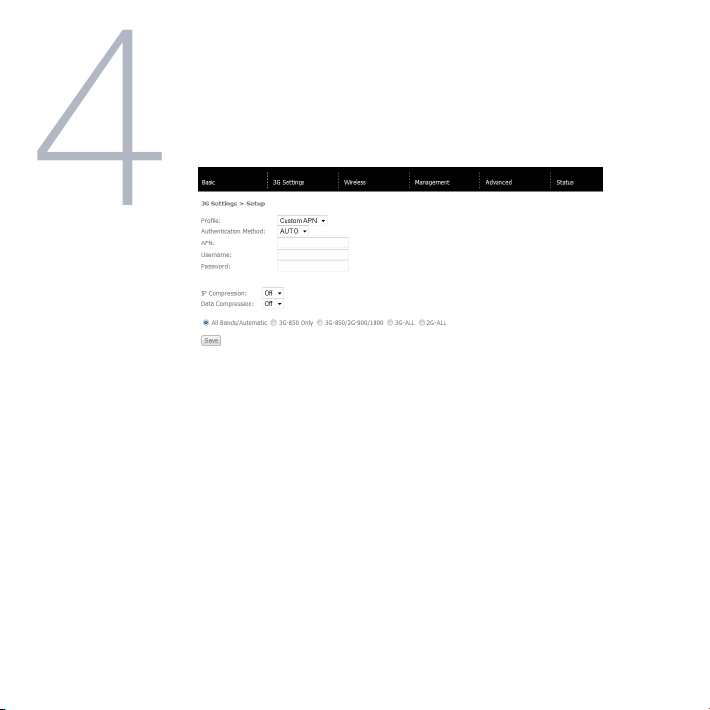
Connecting to the Internet
4
via 3G
1. From the Basic - Home page, hover your mouse over the 3G Settings menu
and click on Setup.
2. With the active 3G SIM inserted into the device, enter the 3G service details
as supplied by your 3G service provider. This may include the APN and/or the
username / password. Leave any elds which are not required blank.
3. Click on Save to use these settings.
* For a list of common APN’s please see next page.
Page 6

List of Mobile Broadband Service Providers:
Mobile Service APN*
Australia
Telstra Telstra.internet
Telstra.pcpack
Telstra.datapack
Telstra.extranet
Optus – Postpaid connect
Optus – Prepaid preconnect
Three – Postpaid 3netaccess
Three – Prepaid 3services
Vodafone – Postpaid vnternet.au
Vodafone – Prepaid vfprepaymbb
Crazy John’s purtona.net
DoDo dodolns1
Blink splns888a1
Internode Internode
Primus primuslns1
TPG internet
Exetel Exetel1
New Zealand
Vodafone NZ www.vodafone.net.nz
CallPlus www.callplus.net.nz
Slingshot www.slingshot.net.nz
Telstra Clear www.telstraclear.net.nz
Telecom NZ XT internet.telecom.co.nz
Page 7
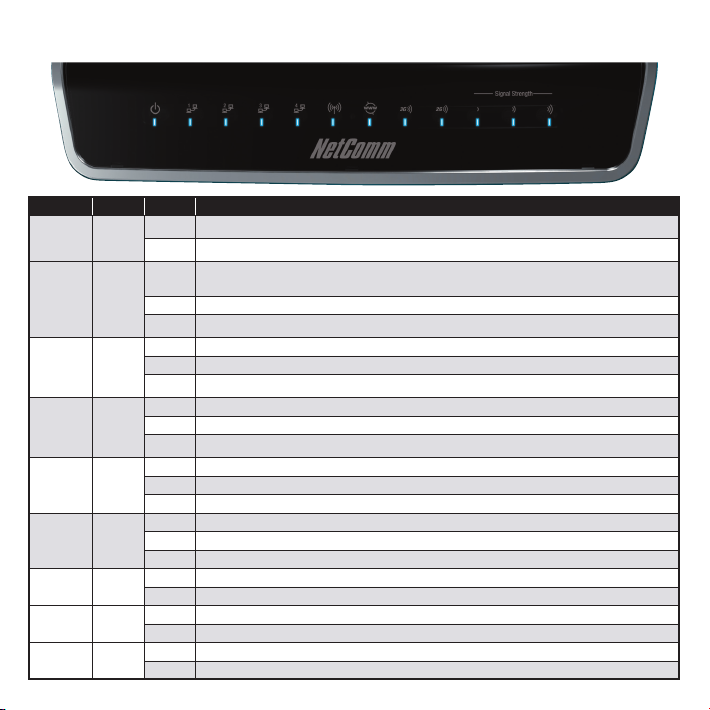
Front LEDs
LED Color Mode Description
POWER Green On Power on
Off Power off
LAN 1~4 Green On Powered device connected to the associated port (in cludes devices with wake-on-LAN capability where a
WiFi Green On The wireless module is ready.
Internet Green Blink Data is transmitted through Internet connection
3G Green On Internet connection established.
2G Green On Internet connection established.
Low Green On Low signal strength
Med Green On Medium signal strength
High Green On High signal strength
** Please note that all lights will ash simultaneously if a rmware upgrade takes place.
slight voltage is supplied to an Ethernet connection)
Off No activity, modem powered off, no cable or no powered device connected to the associated port
Blink LAN activity present (trafc in either direction)
Off The wireless module is not installed.
Blink Data being transmitted or received over WiFi .
Off No connection to the internet or router powered off
On Internet connection established
Blink Connecting with UMTS cellular station
Off No connection with UMTS cellular station, no activity or router powered off.
Blink Connecting to an EDGE, GPRS or GSM cellular station
Off No connection with EDGE, GPRS or GSM cellular station, no activity or router powered off.
Off No activity, router powered off or on other signal strength
Off No activity, router powered off or on other signal strength
Off No activity, router powered off or on other signal strength
Page 8

Rear Panel
3G Antenna (Main) Attach one of the 3G Antennas here in a clockwise direction.
Power Power connector, connects to a DC 12V 1.5A Power Adapter
USIM Card Slot Insert your SIM card here (until you hear a click). Please be careful to insert the
3G Antenna (AUX) Attach one of the 3G Antennas here in a clockwise direction.
Reset Hold this button down for over 10 seconds to reset to factory defaults.
LAN 1 LAN Port for wired Ethernet clients (Computers, Laptops, etc)
LAN 2 LAN Port for wired Ethernet clients (Computers, Laptops, etc)
LAN 3 LAN Port for wired Ethernet clients (Computers, Laptops, etc)
LAN 4 LAN Port for wired Ethernet clients (Computers, Laptops, etc)
WiFi Antenna Attach the WiFi Antennas here in a clockwise direction.
SIM in the correct orientation by viewing the printed icon beside the slot.
Page 9

Troubleshooting
5
Cannot establish a wireless connection
• Make sure the wireless switch on your laptop is in the on position.
• Ensure your device and wireless adapter are using the same wireless
security settings.
• Make sure you are trying to connect to the correct SSID with the correct
security key.
Cannot establish a 3G connection
• Ensure you are using an active 3G SIM card that is activated for Mobile
Broadband Internet service.
• Ensure you have entered the correct APN setting supplied by your 3G
Internet service provider.
Page 10

?
Cannot access the Web UI
• If you have changed your username/password and forgotten them you will
need to reset your router to the factory default settings and the default settings
admin/admin.
How to reset your router to the factory default settings
• With a paperclip, sharp pencil or similar object press the reset button on the
back panel of the device and hold for approximately 10 seconds.
YML-3G19W-AU REV_1
 Loading...