

Page 1
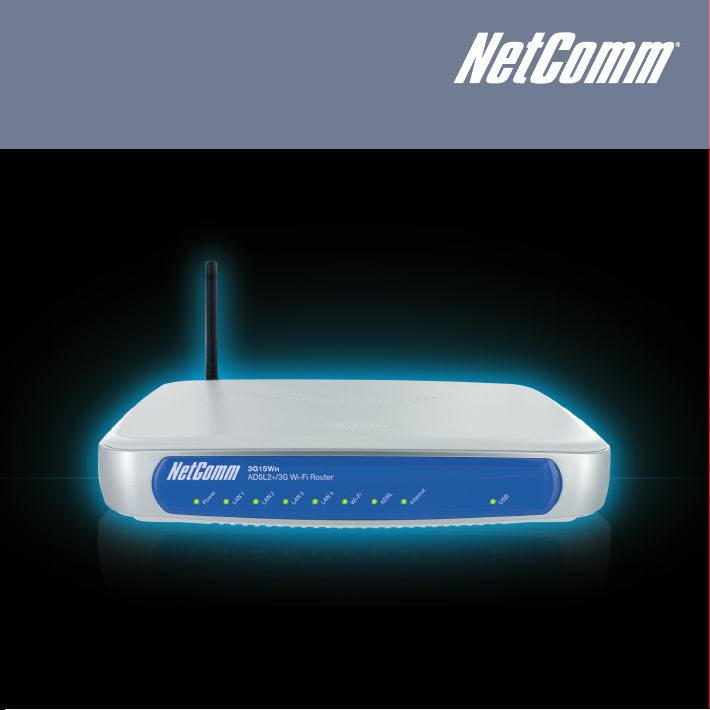
NETCOMM GATEWAYTM SERIES
ADSL2+/3G Wireless N300
4-Port Modem Router
Page 2
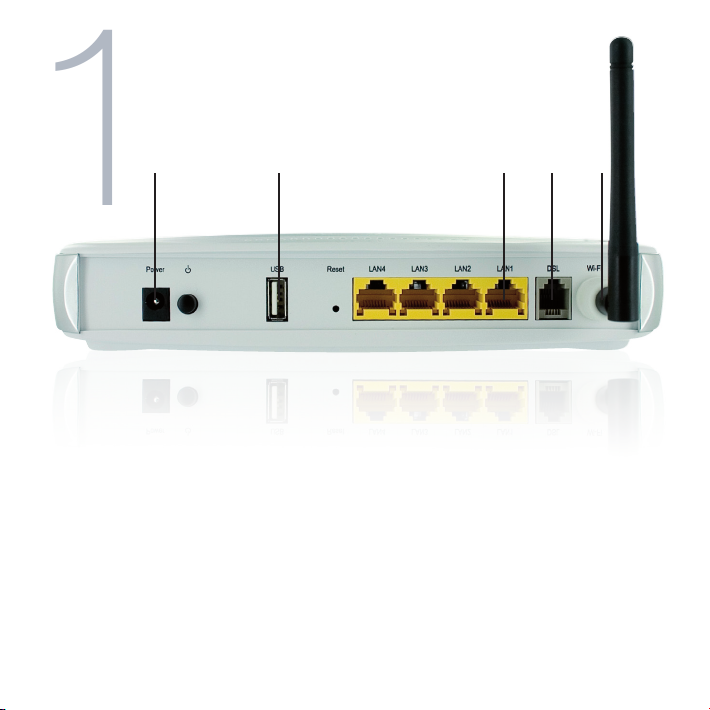
1
Connecting the cables
5 2 3 1 4
1. Connect the supplied RJ-11 cable to the DSL port on the back of your router to
the phone port that supplies your ADSL.
2. And/or, attach a compatible 3G USB modem into the USB port on the back of
the router.
3. Connect the supplied RJ-45 Ethernet cable from one of the LAN ports on the
back of the router to your computer.
4. Screw the supplied detachable antenna to the Wi-Fi connector on the back of
the router.
5. Connect the supplied power adapter to your router and press the on/off button
to power the router on.
Page 3
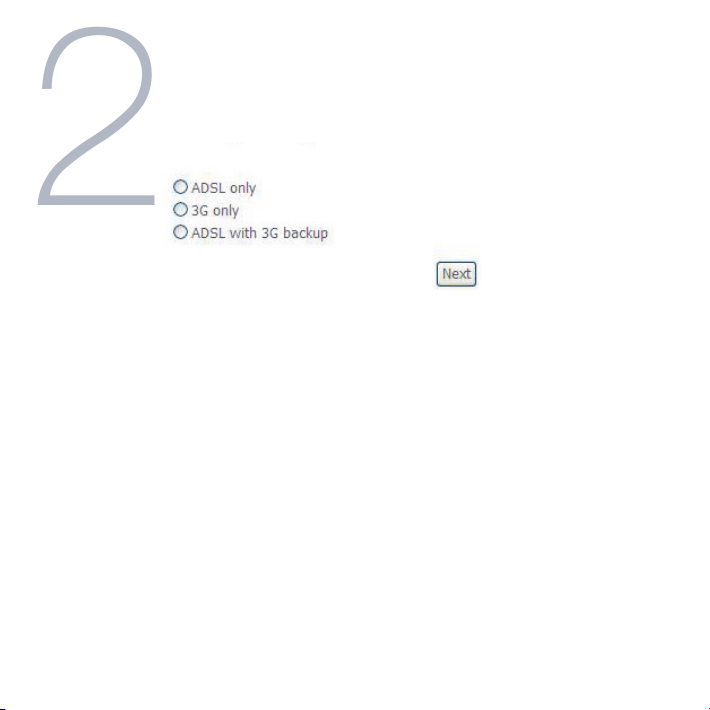
2
Login to the web interface
1. Open a web browser (Internet Explorer, Firefox, Safari) and type 192.168.1.1 into
the address bar.
2. At the login screen type admin into both the username and password elds.
Then click ok. This will take you directly to the Home page.
3. From the top menu, hover over Basic and click on Quick Setup.
4. Select the appropriate connection type and click Next.
Page 4
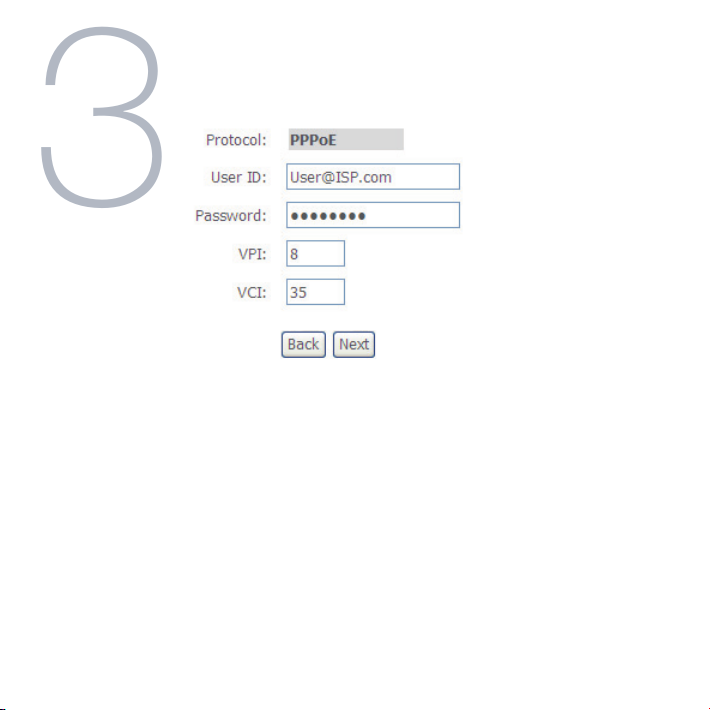
3
Connecting with ADSL
1. Enter the user ID/Password on this screen as supplied by your ISP.
2. Click on Next to use these settings.
3. You will then be asked to enter additional setup details. This will be explained
from Step 6.
Page 5
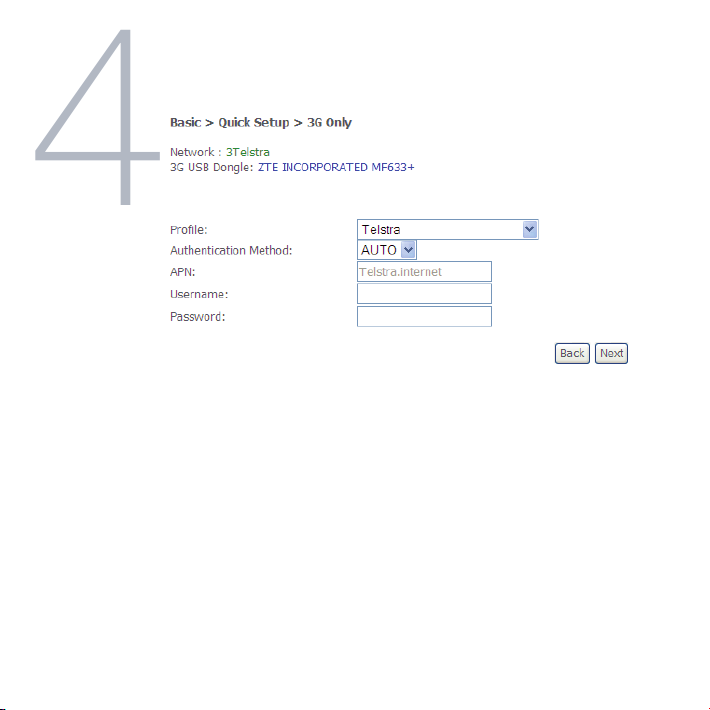
4
Connecting with 3G
1. Select the 3G only box and click Next.
2. Compatible modems will be auto detected: This information can be seen at the
top of the page.
3. From the drop down Prole box select your 3G ISP, which will auto-ll your
APN setting.
4. Enter the username/password supplied by your 3G ISP.
Note: Not all 3G users will have a username/password. Only enter this information if you have been supplied one by your 3G ISP
5. Click on Next to use these settings.
6. You will then be asked to enter additional setup details. This will be explained
from Step 6.
Page 6

5
Conguring 3G backup
1. Select the ADSL with 3G backup box and click Next.
2. Follow the instructions listed above for both ADSL and 3G to set up both
connections.
3. Check the Enable 3G Backup box and enter your desired backup settings.
4. Click on Next to use these settings.
5. You will then be asked to enter additional setup details. This will be explained
from Step 6.
Page 7

6
Wireless Quick Setup
1. The default settings already appear on the wireless quick setup page.
2. You can enable/disable the wireless signal.
3. You can change your wireless SSID. If you do, be sure to remember the new
name or write it down so you know what network to connect to.
4. You can also select the level of wireless security and change the wireless
password.
5. Once you have completed entering your wireless settings click Next.
Page 8

7
USB Storage
1. If a USB device is plugged into the USB port, it will be auto detected and you will
have the choice to Enable USB storage.
2. If you enable USB storage you will be shown the Netbios and Directory name,
you can change these to anything you want.
3. Click Next once you are happy with the settings.
4. To access the storage device open a web browser and type \\Netbios\
Directory\. So using the defaults \\3G15Wn\USB-Storage\
Page 9

8
USB Print Server
1. If a USB device is plugged into the USB port, it will be auto detected and you will
have the choice to Enable on-board print server.
2. If you enable the device to work as a print server you will be asked to enter the
printer name and make and model. Both elds can be named anything you
like. The names will be used to identify the printer later.
3. Click Next once you are happy with the settings.
4. To complete setting up your network printer, please read Appendix A of the
User Manual.
Page 10

10
9
Passwords
1. On this page you can change the passwords for the different levels of users.
2. The default password for all users is the same as the corresponding username.
3. Once you have completed setting the passwords click Finish.
4. You will be taken back to the home page where you can view your connection
status.
Page 11

Establishing a Wireless
Connection
300Mbps1 Wireless Link
PDA
You can connect multiple wireless devices, including laptops, desktops and PDA’s
to your device by following these two basic steps.
1. Using your wireless device, scan the wireless networks in your area and select
the network called NetComm Wireless, then click connect.
Note: If you changed the SSID in the wireless quick setup, then your network name will be different
2. Enter the following default security key: a1b2c3d4e5
Note: To ensure wireless security, we recommend that you change the default settings through the web Interface.
If you changed the wireless password in the wireless quick setup, then your security key will be different
Page 12

11
Troubleshooting
?
Cannot establish a wireless connection
• Make sure the wireless switch on your laptop is in the on position.
• Ensure your device and wireless adapter are using the same wireless
security settings.
• Make sure you are trying to connect to the correct SSID with the correct
security key.
Cannot establish an ADSL connection
• Ensure you have entered the correct username and password as supplied by
your ISP. If you cannot nd them please contact your ISP to ensure you have the
correct details.
Page 13

12
Cannot establish a 3G Connection
• Ensure you are using a compatible 3G USB Modem.
Note: See NetComm Website for a list of compatible modems - www.netcomm.com.au
• Ensure you have entered the correct 3G Prole (ISP name and pre/post paid)
and that the APN is the same as supplied by your 3G ISP.
Cannot access the Web UI
• If you have changed your username/password and forgotten them you will need
to reset your router to the factory default settings and use the default settings
admin/admin
How to reset your router to the factory default settings
• With a paperclip, sharp pencil or similar object press the reset button on the
back panel of the device and hold for approximately 10 seconds.
Page 14

NetComm Velocity Series
Accessories for your product
NP901n
NP900n
NP902n
NP910n
NP910n Wireless N150, this product is perfect for users wishing to extend their network with the
convenience of a miniature USB Adapter.
NP900n Wireless N300, this product is perfect for home users.
NP901n Wireless N300, perfect for data intensive applications within a SoHo environment.
The included USB dock gives you the ability to move the USB Adapter so you always
receive the best possible wireless signal.
NP902n Wireless N300, perfect for SoHo, business users and gamers. The NP902n features
a cable to allow you to position the adapter, a removable hook to neatly attach to the
rear of your monitor and 2 detachable external antennas ensuring you receive the best
possible wireless signal at all times.
* Maximum wireless signal rate and coverage values are derived from IEEE Standard 802.11g and 802.11n Draft 2.0 specications. Actual wireless
speed and coverage are dependent on network and environmental conditions included but not limited to volume of network trafc, building
materials and construction/layout.
 Loading...