


Page 1
User Guide
Wireless Camera
Nest Box
(C1B1)

Page 2
Contents
Section Topic Page
1. Introduction . . . . . . . . . . . . . . . . . . . . . . . . . . . . . . . . . . . . . . . 1
2. Setting Up Your Equipment and System . . . . . . . . . . . . . . . . . 1
3. Unpack Your Eco Nest Box. . . . . . . . . . . . . . . . . . . . . . . . . . . . 2
4. Setting Up Your Equipment for Operation. . . . . . . . . . . . . . . 3
4.1 Set Up the Nest Box . . . . . . . . . . . . . . . . .. . . . . . . . . . . . . . . . 3
4.2 Set up the Receiver and Connect to TV. . . . . . . . . . . . . . . . . . 5
4.3 Set up the Nest Box in the Garden. . . . . . . . . . . . . . . . . . . . . . . 6
5. Miscellaneous . . . . . . . . . . . . . . . . . . . . . . . . . . . . . . . . . . . . . 8
5.1 Adjustment of Camera Focus and Exposure . . . . . . . . . . . . . . 8
5.2 Audio Volume. . . . . . . . . . . . . . . . . . . . . . . . . . . . . . . . . . . . . 8
5.3 Transmission Range. . . .. . . . . . . . . . . . . . . . . . . . . . . . . . . . . . 9
5.4 Cleaning the Nest Box. . . . . . . . . . . . . . . . . . . . . . . . . . . . . . . . 9
5.5 Pictures at Night . . . . . . . . . . . . . . . . . . . . .. . . . . . . . . . . . . . . . 9
6. Specifications, Warranty etc. . . . . . . . . . . . . . . . . . . . . . . . . . . 10
7. Care for the Environment . . . . . . . . . . . . . . . . . . . . . . . . . . . . . . 11
8. Accessories for your Nest Box . . . . . . . . . . . . . . . . . . . . . . . . . . 12
The Nestbox Company Limited . . . . . . . . . . . . . . . . . . . . . . . . . 14

Page 3
1. Introduction
Thank you for purchasing one of the Nestbox Company’s family of products.
We hope you will enjoy many years of viewing nesting birds with this Wireless Camera Nest Box.
2. Setting Up Your Equipment and System
The Wireless Camera Nest Box consists of 2 main components:
1. Nest Box with Camera
2. Battery Box
3. Receiver
As well as this, the product includes the accessories necessary to connect the
parts of the system together, to power sources, and to your computer or TV.
It is easy to put the system together by following these step by step instructions.
Page 1

Page 4
3. Unpack Your Nest Box
Unpack the Wireless Camera Nest Box.
Some of the parts you will need may be packed
inside the Nest Box.
To open the Nest Box pull the peg up from the
roof and tilt the removable panel of the side
away from the body of the box. The panel will
then come away completely. Carefully unpack the other parts of your kit.
As well as this User Guide, you should have the following parts in your kit:
Nest Box with Camera, Lights and Transmitter
Battery box for 4 size D batteries,
including battery holder, on/off switch
and cable to nest Box, and hanging
Bracket.
Mains Power Supply for camera This provides an optional alternative to running the system by battery.
White Diffuser and black Baffle to ensure good
overall coverage of the infra red lights.
Page 2

Page 5
Receiver, with Antenna,
Mains Power
Supply
and Video/Audio Lead
4. Setting Up Your Equipment for Operation
4.1 Set up the Nest Box
Open the side of the Nest Box, so that you can get to the camera unit
fitted to the removable side panel.
Carefully turn the camera so that it is
pointing towards the floor and remove the
lens cap (if fitted) from the front of the
camera.
Page 3

Page 6
If you are running the nest box on batteries, open the Battery Box, re-
move the battery holder and fit 4 size D batteries
(observing the polarity shown on the battery holder).
Replace the battery holder, ensuring that it is securely
connected to the PP3 snap fitting inside the Battery
Box.
Ensuring that the connectors are inside the Battery Box, run the power cable out of the
Battery Box through one of the slots in the base, and
fit the lid onto the Battery Box, using the 4 screws
provided.
If you decide to use the mains power supply, disconnect the battery
holder from the PP3 snap fitting inside the Battery Box. Remove the
battery holder. Connect the PP3 snap
fixing on the end of the Mains Power
Supply Unit to the PP3 snap fixing
inside the Battery Box, run the 2 cables out of the battery box and fit the
lid, using the 4 screws provided.
Connect the other end of the power cable to
the mating connector on the camera inside
the Nest Box. Position the joined connectors
inside the Nest Box and pass the cable out
through the small hole in the side formed
when the side panel is put back in place.
Fit the side panel back onto the Nest Box and
replace the securing peg.
Page 4
Page 7
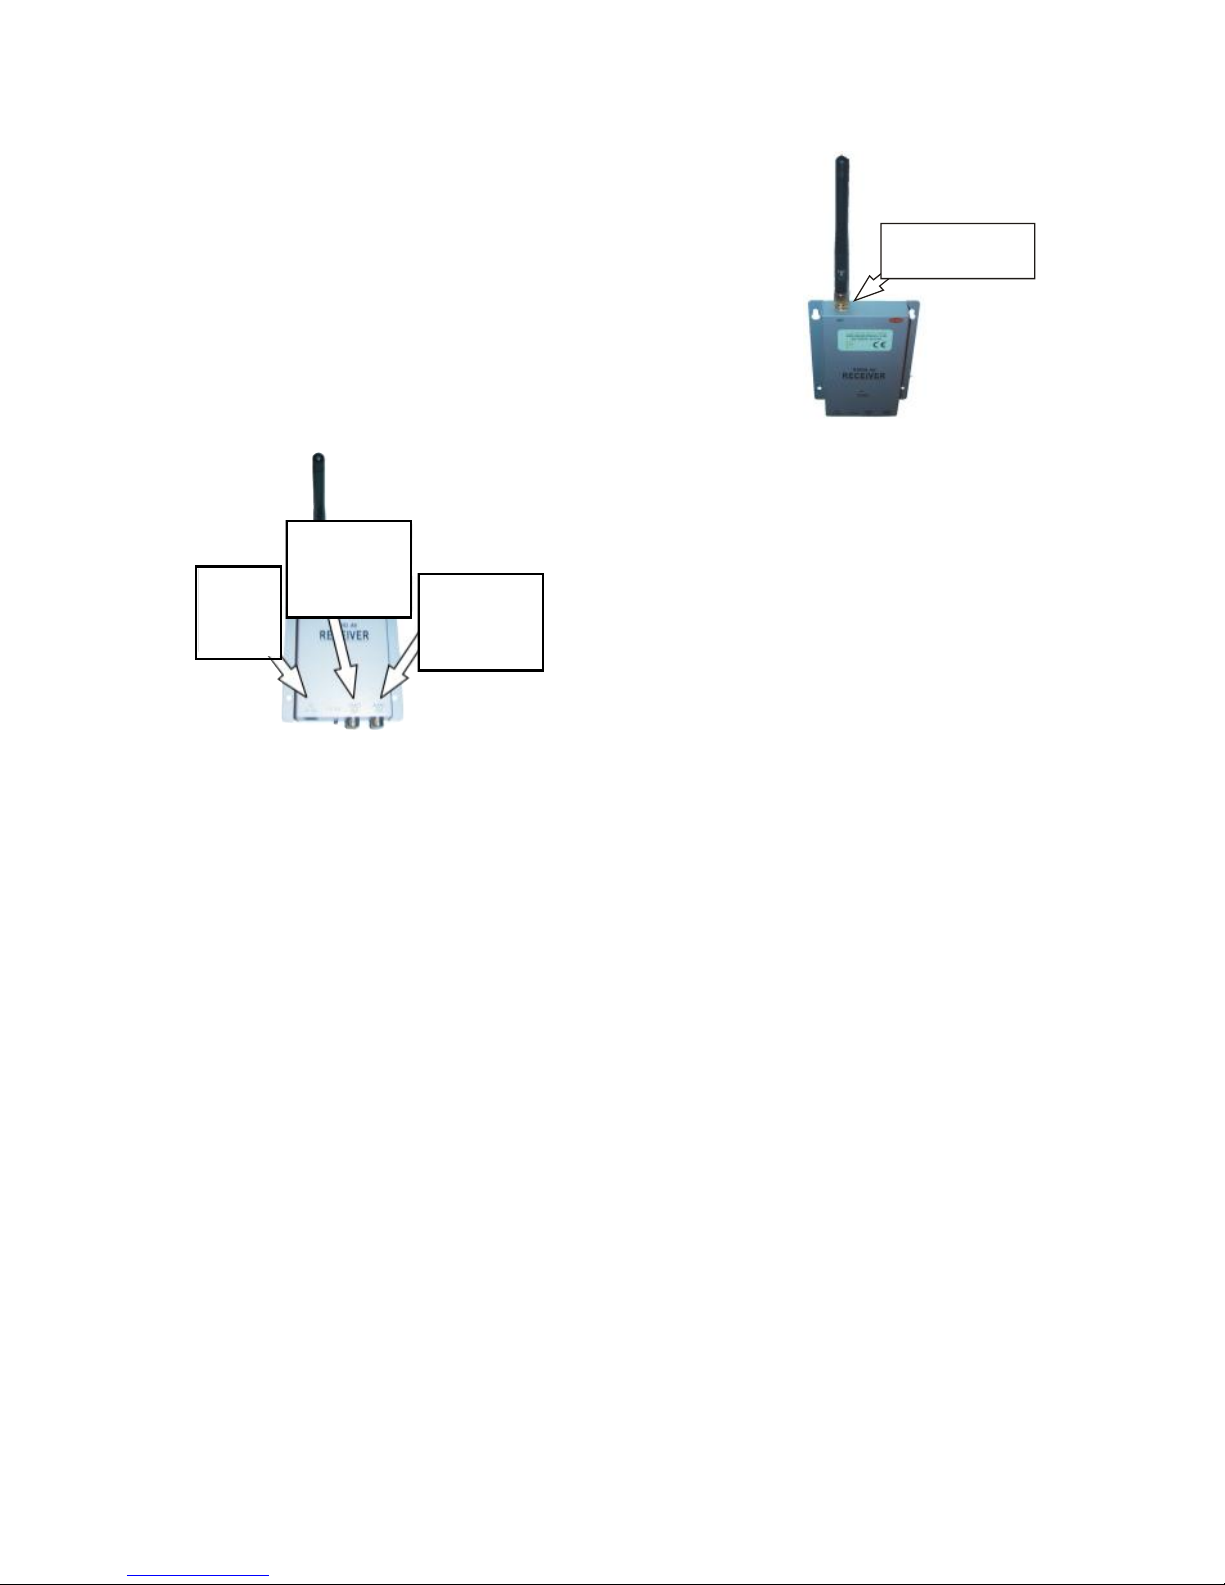
4.2 Set up the Receiver and Connect to TV
Screw the Antenna onto one end of the Receiver. Adjust the angle of the Antenna so that
it is approximately vertical.
The receiver can be mounted vertically using
the screw holes provided, or rested in a hori-
zontal position.
Fit the 9V Mains Power Supply (it has a
cylindrical plug) to the Receiver (DC 912V) and plug it into the Mains.
Switch the power on. The red indicator
light will light to show it is on.
Fit one end of the Receiver Video/Audio Lead to the Receiver, con-
necting one colour to “VIDEO OUT” and the other colour to “AUDIO
OUT”.
Fit the other end of the Receiver Video/Audio Lead to the direct input
video and audio connectors of your TV. Connect the colour you con-
nected to “VIDEO OUT” on the Receiver to Video In on the TV, and
the colour you connected to “AUDIO OUT” on the Receiver to the
Audio In socket on the TV.
As an alternative, you may prefer to plug this in to the Video/Audio
connectors on a video recorder or VCR.
If you only have a SCART input socket for your TV, you can fit the
cable through an appropriate adaptor (not supplied, but available as an
accessory).
The cable (and the signal it carries) is not suitable for direct connection
to your TV aerial or antenna socket.
Turn the TV on, and switch it to the direct video/audio input.
Page 5
SCREW ANTENNA
ONTO RECEIVER
FIT
POWER
SUPPLY
HERE
FIT ONE
COLOUR
CONNECTOR
HERE
FIT OTHER
COLOUR
CONNECTOR
HERE

Page 8
Ensure your Nest Box is powered up (either by battery or
mains).
Set the Channel Switch on the Receiver to the channel number
indicated by the label on the top of the camera. On your TV
screen, you should see the base of the Nest Box and a finger or
pen if you poke it through the entrance hole. You should hear
through the TV if you tap the box. If you didn’t notice which
channel it was set to, simply move the switch in turn to each
of the 4 channels until you see the picture.
At this stage (ie before putting the box outside the house), it is
a good idea to check (and if necessary adjust) the camera angle and focus, so that you get a good view of the bottom of the
nest box, and the focus is a few centimeters above the floor of the box.
4.3 Set up the Nest Box in the Garden
First find a promising location in your garden.
Nest Boxes are normally fitted (with the roof uppermost) to a tree or wall,
about 2 to 4 metres high from the ground. However, depending on the
situation, it is generally OK to fit the box higher. For further advice on
siting nest boxes, you may find it helpful to look at the RSPB web site:
www.rspb.org.uk/gardens/whatyoucando/nestboxes/siting.asp.
It is generally best to place the box out of direct sunlight so it does not get
sun all day or too much wind and rain. This means that you could face it
to the North East or South East.
The Nest Box should be fitted in a position where it is close enough to the
Receiver so that you get a good picture. Although the nominal range is
100 metres, the actual range depends on a number of factors, particularly
including obstacles close to and in between the Nest Box and the Receiver,
such as walls and trees. If you are in any doubt as to the position, it may
be better to fix the Nest Box temporarily until you have checked the reception.
The Nest Box is designed to be fitted in most
situations with just 1 screw or nail, using the
concealed keyhole in the back of the box. Fit
the screw into the tree or wall first, and then
offer up the box onto the screw so that the
screw head goes through the lower part of the
Page 6

Page 9
keyhole. Then slide the box down so that the box is securely fitted. The
keyhole is positioned opposite the entrance hole into the box so that it is
easy to see through for fitting, and the screw can be tightened once the box
is fitted. If you wish to secure the box with a second nail or screw, a hole
in the base/back of the box has also been provided, although in most situations this will not be needed.
Rope, string or wire can also be used to fit the box.
To do so, pass a loop of string etc through the keyhole, and attach it to a small twig, nail etc.
Making sure this is pulled back to the keyhole,
but not through it, tie the string etc round the
tree.
It is best to fit the Nest Box upright or tilted slightly forward to give some
protection from driving rain.
Position the box away from other trees, bushes, branches etc which may
make it easier for predators. Try to provide a clear flight path into the
entrance hole. It is recommended that you do not place it near to a bird
table or other place where you feed the birds, because the constant traffic
of birds will deter nesting
The Battery box should be mounted with its cable exit holes at the base.
Page 7

Page 10
5. Miscellaneous
5.1 Adjustment of Camera Focus and Exposure
Before leaving the factory, the camera focus has been adjusted to a little
above the floor of the nest box. You can adjust the camera focus by turning the lens turret. The camera is a very delicate part of the system so
please do this gently, and be very careful not to touch a finger on the lens.
When viewing a picture illuminated by the infra red lights (when it is too
dark outside for a good colour picture), you may find the picture has a
“hotspot”, a white central area in the middle, or is white all over. This is
due to the concentration or brightness of the infra red lights when so close
to the subject. Use the white Diffuser or black Baffle (or both), clipped
over the lens turret to reduce this effect.
The Diffuser will distribute the light round the box and help
with hotspots.
The black Baffle will reduce the overall infra red intensity.
5.2 Audio Volume
The audio system is fitted with an Automatic Gain Control (AGC) which
increases the amplification when the microphone is picking up little sound,
and decreases it when it picks up more noise. In quiet situations, this results in high gain, and can lead to the pick up of some hum.
We suggest you set the volume on your TV to a level where, in quiet conditions, any background noise or hum is barely audible, and is not intrusive. When the birds take up residence, and start making a noise, the AGC
will ensure that you hear their sounds above the level of the background
noise.
Page 8

Page 11
5.3 Transmission Range
The Transmitter and Receiver have a nominal range of 100 metres.
The actual distance achieved will vary depending on atmospheric conditions, the position and type of nearby obstacles (such as walls, trees, or
metal objects) and the state of the battery
Moving the Receiver just a few centimetres can sometimes make a big
difference to the strength of the signal, so to obtain the best reception, we
suggest you move the Receiver around to find the best location by trial and
error.
5.4 Cleaning the Nest Box
Once a year, after the nesting season has finished and all the birds have
left the nest, we recommend that you clean out the Nest Box and dispose
of all nesting material and unhatched eggs etc. Under UK legislation, you
can only remove unhatched eggs between August and January. If you
remove any eggs you must dispose of them.
To do this, take the side off the box (as explained earlier) and carefully
clean the box, the side panel itself and the camera with a soft cloth or
brush, being especially careful with the camera lens.
Take out any nesting material from the nest box and throw it away, and
wash out the box with hot water (being careful not to get the camera or
connectors wet). With the side open, leave it for a day or two to dry out,
before shutting the box , and putting it back in position.
5.5 Pictures at Night
At night, or when completely dark outside the nest box, the only source of
light in the nest box will be the infra red lights fitted on the camera. Under
such conditions, the camera will give an image which is dimmer than the
image in brighter light such as daylight, and consists of shades of grey,
just like a black and white picture. This is perfectly normal. We use infra
red lights at night so that you can continue to see a picture, but, because
birds cannot see infra red, their natural sense and rhythms of day and night
are not affected.
Because of the dimmer pictures at night, we suggest that you turn the
brightness on your TV (or computer) up at night to get a better picture.
Page 9

Page 12
6. Specifications, Warranty etc
The specifications of the product described and the contents of this User
Guide are subject to change without notice, as part of our continuous improvement process.
Whilst every care has been taken in the preparation of this document, we
realise that it may still be possible to improve it. If you find any errors,
omissions or points which are not clear, please let us know by email at
mail@nestbox.co.uk. We will endeavour to deal with the problem to your
satisfaction, and learn from it for future versions.
The contents of this document may not be reproduced in whole or in part
except for your personal use.
The Nestbox Company Limited warrants all its products against defects in
materials and manufacture for 6 months from the date of purchase. If a
defect is discovered, the Nestbox Company will repair or replace the product (at its option) free of charge, provided it is returned to the address in
this User Guide at the customer’s expense.
The Nestbox Company Limited is not able to accept any responsibility for
any loss, damage, or loss of data suffered by any customer or third party as
a result of use, misuse or malfunction of the product or this User Guide.
In particular, whilst the product has been extensively tested, we are unable
to warrant that is free of defects.
If you have any further technical or user questions relating to the product,
please email it to us at mail@nestbox.co.uk.
From time to time, we provide customers with product updates. Please
check the web site for details.
Page 10
Page 13 Page 11
7. Care for the Environment
The Nestbox Company cares deeply about the Environment. We have
adopted an Environmental Policy designed to demonstrate our commitment to operating our business in harmony with the natural and man
made environments. If you wish to see the full policy, it is available to
read on our web site.
Our products are developed to be economical with natural resources,
both in manufacture and use. We comply with all the relevant laws
and regulations, including those relating to the Restriction of Hazardous Substances (known as RoHS) and Waste Electronic and Electrical
Equipment (WEEE).
The wood used in our products comes from responsibly managed forests, as part of our commitment to the FSC.
When you have finished using this product, please dispose of it responsibly. We would suggest using your local household recycling and
waste treatment facility, particularly for the electronic parts of the
product.
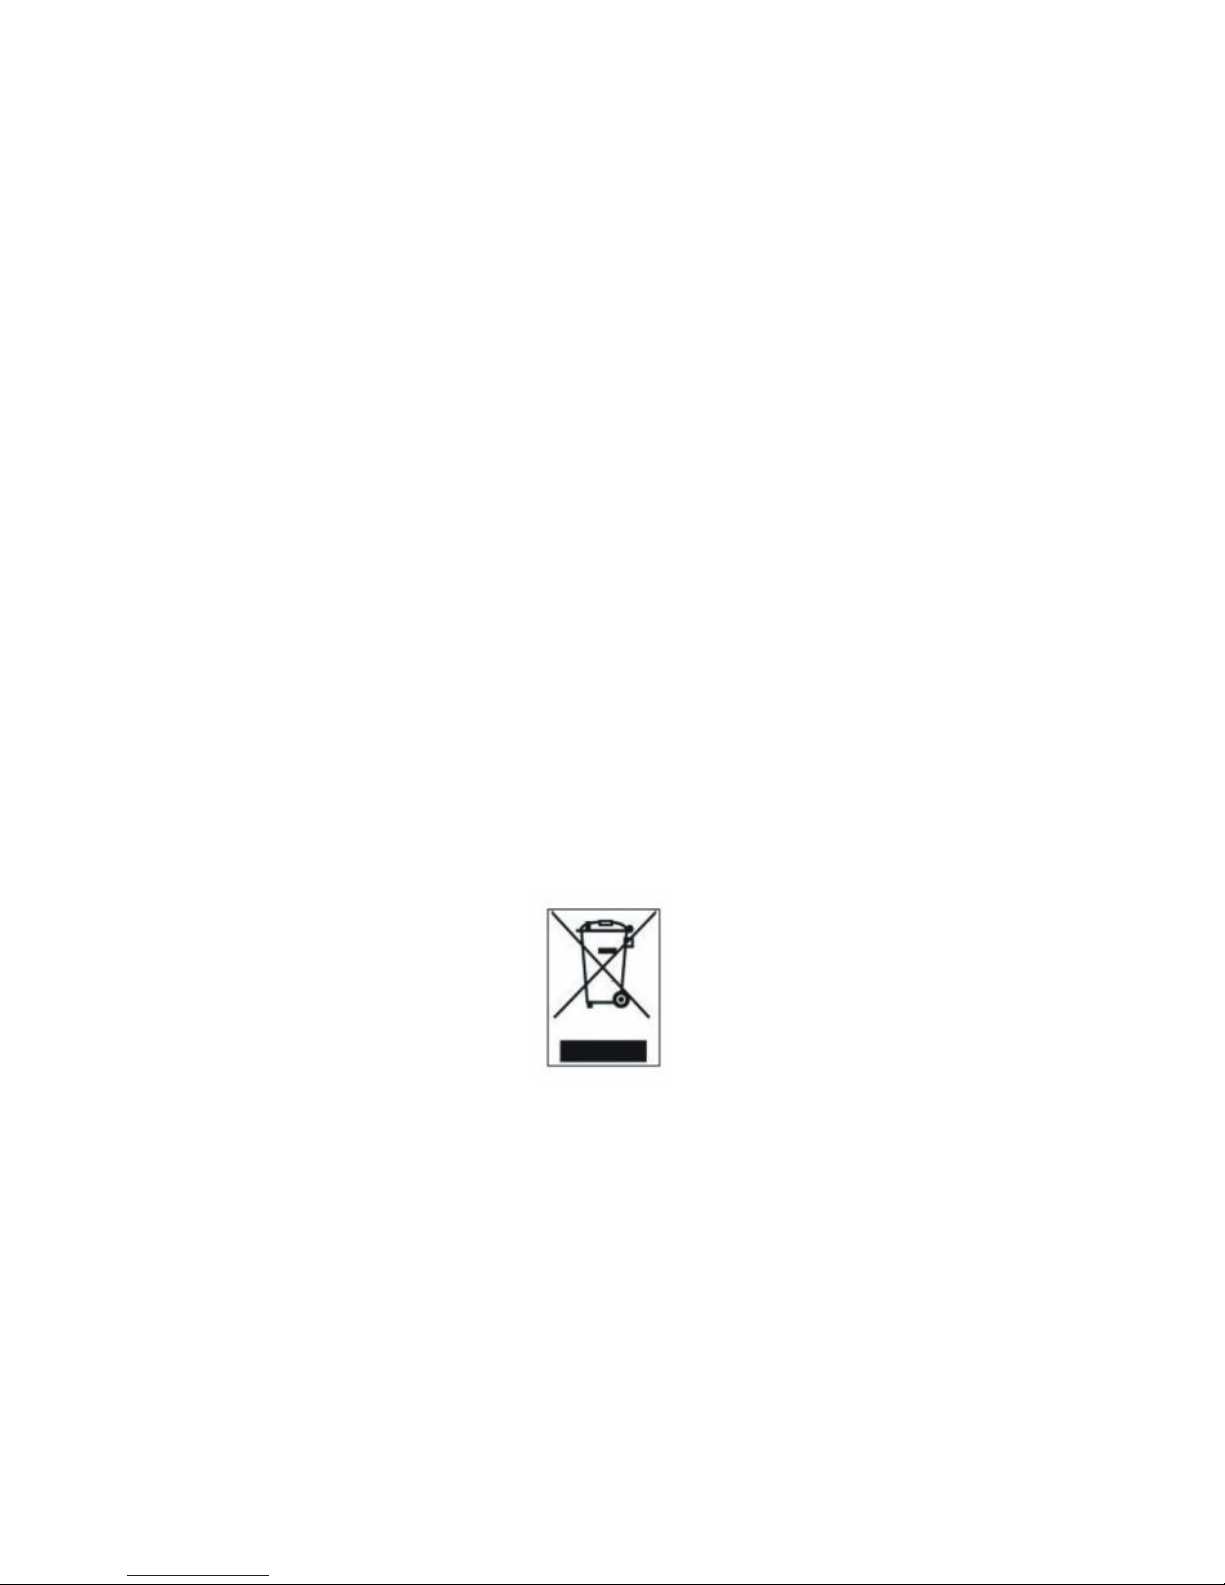
Certain of our products are marked with the following symbol:
This denotes that they must be disposed of at end of their useful life at
an appropriate local waste treatment facility. Please follow this instruction.
This User Guide is printed on recycled paper. All our packaging is
designed so that it can be re-used or disposed of by composting.

Page 14
8. Accessories for your Nest Box
Our comprehensive range of accessories is designed to enable customers to make
the best use of their nest boxes. Why not accessorise your equipment to extend its
capabilities and make it do exactly what you want? The following accessories are
suitable for your Wireless Camera Nest Box:
Daylight Sensing Battery Box
Accessorise the Wireless Camera Nest Box to give it very long battery life,
dusk/dawn switching, use of rechargeable batteries and also site the batteries away from the nest box in a convenient position for changing/
switching.
Battery to Camera Extension Cable
Extend the distance from your battery or battery box to the Eco Nest Box.
Convenient battery changing and avoid disturbance when changing batteries.
Mains to Battery Extension Cable
Want to use mains power, but need a longer cable from the mains power
unit to your battery box or connector?
Connection to PC/Laptop
This small converter allows you to feed pictures of your nest or wildlife
straight into your computer. No need to install any hardware inside the
computer.
Rechargeable High Capacity Battery Set
8 high capacity rechargeable batteries and mains charger. Last for longer
between charges. (Use with Daylight Sensing Battery Box).
Solar Panel
Help save the planet by using renewable energy to operate your Nest Box
or Camera. You may never need to change the batteries again (Requires
Daylight Sensing Battery Box).
Page 12

Page 15
Entrance Hole Plate
Small metal plate to fit on front of nest box, to protect the resident birds
from predation from squirrels, woodpeckers etc.or to reduce the size of the
entrance hole, and limit the box to smallest bird species,. Available in
various sizes.
Side Opening Nest Box
Another nest box to match your Wireless Camera Nest Box, but with no
camera. Use it to increase your chances of attracting birds to nest. Swap
the camera from one box to another if the birds choose the wrong box.
Page 13

Page 16
The Nestbox Company Limited
Eastcote House
Barston Lane
Eastcote
Solihull
West Midlands
B92 0HS UK
Telephone: +44 (0) 1675 442299
Fax: +44 (0) 1675 442544
Web site: www.nestbox.co.uk
Email: mail@nestbox.co.uk
This publication, our products and our designs are
© Copyright 2015 The Nestbox Company Limited.
Certain of our products are protected by UK Patent 2420242
WEEE Producer Registration Number WEE/HA3702UR
Battery Producer Registration Number BPRN03345
All our products are tested
for compliance with the
relevant directives, and carry
the CE Mark
 Loading...