

Nerf 37755-TRU, 37756-TRU User Manual
Model: 37755-TRU/ 37756-TRU
1.0 Installation.
1.1 Removing the Belt Clip
a. Pull the Belt Clip latch forward
(away from the FX-250)
b. While pulling the Belt clip pertinent
latch, push up the Belt clip as
shown in Figure1.
1.2 Installing the Belt Clip
a. Slide the Belt clip into the
slot A “click” indicates the Belt
clip is locked into position.
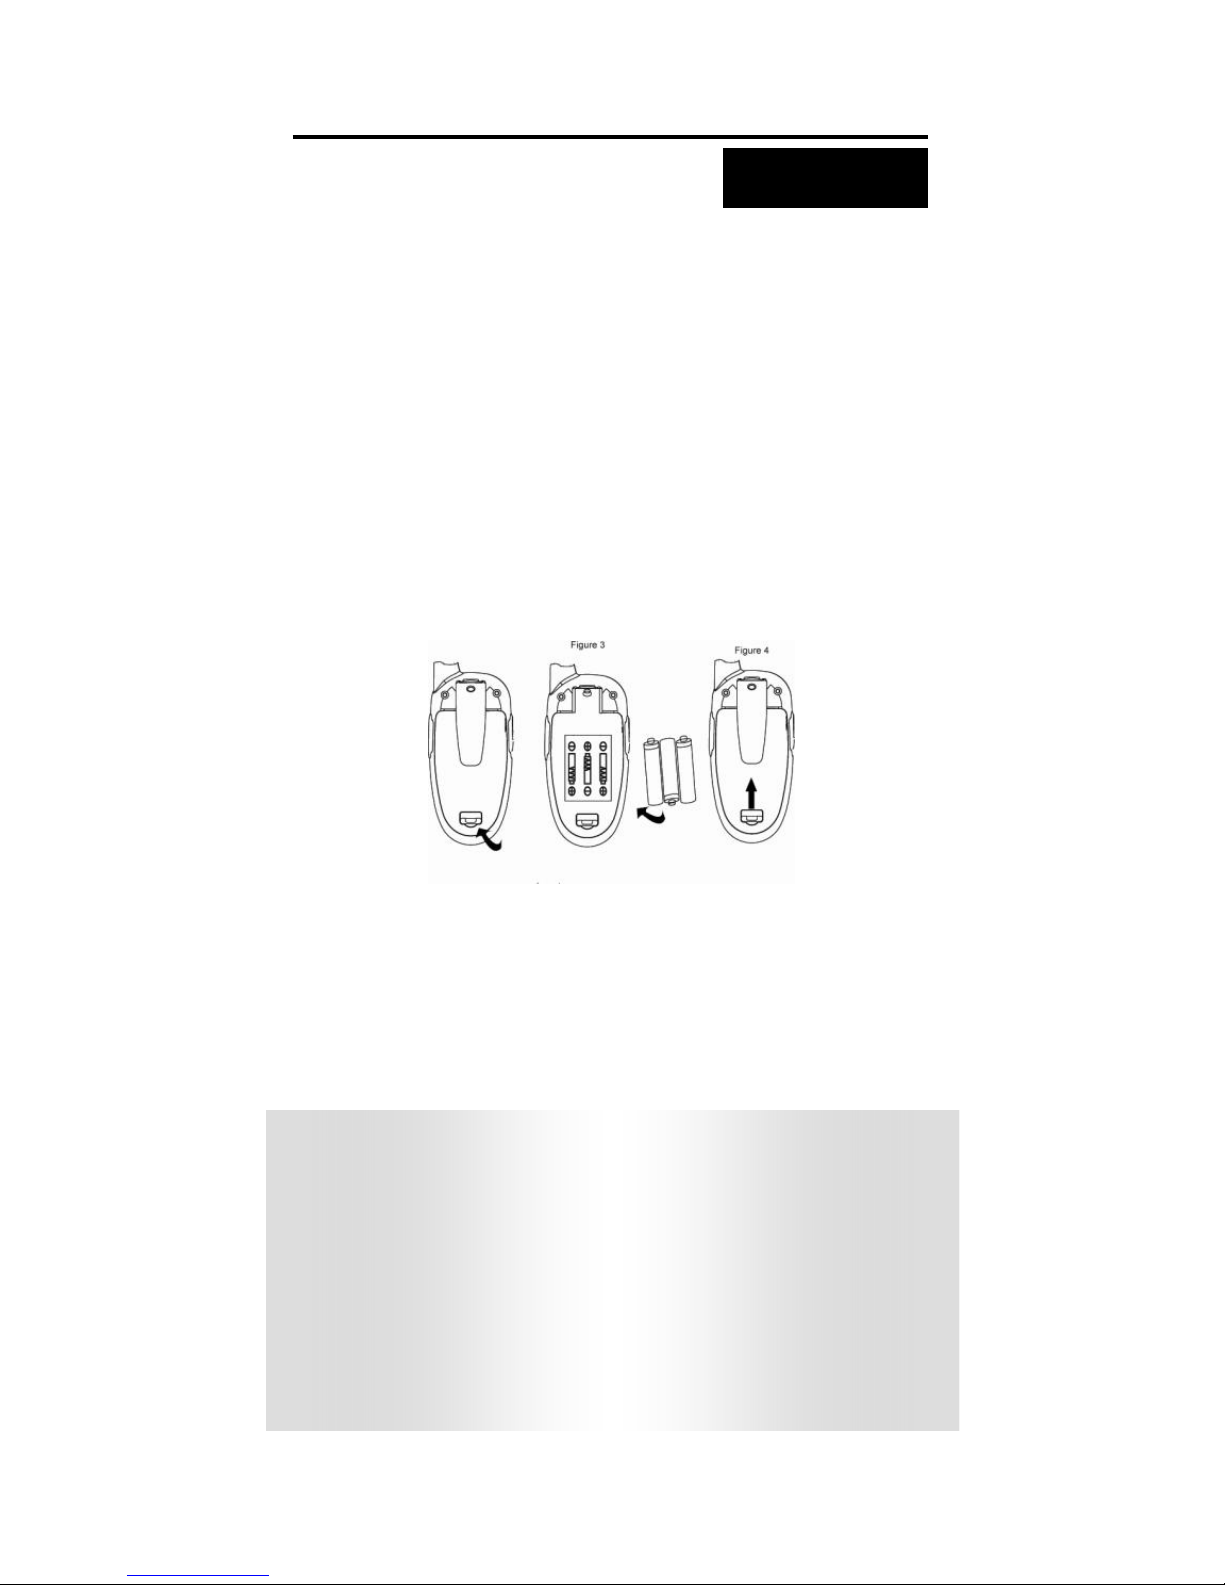
2.0 Installing the Batteries
Caution: Observe the proper battery polarity orientation when
installing batteries. Incorrect positioning can damage both the
batteries and the unit.
a. Pull up on the battery door latch to remove the battery compartment door.
b. Install the rechargeable batteries by following the orientation as
shown in Figure 3 (the arrow is showing and pointing upward.)
c. Replace the Battery compartment cover. See Figure 4.
Important
-Read these Safety Warnings before you charge the batteries.
-When placing the 37755-TRU in the charger, use only the power supplies listed in the user
instructions supplied with the 37755-TRU.
-Don’t try to recharge non-rechargeable batteries.
-Make sure the battery compartment cover is securely locked in place when you are charging
the batteries.
-Dispose of used batteries safely and in a way that will not harm the
environment, never try to burn them or put them anywhere, they could get burnt or punctured.
- Risk of explosion if battery is replaced by an incorrect type.
USER GUIDE
WARNING :
- ALL ELECTRICAL AND ELECTRONIC PRODUCTS INCLUDING BATTERIES SHOULD BE DISPOSED O F SEPARATELY
FROM THE MUNICIPAL WASTE STREAM VIA DESIGNATED COLLECTION FACILITIES APPOINTED BY THE GOVERNMENT
OF THE LOCAL AUTHORITIES
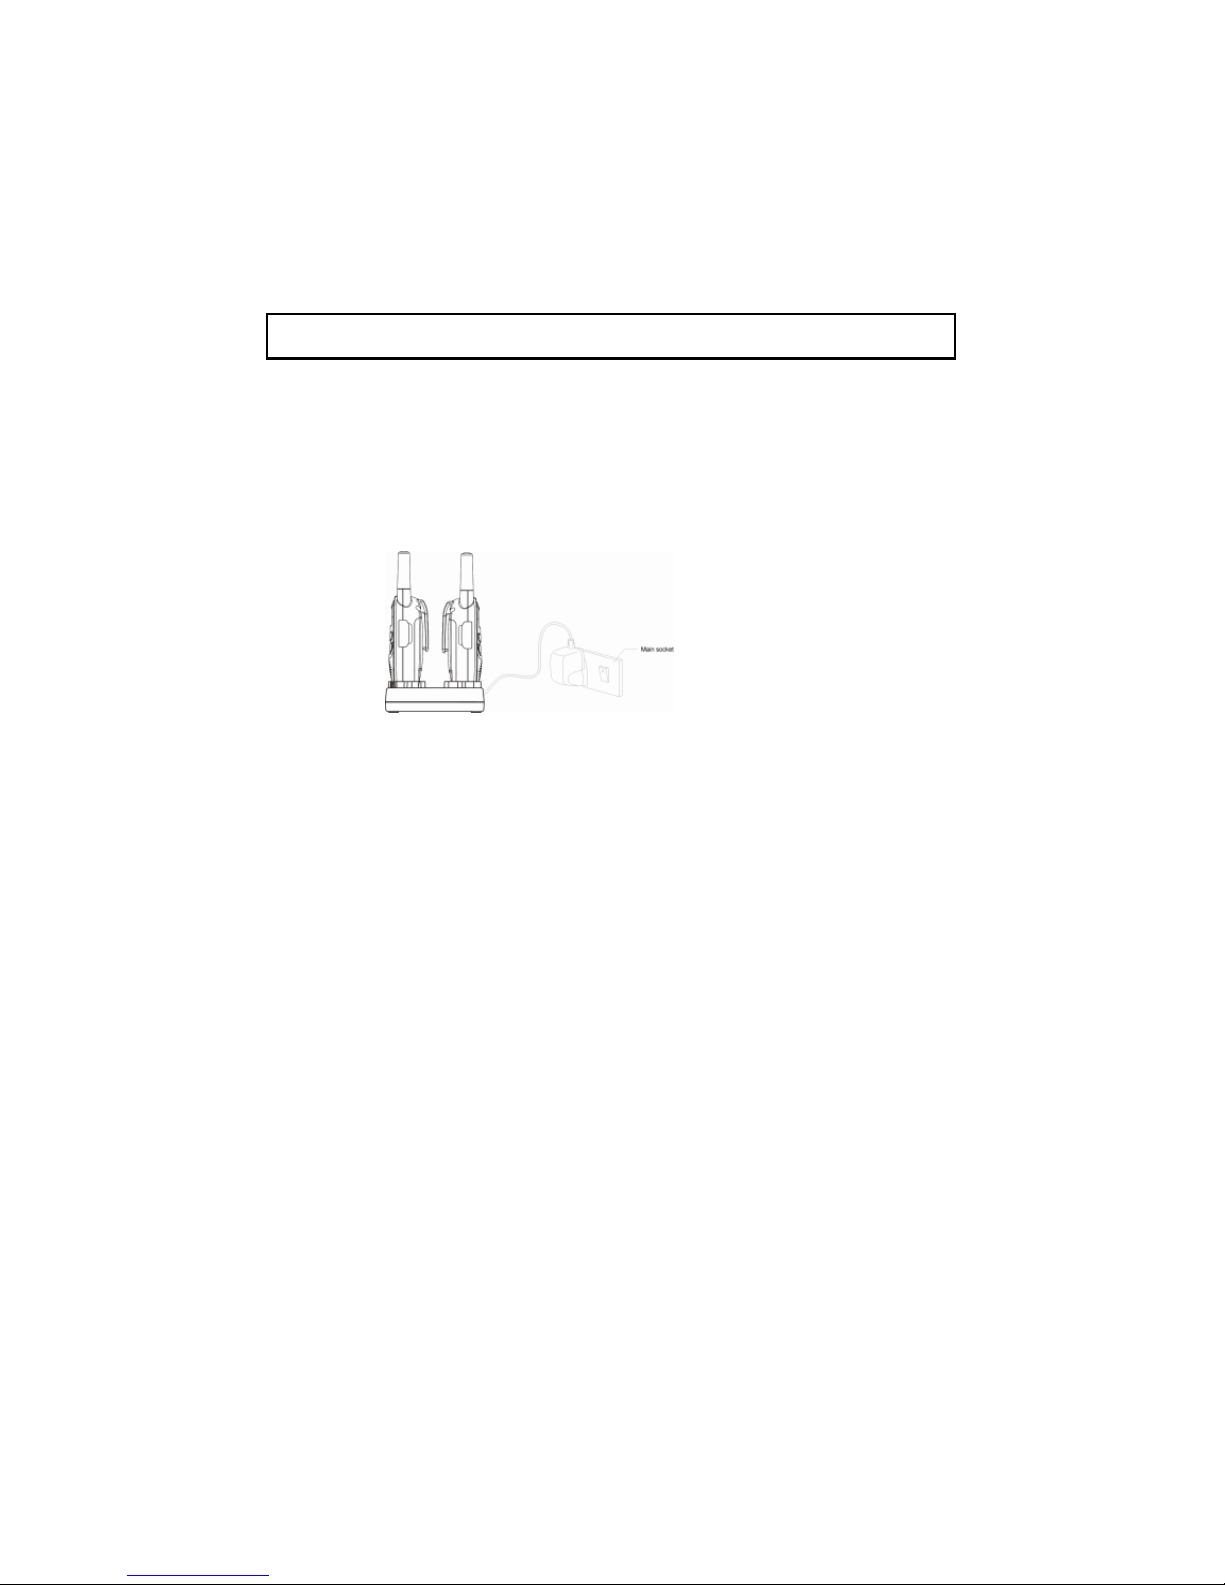
3.0 Charging the batteries
EN60950-1 and will invalidate any approvals & warranty.
a. Place the 37755-TRU units in the charge cradle in an upright position and
facing outward. The Charge LED indicators will light up.
b.It takes about 12 hours to fully recharge the batteries if they are
completely run down. New batteries take up to 14 hours to fully
Charge.
Note:
Use only power supplies listed in the user instruction,
TGE050P055 EU, 5V 550mA
/100-240Vac Dongguan Guanjin Electronics tech., Co., Ltd.
Note:
Transmit and receiving not advisable during charging at “power On” mode basis
Battery meter
The battery icon is located in the left corner of the LCD panel. This battery icon
will displayed when low battery status. These indicate that the battery level
reaches its minimum level, at this stage the handset will emit two beep tones and
then it will automatically turn Off the power.
Battery life
The PMR has a built in power saver feature to make the batteries
last longer. But when you are not using the handset, it's better to
switch off to save the battery power.
Note
:
Use only the batteries listed in the user-instruction – CEL
brand; Jiang Su CEL Co., Ltd., Model EPT-43AAA60h,
1.2VAAA /600mAh Ni-MH rechargeable battery
Important:
Always turn off the PMR units
when charging. This will
shorten the charging time.
 Loading...