

Page 1

Page 2

Page 3
Page 4
Comment éliminer ce produit (déchets d’équipements électriques et électroniques) (Applicable
dans les pays de l’Union Européenne et aux autres pays européens disposant des systèmes
de collecte sélective) Ce symbole sur le produit indique qu’il ne doit pas être éliminé en fin
de vie avec les autres déchets ménagers. L’élimination incontrôlée des déchets pouvant
porter préjudice à l’environnement ou à la santé humaine, veuillez séparer les autres types de
déchets et le recycler de façon responsable. Vous favoriserez ainsi la réutilisation durable des
ressources matérielles. Les particuliers sont invités à contacter le distributeur leur ayant vendu
le produit ou à se renseigner auprès de leur mairie pour savoir où et comment ils peuvent se
débarasser de ce produit afin qu’il soit recyclé en respectant l’environnement. Les entreprises
sont invitées à contacter leurs fournisseurs et à consulter les conditions de leur contrat de
vente. Ce produit ne doit pas être éliminé avec les autres déchets commerciaux.
Made in China
Page 5
Warning
Product features
Name of parts
Connect to PC
Requirments
Attention
USB port
Disconnecting from PC
Buttons functions
Main menu
Page 6
Audio
Vidéo
FM radio
Photos
eBook
Voice recorder
Navigation
Game
Setting
Video conversion
Specifications
FAQ
Page 7
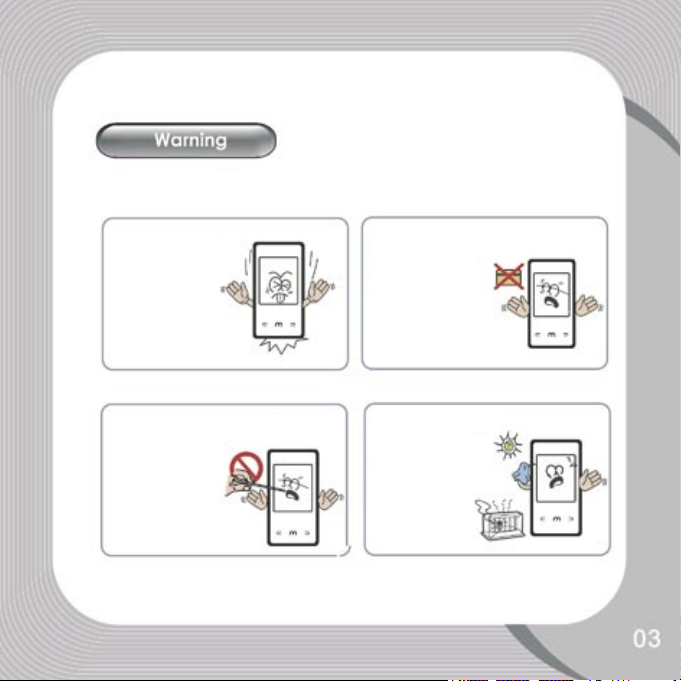
Don’t drop or
strike it
DOn’t put the player
close to your credit
card or any card
with magnetism, it
may hurt your credit
card
Don’t pressure to
the screen, it may
cause damage to
screen
Don’t put your
machine un der the
sun or put it close
to any hot place
Page 8
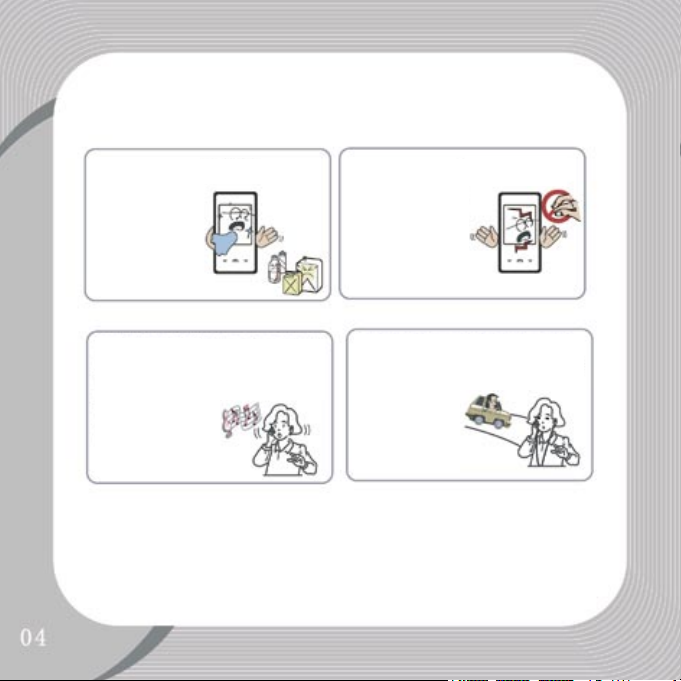
Please use soft
material to clean
the player, don’t
use any chemical
detergent
Don’t touch the
liquid that come
from the screen, it
may hurt your skin.
Call doctor for help
if you put liquid into
your eyes
It will hurt your ear
for long time listening, please stop
use it or drop down
the volume if you
feel uncomfortable
with your ear
Don’t use earphones when you are
driving, cycle or
cross road to avoid
the accident
Page 9
- Ecran TFT 1.8’’ 262k couleurs (160x128)
- Support des formats audio MP3, WMA et WAV
- Support du format vidéo MPEG-4(AVI) 160x128
- Tuner radio FM - Mémorisation de 30 stations
- Support des formats images JPEG et BMP
- Microphone intégré avec enregistrement longue durée
- Fonctions d’économie d’énergie
- Equalizer : 7 pré-réglages + 1 personnalisable
- Support multi-langues
- Support Windows 98se/Me/2K/XP, MacOS 10.3, Linux 2.4.2
- Interface USB 2.0 Full Speed
- Fonction eBook
- Jeu intégré (Tetris)
- Fonction clé USB (UMS)
- Fonction de miseà jour du firmware
Page 10

Name of parts
Earphone jack Vol - Vol +
On/Off - Play/Pause
Forward
Menu/Choice
Back
Page 11

Requirments
- Pentium 133 & up
- Windows 98se minimum
- 20Mb free space on HDD
- CD-rom
- Free USB port
Attention
It need install driver if your PC is windows 98
Pleae upgrade your system if the USB can not
connect to your pc that under WIN98SE/ME/
WIN2000/WIN XP systems
Page 12
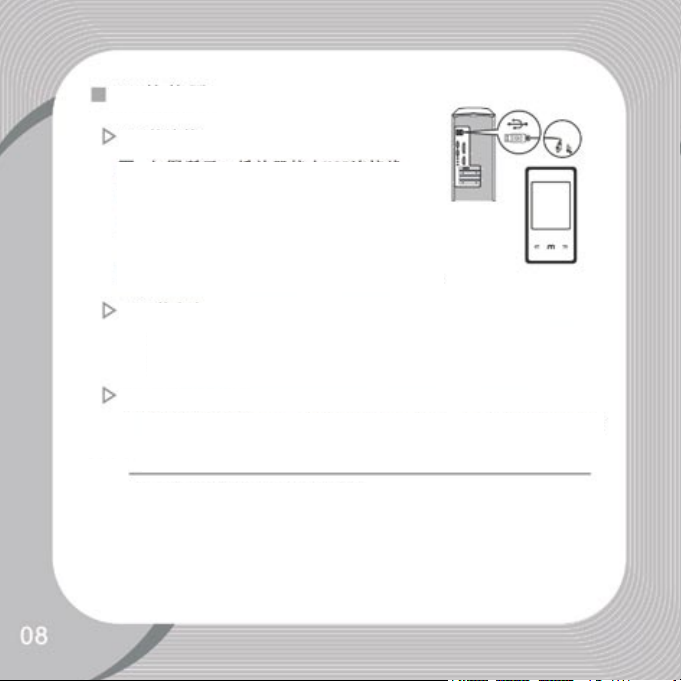
USB port
USB port
1.Connecting your player with PC through
USB cable
2.The connect ICON will show on screen
when your player connected PC
3.Take off the usb calbe when your player disconnected from your PC
Charge from USB port
Keep your player in” On” position when you charge your player
from USB port,just connect your player to PC via USB cable
Charge from AC adaptor
The battery icon will show on the screen when your player is
charging via AC adapor,when it is full charged the battery icon
will turn to green colour
Page 13
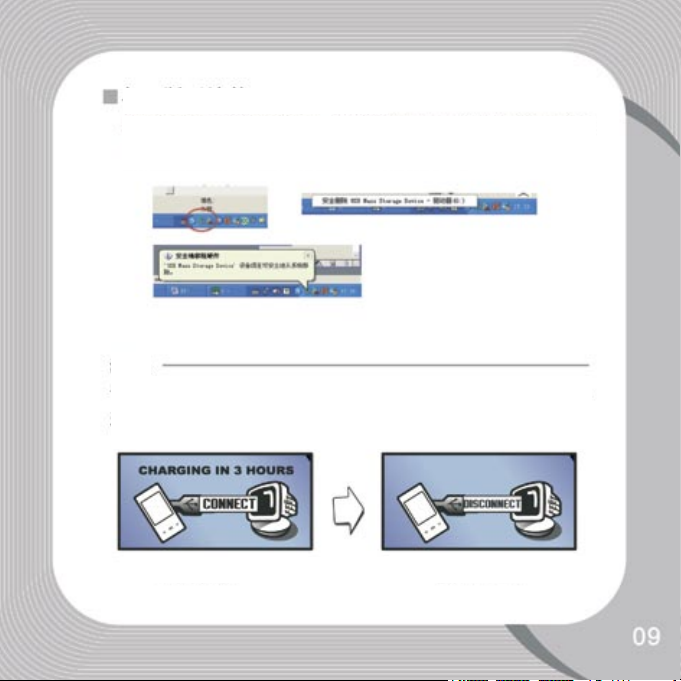
Disconnecting from PC
If you wanna disconnect from PC,click the ICON of “safely remove
the harddrive from PC” in taskbar,please make sure it already
safely removed before you dis-connect your player from PC.
Don’t dis-connected your player from PC when the file is
transfering,it will caused the system damage or the file lost.
Connected
Disconnected
Page 14

The following are the function for each button
Button Icon Function & operation
- Put the power button in «ON», press Play for long time to turn ON
Play
Forward
Back
Vol +
Vol -
On/Off
Menu
Vol + / -
Short press : press for 1 second
Long press : Press 2 seconds or more
the player, long time press Play again to shut down
- Short press Play to Play or Pause the current music, video
- AShort press PLay to return to higher folder when you are in the file
list
- Fast forward or choice next file, picture, song
- Fast back or choice previous file, picture, song
- Volume up or long press to enter FM recording mode in FM mode
- Volume down or enter autosearch function in FM mode
- Power ON/Shut down the NDT-1
- Short press to enter a folder, long press to return to the main menu
- Short press to save the recording under the Voice recorder mode
- Press these buttons at same time will lock or unlock the buttons
Page 15

Menu principal
Audio Video FM radio
Photo
Navigator Game Settings
eBook
Voice recorder
Page 16
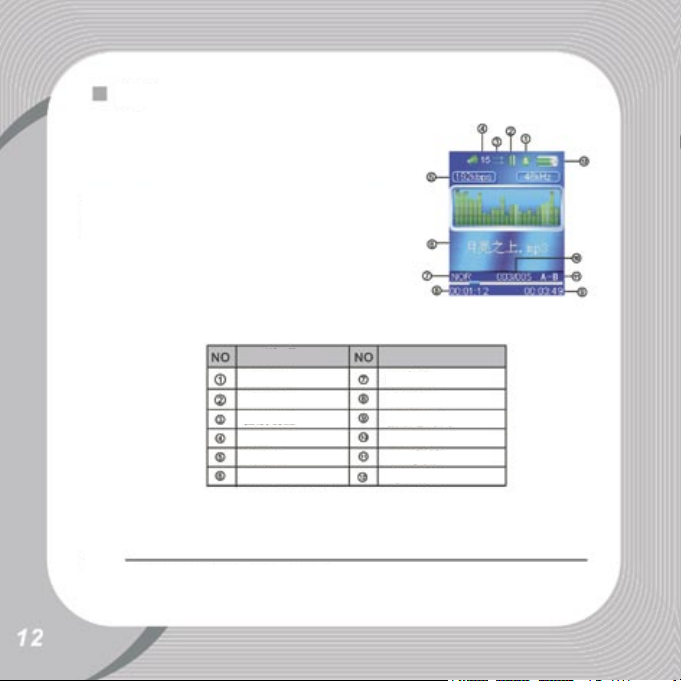
Audio
Press «Menu» to enter Audio mode in the
Main menu
Remark
Repeat
Play/Pause
Play settings
Volume
Bitrate
File name Battery life
Equalizer
Time elapsed
Total time
N° title/Total file
A-B
Page 17

1. Volume control
Short press“VOL+”or “VOL-”button to increase or lower the volume,long
press “VOL+”or “VOL-”button will continue increase or lower till the end
2. Playing list
when you are in music playing interface,Short Press “MENU” enter palying list ,then short press”FW” or “FF” button to select file,when the file is
selected,press”MENU” to inter music palying
3. “A-B” Repeat
when the song is playing,long press”menu” then will showing”A-“,then
long press “menu”again then showing”A-B”,then the song will repeat
within”A-B”,long press”MENU” again to return to normal playing
4. Back to main menu
When the song is playing,short press “MENU” to return back to file
list,then long press”MENU” to the main menu.
Vidéo
Select “audio” in main menu,then short press into “audio” option,then
will into the list of audio,then short press”FW” or “FF” button to select
file,when the file is selected,press”MENU” to enter audio palying
1. Fast Forward / Fast Reverse
long press FW” or “FF” button to Fast Forward orFast Reverse when the
audio is playing
2.Select the playing file
Short press”MENU” to inter the list,then short press FW” or “FF” button to
select
3.Volume control
Short press“VOL+”or “VOL-”button to increase or lower the volume,long
press VOL+”or “VOL-”button will continue increase or lower till the end
Page 18
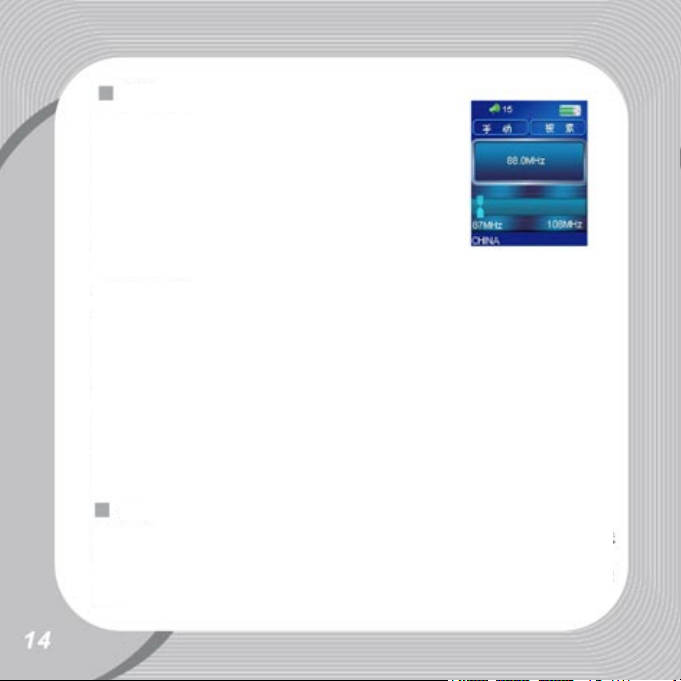
FM Radio
At main menu select“FM” press “Mode” to enter
into“FM Radio Receiver” mode
1) Scanning stations
Auto scan, long press “VOL-“ button to start auto
scan,it will store the channel automatacly. When
the scan is finish,press”FW”,or “FF” to select the
channel
2. Saving channels
Short press”Menu” into scanning modle,short press ”FW”,or “FF” to
search the channel,then short press “play” button to save channel,then
short press ”FW”,or “FF” to continue.
3) FM Recording
At “FM”, press and hold“VOL”button to enter into FM Record mode. Short
press “play” button , FM recording begins. To pause recording press
“play” and to stop press “play” again. Press “Menu” to save the recording.
Press and hold “menu” to return to FM mode.
Photo
At main menu select “Photo” and press “MENU” to enter Photo mode, a
sub-menu showing all your photo files will appear. Short press ”FW”,or
“FF” Select the appropriate file,when the file is selected,press”menu” to
enter full screen showing modle,short FW”,or “FF to browse.
Page 19
eBook
At the main menu, select “Text” then press “play”button to enter into the
Electronic book sub-menu. Then will show the list for the book file,short
press FW”,or “FF to Select the file,when the file is selected, press “MENU”
to open the selected file.,short press FW”,or “FF to page up or page dowm
1.Set bookmark
Short press” play” to ento bookmark setting(you can save 3
bookmark),select and press”menu” to confirm,then press”menu” to
retrieve,short press”VOL+” SO select book mark,”press “menu” to
confirm,then you can read from the bookmark.
Voice recorder
At main menu select “Record” and press “menu” to enter into voice record
mode. Voice recording
After pressing “play” and enter into voice recorder mode, press “play” to
start recording,Press“play”button to pause recording press “menu” button
to save and prepare for next recording,if long press”menu button,then will
return to main menu.
Navigator
Select “Navigator” and press “Menu”to enter into sub-menu for content
management.
Page 20

1) Select the content
Press “FW” or”FF” to select the content
Press “ MENU” button to select and confirm the content
Press“FW” or”FF” to navigate and select file
Press“PLAY ” to play or open the selected file
2) Deleting files
To delete file, use“FW” or”FF” button to navigate and select file to delete.
Long Press“VOL-” button and then choice “Yes” or “no”to delete selected
file. Then Press “menu” button to confirm
Game (Tetris)
At main menu select “Game”, press “MENU” to start game
Operations
1) Start and Stopt
Press “Play”button to start press“play”to pause
2) Basic control
Use “FW” or”FF” to move left or right,press”VOL+“button to rotate the
brick. Use “VOL-” button to increase the speed of the brick fall.
3) Exit Long Press “menu” button to exit and return to main menu
Settings
At main menu select “Settings” Short press “menu” to inter,then press “FW”
or”FF” to navigate and select setting press “play “ to enter into selected
setting.
Page 21

1) Music setting
There are 4 different settings to select Repeat mode Play mode EQ Select,
User EQ Set. Use“FW” or”FF” to navigate and then “play” to select. Press
“Menu” to exit back to the previous level.
Repeat Mode
At this setting : Play once, Play and repeat once, Folder play once,
Folder play and repeat once, All play once, All play and repeat once, Play
Intro.
Play Mode
Play mode setting : Play in order of sequence, Shuffle play
EQ Select
EQ setting : Normal, 3D, Rock, Pop, Classical, Bass, Jazz, User EQ
User EQ setting
At this setting : 5 different frequency settings to adjust to suit your own
preference
2. FM Radio
3 different category settings. Stereo SW, FM Region. Use“FW” or”FF” to
navigate and press “play” to select. Press “Menu” to exit to previous level.
Stereo SW
2 settings : ON/OFF
Page 22

- FM region
Choice : China, Europe, Japan, US
- Delete channel
Select a station then push «Menu» to delete.
3) Voice Recording
2 settings available : REC Quality, REC Volume. Use““FW” or”FF””to navigate and “play” to select. Press “Menu” to return to previous level.
REC Quality
2 selections : High quality, Normal quality
REC Volume
In the sub-menu : +1,+2,+3,+4,+5, there are 5 different REC volume to
select.
4) Display
Can select 3 different settings : Backlight timing,Brightness,Backlight
Mode.
Backlight timing
6 different settings : 5sec,10sec,15sec,20sec, 30sec,always on
Brightness
5 different brightness settings : 1,2,3,4,5. The higher the number the brighter the display
Page 23
Backlight mode
2 different settings : Normal, Power saving mode
5) System setting
4 different categories : Language,About,Upgrade,Default Set.
Language
Default Languages : Simplified Chinese,Traditional Chinese,ENGLISH, 3
default languages available for selection
About
Device Information display : Device flash memory size, Date, Version
number. This information is read-only files. To exit, press “Mode”
Upgrade
Press “Mode” to enter and use““FW” or”FF”” to choose “Yes” or “No” to
continue with upgrade, press “ play” to confirm selection
Connect the NDT-1 to you PC. STart the upgrade software. Click on Open
then select the .RFW file. Click on «Update» then wait for the message
«Update successfull» to display (wait 2-5 mn) then click on Exit and
disconnect the player.
Page 24

You need to format the player after the firmware upgrade.
Default Set
Press “Mode” to enter, use““FW” or”FF”” to select “Yes” or“No”, press “play”
to confirm selection to reset device to factory default settings
6) Power Off Time
This function allows user to set a fixed time for the device to automatically
power-off. Press “PLAY”to select , after selection press” MENU» exit and
save setting
Power-off time set
Power-off time set available : OFF, 10 mins, 15 mins, 30 mins, 60 mins, 120
mins, 6 different settings to select
Page 25

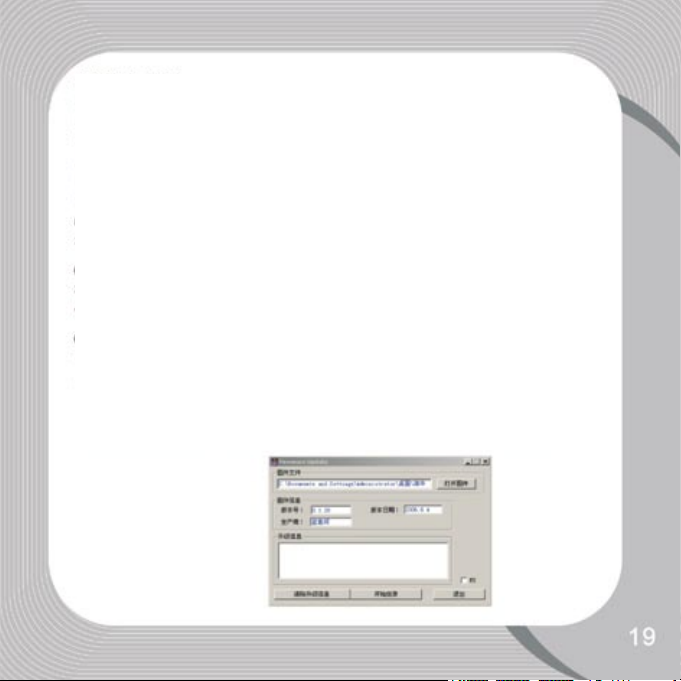
Video conversion
Install AVConverter V1.0 with the
CD provided. Select the original
file, on the right side of the menu
click original file, select MTV
Select path/location Select convert video quality
After selecting, click “begin conversion”
Once conversion reaches 100% it indicates conversion completed successfully, transfer the converted file using the USB to your
device and you can begin playing the file
Page 26

Fonction Détails
Display
USB
Audio
Video
Photo
Recording
Radio FM
MP3
WMA
Frequency
SNR
Output power
Autonomy
Languages
Weight
Size
1.8’’ TFT (160x128) 262k colors
USB 2.0 Full Speed
MP3, WMA, WAV
AVI (160x128)
JPEG, BMP
WAV (32-64Kbps) - 32 h recording (512Mo)
87.5 MHz - 108 MHz / Save up to 30 channels
8Kbps - 320Kbps
32Kbps - 384Kbps
20Hz - 20KHz
85dB
5mW x 2 / 32 Ohms
8 h
8
42g
77 x 40 x 7.5 mm
Page 27

Device doesn’t power ON
•Check battery power
•Charge battery and try again
•After charging and if problem still persists, send
back to vendor
Cannot hear with your
earphones
Control buttons no response
FM bad reception
Cannot download files •Check if device and PC connected properly
•Check volume
•Check if earphone is connected properly
•Check if the device is locked. To unlock, press
and hold “Vol” buttons
•Change earphone line and device position
•Turn off any other electrical device nearby that
may caused the reception
•Earphone acts as antenna
•Check if memory is full
•Check if USB cable is faulty
 Loading...