

Page 1

Kühl- und Gefrierkombination
Fridge-freezer
Réfrigérateur / Congélateur
combiné
Combinazione frigorifero /
congelatore
Koel-/diepvriescombinatie
de Gebrauchsanleitung ..................2
en User manual ............................ 22
fr Notice d'utilisation ...................43
it Istruzioni per l’uso ................... 68
nl Gebruiksaanwijzing .................91
KI67.. / KI68..
Page 2

de
de Inhaltsverzeichnis
de Gebrauchsanleitung
( Sicherheitshinweise . . . . . . . . . . 3
Zu dieser Anleitung . . . . . . . . . . . . . . .3
Explosionsgefahr . . . . . . . . . . . . . . . . . 3
Stromschlaggefahr. . . . . . . . . . . . . . . .3
Verbrennungsgefahr durch Kälte. . . . . 4
Verletzungsgefahr . . . . . . . . . . . . . . . .4
Gefahren durch Kältemittel . . . . . . . . . 4
Vermeidung von Risiken für
Kinder und gefährdete Personen. . . . . 4
Sachschäden. . . . . . . . . . . . . . . . . . . .5
Gewicht . . . . . . . . . . . . . . . . . . . . . . . .5
8 Bestimmungsgemäßer
Gebrauch. . . . . . . . . . . . . . . . . . . 5
7 Umweltschutz . . . . . . . . . . . . . . . 5
Verpackung . . . . . . . . . . . . . . . . . . . . . 5
Altgerät . . . . . . . . . . . . . . . . . . . . . . . . 5
M Alarm . . . . . . . . . . . . . . . . . . . . . .12
Türalarm . . . . . . . . . . . . . . . . . . . . . . 12
Temperaturalarm . . . . . . . . . . . . . . . 12
U Kühlfach . . . . . . . . . . . . . . . . . . .12
Beim Einlagern beachten . . . . . . . . . 13
Kältezonen im Kühlfach beachten . . 13
Gemüsebehälter mit
Feuchtigkeitsregler . . . . . . . . . . . . . . 13
W Gefrierfach . . . . . . . . . . . . . . . . .14
Maximales Gefriervermögen. . . . . . . 14
Gefriervolumen vollständig nutzen . . 14
Tiefkühlkost einkaufen . . . . . . . . . . . 14
Beim Einordnen beachten . . . . . . . . 15
Frische Lebensmittel einfrieren. . . . . 15
Gefriergut auftauen. . . . . . . . . . . . . . 16
= Abtauen. . . . . . . . . . . . . . . . . . . .16
5 Aufstellen und Anschließen . . . 6
Lieferumfang . . . . . . . . . . . . . . . . . . . . 6
Technische Daten . . . . . . . . . . . . . . . .6
Gerät aufstellen . . . . . . . . . . . . . . . . . .6
Nischentiefe. . . . . . . . . . . . . . . . . . . . . 6
Side by side Aufstellung . . . . . . . . . . . 6
Energie sparen . . . . . . . . . . . . . . . . . .7
Vor dem ersten Gebrauch . . . . . . . . . . 8
Elektrischer Anschluss. . . . . . . . . . . . . 8
Kühlfach . . . . . . . . . . . . . . . . . . . . . . 16
Gefrierfach . . . . . . . . . . . . . . . . . . . . 17
D Reinigen . . . . . . . . . . . . . . . . . . .17
Ausstattung reinigen. . . . . . . . . . . . . 18
l Gerüche. . . . . . . . . . . . . . . . . . . .18
9 Beleuchtung . . . . . . . . . . . . . . . .18
* Gerät kennenlernen . . . . . . . . . . 8
Gerät . . . . . . . . . . . . . . . . . . . . . . . . . .8
Bedienelemente. . . . . . . . . . . . . . . . . .9
Ausstattung . . . . . . . . . . . . . . . . . . . . .9
> Geräusche. . . . . . . . . . . . . . . . . .18
Normale Geräusche . . . . . . . . . . . . . 18
Geräusche vermeiden . . . . . . . . . . . 18
1 Gerät bedienen . . . . . . . . . . . . . 10
Gerät einschalten. . . . . . . . . . . . . . . .10
Gerät ausschalten und stilllegen . . . .10
Temperatur einstellen . . . . . . . . . . . .11
Super-Kühlen . . . . . . . . . . . . . . . . . . .11
Super-Gefrieren . . . . . . . . . . . . . . . . .11
Urlaubsmodus . . . . . . . . . . . . . . . . . . 12
2
3 Störungen, was tun? . . . . . . . . .19
4 Kundendienst . . . . . . . . . . . . . . .21
Geräte-Selbsttest . . . . . . . . . . . . . . . 21
Reparaturauftrag und Beratung
bei Störungen. . . . . . . . . . . . . . . . . . 21
Garantie . . . . . . . . . . . . . . . . . . . . . . 21
Page 3

Sicherheitshinweise de
(Sicherheitshinweise
Sicherheitshinweise
Dieses Gerät entspricht den
einschlägigen
Sicherheitsbestimmungen für
Elektrogeräte und ist
funkentstört.
Der Kältekreislauf ist auf
Dichtheit geprüft.
Zu dieser Anleitung
■ Lesen und befolgen Sie
die Gebrauchs- und
Montageanleitung. Sie
enthalten wichtige
Informationen über
Aufstellen, Gebrauch und
Wartung des Geräts.
■ Der Hersteller haftet nicht,
wenn Sie die Hinweise und
Warnungen der Gebrauchsund Montageanleitung
missachten.
■ Bewahren Sie alle
Unterlagen für späteren
Gebrauch und für
nachfolgende Besitzer auf.
Explosionsgefahr
■ Nie elektrische Geräte
innerhalb des Geräts
verwenden (z. B. Heizgeräte
oder elektrische Eisbereiter).
■ Keine Produkte mit
brennbaren Treibgasen
(z. B. Spraydosen) und keine
explosiven Stoffe im Gerät
lagern.
■ Hochprozentigen Alkohol nur
dicht verschlossen und
stehend lagern.
Stromschlaggefahr
Unsachgemäße Installationen
und Reparaturen können den
Benutzer erheblich gefährden.
■ Bei beschädigter
Netzanschlussleitung: Gerät
sofort vom Netz trennen.
■ Gerät nur vom Hersteller,
Kundendienst oder einer
ähnlich qualifizierten Person
reparieren lassen.
■ Nur Originalteile des
Herstellers verwenden.
Bei diesen Teilen
gewährleistet der Hersteller,
dass sie die
Sicherheitsanforderungen
erfüllen.
■ Eine Verlängerung der
Netzanschlussleitung darf
nur über den Kundendienst
bezogen werden.
3
Page 4

de Sicherheitshinweise
Verbrennungsgefahr durch Kälte
■ Nie Gefriergut sofort –
nachdem es aus dem
Gefrierfach genommen
wurde – in den Mund
nehmen.
■ Längeren Kontakt der
Haut mit Gefriergut, Eis
und den Rohren im
Gefrierfach vermeiden.
Verletzungsgefahr
Behälter mit
kohlensäurehaltigen Getränken
können platzen.
Keine Behälter mit
kohlensäurehaltigen Getränken
im Gefrierfach lagern.
Gefahren durch Kältemittel
In den Rohren des
Kältekreislaufs befindet sich in
geringer Menge das
umweltfreundliche aber
brennbare Kältemittel R600a.
Es schädigt nicht die
Ozonschicht und erhöht nicht
den Treibhauseffekt. Wenn das
Kältemittel austritt, kann es die
Augen verletzen oder sich
entzünden.
■ Rohre nicht beschädigen.
Bei Beschädigung der Rohre:
■ Feuer und Zündquellen vom
Gerät fernhalten.
■ Raum lüften.
■ Gerät ausschalten und
Netzstecker ziehen.
■ Kundendienst rufen.
Vermeidung von Risiken für Kinder und gefährdete Personen
Gefährdet sind:
■ Kinder,
■ Personen, die körperlich,
psychisch oder in ihrer
Wahrnehmung
eingeschränkt sind,
■ Personen, die nicht
genügend Wissen über
die sichere Bedienung des
Geräts haben.
Maßnahmen:
■ Sicherstellen, dass Kinder
und gefährdete Personen die
Gefahren verstanden haben.
■ Eine für die Sicherheit
verantwortliche Person muss
Kinder und gefährdete
Personen am Gerät
beaufsichtigen oder anleiten.
■ Nur Kinder ab 8 Jahren das
Gerät benutzen lassen.
■ Bei Reinigung und Wartung
Kinder beaufsichtigen.
■ Niemals Kinder mit dem
Gerät spielen lassen.
4
Page 5

Bestimmungsgemäßer Gebrauch de
Erstickungsgefahr
■ Bei Gerät mit Türschloss:
Schlüssel außer Reichweite
von Kindern aufbewahren.
■ Verpackung und deren Teile
nicht Kindern überlassen.
Sachschäden
Um Sachschäden zu
vermeiden:
■ Nicht auf Sockel, Auszüge
oder Türen treten oder
darauf abstützen.
■ Kunststoffteile und
Türdichtungen öl- und fettfrei
halten.
■ Am Stecker ziehen – nicht
am Anschlusskabel.
Gewicht
Beachten Sie beim Aufstellen
und Transport des Gerätes,
dass es sehr schwer sein kann.
~ "Aufstellort" auf Seite 6
7 Umweltschutz
Umweltschutz
Verpackung
Alle Materialien sind umweltverträglich
und wieder verwertbar:
■ Entsorgen Sie die Verpackung
umweltgerecht.
■ Informieren Sie sich über
Entsorgungswege bei Ihrem
Fachhändler oder bei der
öffentlichen Verwaltung.
Altgerät
Durch umweltgerechte Entsorgung
können wertvolle Rohstoffe
wiedergewonnen werden.
:Warnung
Kinder können sich im Gerät einschließen und ersticken!
■ Um Kindern das Hineinklettern zu
erschweren, Ablagen und Behälter
nicht aus dem Gerät nehmen.
■ Kinder vom ausgedienten Gerät
fernhalten.
Achtung!
Kältemittel und schädliche Gase
können austreten.
Rohre des Kältemittel-Kreislaufs und
Isolierung nicht beschädigen.
8 Bestimmungsgemäßer
Gebrauch
Bestimmungsgemäßer Gebrauch
Verwenden Sie dieses Gerät
■ nur zum Kühlen und Gefrieren von
Lebensmitteln und zur Eisbereitung.
■ nur im Privathaushalt und im
häuslichen Umfeld.
■ nur gemäß dieser
Gebrauchsanleitung.
Dieses Gerät ist für eine Nutzung bis zu
einer Höhe von maximal 2000 Metern
über dem Meeresspiegel bestimmt.
1. Netzstecker ziehen.
2. Netzanschlussleitung durchtrennen.
3. Gerät fachgerecht entsorgen lassen.
Dieses Gerät ist entsprechend
der europäischen Richtlinie
2012/19/EU über Elektro- und
Elektronikaltgeräte
(waste electrical and electronic
equipment - WEEE) gekennzeichnet.
Die Richtlinie gibt den Rahmen für eine
EU-weit gültige Rücknahme und
Verwertung der Altgeräte vor.
5
Page 6

de Aufstellen und Anschließen
5 Aufstellen und
Anschließen
Aufstellen und Anschließen
Lieferumfang
Prüfen Sie nach dem Auspacken alle
Teile auf eventuelle Transportschäden.
Wenden Sie sich bei Beanstandungen
an den Händler, bei dem Sie das Gerät
erworben haben oder an unseren
Kundendienst.
~ "Kundendienst" auf Seite 21
Die Lieferung besteht aus folgenden
Teilen:
■ Einbaugerät
■ Ausstattung (modellabhängig)
■ Beutel mit Montagematerial
■ Gebrauchsanleitung
■ Montageanleitung
■ Kundendienstheft
■ Garantiebeilage
■ Informationen zu Energieverbrauch
und Geräuschen
Technische Daten
Kältemittel, Nutzinhalt und weitere
technische Angaben befinden sich
auf dem Typenschild.
~ "Gerät kennenlernen" auf Seite 8
Pro 8 g Kältemittel muss der Raum
mindestens 1 m³ groß sein. Die Menge
des Kältemittels Ihres Geräts steht auf
dem Typenschild im Inneren des
Geräts.
~ "Gerät kennenlernen" auf Seite 8
Das Gewicht des Gerätes kann je nach
Modell bis zu 70 kg betragen.
Zulässige Raumtemperatur
Die zulässige Raumtemperatur hängt
von der Klimaklasse des Geräts ab.
Angaben zur Klimaklasse finden Sie auf
dem Typenschild.
~ "Gerät kennenlernen" auf Seite 8
Klimaklasse Zulässige Raumtemperatur
SN +10 °C ... 32 °C
N +16 °C ... 32 °C
ST +16 °C ... 38 °C
T +16 °C ... 43 °C
Das Gerät ist innerhalb der zulässigen
Raumtemperatur voll funktionsfähig.
Wird ein Gerät der Klimaklasse SN bei
kälteren Raumtemperaturen betrieben,
können Beschädigungen am Gerät bis
zu einer Raumtemperatur von +5 °C
ausgeschlossen werden.
Gerät aufstellen
Aufstellort
Je mehr Kältemittel in einem Gerät ist,
desto größer muss der Raum sein, in
dem das Gerät steht. In zu kleinen
Räumen kann bei einem Leck ein
brennbares Gas-Luft-Gemisch
entstehen.
6
Nischentiefe
Für das Gerät wird eine Nischentiefe
von 56 cm empfohlen. Bei einer
kleineren Nischentiefe – mindestens
55 cm – erhöht sich die
Energieaufnahme geringfügig.
Side by side Aufstellung
Eine Aufstellung der Geräte
nebeneinander ist nur mit einem
Abstand von mindestens 15 cm
möglich.
Page 7

Aufstellen und Anschließen de
Energie sparen
Wenn Sie die folgenden Hinweise befolgen, verbraucht Ihr Gerät weniger Strom.
Hinweis: Die Anordnung der Ausstattungsteile hat keinen Einfluss auf den Energieverbrauch des Geräts.
Gerät aufstellen
Gerät vor direkter Sonneneinstrahlung schützen. Das Gerät muss bei niedrigeren UmgebungstempeGerät mit möglichst großem Abstand zu Heizkör-
pern, Herd und anderen Wärmequellen aufstellen:
3 cm zu Elektro- oder Gasherden
30 cm zu Öl- oder Kohleherden
Hinweis: Wenn das nicht möglich ist eine
Isolierplatte zwischen Gerät und Wärmequelle
anbringen.
Aufstellort mit einer Raumtemperatur von
ca. 20 °C wählen.
Nischentiefe von 56 cm verwenden.
Achtung!
Verbrennungsgefahr!
Einzelne Teile des Geräts werden bei Betrieb heiß.
Eine Berührung dieser Teile kann zu Verbrennungen
führen.
Nicht Lüftungsöffnungen abdecken oder zustellen.
Raum täglich lüften.
raturen seltener kühlen und verbraucht dadurch
weniger Strom.
Die Luft an der Rückwand des Geräts erwärmt sich
nicht so stark. Das Gerät verbraucht weniger Strom,
wenn die warme Luft abziehen kann.
Gerät nutzen
Gerätetür nur kurz öffnen. Die Luft im Gerät erwärmt sich nicht so stark. Das
Gekaufte Lebensmittel in einer Kühltasche
transportieren und schnell ins Gerät legen.
Gerät muss seltener kühlen und verbraucht
dadurch weniger Strom.
Warme Lebensmittel und Getränke erst abkühlen
lassen, dann in ins Gerät stellen.
Gefriergut zum Auftauen ins Kühlfach legen,
um die Kälte des Gefrierguts zu nutzen.
Zwischen den Lebensmitteln und zu der Rückwand
immer etwas Platz lassen.
Lebensmittel luftdicht verpacken.
Die Luft kann zirkulieren und die Luftfeuchtigkeit
bleibt konstant. Das Gerät muss seltener kühlen
und verbraucht dadurch weniger Strom.
Geräterückseite einmal jährlich absaugen. Die Luft an der Rückwand des Geräts erwärmt sich
Nicht Lüftungsöffnungen abdecken oder zustellen.
--------
nicht so stark. Das Gerät verbraucht weniger Strom,
wenn die warme Luft abziehen kann.
7
Page 8

de Gerät kennenlernen
Vor dem ersten Gebrauch
1. Infomaterial entnehmen und
Klebestreifen sowie Schutzfolie
entfernen.
2. Gerät reinigen.
~ "Reinigen" auf Seite 17
Elektrischer Anschluss
Achtung!
Das Gerät nicht an elektronische
Energiesparstecker anschließen.
Hinweis: Sie können das Gerät an netzgeführte und an sinusgeführte Wechselrichter anschließen. Netzgeführte Wechselrichter werden bei Photovoltaikanlagen mit direktem Anschluss an das öffentliche Stromnetz verwendet. Bei Insellösungen müssen Sie sinusgeführte Wechselrichter verwenden. Insellösungen, z. B. auf Schiffen oder Gebirgshütten, haben keinen direkten Anschluss an das öffentliche Stromnetz.
1. Nach dem Aufstellen des Geräts
mit dem Anschluss mindestens
1 Stunde warten, um Schäden am
Verdichter zu vermeiden.
2. Gerät über eine vorschriftsmäßig
installierte Steckdose anschließen.
Die Steckdose muss folgende Daten
erfüllen:
Steckdose mit 220 V ... 240 V
Schutzleiter 50 Hz
Sicherung 10 A ... 16 A
Außerhalb Europas: Prüfen, ob die
angegebene Stromart des Geräts
mit den Werten Ihres Stromnetzes
übereinstimmt. Die Angaben zum
Gerät stehen auf dem Typenschild.
~ "Gerät kennenlernen" auf Seite 8
3. Gerät an eine Steckdose in der Nähe
des Geräts anschließen.
Die Steckdose muss auch nach dem
Aufstellen des Geräts frei zugänglich
sein.
* Gerät kennenlernen
Gerät kennenlernen
Klappen Sie die letzte Seite mit den
Abbildungen aus. Abweichungen
zwischen Gerät und Abbildungen sind
je nach Ausstattung möglich.
Gerät
~ Bild !
* Nicht bei allen Modellen.
# Kühlfach
+ Gefrierfach
(-h Bedienelemente
)"* Ventilator
)* Beleuchtung
)2 Ausziehbare Ablage
): Gemüsebehälter mit
)B Typenschild
)J* Beerenschale
)R Gefrierkalender
)Z Gefriergutbehälter
)b Butter- und Käsefach
)j* Absteller Vario
1" Ablage für große Flaschen
Feuchtigkeitsregler
8
Page 9

Gerät kennenlernen de
Bedienelemente
~ Bild "
( Taste #
Schaltet das Gerät ein oder aus.
0 Taste Super Gefrierfach
Schaltet Super-Gefrieren ein oder
aus.
8 Taste K/J Gefrierfach
Stellt die Temperatur des
Gefrierfachs ein.
@ Anzeige Temperatur Gefrierfach
Zeigt die eingestellte Temperatur
in °C an.
H Taste Alarm
Schaltet den Warnton ab.
P Taste Holiday
Schaltet den Urlaubsmodus ein
oder aus.
X Taste K/J Kühlfach
Stellt die Temperatur des
Kühlfachs ein.
` Anzeige Temperatur Kühlfach
Zeigt die eingestellte Temperatur
in °C an.
h Taste Super Kühlfach
Schaltet Super-Kühlen ein oder
aus.
Ausstattung
(nicht bei allen Modellen)
Ablage
~ Bild #
Sie können die Ablage variieren:
■ Ablage herausziehen und
herausnehmen.
Vario-Ablage
~ Bild $
Sie können hohes Kühlgut
(z. B. Kannen oder Flaschen) lagern:
■ Vorderen Teil der Ablage
herausnehmen und unter den
hinteren Teil schieben.
Ausziehbare Ablage
~ Bild %
Sie können sich eine bessere Übersicht
verschaffen:
■ Ablage herausziehen.
Sie können die Ablage ganz
herausnehmen:
1. Beide Knöpfe unter der Ablage
drücken und gedrückt halten.
2. Ablage herausziehen, absenken und
seitlich herausschwenken.
Behälter
~ Bild &
Sie können den Behälter
herausnehmen:
■ Behälter bis zum Anschlag
herausziehen, vorne anheben
und herausnehmen.
Butterfach und Käsefach
~ Bild '
Sie können das Fach einfach öffnen:
■ Unten in der Mitte der Klappe leicht
drücken.
Das Fach öffnet sich nach unten. Die
Klappe schiebt sich unter das Fach.
Absteller
~ Bild (
Sie können den Absteller
herausnehmen:
■ Absteller nach oben anheben
und herausnehmen.
Absteller Vario
~ Bild )
Sie können im unteren Absteller große
Flaschen lagern:
■ Absteller nach rechts oder links
verschieben.
9
Page 10

de Gerät bedienen
Flaschenhalter
~ Bild *
Wenn Sie die Tür öffnen und schließen:
■ Der Flaschenhalter verhindert, dass
Flaschen kippen.
Gefrierkalender
~ Bild !/)R
Der Gefrierkalender gibt die maximale
Lagerdauer in Monaten bei einer
durchgehenden Temperatur von
–18 °C an.
Eisschale
Sie können Eiswürfel bereiten:
1. Eisschale zu 3/4 mit Wasser füllen
und in das Gefrierfach stellen. Hinweis: Festgefrorene Eisschale
nur mit stumpfem Gegenstand lösen
(z. B. Löffelstiel).
2. Zum Lösen der Eiswürfel Eisschale
kurz unter fließendes Wasser halten
oder leicht verwinden.
Kälteakku
Bei einem Stromausfall oder einer
Störung:
■ Der Kälteakku verzögert die
Erwärmung des eingelagerten
Gefrierguts.
Hinweis: Die Lagerdauer ist am längsten, wenn Sie den Kälteakku im obersten Fach auf die Lebensmittel legen.
Sie können den Kälteakku zum
vorübergehenden Kühlhalten von
Lebensmitteln, z. B. in einer Kühltasche,
herausnehmen.
1 Gerät bedienen
Gerät bedienen
Gerät einschalten
1. Taste # drücken.
Das Gerät beginnt zu kühlen.
Warnton, blinkende
Temperaturanzeige des Gefrierfachs
und leuchtende Taste Alarm zeigen
an, dass das Gefrierfach noch zu
warm ist.
2. Taste Alarm drücken.
Der Warnton schaltet ab.
3. Die gewünschte Temperatur
einstellen.
~ "Temperatur einstellen"
auf Seite 11
Hinweise zum Betrieb
■ Nach dem Einschalten kann es
mehrere Stunden dauern, bis die
eingestellten Temperaturen erreicht
sind. Vor Erreichen der gewählten
Temperatur keine Lebensmittel
einlegen.
■ Die Stirnseiten des Gehäuses
werden teilweise leicht beheizt. Dies
verhindert Schwitzwasserbildung im
Bereich der Türdichtung.
■ Wenn sich die Gefrierfach-Tür nach
dem Schließen nicht sofort wieder
öffnen lässt: einen Moment warten,
bis sich der entstandene Unterdruck
ausgeglichen hat.
Gerät ausschalten und stilllegen
Gerät ausschalten
■ Taste # drücken.
Das Gerät kühlt nicht mehr.
10
Page 11

Gerät bedienen de
Gerät stilllegen
Wenn Sie das Gerät längere Zeit
nicht benutzen:
1. Taste # drücken.
Das Gerät kühlt nicht mehr.
2. Netzstecker ziehen oder Sicherung
ausschalten.
3. Gerät reinigen.
4. Gerät offen lassen.
Temperatur einstellen
Empfohlene Temperatur
Kühlfach: +4 °C
Gefrierfach: –18 °C
Kühlfach
■ Taste K/J so oft drücken, bis die
Anzeige die gewünschte Temperatur
zeigt.
Gefrierfach
■ Taste K/J so oft drücken, bis die
Anzeige die gewünschte Temperatur
zeigt.
Aufkleber OK
(nicht bei allen Modellen)
Mit dem Aufkleber OK können Sie
prüfen, ob die Temperatur im Kühlfach
+4 °C oder kälter erreicht.
Wenn der Aufkleber nicht OK zeigt,
Temperatur schrittweise verringern.
Nach Inbetriebnahme des Geräts kann
es bis zu 12 Stunden dauern, bis die
eingestellte Temperatur erreicht ist.
Korrekte Einstellung
Super-Kühlen
Beim Super-Kühlen kühlt das Kühlfach
so kalt wie möglich.
Super-Kühlen einschalten z. B.:
■ vor dem Einlegen großer Mengen
Lebensmittel
■ zum Schnellkühlen von Getränken
Hinweis: Wenn Super-Kühlen eingeschaltet ist, kann es zu vermehrten Geräuschen kommen.
Nach ca. 15 Stunden schaltet das
Gerät auf Normalbetrieb.
Super-Kühlen ein-/ausschalten:
■ Taste Super drücken.
Wenn das Super-Kühlen
eingeschaltet ist, leuchtet die Taste.
Super-Gefrieren
Beim Super-Gefrieren kühlt das
Gefrierfach so kalt wie möglich.
Super-Gefrieren einschalten z. B.:
■ um Lebensmittel schnell bis zum
Kern durchzufrieren
■ 4 ... 6 Stunden vor dem Einlegen
einer Lebensmittelmenge ab 2 kg
■ zur Ausnutzung des max.
Gefriervermögens
~ "Maximales Gefriervermögen"
auf Seite 14
Hinweis: Wenn Super-Gefrieren eingeschaltet ist, kann es zu vermehrten Geräuschen kommen.
Nach ca. 2 ^ Tagen schaltet das Gerät
auf Normalbetrieb.
Super-Gefrieren ein-/ausschalten:
■ Taste Super drücken.
Wenn das Super-Gefrieren
eingeschaltet ist, leuchtet die Taste.
11
Page 12

de Alarm
Urlaubsmodus
Bei längerer Abwesenheit können Sie
das Gerät in den energiesparenden
Urlaubsmodus umstellen.
Die Temperatur im Kühlfach wird
automatisch auf +14 °C umgestellt.
Lagern Sie während dieser Zeit keine
Lebensmittel im Kühlfach.
Die Temperatur im Gefrierfach bleibt
unverändert.
Urlaubsmodus ein-/ausschalten:
■ Taste Holiday drücken.
Wenn der Urlaubsmodus
eingeschaltet ist, leuchtet die
Taste und die Anzeige Temperatur
Kühlfach zeigt keine Temperatur
mehr an.
M Alarm
Alarm
Türalarm
Wenn die Gerätetür länger als eine
Minute offen steht, schaltet sich der
Türalarm (Dauerton) ein.
■ Tür schließen oder Taste Alarm
drücken.
Der Warnton wird abgeschaltet.
Temperaturalarm
Wenn es im Gefrierfach zu warm wird,
schaltet sich der Temperaturalarm
(Intervallton) ein.
Achtung!
Beim Auftauen können Bakterien
entstehen und das Gefriergut kann
verderben.
An- oder aufgetautes Gefriergut nicht
wieder einfrieren.
Erst nach dem Kochen oder Braten
erneut einfrieren. Die maximale
Lagerdauer nicht mehr voll nutzen.
Hinweis: Ohne Gefahr für das Gefriergut kann sich der Alarm in folgenden Fällen einschalten:
■ Das Gerät wird in Betrieb
genommen.
■ Große Mengen frischer Lebensmittel
werden eingelegt.
■ Die Gefrierfach-Tür ist zu lange
geöffnet.
Wärmste Temperatur anzeigen und
Warnton ausschalten:
■ Taste Alarm drücken.
Die Anzeige zeigt kurz die wärmste
Temperatur an, die im Gefrierfach
geherrscht hat. Danach zeigt die
Anzeige wieder die eingestellte
Temperatur an.
Von diesem Zeitpunkt an wird die
wärmste Temperatur neu ermittelt
und gespeichert.
Hinweis: Die Taste Alarm leuchtet, bis die eingestellte Temperatur wieder erreicht ist.
U Kühlfach
Kühlfach
Das Kühlfach eignet sich zum
Aufbewahren von Fleisch, Wurst, Fisch,
Milchprodukten, Eiern, fertigen Speisen
und Backwaren.
Die Temperatur ist von +2 °C ... +8 °C
einstellbar.
Durch die Kühllagerung können Sie
auch hoch verderbliche Lebensmittel
kurz- bis mittelfristig lagern. Je tiefer die
gewählte Temperatur, desto langsamer
laufen enzymatische, chemische sowie
auch der Verderb durch
Mikroorganismen ab. Eine Temperatur
von +4 °C oder darunter gewährleistet
die optimale Frischhaltung und
Sicherheit der gelagerten Lebensmittel.
12
Page 13

Kühlfach de
Beim Einlagern beachten
■ Frische, unversehrte Lebensmittel
einlagern.
So bleibt Frische und Qualität länger
erhalten.
■ Bei Fertigprodukten und abgefüllten
Waren das vom Hersteller
angegebene Mindesthaltbarkeitsoder Verbrauchsdatum nicht
überschreiten.
■ Um Aroma, Farbe und Frische zu
erhalten, Lebensmittel gut verpackt
oder abgedeckt einlagern.
So vermeiden Sie
Geschmacksübertragungen und
Verfärbungen der Kunststoffteile.
■ Warme Speisen und Getränke erst
abkühlen lassen, dann in das
Kühlfach stellen.
Kältezonen im Kühlfach beachten
Durch die Luftzirkulation im Kühlfach
entstehen Zonen unterschiedlicher
Kälte.
Kälteste Zone
Die kälteste Zone ist zwischen dem
seitlich eingeprägten Pfeil und der
darunter liegenden Ablage.
~ Bild +
Hinweis: Lagern Sie in der kältesten Zone empfindliche Lebensmittel, z. B. Fisch, Wurst und Fleisch.
Wärmste Zone
Die wärmste Zone ist an der Tür ganz
oben.
Gemüsebehälter mit Feuchtigkeitsregler
~ Bild ,
Der Gemüsebehälter ist der optimale
Lagerort für frisches Obst und Gemüse.
Über den Feuchtigkeitsregler und eine
spezielle Abdichtung können Sie die
Luftfeuchtigkeit im Gemüsebehälter
anpassen. Damit können Sie frisches
Obst und Gemüse bis zu zweimal
länger einlagern als bei konventioneller
Lagerung.
Die Luftfeuchtigkeit im Gemüsebehälter
können Sie nach Art und Menge der
einzulagerndern Ware einstellen:
■ überwiegend Obst sowie bei hoher
Beladung – niedrigere
Luftfeuchtigkeit einstellen
■ überwiegend Gemüse sowie bei
Mischbeladung oder geringer
Beladung – höhere Luftfeuchtigkeit
einstellen
Hinweise
■ Kälteempfindliches Obst
(z. B. Ananas, Banane, Papaya
und Zitrusfrüchte) und Gemüse
(z. B. Auberginen, Gurken, Zucchini,
Paprika, Tomaten und Kartoffeln)
sollten Sie für den optimalen Erhalt
von Qualität und Aroma außerhalb
des Kühlschranks bei Temperaturen
von circa +8 °C ... +12 °C lagern.
■ Je nach Lagermenge und Lagergut
kann sich im Gemüsebehälter
Kondenswasser bilden.
Kondeswasser mit einem trockenen
Tuch entfernen und Luftfeuchtigkeit
im Gemüsebehälter über den
Feuchtigkeitsregler anpassen.
Hinweis: Lagern Sie in der wärmsten Zone z. B. Hartkäse und Butter. Käse kann sein Aroma weiter entfalten, Butter bleibt streichfähig.
13
Page 14

de Gefrierfach
W Gefrierfach
Gefrierfach
Das Gefrierfach eignet sich zum:
■ Lagern von Tiefkühlkost
■ Herstellen von Eiswürfeln
■ Einfrieren von Lebensmitteln
Die Temperatur ist von
–16 °C ... –24 °C einstellbar.
Durch die Gefrierlagerung können Sie
verderbliche Lebensmittel nahezu ohne
merkliche Qualitätseinbußen langfristig
lagern, da die tiefen Temperaturen den
Verderb stark verlangsamen oder
stoppen. Aussehen, Aroma und alle
wertvollen Inhaltsstoffe bleiben
weitestgehend erhalten.
Die langfristige Lagerung von
Lebensmitteln sollte bei –18 °C
oder darunter erfolgen.
Die Zeitspanne zwischen der
Einlagerung frischer Lebensmittel und
dem völligen Durchfrieren ist abhängig
von folgenden Faktoren:
■ eingestellter Temperatur
■ Art des Lebensmittels
■ Füllung des Gefrierfachs
■ Einlagerungsmenge und -art
Maximales Gefriervermögen
Das maximale Gefriervermögen gibt an,
welche Menge Lebensmittel in
24 Stunden bis zum Kern durchgefroren
werden kann.
Angaben zum maximalen
Gefriervermögen finden Sie auf dem
Typenschild.
~ "Gerät kennenlernen" auf Seite 8
Zur Nutzung des maximalen
Gefriervermögens das Super-Gefrieren
24 Stunden vor dem Einlegen der
frischen Lebensmittel einschalten.
Voraussetzungen für das maximale Gefriervermögen
1. Circa 24 Stunden bevor Sie frische
Ware einlegen: Super-Gefrieren
einschalten.
~ "Super-Gefrieren" auf Seite 11
2. Behälter aus dem Gefrierfach
nehmen und die Lebensmittel direkt
auf den Ablagen und dem
Gefrierfachboden stapeln.
3. Zuerst das oberste Fach mit
Lebensmitteln füllen. Dort werden sie
am schnellsten durchgefroren.
4. Wenn das oberste Fach nicht
ausreicht, die verbleibende Menge
im darunterliegenden Fach von
vorne rechts beginnend lagern.
5. Frische Lebensmittel möglichst dicht
an den Seitenwänden einfrieren.
Gefriervolumen vollständig nutzen
Um die maximale Menge an Gefriergut
unterzubringen:
■ Alle Ausstattungsteile entnehmen.
■ Lebensmittel direkt auf den Ablagen
und dem Gefrierfachboden lagern.
Tiefkühlkost einkaufen
■ Auf unbeschädigte Verpackung
achten.
■ Mindesthaltbarkeitsdatum nicht
überschreiten.
■ Temperatur in der Verkaufstruhe
muss –18 °C oder kälter sein.
■ Tiefkühlkost möglichst in einer
Isoliertasche transportieren und
schnell in das Gefrierfach legen.
14
Page 15

Gefrierfach de
Beim Einordnen beachten
■ Größere Mengen Lebensmittel im
obersten Fach einfrieren.
Dort werden sie besonders schnell
und schonend eingefroren.
■ Lebensmittel großflächig in die
Fächer oder Gefriergutbehälter
legen.
■ Einzufrierende Lebensmittel nicht
mit gefrorenen Lebensmitteln in
Berührung bringen.
Bei Bedarf durchgefrorene
Lebensmittel in die
Gefriergutbehälter umstapeln.
■ Wichtig für einwandfreie
Luftzirkulation im Gerät:
Gefriergutbehälter bis zum Anschlag
einschieben.
Frische Lebensmittel einfrieren
Zum Einfrieren nur frische und
einwandfreie Lebensmittel verwenden.
Lebensmittel, die gekocht, gebraten
oder gebacken verzehrt werden, sind
geeigneter für das Einfrieren als
Lebensmittel, die roh verzehrt werden.
Vor dem Einfrieren sind je nach
Lebensmittel Vorbereitungsprozesse
durchzuführen, um Nährwert, Aroma
und Farbe bestmöglich zu erhalten:
■ Gemüse: waschen, zerkleinern,
blanchieren.
■ Obst: waschen, entkernen und
eventuell schälen, eventuell Zucker
oder Ascorbinsäurelösung zufügen.
Hinweise dazu finden Sie in
einschlägiger Literatur.
Zum Einfrieren geeignet
■ Backwaren
■ Fisch und Meeresfrüchte
■ Fleisch
■ Wild und Geflügel
■ Gemüse, Obst und Kräuter
■ Eier ohne Schale
■ Milchprodukte, z. B. Käse,
Butter und Quark
■ fertige Gerichte und Speisereste,
z. B. Suppen, Eintöpfe, gegartes
Fleisch, gegarter Fisch,
Kartoffelspeisen, Aufläufe und
Süßspeisen
Zum Einfrieren nicht geeignet
■ Gemüsesorten, die üblicherweise
roh verzehrt werden, z. B. Blattsalate
oder Radieschen
■ ungeschälte oder hartgekochte Eier
■ Weintrauben
■ ganze Äpfel, Birnen und Pfirsiche
■ Joghurt, Dickmilch, saure Sahne,
Creme Fraiche und Mayonnaise
Gefriergut verpacken
Die richtige Art der Verpackung und
Materialauswahl bestimmen maßgeblich
den Erhalt der Produktqualität und
vermeidet die Entwicklung von
Gefrierbrand.
1. Lebensmittel in die Verpackung
einlegen.
2. Luft herausdrücken.
3. Verpackung luftdicht verschließen,
damit die Lebensmittel den
Geschmack nicht verlieren oder
austrocknen.
4. Verpackung mit Inhalt und
Einfrierdatum beschriften.
15
Page 16

de Abtauen
Geeignete Verpackung:
■ Kunststoff-Folie
■ Schlauch-Folie aus Polyethylen (PE)
■ Alu-Folie
■ Gefrierdosen
Geeignete Verschlüsse:
■ Gummiringe
■ Kunststoff-Klipse
■ Kältebeständige Klebebänder
Nicht geeignete Verpackung:
■ Packpapier
■ Pergamentpapier
■ Cellophan
■ Müllbeutel und gebrauchte
Einkaufstüten
Haltbarkeit des Gefriergutes bei –18 °C
Fisch, Wurst, fertige Speisen,
Backwaren:
bis zu 6 Monate
Geflügel, Fleisch: bis zu 8 Monate
Gemüse, Obst: bis zu 12 Monate
Gefriergut auftauen
Die Auftaumethode ist an Lebensmittel
und Verwendungszweck anzupassen,
um die Produktqualität bestmöglich zu
erhalten.
Auftaumethoden:
■ im Kühlfach (besonders geeignet
für tierische Lebensmittel wie Fisch,
Fleisch, Käse, Quark)
■ bei Raumtemperatur (Brot)
■ Mikrowelle (Lebensmittel zum
sofortigen Verzehr oder sofortiger
Zubereitung)
■ Backofen/Herd (Lebensmittel zum
sofortigen Verzehr oder sofortiger
Zubereitung)
Achtung!
An- oder aufgetautes Gefriergut nicht
wieder einfrieren. Erst nach dem
Verarbeiten zu einem Fertiggericht
(gekocht oder gebraten) können Sie
es erneut einfrieren.
Die maximale Lagerdauer des
Gefrierguts nicht mehr voll nutzen.
= Abtauen
Abtauen
Kühlfach
Während die Kühlmaschine läuft, bilden
sich an der Rückwand
Tauwassertropfen oder Reif. Dies ist
funktionsbedingt. Die Tauwassertropfen
oder den Reif müssen Sie nicht
abwischen. Die Rückwand taut
automatisch ab. Das Tauwasser läuft in
die Tauwasserrinne.
~ Bild .
Von der Tauwasserrinne läuft das
Tauwasser zur Verdunstungsschale,
wo es verdunstet.
Hinweis: Tauwasserrinne und Ablaufloch sauber halten, damit das Tauwasser ablaufen kann und Geruchsbildung vermieden wird.
16
Page 17

Reinigen de
Gefrierfach
Da das Gefriergut nicht antauen darf,
taut das Gefrierfach nicht automatisch
ab. Eine Reifschicht im Gefrierfach
verschlechtert die Kälteabgabe an das
Gefriergut und erhöht den
Stromverbrauch.
■ Reifschicht regelmäßig entfernen.
Achtung!
Schäden an den Rohren des
Kältekreislaufs vermeiden.
Austretendes Kältemittel kann die
Augen verletzen oder sich entzünden.
■ Nicht Reifschicht oder Eis mit
Messer oder spitzem Gegenstand
abschaben.
Gehen Sie wie folgt vor:
1. Ca. 4 Stunden vor dem Abtauen
das Super-Gefrieren einschalten.
Die Lebensmittel erreichen dadurch
sehr tiefe Temperaturen und Sie
können die Lebensmittel länger bei
Raumtemperatur lagern.
2. Gefriergut entnehmen und an einem
kühlen Ort zwischenlagern.
3. Gerät ausschalten.
4. Netzstecker ziehen oder Sicherung
ausschalten.
5. Um Abtauvorgang zu beschleunigen:
Topf mit heißem Wasser auf
Topfuntersetzer in das Gefrierfach
stellen.
6. Mit Tuch oder Schwamm Tauwasser
aufwischen.
7. Gefrierfach trocken reiben.
8. Gerät einschalten.
9. Gefriergut einlegen.
D Reinigen
Reinigen
Achtung!
Schäden am Gerät und den
Ausstattungsteilen vermeiden.
■ Keine sand-, chlorid- oder
säurehaltigen Putz- und
Lösungsmittel verwenden.
■ Keine scheuernden oder kratzenden
Schwämme verwenden.
Auf den metallischen Oberflächen
kann Korrosion entstehen.
■ Nie Ablagen und Behälter im
Geschirrspüler reinigen.
Die Teile können sich verformen.
Gehen Sie wie folgt vor:
1. Gerät ausschalten.
2. Netzstecker ziehen oder Sicherung
ausschalten.
3. Lebensmittel herausnehmen und
an einem kühlen Ort lagern.
Wenn vorhanden: Kälteakku auf die
Lebensmittel legen.
4. Wenn vorhanden: Warten, bis die
Reifschicht abgetaut ist.
5. Gerät mit einem weichen Tuch,
lauwarmen Wasser und etwas
pH-neutralem Spülmittel reinigen.
Achtung!
Das Spülwasser darf nicht in die
Beleuchtung oder durch das
Ablaufloch in den
Verdunstungsbereich gelangen.
6. Türdichtung mit klarem Wasser
abwischen und gründlich trocken
reiben.
7. Gerät wieder anschließen,
einschalten und Lebensmittel
einlegen.
17
Page 18

de Gerüche
Ausstattung reinigen
Zum Reinigen die variablen Teile aus
dem Gerät nehmen.
~ "Ausstattung" auf Seite 9
Tauwasserrinne
~ Bild .
Tauwasserrinne und Ablaufloch
regelmäßig mit Wattestäbchen oder
ähnlichem reinigen, damit das
Tauwasser ablaufen kann.
Ablage über dem Gemüsebehälter
~ Bild -
1. Gemüsebehälter herausziehen.
2. Ablage herausnehmen und zum
Reinigen auseinandernehmen.
l Gerüche
Gerüche
Falls Sie unangenehme Gerüche
feststellen:
1. Gerät mit Ein/Aus-Taste #
ausschalten.
2. Alle Lebensmittel aus dem Gerät
herausnehmen.
3. Innenraum reinigen.~ "Reinigen"
auf Seite 17
4. Alle Verpackungen reinigen.
5. Stark riechende Lebensmittel
luftdicht verpacken, um
Geruchsbildung zu verhindern.
6. Gerät wieder einschalten.
7. Lebensmittel einordnen.
8. Nach 24 Stunden prüfen, ob es
erneut zu Geruchsbildung
gekommen ist.
9 Beleuchtung
Beleuchtung
Ihr Gerät ist mit einer wartungsfreien
LED-Beleuchtung ausgestattet.
Nur der Kundendienst oder autorisierte
Fachkräfte dürfen die Beleuchtung
reparieren.
> Geräusche
Geräusche
Normale Geräusche
Brummen: Ein Motor läuft,
z. B. Kälteaggregat, Ventilator.
Blubbern, Surren oder Gurgeln:
Kältemittel fließt durch die Rohre.
Klicken: Motor, Schalter oder
Magnetventile schalten ein oder aus.
Knacken: Automatische Abtauung
erfolgt.
Geräusche vermeiden
Gerät steht uneben: Gerät mit Hilfe
einer Wasserwaage ausrichten. Falls
nötig etwas unterlegen.
Behälter, Ablagen oder Absteller
wackeln oder klemmen:
Herausnehmbare Ausstattungsteile
prüfen und eventuell neu einsetzen.
Flaschen oder Gefäße berühren sich:
Flaschen oder Gefäße
auseinanderrücken.
18
Page 19
Störungen, was tun? de
3 Störungen, was tun?
Störungen, was tun?
Bevor Sie den Kundendienst rufen, überprüfen Sie anhand dieser Tabelle, ob Sie die Störung selbst beheben können.
Die Temperatur weicht stark von der Einstellung ab.
Gerät für 5 Minuten ausschalten.
~ "Gerät ausschalten und stilllegen" auf Seite 10
Wenn die Temperatur zu warm ist, Temperatur nach
ein paar Stunden erneut prüfen.
Wenn die Temperatur zu kalt ist, Temperatur am
Folgetag erneut prüfen.
Keine Anzeige leuchtet.
Der Netzstecker sitzt nicht fest. Netzstecker anschließen.
Die Sicherung wurde ausgelöst. Sicherungen prüfen.
Der Strom ist ausgefallen. Prüfen, ob Strom vorhanden ist.
Anzeige zeigt E... an.
Die Elektronik hat einen Fehler erkannt. Kundendienst rufen.
Ein Warnton ertönt und die Taste Alarm leuchtet
Gerätetür ist offen. Gerätetür schließen.
Be- und Entlüftungsöffnungen sind verdeckt. Be- und Entlüftungsöffnungen freiräumen.
Es wurden große Mengen frischer Lebensmittel
eingelagert.
~ "Kundendienst" auf Seite 21
Taste Alarm drücken. Alarm ist ausgeschaltet.
Maximales Gefriervermögen nicht überschreiten.
Anzeige blinkt, Warnton ertönt und Taste Alarm leuchtet.
Taste Alarm drücken. Alarm ist ausgeschaltet.
Gerätetür ist offen. Gerätetür schließen.
Be- und Entlüftungsöffnungen sind verdeckt. Be- und Entlüftungsöffnungen freiräumen.
Es wurden große Mengen frischer Lebensmittel
Maximales Gefriervermögen nicht überschreiten.
eingelagert.
19
Page 20

de Störungen, was tun?
Anzeige blinkt.
Die Temperatur im Gefrierfach war zu warm. Nach Drücken der Taste Alarm wird 5 Sekunden
lang die wärmste Temperatur angezeigt, die im
Gefrierfach geherrscht hat. Taste Alarm drücken.
Die Anzeige blinkt nicht mehr.
Gerät kühlt nicht, Anzeige und Beleuchtung leuchten.
Ausstellmodus eingeschaltet. Taste Alarm für 10 Sekunden gedrückt halten, bis
ein Bestätigungston ertönt. Warten und prüfen, ob
Gerät kühlt.
--------
20
Page 21

Kundendienst de
4 Kundendienst
Kundendienst
Sollte es Ihnen nicht gelingen die
Störung zu beheben, wenden Sie sich
bitte an unseren Kundendienst. Wir
finden immer eine passende Lösung,
auch um unnötige Technikerbesuche zu
vermeiden.
Die Kontaktdaten für den
nächstgelegenen Kundendienst finden
Sie hier bzw. im beiliegenden
Kundendienst-Verzeichnis.
Geben Sie beim Anruf bitte die
Erzeugnis-Nummer (E-Nr.) und die
Fertigungsnummer (FD) an, die Sie auf
dem Typenschild finden.
~ "Gerät kennenlernen" auf Seite 8
Vertrauen Sie auf die Kompetenz des
Herstellers. Sie stellen somit sicher,
dass die Reparatur von geschulten
Servicetechnikern durchgeführt wird, die
mit den Original-Ersatzteilen für Ihr
Hausgerät ausgerüstet sind.
Geräte-Selbsttest
Ihr Gerät verfügt über ein
Selbsttestprogramm das Fehler anzeigt,
die Ihr Kundendienst beheben kann.
■ Wenn nach Ende des Selbsttests
zweimal ein Signal ertönt: Ihr Gerät
ist in Ordnung.
■ Wenn die Taste Super Gefrierfach
10 Sekunden blinkt und 5 Signale
ertönen: Kundendienst
benachrichtigen.
Nach Ablauf des Programms geht das
Gerät in den Normalbetrieb über.
Reparaturauftrag und Beratung bei Störungen
Die Kontaktdaten aller Länder finden Sie
im beiliegenden
Kundendienst-Verzeichnis.
D 089 12 474 474
A 0810 550 544
CH 0848 840 040
--------
Garantie
Nähere Angaben zu Garantiezeit und
Garantiebedingungen in Ihrem Land
erhalten Sie bei Ihrem Kundendienst,
Ihrem Fachhändler und auf unserer
Internetseite.
1. Gerät ausschalten und 5 Minuten
warten.
2. Gerät einschalten.
3. Innerhalb der ersten 10 Sekunden
nach dem Einschalten die
Taste Super Gefrierfach für
3 ... 5 Sekunden drücken und
gedrückt halten.
Der Selbsttest startet, ein Dauerton
ertönt.
21
Page 22

en
en Table of contents
en User manual
( Safety instructions . . . . . . . . . . 24
About these instructions . . . . . . . . . .24
Risk of explosion . . . . . . . . . . . . . . . .24
Risk of electric shock . . . . . . . . . . . .24
Risk of cold burns . . . . . . . . . . . . . . .24
Risk of injury . . . . . . . . . . . . . . . . . . .24
Danger due to refrigerants. . . . . . . . .25
Avoiding placing children and
vulnerable people at risk . . . . . . . . . .25
Damage. . . . . . . . . . . . . . . . . . . . . . .25
Weight . . . . . . . . . . . . . . . . . . . . . . . .26
8 Intended use . . . . . . . . . . . . . . . 26
1 Operating the appliance . . . . . .31
Switching on the appliance . . . . . . . 31
Switching off and disconnecting
the appliance . . . . . . . . . . . . . . . . . . 31
Setting the temperature . . . . . . . . . . 32
Super cooling. . . . . . . . . . . . . . . . . . 32
Super freezing . . . . . . . . . . . . . . . . . 32
Holiday mode . . . . . . . . . . . . . . . . . . 33
M Alarm . . . . . . . . . . . . . . . . . . . . . .33
Door opening alarm . . . . . . . . . . . . . 33
Temperature alarm . . . . . . . . . . . . . . 33
U Refrigerator compartment. . . . .34
7 Environmental protection . . . . 26
Packaging . . . . . . . . . . . . . . . . . . . . .26
Old appliances . . . . . . . . . . . . . . . . . 26
5 Installation and connection . . . 27
Contents of package . . . . . . . . . . . . . 27
Technical specifications. . . . . . . . . . . 27
Installing the appliance . . . . . . . . . . .27
Cavity depth. . . . . . . . . . . . . . . . . . . .27
Side by-side installation . . . . . . . . . . .27
Tips for saving energy . . . . . . . . . . . . 28
Before using your appliance
for the first time . . . . . . . . . . . . . . . . .29
Electrical connection . . . . . . . . . . . . .29
Note when storing food . . . . . . . . . . 34
Note the chill zones in the
refrigerator compartment . . . . . . . . . 34
Vegetable container with
humidity control . . . . . . . . . . . . . . . . 34
W Freezer compartment. . . . . . . . .35
Maximum freezing capacity . . . . . . . 35
Fully utilising the freezer volume . . . 35
Purchasing frozen food . . . . . . . . . . 36
Note when loading products . . . . . . 36
Freezing fresh food . . . . . . . . . . . . . 36
Thawing frozen food. . . . . . . . . . . . . 37
= Defrosting . . . . . . . . . . . . . . . . . .37
* Getting to know
your appliance . . . . . . . . . . . . . 29
Appliance. . . . . . . . . . . . . . . . . . . . . .29
Controls . . . . . . . . . . . . . . . . . . . . . . . 30
Interior fittings . . . . . . . . . . . . . . . . . .30
Refrigerator compartment . . . . . . . . 37
Freezer compartment . . . . . . . . . . . . 38
22
Page 23

D Cleaning . . . . . . . . . . . . . . . . . . . 38
Cleaning the equipment . . . . . . . . . . 39
l Odours . . . . . . . . . . . . . . . . . . . . 39
9 Lighting. . . . . . . . . . . . . . . . . . . . 39
> Noises. . . . . . . . . . . . . . . . . . . . . 39
Normal noises . . . . . . . . . . . . . . . . . 39
Preventing noises . . . . . . . . . . . . . . . 39
3 Faults – what to do? . . . . . . . . . 40
4 Customer service. . . . . . . . . . . . 42
Appliance self-test . . . . . . . . . . . . . . 42
Repair order and advice
on faults . . . . . . . . . . . . . . . . . . . . . . 42
Guarantee. . . . . . . . . . . . . . . . . . . . . 42
en
23
Page 24

en Safety instructions
( Safety instructions
Safety instructions
This appliance complies with
the relevant safety regulations
for electrical appliances and is
fitted with noise suppression.
The refrigeration circuit has
been checked for leaks.
About these instructions
■ Read and follow the
operating and installation
instructions. They contain
important information on how
to install, use and maintain
the appliance.
■ The manufacturer is not
liable if you disregard the
instructions and warnings in
the operating and installation
instructions.
■ Retain all documents for
subsequent use or for the
next owner.
Risk of explosion
■ Never use electric devices
inside the appliance
(e.g. heaters or electric
ice makers).
■ Do not store products which
contain flammable
propellants (e.g. spray cans)
or explosive substances in
the appliance.
■ Store high-percentage
alcohol tightly closed and
standing up.
Risk of electric shock
Improper installations
and repairs may put the user
at considerable risk.
■ If the power cord is
damaged: Immediately
disconnect appliance from
the power supply.
■ Have the appliance repaired
by the manufacturer,
customer service or a
similarly qualified person
only.
■ Use original parts supplied
by the manufacturer only.
The manufacturer
guarantees that these parts
satisfy the safety
requirements.
■ Only purchase an extension
cable from customer service.
Risk of cold burns
■ Never put frozen food
straight from the freezer
compartment into your
mouth.
■ Avoid prolonged contact of
skin with frozen food, ice and
the tubes in the freezer
compartment.
Risk of injury
Containers which contain
carbonated drinks may burst.
Do not store containers which
contain carbonated drinks in
the freezer compartment.
24
Page 25

Safety instructions en
Danger due to refrigerants
The tubes of the refrigeration
circuit contain a small quantity
of the environmentally friendly
but flammable refrigerant
R600a. It does not damage the
ozone layer and does not
increase the greenhouse effect.
If refrigerant escapes, it may
injure your eyes or ignite.
■ Do not damage the tubes
If the tubes are damaged:
■ Keep naked flames and
ignition sources away from
the appliance.
■ Ventilate the room.
■ Switch off the appliance and
pull out the mains plug.
■ Call the after-sales service.
Avoiding placing children and vulnerable people at risk
Measures:
■ Ensure that children and
vulnerable people have
understood the hazards.
■ Children or vulnerable
people must be supervised
by a responsible person
when using the appliance.
■ Only children from 8 years
and above may use the
appliance.
■ Supervise children while the
appliance is being cleaned
or maintained.
■ Never allow children to play
with the appliance.
Risk of suffocation
■ If the appliance features a
lock: keep the key out of the
reach of children.
■ Keep children away from the
packaging and its parts.
At risk are:
■ Children,
■ People who have limited
physical, mental or sensory
abilities,
■ People who have inadequate
knowledge concerning safe
operation of the appliance.
Damage
To prevent damage:
■ Do not stand or support
yourself on the base, runners
or doors.
■ Keep plastic parts and door
seals free of oil and grease.
■ Pull the mains plug – not the
power cord.
25
Page 26

en Intended use
Weight
When installing and
transporting the appliance,
note that it may be very heavy.
~ "Installation location"
on page 27
8 Intended use
Intended use
Use this appliance
■ only for the cooling and freezing
of food and for making ice.
■ only in the home and in the home
environment.
■ only according to these operating
instructions.
This appliance is intended for use up
to a maximum height of 2000 metres
above sea level.
7 Environmental
protection
Environmental protection
Packaging
Old appliances
Valuable raw materials can be
reclaimed by recycling old appliances.
:Warning
Children may become locked in the appliance and suffocate!
■ To prevent children from climbing in,
leave shelves and containers in the
appliance.
■ Keep children away from the
redundant appliance.
Caution!
Refrigerant and harmful gases may
escape.
Do not damage the tubes of the
refrigerant circuit and insulation.
1. Remove the mains plug.
2. Sever the power cord.
3. Have the appliance disposed of
professionally.
This appliance is labelled in
accordance with European
Directive 2012/19/EU
concerning used electrical and
electronic appliances
(waste electrical and electronic
equipment - WEEE). The guideline
determines the framework for the return
and recycling of used appliances as
applicable throughout the EU.
All materials are environmentally safe
and recyclable:
■ Dispose of packaging in an
environmentally friendly manner.
■ Please ask your dealer or inquire
at your local authority about current
means of disposal.
26
Page 27

Installation and connection en
5 Installation and
connection
Installation and connection
Contents of package
After unpacking all parts, check for
any damage in transit.
If you have any complaints, contact the
dealer from whom you purchased the
appliance or our after-sales service.
~ "Customer service" on page 42
The delivery consists of the following
parts:
■ Built-in appliance
■ Interior fittings (depending on model)
■ Bag containing installation materials
■ User manual
■ Installation instructions
■ Customer service booklet
■ Warranty enclosure
■ Information on the energy
consumption and noises
Technical specifications
Refrigerant, cubic capacity and further
technical specifications can be found on
the rating plate.
~ "Getting to know your appliance"
on page 29
Installing the appliance
Installation location
The more refrigerant an appliance
contains, the larger the room must be
in which the appliance is situated.
Leaking refrigerant can form
a flammable gas-air mixture in rooms
which are too small.
The room must be at least 1 m³ per 8 g
of refrigerant. The amount of refrigerant
in your appliance is indicated
on the rating plate inside the appliance.
~ "Getting to know your appliance"
on page 29
The weight of the appliance may be up
to 70 kg depending on the model.
Permitted room temperature
The permitted room temperature
depends on the climatic class of the
appliance.
Information on the climatic class can
be found on the rating plate.
~ "Getting to know your appliance"
on page 29
Climatic
Permitted room temperature
category
SN +10 °C ... 32 °C
N +16 °C ... 32 °C
ST +16 °C ... 38 °C
T +16 °C ... 43 °C
The appliance is fully functional within
the permitted room temperature.
If an appliance of climatic class SN is
operated at colder room temperatures,
the appliance will not be damaged up to
a room temperature of +5 °C.
Cavity depth
A cavity depth of 56 cm
is recommended for the appliance.
If the cavity depth is smaller – at least
55 cm – the energy consumption
increases slightly.
Side by-side installation
It is only possible to install appliances
side by side with a gap of at least
15 cm.
27
Page 28

en Installation and connection
Tips for saving energy
If you follow the instructions below, your appliance will use less power.
Note: The arrangement of the features does not affect the energy consumption of the appliance.
Installing the appliance
Keep the appliance out of direct sunlight. The appliance must cool less frequently at low
Install the appliance as far away as possible from
heating elements, cooker and other heat sources:
3 cm to electric or gas cookers.
30 cm to an oil or solid-fuel cooker.
Note: If this is not possible, attach an insulating
plate between the appliance and heat source.
Select an installation location at a room temperature
of approx. 20 °C.
Use a cavity depth of 56 cm.
Caution!
Risk of burns!
Individual parts of the appliance become hot during
operation. Touching these parts may result in burns.
Do not cover or block the ventilation openings.
Ventilate the room daily.
ambient temperatures and therefore consumes less
power.
The air on the rear panel of the appliance does not
warm up so intensely. The appliance consumes less
power if the warm air can escape.
Using the appliance
Open the appliance door only briefly. The air in the appliance does not warm up so
Transport purchased food in a cool bag and place
quickly in the appliance.
intensely. The appliance must cool less frequently
and therefore consumes less power.
Allow warm food and drinks to cool down before
placing in the appliance.
Thaw frozen food in the refrigerator compartment in
order to utilise the low temperature of the frozen
food.
Always leave a space between the food and the rear
panel.
Pack food airtight.
The air can circulate and the air humidity will
remain constant. The appliance must cool less
frequently and therefore consumes less power.
Vacuum the back of the appliance once a year. The air on the rear panel of the appliance does not
Do not cover or block the ventilation openings.
--------
warm up so intensely. The appliance consumes less
power if the warm air can escape.
28
Page 29
Getting to know your appliance en
Before using your appliance for the first time
1. Remove leaflets, adhesive tape and
protective film.
2. Clean the appliance.
~ "Cleaning" on page 38
Electrical connection
Caution!
Do not connect the appliance to
electronic energy saver plugs.
Note: You can connect the appliance to mains-controlled and sine-controlled inverters. Mains-controlled inverters are used for photovoltaic systems which are connected directly to the national grid. Sine-controlled inverters must be used for isolated applications. Isolated applications, e.g. on ships or in mountain lodges, which are not connected directly to the national grid.
1. After installing the appliance, wait at
least 1 hour before connecting it to
prevent damaging the compressor.
2. Connect the appliance via a
correctly installed socket.
The socket must comply with the
following data:
Socket with 220 V ... 240 V
Conductor 50 Hz
Fuse 10 A ... 16 A
Outside Europe: Check whether the
indicated current type of the
appliance corresponds with the
values of your power supply.
Appliance specifications are on the
rating plate.
~ "Getting to know your appliance"
on page 29
3. Connect the appliance to a socket
near the appliance.
The socket must be freely
accessible even after the appliance
has been installed.
* Getting to know your
appliance
Getting to know your appliance
Fold out the last page with the
diagrams. The appliance and diagrams
may differ according to features.
Appliance
~ Fig. !
* Not all models.
# Refrigerator compartment
+ Freezer compartment
(-h Controls
)"* Fan
)* Lighting
)2 Extendable shelf
): Vegetable container with
)B Rating plate
)J* Berry tray
)R Freezer calendar
)Z Frozen food container
)b Butter and cheese
)j* Storage compartment Vario
1" Tray for large bottles
humidity control
compartment
29
Page 30

en Getting to know your appliance
Controls
~ Fig. "
( Button #
Switches the appliance on or off.
0 Button Super freezer
compartment
Switches Super freezing on or
off.
8 Button K/J freezer compartment
Sets the temperature of the
freezer compartment.
@ Freezer compartment
temperature display
Indicates the set temperature
in °C.
H Button Alarm
Switches the warning signal off.
P Button Holiday
Switches holiday mode on or off.
X Button K/J refrigerator
compartment
Sets the temperature of the
refrigerator compartment.
` Refrigerator compartment
temperature display
Indicates the set temperature
in °C.
h Button Super refrigerator
compartment
Switches Super cooling on or off.
Interior fittings
(not all models)
Shelf
~ Fig. #
You can vary the shelf:
■ Pull out and remove the shelf.
Vario shelf
~ Fig. $
You can store tall items (e.g. cans
or bottles):
■ Take out the front part of the shelf
and push under the rear part.
Extendable shelf
~ Fig. %
You can give yourself a better overview:
■ Pull out a shelf.
You can completely remove the shelf:
1. Press and hold down both buttons
under the shelf.
2. Pull out the shelf, lower and swing
out to the side.
Container
~ Fig. &
You can remove the container:
■ Pull out the container all the way,
lift at the front and remove.
Butter and cheese compartment
~Fig. '
The compartment is easy to open:
■ Lightly press the flap below in the
middle.
The compartment opens
downwards. The flap is pushed
under the compartment.
Storage compartment
~ Fig. (
You can remove the storage
compartment:
■ Lift up storage compartment and
remove.
30
Page 31

Operating the appliance en
Storage compartment Vario
~ Fig. )
You can store large bottles in the lower
storage compartment:
■ Push storage compartment to the
right or left.
Bottle holder
~ Fig. *
When you open and close the door:
■ The bottle holder prevents the
bottles from overturning.
Freezer calendar
~ Fig. !/)R
The freezer calendar indicates the
maximum storage duration in months
at a constant temperature of –18 °C.
Ice cube tray
You can make ice cubes:
1. Fill the ice cube tray 3/4 full with
water and place in the freezer
compartment.
Note: If the ice cube tray is stuck to the freezer compartment, loosen with a blunt implement only (e.g. spoon handle).
2. To loosen the ice cubes, twist the
ice cube tray slightly or hold briefly
under flowing water.
Ice pack
In the event of a power failure or a fault:
■ The ice pack delays the warming of
the stored frozen food.
Note: The longest storage time is obtained by placing the ice pack on the food in the top compartment.
You can take out the ice pack for
temporarily keeping food cool,
e.g. in a cool bag.
1 Operating the
appliance
Operating the appliance
Switching on the appliance
1. Press the # button.
The appliance begins to cool.
Warning signal, flashing temperature
display on the freezer compartment
and lit button Alarm indicate that the
freezer compartment is still too
warm.
2. Press the Alarm button.
The warning signal switches off.
3. Setting the required temperature.
~ "Setting the temperature"
on page 32
Operating tips
■ After the appliance has been
switched on, it may take several
hours until the set temperatures
have been reached. Do not put in
any food until the selected
temperature has been reached.
■ The sides of the housing are partly
heated slightly. This prevents
condensation in the area of the door
seal.
■ If the freezer compartment door
cannot be immediately re-opened
after it has been closed, wait until the
resulting low pressure has
equalised.
Switching off and disconnecting the appliance
Switching off the appliance
■ Press the # button.
The appliance no longer cools.
31
Page 32

en Operating the appliance
Disconnecting the appliance
If you do not use the appliance for a
prolonged period:
1. Press the # button.
The appliance no longer cools.
2. Pull out the mains plug or switch off
the fuse.
3. Clean the appliance.
4. Leave the appliance open.
Setting the temperature
Recommended temperature
Refrigerator compartment: +4 °C
Freezer compartment: –18 °C
Refrigerator compartment
■ Keep pressing the button K/J until
the display indicates the required
temperature.
Freezer compartment
■ Keep pressing the button K/J until
the display indicates the required
temperature.
Sticker OK
(not all models)
You can use sticker OK to check
whether the temperature in the
refrigerator compartment reaches
+4 °C or lower.
If the sticker does not indicate OK,
gradually reduce temperature.
When the appliance is switched on, it
may take up to 12 hours until the set
temperature is reached.
Correct setting
Super cooling
Super cooling cools the refrigerator
compartment as cold as possible.
Switch on super cooling mode, e.g.:
■ before placing large quantities of
food in the compartment
■ for cooling drinks quickly
Note: When super cooling is switched on, increased operating noises may occur.
After 15 hours the appliance switches
to normal operation.
Switching Super cooling on/off:
■ Press the Super button.
The button is lit when Super cooling
is switched on.
Super freezing
Super freezing cools the freezer
compartment as cold as possible.
Switch on super freezing mode, e.g.:
■ to freeze food solid as quickly as
possible:
■ 4–6 hours before placing food
weighing 2 kg or more in the freezer
compartment
■ to use the max. freezing capacity
~ "Maximum freezing capacity"
on page 35
Note: When super freezing is switched on, increased operating noises may occur.
After approx. 2 ^ days the appliance
switches to normal operation.
Switching Super freezing on/off:
■ Press the Super button.
The button is lit when Super freezing
is switched on.
32
Page 33

Alarm en
Holiday mode
If leaving the appliance for a long
period of time, you can switch
the appliance over to the energy-saving
holiday mode.
The temperature in the refrigerator
compartment is automatically switched
to +14 °C.
Do not store any food in the refrigerator
compartment during this time.
The temperature in the freezer
compartment remains unchanged.
Switching holiday mode on/off:
■ Press the Holiday button.
When holiday mode is switched on,
the button is lit and the refrigerator
compartment temperature display no
longer indicates a temperature.
M Alarm
Alarm
Door opening alarm
The door opening alarm (continuous
sound) switches on if the appliance
door is open for longer than one minute.
■ Close the door or press button
Alarm.
The warning signal is switched off.
Temperature alarm
If the freezer compartment becomes too
warm, the temperature alarm
(intermittent signal) switches on.
Caution!
During the thawing process, bacteria
may occur and spoil the frozen food.
Do not refreeze thawing or thawed food.
Refreeze food only after cooking. Do
not store the frozen produce for the
max. storage period.
Note: The alarm may be actuated without risk to the frozen food in the following cases:
■ The appliance is switching on.
■ Large quantities of fresh food are put
in.
■ The freezer compartment door has
been open too long.
Indicating warmest temperature and
switching off warning signal:
■ Press the Alarm button.
The display briefly indicates the
warmest temperature reached in the
freezer compartment. Then the
display indicates the set temperature
again.
From this time on the warmest
temperature is recalculated and
saved.
Note: The button Alarm remains lit until the set temperature has been reached again.
33
Page 34

en Refrigerator compartment
U Refrigerator
compartment
Refrigerator compartment
The refrigerator compartment is suitable
for storing meat, sausages, fish, dairy
products, eggs, ready meals and
pastries.
The temperature can be set from
+2 °C ... +8 °C.
The refrigerator compartment can also
be used to store highly perishable foods
in the short to medium term. The lower
the selected temperature, the slower the
enzymatic and chemical processes and
deterioration by microorganisms. A
temperature of +4 °C or lower ensures
optimum freshness and safety of the
stored foods.
Note when storing food
■ Store fresh, undamaged food.
The quality and freshness will then
be retained for longer.
■ In the case of ready products and
bottled goods do not exceed the
minimum sell-by date or use-by-date
indicated by the manufacturer.
■ To retain aroma, colour
and freshness, pack or cover food
well before placing it in the
appliance.
This avoids transference of flavours
and discolouration of the plastic
parts.
■ Leave warm food and drinks to cool
down before placing them in the
refrigerator compartment.
Note the chill zones in the refrigerator compartment
Coldest zone
The coldest zone is between the arrow
stamped on the side and the shelf
underneath.
~ Fig. +
Note: Store perishable food (e.g. fish, sausages and meat) in the coldest zone.
Warmest zone
The warmest zone is at the very top of
the door.
Note: Store e.g. hard cheese and butter in the warmest zone. Cheese can continue to release its flavour and the butter will still be easy to spread.
Vegetable container with humidity control
~ Fig. ,
The vegetable container is the best
storage location for fresh fruit and
vegetables. You can adjust the air
humidity in the vegetable container via
the humidity controller and a special
seal. This allows fresh fruit and
vegetables to be stored twice as long
as with conventional storage.
The air humidity in the vegetable
container can be set according to
the type and amount of products to
be stored:
■ Mainly fruit as well as for a large
load – set lower air humidity
■ Mainly vegetables as well as for
a mixed load or small load – set
higher air humidity
The air circulation in the refrigerator
compartment creates different chill
zones.
34
Page 35

Freezer compartment en
Notes
■ Fruit sensitive to cold (e.g.
pineapple, banana, papaya and
citrus fruit) and vegetables sensitive
to cold (e.g. aubergines, cucumbers,
zucchini, peppers, tomatoes and
potatoes) should be stored outside
the refrigerator at temperatures of
approx. +8 °C – +12 °C for optimum
preservation of quality and flavour.
■ Condensation may form in the
vegetable container depending on
the food and quantity stored.
Remove condensation with a dry
cloth and adjust air humidity in the
vegetable container with
the humidity controller.
W Freezer compartment
Freezer compartment
The freezer compartment is suitable for:
■ storing frozen food
■ making ice cubes
■ freezing food
The temperature can be set from
–16 °C ... –24 °C.
The freezer compartment can be used
to store perishable foods long-term
almost without any noticeable reduction
in quality, as the low temperatures
considerably slow down or stop
deterioration. Appearance, flavour and
all valuable ingredients are largely
retained.
Long-term storage of food should be at
–18 °C or lower.
The time between putting fresh food in
the freezer compartment and it freezing
solid depends on the following factors:
■ set temperature
■ type of food
■ amount of food in the freezer
compartment
■ quantity and type of storage
Maximum freezing capacity
The maximum freezing capacity
indicates the quantity of food which
can be frozen solid within 24 hours.
Information on the max. freezing
capacity can be found on the rating
plate.
~ "Getting to know your appliance"
on page 29
To use the maximum freezer capacity,
switch on Super freeze 24 hours before
placing the fresh food in the freezer
compartment.
Prerequisites for max. freezing capacity
1. Approx. 24 hours before inserting
fresh produce: switch on Super
freeze.
~ "Super freezing" on page 32
2. Take the container out of the freezer
compartment and stack the food
directly on the shelves and on the
floor of the freezer compartment.
3. First fill the upper compartment with
food. This is where the food will
freeze most quickly.
4. If the top compartment is
inadequate, store the remaining
quantity in the compartment
underneath starting at the front right
side.
5. Freeze fresh food as close as
possible to the side panels.
Fully utilising the freezer volume
To place the maximum quantity of
frozen food in the freezer compartment:
■ remove all fittings.
■ Store food directly on the shelves
and on the floor of the freezer
compartment.
35
Page 36

en Freezer compartment
Purchasing frozen food
■ Ensure the packaging is not
damaged.
■ Do not exceed the minimum sell-by
date.
■ The temperature in the supermarket
freezer must be –18 °C or lower.
■ If possible, transport frozen food in
a cool bag and place quickly in the
freezer compartment.
Note when loading products
■ Freeze large quantities of food in the
top compartment.
This is where the food will freeze
especially quickly and gently.
■ Distribute food in the compartments
or frozen food containers.
■ Do not bring food which is to be
frozen into contact with frozen food.
If required, restack frozen food in the
frozen food containers.
■ Important for unrestricted air
circulation in the appliance:
push in frozen food container all the
way.
Freezing fresh food
Freeze only fresh and undamaged food.
Food which is boiled, fried or baked is
more suitable for freezing than food
which is raw.
Before freezing food, make preparations
appropriate to the food in order to retain
the best possible nutritional value,
flavour and colour:
■ Vegetables: wash, chop, blanch.
■ Fruit: wash, pit and perhaps peel,
possibly add sugar or ascorbic acid
solution.
Suitable for freezing
■ Baked goods
■ Fish and seafood
■ Meat
■ Poultry and game
■ Vegetables, fruit and herbs
■ Eggs without shells
■ Dairy products, e.g. cheese,
butter and quark
■ Ready meals and leftovers,
e.g. soups, stews, cooked meat
and fish, potato dishes, soufflés and
desserts
Not suitable for freezing
■ Types of vegetables which are
usually eaten raw, e.g. lettuce or
radishes
■ Unpeeled or hard boiled eggs
■ Grapes
■ Whole apples, pears and peaches
■ Yoghurt, soured milk, sour cream,
creme fraiche and mayonnaise
Packing frozen food
The correct type of packaging and
material selection are decisive factors in
the retention of the product quality and
prevent the development of freezer
burn.
1. Place food in packaging.
2. Remove air.
3. Pack food airtight to prevent it from
losing flavour and drying out.
4. Label packaging with contents and
date of freezing.
Information on how to do this can be
found in the relevant literature.
36
Page 37

Defrosting en
Suitable packaging:
■ Plastic film
■ Tubular film made of polyethylene
(PE)
■ Aluminium foil
■ Freezer containers
Suitable locks:
■ Rubber bands
■ Plastic clips
■ Cold-resistant adhesive tape
Not suitable packaging:
■ Wrapping paper
■ Greaseproof paper
■ Cellophane
■ Refuse bags and used shopping
bags
Shelf life of frozen food at –18 °C
Fish, sausage, ready meals
and cakes and pastries:
up to 6 months
Meat, poultry: up to 8 months
Fruit, vegetables: up to 12 months
Thawing frozen food
The thawing method must be adjusted
to the food and application in order to
retain the best possible product quality.
Thawing methods:
■ in the refrigerator compartment
(especially suitable for animal-based
foods such as fish, meat, cheese,
quark)
■ at room temperature (bread)
■ in the microwave (food for
immediate consumption or
immediate preparation)
■ in the oven/cooker (food for
immediate consumption or
immediate preparation)
Caution!
Do not refreeze thawing or thawed food.
You can only refreeze the food when it
has been used for a ready-to-eat meal
(boiled or fried).
The frozen food can no longer be stored
for the maximum duration.
= Defrosting
Defrosting
Refrigerator compartment
While the refrigerating unit is running,
condensation droplets or frost form on
the rear panel. This is due to functional
reasons. It is not necessary to wipe off
the condensation droplets or frost. The
rear panel defrosts automatically. The
condensation drains off into the
condensation channel.
~ Fig. .
The condensation runs from the
condensation channel to the
evaporation pan where it evaporates.
Note: Keep the condensation channel and drainage hole clean so that the condensation can drain and odours do not form.
37
Page 38

en Cleaning
Freezer compartment
As the frozen food may not start
thawing, the freezer compartment does
not defrost automatically. A layer of
hoarfrost in the freezer compartment
impairs refrigeration of the frozen food
and increases power consumption.
■ Remove the layer of frost regularly!
Caution!
Avoid any damage to the pipes of the
refrigeration circuit.
If refrigerant escapes, it may injure your
eyes or ignite.
■ Do not scrape off hoarfrost or ice
with a knife or pointed object.
Proceed as follows:
1. Switch on the super freezing
approx. 4 hours before defrosting.
This means that the food reaches
very low temperatures and it can
be stored for longer at room
temperature.
2. Remove the frozen food and place
temporarily in a cool location.
3. Switch off the appliance.
4. Pull out the mains plug or switch
off the fuse.
5. To accelerate the defrosting
process: place a pan of hot water
on a trivet in the freezer
compartment.
6. Wipe up the condensation water
with a cloth or sponge.
7. Wipe the freezer compartment dry.
8. Switch on the appliance.
9. Put the frozen food back into the
appliance.
D Cleaning
Cleaning
Caution!
Avoid damaging the appliance and
the fittings.
■ Do not use abrasive, chloride or
acidic cleaning agents or solvents.
■ Do not use scouring or abrasive
sponges.
The metallic surfaces may corrode.
■ Never clean the shelves
or containers in the dishwasher.
The parts may become deformed.
Proceed as follows:
1. Switch off the appliance.
2. Pull out the mains plug or switch
off the fuse.
3. Take out the food and store in
a cool location.
If present: place ice pack
on the food.
4. If present: wait until the layer of frost
has thawed.
5. Clean the appliance with a soft cloth,
lukewarm water and a little
pH-neutral washing-up liquid.
Caution!
The rinsing water must not run into
the light or through the drainage
hole into the evaporation area.
6. Wipe door seal with clear water and
dry thoroughly with a cloth.
7. Reconnect and switch on appliance
and put in food.
38
Page 39

Odours en
Cleaning the equipment
To clean, take the variable parts out
of the appliance.
~ "Interior fittings" on page 30
Condensation channel
~ Fig. .
Regularly clean the condensation
channel and drainage hole with a cotton
bud or similar implement to ensure that
the condensation can drain.
Shelf above the vegetable container
~ Fig. -
1. Pull out vegetable container.
2. Take out shelf and dismantle to
clean.
l Odours
Odours
If you experience unpleasant odours:
1. Switch off the appliance with
the On/Off button #.
2. Take all food out of the appliance.
3. Clean the inside.~ "Cleaning"
on page 38
4. Clean all packages.
5. Seal strong smelling food in order
to avoid odours from forming.
6. Switch the appliance on again.
7. Store food in the appliance.
8. Check whether the formation of
odours is still occurring after
24 hours.
9 Lighting
Lighting
Your appliance features a
maintenance-free LED light.
Only customer service or authorised
technicians may repair the light.
> Noises
Noise
Normal noises
Droning: A motor is running,
e.g. refrigerating unit, fan.
Bubbling, buzzing or gurgling:
Refrigerant is flowing through the tubes.
Clicking: Motor, switches or solenoid
valves are switching on and off.
Cracking: Automatic thawing
successful.
Preventing noises
Appliance is not level: Align appliance
using a spirit level. If required, place a
little packing underneath.
Containers, shelves or storage
compartments wobble or stick: Check
the removable fittings and re-insert if
required.
Bottles or receptacles are touching
each other: Move bottles or receptacles
away from each other.
39
Page 40
en Faults – what to do?
3 Faults – what to do?
Faults – what to do?
Before you call customer service, use this table to check whether you can rectify the fault yourself.
Temperature differs greatly from the set value.
Switch off appliance for 5 minutes.
~ "Switching off and disconnecting the appliance"
on page 31
If the temperature is too warm, check temperature
again after a couple of hours.
If the temperature is too cold, check temperature
again on the following day.
Displays do not illuminate.
The mains plug has not been inserted properly. Connect the mains plug.
The fuse has tripped. Check the fuses.
The power has failed. Check whether the power is on.
Display indicates “E…”.
Electronics have detected a fault. Call the customer service.
~ "Customer service" on page 42
A warning signal sounds and button Alarm is lit
Press the Alarm button. Alarm is switched off.
Appliance door is open. Close the appliance door.
Ventilation openings have been covered. Clear ventilation openings.
Large quantities of fresh food were placed in the
Do not exceed max. freezing capacity.
appliance.
Display flashes, warning signal sounds and button Alarm is lit.
Press the Alarm button. Alarm is switched off.
Appliance door is open. Close the appliance door.
Ventilation openings have been covered. Clear ventilation openings.
Large quantities of fresh food were placed in the
Do not exceed max. freezing capacity.
appliance.
40
Page 41

Faults – what to do? en
Display flashes.
The temperature in the freezer compartment was
too warm.
When button Alarm has been pressed, the warmest
temperature reached in the freezer compartment is
displayed for 5 seconds. Press the Alarm button.
The display stops flashing.
Appliance is not cooling, display and light are lit.
Demo mode switched on. Hold down button Alarm for 10 seconds until an
acknowledgement signal sounds. Wait and check
whether the appliance is cooling.
--------
41
Page 42

en Customer service
4 Customer service
Customer service
If you are unable to rectify the fault,
please contact our customer service.
We will always find an appropriate
solution in order to avoid unnecessary
visits by engineers.
The contact information for your nearest
customer service can be found here or
on the enclosed customer service list.
When calling, please state the product
number (E-Nr.) and the production
number (FD) which can be found on the
rating plate.
~ "Getting to know your appliance"
on page 29
Trust the expertise of the
manufacturer. You can therefore be
sure that the repair is carried out by
trained service technicians who carry
original spare parts for your domestic
appliances.
Appliance self-test
Your appliance features a self-test
programme which displays the fault
which your customer service can rectify.
1. Switch off the appliance and wait
5 minutes.
2. Switch on the appliance.
3. Within the first 10 seconds after
switching on the appliance, press
and hold down button Super freezer
compartment for 3–5 seconds.
The self-test starts, a continuous
sound is heard.
■ If a signal sounds twice at the end of
the self-test: Your appliance is in
working order.
■ If button Super freezer compartment
flashes for 10 seconds and
5 signals sound: Inform customer
service.
When the programme has ended,
the appliance switches over to normal
operation.
Repair order and advice on faults
Contact information for all countries can
be found on the enclosed customer
service list.
GB 0344 892 8989 Calls charged at local or
mobile rate.
IE 01450 2655 0.03 € per minute at
peak. Off peak 0.0088 €
per minute.
--------
Guarantee
Detailed information on the warranty
period and warranty conditions in your
country are available from your
customer service, your dealer and on
our website.
42
Page 43

fr Table des matières
fr Notice d'utilisation
( Consignes de sécurité . . . . . . . 45
À propos de cette notice . . . . . . . . . 45
Risque d'explosion . . . . . . . . . . . . . . 45
Risque d’électrocution . . . . . . . . . . . 45
Risque d'engelures provoquées
par le froid . . . . . . . . . . . . . . . . . . . . 46
Risque de blessure. . . . . . . . . . . . . . 46
Risques dus au fluide frigorigène . . . 46
Évitez des risques pour les
enfants et les personnes
en danger : . . . . . . . . . . . . . . . . . . . . 47
Dégâts matériels. . . . . . . . . . . . . . . . 47
Poids . . . . . . . . . . . . . . . . . . . . . . . . 47
Prescriptions-d’hygiène-
alimentaire . . . . . . . . . . . . . . . . . . . . 48
8 Conformité d'utilisation. . . . . . . 48
* Présentation de l’appareil . . . . 53
Appareil. . . . . . . . . . . . . . . . . . . . . . . 53
Eléments de commande . . . . . . . . . .53
Équipement . . . . . . . . . . . . . . . . . . . . 53
1 Utilisation de l'appareil . . . . . . . 55
Mettre l'appareil sous tension . . . . . . 55
Arrêt et remisage de l’appareil . . . . . 55
Régler la température . . . . . . . . . . . . 56
Super-réfrigération. . . . . . . . . . . . . . . 56
Supercongélation . . . . . . . . . . . . . . . 56
Mode Vacances . . . . . . . . . . . . . . . . 57
M Alarme . . . . . . . . . . . . . . . . . . . . 57
Alarme de porte . . . . . . . . . . . . . . . . 57
Alarme de température . . . . . . . . . . . 57
fr
7 Protection de
l'environnement . . . . . . . . . . . . . 49
Emballage. . . . . . . . . . . . . . . . . . . . . 49
Appareil usagé . . . . . . . . . . . . . . . . . 49
5 Installation et branchement . . . 49
Étendue des fournitures . . . . . . . . . . 49
Données techniques. . . . . . . . . . . . . 50
Installer l’appareil . . . . . . . . . . . . . . . 50
Profondeur de niche . . . . . . . . . . . . . 50
Installation side-by-side. . . . . . . . . . . 50
Economies d’énergie . . . . . . . . . . . . 51
Avant la première utilisation . . . . . . . 52
Raccordement électrique . . . . . . . . . 52
U Compartiment réfrigérateur . . . 58
Consignes de rangement . . . . . . . . . 58
Tenez compte des différentes
zones froides dans le
compartiment réfrigérateur . . . . . . . . 58
Bac à légumes avec régulateur
d’humidité . . . . . . . . . . . . . . . . . . . . . 59
W Compartiment congélateur . . . 59
Capacité de congélation
maximale. . . . . . . . . . . . . . . . . . . . . . 60
Utiliser l’intégralité du volume
de congélation. . . . . . . . . . . . . . . . . . 60
Achats de produits surgelés . . . . . . . 60
Attention lors de rangement . . . . . . . 60
Congélation de produits frais . . . . . . 61
Décongélation des produits . . . . . . . 62
43
Page 44

fr
= Dégivrer l’appareil . . . . . . . . . . 62
Compartiment réfrigérateur . . . . . . . .62
Compartiment congélation. . . . . . . . .63
D Nettoyage . . . . . . . . . . . . . . . . . 63
Nettoyage des accessoires . . . . . . . .64
l Odeurs . . . . . . . . . . . . . . . . . . . . 64
9 Éclairage . . . . . . . . . . . . . . . . . . 64
> Bruits . . . . . . . . . . . . . . . . . . . . . 64
Bruits normaux . . . . . . . . . . . . . . . . . 64
Éviter la génération de bruits. . . . . . .64
3 Dérangements, Que faire si … 65
4 Service après-vente . . . . . . . . . 67
Autodiagnostic de l’appareil . . . . . . .67
Conseils et réparations . . . . . . . . . . .67
Garantie. . . . . . . . . . . . . . . . . . . . . . .67
44
Page 45

Consignes de sécurité fr
( Consignes de sécurité
Consignes de sécurité
Cet appareil est conforme
aux dispositions de sécurité
applicables aux appareils
électriques et il est déparasité.
Le circuit frigorifique a subi
un contrôle d’étanchéité.
À propos de cette notice
■ Veillez lire et respecter le
contenu de cette notice
d'utilisation et de montage.
Elle contiennent des
remarques importantes
concernant l’installation,
l’utilisation et l’entretien de
l’appareil.
■ Le fabricant décline toute
responsabilité si vous ne
tenez pas compte des
remarques et avertissements
figurant dans la notice de
montage et celle d'utilisation.
■ Veuillez conserver tous ces
documents en vue d’une
réutilisation ultérieure ou
pour le cas où l’appareil
changerait de propriétaire.
Risque d'explosion
■ N’utilisez pas d’appareils
électriques à l’intérieur
de l’appareil (par ex.
appareils de chauffage,
machine à glaçons).
■ Ne stockez dans l'appareil
aucun produit contenant des
gaz propulseurs
combustibles (bombes
aérosols par exemple) et
aucune substance explosive.
■ Stockez les boissons
fortement alcoolisées en
position verticale dans des
récipients bien fermés.
Risque d’électrocution
Les installations et réparations
inexpertes peuvent engendrer
des risques considérables pour
l’utilisateur.
■ Si le cordon d'alimentation
est endommagé :
Débranchez immédiatement
l'appareil du secteur.
■ Ne confiez la réparation
qu'au fabricant, au service
après-vente ou à une
personne présentant une
qualification équivalente.
45
Page 46

fr Consignes de sécurité
■ N’utilisez que des pièces de
rechange d'origine venant du
fabricant.
Le fabricant garantit que ces
pièces d'origine remplissent
les exigences de sécurité.
■ S’il faut allonger le cordon
de raccordement au secteur
avec un prolongateur,
procurez-vous-le
exclusivement auprès du
service après-vente.
Risque d'engelures provoquées par le froid
■ Ne portez jamais des
produits surgelés à la
bouche immédiatement
après les avoir sortis du
compartiment congélateur.
■ Évitez tout contact prolongé
de la peau avec le produit
congelé, la glace et les
tubulures présents dans le
compartiment congélateur.
Risque de blessure
Risques dus au fluide frigorigène
Dans les tubulures du circuit
frigorifique circule une petite
quantité de R600a, un fluide
frigorigène respectueux de
l'environnement mais
combustible. Il n'abîme pas
la couche d'ozone et n'accroît
pas l'effet de serre. Le fluide
frigorigène risque en fuyant
de blesser les yeux ou
de s'enflammer.
■ Ne pas endommager les
tubulures.
Si les tubulures ont été
endommagées :
■ Eloignez l’appareil de toute
flamme nue ou source
d’inflammation.
■ Aérez la pièce.
■ Éteignez l’appareil puis
débranchez-le.
■ Appeler le service
après-vente.
Les récipients contenant des
boissons gazeuses risquent
d'éclater.
Dans le compartiment
congélateur, ne rangez jamais
de boissons gazeuses.
46
Page 47

Consignes de sécurité fr
Évitez des risques pour les enfants et les personnes en danger :
Personnes à risques :
■ les enfants,
■ les personnes présentant
un handicap physique,
psychique ou sensoriel,
■ les personnes qui ne savent
pas suffisamment comment
utiliser l'appareil de manière
sûre.
Mesures :
■ Assurez-vous que les enfants
et les personnes à risques
ont bien compris la nature
des dangers.
■ Une personne responsable
de la sécurité doit surveiller
ou guider les enfants et les
personnes en danger
lorsqu’elles se trouvent près
de l’appareil.
■ Ne permettez l’utilisation de
l’appareil qu’aux enfants
à partir de 8 ans.
■ Surveillez les enfants
pendant le nettoyage et la
maintenance.
■ Ne jamais laisser des
enfants jouer avec l'appareil.
Risque d'étouffement
■ Appareils équipés d’une
serrure : rangez la clé hors
de portée des enfants.
■ Ne permettez jamais aux
enfants de jouer avec
l’emballage et ses pièces
constitutives.
Dégâts matériels
Pour éviter des dégâts
matériels :
■ Ne vous servez jamais
du socle, des glissières
ou des portes comme
marchepieds et ne vous
appuyez jamais dessus.
■ Veillez à ce que les pièces
en matière plastique et les
joints de porte soient
exempts d'huile et de
graisse.
■ Pour débrancher, ne
saisissez que la fiche mâle,
pas le cordon de
branchement.
Poids
Rappelez-vous pendant le
transport et l'installation de
l'appareil que ce dernier peut
être très lourd.
~ "Lieu d’installation"
à la page 50
47
Page 48

fr Conformité d'utilisation
Prescriptions-d’hygiènealimentaire
Conformément
à la réglementation française
visant à empêcher la présence
de listeria dans le
compartiment réfrigérateur,
nous vous remercions de
respecter les consignes
suivantes :
■ Nettoyez fréquemment le
compartiment intérieur du
réfrigérateur à l’aide d’un
détergent non agressif, ne
provoquant pas d’oxydation
des pièces métalliques
(utilisez par ex. de l’eau tiède
additionnée d’un peu de
produit à vaisselle).
Ensuite, désinfectez avec de
l’eau additionnée de vinaigre
ou de jus de citron les
surfaces que vous avez
préalablement nettoyées, ou
utilisez un produit germicide
en vente dans le commerce
et adapté aux réfrigérateurs
(avant d’utiliser ce produit
sur les pièces métalliques,
faites un test de compatibilité
à un endroit peu visible).
■ Enlevez les emballages
commerciaux avant de
mettre les produits
alimentaires dans le
compartiment réfrigérateur
(par ex. le carton qui réunit
les pots de yaourt).
■ Pour éviter toute
contamination entre des
produits alimentaires de
nature différente, rangez-les
bien séparés les uns des
autres, bien emballés ou
rangés dans des récipients
à couvercle.
■ Avant de préparer des plats
et de saisir des produits
alimentaires, lavez-vous les
mains. Avant de préparer
d’autres plats, lavez-vous
à nouveau les mains.
Lavez-les encore une fois
avant de prendre un repas.
■ Lavez les ustensiles
de cuisine dont vous venez
de vous servir avant de les
réutiliser (cuillère en bois,
planche de découpe,
couteau de cuisine, etc.).
8 Conformité
d'utilisation
Conformité d'utilisation
Utilisez cet appareil
■ Uniquement pour réfrigérer et
congeler des produits alimentaires,
et pour préparer de la glace.
■ Uniquement dans un foyer et dans
l'environnement domestique.
■ Uniquement en conformité avec la
présente notice d'utilisation.
Cet appareil est conçu pour une
utilisation jusqu'à une altitude maximale
de 2 000 m.
48
Page 49
Protection de l'environnement fr
7 Protection de
l'environnement
Protection de l'environnement
Emballage
Tous les matériaux sont compatibles
avec l’environnement et recyclables :
■ Éliminer l’emballage dans le respect
de l’environnement.
■ Veuillez vous informer sur les circuits
d'élimination auprès de votre
revendeur ou de l'administration
publique.
Eliminez l'emballage en
respectant l'environnement.
Appareil usagé
Leur élimination dans le respect
de l’environnement permet d’en
récupérer de précieuses matières
premières.
:Mise en garde
Les enfants risque de s'enfermer dans l'appareil et de s'asphyxier. !
■ Pour compliquer la pénétration des
enfants dans l'appareil, ne retirez
pas les clayettes et les bacs.
■ Éloignez les enfants de l’appareil
qui a cessé de servir.
Attention !
Le fluide frigorigène et des gaz nocifs
peuvent se dégager.
Veillez à ne pas endommager les
tubulures du circuit frigorifique et
l'isolant.
Cet appareil est marqué selon
la directive européenne
2012/19/UE relative aux
appareils électriques et
électroniques usagés (waste electrical
and electronic equipment - WEEE).
La directive définit le cadre pour une
reprise et une récupération des
appareils usagés applicables dans les
pays de la CE.
5 Installation et
branchement
Installation et branchement
Étendue des fournitures
Après avoir déballé, vérifiez toutes les
pièces pour détecter d’éventuels dégâts
dus au transport.
En cas de réclamation, veuillez vous
adresser au revendeur auprès duquel
vous avez acquis l'appareil ou à notre
service après-vente.
~ "Service après-vente" à la page 67
La livraison comprend les pièces
suivantes :
■ Appareil encastrable
■ Équipement (selon le modèle)
■ Sachet avec visserie de montage
■ Mode d'emploi
■ Notice de montage
■ Carnet de service après-vente
■ Pièce annexe de la garantie
■ Informations relatives à la
consommation d’énergie et aux
bruits
1. Débrancher la fiche mâle de
la prise de courant.
2. Tranchez le cordon
de raccordement au secteur.
3. Faites éliminer l'appareil
professionnellement.
49
Page 50

fr Installation et branchement
Données techniques
La plaque signalétique mentionne le
fluide frigorigène, la contenance utile
ainsi que d'autres indications.
~ "Présentation de l’appareil"
à la page 53
Installer l’appareil
Lieu d’installation
Plus l’appareil contient du fluide
réfrigérant et plus grande doit être
la pièce dans laquelle il se trouve. Dans
les pièces trop petites, un mélange
gaz-air inflammable peut se former en
cas de fuite.
Comptez 1 m³ de volume minimum de
la pièce pour 8 g de fluide réfrigérant.
La quantité de fluide présente dans
l’appareil est indiquée sur la plaque
signalétique située à l’intérieur de ce
dernier.
~ "Présentation de l’appareil"
à la page 53
Selon le modèle, le poids de l'appareil
peut atteindre 70 kg.
Température ambiante admissible
La température ambiante admissible
dépend de la catégorie climatique de
l'appareil.
Des indications sur la classe climatique
se trouvent sur la plaque signalétique.
~ "Présentation de l’appareil"
à la page 53
Catégorie climatique
SN +10 °C ... 32°C
N +16 °C ... 32°C
ST +16 °C ... 38 °C
T +16 °C ... 43 °C
L'appareil est entièrement opérationnel
dans la plage de température ambiante
admissible.
Si un appareil de la catégorie climatique
SN est utilisé à des températures
ambiantes plus basses, il n’est pas
possible d’exclure que l’appareil
s’endommage jusqu'à une température
de +5 °C.
Température ambiante admissible
Profondeur de niche
Une profondeur de niche de 56 cm est
recommandée pour cet appareil. Si la
niche est moins profonde (profondeur
minimum = 55 cm), la consommation
d'énergie augmente légèrement.
Installation side-by-side
Une installation côte-à-côte des
appareils n'est autorisée qu'avec un
écartement de 15 cm minimum.
50
Page 51

Installation et branchement fr
Economies d’énergie
Si vous suivez les instructions suivantes, votre appareil consommera moins d’énergie.
Remarque : L’agencement des pièces d’équipement n’a aucune influence sur la consommation d’énergie de l’appareil.
Installer l’appareil
Protégez l'appareil contre l’ensoleillement direct. En présence de températures ambiantes assez
Installez l'appareil à la plus grande distance possible
d'un radiateur, d'une cuisinière et d'autres sources
de chaleur.
3 cm par rapport aux cuisinières électriques ou
à gaz.
30 cm par rapport à un appareil de chauffage
au fuel ou au charbon.
Remarque : Si ce n'est pas possible, il faut installer
une plaque isolante entre l'appareil et la source de
chaleur.
Choisissez un lieu d'installation où règne une
température ambiante d'environ 20 °C.
Utilisez une cavité de 56 cm de profondeur.
Attention !
Risque de brûlures !
Certaines pièces de l'appareil deviennent très
chaudes en service. Le fait de toucher ces pièces
peut provoquer des brûlures.
Ne recouvrez et ne bouchez pas les orifices
d'aération.
Aérez quotidiennement la pièce.
basses, l'appareil doit réfrigérer moins souvent et il
consomme donc moins de courant.
L'air au contact de la paroi arrière de l'appareil ne
s'échauffe pas aussi fortement. L'appareil
consomme moins de courant si l'air chaud peut
s'échapper.
Utilisation de l'appareil
N'ouvrez la porte de l'appareil que brièvement. L'air dans l'appareil ne s'échauffe pas aussi
Transportez les produits alimentaires achetés dans
un sac isotherme et rangez-les rapidement dans
l'appareil.
Attendez que les plats chauds aient refroidi avant de
les ranger dans le compartiment congélateur !
Pour dégeler les produits congelés, rangez-les dans
le compartiment réfrigérateur pour profiter du froid
des produits congelés.
fortement. L'appareil doit réfrigérer plus rarement
et consomme de la sorte moins d'électricité.
51
Page 52

fr Installation et branchement
Utilisation de l'appareil
Laissez toujours un peu de place entre les produits
alimentaires et la paroi arrière.
Emballez hermétiquement les produits alimentaires.
Une fois par an, passez l'aspirateur au dos de
l'appareil.
Ne recouvrez et ne bouchez pas les orifices
d'aération.
--------
Avant la première utilisation
1. Retirez la documentation informative
et les rubans adhésifs ainsi que la
feuille protectrice.
2. Nettoyez l’appareil.
~ "Nettoyage" à la page 63
Raccordement électrique
Attention !
Ne raccordez pas l’appareil à une fiche
électronique d'économie d'énergie.
Remarque : Vous pouvez raccorder l'appareil à des onduleurs pilotés par le réseau et pilotés en onde sinusoïdale. Les onduleurs pilotés par le réseau s'utilisent sur les installations photovoltaïques directement raccordées au réseau public d'électricité. Dans les solutions en îlot, vous devrez utiliser des onduleurs pilotés en onde sinusoïdale. Les solutions en îlot, par exemple sur les bateaux ou les refuges de montage, n'ont pas de raccordement direct au réseau public d'électricité.
L'air peut circuler de cette manière et l'humidité de
l'air demeure constante. L'appareil doit réfrigérer
plus rarement et consomme de la sorte moins
d'électricité.
L'air au contact de la paroi arrière de l'appareil ne
s'échauffe pas aussi fortement. L'appareil
consomme moins de courant si l'air chaud peut
s'échapper.
1. Après l'installation de l'appareil,
attendez au moins 1 heure avant de
le raccorder car cela empêche
d'endommager le compresseur.
2. Raccordez l'appareil via une prise
femelle réglementairement installée.
La prise doit répondre aux
spécifications suivantes :
Prise avec 220 V ... 240 V
Fil de terre 50 Hz
Fusible 10 A ... 16 A
Hors d’Europe : Vérifiez si
le paramétrage du courant indiqué
pour l'appareil correspond à celui
offert par le secteur dans votre
localité. Les indications se trouvent
sur la plaque signalétique.
~ "Présentation de l’appareil"
à la page 53
3. Raccordez l'appareil à une prise
proche de lui.
Cette prise doit rester accessible
même après avoir installé l'appareil.
52
Page 53

Présentation de l’appareil fr
* Présentation de
l’appareil
Présentation de l’appareil
Dépliez le volet illustré situé à la
dernière page. Selon l'équipement, des
différences sont possibles entre
l'appareil et les illustrations.
Appareil
~ Fig. !
* Selon le modèle.
# Compartiment réfrigérateur
+ Compartiment congélateur
(-h Eléments de commande
)"* Ventilateur
)* Éclairage
)2 Clayette coulissante
): Bac à légumes avec
)B Plaque signalétique
)J* Bac à baies
)R Calendrier de congélation
)Z Bac à produits congelés
)b Casier à beurre et à fromage
)j* Rangement Vario
1" Clayette à grandes bouteilles
régulateur d’humidité
Eléments de commande
~ Fig. "
( Touche #
Allume ou éteint l'appareil.
0 Touche Super compartiment
congélateur
Allume ou éteint la
supercongélation.
8 Touche K/J compartiment
congélateur
Règle la température du
compartiment congélateur.
@ Affichage de la température dans
le compartiment congélateur
Affiche la température réglée en
°C.
H Touche Alarm
Éteint l'alarme sonore.
P Touche Holiday
Allume ou éteint le mode
Vacances.
X Touche K/J compartiment
réfrigérateur
Règle la température du
compartiment réfrigérateur.
` Affichage de la température du
compartiment réfrigérateur
Affiche la température réglée en
°C.
h Touche Super compartiment
réfrigérateur
Allume ou éteint la
superréfrigération.
Équipement
(selon le modèle)
Clayette
~ Fig. #
Vous pouvez varier la position des
clayettes :
■ Tirez la clayette à vous et sortez-la.
53
Page 54

fr Présentation de l’appareil
Clayette rétractable (Vario)
~ Fig. $
Vous pouvez ranger de produits hauts
à réfrigérer (par exemple verseuses ou
bouteilles) :
■ Retirez la partie avant de la clayette
et poussez-la sous la partie arrière.
Clayette coulissante
~ Fig. %
Vous pouvez améliorer la visibilité :
■ Tirez la clayette à vous.
Vous pouvez sortir entièrement
la clayette:
1. Appuyez longuement sur les deux
boutons sous la clayette.
2. Tirez la clayette à vous, abaissez-la
et faites-la basculer latéralement
pour l’extraire.
Récipient
~ Fig. &
Vous pouvez retirer le bac :
■ Tirez le bac à vous jusqu’à la butée,
soulevez-le à l’avant puis extrayez-le.
Casier à beurre et casier à fromage
~ Fig. '
Vous pouvez facilement ouvrir le
casier :
■ Appuyez légèrement en bas au
milieu sur le couvercle abattant.
Le casier s’ouvre vers le bas. Le
couvercle abattant se glisse sous le
casier.
Rangement
~ Fig. (
Vous pouvez retirer le rangement :
■ Soulevez le rangement et retirez-le.
Rangement Vario
~ Fig. )
Vous pouvez placer de grandes
bouteilles dans le rangement inférieur :
■ Déplacez le rangement vers la droite
ou la gauche.
Porte-bouteilles
~ Fig. *
Lorsque vous ouvrez et fermez la porte :
■ Le porte-bouteille empêche les
bouteilles de se renverser.
Calendrier de congélation
~ Fig. !/)R
Le calendrier de congélation indique
la durée maximale de stockage, en
mois, à une température permanente
de –18 °C.
Bac à glaçons
Vous pouvez préparer des glaçons :
1. Remplissez le bac à glaçons aux
3/4 avec de l’eau, puis placez-le
dans le compartiment congélateur.
Remarque : Si le bac est resté collé dans le compartiment congélateur, n’utilisez qu’un instrument émoussé pour le décoller (un manche de cuiller par ex.).
2. Pour enlever les glaçons du bac,
passez-le brièvement sous l’eau
du robinet ou déformez légèrement
le bac.
54
Page 55

Utilisation de l'appareil fr
Accumulateur de froid
En cas de panne de courant ou de
dérangement :
■ L'accumulateur de froid retarde
le réchauffement des produits
congelés rangés.
Remarque : La durée maximale de stockage est maximale si vous placez l’accumulateur de froid sur les produits alimentaires situés dans le compartiment le plus haut.
Vous pouvez sortir l'accumulateur de
froid pour maintenir temporairement
des produits alimentaires au frais, par
exemple dans un sac isotherme.
1 Utilisation de l'appareil
Utilisation de l'appareil
Mettre l'appareil sous tension
1. Appuyez sur la touche #.
L’appareil commence à réfrigérer.
L'alarme sonore, l'affichage
clignotant de température du
compartiment congélateur et
l'allumage de la touche Alarm
indiquent que le compartiment
congélateur n'est pas encore assez
froid.
2. Appuyez sur la touche Alarm.
L’alarme sonore s’éteint.
3. Réglez la température souhaitée.
~ "Régler la température"
à la page 56
Remarques concernant le fonctionnement de l’appareil
■ Après son allumage, l’appareil peut
avoir besoin de plusieurs heures
pour atteindre les températures
réglées. Ne rangez pas de produits
alimentaires tant que la température
choisie n'est pas atteinte.
■ L’appareil chauffe légèrement une
partie de ses surfaces frontales pour
empêcher une condensation d’eau
dans la zone du joint de porte.
■ Si la porte du compartiment
congélateur ne se laisse pas
immédiatement rouvrir après l’avoir
fermée, attendez un moment pour
laisser à la dépression régnant dans
le compartiment le temps de se
résorber.
Arrêt et remisage de l’appareil
Éteindre l'appareil
■ Appuyez sur la touche #.
L’appareil ne réfrigère plus.
Remisage de l’appareil
Si l'appareil doit rester longtemps hors
service :
1. Appuyez sur la touche #.
L’appareil ne réfrigère plus.
2. Débranchez la fiche de la prise ou
ramenez le disjoncteur en position
éteinte.
3. Nettoyez l'appareil.
4. Laissez l'appareil ouvert.
55
Page 56

fr Utilisation de l'appareil
Régler la température
Température recommandée
Compartiment réfrigérateur : +4 °C
Compartiment congélateur : –18 °C
Compartiment réfrigérateur
■ Appuyez sur la touche K/J
répétitivement jusqu'à ce que la
température souhaitée s'affiche.
Compartiment congélateur
■ Appuyez sur la touche K/J
répétitivement jusqu'à ce que la
température souhaitée s'affiche.
Autocollant OK
(selon le modèle)
Avec l'autocollant OK, vous pouvez
vérifier si la température dans
le compartiment congélateur descend
jusqu'à +4 °C ou plus bas.
Si l'autocollant n'affiche pas OK,
abaissez progressivement la
température.
Après la mise en service de l'appareil,
ce dernier peut nécessiter jusqu'à
12 heures pour atteindre la température
réglée.
Réglage correct
Super-réfrigération
Pendant la super-réfrigération, le
compartiment réfrigérateur refroidit
au maximum.
Enclenchez la super-réfrigération par ex.
dans les cas suivants :
■ avant de ranger de grandes
quantités d’aliments
■ pour refroidir rapidement des
boissons
Remarque : Si vous avez activé la super-réfrigération, l’appareil peut fonctionner plus bruyamment.
Au bout de 15 heures, l'appareil revient
en service normal.
Allumer / Éteindre la super-réfrigération:
■ Appuyer sur la touche Super.
Le voyant de la touche est allumé si
vous avez activé la
super-réfrigération.
Supercongélation
Pendant la supercongélation,
le compartiment congélateur refroidit
au maximum.
Enclenchez la supercongélation
par ex. dans les cas suivants :
■ Pour congeler les produits
alimentaires rapidement à cœur :
■ 4 à 6 heures avant de ranger 2 kg
de produits alimentaires ou plus
■ pour profiter de la capacité
de congélation maximale
~ "Capacité de congélation
maximale" à la page 60
56
Page 57

Alarme fr
Remarque : Si vous avez activé la supercongélation, l’appareil peut fonctionner plus bruyamment.
Au bout de 2 jours et ^ environ,
l'appareil revient en service normal.
Allumer / Éteindre la supercongélation:
■ Appuyer sur la touche Super.
Le voyant de la touche est allumé si
vous avez activé la
supercongélation.
Mode Vacances
En cas d’absence prolongée, vous
pouvez commuter l’appareil sur le mode
Vacances, économe en énergie lui
aussi.
La température du compartiment
réfrigérateur commute automatiquement
sur +14 °C.
Pendant cette période, ne rangez pas
de produits alimentaires dans
le compartiment réfrigérateur.
La température dans le compartiment
congélateur reste inchangée.
Allumer / Éteindre le mode Vacances :
■ Appuyez sur la touche Holiday.
Une fois le mode Vacances activé,
la touche est allumée et l’indicateur
de température du compartiment
réfrigérateur n’affiche plus de
température.
M Alarme
Alarme
Alarme de porte
L’alarme relative à la porte
(signal sonore permanent) s’active si
la porte de l’appareil est restée ouverte
plus d’une minute.
■ Fermez la porte ou appuyez sur la
touche Alarm.
L’alarme sonore s’éteint.
Alarme de température
Si la température monte trop dans
le compartiment congélateur, l'alarme
de température s'allume
(sonorité intermittente).
Attention !
Pendant la décongélation, des
bactéries peuvent apparaître et les
produits congelés s'abîmer.
Ne remettez pas à congeler des
produits alimentaires partiellement ou
entièrement décongelés.
Ne recongelez qu'après avoir les avoir
fait cuire ou rôtir. N’utilisez pas la durée
de conservation dans son intégralité.
Remarque : L’alarme peut s’activer dans les cas suivants, sans qu'il y ait de risque pour les produits congelés :
■ Pendant l'entrée en service de
l’appareil.
■ Rangement de grandes quantités
de produits alimentaires frais.
■ La porte du compartiment
congélateur est restée trop
longtemps ouverte.
57
Page 58

fr Compartiment réfrigérateur
Pour afficher la température la plus
élevée qui a régné et pour éteindre
l'alarme sonore :
■ Appuyez sur la touche Alarm.
La température la plus élevée qui
a régné dans le compartiment
congélateur s'affiche brièvement.
Ensuite s'affiche à nouveau
la température qui a été réglée.
A partir de ce moment-là, l’appareil
recommence à déterminer
et enregistrer la température la plus
élevée.
Remarque : La touche Alarm s’allume jusqu'à ce que la température réglée soit à nouveau atteinte.
U Compartiment
réfrigérateur
Compartiment réfrigérateur
Le compartiment réfrigérateur convient
pour conserver la viande, la charcuterie,
le poisson, les produits laitiers, les
œufs, les plats précuisinés et les
pâtisseries.
La température est réglable entre
+2 °C ... +8 °C.
En raison du stockage au froid, vous
pouvez aussi ranger des denrées très
périssables à court et moyen terme.
Plus la température choisie est basse
et plus les processus enzymatiques
et chimiques ainsi que la détérioration
par des micro-organismes sont lents.
Une température de +4 °C ou inférieure
garantit un maintien au frais optimal
ainsi que la sécurité des produits
alimentaires stockés.
Consignes de rangement
■ Rangez les produits alimentaires
frais et intacts.
Ils conserveront ainsi plus
longtemps leur qualité et leur
fraîcheur.
■ Produits tout prêts et liquides
conditionnés : respectez la date de
conservation minimum ou la date
de consommation indiquée par
le fabricant.
■ Pour préserver l'arôme, la teinte et la
fraîcheur, rangez les produits
alimentaires bien emballés ou
couverts.
Vous évitez ainsi les
communications d'odeurs et que les
pièces en plastique se colorent.
■ Attendez que les produits
alimentaires chauds et les boissons
aient refroidi avant de les mettre
dans le compartiment réfrigérateur.
Tenez compte des différentes zones froides dans le compartiment réfrigérateur
L’air circulant dans le compartiment
réfrigérateur fait que des zones
différemment froides apparaissent.
La zone la plus froide
La zone la plus froide est située entre
la flèche imprimée sur le côté et la
clayette située en dessous.
~ Fig. +
Remarque : Rangez les produits alimentaires délicats dans la zone la plus froide (par ex. le poisson, la charcuterie et la viande).
58
Page 59

Compartiment congélateur fr
Zone la moins froide
La zone la moins froide se trouve
complètement en haut, contre la porte.
Remarque : Rangez dans la zone la moins froide par ex. le fromage dur et le beurre. Le fromage peut continuer de développer son arôme et le beurre demeure tartinable.
Bac à légumes avec régulateur d’humidité
~ Fig. ,
Le bac à légumes est l’endroit optimal
où stocker les fruits et légumes frais. Le
régulateur d’humidité et un joint spécial
vous permettent d’ajuster l’humidité de
l’air dans le bac à légumes. Les fruits et
légumes frais se conservent ainsi
jusqu'à deux fois plus longtemps
qu’avec un mode de rangement
conventionnel.
Vous pouvez adapter l’humidité de l’air
régnant dans le bac à légumes
en fonction de la nature et de
la quantité des produits à ranger :
■ Fruits principalement et appareil très
rempli – Réglez l'appareil sur une
humidité de l’air moins élevée
■ Légumes principalement et appareil
rempli de produits différents ou
faiblement rempli – Réglez l'appareil
sur une humidité de l’air plus élevée
■ Suivant la quantité et la nature des
produits stockés, de l’eau peu se
condenser dans le bac à légumes.
Retirez l’eau condensée avec un
essuie-tout sec et ajustez l'humidité
de l’air dans le bac à légumes via
le régulateur d’humidité.
W Compartiment
congélateur
Compartiment congélateur
Le compartiment congélateur convient
pour ceci :
■ pour stocker des produits surgelés
■ pour préparation de glaçons
■ pour congeler des produits
alimentaires
La température est réglable entre
–16 °C ... –24 °C.
La congélation vous permet de stocker
longtemps les denrées périssables
sans pertes notables de qualité vu que
les basses températures ralentissent
fortement la détérioration ou la
stoppent. L'aspect, l'arôme et
l'ensemble des ingrédients demeurent
préservés dans leur très large majorité.
La température de stockage à long
terme des produits alimentaires doit
être de –18 °C ou encore plus basses.
Remarques
■ Il est recommandé de ranger les
fruits (par exemple ananas, bananes,
papayes, agrumes) et légumes
(par exemple les aubergines,
concombres, courgettes, poivrons,
tomates et pommes de terre) qui
craignent le froid hors du
réfrigérateur à des températures
entre +8 °C à +12 °C pour
en préserver optimalment la qualité
et l’arôme.
Le temps nécessaire pour permettre
aux produits frais rangés au
congélateur de congeler à cœur
dépend des facteurs suivants :
■ Température réglée
■ Nature du produit alimentaire
■ Degré de remplissage du
compartiment congélation
■ Quantité et type de stockage
59
Page 60

fr Compartiment congélateur
Capacité de congélation maximale
La capacité maximale de congélation
indique quelle quantité d'aliments
l'appareil peut congeler à cœur en
24 heures.
Sur la plaque signalétique, vous
trouverez des indications concernant
la capacité de congélation maximale.
~ "Présentation de l’appareil"
à la page 53
Pour profiter de la capacité de
congélation maximale, allumez la
supercongélation 24 heures avant de
ranger des produits frais.
Conditions préalables pour une capacité de congélation maximale
1. 24 heures environ avant de ranger
des produits frais : allumez la
supercongélation.
~ "Supercongélation" à la page 56
2. Retirez le récipient du compartiment
congélateur et déposez les produits
alimentaires directement sur les
clayettes et le fond du compartiment
congélateur.
3. Commencez par garnir le
compartiment supérieur avec des
produits alimentaires. C'est là qu'ils
seront congelés à cœur le plus
rapidement.
4. Si le compartiment supérieur ne
suffit pas, stockez la quantité
restante dans le compartiment situé
en dessous, en commençant du
côté avant droit.
5. Faites congelez les produits
alimentaires frais le plus près
possible des parois latérales.
Utiliser l’intégralité du volume de congélation
Pour loger la quantité maximale de
produits congelés :
■ retirez toutes les pièces
d'équipement.
■ Déposez les produits alimentaires
directement sur les clayettes et le
fond du compartiment congélateur.
Achats de produits surgelés
■ Vérifiez que l'emballage est intact.
■ Ne dépassez pas la date de
conservation minimum.
■ La température indiquée par le
thermomètre du congélateur
commercial doit être égale à –18 °C
ou encore plus basse.
■ Utilisez de préférence un sac
isotherme pour le transport puis
rangez les produits le plus
rapidement possible dans le
compartiment congélateur.
Attention lors de rangement
■ Congelez des quantités d'aliments
plus importantes dans le
compartiment supérieur.
C'est là qu'ils seront congelés le
plus vite et en douceur.
■ Étalez les produits alimentaires sur
une grande surface dans les
compartiments ou les bacs
à produits congelés.
■ Veillez à ce que les produits
alimentaires à congeler n'entrent pas
en contact avec d'autres déjà
congelés.
Si nécessaire, réordonnez les
produits alimentaires congelés
à cœur déjà présents dans les bacs.
■ Consigne importante pour que l'air
circule de manière impeccable dans
l'appareil :
Insérez le bac à produits congelés
jusqu'à la butée.
60
Page 61

Compartiment congélateur fr
Congélation de produits frais
Pour congeler les aliments, n’utilisez
que des aliments frais et d’un aspect
impeccable.
Les aliments consommés cuits
(y compris au four) et rôtis se prêtent
mieux à la congélation que les aliments,
consommés crus.
Avant la congélation, il faut soumettre
les aliments à des processus de
préparation différents selon la variété,
pour préserver au mieux leur valeur
nutritive, leur arôme et leur couleur :
■ Légumes : Lavage, broyage,
blanchiment.
■ Fruits : Lavage, dénoyautage et
éventuellement épluchage ; ajoutez
le cas échéant du sucre ou de
l'acide ascorbique en solution.
Vous trouverez des conseils à ce sujet
dans la littérature spécialisée.
Vont au congélateur
■ Pain et pâtisserie
■ Poisson et fruits de mer
■ Viande
■ Le gibier et la volaille
■ Fruits, légumes et herbes
■ Les œufs sans coque
■ Les produits laitiers, par ex.
le fromage, le beurre et le fromage
blanc
■ Les plats précuisinés et restes de
plats, par exemple soupes, ragoûts,
viande cuite, poisson cuit, plats
à base de pommes de terre, soufflés
et mets sucrés
Ne vont pas au congélateur
■ Variétés de légumes habituellement
dégustées crues, par exemple les
salades ou radis
■ Œufs avec coque ou les œufs cuits
durs
■ Raisins
■ Pommes, poires, pêches entières
■ Yaourt, lait caillé, crème acidulée,
crème fraîche et mayonnaise
Emballer les surgelés
La nature correcte de l'emballage et le
choix du matériau conditionnent
de manière déterminante
la préservation de la qualité du produit,
et évitent l'apparition de brûlures par le
froid.
1. Placez les aliments dans
l’emballage.
2. Presser pour chasser l’air.
3. Fermez hermétiquement l'emballage
afin que les produits alimentaires ne
perdent pas leur goût ou ne sèchent
pas.
4. Indiquez sur l’emballage le contenu
et la date de congélation.
Emballage adapté :
■ Feuilles en plastique
■ Feuilles en polyéthylène
■ Feuilles d’aluminium
■ Boîtes de congélation
Moyens de fermeture appropriés :
■ Caoutchoucs
■ Clips en plastique
■ Rubans adhésifs résistants au froid
Emballage non approprié :
■ Papier d’emballage
■ Papier sulfurisé
■ Cellophane
■ Sacs-poubelles et sacs d’achat déjà
utilisés
61
Page 62

fr Dégivrer l’appareil
Durée de conservation du produit congelé à –18 °C
Poisson, charcuterie, plats
pré-cuisinés, pâtisseries :
jusqu’à 6 mois
Viande, volaille : jusqu’à 8 mois
Fruits, légumes : jusqu’à 12 mois
Décongélation des produits
Il faut adapter la méthode de
décongélation au produit alimentaire
concerné et au but d'utilisation afin de
préserver au mieux la qualité du produit.
Méthodes de décongélation :
■ Dans le compartiment réfrigérateur
(convient particulièrement aux
denrées d'origine animale comme
le poisson, la viande, le fromage et
le fromage blanc)
■ À la température ambiante (pain)
■ Au micro-ondes (produits
alimentaires destinés à une
consommation ou une préparation
immédiate)
■ Four / cuisinière (produits
alimentaires destinés à une
consommation ou une préparation
immédiate)
= Dégivrer l’appareil
Dégivrer l’appareil
Compartiment réfrigérateur
Pendant que le groupe frigorifique
fonctionne, des gouttelettes d’eau de
condensation ou du givre se forment
contre la paroi arrière. Ce phénomène
est le résultat du fonctionnement
de l’appareil. Vous n'avez pas besoin
d'essuyer les gouttes d'eau de
dégivrage ou le givre. La paroi arrière
se dégivre automatiquement. L’eau du
dégivrage s’écoule par la rigole
d’écoulement à cet effet.
~ Fig. .
De la rigole, l’eau de dégivrage se rend
dans le bac d'évaporation d'où elle
s’évapore.
Remarque : Maintenez la rigole d'eau de dégivrage et l'orifice d'écoulement propres afin que l'eau de dégivrage puisse s'écouler librement et d'éviter toute apparition d'odeur.
Attention !
Ne remettez pas à congeler des
produits alimentaires partiellement ou
entièrement décongelés. Vous ne
pouvez recongeler qu'après avoir
transformé la denrée en plat prêt à
déguster (plat cuit au four compris).
N'utilisez plus intégralement la durée
maximale de conservation du produit
congelé.
62
Page 63

Nettoyage fr
Compartiment congélation
Le compartiment congélation ne
décongèle pas automatiquement afin
que les aliments congelés ne
décongèlent pas. Une couche de givre
gêne la communication du froid aux
produits et accroît la consommation
de courant.
■ Éliminer régulièrement la couche
de givre.
Attention !
Évitez tout dommage aux tuyaux du
circuit de refroidissement.
Le fluide frigorigène risquerait en fuyant
de blesser les yeux ou de s'enflammer.
■ Ne raclez jamais la couche de givre
avec un couteau ou un objet pointu.
Procédez comme suit :
1. Allumez la supercongélation
env. 4 heures avant le dégivrage.
Ce mode amène les produits
alimentaires à très basses
températures, ce qui vous permet
de les stocker plus longtemps
à température ambiante.
2. Retirez les aliments congelés et
stockez-les dans un endroit frais.
3. Mettre l'appareil hors tension.
4. Débranchez la fiche mâle du secteur
ou ramenez le disjoncteur en
position éteinte.
5. Pour accélérer le dégivrage : posez
dans le compartiment congélation
un dessous de plat et une casserole
remplie d’eau chaude.
6. Essuyez l’eau de dégivrage avec un
chiffon ou une éponge.
7. Passez un essuie-tout sec pour
sécher le compartiment congélation.
8. Enclenchez l’appareil.
9. Rangez les produits congelés.
D Nettoyage
Nettoyage
Attention !
Évitez d'endommager l'appareil et ses
pièces d'équipement.
■ N’utilisez aucun produit de nettoyage
contenant du sable, du chlorure ou
de l’acide, ni aucun solvant.
■ N’utilisez jamais d’éponges
abrasives ou susceptibles de rayer.
De la corrosion peut apparaître
sur les surfaces métalliques.
■ Ne nettoyez jamais les clayettes
et les bacs au lave-vaisselle.
Ces pièces pourraient se déformer !
Procédez comme suit :
1. Mettre l'appareil hors tension.
2. Débranchez la fiche de la prise ou
ramenez le disjoncteur en position
éteinte.
3. Sortez les produits alimentaires
et rangez-les dans un endroit frais.
Si présent : Déposez l'accumulateur
de froid sur les produits
alimentaires.
4. Si présente : Attendez que la couche
de givre ait fondu.
5. Ne nettoyez l’appareil qu’avec
un chiffon doux, de l’eau tiède
et du produit à vaisselle présentant
un pH neutre.
Attention !
Veillez à ce que l'eau de rinçage ne
pénètre pas dans l'éclairage et
qu'elle ne gagne pas la zone
d'évaporation via l'orifice
d'écoulement.
6. Essuyez le joint de porte avec
de l'eau propre et frottez
soigneusement avec un chiffon pour
le sécher.
7. Rebranchez l'appareil, allumez-le
et rangez les produits alimentaires.
63
Page 64

fr Odeurs
Nettoyage des accessoires
Pour nettoyer, retirez les pièces
variables de l'appareil.
~ "Équipement" à la page 53
Rigole d’écoulement de l’eau de dégivrage
~ Fig. .
Avec un bâtonnet ouaté ou un objet
similaire, nettoyez régulièrement la
rigole et le trou d’écoulement afin que
l’eau de dégivrage puisse s’écouler.
Rangement au dessus du bac à légumes
~ Fig. -
1. Extrayez le bac à légumes.
2. Retirez la clayette et démontez-la
pour la nettoyer.
l Odeurs
Odeurs
Si des odeurs désagréables se
manifestent :
1. Éteignez l’appareil par la touche
Marche / Arrêt #.
2. Sortez tous les produits alimentaires
de l’appareil.
3. Nettoyer l'intérieur de
l'appareil.~ "Nettoyage"
à la page 63
4. Nettoyer tous les emballages.
5. Pour empêcher l'apparition d'odeurs,
mettez sous emballage hermétique
les produits alimentaires qui
dégagent une forte odeur.
6. Rallumez l’appareil.
7. Rangez les produits alimentaires.
8. Au bout de 24 heures, vérifiez si de
nouveau des odeurs sont apparues.
9 Éclairage
Éclairage
Votre appareil est équipé d’un éclairage
par LED ne demandant pas d’entretien.
Seul le service après-vente ou des
spécialistes agréés sont autorisés
à réparer l'éclairage.
> Bruits
Bruits
Bruits normaux
Bourdonnement : Un moteur tourne,
par exemple le groupe frigorifique, un
ventilateur.
Gargouillis, ronflement ou clapotis :
Le fluide frigorigène circule dans les
tuyaux.
Cliquetis : Le moteur, les interrupteurs
ou les électrovannes s’allument /
s’éteignent.
Craquement : le dégivrage automatique
est en cours.
Éviter la génération de bruits
L’appareil ne repose pas d’aplomb :
Ajustez l’appareil à l’aide d’un niveau
à bulle. Si nécessaire, insérez quelque
chose sous l'appareil.
Des récipients, clayettes ou
rangements vacillent ou se coincent :
Vérifiez les pièces d'équipement
amovibles et remettez-les
éventuellement en place.
Des bouteilles ou récipients se
touchent : Éloignez les bouteilles ou
récipients les uns des autres.
64
Page 65

Dérangements, Que faire si … fr
3 Dérangements, Que faire si …
Dérangements, Que faire si …
Avant d’appeler le service après-vente, veuillez vérifier si le tableau ci-après ne vous permet pas de supprimer le dérangement vous-même.
La température dévie fortement par rapport au réglage.
Éteignez l'appareil et laissez-le éteint 5 minutes.
~ "Arrêt et remisage de l’appareil" à la page 55
Si la température est trop élevée, vérifiez-la
à nouveau au bout de quelques heures.
Si la température est trop basse, vérifiez-la
à nouveau le jour suivant.
Aucun voyant ne s’allume.
Fiche mâle incorrectement branchée dans la prise
de courant.
Fusible grillé / disjoncteur disjoncté. Vérifiez les fusibles / disjoncteurs.
Une coupure de courant s'est produite. Vérifiez la présence de courant.
Affichage indique E....
L’électronique a détecté un défaut. Prévenez le service après-vente.
Raccordez la fiche mâle.
~ "Service après-vente" à la page 67
Une alarme sonore retentit et la touche Alarm s'allume.
Appuyer sur la touche Alarm. L'alarme est éteinte.
La porte de l'appareil est ouverte. Fermer la porte de l'appareil.
Orifices d’entrée et de sortie d’air recouverts. Dégagez les orifices d'entrée et de sortie d'air.
De grandes quantités de produits alimentaires frais
ont été rangés.
Ne dépassez pas la capacité de congélation
maximale.
Le voyant clignote, une alarme sonore retentit et la touche Alarm s'allume.
Appuyer sur la touche Alarm. L'alarme est éteinte.
La porte de l'appareil est ouverte. Fermer la porte de l'appareil.
Orifices d’entrée et de sortie d’air recouverts. Dégagez les orifices d'entrée et de sortie d'air.
De grandes quantités de produits alimentaires frais
ont été rangés.
Ne dépassez pas la capacité de congélation
maximale.
65
Page 66

fr Dérangements, Que faire si …
L'affichage clignote.
La température a trop monté dans le compartiment
congélateur.
Après avoir appuyé sur la touche Alarm
la température la plus élevée qui a régné dans
le compartiment congélateur s'affiche pendant
5 secondes. Appuyer sur la touche Alarm.
L'affichage ne clignote plus.
L'appareil ne réfrigère pas, l’affichage et l'éclairage sont allumés.
Mode Exposition activé. Appuyez sur la touche Alarm, pendant
10 secondes, jusqu’à ce qu’une tonalité
de confirmation se fasse entendre. Attendez
et vérifiez si l'appareil réfrigère.
--------
66
Page 67

Service après-vente fr
4 Service après-vente
Service après-vente
Si vous ne parvenez pas à supprimer
le défaut, veuillez s.v.p. vous adresser
à notre service après-vente. Nous
trouverons toujours une solution
adaptée, aussi afin d’éviter des
déplacements inutiles du technicien.
Vous trouverez ici ou dans le répertoire
du service après-vente les données
permettant de contacter le service
après-vente le plus proche.
Lors de l’appel, veuillez indiquer
le numéro de série (E-Nr) et le numéro
de fabrication (FD) que vous trouverez
sur la plaque signalétique.
~ "Présentation de l’appareil"
à la page 53
Faites confiance aux compétences du
fabricant. Vous vous assurerez ainsi
que les réparations soient réalisées par
des techniciens de SAV formés à cet
effet, qui disposent des pièces de
rechange d’origine adaptées à vos
appareils électroménagers.
Autodiagnostic de l’appareil
Votre appareil comprend
un programme d'autodiagnostic
affichant les défauts que votre service
après-vente peut supprimer.
■ Si un signal retentit deux fois à la fin
de l'autodiagnostic : Votre appareil
est en ordre.
■ Si la touche Super du compartiment
congélateur clignote pendant
10 secondes et que 5 tonalités
retentissent : Prévenez le service
après-vente.
Une fois le programme exécuté,
l’appareil revient sur le service normal.
Conseils et réparations
Vous trouverez les coordonnées du
service après-vente des différents pays
dans la liste ci-jointe.
FR 01 40 10 42 10
B 070 222 143
CH 0848 840 040
--------
Garantie
Vous recevrez des renseignements
détaillés sur la durée et les conditions
de la garantie dans votre pays auprès
de votre service après-vente, de votre
revendeur et sur notre site Internet.
1. Éteignez l’appareil et attendez
5 minutes.
2. Mettre l’appareil sous tension.
3. Au cours des 10 premières
secondes après l'allumage, appuyez
longuement sur la touche Super
du compartiment congélateur,
pendant 3 à 5 secondes.
L'autodiagnostic commence et une
tonalité permanente retentit.
67
Page 68

it
it Indice
it Istruzioni per l’uso
( Istruzioni di sicurezza . . . . . . . 70
Su questo libretto d'istruzioni. . . . . . .70
Pericolo di esplosione . . . . . . . . . . . . 70
Pericolo di scarica elettrica . . . . . . . .70
Pericolo di ustioni da freddo . . . . . . .71
Pericolo di lesioni . . . . . . . . . . . . . . .71
Pericoli da refrigerante. . . . . . . . . . . .71
Evitare pericoli a bambini
e persone a rischio . . . . . . . . . . . . . .72
Danni materiali. . . . . . . . . . . . . . . . . . 72
Peso . . . . . . . . . . . . . . . . . . . . . . . . .72
8 Uso corretto . . . . . . . . . . . . . . . 72
1 Utilizzare l'apparecchio . . . . . . .79
Accensione dell’apparecchio . . . . . . 79
Spegnere e mettere fuori servizio
l’apparecchio . . . . . . . . . . . . . . . . . . 79
Impostazione della temperatura . . . . 79
Super-raffreddamento. . . . . . . . . . . . 80
Super-congelamento . . . . . . . . . . . . 80
Modo Vacanza . . . . . . . . . . . . . . . . . 80
M Allarme . . . . . . . . . . . . . . . . . . . .81
Allarme porta . . . . . . . . . . . . . . . . . . 81
Allarme temperatura. . . . . . . . . . . . . 81
U Frigorifero . . . . . . . . . . . . . . . . . .81
7 Tutela dell'ambiente . . . . . . . . . 73
Imballaggio . . . . . . . . . . . . . . . . . . . .73
Apparecchio dismesso . . . . . . . . . . .73
5 Installazione
e allacciamento. . . . . . . . . . . . . 73
Contenuto della confezione . . . . . . . .73
Dati tecnici. . . . . . . . . . . . . . . . . . . . .74
Installazione dell'apparecchio . . . . . .74
Profondità della nicchia . . . . . . . . . . . 74
Installazione side-by-side . . . . . . . . . .74
Risparmio energetico. . . . . . . . . . . . .75
Prima del primo utilizzo . . . . . . . . . . .76
Allacciamento elettrico. . . . . . . . . . . .76
* Conoscere l'apparecchio . . . . . 77
Apparecchio . . . . . . . . . . . . . . . . . . .77
Elementi di comando. . . . . . . . . . . . .77
Caratteristiche . . . . . . . . . . . . . . . . . .77
Tenere presente nella
conservazione . . . . . . . . . . . . . . . . . 82
Considerare le zone fredde
nel frigorifero . . . . . . . . . . . . . . . . . . 82
Cassetto per verdure con
regolatore di umidità . . . . . . . . . . . . 82
W Congelatore . . . . . . . . . . . . . . . .83
Massima capacità di
congelamento . . . . . . . . . . . . . . . . . 83
Sfruttare interamente
il volume utile . . . . . . . . . . . . . . . . . . 83
Acquisto di alimenti surgelati . . . . . . 83
Tenere presente nella
sistemazione . . . . . . . . . . . . . . . . . . 84
Congelamento di alimenti freschi . . . 84
Scongelamento di alimenti
congelati. . . . . . . . . . . . . . . . . . . . . . 85
68
Page 69

= Sbrinamento. . . . . . . . . . . . . . . . 85
Frigorifero . . . . . . . . . . . . . . . . . . . . . 85
Congelatore . . . . . . . . . . . . . . . . . . . 86
D Pulizia . . . . . . . . . . . . . . . . . . . . . 86
Pulire gli elementi in dotazione
all’apparecchio . . . . . . . . . . . . . . . . . 87
l Odori . . . . . . . . . . . . . . . . . . . . . . 87
9 Illuminazione . . . . . . . . . . . . . . . 87
> Rumori . . . . . . . . . . . . . . . . . . . . 87
Rumori normali . . . . . . . . . . . . . . . . . 87
Evitare i rumori . . . . . . . . . . . . . . . . . 87
3 Guasti, Che fare se? . . . . . . . . . 88
4 Servizio di assistenza
clienti . . . . . . . . . . . . . . . . . . . . . 90
Autotest dell’apparecchio . . . . . . . . . 90
Ordine di riparazione e
consulenza in caso di guasti . . . . . . 90
Garanzia . . . . . . . . . . . . . . . . . . . . . . 90
it
69
Page 70

it Istruzioni di sicurezza
( Istruzioni di sicurezza
Istruzioni di sicurezza
Questo apparecchio
è conforme alle vigenti norme
di sicurezza per
le apparecchiature elettriche
ed è schermato contro
i radiodisturbi.
La tenuta ermetica del circuito
refrigerante è stata sottoposta
a controllo.
Su questo libretto d'istruzioni
■ Leggere e osservare le
istruzioni per l'uso ed
il montaggio. Esse
contengono importanti
informazioni per
l’installazione, l’uso e la
manutenzione
dell’apparecchio.
■ Il produttore non risponde
in caso di inosservanza delle
istruzioni e avvertenze del
libretto di istruzioni per l'uso
ed il montaggio.
■ Conservare tutta
la documentazione per l'uso
futuro e per eventuali
successivi proprietari.
Pericolo di esplosione
■ Non introdurre mai
apparecchi elettrici all’interno
di questo elettrodomestico
(es. apparecchi
di riscaldamento, produttori
di ghiaccio elettrici).
■ Non conservare
nell'apparecchio prodotti
contenenti gas propellenti
combustibili (ad es.
bombolette spray)
e sostanze esplosive.
■ Conservare alcool ad alta
gradazione in un contenitore
ermeticamente chiuso,
e posto in posizione
verticale.
Pericolo di scarica elettrica
Le riparazioni male eseguite
possono causare all'utente
pericoli e danni considerevoli.
■ In caso di danni al cavo
di collegamento: scollegare
immediatamente
l’apparecchio dalla rete.
■ Fare riparare l'apparecchio
solo dal produttore, dal
centro di assistenza tecnica
autorizzato o da altra
persona dotata di uguale
qualifica.
70
Page 71

Istruzioni di sicurezza it
■ Usare solo parti di ricambio
originali.
Solo con queste parti
il costruttore garantisce che
i requisiti di sicurezza siano
soddisfatti.
■ Il prolungamento del cavo
elettrico di alimentazione
deve essere eseguito dal
centro di assistenza tecnica
autorizzato.
Pericolo di ustioni da freddo
■ Non mettere in bocca
alimenti congelati appena
presi dal congelatore.
■ Evitare il contatto prolungato
della pelle con prodotti
surgelati, ghiaccio e con
i tubi nel congelatore.
Pericolo di lesioni
I contenitori di bevande
contenenti anidride carbonica
possono esplodere.
Non conservare nel
congelatore contenitori con
bevande contenenti anidride
carbonica.
Pericoli da refrigerante
Il circuito del refrigeratore
contiene nei suoi tubi piccole
quantità del gas refrigerante
R600a non inquinante ma
infiammabile. Esso non
danneggia lo strato di ozono
e non aumenta l'effetto serra. In
caso di fuoruscita, il
refrigerante può ferire gli occhi
o incendiarsi.
■ Non danneggiare i tubi.
In caso di danno ai tubi:
■ Tenere le fonti di calore
lontane dall'apparecchio.
■ Ventilare l'ambiente.
■ Spegnere l’apparecchio ed
estrarre la spina
d’alimentazione.
■ Rivolgersi al servizio di
assistenza.
71
Page 72

it Uso corretto
Evitare pericoli a bambini e persone a rischio
Sussiste pericolo per:
■ bambini,
■ persone con limiti fisici,
psichici o di percezione,
■ persone non
sufficientemente informate
sull'uso sicuro
dell'apparecchio.
Provvedimenti:
■ accertarsi che i bambini e le
persone a rischio abbiano
compreso i pericoli.
■ Una persona responsabile
della sicurezza è tenuto a
sorvegliare o istruire i
bambini e le persone a
rischio in rapporto con
l'apparecchio.
■ Permettere l’uso
dell’apparecchio solo a
bambini in età di 8 anni
o superiore.
■ Sorvegliare i bambini
durante la pulizia e la
manutenzione.
■ Non permettere che i
bambini giochino con
l'apparecchio.
Pericolo di asfissia
■ Per apparecchi con serratura
della porta: conservare la
chiave fuori della portata dei
bambini.
■ Non abbandonare parti
dell’imballaggio che
possano essere fonte
di gioco per i bambini.
Danni materiali
Per evitare danni materiali:
■ Non salire su zoccolo, parti
estraibili o porte né
sostenersi sugli stessi.
■ Tenere le parti in materiale
plastico e le guarnizioni delle
porte sempre libere da olio
e grasso.
■ Evitare di esercitare trazioni
sul cavo linea,
ma impugnare correttamente
la spina.
Peso
Nell'installazione e nel trasporto
di questo apparecchio
considerare che è molto
pesante.
~ "Luogo d’installazione"
a pagina 74
8 Uso corretto
Uso corretto
Utilizzare questo apparecchio
■ solo per raffreddare e congelare
alimenti e per la produzione
di ghiaccio.
■ solo nell'uso domestico e nella sfera
privata.
■ solo osservando queste istruzioni
per l'uso.
Questo apparecchio è progettato solo
per l'utilizzo fino ad un'altezza di
massimo 2000 metri sul livello del
mare.
72
Page 73

Tutela dell'ambiente it
7 Tutela dell'ambiente
Tutela dell'ambiente
Imballaggio
Tutti i materiali sono compatibili con
l'ambiente e riciclabili:
■ Si prega di smaltire le confezioni nel
rispetto dell’ambiente.
■ Informarsi sulle possibilità
di smaltimento presso il proprio
rivenditore specializzato o presso
l'amministrazione pubblica.
Apparecchio dismesso
Un corretto smaltimento nel rispetto
dell’ecologia, permette di recuperare
materie prime pregiate.
:Avviso
I bambini possono restare imprigionati nell'apparecchio e soffocare!
■ Per rendere difficile ai bambini
l'ingresso nell'apparecchio, non
rimuovere dal suo interno ripiani
e contenitori.
■ Tenere i bambini lontano
dall'apparecchio dismesso.
Attenzione!
Possibile fuoruscita di refrigerante
e gas dannosi.
Non danneggiare i tubi del circuito
refrigerante e l'isolamento.
1. Staccare la spina di alimentazione.
2. Troncare il cavo di allacciamento
alla rete.
3. Fare smaltire l'apparecchio a regola
d'arte.
Questo apparecchio dispone di
contrassegno ai sensi della
direttiva europea 2012/19/UE in
materia di apparecchi elettrici ed
elettronici (waste electrical and
electronic equipment - WEEE).
Questa direttiva definisce le norme per
la raccolta e il riciclaggio degli
apparecchi dismessi valide su tutto il
territorio dell’Unione Europea.
5 Installazione
e allacciamento
Installazione e allacciamento
Contenuto della confezione
Dopo lo sballaggio controllare
l’apparecchio per accertare eventuali
danni di trasporto.
In caso di contestazioni rivolgersi al
fornitore presso il quale l’apparecchio
è stato acquistato oppure al nostro
servizio di assistenza clienti.
~ "Servizio di assistenza clienti"
a pagina 90
La dotazione comprende i seguenti
componenti:
■ Apparecchio da incasso
■ Accessori (a secondo del modello)
■ Busta con il materiale utile al
montaggio
■ Istruzioni per l'uso
■ Instruzioni per l’installazione
■ Libretto del centro di assistenza
tecnica autorizzato
■ Allegato di garanzia convenzionale
■ Informazioni sul consumo energetico
e sui possibili rumori
73
Page 74

it Installazione e allacciamento
Dati tecnici
Il refrigerante, il contenuto utile ed altri
dati tecnici sono indicati sulla targhetta
porta-dati.
~ "Conoscere l'apparecchio"
a pagina 77
Installazione dell'apparecchio
Luogo d’installazione
Sussiste una relazione circa la quantità
di gas refrigerante contenuto in un
apparecchio e la cubatura del locale
dove è posizionato. In ambienti troppo
piccoli, in caso di fuga si può formare
una miscela infiammabile d’aria e gas.
Ogni 8 g di refrigerante l’ambiente deve
disporre di un volume minimo di 1 m³.
La quantità di refrigerante del vostro
apparecchio è indicata sulla targhetta
d’identificazione nell’interno
dell’apparecchio.
~ "Conoscere l'apparecchio"
a pagina 77
A seconda del modello l'apparecchio
può pesare fino a 70 kg.
Temperatura ambiente ammessa
La temperatura ambiente ammessa
dipende dalla classe climatica
dell'apparecchio.
La classe climatica è indicata sulla
targhetta porta-dati.
~ "Conoscere l'apparecchio"
a pagina 77
Classe climatica
SN +10 °C ... 32 °C
N +16 °C ... 32 °C
ST +16 °C ... 38 °C
T +16 °C ... 43 °C
Nei limiti della temperatura ambiente
ammessa l'apparecchio è pienamente
efficiente.
Se un apparecchio della classe
climatica SN viene messo in funzione
a temperature ambiente inferiori,
possono essere esclusi danni
all’apparecchio fino ad una temperatura
ambiente di +5 °C.
Temperatura ambiente ammessa
Profondità della nicchia
Per l'apparecchio si consiglia
una profondità della nicchia di 56 cm.
Una minore profondità della nicchia
– minimo 55 cm – fa aumentare
leggermente l'assorbimento di energia.
Installazione side-by-side
È possibile collocare gli apparecchi uno
di fianco all'altro mantenendo una
distanza minima di 15 cm.
74
Page 75

Installazione e allacciamento it
Risparmio energetico
Osservando le avvertenze seguenti l'apparecchio consuma meno energia elettrica.
Avvertenza: La disposizione delle parti dell'attrezzatura non incide sul consumo di energia dell'apparecchio.
Installazione dell'apparecchio
Proteggere l'apparecchio dalla luce diretta del sole. A più basse temperature ambiente l'apparecchio
Disporre l'apparecchio alla maggiore distanza
possibile da radiatori, piano di cottura e altre fonti
di calore:
Da cucine elettriche o a gas: 3 cm.
Da stufe ad olio o a carbone: 30 cm.
Avvertenza: Quando questo non è possibile,
inserire un pannello isolante fra apparecchio e fonte
di calore.
Scegliere un luogo di installazione con una
temperatura ambiente di ca. 20 °C.
Utilizzare una profondità della nicchia di 56 cm.
Attenzione!
Pericolo di scottature!
Singole parti dell'apparecchio si riscaldano durante
il funzionamento. Un contatto con queste parti può
causare ustioni.
Non coprire o ostruire le aperture di ventilazione.
Ventilare l'ambiente ogni giorno.
deve raffreddare con minore frequenza e consuma
perciò meno energia elettrica.
L'aria circolante lungo la parete posteriore
dell'apparecchio non si riscalda eccessivamente.
L'apparecchio consuma meno energia elettrica se
l'aria calda può defluire.
Uso dell'apparecchio
Aprire la porta dell'apparecchio solo brevemente. Si evita così un eccessivo riscaldamento dell'aria
Trasportare gli alimenti acquistati in una borsa
termica e metterli subito nell'apparecchio.
Lasciare raffreddare gli alimenti e le bevande, se
caldi, prima di introdurli nell’apparecchio!
Per scongelare gli alimenti surgelati metterli nel
frigorifero, per sfruttare il freddo accumulato dai
surgelati.
Lasciare sempre un poco di spazio fra gli alimenti
e la parete posteriore.
Conservare gli alimenti in confezioni ermetiche.
nell'apparecchio. L'apparecchio deve raffreddare
con minore frequenza e consuma così meno
energia elettrica.
L'aria può così circolare e l'umidità dell'aria resta
costante. L'apparecchio deve raffreddare con
minore frequenza e consuma così meno energia
elettrica.
75
Page 76

it Installazione e allacciamento
Uso dell'apparecchio
Aspirare una volta all'anno il lato posteriore
dell'apparecchio.
Non coprire o ostruire le aperture di ventilazione.
--------
Prima del primo utilizzo
1. Togliere il materiale d'informazione
e rimuovere i nastri adesivi e il film
protettivo.
2. Pulire l’apparecchio.
~ "Pulizia" a pagina 86
Allacciamento elettrico
Attenzione!
Non collegare l'apparecchio ad una
presa a risparmio energetico
elettronica.
Avvertenza: L'apparecchio può essere collegato ad inverter gestiti dalla rete ed a inverter sinusoidali. Gli inverter gestiti dalla rete sono utilizzati in impianti fotovoltaici con collegamento diretto alla rete elettrica pubblica. In caso di soluzioni ad isola utilizzare inverter sinusoidali. Le soluzioni ad isola, ad es. sulle navi o in baite di montagna, non hanno un allacciamento diretto alla rete elettrica pubblica.
L'aria circolante lungo la parete posteriore
dell'apparecchio non si riscalda eccessivamente.
L'apparecchio consuma meno energia elettrica se
l'aria calda può defluire.
1. Per evitare danni al compressore,
dopo l'installazione dell'apparecchio
attendere almeno 1 ora prima di
collegarlo.
2. Collegare l'apparecchio tramite una
presa elettrica installata a norma.
La presa elettrica deve soddisfare
i dati seguenti:
Presa con 220 V ... 240 V
Linea di terra 50 Hz
Fusibile 10 A ... 16 A
Fuori dell'Europa: verificare se il tipo
di corrente indicato dell'apparecchio
coincide con i valori della propria
rete elettrica. I dati dell'apparecchio
sono indicati sulla targhetta
porta-dati.
~ "Conoscere l'apparecchio"
a pagina 77
3. Collegare l'apparecchio ad una
presa elettrica in prossimità
dell'apparecchio.
La presa deve essere liberamente
accessibile anche dopo
l'installazione dell'apparecchio.
76
Page 77

Conoscere l'apparecchio it
* Conoscere
l'apparecchio
Conoscere l'apparecchio
Aprire l'ultima pagina con le figure.
A seconda della dotazione sono
possibili differenze fra apparecchio
e figure.
Apparecchio
~ Figura !
* Non in tutti i modelli.
# Frigorifero
+ Congelatore
(-h Elementi di comando
)"* Ventola
)* Illuminazione
)2 Ripiano estraibile
): Cassetto per verdure con
)B Targhetta identificativa
)J* Vassoio per frutti di bosco
)R Calendario di congelamento
)Z Cassetto surgelati
)b Scomparto per burro
)j* Balconcino Vario
1" Ripiano per bottiglie grandi
regolatore di umidità
e formaggio
Elementi di comando
~ Figura "
( Pulsante #
Accende o spegne
l'apparecchio.
0 Pulsante Super congelatore
Attiva o disattiva
il super-congelamento.
8 Pulsante K/J congelatore
Regola la temperatura del
congelatore.
@ Display temperatura congelatore
Indica in °C la temperatura
regolata.
H Pulsante Alarm
Disattiva il segnale acustico.
P Pulsante Holiday
Attivare o disattivare la modalità
vacanza.
X Pulsante K/J frigorifero
Regola la temperatura del
frigorifero.
` Display temperatura frigorifero
Indica in °C la temperatura
regolata.
h Pulsante Super frigorifero
Attiva o disattiva
il super-raffreddamento.
Caratteristiche
(non in tutti i modelli)
Ripiano
~ Figura #
La posizione del ripiano è variabile:
■ estrarre il ripiano e rimuoverlo.
Ripiano variabile
~ Figura $
Possono essere introdotti contenitori alti
(ad es. bricchi o bottiglie):
■ Estrarre la parte anteriore del ripiano
e spingerla sotto la parte posteriore.
77
Page 78

it Conoscere l'apparecchio
Ripiano estraibile
~ Figura %
È possibile vedere meglio il contenuto:
■ Estrarre il ripiano.
Il ripiano può essere completamente
rimosso:
1. Premere e tenere premuti i due
pulsanti sotto il ripiano.
2. Tirare i ripiani, abbassarli e ruotarli
lateralmente.
Contenitore
~ Figura &
Il cassetto può essere rimosso:
■ Estrarre il cassetto fino all’arresto,
sollevarlo avanti ed estrarlo.
Scompartimento per il burro e scompartimento per il formaggio
~ Figura '
Lo scomparto si apre facilmente:
■ premere leggermente la parte in
basso al centro dello sportello.
Lo scomparto si apre verso il basso.
Lo sportello si sposta sotto lo
scomparto.
Balconcino
~ Figura (
Il balconcino può essere rimosso:
■ Sollevare ed estrarre il balconcino.
Balconcino Vario
~ Figura )
Nel balconcino inferiore possono
essere conservate bottiglie grandi:
■ Spostare il balconcino verso destra
o sinistra.
Fermabottiglie
~ Figura *
Quando si apre e chiude la porta:
■ Il fermabottiglie impedisce la caduta
di bottiglie.
Calendario di congelamento
~ Figura !/)R
Il calendario di congelamento indica la
massima durata di conservazione in
mesi ad una temperatura costante di
–18 °C.
Vaschetta del ghiaccio
Possono essere prodotti cubetti
di ghiaccio:
1. Riempire la vaschetta del ghiaccio
per 3/4 con acqua e inserirla nel
congelatore.
Avvertenza: Staccare la vaschetta del ghiaccio eventualmente attaccata solo con un oggetto non acuminato (manico di cucchiaio).
2. Per staccare i cubetti di ghiaccio
mettere brevemente la vaschetta
sotto acqua corrente oppure torcerla
leggermente.
Accumulatori del freddo
In caso di interruzione dell'energia
elettrica o di un guasto:
■ L'accumulatore di freddo ritarda
il riscaldamento dei surgelati
conservati nell'interno.
Avvertenza: La massima durata di conservazione si raggiunge deponendo l'accumulatore di freddo sopra gli alimenti nel primo scomparto superiore.
L'accumulatore di freddo può essere
utilizzato per la temporanea
conservazione al fresco di alimenti, ad
es. in una borsa termica.
78
Page 79

Utilizzare l'apparecchio it
1 Utilizzare
l'apparecchio
Utilizzare l'apparecchio
Accensione dell’apparecchio
1. Premere il tasto #.
L’apparecchio inizia a raffreddare.
Segnale acustico, display
temperatura del congelatore
intermittente e tasto Alarm acceso
indicano che la temperatura nel
congelatore è ancora troppo alta.
2. Premere il tasto Alarm.
Il segnale acustico si disattiva.
3. Regolare la temperatura desiderata.
~ "Impostazione della temperatura"
a pagina 79
Istruzioni per il funzionamento
■ Dopo l’accensione possono
trascorrere diverse ore prima che
le temperature regolate vengano
raggiunte. Non introdurre alimenti
prima che sia stata raggiunta la
temperatura scelta.
■ Il lato anteriore dell’apparecchio è in
parte leggermente riscaldato, questo
impedisce la formazione
di condensa nella zona
della guarnizione della porta.
■ Se la porta del congelatore, dopo
averla chiusa, oppone resistenza ad
una nuova apertura, attendere un
attimo finché le pressioni interne non
si siano compensate.
Spegnere e mettere fuori servizio l’apparecchio
Spegnimento dell’apparecchio
■ Premere il tasto #.
L’apparecchio non raffredda più.
Mettere fuori servizio l’apparecchio
Quando non si usa l’apparecchio per un
lungo periodo:
1. Premere il tasto #.
L’apparecchio non raffredda più.
2. Estrarre la spina di alimentazione o
disinserire il dispositivo di sicurezza.
3. Pulire l’apparecchio.
4. Lasciare aperto l’apparecchio.
Impostazione della temperatura
Temperatura consigliata
Frigorifero: +4 °C
Congelatore: –18 °C
Frigorifero
■ Premere ripetutamente il pulsante
K/J finché il display non indica
la temperatura desiderata.
Congelatore
■ Premere ripetutamente il pulsante
K/J finché il display non indica
la temperatura desiderata.
79
Page 80

it Utilizzare l'apparecchio
Adesivo OK
(non in tutti i modelli)
Con l'adesivo OK si può controllare
se la temperatura nel frigorifero
ha raggiungo +4 °C o meno.
Se l'adesivo non indica OK, ridurre
progressivamente la temperatura.
Dopo la messa in funzione
dell'apparecchio possono passare
fino a 12 ore prima che sia raggiunta
la temperatura regolata.
Corretta regolazione
Super-raffreddamento
Con il super-raffreddamento il frigorifero
raffredda al massimo della potenza.
Inserire il super-raffreddamento per es.:
■ prima d’introdurre grandi quantità
di alimenti
■ per raffreddare rapidamente
bevande
Super-congelamento
Con il super-congelamento
il congelatore raffredda al massimo
della potenza.
Inserire il super-congelamento ad es.:
■ Per congelare rapidamente
e completamente gli alimenti.
■ 4–6 ore prima di introdurre una
quantità di generi alimentari di 2 kg
o superiore
■ per utilizzare la massima capacità di
congelamento
~ "Massima capacità
di congelamento" a pagina 83
Avvertenza: Con il super-congelamento inserito, maggiori sono i rumori di funzionamento.
Dopo ca. 2 ^ giorni l'apparecchio
commuta a funzionamento normale.
Attivare/disattivare il
super-congelamento:
■ Premere il tasto Super.
Il pulsante è acceso quando il
super-congelamento è inserito.
Avvertenza: Con il super-raffreddamento attivato il rumore dell'apparecchio aumenta.
Dopo 15 ore l'apparecchio commuta
a funzionamento normale.
Attivare/disattivare il
super-raffreddamento:
■ Premere il tasto Super.
Il pulsante è acceso quando il
super-raffreddamento è inserito.
80
Modo Vacanza
In caso di assenza prolungata si può
commutare l’apparecchio nel modo
Vacanza, per il risparmio energetico.
La temperatura nel frigorifero viene
impostata automaticamente a +14 °C.
In questo periodo non immettere
alimenti nel frigorifero.
La temperatura del congelatore resta
invariata.
Attivare/disattivare la modalità vacanza:
■ Premere il tasto Holiday.
Quando la modalità vacanza
è attivata, il pulsante si accende ed
il display temperatura del frigorifero
non indica più la temperatura.
Page 81

Allarme it
M Allarme
Allarme
Allarme porta
L’allarme porta (suono continuo) si
attiva quando la porta dell’apparecchio
resta aperta per oltre un minuto.
■ Chiudere la porta o premere il
pulsante Alarm.
Il segnale acustico viene disattivato.
Allarme temperatura
Se nel congelatore la temperatura
aumenta troppo scatta l'allarme
temperatura (segnale acustico
intermittente).
Attenzione!
Durante lo sbrinamento possono
svilupparsi batteri e i prodotti surgelati
possono deteriorarsi.
Non ricongelare gli alimenti
parzialmente o completamente
decongelati.
Ricongelare solo dopo cottura
o arrosto. Non utilizzare più interamente
la durata max. di conservazione.
Avvertenza: Senza pericolo per gli alimenti surgelati l'allarme può attivarsi nei casi seguenti:
■ L'apparecchio viene messo
in funzione.
■ Vengono introdotte grandi quantità
di alimenti freschi.
■ Porta del congelatore aperta per
troppo tempo.
Visualizzare la massima temperatura
raggiunta e disattivare il segnale
acustico:
■ Premere il tasto Alarm.
Il display indica brevemente
la massima temperatura raggiunta
nel congelatore. Dopo il display
indica di nuovo la temperatura
regolata.
Iniziando da questo momento
la massima temperatura viene
di nuovo rilevata e memorizzata.
Avvertenza: Il tasto Alarm resta acceso finché la temperatura regolata non è stata di nuovo raggiunta.
U Frigorifero
Frigorifero
Il frigorifero è adatto alla conservazione
di carne, insaccati di carne, pesce,
latticini, uova, alimenti pronti e prodotti
da forno.
La temperatura può essere regolata da
+2 °C ... +8 °C.
Mediante conservazione in frigorifero
anche alimenti altamente deperibili
possono essere conservati a breve
o medio termine. Quanto più bassa
è la temperatura selezionata, tanto più
lentamente si sviluppa il deterioramento
enzimatico, chimico o causato
da microrganismi. Una temperatura di
+4 °C o inferiore garantisce la
conservazione della freschezza ottimale
e la sicurezza degli alimenti conservati.
81
Page 82

it Frigorifero
Tenere presente nella conservazione
■ Conservare alimenti freschi e integri.
Così la qualità e la freschezza si
conservano più a lungo.
■ Per prodotti pronti e alimenti
confezionati non superare la data
minima di conservazione o la data di
consumo indicata dal produttore.
■ Sistemare gli alimenti ben
confezionati o coperti, per
conservare aroma, colore
e freschezza.
Si evitano così trasmissioni di gusto
e alterazione di colore delle parti in
materiale sintetico.
■ Lasciare raffreddare alimenti
e bevande caldi e solo dopo
introdurli nel frigorifero.
Considerare le zone fredde nel frigorifero
La circolazione dell’aria nel frigorifero,
genera delle zone con temperature
differenti.
La zona più fredda
La zona più fredda si trova fra la freccia
impressa lateralmente e il sottostante
ripiano.
~ Figura +
Avvertenza: Conservare nella zona più fredda gli alimenti delicati (per es. pesce, salsiccia e carne).
Zona più calda
La zona meno fredda è nella parte più
alta della porta.
Cassetto per verdure con regolatore di umidità
~ Figura ,
Il cassetto per verdure è il luogo di
conservazione ottimale per frutta fresca
e verdura. L'umidità dell'aria nel
cassetto verdura può essere adattata
per mezzo del regolatore umidità e di
una speciale guarnizione. Con ciò la
frutta e verdura fresche possono essere
conservate fino a raddoppiare la durata
rispetto alla conservazione tradizionale.
L'umidità dell'aria nel cassetto per
verdure può essere regolata a seconda
del tipo e della quantità dei prodotti da
conservare:
■ Prevalentemente frutta e, in caso
di carico elevato, regolare una
bassa umidità dell'aria
■ Prevalentemente verdura e, in caso
di carico misto o di carico ridotto,
regolare a maggiore umidità dell'aria
Avvertenze
■ Per la conservazione ottimale
della qualità e dell'aroma di frutta
(ad es. ananas, banane, papaie ed
agrumi) e ortaggi (ad es. melanzane,
cetrioli, zucchine, peperoni,
pomodori e patate) che temono
il freddo, conservarli fuori del
frigorifero a temperature di circa
+ 8 °C ... +12 °C.
■ A seconda della quantità e del
prodotto conservato, nel cassetto
verdura può formarsi condensa.
Rimuovere la condensa con un
panno asciutto e adattare l’umidità
dell’aria nel cassetto verdura con il
regolatore umidità.
Avvertenza: Conservare nelle zone meno fredde ad es. formaggio duro e burro. Il formaggio può così continuare a diffondere il suo aroma e il burro resta spalmabile.
82
Page 83

Congelatore it
W Congelatore
Congelatore
Il congelatore è adatto per:
■ conservare surgelati
■ produrre cubetti di ghiaccio
■ congelare alimenti
La temperatura può essere regolata
da –16 °C ... –24 °C.
Con la conservazione nel congelatore
gli alimenti deteriorabili possono essere
conservati a lungo senza apprezzabili
perdite di qualità, poiché le basse
temperature rallentano notevolmente
o addirittura arrestano il deterioramento.
L'aspetto, l'aroma e tutte le preziose
sostanze si conservano in massima
parte integre.
La conservazione a lungo termine degli
alimenti va eseguita a –18 °C o a
temperature più basse.
Il tempo necessario per il congelamento
completo di alimenti freschi dipende dai
fattori seguenti:
■ temperatura regolata
■ genere di alimento
■ riempimento del congelatore
■ quantità e tipo di conservazione
Massima capacità di congelamento
Condizioni per la max. capacità di congelamento
1. Circa 24 ore prima di introdurre
prodotti freschi: accendere il
super-congelamento.
~ "Super-congelamento"
a pagina 80
2. Togliere i contenitori dal congelatore
e accumulare gli alimenti
direttamente sui ripiani e sul fondo
del congelatore.
3. Riempire con gli alimenti prima
il primo scomparto superiore. Qui
essi vengono completamente
congelati nel modo più rapido.
4. Se lo scomparto superiore non
è sufficiente, conservare la quantità
restante nello scomparto sottostante
iniziando da avanti a destra.
5. Congelare gli alimenti freschi
possibilmente vicino alle pareti
laterali.
Sfruttare interamente il volume utile
Per sistemare la massima quantità
di surgelati:
■ Rimuovere tutte le parti
dell'attrezzatura interna.
■ Deporre gli alimenti direttamente sui
ripiani e sul fondo del congelatore.
La massima capacità di congelamento
indica la quantità di alimenti, che può
essere completamente congelata anche
nel suo interno in 24 ore.
Sulla targhetta porta-dati sono riportati
i dati della max. capacità di
congelamento.
~ "Conoscere l'apparecchio"
a pagina 77
Per sfruttare la massima capacità
di congelamento, accendere il
super-congelamento 24 ore prima
di introdurre gli alimenti freschi.
Acquisto di alimenti surgelati
■ Prestare attenzione all'integrità delle
confezioni.
■ Non superare la data di scadenza
minima.
■ La temperatura
nell’espositore-congelatore di
vendita deve essere –18 °C
o inferiore.
■ Trasportare gli alimenti surgelati
possibilmente in una borsa termica
e conservarli poi al più presto nel
congelatore.
83
Page 84

it Congelatore
Tenere presente nella sistemazione
■ Congelare grandi quantità di alimenti
nello scomparto superiore.
In esso si congelano in modo
particolarmente rapido e delicato.
■ Deporre gli alimenti sparsi sulla
superficie negli scomparti o nei
cassetti surgelati.
■ Non mettere gli alimenti da surgelare
a contatto con gli alimenti surgelati.
Se necessario, spostare gli alimenti
surgelati nei cassetti dei surgelati.
■ Importante per la perfetta
circolazione dell'aria
nell'apparecchio:
Spingere nell'interno i cassetti
surgelati fino all’arresto.
Congelamento di alimenti freschi
Congelare soltanto alimenti freschi
e integri.
Gli alimenti che si consumano cotti,
arrostiti o cotti in forno sono più adatti
per il congelamento rispetto agli
alimenti che si consumano crudi.
Prima del congelamento, a seconda
dell'alimento, eseguire i processi
di preparazione per conservare al
meglio il valore nutritivo, l'aroma
e il colore:
■ Verdura: lavare, sminuzzare,
sbollentare.
■ Frutta: lavare, snocciolare ed
eventualmente sbucciare,
aggiungere eventualmente zucchero
o soluzione di acido ascorbico.
Indicazioni a proposito sono disponibili
in ricettari o riviste di cucina.
Sono idonei per il congelamento
■ Prodotti da forno
■ Pesce e frutti di mare
■ Carne
■ Selvaggina e pollame
■ Verdura, frutta ed erbe aromatiche
■ Uova senza buccia
■ Latticini, ad es. formaggio, burro
e quark
■ Alimenti pronti e residui di pietanze,
ad es. minestre, piatti unici, carne
cotta, pesce cotto, alimenti di patate,
sformati e dolci
Non sono idonei per il congelamento
■ I tipi di ortaggi, che solitamente
si consumano crudi, ad es. insalata
in foglia o ravanelli
■ Uova non sbucciate o uova sode
■ Uva
■ Mele, pere e pesche intere
■ Yogurt, latte cagliato, panna acida,
crème fraiche e maionese
Confezionamento di alimenti surgelati
Il giusto tipo di imballaggio e scelta
del materiale influenzano in modo
determinante la conservazione della
qualità del prodotto ed evitano
lo sviluppo di ustione da freddo.
1. Introdurre l’alimento nella
confezione.
2. Fare uscire l’aria.
3. Chiudere le confezioni a tenuta
d'aria, per evitare che gli alimenti
perdano il gusto o possano
essiccarsi.
4. Scrivere sulla confezione
il contenuto e la data
di congelamento.
84
Page 85

Sbrinamento it
Imballaggio idoneo:
■ Film di plastica
■ Film tubolare in polietilene (PE)
■ Film di alluminio
■ Contenitori freezer
Chiusure adatte:
■ Anelli di gomma
■ Clip di plastica
■ Nastri adesivi resistenti al freddo
Confezioni non adatte:
■ Carta da imballaggio
■ Carta pergamena
■ Cellofan
■ Sacchetti per rifiuti e borse della
spesa usate
Durata di conservazione dei prodotti surgelati a –18 °C
Pesce, salsiccia, pietanze
pronte, prodotti da forno:
fino a 6 mesi
Carne, pollame: fino a 8 mesi
Frutta, verdura: fino a 12 mesi
Scongelamento di alimenti congelati
Per conservare al meglio la qualità del
prodotto, il metodo di scongelamento
va adeguato all'alimento e all'uso
previsto.
Metodi di scongelamento:
■ nel frigorifero (particolarmente
adatto per alimenti di origine
animale, come pesce, carne,
formaggio, quark)
■ a temperatura ambiente (pane)
■ microonde (alimenti per il consumo
immediato o la preparazione
immediata)
■ forno/fornello (alimenti per il
consumo immediato o la
preparazione immediata)
Attenzione!
Non ricongelare gli alimenti
parzialmente o completamente
decongelati. Ricongelare solo dopo
aver trasformato il prodotto in alimento
pronto (cotto o arrosto).
Considerare una durata di
conservazione inferiore del prodotto
surgelato.
= Sbrinamento
Sbrinamento
Frigorifero
Durante il funzionamento del
refrigeratore, sulla parete posteriore si
formano gocce di condensa o brina.
Questo dipende dal funzionamento.
Non è necessario asciugare le gocce
di condensa o la brina. La parete
posteriore si sbrina automaticamente.
L’acqua di sbrinamento scorre nel
relativo convogliatore.
~ Figura .
Dal convogliatore di scolo dell'acqua di
sbrinamento l'acqua di scorre nella
vaschetta di evaporazione e qui
evapora.
Avvertenza: Per fare defluire l'acqua di sbrinamento ed evitare la formazione di odori, mantenere puliti il convogliatore di scolo dell'acqua di sbrinamento e il foro di scarico.
85
Page 86

it Pulizia
Congelatore
Per evitare che gli alimenti si
scongelino, il congelatore non esegue
lo sbrinamento automaticamente. Uno
strato di brina nel congelatore rallenta
il passaggio del freddo agli alimenti
congelati e aumenta il consumo di
energia elettrica.
■ Rimuovere regolarmente lo strato
di brina.
Attenzione!
Non danneggiare i tubi del circuito
di raffreddamento.
In caso di fuoriuscita, il refrigerante può
provocare lesioni agli occhi
o incendiarsi.
■ Non raschiare lo strato di brina
oppure il ghiaccio con un coltello
o con un oggetto acuminato.
Procedere come segue:
1. Attivare la funzione
super-congelamento ca. 4 ore prima
dello sbrinamento.
Gli alimenti raggiungono così
temperature molto basse e possono
essere conservati a temperatura
ambiente più a lungo.
2. Togliere gli alimenti congelati e
collocarli in un luogo fresco.
3. Spegnere l’apparecchio.
4. Estrarre la spina di alimentazione
o disinserire il dispositivo di
sicurezza.
5. Per accelerare lo sbrinamento,
mettere nel congelatore una pentola
con acqua bollente su un
sottopentola.
6. Rimuovere l'acqua prodotta dallo
scongelamento con un panno o una
spugna.
7. Asciugare il congelatore.
8. Accendere l’apparecchio.
9. Introdurre gli alimenti congelati.
D Pulizia
Pulizia
Attenzione!
Evitare danni all'apparecchio e alle sue
dotazioni.
■ Per la pulizia non utilizzare prodotti
abrasivi, prodotti a base di cloro,
solventi o acidi.
■ Non usare spugne abrasive
o spugne che graffiano.
Sulle superfici metalliche può
formarsi corrosione.
■ Non lavare i ripiani ed i contenitori
nella lavastoviglie.
Questi elementi si possono
deformare.
Procedere come segue:
1. Spegnere l’apparecchio.
2. Estrarre la spina di alimentazione
o disinserire il dispositivo di
sicurezza.
3. Estrarre gli alimenti e conservarli in
un luogo fresco.
Se disponibile: mettere sugli alimenti
l'accumulatore di freddo.
4. Se presente: attendere che lo strato
di brina si sia sciolto.
5. Pulire l’apparecchio con un panno
morbido e acqua tiepida
leggermente saponata.
Attenzione!
L'acqua di lavaggio non deve
penetrare nell'illuminazione o,
attraverso il foro di scarico, nella
zona di evaporazione.
6. Strofinare la guarnizione della porta
con acqua pura e asciugarla
accuratamente.
7. Collegare di nuovo l'apparecchio,
accenderlo e introdurre gli alimenti.
86
Page 87

Odori it
Pulire gli elementi in dotazione all’apparecchio
Per la pulizia estrarre dall'apparecchio
le parti variabili.
~ "Caratteristiche" a pagina 77
Convogliatore di drenaggio dell’acqua di sbrinamento
~ Figura .
Per il libero deflusso dell’acqua di
sbrinamento, pulire regolarmente il
convogliatore di drenaggio dell’acqua di
sbrinamento ed il foro di scarico
utilizzando bastoncini cotonati o simili.
Ripiano sopra il cassetto verdura
~ Figura -
1. Estrarre il cassetto verdura.
2. Estrarre il ripiano e smontarlo per la
pulizia.
l Odori
Odori
Nel caso si avvertano odori sgradevoli:
1. Spegnere l’apparecchio con
il pulsante Acceso/Spento #.
2. Estrarre tutti gli alimenti
dall’apparecchio.
3. Pulire il vano interno.~ "Pulizia"
a pagina 86
4. Pulire tutte le confezioni.
5. Per impedire la formazione di odori,
sigillare ermeticamente gli alimenti
che emanano forte odore.
6. Accendere di nuovo l'apparecchio.
7. Inserire gli alimenti.
8. Dopo 24 ore controllare se si è di
nuovo sviluppato odore.
9 Illuminazione
Illuminazione
L’apparecchio è dotato di
un’illuminazione a LED esente da
manutenzione.
Solo il servizio assistenza clienti
o tecnici specializzati sono autorizzati
a riparare l'illuminazione.
> Rumori
Rumori
Rumori normali
Ronzio: un motore è in funzione, ad es.
gruppo frigorifero, ventola.
Ribollire, fruscìo o gorgoglìo:
refrigerante che scorre attraverso i tubi.
Clicchettio: Inserimento
o disinserimento del motore,
di interruttori o elettrovalvole.
Crepitio: esecuzione sbrinamento
automatico.
Evitare i rumori
Appoggio non livellato
dell'apparecchio: Livellare
l'apparecchio con una livella a bolla
d'aria. Se necessario inserire sotto
spessori.
Contenitore, ripiani o balconcini
vibrano o sono bloccati: controllare le
parti di attrezzatura estraibili ed
eventualmente reinserirle.
Bottiglie o contenitori si toccano:
distanziare le bottiglie o i contenitori.
87
Page 88

it Guasti, Che fare se?
3 Guasti, Che fare se?
Guasti, Che fare se?
Prima di rivolgersi al servizio assistenza clienti, verificare sulla base di questa tabella se si riesce ad eliminare da soli le anomalie di funzionamento.
La temperatura si discosta notevolmente dalle impostazioni iniziali.
Spegnere l'apparecchio per 5 minuti.
~ "Spegnere e mettere fuori servizio
l’apparecchio" a pagina 79
Se la temperatura è troppo elevata, controllare di
nuovo la temperatura dopo circa due ore.
Se la temperatura è troppo bassa, controllare
di nuovo la temperatura il giorno seguente.
Tutte le spie spente.
La spina d’alimentazione non è inserita
correttamente.
È intervenuto il dispositivo di sicurezza. Controllare il dispositivo elettrico di sicurezza.
Manca l'energia elettrica. Controllare se vi è energia elettrica.
Il display indica E….
Il sistema elettronico ha riconosciuto un errore. Rivolgersi al servizio di assistenza clienti autorizzato!
Collegare la spina di alimentazione.
~ "Servizio di assistenza clienti" a pagina 90
Viene emesso un segnale acustico e il pulsante Alarm è acceso.
Premere il tasto Alarm. L'allarme è disattivato.
La porta dell'apparecchio è aperta. Chiudere la porta dell'apparecchio.
I passaggi dell’aria per l’aerazione sono ostruiti. Liberare le aperture di afflusso e deflusso dell'aria.
Sono state conservate grandi quantità di alimenti
Non superare la capacità massima di congelamento.
freschi.
Il display lampeggia, viene emesso un segnale acustico e il pulsante Alarm è acceso.
Premere il tasto Alarm. L'allarme è disattivato.
La porta dell'apparecchio è aperta. Chiudere la porta dell'apparecchio.
I passaggi dell’aria per l’aerazione sono ostruiti. Liberare le aperture di afflusso e deflusso dell'aria.
Sono state conservate grandi quantità di alimenti
Non superare la capacità massima di congelamento.
freschi.
88
Page 89

Guasti, Che fare se? it
L'indicatore lampeggia.
La temperatura nel congelatore è troppo elevata. Dopo avere premuto il pulsante Alarm viene
visualizzata per 5 secondi la temperatura più elevata
raggiunta nel congelatore. Premere il tasto Alarm.
Il display non lampeggia più.
L'apparecchio non raffredda, e l'illuminazione è accesa.
Modalità di esposizione attivata. Mantenere premuto il pulsante Alarm per
10 secondi, finché non viene emesso un tono
di conferma. Attendere e controllare se
l'apparecchio raffredda.
--------
89
Page 90

it Servizio di assistenza clienti
4 Servizio di assistenza
clienti
Servizio di assistenza clienti
Contattate il nostro servizio assistenza
clienti, nel caso in cui non è possibile
risolvere eventuali anomalie di
funzionamento. Troviamo sempre una
soluzione idonea, anche per evitare una
inutile uscita del tecnico.
L’elenco dei centri di assistenza più
vicini sono indicati o fornibili dal servizio
assistenza clienti.
Alla chiamata indicare la sigla del
prodotto (E-Nr.) e il numero di
fabbricazione (FD), che si trovano sulla
targhetta porta-dati.
~ "Conoscere l'apparecchio"
a pagina 77
Fidatevi della competenza del
costruttore. La competenza del
produttore e dei tecnici dei centri di
assistenza autorizzati, garantiscono la
qualità delle riparazioni, con l’impiego di
parti di ricambio originali.
Autotest dell’apparecchio
L'apparecchio dispone di un
programma di autotest che indica
i guasti, che il servizio assistenza clienti
può riparare.
■ Se alla fine dell'autotest viene
emesso un doppio segnale acustico:
l'apparecchio funziona regolarmente.
■ Quando il pulsante Super del
congelatore lampeggia per
10 secondi e viene emesso 5 volte il
segnale acustico: informare il
servizio assistenza clienti.
Alla fine del programma l'apparecchio
passa al funzionamento normale.
Ordine di riparazione e consulenza in caso di guasti
I dati di contatto di tutti i paesi sono
reperibili nell'elenco dei centri di
assistenza clienti allegato.
I 800-522822 Linea verde
CH 0848 840 040
--------
Garanzia
Per avere maggiori dettagli sulla durata
della garanzia e sulle condizioni di
garanzia nel proprio paese rivolgersi al
proprio servizio assistenza clienti, al
proprio rivenditore specializzato
o consultare il nostro sito Internet.
1. Spegnere l’apparecchio ed
attendere 5 minuti.
2. Accendere l’apparecchio.
3. Entro i primi 10 secondi dopo
l'accensione premere e mantenere
premuto pulsante Super del
congelatore per 3–5 secondi.
L'autotest inizia, si sente un tono
continuo.
90
Page 91

nl
nl Inhoud
nl Gebruiksaanwijzing
( Veiligheidsvoorschriften . . . . . . 93
Over deze gebruiksaanwijzing . . . . . 93
Kans op explosie . . . . . . . . . . . . . . . 93
Risico van een elektrische schok . . . 93
Verbrandingsgevaar door kou . . . . . 93
Risico op letsel . . . . . . . . . . . . . . . . . 94
Gevaren door of van
het koelmiddel . . . . . . . . . . . . . . . . . 94
Vermijden van risico's voor
kinderen en kwetsbare personen . . . 94
Materiële schade . . . . . . . . . . . . . . . 95
Gewicht. . . . . . . . . . . . . . . . . . . . . . . 95
1 Apparaat bedienen . . . . . . . . . 102
Apparaat inschakelen . . . . . . . . . . . 102
Apparaat uitschakelen en
buiten werking stellen . . . . . . . . . . . 102
Temperatuur instellen . . . . . . . . . . . 102
Superkoelen . . . . . . . . . . . . . . . . . . 103
Supervriezen . . . . . . . . . . . . . . . . . .103
Vakantiemodus . . . . . . . . . . . . . . . . 103
M Alarm . . . . . . . . . . . . . . . . . . . . 104
Deuralarm . . . . . . . . . . . . . . . . . . . .104
Temperatuuralarm . . . . . . . . . . . . . . 104
8 Correct gebruik van
het apparaat . . . . . . . . . . . . . . . . 95
7 Milieubescherming . . . . . . . . . . 95
Verpakking . . . . . . . . . . . . . . . . . . . . 95
Oude apparaten . . . . . . . . . . . . . . . . 96
5 Installeren en aansluiten. . . . . . 96
Inhoud van de verpakking . . . . . . . . 96
Technische gegevens. . . . . . . . . . . . 96
Apparaat installeren . . . . . . . . . . . . . 97
Nisdiepte . . . . . . . . . . . . . . . . . . . . . 97
Side-by-side- opstelling . . . . . . . . . . . 97
Energie besparen . . . . . . . . . . . . . . . 98
Voor het eerste gebruik . . . . . . . . . . 99
Elektrische aansluiting . . . . . . . . . . . 99
* Het apparaat leren kennen . . . 100
Apparaat. . . . . . . . . . . . . . . . . . . . . 100
Bedieningselementen . . . . . . . . . . . 100
Uitrusting . . . . . . . . . . . . . . . . . . . . 100
U Koelvak. . . . . . . . . . . . . . . . . . . 104
In acht nemen bij het bewaren . . . . 105
Let op de koudezones in
het koelvak . . . . . . . . . . . . . . . . . . .105
Groentelade met
vochtigheidsregelaar . . . . . . . . . . . . 105
W Vriesvak . . . . . . . . . . . . . . . . . . 106
Maximale invriescapaciteit. . . . . . . . 106
Vriesvermogen volledig benutten . . 106
Inkopen van diepvriesproducten . . . 106
Attentie bij het inruimen. . . . . . . . . . 107
Verse levensmiddelen invriezen . . . 107
Ontdooien van diepvrieswaren . . . . 108
= Ontdooien . . . . . . . . . . . . . . . . 108
Koelvak . . . . . . . . . . . . . . . . . . . . . .108
Vriesvak. . . . . . . . . . . . . . . . . . . . . . 109
91
Page 92

nl
D Schoonmaken . . . . . . . . . . . . . 109
Schoonmaken van het interieur . . . .110
l Luchtjes. . . . . . . . . . . . . . . . . . 110
9 Verlichting . . . . . . . . . . . . . . . . 110
> Geluiden . . . . . . . . . . . . . . . . . 110
Normale geluiden . . . . . . . . . . . . . .110
Voorkomen van geluiden. . . . . . . . .110
3 Storingen, wat te doen?. . . . . 111
4 Servicedienst . . . . . . . . . . . . . 113
Zelftest apparaat . . . . . . . . . . . . . . .113
Verzoek om reparatie en
advies bij storingen . . . . . . . . . . . . .113
Garantie. . . . . . . . . . . . . . . . . . . . . .113
92
Page 93

Veiligheidsvoorschriften nl
(
Veiligheidsvoorschriften
Veiligheidsvoorschriften
Dit apparaat voldoet aan de
geldende veiligheidsbepalingen
voor elektrische apparatuur en
het is radio-ontstoord.
Het koelcircuit is op dichtheid
gecontroleerd.
Over deze gebruiksaanwijzing
■ Lees de gebruiksaanwijzing
en de montagehandleiding
en neem deze in acht. U
vindt daarin belangrijke
informatie over plaatsing,
gebruik en onderhoud van
het apparaat.
■ De fabrikant is niet
aansprakelijk wanneer
u de aanwijzingen en
waarschuwingen in
de gebruiksaanwijzing en de
montagehandleiding negeert.
■ Bewaar alle documenten
voor later gebruik en voor
eventuele volgende
eigenaars.
■ Dranken met een hoog
alcoholpercentage altijd
goed afgesloten en staand
bewaren.
Risico van een elektrische schok
Onvakkundige installatie en
reparaties kunnen groot gevaar
opleveren voor de gebruiker
van het apparaat.
■ Bij een beschadigd
aansluitsnoer: Apparaat
direct losmaken van het
stroomnet.
■ Het apparaat uitsluitend laten
repareren door de fabrikant,
de klantenservice of een
andere gekwalificeerde
persoon.
■ Alleen originele onderdelen
van de fabrikant gebruiken.
De fabrikant garandeert dat
deze onderdelen voldoen
aan de veiligheidseisen.
■ Een verlengsnoer voor de
aansluitkabel mag uitsluitend
via de klantenservice worden
aangeschaft.
Kans op explosie
■ Gebruik nooit elektrische
apparaten in het apparaat
(bijv. verwarmingsapparaten
of elektrische ijsbereiders).
■ Geen producten met
brandbare drijfgassen
(bijv. spuitbussen) en geen
explosieve stoffen in het
apparaat opslaan.
Verbrandingsgevaar door kou
■ Diepvrieswaren nadat u ze
uit het vriesvak hebt gehaald,
nooit onmiddellijk in de
mond nemen.
■ Voorkom dat de huid
langdurig in contact komt
met diepvrieswaren, ijs en de
buizen in het vriesvak.
93
Page 94

nl Veiligheidsvoorschriften
Risico op letsel
Flessen of blikjes met
koolzuurhoudende drank
kunnen barsten.
Geen flessen of blikjes met
koolzuurhoudende drank in
het vriesvak bewaren.
Gevaren door of van het koelmiddel
De leidingen van het koelcircuit
bevatten een kleine
hoeveelheid van het
milieuvriendelijke, maar
brandbare koelmiddel R600a.
Dit is niet schadelijk voor de
ozonlaag en verhoogt het
broeikaseffect niet. Vrijkomend
koelmiddel kan echter
oogletsel veroorzaken of vlam
vatten.
■ Leidingen niet beschadigen.
Bij beschadiging van de
leidingen:
■ Vuur en ontstekingsbronnen
uit de buurt van het apparaat
houden.
■ De ruimte ventileren.
■ Het apparaat uitschakelen
en de stekker uit het
stopcontact trekken.
■ Contact opnemen met de
servicedienst.
Vermijden van risico's voor kinderen en kwetsbare personen
Er bestaat gevaar voor:
■ kinderen;
■ personen met lichamelijke,
geestelijke of zintuiglijke
beperkingen;
■ personen die onvoldoende
kennis hebben over de
veilige bediening van het
apparaat.
Maatregelen:
■ Zorg dat kinderen en
kwetsbare personen
begrijpen wat de gevaren
zijn.
■ Een voor de veiligheid
verantwoordelijke persoon
moet toezicht houden op
kinderen en kwetsbare
personen bij het apparaat
of hen instrueren.
■ Alleen kinderen vanaf 8 jaar
het apparaat laten
gebruiken.
■ Bij reiniging en onderhoud
toezicht houden op kinderen.
■ Laat kinderen nooit met het
apparaat spelen.
94
Page 95

Bestemming van het apparaat nl
Kans op stikken
■ Bij een apparaat met
deurslot: Sleutel buiten
bereik van kinderen
opbergen.
■ Verpakkingsmateriaal en
onderdelen van het apparaat
zijn geen speelgoed voor
kinderen.
Materiële schade
Om materiële schade te
voorkomen:
■ Niet op de sokkel,
uitschuifdelen of deuren
staan of leunen.
■ Kunststof onderdelen en
deurafdichtingen olie- en
vetvrij houden.
■ Aan de stekker trekken –
niet aan de aansluitkabel.
Gewicht
Houd er bij plaatsing en
transport van het apparaat
rekening mee dat het apparaat
erg zwaar kan zijn.
~ "De juiste opstelplaats"
op pagina 97
8 Correct gebruik van
het apparaat
Bestemming van het apparaat
Gebruik dit apparaat
■ uitsluitend voor het koelen en
invriezen van levensmiddelen en
voor ijsbereiding.
■ uitsluitend voor privégebruik en
huishoudelijk gebruik.
■ uitsluitend volgens deze
gebruiksaanwijzing.
Dit apparaat is bestemd voor gebruik tot
op hoogten van maximaal 2.000 meter
boven zeeniveau.
7 Milieubescherming
Milieubescherming
Verpakking
Alle materialen zijn onschadelijk voor
het milieu en kunnen hergebruikt
worden.
■ Zorg dat de verpakking
milieuvriendelijk wordt afgevoerd.
■ Informatie over het afvoeren van
afval en het oude apparaat kunt
u opvragen bij uw speciaalzaak of bij
de gemeente.
95
Page 96

nl Installeren en aansluiten
Oude apparaten
Door een milieuvriendelijke afvoer
kunnen waardevolle grondstoffen
worden teruggewonnen.
:Waarschuwing
Kinderen kunnen zichzelf in het apparaat opsluiten en stikken.!
■ Legplateaus en lades niet uit het
apparaat nemen, om te voorkomen
dat kinderen in het apparaat kruipen.
■ Kinderen uit de buurt van een
afgedankt apparaat houden.
Attentie!
Er kan koelmiddel en schadelijk gas
vrijkomen.
Buizen van de koelmiddelkringloop en
isolatie niet beschadigen.
1. Stekker uit het stopcontact halen.
2. Aansluitsnoer doorknippen.
3. Apparaat op deskundige wijze laten
afvoeren.
Dit apparaat is gekenmerkt in
overeenstemming met de
Europese richtlijn 2012/19/EU
betreffende afgedankte
elektrische en elektronische apparatuur
(waste electrical and electronic
equipment - WEEE).
De richtlijn geeft het kader aan voor de
in de EU geldige terugneming en
verwerking van oude apparaten.
5 Installeren en
aansluiten
Installeren en aansluiten
Inhoud van de verpakking
Controleer na het uitpakken alle
onderdelen op eventuele
transportschade.
Voor klachten kunt u terecht bij de
winkel waar u het apparaat hebt
aangeschaft of bij onze servicedienst.
~ "Servicedienst" op pagina 113
De levering bestaat uit de volgende
onderdelen:
■ Inbouwapparaat
■ Uitrusting (modelafhankelijk)
■ Zakje met montagemateriaal
■ Gebruiksaanwijzing
■ Installatievoorschrift
■ Klantenserviceboekje
■ Garantiebijlage
■ Informatie over energieverbruik en
geluiden
Technische gegevens
Koelmiddel, netto inhoud van het
apparaat en andere technische
gegevens vindt u op het typeplaatje.
~ "Het apparaat leren kennen"
op pagina 100
96
Page 97

Installeren en aansluiten nl
Apparaat installeren
De juiste opstelplaats
Hoe meer koelmiddel het apparaat
bevat, des te groter moet de ruimte zijn
waarin het apparaat wordt opgesteld. In
een te kleine ruimte kan bij een lek een
ontvlambaar mengsel van gas en lucht
ontstaan.
Per 8 g koelmiddel moet het vertrek
minstens 1 m³ groot zijn. De
hoeveelheid koelmiddel in uw apparaat
vindt u op het typeplaatje aan de
binnenkant van het apparaat.
~ "Het apparaat leren kennen"
op pagina 100
Het gewicht van het apparaat kan
afhankelijk van het model tot 70 kg
bedragen.
Toegestane omgevingstemperatuur
De toegestane binnentemperatuur is
afhankelijk van de klimaatklasse van het
apparaat.
Informatie over de klimaatklasse vindt
u op het typeplaatje.
~ "Het apparaat leren kennen"
op pagina 100
Klimaatklasse Toegestane omgevings-
temperatuur
SN +10 °C ... 32 °C
N +16 °C ... 32 °C
ST +16 °C ... 38 °C
T +16 °C ... 43 °C
Het apparaat is volledig functioneel
binnen de toegestane
binnentemperatuur.
Wanneer een apparaat uit klimaatklasse
SN wordt gebruikt bij een lagere
binnentemperatuur, kunnen
beschadigingen aan het apparaat
worden uitgesloten tot een
binnentemperatuur van +5 °C.
Nisdiepte
Voor het apparaat wordt een nisdiepte
van 56 cm aanbevolen. Bij een kleinere
nisdiepte – minstens 55 cm – wordt het
energieverbruik iets hoger.
Side-by-side- opstelling
De apparaten mogen slechts met een
minimale tussenafstand van 15 cm
naast elkaar worden opgesteld.
97
Page 98

nl Installeren en aansluiten
Energie besparen
Wanneer u de volgende aanwijzingen opvolgt, verbruikt uw apparaat minder stroom.
Aanwijzing: De plaatsing van de uitrustingsonderdelen heeft geen invloed op het energieverbruik van het apparaat.
Apparaat installeren
Apparaat niet blootstellen aan direct zonlicht. Bij een lage omgevingstemperatuur hoeft het
Het apparaat zo ver mogelijk van radiatoren, fornuis
en andere warmtebronnen plaatsen:
Naast elektrische of gasfornuizen: 3 cm.
Naast een cv-installatie: 30 cm.
Aanwijzing: Als dat niet mogelijk is een
isolatieplaat aanbrengen tussen het apparaat
en de warmtebron.
Een opstelplaats met een binnentemperatuur van
ca. 20 °C kiezen.
Een nisdiepte van 56 cm aanhouden.
Attentie!
Gevaar voor verbranding!
Sommige onderdelen van het apparaat worden
tijdens het gebruik heet. Aanraking van deze
onderdelen kan brandwonden veroorzaken.
Ventilatieopeningen niet afdekken of versperren.
De ruimte dagelijks luchten.
apparaat minder vaak te koelen en verbruikt
daardoor minder stroom.
De lucht bij de achterwand van het apparaat wordt
niet zo warm. Het apparaat verbruikt minder stroom
wanneer de warme lucht kan wegtrekken.
Gebruik van het apparaat
Deur van het apparaat slechts kort openen. De lucht in het apparaat wordt niet veel warmer. Het
Gekochte levensmiddelen in een koeltas
transporteren en snel in het apparaat leggen.
apparaat hoeft minder vaak te koelen en verbruikt
daardoor minder stroom.
Warme gerechten en dranken eerst laten afkoelen,
daarna in het apparaat plaatsen.
Diepvrieswaren ter ontdooiing in het koelvak leggen,
om de kou van de diepvrieswaren te benutten.
Altijd wat ruimte openlaten tussen de levensmiddelen en de achterwand.
Levensmiddelen luchtdicht verpakken.
Achterkant van het apparaat eenmaal per jaar
schoon zuigen.
Ventilatieopeningen niet afdekken of versperren.
--------
De lucht kan circuleren en de luchtvochtigheid blijft
constant. Het apparaat hoeft minder vaak te koelen
en verbruikt daardoor minder stroom.
De lucht bij de achterwand van het apparaat wordt
niet zo warm. Het apparaat verbruikt minder stroom
wanneer de warme lucht kan wegtrekken.
98
Page 99

Installeren en aansluiten nl
Voor het eerste gebruik
1. Infomateriaal eruit nemen en zowel
plakband als beschermfolie
verwijderen.
2. Apparaat schoonmaken.
~ "Schoonmaken" op pagina 109
Elektrische aansluiting
Attentie!
Het apparaat niet aansluiten op een
elektronische electronische
energiebesparende stekker.
Aanwijzing: U kunt het apparaat aansluiten op netvoedingsinverters en sinusinverters. Netvoedingsinverters worden gebruikt bij fotovoltaïsche installaties met rechtstreekse aansluiting op het openbare elektriciteitsnet. Bij losstaande systemen dient u sinusinverters gebruiken. Losstaande systemen, bijv. op schepen of in berghutten, hebben geen rechtstreekse aansluiting op het openbare elektriciteitsnet.
1. Na plaatsing van het apparaat
minstens 1 uur wachten met
aansluiten, om beschadiging van
de compressor te voorkomen.
2. Het apparaat aansluiten op een
volgens de voorschriften
geïnstalleerd stopcontact.
Het stopcontact moet voldoen aan
de volgende voorwaarden:
Stopcontact met 220 V ... 240 V
Aardleiding 50 Hz
Zekering 10A ... 16 A
Buiten Europa: controleren of de
vermelde stroomsoort van het
apparaat overeenkomt met de
waarden van uw elektriciteitsnet. De
gegevens van het apparaat staan op
het typeplaatje.
~ "Het apparaat leren kennen"
op pagina 100
3. Het apparaat aansluiten op een
stopcontact in de buurt van het
apparaat.
Het stopcontact moet vrij
toegankelijk zijn na de plaatsing van
het apparaat.
99
Page 100
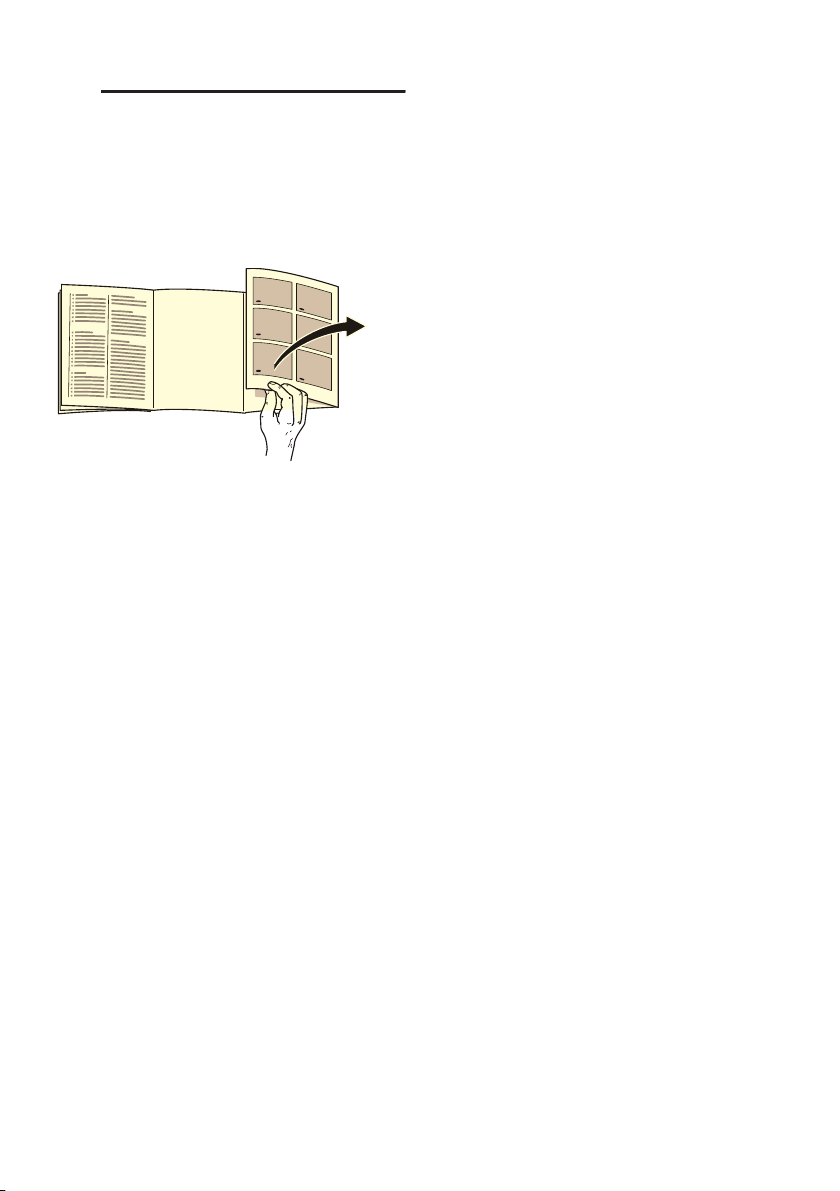
nl Het apparaat leren kennen
* Het apparaat leren
kennen
Het apparaat leren kennen
Klap het laatste blad met afbeeldingen
open. Afhankelijk van de uitrusting
kunnen er verschillen zijn tussen uw
apparaat en de afbeeldingen.
Apparaat
~ Afb. !
* Niet bij alle modellen.
# Koelvak
+ Vriesvak
(-h Bedieningselementen
)"* Ventilator
)* Verlichting
)2 Uittrekbaar legplateau
): Groentelade met
)B Typeplaatje
)J* Bessenlade
)R Diepvrieskalender
)Z Diepvrieslade
)b Boter- en kaasvak
)j* Flessenrek Vario
1" Vak voor grote flessen
vochtigheidsregelaar
Bedieningselementen
~ Afb. "
( Toets #
Schakelt het apparaat in of uit.
0 Toets Super vriesvak
Schakelt het supervriezen in
of uit.
8 Toets K/J vriesvak
Stelt de temperatuur van het
vriesvak in.
@ Indicatie temperatuur
diepvriesvak
Toont de ingestelde temperatuur
in °C.
H Toets Alarm
Schakelt het alarmsignaal uit.
P Toets Holiday
Schakelt de vakantiemodus in
of uit.
X Toets K/J koelvak
Stelt de temperatuur van het
koelvak in.
` Indicatie temperatuur koelvak
Toont de ingestelde temperatuur
in °C.
h Toets Super koelvak
Schakelt het superkoelen in
of uit.
Uitrusting
(niet bij alle modellen)
Legplateau
~ Afb. #
U kunt het legplateau variëren:
■ Legplateau eruit trekken en
verwijderen.
100
 Loading...