

Needle Cooler NC-1 User Manual
NC-1
NEEDLE
A M
C I
C
~'>-----
-<fT'i
E
Co~pressed
~
a1r
supply
0
R
I
E
s
f---
--1,.------,lf---
Pr-f
I U inlet
Model9003
Manual Drain
Filter
(
,...._
Model9027
011
Removal
Filter
(not Included)
COOLER
-.1
N
To
~er
I
c
0
0
L
E
R
INSTRUCTIONS
Mini Cooler System
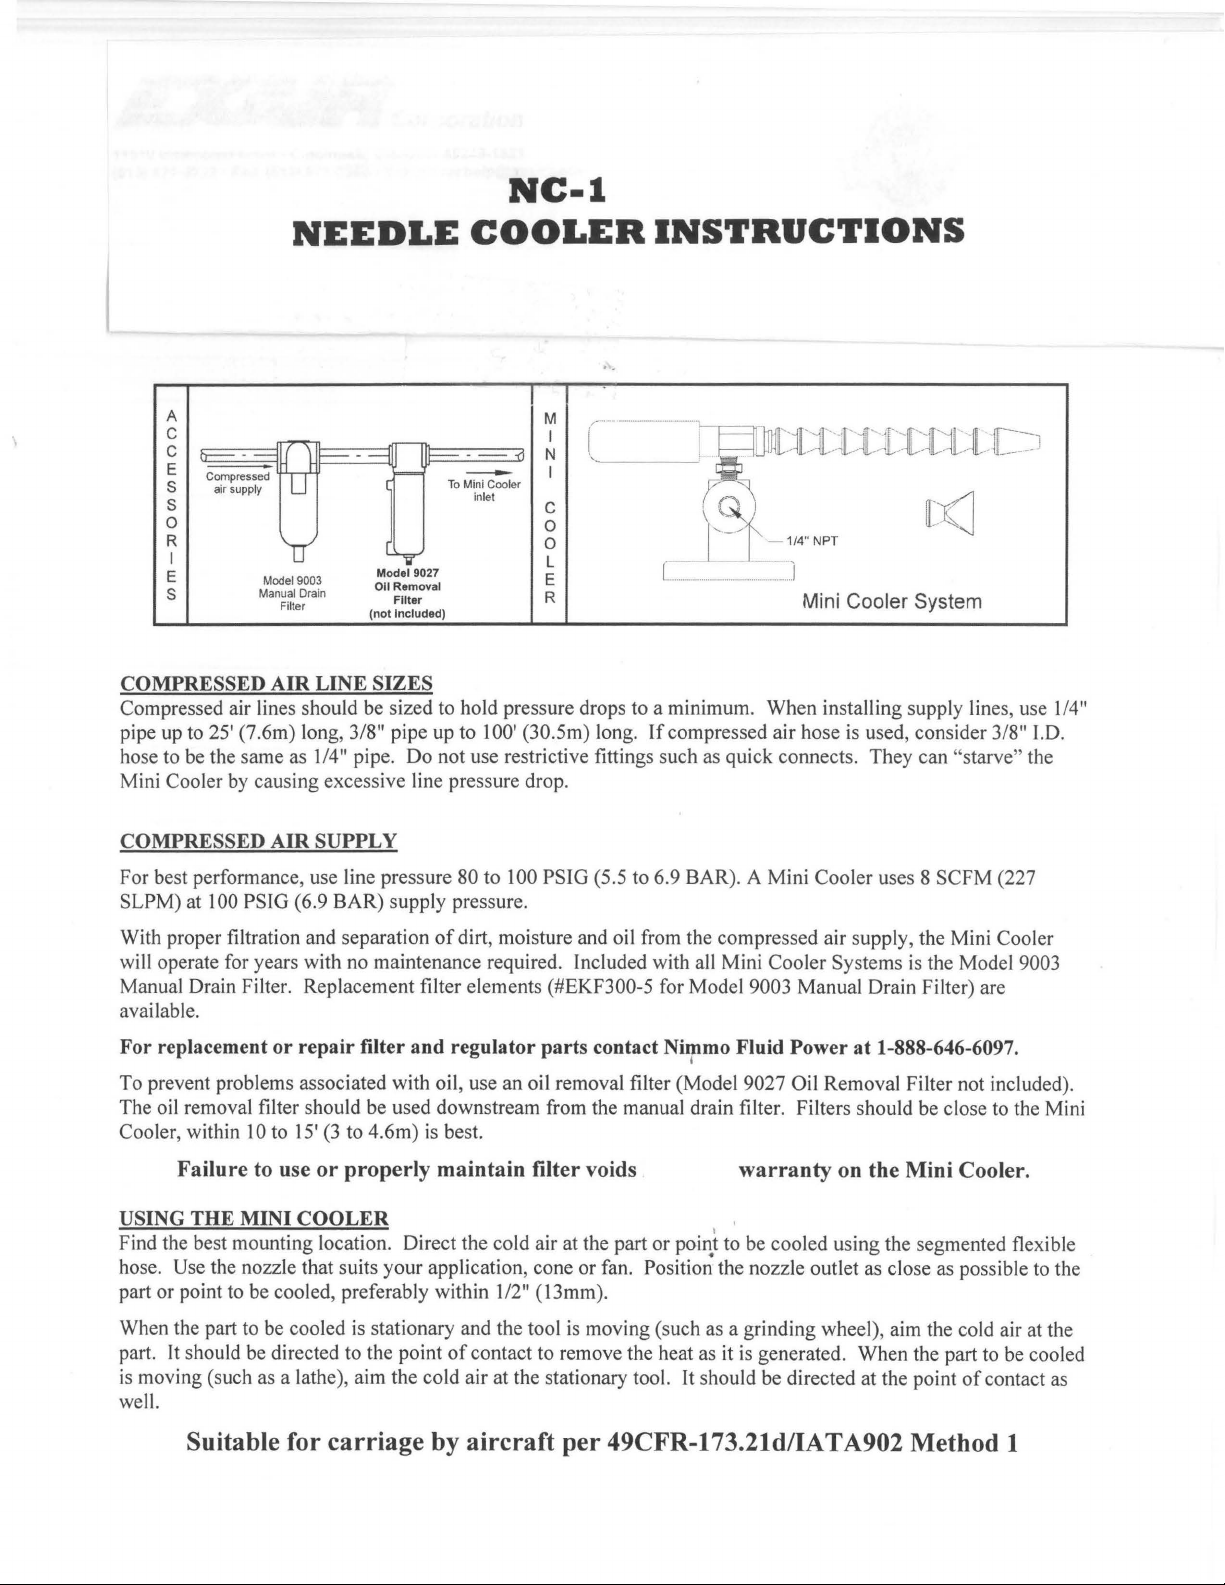
COMPRESSED AIR LINE SIZES
Compressed air lines should be sized to hold pressure drops to a minimum. When installing supply lines, use 1/4"
pipe
up
hose to
to 25' (7.6m) long, 3/8" pipe up to 1 00' (30.5m) long.
be
the same as 1/4" pipe. Do not use restrictive fittings such as quick connects. They can "starve " the
If
compressed air hose
is
used, consider 3/8" I. D.
Mini Cooler by causing excessive line pressure drop.
COMPRESSED
AIR
SUPPLY
For best performance, use line pressure 80 to 100 PSIG (5.5 to 6.9 BAR). A Mini Cooler uses 8 SCFM (227
SLPM) at 100 PSIG (6.9 BAR) supply pressure.
With proper filtration and separation
will operate for years with no maintenance required. Included with all Mini Cooler Systems
of
dirt, moisture and oil from the compressed air supply, the Mini Cooler
is
the Model 9003
Manual Drain Filter. Replacement filter elements (#EKF300-5 for Model 9003 Manual Drain Filter) are
available.
For replacement or repair filter and regulator parts contact Nimmo Fluid Power at 1-888-646-6097.
I
To prevent problems associated with oil, use an oil removal filter (Model 9027 Oil Removal Filter not included).
The oil removal filter should be used downstream from the manual drain filter. Filters should be close to the Mini
Cooler, within
Failure to use or properly maintain filter voids
USING THE MINI COOLER
Find the best mounting location. Direct the cold air at the part or point to be cooled using the segmented flexible
hose. Use the nozzle that suits your application, cone or fan.
10
to 15'
(3
to 4.6m)
is
best.
Positio;
warranty on the Mini Cooler.
I
the nozzle outlet as close as possible to the
part or point to be cooled, preferably within 1/2" (13mm).
When the part to be cooled
part. It should be directed to the point
is
moving (such as a lathe), aim the cold air at the stationary tool.
is
stationary and the tool
of
contact to remove the heat as it is generated. When the part to
is
moving (such as a grinding wheel), aim the cold air at the
be
It
should be directed at the point
of
contact as
cooled
well.
Suitable for carriage by aircraft per 49CFR-173.21d/IATA902 Method 1
CONTROLLING THE
The Mini cooler gives instant cold air when compressed air
of
cold air can be reduced by regulating the compressed air supply with the pressure regulator. Lower pressures
give less cold flow and reduce compressed air consumption.
COLD
AIR
is
supplied to
it.
If
less cold air
is
needed, the volume
TROUBLESHOOTING &
If
the Mini Cooler Does Not Perform Properly, check the four common problems listed below:
1.
Inlet Pressure - Low inlet pressure supply will cause poor performance. Measure the pressure at the
compressed air inlet
can cause excessive pressure drops and deteriorate performance.
2.
Inlet Temperature - A Mini Cooler provides a temperature drop from supply air temperature. In some cases,
the supply air is warmer than ambient air due to compressed air lines running across ceilings, near furnaces,
direct sun, etc. In this case, the cold air may be warmer than anticipated and adequate refrigeration may not
be available for the application.
3.
Back
Pressure-
Use only the flexible segmented hose included with the Mini Cooler.
Cold
4. No
internal freezing. This can reduce or even stop cold air flow. Drain the filter often, or crack open for a small
continuous air bleed.
(a) Blow air (use an air gun) into the cold end fitting with the Mini Cooler off.
(b) Turn the Mini Cooler
(c) Put a dryer on the compressed air supply.
The Mini Cooler has no moving parts. Maintenance
However,
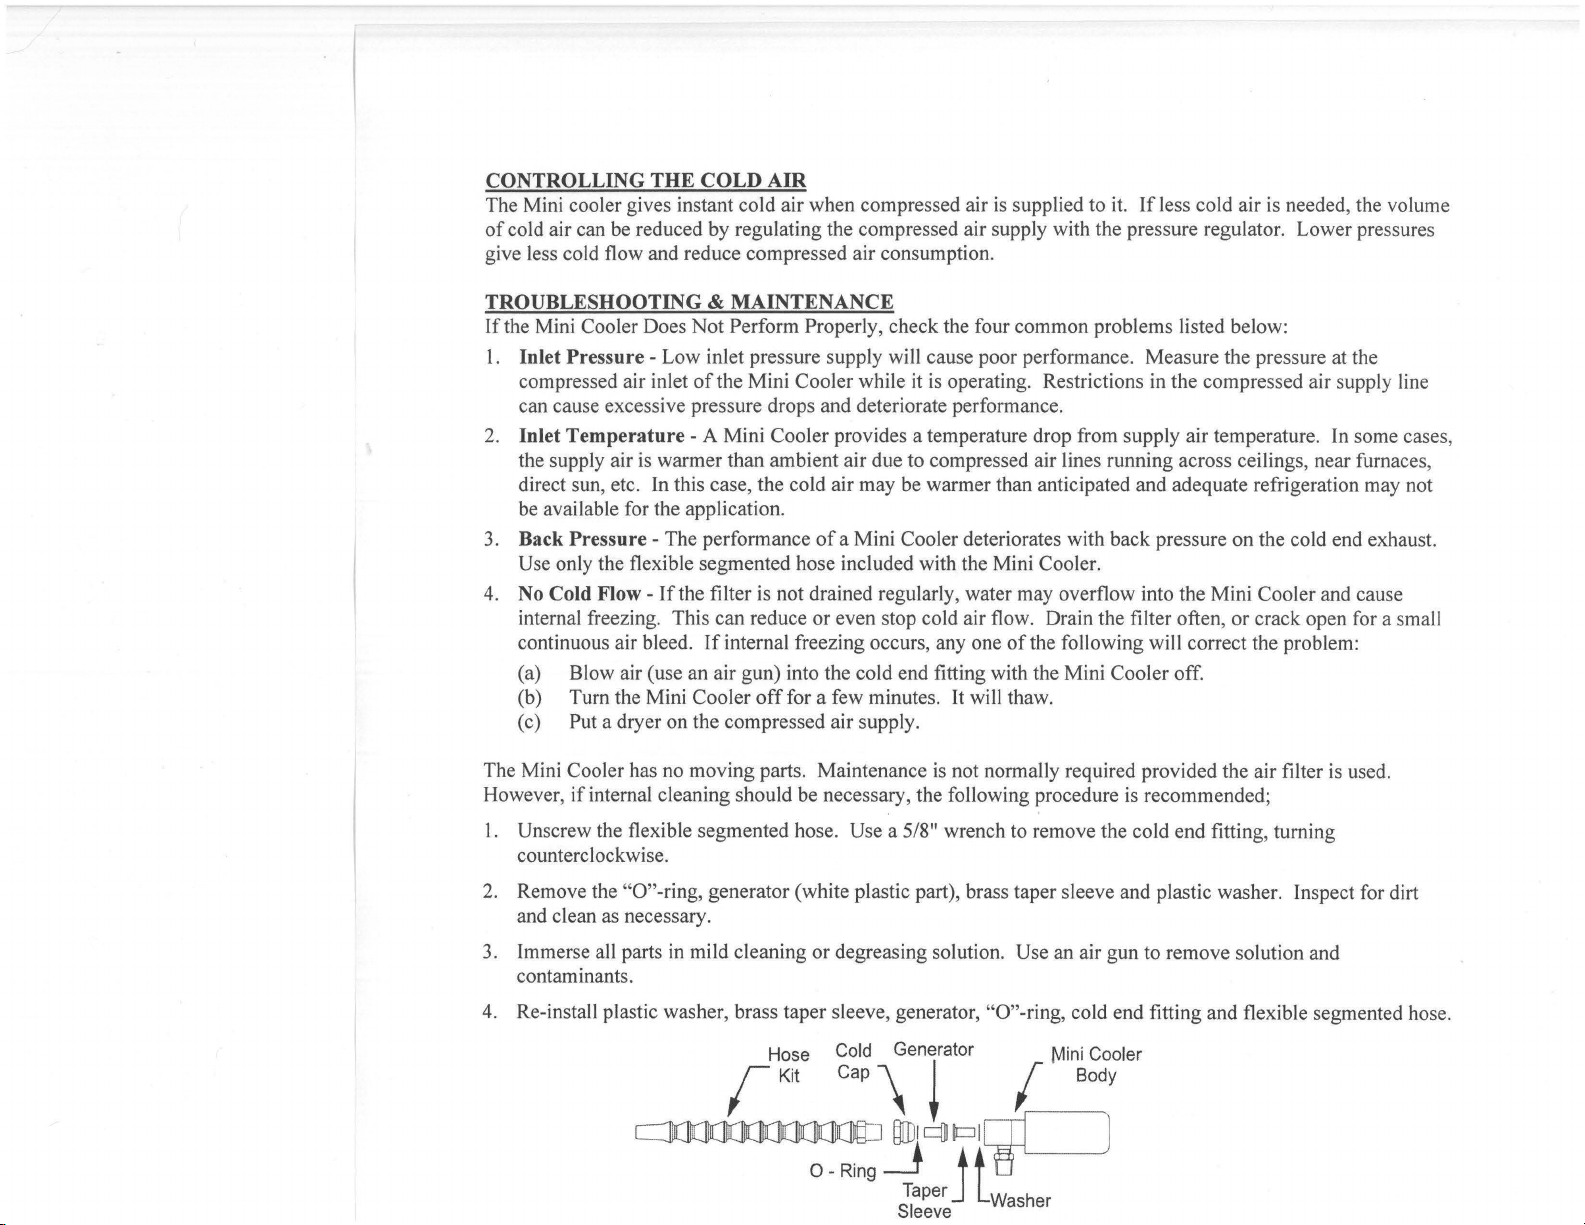
1.
Unscrew the flexible segmented hose. Use a 5/8" wrench to remove the cold end fitting, turning
counterclockwise.
Flow-
if
internal cleaning should be necessary, the following procedure
The performance
If
MAINTENANCE
of
the Mini Cooler while it is operating. Restrictions in the compressed air supply line
of
a Mini Cooler deteriorates with back pressure on the cold end exhaust.
the filter is not drained regularly, water may overflow into the Mini Cooler and cause
If
internal freezing occurs, any one
off
for a few minutes. It will thaw.
is
of
the following will correct the problem:
not normally required provided the air filter
is
recommended;
is
used.
2.
Remove the
and clean as necessary.
3. Immerse all parts in mild cleaning or degreasing solution. Use an air gun to remove solution and
contaminants .
4. Re-install plastic washer, brass taper sleeve, generator, "0"-ring, cold end fitting and flexible segmented hose.
"0"-ring,
generator (white plastic part), brass taper sleeve and plastic washer. Inspect for dirt
C ]C))JOJOCJOJ
Hose
r
Kit
Cold
Cap
\
CID
0-Ring_:]
Generator
~
§ID
1 q 1o1
Jt
Taper
Sleeve
[_
nJI
~
Washer
Mini
Cooler
Body
 Loading...