

Page 1
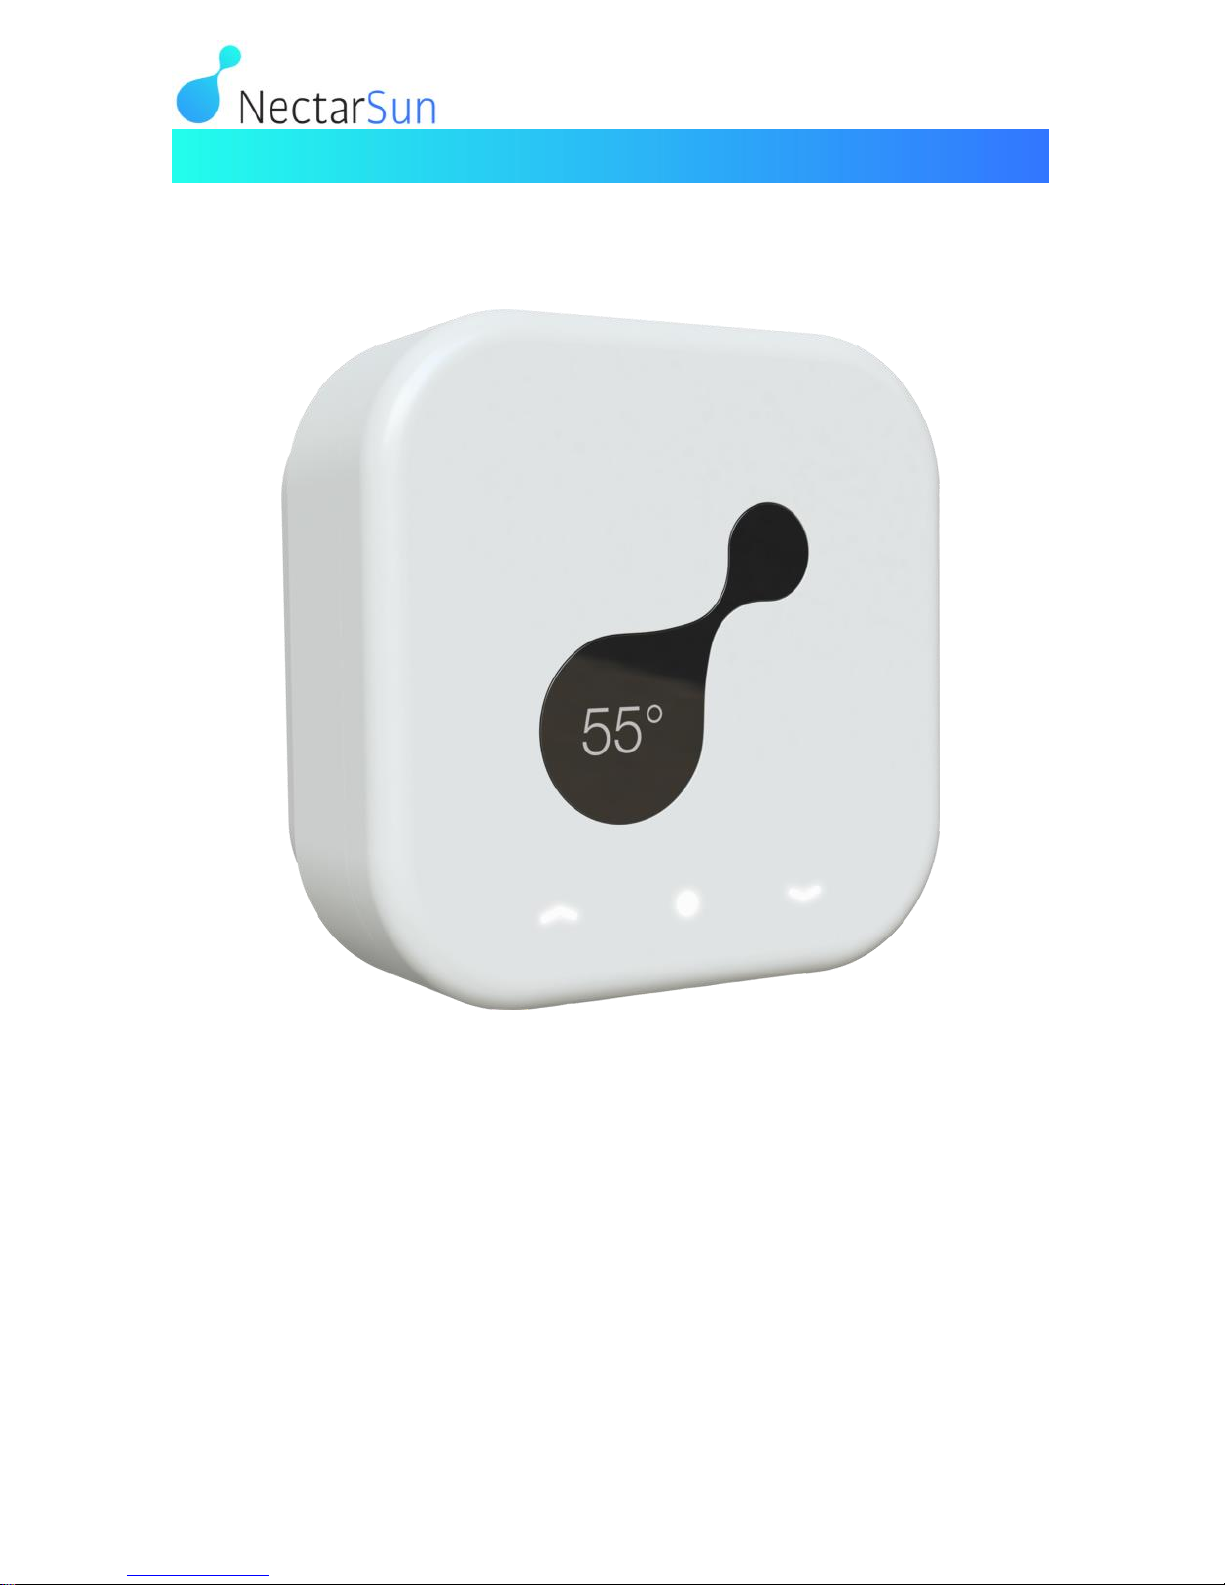
PHOTOVOLTAIC HEAT CONTROLER PVHC – 2.01
USER MANUAL
Page 2

2
PHOTOVOLTAIC HEAT CONTROLER PVHC – 2.01
CONTENT
CONTROL ELEMENTS AND CONNECTIONS ........................... 3
HOW IT WORKS............................................................................. 4
INSTALLATION PROCEDURE, SWITCHING ON THE
DEVICE ............................................................................................ 5
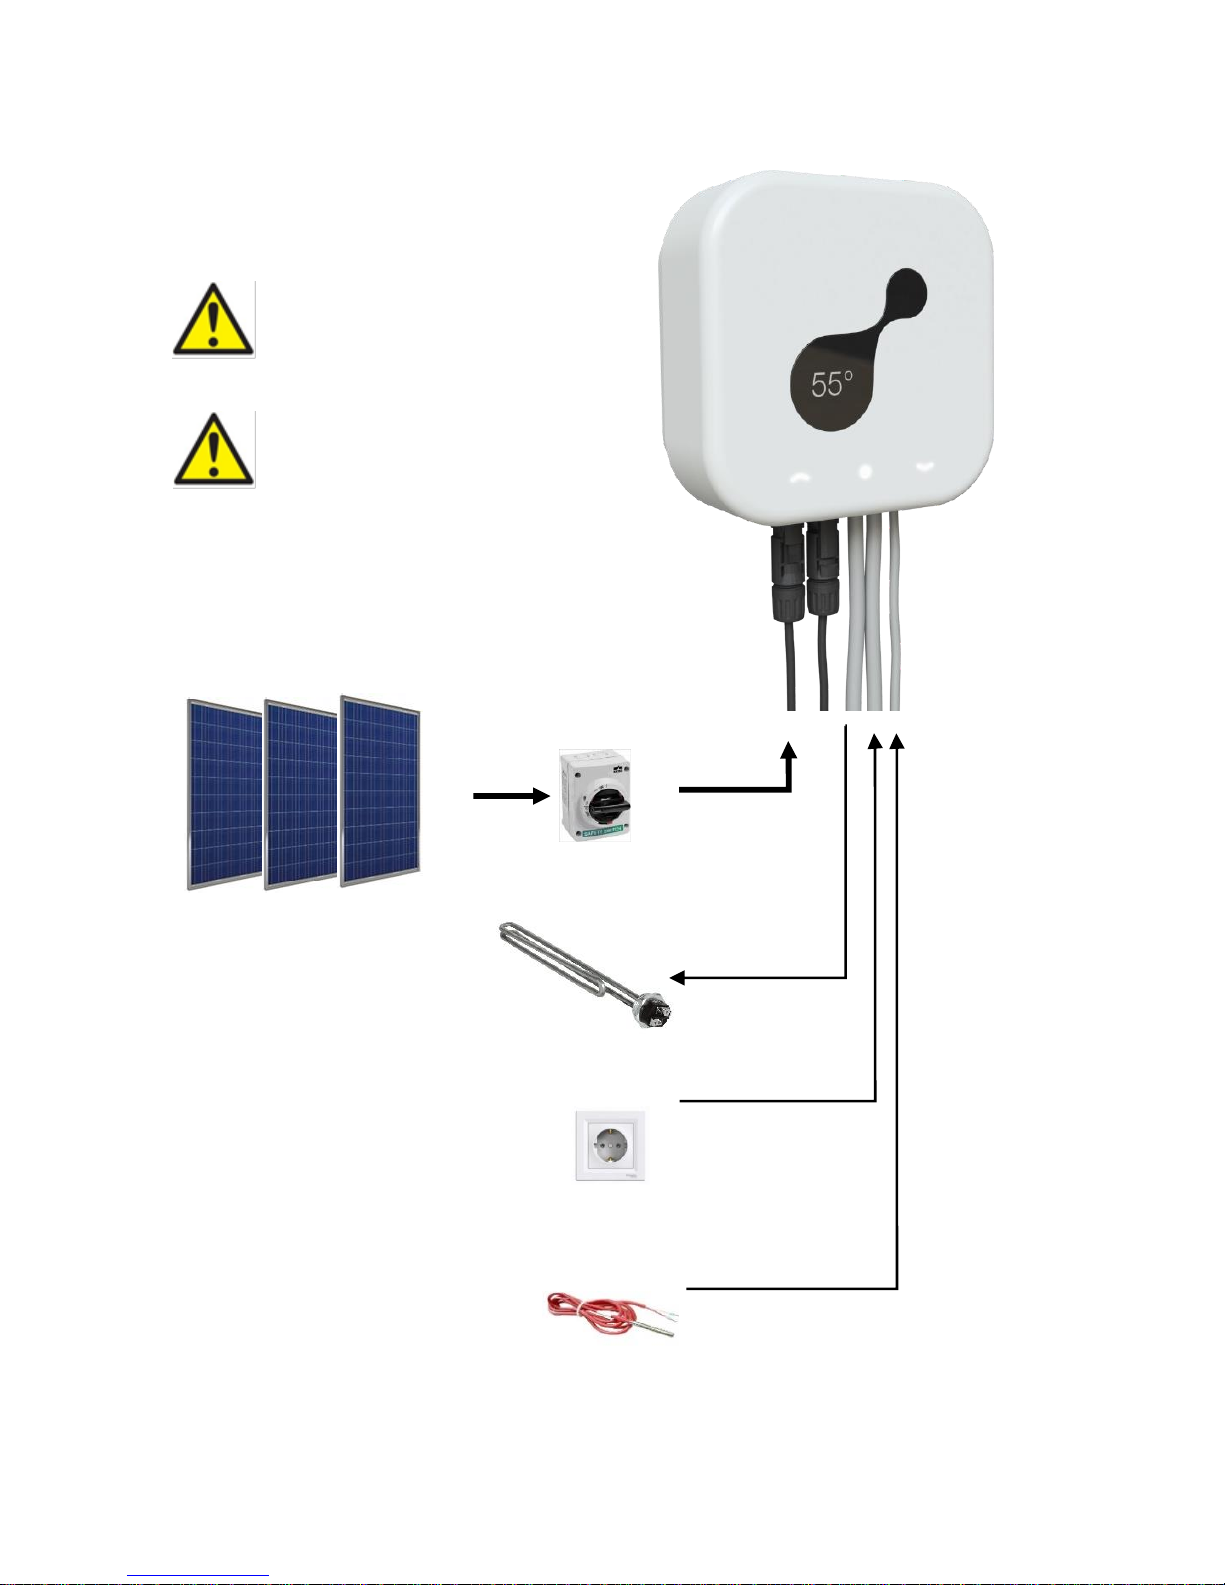
CONNECTION DIAGRAM ............................................................ 6
USER MENU ................................................................................... 7
SPECIFICATIONS ........................................................................ 11
EU Declaration of Conformity ....................................................... 12
Page 3
3
PHOTOVOLTAIC HEAT CONTROLER PVHC – 2.01
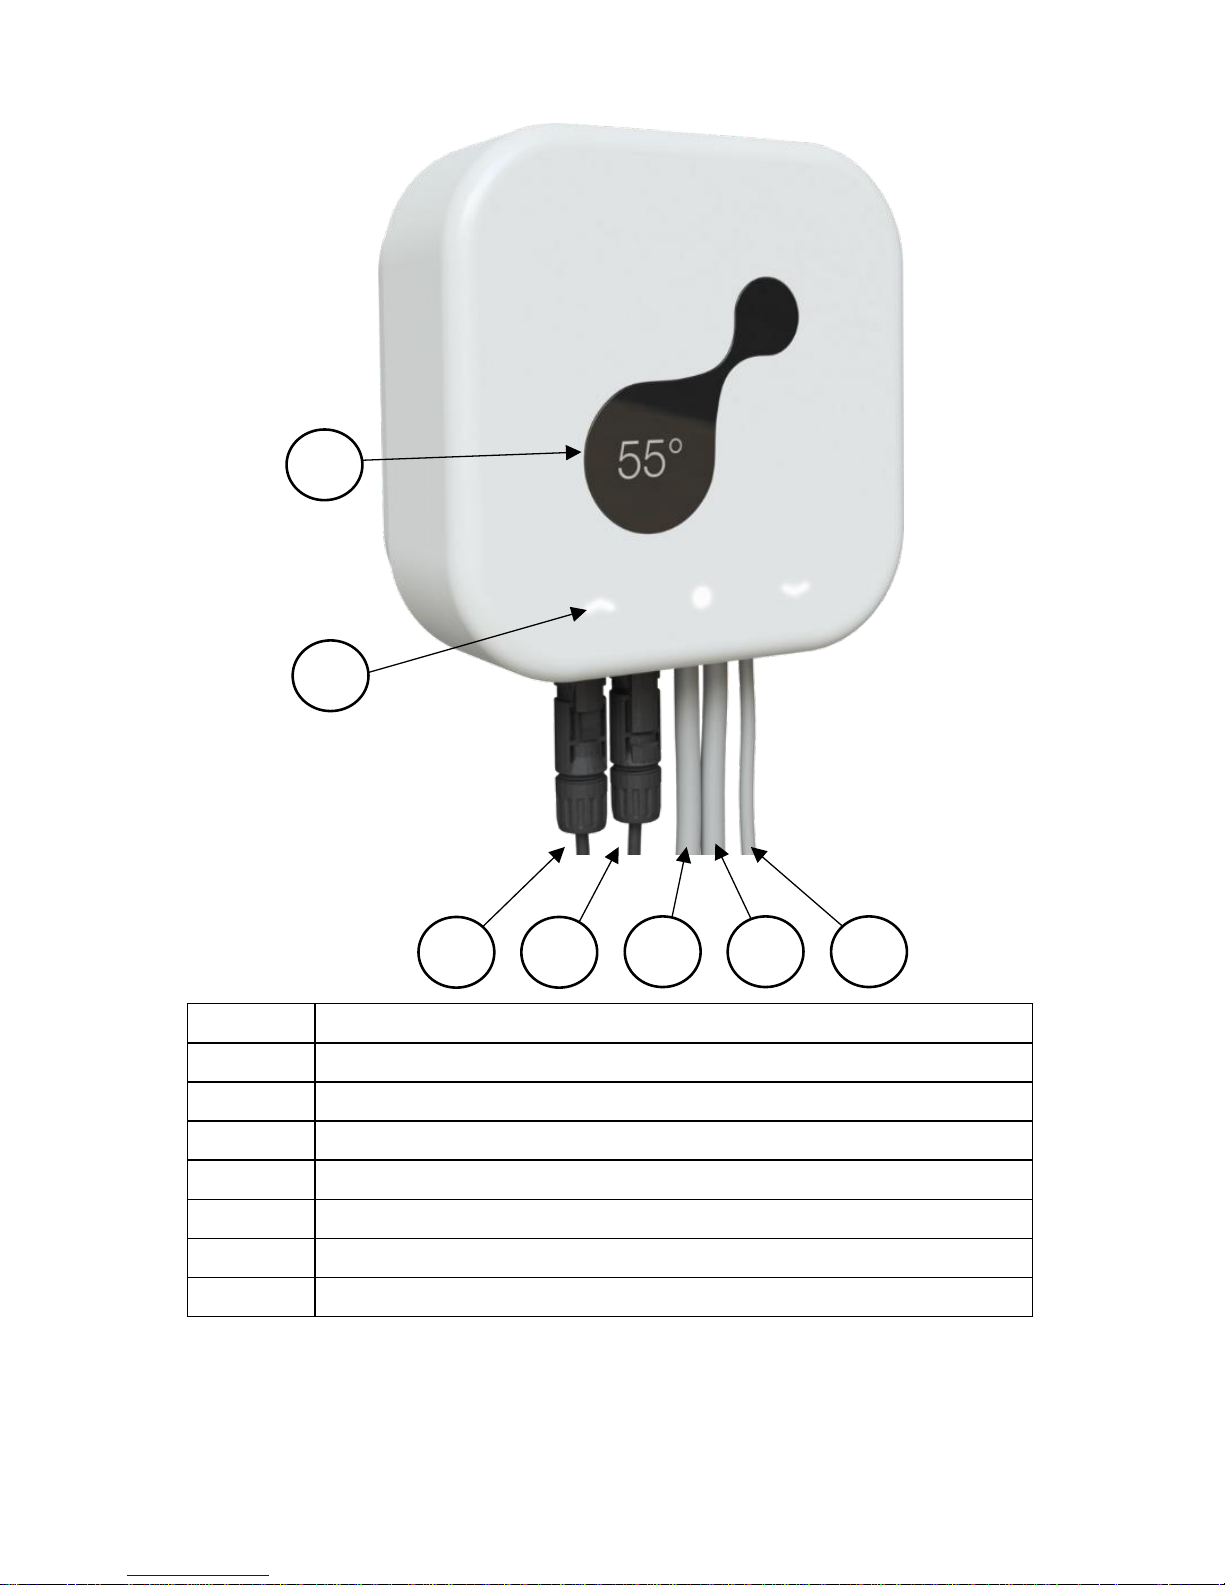
CONTROL ELEMENTS AND CONNECTIONS
Position
Control elements & connections
1
OLED text display
2
Touch sensitive control buttons
3
Photovoltaic modules connection (POSITIVE)
4
Photovoltaic modules connection (NEGATIVE)
5
Device connection cable to the water heating element
6
Device connection cable to the main power grid
7
Device connection cable to the temperature sensor
1
2
3
4
7 6 5
Page 4
4
PHOTOVOLTAIC HEAT CONTROLER PVHC – 2.01
HOW IT WORKS
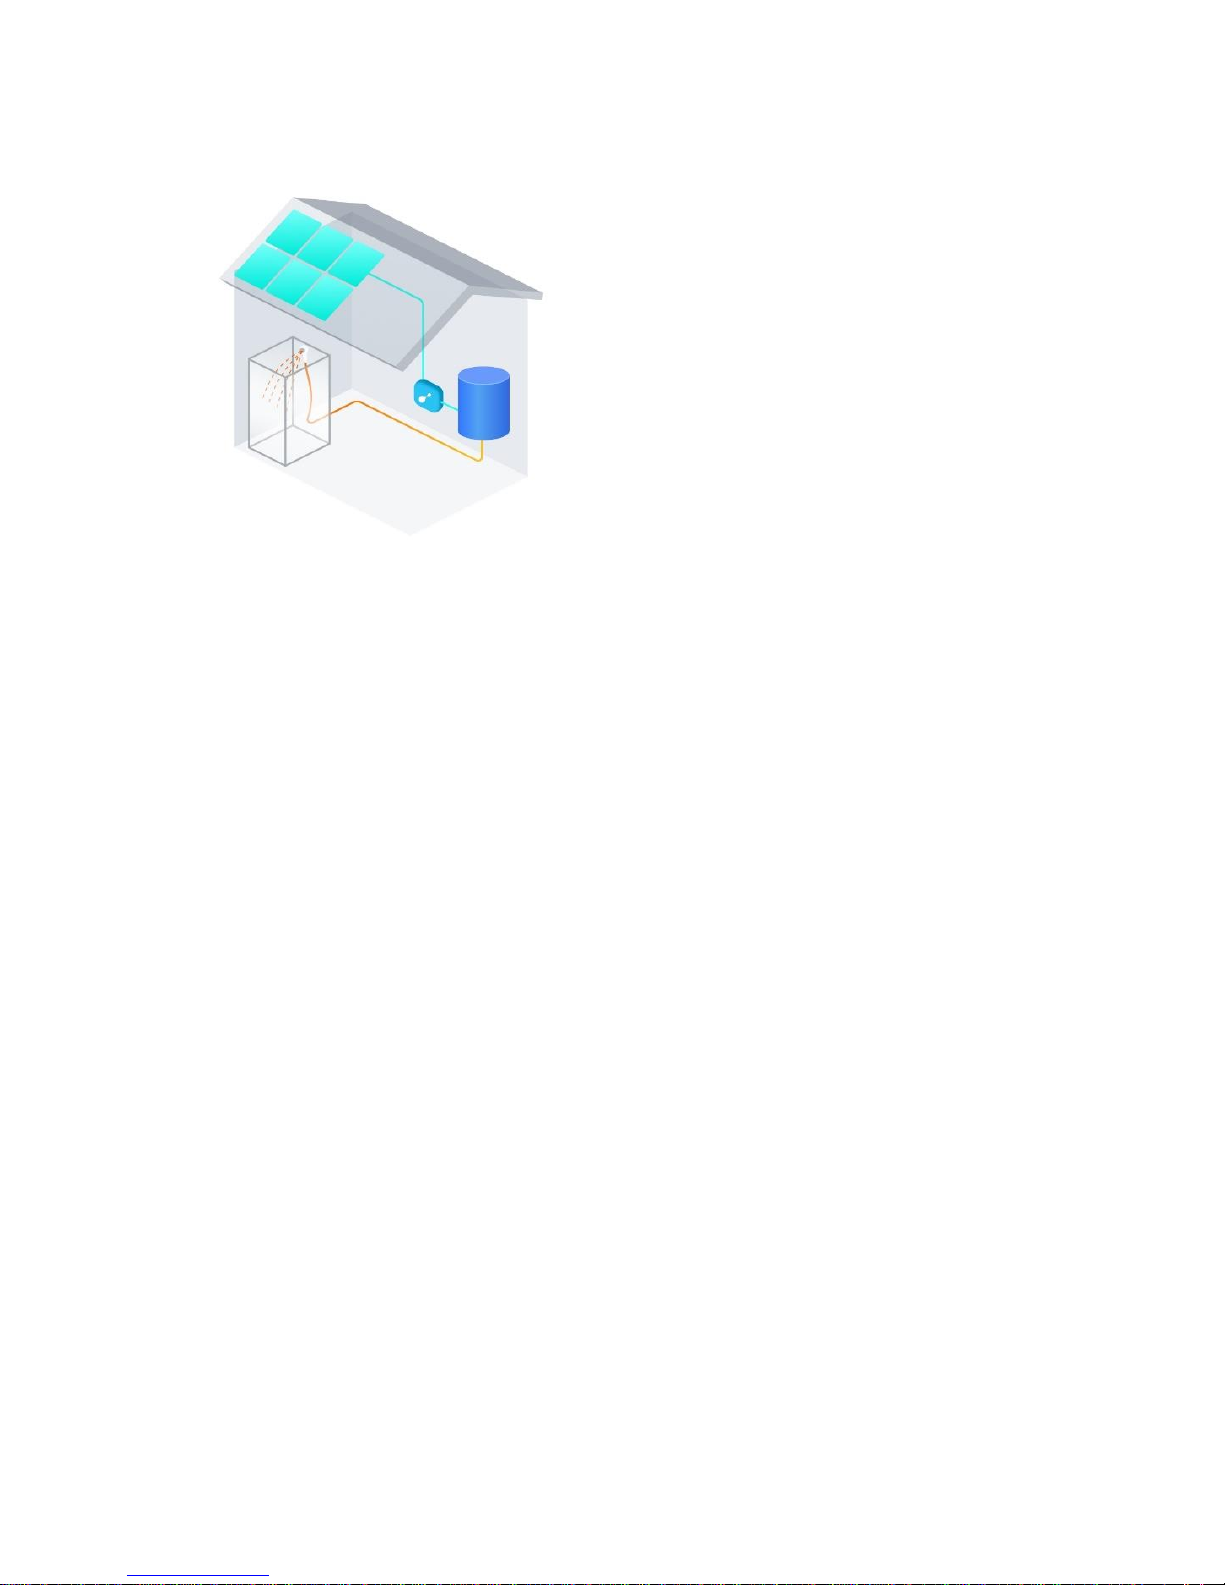
Our heating system is as simple as possible. Install solar panels, connect them to the
NectarSun controller and water heater you already have (for further instructions please
see furter pages).
Energy produced by solar panels is stored in
your heater to keep it when you need it, day
or night.
Controller is able to connect to most elecric
water heaters available for household use.
The device connects directly to the water
heater, without changing the existing
electrical wiring.
No pipes, valves, pumps or other additional
equipment.
Location for Solar Panels Depending on the demand for hot water from 4 to 12 solar
modules can be installed, maximum 2500 Wp. The arrangement of the modules can be
decided individually. They can optionally be mounted on a pitched roof, flat roof, or can
be free-standing. An appropriate mounting angle can range from 20° up to about 50°.
Special reinforcements are available for extreme conditions such as high wind areas and
snow loads. Avoid any shadow areas especially between southeast and southwest. Even
partialshading will lead to a significant performance reduction.
Note, please check any national regulations for specific countries.
Durability and Security stands out due to exceptional Nectar Sun functionality:
• The MPPT system inside the controller is always balancing the highest solar
power, depending on the solar radiation available.
• Controller and water storage tank are working with DC,so that there are no
conversion losses.
• Necar Sun has a boost mode to avoid legionella.
• it is advisable to install a thermostatic water mixer. It regulates the water
temperature by mixing in cold water to reach the desired temperature. For
this, the combi valve MT GDS should be used.
• Protection against overheating due to overload separation of the solar
modules.
• Protection against overvoltage with surge protection in the PV input.
• Protection against risk of frost – away mode and PV modules are frost
resistant.
• High reliability: solar savings (kWh) can be read on the display or Nectar Sun
app.
• High electricalsafety due to positive separation of the PV-side and
conformance testing of standard under the CE certification procedures.
Page 5
5
PHOTOVOLTAIC HEAT CONTROLER PVHC – 2.01
INSTALLATION PROCEDURE, SWITCHING ON THE DEVICE
CAUTION! HIGH VOLTAGE.
CONNECTION WORKS SHOULD ONLY BE CARRIED OUT BY
QUALIFIED SPECIALISTS.
1. Recommended maximum total power of PV modules in the maximum power point
1.5kW should not exceed 2.5 kW.
2. PV modules are connected serially. Maximum current of PV modules in the maximum
power point should not exceed 10 A.
3. When installing connections of PV modules, assure that connection polarity is not
reversed.
4. When configuring the photovoltaic system, make sure that all photovoltaic system
components are operating completely within their permitted operating range. All
measures recommended by the solar module manufacturer for maintaining solar
module properties must be followed.
CAUTION! If connection polarity is reversed, damage to the device
is unavoidable.
5. Nectar Sun installation and wiring works may be only performed when the device is
completely OFF, that is, all the switches are set to 0 position.
CAUTION! It is forbidden to disassemble, install or perform other
connection works when Nectar Sun device is not completely OFF.
6. Compatibility with hot water tanks please see „Specifications. Recommended heating
element“. Recommended to have overpressure valve.
7. Nectar Sun device must be installed as close to the boiler as possible. The installation
place must not hinder natural ventilation of the device and be convenient to control it.
For precise readings we recommend to install temperature sensor on the top of the
tank.
8. Nectar Sun is suitable for indoor installation only.
9. The device must not be installed or operated above an altitude of 11,154 ft. (3400 m).
The maximum permissible DC voltage of the inverter depends on the altitude.
10. Disconnect the boiler from electricity grid and connect it to Nectar Sun.
11. Connect connectors of solar PV modules to the Nectar Sun (see Fig. “Control
Elements and Connections”)
12. Connect Nectar Sun device to electricity grid.
13. The manufacturer is not responsible for any damage resulting from improper use. All
warranty claims are considered void in such cases. Proper use also means - carefully
reading and obeying all the instructions and safety and danger notices in the operating
instructions - carrying out all the specified inspection and servicing work - installation as
per operating instructions.
14. Modifications of the device are not allowed. Nectar Sun device can be connected
only to water tank (boiler).
Page 6
6
PHOTOVOLTAIC HEAT CONTROLER PVHC – 2.01
CONNECTION DIAGRAM
CAUTION! It is forbidden to
disassemble, install or
perform other connection
works when NectarSun device
is not completely OFF.
CAUTION! If connection
polarity is reversed, damage
to the device is unavoidable.
System protection by
Switch, relays
overvoltage and other
devices
Temperature sensor
Power grid
Water heating
element
PV modules
Page 7

7
PHOTOVOLTAIC HEAT CONTROLER PVHC – 2.01
USER MENU
When starting up your Nectar Sun for the first time, various setup settings must be selected.
To switch on the device you need to
To set up your Nectar Sun you need to do the following:
To set up a time.
Note: after this step your Nectar Sun is starting to work. If you want to set up an additional
information proceed with following:
To control and set up please choose :
if you want to connect the device with internet via wifi and control it with Nectar Sun app. For
further instructions please see: “How to connect wifi and control via app”;
if you want to control the device manually. For further instructions please see: “How to
control manually”.
Note: 30 min. after switching on the device your Nectar Sun is ready to be connected to wifi.
If you want to pair the device with wifi later, please go to the section „Settings. Pair with wifi“.
If setup is stopped before it is completed, it can be started again via reset.
Page 8
8
PHOTOVOLTAIC HEAT CONTROLER PVHC – 2.01
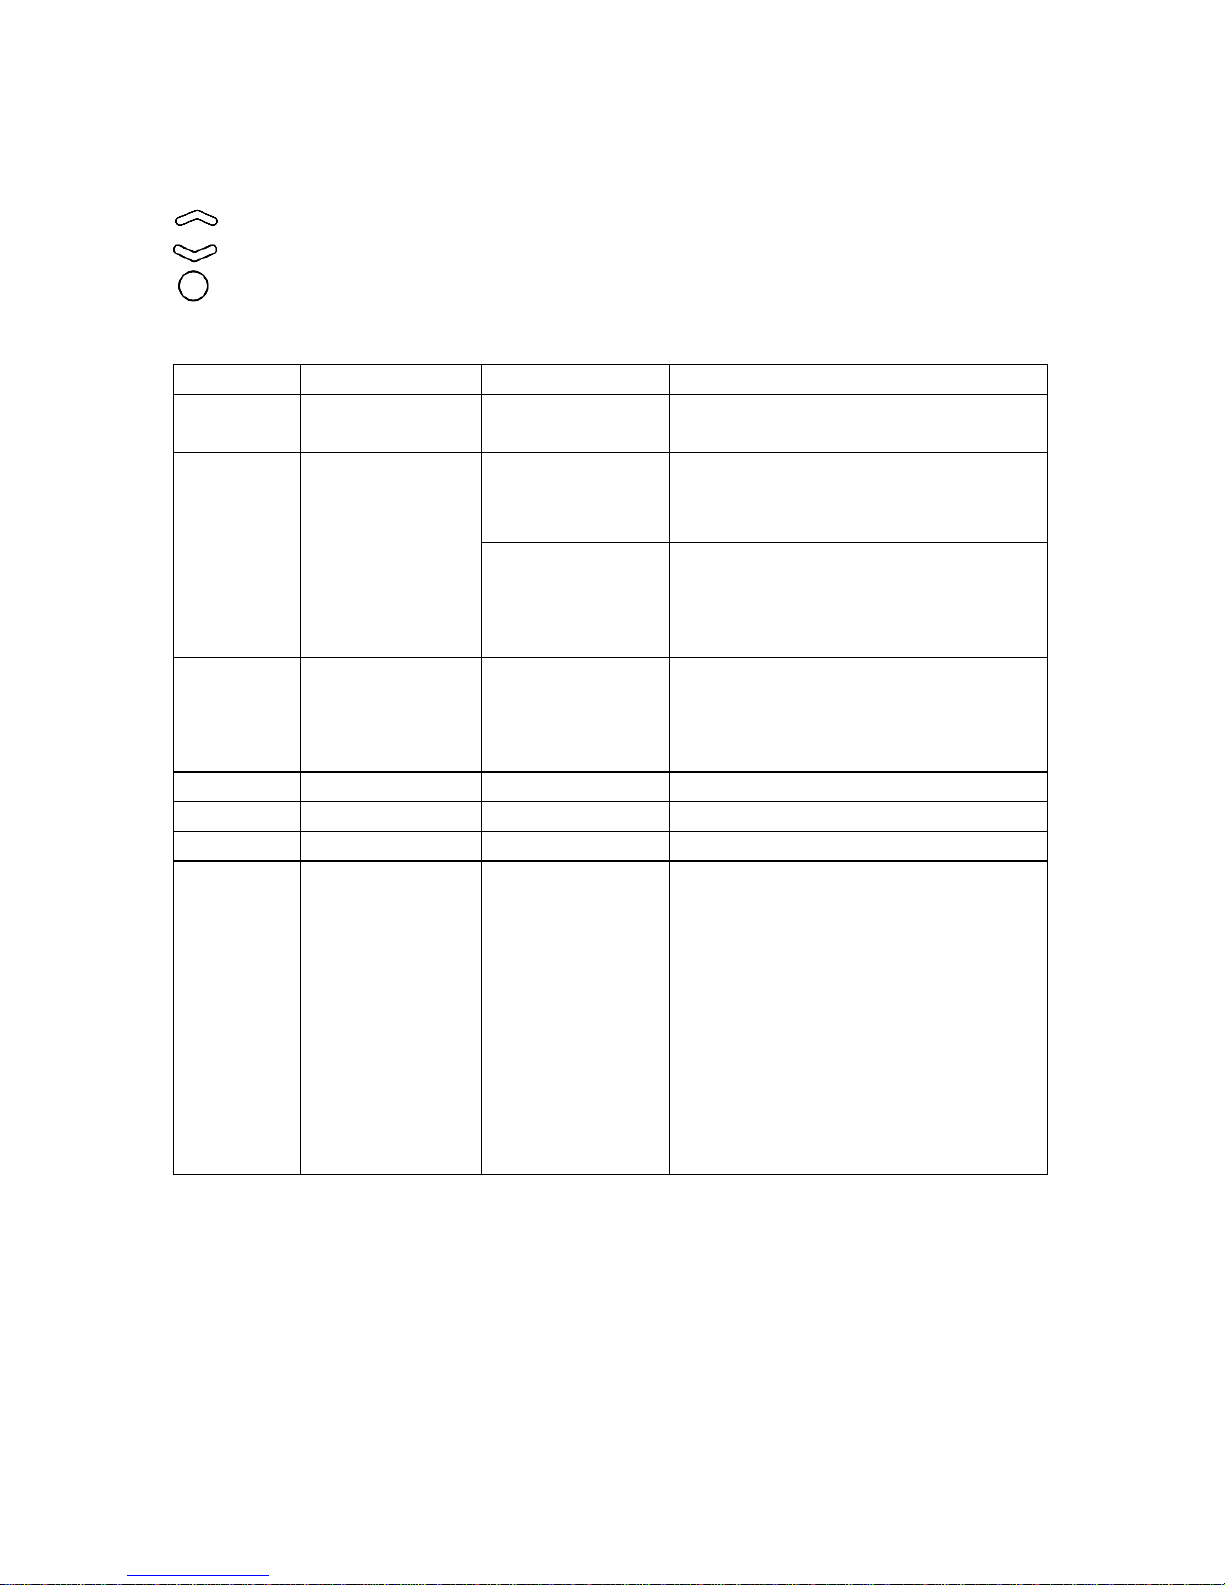
HOW TO CONNET WIFI AND CONTROL VIA APP
(CONFIGURED MENU)
Note:
To navigate and go to next screen.
To navigate and go to previous screen.
To select or confirm press.
Main screens in various operation modes
Display:
Explication
Idle
Main display with current water
temperature
Active
status
Connected to
wifi or not
connected
water temperature
Connected to network of not
connected
Grid/Sun/Idle
Grid - shows power from grid, if
uses;
Sun - displays power from pv, if uses;
Idle – shows nothing.
Active
totals
Today XX kWh
Total XXX kWh
Today – energy (from PV) count
during the day (kWh.)
TOTAL – total energy count (from PV)
from start-up (kWh, MWh).
Settings
Settings
Select to open settings menu
Language
Language
Set display language
Back
Back
Go back to main screen
Reset
Reset
Reset all settings:
• day/night time;
• day/night temperature;
• time;
• language;
• mode;
• wifi configured, if it was connected.
To start your Nectar Sun you need to
set a time.
30 min. after Reset you can pair the
device with wifi.
To set up other operations please see Nectar Sun App.
For Android: www.nectarsun.com/android
For iPhone: www.nectarsun.com/iphone
Page 9
9
PHOTOVOLTAIC HEAT CONTROLER PVHC – 2.01
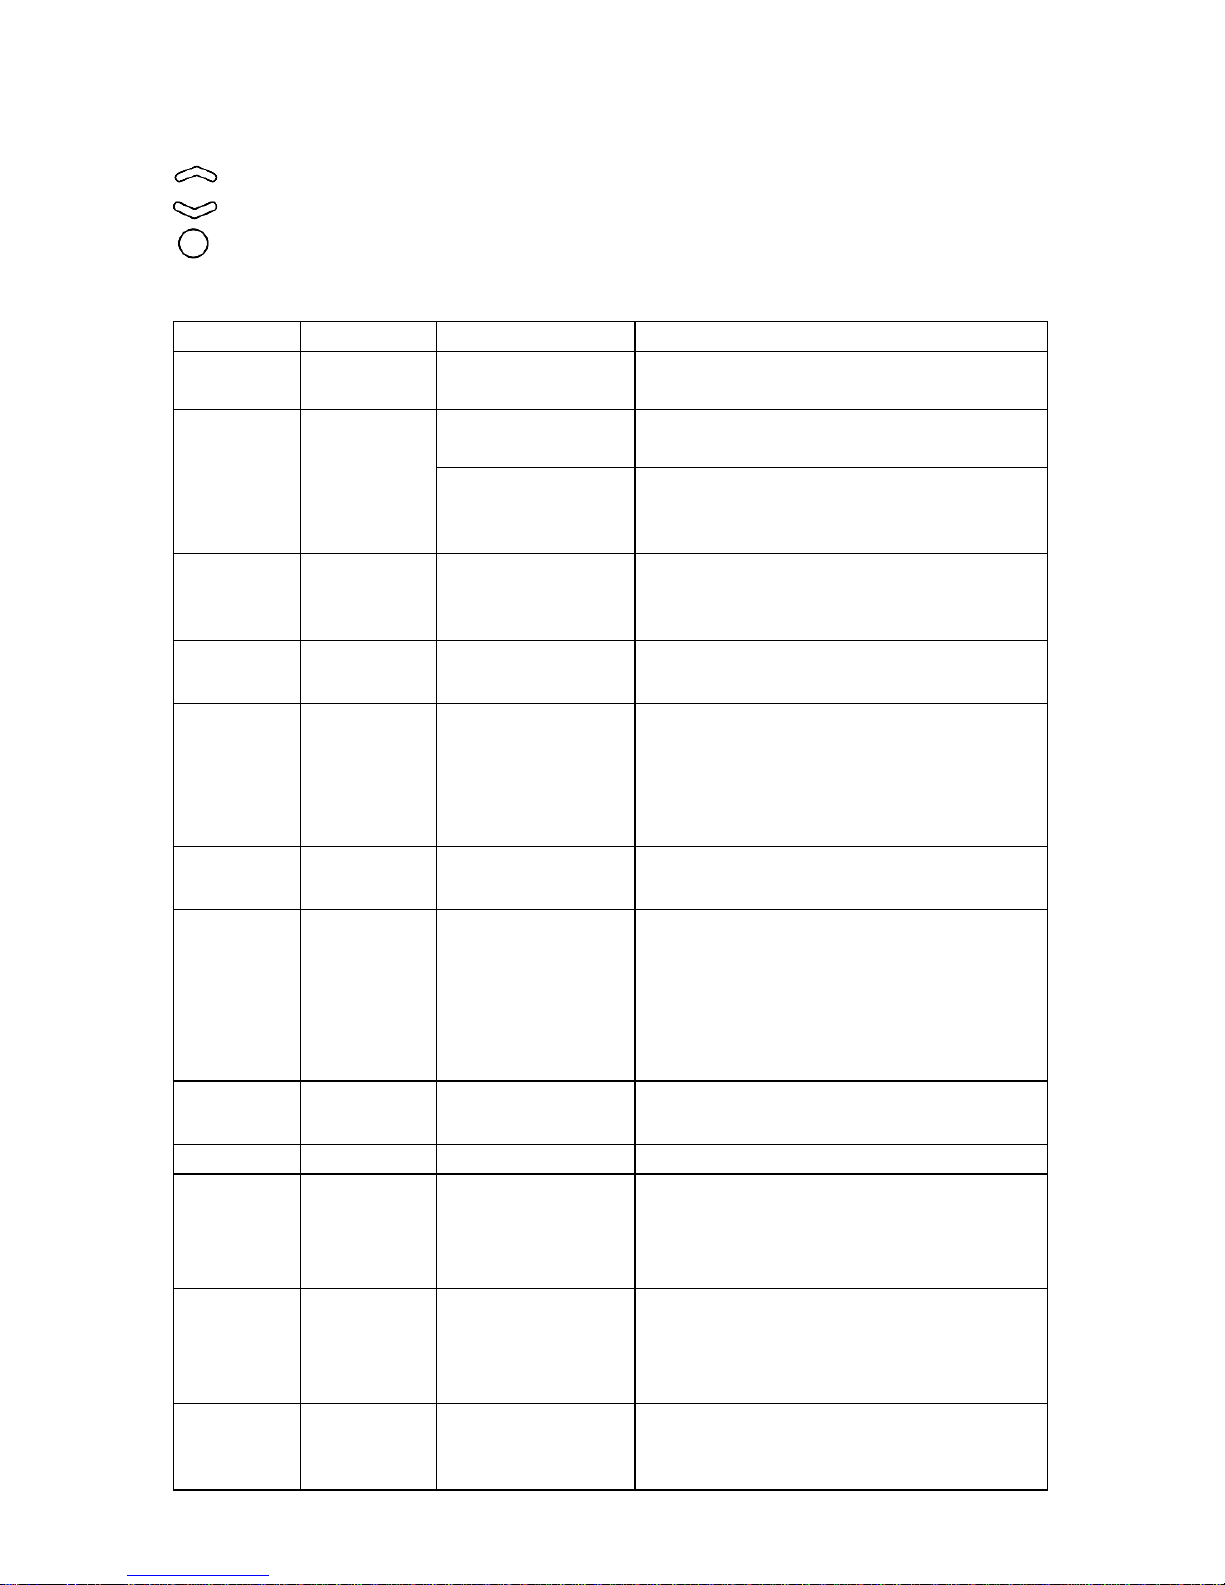
CONTROL MANUALLY (NOT CONFIGURED MENU)
Note:
To navigate and go to next screen.
To navigate and go to previous screen.
To select or confirm press.
Main screen in various operation modes:
Display:
Menu item
Text
Explication
Idle
Main display with current water
temperature
Active
status
Auto/Away/No
grid/Boost
Shows heating mode status.
Grid/Sun/Idle
Grid - shows power from grid, if uses;
Sun - displays power from pv, if uses;
Idle – shows nothing.
Active
totals
Today XX kWh
Total XXX kWh
Today - energy count during the day.
TOTAL – total energy count from startup. In kWh, MWh.
Mode
Press to choose the mode
Auto
Auto mode keeps water temperature
according to day/night temperature
settings (pls. See settings).
Uses grid power, if PV power is not
enough or not available.
Away
Away mode keeps water temperature
between 10-45°C
No grid
No grid mode uses only PV for water
heating. When this mode is selected, the
maximum temperature could reach 75
°C.
Connects to grid, if water temperature is
< 5°C.
Boost
Boosts up water temperature to 66°C.
Connects to grid.
Settings
Settings
Select to open settings menu
Day temp.
Day temp.
Select the minimum temperature you
want to heat water in day time.
Heating from grid is turned on below this
temperature.
Night
temp.
Night temp.
Select the minimum temperature you
want to heat water at night time.
Heating from grid is turned on below this
temperature.
Max temp.
Max temp.
We recommend Set maximum water
temperature, then heating from sun
panels.
Page 10
10
PHOTOVOLTAIC HEAT CONTROLER PVHC – 2.01
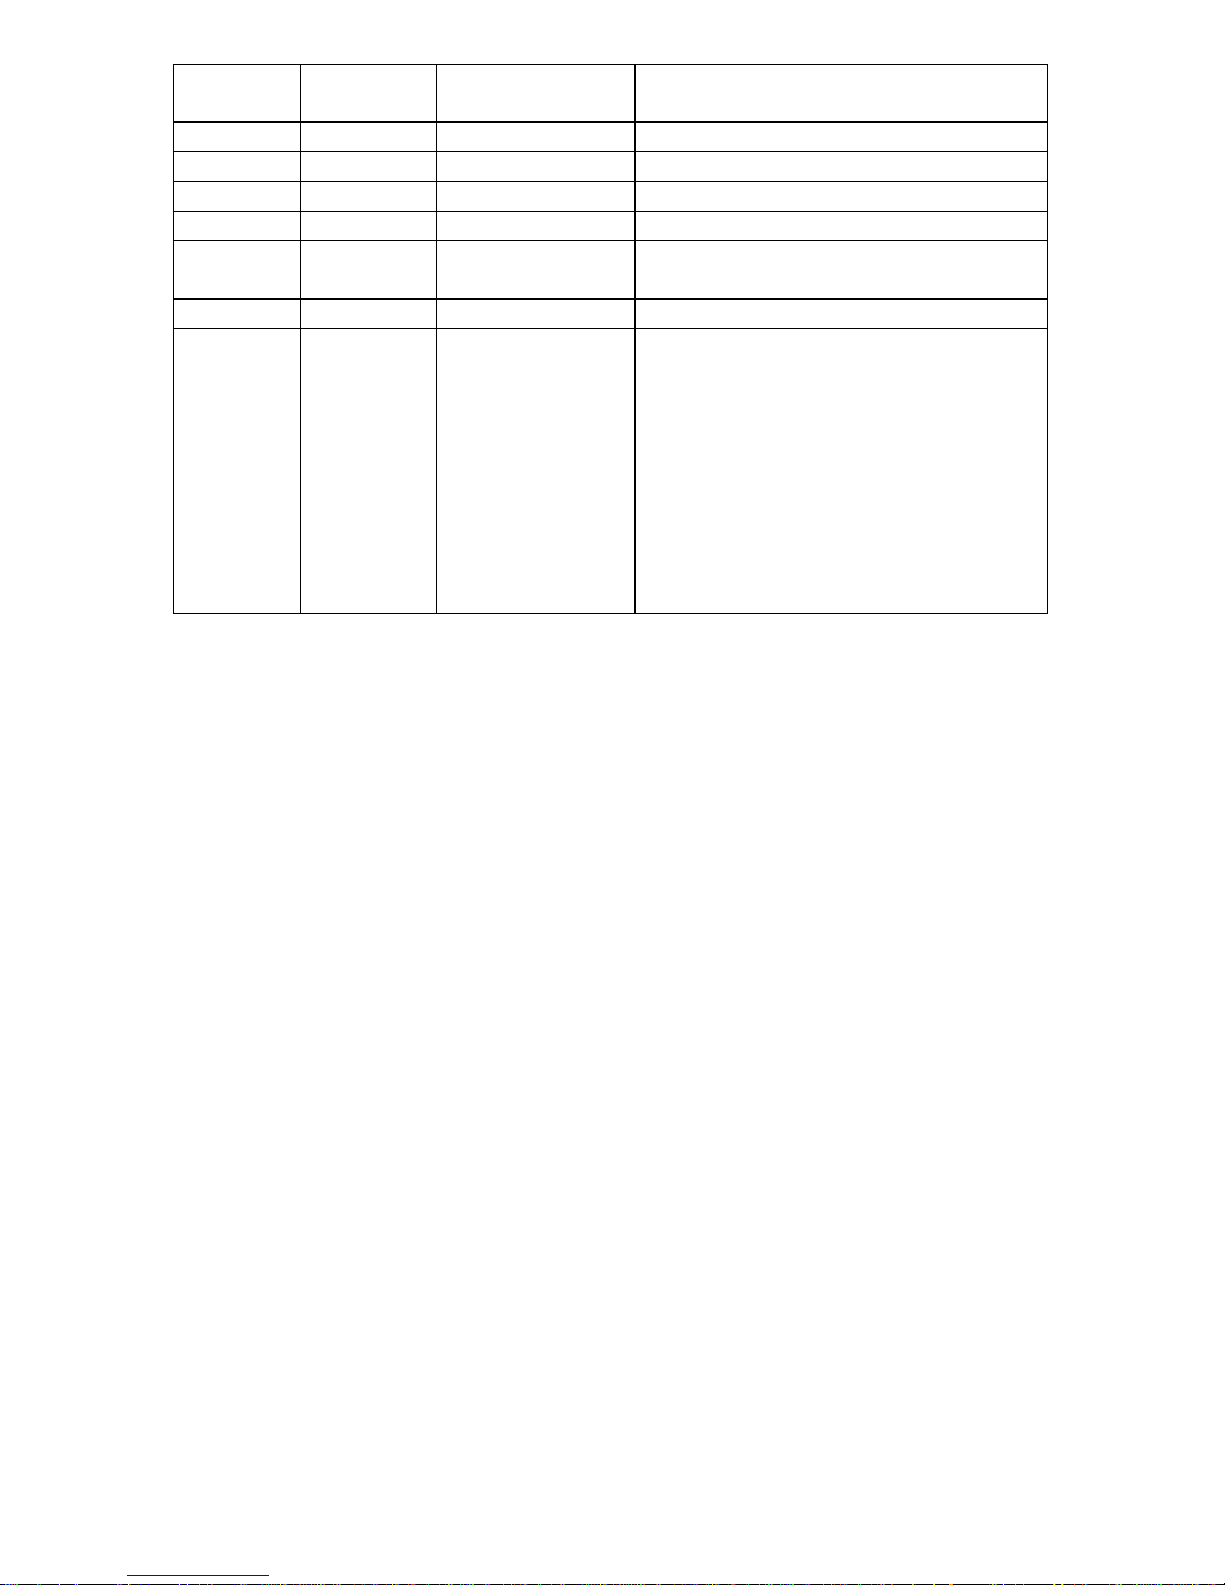
While heating from PV, water heating is
turned off then temperature is reached.
Day starts
Day starts
Set the start of your day, e.g.: 7:30 a.m.
Night starts
Night starts
Set the end of your day, e.g.: 10:30 p.m.
Time
Time
Set current time
Language
Language
Set display language
Pair with
wifi
Pair with wifi
Connect to wifi
Back
Back
Go back to main screen
Reset
Reset
Reset all settings:
• day/night time
• day/night temperature
• time
• language
• mode
To start your Nectar Sun you need to set
a time.
30 min. after Reset you can pair the
device with wifi.
Page 11

11
PHOTOVOLTAIC HEAT CONTROLER PVHC – 2.01
SPECIFICATIONS
ELECTRICAL PARAMETERS
Voltage range 90 - 264VAC / 47 - 63Hz
Max, output current 16A
Overvoltage protection yes
Overcurrent protection yes
INPUT (DC)
Recommended max PV power 1500 – 2500 Wp
Max. input voltage (Voc PV) 350 V
Max. current (Isc PV) 10A
No of MPP trackers 1
MTTP range 100 - 260
V
Load (heater) 16 - 53 Ω
OUTPUT
RECOMMENDED HEATING ELEMENT:
1 kW, 4x250W photovoltaic panels 3-3,5 kW heat element
1,5kW, 6x250W photovoltaic panels 2-2,5 kW heat element
Max. efficiency ≥ 99 %
GENERAL DATA
Cooling natural convection
Operating temperature range +10° C .. +30°C
Max. store humidity 75% non condensing
DC connection MC4
Temperature sensor digital
WLAN IEEE 802.11b/g/n client
Degree of protection IP20
Max. heating temperature 90°C
Dimensions (wxhxd) mm 150x150x83
Weight, kg. 1
Certification CE, TUV
EMC device class B
Warranty 5 year
Page 12

12
PHOTOVOLTAIC HEAT CONTROLER PVHC – 2.01
EU Declaration of Conformity
Vendor’s name: LTD Saulės Grąža Saulėtekio al. 15, LT-10224, Vilnius, Lithuania
Product description: Photovoltaic heat controller
Type designation: PVHC-2.01
This is to confirm that the unit stated above is compliant with the protection requirements
set forth in Directive 2004/108/EC of the European Parliament and of the Council of 15
December 2004 on the approximation of the laws of the Member States relating to
electromagnetic compatibility (Electromagnetic Compatibility Directive) and Directive
2006/95/EC (Low Voltage Directive).
The unit is compliant with the following standards:
2006/95/EC
“Directive relating to electrical
equipment designed for use
within specific voltage limits”
2004/108/EC
“Directive relating to electromagnetic
compatibility”
Safety of the unit:
IEC 60950-1:2005, mod.
IEC 60950-1:2005/A1:2009, mod.
Electromagnetic disturbances:
EN 55011:2009
EN 55011:2009/A1:2010
EN 61000-3-2:2014*
Electromagnetic immunity:
EN 61000-6-1:007
EN 61000-4-2:2009
The unit mentioned above is therefore labelled with the CE mark.
Any unauthorized modifications to the supplied unit and/or any use of the unit that is
contrary to its intended purpose shall render this Declaration of Conformity null and void.
Page 13

13
PHOTOVOLTAIC HEAT CONTROLER PVHC – 2.01
Warranty
Every new Nectar Sun is protected with comprehensive warranty. Standart warranty for the
device is 2 years from the date of purchase. To extend it you can fill in an additional
information in www.nectarsun.com/warranty.
This warranty does not effect or replace the consumer‘s legal rights under applicable laws.
Unless contrary to the respective local law, the warranty in respect of a repared or replaced
product/part shall extend to the remaining warranty period of the repaired product or
replacement thereof to the consumer.
Upon request the consumer may be required to provide the purchase receipt or other
documentation or information in respect of the date and place of purchase. If the event that
the information is not presented or if it is incomplete or illegible, Nectar Sun reserves the
right to refuse the warranty service.
This warranty does not cover demage resulting from:
✓ Normal wear and tear of the equipment;
✓ Defects and damages due to the equipment being used other than in a normal and
customary manner.
✓ Any unauthorised disassembly, repair, alteration or modifications being carried out.
✓ Misuse, abuse, negligence or accident howsoever caused.
✓ Defects and damage arising from improper testing, operation, maintenance,
installation, or any alteration or modification.
✓ Defects or demage due to spillage of food or liquids, corrosion, rust or the use of
wrong voltage.
✓ Scratches or damage to plastic surface and all other externally exposed parts that
are due to normal customer use.
✓
This warranty will be void in any of the followng events:
✓ If the serial number or warranty seal on the equipment has been defaced or
removed;
✓ If any term contained in consumer guide has been altered or modified in any way
without the prior written consent of Nectar Sun.
✓ Without any proof of purchase.
Page 14
PHOTOVOLTAIC HEAT CONTROLER PVHC – 2.01
TROUBLE SHOOTING GUIDE
We recommend to call a specified professional or electrician to repair
the device.
Cause(s)
Solution(s)
Device doesn’t turn on when
plugged in 230V socket
Check if the socket has voltage.
If it proved to be true,
disconnect device from AC
socket, remove cover and check
main power grid fuse that is
shown in the internal
connections diagram (page 5).
Check main power grid wires
connection is connected
properly.
Device turns on, but sun mode
doesn’t work
Disconnect device from AC
socket, unplug PV wires, remove
cover and check PV fuse, that is
show in the internal connections
diagram (page 5).
Also check if heater wires are
connected properly in the
device. They are marked as
water heating element in
internal connections diagram
(page 5).
 Loading...