

NEC of America FOMA N906IL Users manual

Specific Absorption Rate of Mobile Phones,
etc.
Specific Absorption Rate (SAR)
This model phone FOMA N906iL meets the MIC’s*1 technical regulation for exposure to radio waves.
The technical regulation established permitted levels of radio frequency energy, based on standards
that were developed by independent scientific organizations through periodic and thorough evaluation
of scientific studies. The regulation employs a unit of measurement known as the Specific Absorption
Rate, or SAR. The SAR limit is 2 watts/kilogram (W/kg)
includes a substantial safety margin designed to assure the safety of all persons, regardless of age
and health. The value of the limit is equal to the international guidelines recommended by ICNIRP
All phone models should be confirmed to comply with the regulation, before they are available for sale
to the public. The highest SAR value for this model phone FOMA N906iL is 0.32 W/kg. It was taken
by the Telecom Engineering Center (TELEC), a Registered Certification Agency on the Radio Law.
The test for SAR was conducted in accordance with the MIC testing procedure using standard
operating positions with the phone transmitting at its highest permitted power level in all tested
frequency bands. While there may be differences between the SAR levels of various phones and at
various positions, they all meet the MIC’s technical regulation. Although the SAR is determined at the
highest certified power level, the actual SAR of the phone during operation can be well below the
maximum value.
For further information about SAR, please visit the following websites:
World Health Organization (WHO): http://www.who.int/peh-emf/
ICNIRP: http://www.icnirp.de/
MIC: http://www.tele.soumu.go.jp/e/ele/body/index.htm
TELEC: http://www.telec.or.jp/ENG/Index_e.htm
NTT DoCoMo: http://www.nttdocomo.co.jp/english/product/
NEC: http://www.n-keitai.com/lineup/ (in Japanese only)
Association of Radio Industries and Businesses: http://www.arib-emf.org/index.html (in Japanese
only)
*1: Ministry of Internet Affairs and Communications
*2: The technical regulation is provided in Article 14-2 of the Ministry Ordinance Regulating
Radio Equipment.
*3: International Commission on Non-lonizing Radiation Protection
*2
averaged over ten grams of tissue. The limit
*3
.
Radio Frequency (RF) Signals
THIS MODEL PHONE MEETS THE U.S. GOVERNMENT'S REQUIREMENTS FOR EXPOSURE TO
RADIO WAVES.
Your wireless phone contains a radio transmitter and receiver. Your phone is designed and
manufactured not to exceed the emission limits for exposure to radio frequency (RF) energy set by the
Federal Communications Commission of the U.S. Government. These limits are part of comprehensive
guidelines and establish permitted levels of RF energy for the general population. The guidelines are
based on standards that were developed by independent scientific organizations through periodic and
thorough evaluation of scientific studies.
433
SAR
The exposure standard for wireless mobile phones employs a unit of measurement known as the
Specific Absorption Rate (SAR). The SAR limit set by the FCC is 1.6 W/kg.* Tests for SAR are
conducted using standard operating positions accepted by the FCC with the phone transmitting at its
highest certified power level in all tested frequency bands. Although the SAR is determined at the
highest certified power level, the actual SAR level of the phone while operating can be well below the
maximum value. This is because the phone is designed to operate at multiple power levels so as to
use only the power required to reach the network. In general, the closer you are to a wireless base
station antenna, the lower the output.
Before a phone model is available for sale to the public, it must be tested and certified to the FCC that
it does not exceed the limit established by the U.S. government-adopted requirement for safe
exposure. The tests are performed on position and locations (for example, at the ear and worn on the
body) as required by FCC for each model. The highest SAR value for this model phone as reported to
the FCC when tested for use at the ear is 0.22 W/kg, and when worn on the body, is 0.32 W/kg.
(Body-worn measurements differ among phone models, depending upon available accessories and
FCC requirements). While there may be differences between the SAR levels of various phones and at
various positions, they all meet the U.S. government requirement.
The FCC has granted an Equipment Authorization for this model phone with all reported SAR levels
evaluated as in compliance with the FCC RF exposure guidelines. SAR information on this model
phone is on file with the FCC and can be found under the Display Grant section at https://
gullfoss2.fcc.gov/oetcf/eas/reports/GenericSearch.cfm after search on FCC ID A98-FOMA-N906IL.
For body worn operation, this phone has been tested and meets the FCC RF exposure guidelines
when used with an accessory designated for this product or when used with an accessory that
contains no metal and that positions the handset a minimum of 1.5 cm from the body.
*In the United States, the SAR limit for wireless mobile phones used by the public is 1.6 watts/kg (W/
kg) averaged over one gram of tissue. SAR values may vary depending upon national reporting
requirements and the network band.
FCC Regulations
This mobile phone complies with part 15 of the FCC Rules. Operation is subject to the following two
conditions: (1) This device may not cause harmful interference, and (2) this device must accept any
interference received, including interference that may cause undesired operation.
This mobile phone has been tested and found to comply with the limits for a Class B digital device,
pursuant to Part 15 of the FCC Rules. These limits are designed to provide reasonable protection
against harmful interference in a residential installation. This equipment generates, uses and can
radiate radio frequency energy and, if not installed and used in accordance with the instructions, may
cause harmful interference to radio communications. However, there is no guarantee that interference
will not occur in a particular installation; if this equipment does cause harmful interference to radio or
television reception, which can be determined by turning the equipment off and on, the user is
encouraged to try to correct the interference by one or more of the following measures:
e Reorient or relocate the receiving antenna.
e Increase the separation between the equipment and receiver.
SAR
e Connect the equipment into an outlet on a circuit different from that to which the receiver is connected.
e Consult the dealer or an experienced radio/TV technician for help.
Changes or modifications not expressly approved by the party responsible for compliance could void
the user’s authority to operate the equipment.
434
Voice/Videophone Calls
■Making a Voice/Videophone Call
FOMA Making a Voice/Videophone Call......................................................................... 2
Switching a Voice/Videophone Call During a Call (Caller).............................................. 5
Using International Call............................................................................. 6
Using Handsfree Operation During a Call ..................................................... 8
Using the Redial/Dialed Calls/Received Calls Record.... 8
Using Chaku-moji ......................................................................................... 11
Setting Caller ID Notification ........................................................................................... 12
Sending Push Signals..................................................................................... 13
Using the Prefix Function................................................................................................ 14
Setting Sub-addresses When Making Calls ..................................... 15
Setting the Alarm Used for Reconnection............................................. 15
Blocking Out Ambient Noise .................................................................... 15
Making Handsfree Calls in the Car ........................................................ 15
Redial/Dialed calls/Received calls
■Receiving a Voice/Videophone Call
Receiving FOMA Voice/Videophone Calls...................................................................... 16
When the Other Party Switches FOMA Voice/Videophone Calls (Caller)....................... 17
Using the Dial Keys to Answer a Call........................................................ 17
Ending/Holding Calls with the FOMA Terminal Folded....................... 18
Adjusting the Earpiece Volume.......................................................................... 18
Adjusting the Volume of Ring Tone .............................................................. 19
■Settings for when you cannot take calls
Holding the Ringing/Current Call ............................................................ 19
Using the Public Mode (Driving Mode) .................................... 20
Using the Public Mode (Power OFF) .......................................... 21
Setting the Notification Method for Missed Calls .................................. 22
Having the Caller Leave a Message ...................................................... 23
Having Callers Leave a Message During an Incoming Call ..................... 24
Playing/Erasing Recorded Messages, Voice Memos and Video Memos........................ 25
Public mode (Driving mode)
Public mode (Power OFF)
■Setting the Videophone
Using Chara-den............................................................................................................. 26
Selecting the Image Sent to the Other Party .................................................................. 26
Setting the Hands-free Operation for Videophone Calls....................... 28
Setting the Image Displayed During a Videophone Call................................................. 28
Setting for Switching Between FOMA Voice Call and Videophone Call
....................................................................................................................... 29
Setting the Answer Mode When You Receive a Videophone Call During i-mode
................................................................................................................. 29
Using the Videophone Connecting to External Devices ................................................. 30
Remote Monitoring ............................................................................. 30
WORLD CALL
Hands-free
Chaku-moji
Pause dial
Sub-address setting
Reconnect signal
Noise reduction
In-car hands-free
Answer setting
Setting when folded
Vol ume
Ring volume
On hold/Holding
Info notice setting
Record message
Quick message
Hands-free switch
Ntfy switch-mode
V-phone while packet
Remote monitoring
1
Making FOMA Voice/
Videophone Calls
z FOMA voice calls/videophone calls cannot be
made in WLAN single mode.
z In DUAL mode (FOMA prefer/WLAN prefer), FOMA
voice call/videophone call or WLAN voice call can
Voice/Videophone Calls
be selected while entering a phone number.
Dial the phone number starting with
1
the other party’s area code
The “Enter phone number” screen appears.
Always start by entering the area code, even for
calls within the same area.
If the number exceeds 26 digits, last 26 digits
are displayed. You can dial up to 80 digits.
If “ ” is displayed, press d to display
“”.
<When you enter a wrong number>
■ To insert a number
Press v to move the cursor to the number to
the left of the position where you want to insert
the number, then enter the number.
■ To delete a number
Press v to move the cursor to the number you
want to delete, then press t.
Hold down t for 1 second or longer to delete
all the numbers to the left of the cursor and the
number in the cursor position.
■ To reenter the number
Move the cursor to the beginning or end of the
number and hold down t for 1 second or
longer to return to the standby screen.
<Videophone>
■ To make a videophone call with Chara-
den
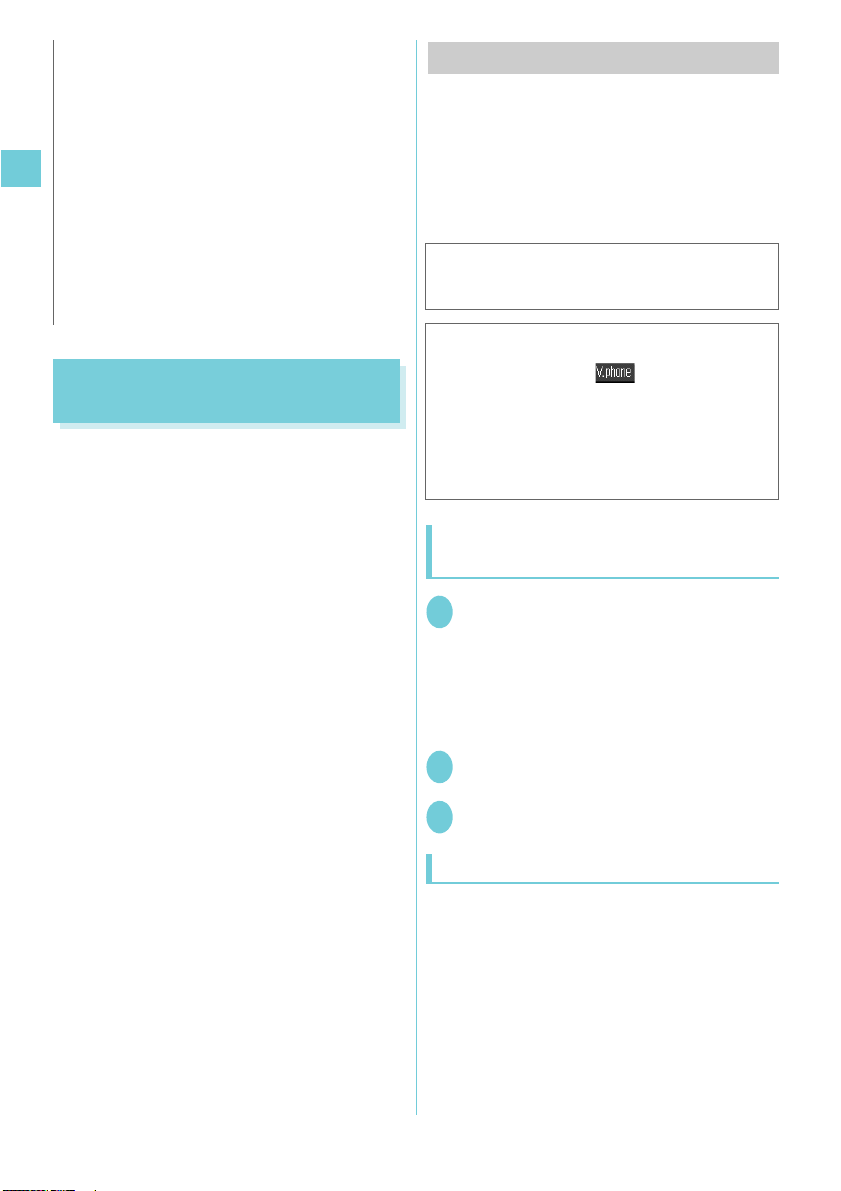
X (FUNC)X“Select image”X“Chara-
den”XSelect Chara-den
r (FOMA voice call)/o ()
2
(videophone call)
<FOMA Voice Call>
The “FOMA voice in-call” screen appears.
■ If you hear the busy tone
The line is busy. Call again after a while.
■ If you hear a message saying that the
other party cannot be reached
The other party’s mobile phone is not turned
on or is out of signal range. Call again after a
while.
■ If you hear a message requesting your
caller ID
The other party sets the Caller ID Request
service to “Activate”. Call again with caller ID
notified.
<Videophone>
The “Videophone in-call” screen appears.
You will hear the other party’s voice from the
speaker and you can start talking.
■ If a videophone call is not connected →
p.5
■ To switch between camera image and
substitute image
X (FUNC)X“Substitute image” or “My
side”
■ To send video from the rear camera
X (Change)
Each time you press (Change), the front
camera/rear camera switches.
■ To switch the main screen
X (1 second or longer)
Each time you press (1 second or longer),
the screen switches in the following order:
Other party’s image on the main screen→
Your own camera image on the main screen →
Display only the other party’s image→Display
only your own camera image
■ To mute the voice to send (Microphone
mute)
X (マナー ) (1 second or longer)
“ ” appears while the voice is muted.
The video image sending is continued.
To cancel muting, press ( マナー ) for 1
second or longer again.
■ To make a WLAN voice call
XVerify that “ ” is displayed, and press r
If “ ” is displayed, press d to display
“ ”, then press d again.
2

■ To change between FOMA voice call/
videophone call during a call (caller)
“Switching FOMA Voice/Videophone Call During
a Call (Caller)”→p.5
■ To put the current voice/videophone call
on hold
“Holding the Ringing/Current Call” → p.19
■ When 2in1 is in Dual mode
The Outgoing number selection screen appears.
Select a phone number.
To end the call, pressy
3
N
z When talking in View style, you can hear the other’s
voice, but cannot send your voice. Use Normal style.
<FOMA Voice Call>
z “ ” flashes while dialing and lights up during the
call.
<Videophone call>
z “ ” flashes while dialing a videophone call and lights
up during the call.
z If you make a videophone call to an emergency
number (110, 119 or 118) from the FOMA terminal,
the call is automatically changed to a FOMA voice call.
z You cannot receive i-mode mail or a MessageR/F
during a videophone call (you can receive SMS,
instant message or presence report). Received mail is
kept at the i-mode Center and can be retrieved using
“Check new messages” after the videophone call.
z If the low-voltage alarm “Recharge batter y” appears
on the display during a videophone call, the other
party sees the “カメラオフ Camera Off” message
and the call is disconnected about 20 seconds later. If
you start charging batter y before the call is
terminated, the videophone call continues with the
image that had been displayed before the low-voltage
alarm.
z Digital communication charges are still applied when
the substitute image is displayed during a videophone
call.
What is the Videophone
You can use the videophone call function
between the terminals that support the DoCoMo
videophone system.
z DoCoMo videophone conforms to the 3G-
*1
standard set down in the international
324M
*2
3GPP
standards. Your FOMA terminal cannot
connect to a videophone terminal that uses a
different system from DoCoMo videophones.
*2: 3GPP (3rd Generation Par tnership Project) A
regional standardization body established to
develop commonly applied technical
specifications for 3rd-generation mobile
communications systems (IMT-2000).
*1: 3G-324MAn international standard for 3rd-
generation mobile videophones.
z There are 2 types of connection speed (64K
(64kbps)/32K (32kbps)) for the videophone, but
the onefone cannot use the videophone in 32K.
■How to view the videophone screen
11
33
44
①Main screen (Camera image of the other party
is displayed at the time of purchase)
②Sub-screen (Your own camera image is
displayed at the time of purchase)
③Call duration
④Settings
: Sending or receiving voice/
Transmission error
: Sending or receiving video/
Transmission error
: Sending camera image/Sending
substitute image
(white) (gray): Handsfree ON/OFF
: Visual check in progress
: Photo mode (Portrait/Scenery/
: Key operation mode (DTMF
1分32
秒
: Muting the microphone
Close-up)
*1
/Whole action mode*2/
mode
22
Voice/Videophone Calls
3

Enter phone number screen
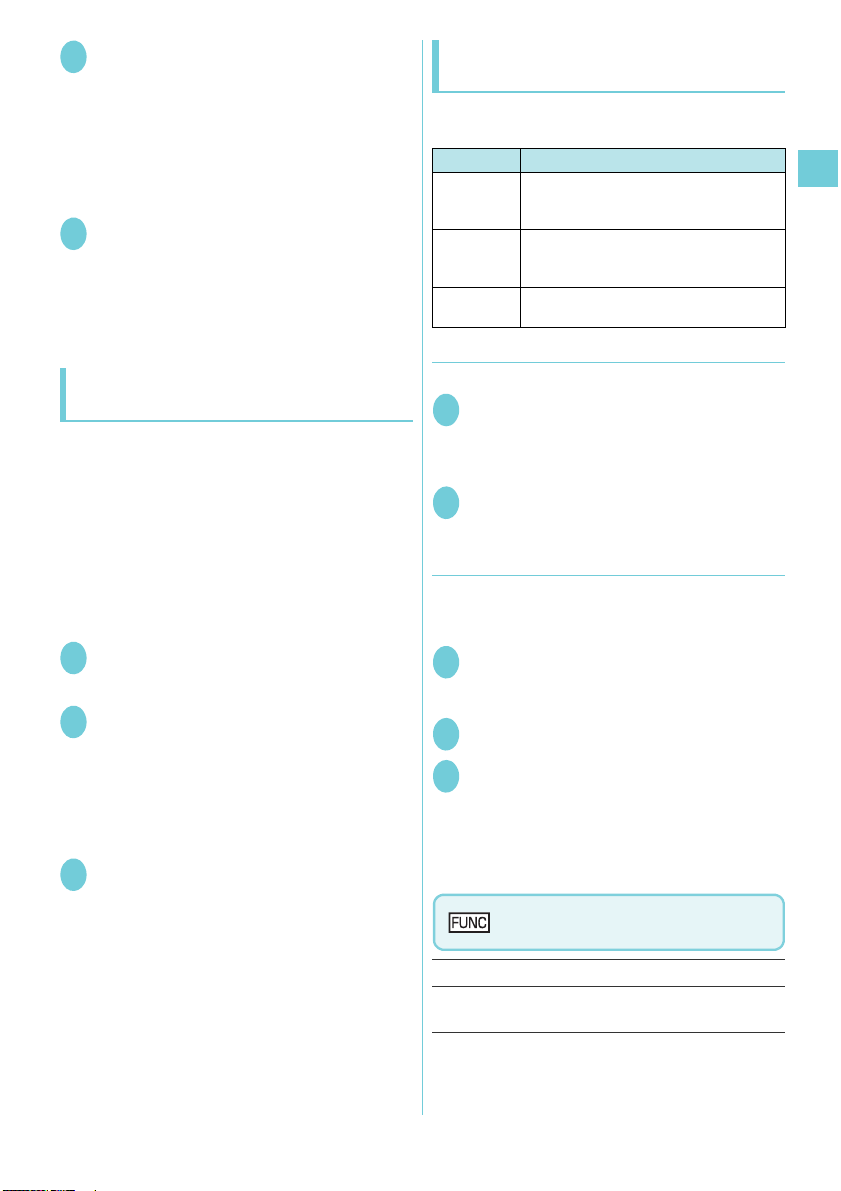
(p.2)
Sending mode*……Select FOMA or WLAN for dialing.
Inp. SIP address……Shows the SIP address entry
screen.
Notify Caller ID→ p.13
Voice/Videophone Calls
Prefix numbers→ p.15
Prefix……Enters a prefix for a WLAN voice call.
Chaku-moji→ p. 11
Int’l call→ p.7
Multi Number
Add to phonebook
Compose message
Select image……Selects the image used during a
videophone call from “My side”/“Chara-den”. Select
“Release settings” to cancel the setting.
*: This function is unavailable when 2in1 mode is in B mode.
*
Videophone in-call screen (p.2)
Petit message→ p. 29
Decoration→p.28
Off decoration……Deletes the displayed message or
stamp.
Substitute image ⇔My side……Switches between the
camera image and the substitute image.
Front camera⇔ Rear camera……Switches between
front camera and rear camera. This setting is only
retained during the call.
Change main disp.……Change the main display. The
screen changes in the order of “Displaying the image from
the other party’s camera on your main screen.” →
“Displaying the image from your own camera on your
main screen.” →“Displaying only the image from the other
party’s camera.” →“Displaying only the image from your
own camera.”
Visual check ⇔Visual check off→ p.2 7
V.phone settings……Sets the screen for videophone
call.
Visual prefer……Sets the image sent to and
received from the other party. This setting is only
retained during the call.
Normal (default)……Standard setting for both
quality and movement.
Prefer img qual……Sends more finely
detailed video images. Best for motionless
subjects.
Prefer motion spd……Sends video images
with smooth movement. Best for fast-moving
subjects.
Brightness……Five brightness levels (-2 to 0 to +2)
are available.
White balance……Sets image color tones. This
setting is also applied to the equivalent camera
functions.
Color mode set……Selects the effect for the movie
from “Normal”/“Sepia”/“Monochrome”. This setting is
only retained during the call.
Photo mode……Sets modes suited to the scene
being shot. This setting cannot be set for the front
camera.
Chara-den set.……You can set the following when
Chara-den is used. This setting cannot be set for the
camera images.
Switch Chara-den……Selects the character to be
displayed.
Action List……Checks the available actions and
the corresponding keys. You can also view the action
list by pressing w.
Change Action……Changes the Action mode.
Switch image……Displays your own custom image
on the other party’s display.→ p. 26
Display light……Sets lighting of backlight.
All time ON (default)……Turns the backlight on all
the time.
10 seconds ON……Turns the backlight on for 10
seconds only.
Front camera Reverse……Sets whether to display your
camera image as a mirror image (ON) or normal image
(OFF) on the FOMA terminal during a call.
Own number……Displays your phone number during a
videophone call.
Send DTMF tone⇔DTMF tone OFF……Sets/cancels
push signal transmission mode during Chara-den.Except
for Chara-den, videophone calls are always in push signal
transmission mode.
Change to voice→ p.5
Loc. notification
4
● If a videophone call is not connected
When a videophone call is not connected, the cause
of the failure appears.
z The cause may not appear depending on the
situation.
z Depending on the type of other party’s phone or the
possible lack of a network service subscription, the
reason may not accurately reflect the other party’s
actual status.
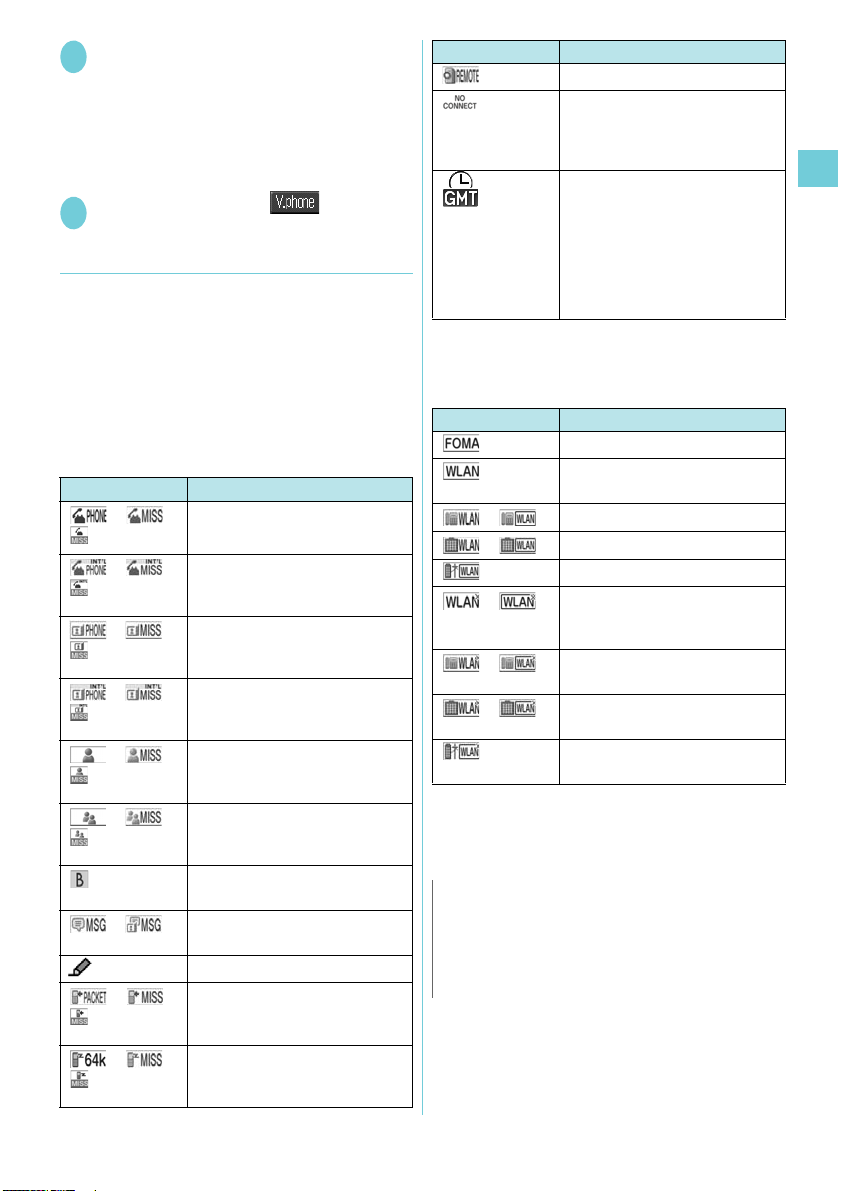
Display Cause
Check number then
redial
Busy The line is busy
Busy with packet
transmission
Out of service area/
power off
Set caller ID to ON You connected without notifying
Your call is being
forwarded
Redial using voice
call
Please activate
caller ID before
dialing again
At the user’s
request, your call
cannot be connected
Upper limit has been
exceeded
Connection failed
Connection failed Set the caller ID notification to
Please make your
call from the i-mode
web page
z If the videophone call is not connected, your call is
automatically switched to a FOMA voice call when
you set “Auto redial as voice” to “ON”. However, the
call may not be handled in this way if you call an
ISDN synchronous 64K or ISDN videophone which
The called phone number is not
used
• This message may also
appear during packet
communication.
The other party is using packet
communication
The other party is out of FOMA
service area or the phone is
turned off
your caller ID (when dialing into
Visualnet, etc.)
The call is being forwarded (A
Videophone call is made when
the forwarding number is for a
3G-324M-compatible
videophone)
The phone for the forwarding
number is not compatible with
videophone calls
The other party sets the Caller
ID request service
The other party sets the
Nuisance call blocking service
The upper limit set for a Limit
billing plan (Type Limit and
Family Wide Limit) is exceeded
“ON” and retry
• This message may also
appear in other situations
You attempted to make a
videophone call to watch V-line
without browsing the i-mode
official site
does not support the 3G-324M standard (as of
May, 2008) or if you dial a wrong number. Note that
call charge may be applied in some cases.
Switching FOMA Voice/
Videophone Call During a Call
(Caller)
z If the handset of the other party is the FOMA
terminal supporting the call switch, you can switch
between FOMA voice call and videophone call.
(This function is available in communications
between voice call and videophone call switchable
terminals.)
z You can switch the voice call only when you are the
caller.
z To switch the call, the receiver needs to set “Ntfy
switch-mode” to notify the switch beforehand.→
p.29
z You can switch FOMA voice/videophone calls
repeatedly.
z WLAN voice call and videophone call cannot be
changed.
<Example: To switch a FOMA voice call to a videophone
call>
FOMA voice in-call screen (p.2)Xd
1
()X“YES”
While switching, the screen which indicates that
the calls are being switched appears and the
voice guidance is played.
■ To switch a videophone call to a FOMA
voice call
XVideophone in-call screen (p.2)Xu
(FUNC)X“Change to voice”
N
z It takes about 5 seconds to switch the calls. Note that
the signal quality may affect how long it takes.
z You cannot switch the calls during calling in the
following cases:
• When the other party is holding the call
• When the other party activates Record message
z The displayed call duration is reset to 0 second each
time the calls are switched. However, after switching, if
the videophone call is finished, the displayed call time
is the total of FOMA voice call and videophone call.
The time took for switching is excluded from the call
duration.
z Depending on the other party’s communication
conditions or the signal quality, you may not be able to
switch the calls and the call may be canceled.
z When the call is switched, the first dialed call is
registered to the Redial/Dialed calls records. The first
received call is registered to the Received calls record.
Continued on next page
Voice/Videophone Calls
5
N
z You are not charged while “SWITCHING VOICE/
VIDEO” appears.
z If you switch the calls, the amount of call charge displayed
in “Call data” may differ from the actual one.
<When switching from FOMA voice call to
videophone call>
z If the caller is using i-mode, the packet communication
Voice/Videophone Calls
is canceled to switch to videophone.
z If the other party is using packet communication
(including i-mode), you receive the message “No
Switch” meaning you cannot switch the calls and the
FOMA voice call continues.
z You cannot switch the calls when “Call Waiting” is
activated.
Using International Call
<WORLD CALL>
WORLD CALL is an international call service that can
be used on a DoCoMo’s mobile phone.
You subscribed to “WORLD CALL” at the time of
FOMA service contract (except if you reject
subscription).
z Calls can be made to about 240 countries and
areas.
z “WORLD CALL” charges are combined with
monthly FOMA call charges.
z To make an international call, enter a phone
number directly, use “+”, or select “Int’l call” or
“Prefix numbers” from the Phone number entry,
Redial/Dialed calls, Received calls or Phonebook
detail function menus.
z This service is not available in some payment
plans.
International calling order change
Mobile phones and other mobile communications are
not included in the “MYLINE” service, and the
“MYLINE” service is not available for WORLD CALL.
However, the “MYLINE” service introduction changed
the dialing order for international call made from a
mobile phone, etc. The former dialing order
(excluding “010” from the following dialing order) is
not available.
If you have further questions regarding WORLD
CALL, contact the inquiries number provided on
the back of this manual.
To make an international videophone to a user of
specific 3G mobile terminal overseas, dial as
follows then press o ().
z See the DoCoMo’s Website for information on
accessible countries and operators.
z Depending on the other party’s terminal, the image
of the other party displayed on the FOMA terminal
may be distorted or the connection may fail when
making an international videophone.
Making an international call by dialing
a phone number
Dial the following: 009130 → 010 →
1
Country code→ Area code (Long
distance code) → The other party’s
phone number
If the area code (long distance code) begins with
“0”, omit the first “0”. When placing a call to a
fixed-line phone in Italy, the initial “0” is required.
r
2
International call is made.
To end the call, press y
3
Making an international call using “+”
Using “+”, an international call can be made without
dialing an international access code such as 009130-
010.
z “Auto Int’l call set.” under “Int’l dial assistant” is set
to “ON” (Automatically added) at the time of
purchase, and international access code is
automatically dialed.
z For WLAN voice call, “+” is not converted to
international access code before dialing.
6
On the standby screen, dial the
X
X
X
1
following: + (0 (1 second or longer))
→Country code →Area code (Long
distance code)→ The other party’s
phone number
If the area code (long distance code) begins with
“0”, omit the first “0”. When placing a call to a
fixed-line phone in Italy, the initial “0” is required.
r
“Dial”
2
International call is made.
■ To make a call without converting “+” to
international access code
■ To cancel calling
X“Cancel”
Making an international call using the
dialing function <Int’l call>
Add a country code or international access code to
make an international call.
z Country code or international access code can be
added by “Int’l dial assistant”.
z You can use the international dialing function from
the “Enter phone number” screen and the detail
screens of “Phonebook”/“Received calls”/“Dialed
calls”/“Redial” screens.
<Example: To use the international dialing function
the Enter phone number screen>
Enter the phone number of the other
1
party
u (FUNC)
2
country code
access code
Selected country code and international access
code are added. If the area code begins with “0”,
the initial “0” is automatically deleted (except
when “Italy” is selected for the country code).
r
3
“Int’ call”XSelect a
Select an international
Making an international call quickly
<Int’l dial assistance>
Change the settings for making an international call
or edit a country code. The following items can be set:
Setting Description
Auto int’l
call set.
Country
Code
setting
IDD Prefix
setting
● Setting “+” auto-conversion
Set “+” auto-conversion for an international call.
iX“Settings”X“Dialing”XInt’l dial
1
assistanceXAuto int’l call set.X“ON”
■ To cancel auto-conversion
X“OFF”
Select a country codeXSelect an
2
international access code
● Editing a country code
Up to 22 country codes can be registered to make an
international call.
For country codes, visit DoCoMo’s website.
iX“Settings”X“Dialing”X“Int’l dial
1
assistance”X“Country Code setting”
The “Country Code setting” screen appears.
Highlight an itemXo (Edit)
2
Enter a country nameXEnter a country
3
code
You can enter up to 8 double-byte or 16 singlebyte characters for a country name, and 5 digits
for a country code.
Automatically converts entered + to the
specified international access code when
making an international call from Japan.
Edits a country name and code used to
make an international call. 22 names and
codes are stored at the time of purchase.
Adds an international access name and
code used to make an international call.
Country Code setting screen
(p.7)
Voice/Videophone Calls
Edit……Edits the country code.
Delete……Select “Delete this”, “Delete selected” or
“Delete all”. “About multiple-choice”
Continued on next page
7
● Registering international access codes
X
X
X
X
X
Up to 3 international access codes can be registered
to add to the beginning of a phone number when
making an international call.
i
“Settings”X“Dialing”X“Int’l dial
1
assistance”
The “IDD Prefix setting” screen appears.
Voice/Videophone Calls
Highlight “<Not recorded>”
2
■ To change an already stored item
XHighlight an item to changeXo (Edit)
Enter an international access
3
name
“IDD Prefix setting”
o (Edit)
Enter an international access
code
You can enter up to 8 double-byte or 16 singlebyte characters for an international access
name, and 10 digits for an international access
code.
Using Handsfree Operation
During a Call
<Hands-free>
You can hear the other party’s voice from the speaker while
talking.
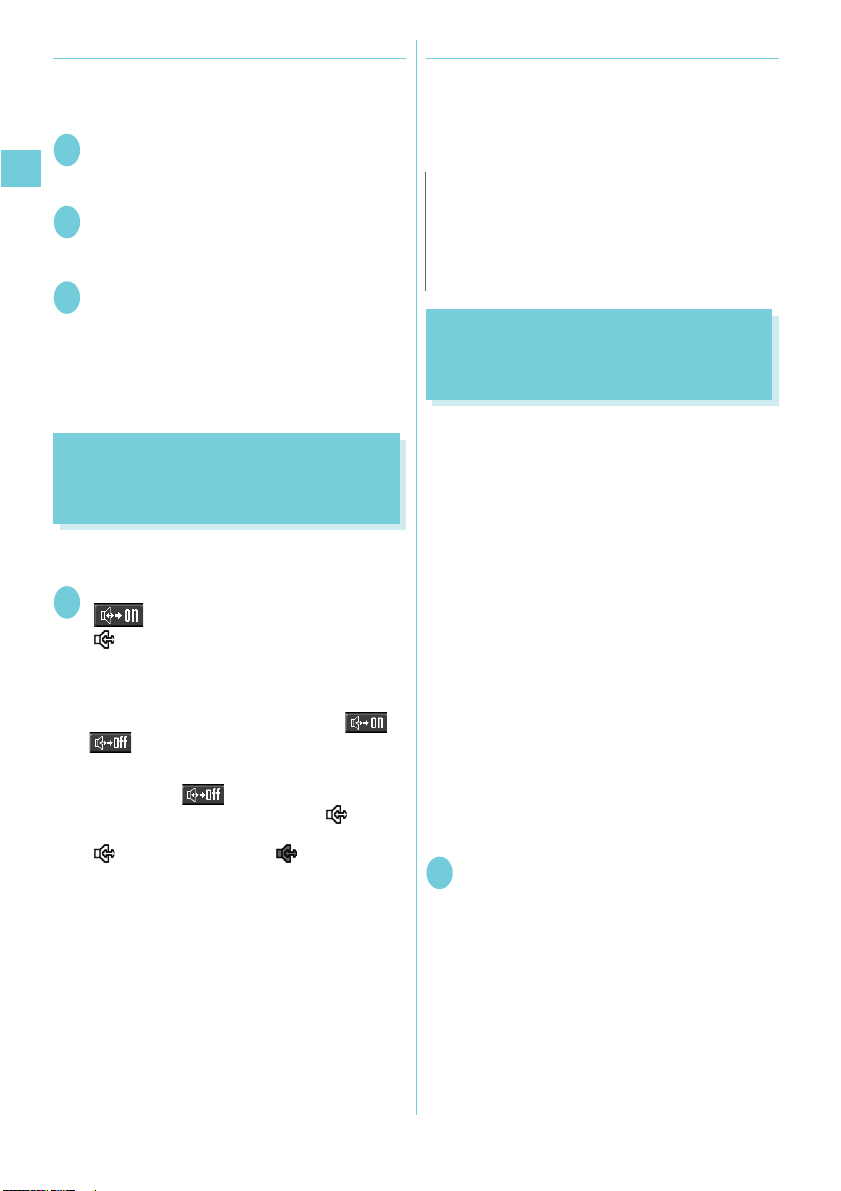
FOMA voice in-call screen (p.2)Xo
1
()
“ ” (white) appears and you can hear the
other party’s voice through a speaker during a
handsfree call.
While your terminal is ringing, you can switch to
handsfree operation by pressing o (/
).
■ To cancel the handsfree operation
XPress o ( ) during a handsfree call
The handsfree operation ends, and “ ” (white)
disappears in case of voice call or PushTalk.
“ ” (white) is changed to “ ” (gray) in case
of videophone.
● Notes on using the handsfree operation
It is recommended to keep a distance of about 30 cm
from the FOMA terminal during a handsfree call. If
the distance is longer or shorter than 30 cm, the other
party may find it difficult to hear you or your voice may
sound differently.
N
z Other party’s voice may be heard by those around you
during a handsfree call. Move to an area where your
call will not disturb other people before switching to a
hands-free call.
z When a call is finished, the handsfree setting is canceled.
Using the Redial/Dialed Calls/
Received Calls Record
<Redial/Dialed calls/Received calls>
Information on dialed or received calls, including the
caller’s phone number, SIP address and the date and
time are stored in the Redial/Dialed calls/Received
calls record. You can make a call to the other party
easily by using these records.
z When you make calls to the same phone number/
SIP address repeatedly, the latest entry is stored
as the Redial record and separate entries are
stored for the Dialed calls record.
z The Redial record can hold up to 30 phone
numbers/SIP addresses for voice/videophone calls
or PushTalk calls.
z The Dialed calls/Received calls record stores up to
30 voice/videophone call or PushTalk call entries
and 30 packet communication or 64K data
communication entries.
z When the log exceeds the maximum, logs are
overwritten from the oldest one.
z Redial/Dialed calls/Received calls record for
PushTalk
<Example: To make a call from the Redial/Received
calls list screen>
On the standby screen
1
h (Received calls)
The “Redial (list)” or “Received calls (list)”
screen appears.
■ To check the Dialed calls
XiX“Own Data”X“Dialed calls”
The “Dialed calls (list)” screen appears.
j (Redial)/
8
Highlight the Redial/Received calls
2
record entry
■ To make a call after checking the details of
the Redial/Received calls record
XSelect the Redial/Received calls record entry
The “Redial (detail)” or “Received calls (detail)”
screen appears.
r (voice call)/o ()
3
(videophone call)/@(PushTalk)
● Checking the number of missed calls
■ To confirm only the missed calls from the
Received calls record
XiX“Own Data”X“Received calls”
Total number of received calls, the number of missed
calls and the number of unconfirmed missed calls
appear.
When you select “Missed calls”, only the missed calls
appears.
■Redial/Dialed calls/Received calls record icons
*1
Icon
//
//
//
//
//
//
※2
/
//
//
Incoming and outgoing/missed/
unconfirmed missed voice calls
Incoming and outgoing/missed/
unconfirmed missed international
voice calls
Incoming and outgoing/missed/
unconfirmed missed videophone
calls
Incoming and outgoing/missed/
unconfirmed missed international
videophone calls
Incoming and outgoing/missed/
unconfirmed missed PushTalk
(one-to-one) calls
Incoming and outgoing/missed/
unconfirmed missed PushTalk
(group) calls
Incoming and outgoing calls to B
mode for 2in1 setting
Recorded voice record message/
videophone message
Received calls with Chaku-moji
Incoming and outgoing/missed/
unconfirmed missed packet
communication
Incoming and outgoing/missed/
unconfirmed missed 64K data
communication
Description
*1
Icon
Incoming remote observation calls
Incoming packet communication or
64K data communication that is
received without external device
connected
Incoming and outgoing calls when
you select any zones other than
“GMT+9” on the time zone
regardless of “Auto time adjust”
setting.
When “Summer time” is set to
“ON”, the World watch is displayed
reflecting the setting.
*1 : Some icons may appear differently between the screens
of detail and list.
*2 : Displayed only when the 2in1 is in Dual mode.
Description
■Displayed Dialing mode/Receiving mode icons
*1
Icon
FOMA dialing/receiving
WLAN dialing, WLAN (extension
or outside) receiving
/
/
/
/
/
*1 : Some icons may appear differently between the screens
of detail and list.
*2 : Icons displayed for WLAN (extension or outside)
receiving vary depending on the main device (SIP
server) settings.
WLAN (extension) receiving
WLAN (outside) receiving
WLAN (dedicated) receiving
WLAN call that could not be dialed
or received (extension or
outside)
WLAN call (extension) that could not
be received
WLAN call (outside) that could not be
received
WLAN call (dedicated) that could
not be received
Description
*2
*2
*2
*2
*2
*2
N
z If you use 2in1, up to 30 records are stored for each
phone number. Also, when set to Dual mode, up to 30
Redial/Dialed calls/Received calls records for both
phone numbers and total of the 60 records are
displayed.
Voice/Videophone Calls
Continued on next page
9
 Loading...