

Page 1

User’s Manual
CONTENTS
How to Attach Options to the Plasma Monitor ... E-1
Introduction................................................... E-2
Part Names and Function................................ E-3
Installation .................................................... E-8
Basic Operations ......................................... E-13
WIDE Operations ........................................ E-15
OSM Controls ............................................. E-17
External Control........................................... E-38
Table for Signals Supported .......................... E-50
Troubleshooting ........................................... E-51
Specifications.............................................. E-52
Bedienungshandbuch
Manuel de l'utilisateur
Manual del Usuario
Bruksanvisning
Manuale d'uso
Page 2
Important Information
Warnings and Safety Precaution
The NEC Multimedia monitor PlasmaSync 5000W is
designed and manufactured to provide long, troub lefree service. No maintenance other than cleaning is
required. Use a soft dry cloth to clean the panel. Never
use solvents such as alcohol or thinner to clean the
panel surface.
The plasma display panel consists of fine picture elements or pixels (cells). Although NEC produces
plasma display panels with more than 99.99 percent
active cells, there can be some cells that do not produce light or remain lit.
For operating safety and to a v oid damage to the unit,
read carefully and observe the following instructions.
To avoid shock and fire hazards:
1. Provide adequate space for ventilation to avoid internal heat build-up. Do not cover rear vents or install in a
closed cabinet or shelves.
The unit is equipped with cooling fans. If you install
the unit in a an enclosure, be sure there is adequate
space at the top of the unit to allow hot air to rise and
escape.
If the monitor becomes too hot, the overheat protector
will be activated and the monitor will be turned off. If
this happens, turn off the power to the monitor and unplug the power cord. If the room where the monitor is
installed is particularly hot, move the monitor to a cooler
location, and wait for the monitor to cool for 60 minutes. If the problem persists, contact your NEC dealer
for service.
2. Do not use the power cord polarized plug with extension cords or outlets unless the prongs can be completely
inserted.
3. Do not expose unit to water or moisture.
4. Av oid damage to the power cord , and do not attempt to
modify the power cord.
5. Unplug unit during electrical storms or if unit will not
be used over a long period.
6. Do not open the cabinet which has potentially dangerous high voltage components inside. If the unit is damaged in this way the warranty will be void. Moreover,
there is a serious risk of electric shock.
7. Do not attempt to service or repair the unit. NEC is not
liable for any bodily harm or damage caused if unqualified persons attempt service or open the back cover.
Refer all service to authorized NEC Service Centers.
To avoid damage and prolong operating life:
1. Use only with 100-240V 50/60Hz AC power supply.
Continued operation at line voltages greater than 100240 Volts A C will shorten the life of the unit, and might
even cause a fire hazard.
2. Handle the unit carefully when installing it and do not
Precautions
Please read this manual carefully before using your NEC
PlasmaSync - 50 inch Plasma Monitor PX-50M5G and
keep the manual handy for future reference.
RISK OF ELECTRIC SHOCK
DO NOT OPEN
CAUTION: TO REDUCE THE RISK OF ELECTRIC
SHOCK, DO NOT REMOVE COVER.
NO USER-SERVICEABLE PARTS INSIDE. REFER SER VICING TO QU ALIFIED SERVICE PERSONNEL.
This symbol warns the user that uninsulated
voltage within the unit may have suf f icient
magnitude to cause electric shock. Therefore, it is dangerous to make any kind of
contact with any part inside of this unit.
This symbol alerts the user that important
literature concerning the operation and
maintenance of this unit has been included.
Therefore, it should be read carefully in
order to avoid any problems.
WARNING
TO PREVENT FIRE OR SHOCK HAZARDS, DO NOT
EXPOSE THIS UNIT TO RAIN OR MOISTURE. ALSO
DO NOT USE THIS UNIT'S POLARIZED PLUG WITH
AN EXTENSION CORD RECEPT A CLE OR OTHER OUTLETS, UNLESS THE PRONGS CAN BE FULLY INSERTED . REFRAIN FROM OPENING THE CABINET AS
THERE ARE HIGH-VOLTAGE COMPONENTS INSIDE.
REFER SERVICING TO QUALIFIED SERVICE PERSONNEL.
WARNING
This is a product of Class B. In case of any functionality
disturbance in the usage, it is requested to ask the supplier
for the appropriate treatment.
CAUTION
Page 3

drop.
3. Locate set away from heat, excessive dust, and direct
sunlight.
4. Protect the inside of the unit from liquids and small
metal objects. In case of accident, unplug the unit and
have it serviced by an authorized NEC Service Center .
5. Do not hit or scratch the panel surface as this causes
flaws on the surface of the screen.
6. For correct installation and mounting it is strongly recommended to use a trained, authorized NEC dealer.
7. As is the case with any phosphor-based display (like a
CRT monitor, for example) light output will gradually
decrease over the life of a Plasma Display Panel.
Recommendations to avoid or minimize phosphor burn-in
Like all phosphor-based display devices and all other gas
plasma displays, PlasmaSync monitors can be susceptible
to phosphor burn under certain circumstances. Certain operating conditions, such as the continuous display of a
static image over a prolonged period of time, can result in
phosphor burn if proper precautions are not taken. To protect your investment in this NEC PlasmaSync monitor,
please adhere to the following guidelines and recommendations for minimizing the occurrence of image burn:
• Always enable and use your computer’s screen saver
function during use with a computer input source.
• Display a moving image whenever possible.
• Always power down the monitor when you are finished
using it.
If the PlasmaSync monitor is in long term use or continuous operation take the following measures to reduce the
likelihood of phosphor burn:
• Lower the Brightness and Contrast le vels as much as pos-
sible without impairing image readability.
• Display an image with many colors and color gradations
(ie. photographic or photo-realistic images).
• Create image content with minimal contrast between light
and dark areas, for example white characters on black
backgrounds. Use complementary or pastel color whenever possible.
• Avoid displaying images with few colors and distinct,
sharply defined borders between colors.
Contact NEC affiliates on authorized dealer for other recommended procedures that will best suit your particular
application needs.
Burn-in is not covered by the warranty.
Page 4

Contents
How to Attach Options to the Plasma Monitor
.......E-1
Introduction...................................................E-2
Introduction to the PlasmaSync 50–inch
Plasma Monitor .................................................... E-2
The features you'll enjoy include: ........................... E-2
Contents of the Package........................................ E-2
Part Names and Function ...............................E-3
Front View ........................................................... E-3
Rear View / Terminal Board.................................. E-4
Remote Controller................................................. E-5
Battery Installation and Replacement ...................... E-6
Using the wired remote control mode ..................... E-7
Operating Range ................................................. E-7
Handling the remote controller .............................. E-7
Installation....................................................E-8
Connecting Your PC Or Macintosh Computer ......... E-9
Connecting Your Document Camera....................... E-9
Connecting Your VCR Or Laser Disc Player............. E-9
Connecting Your DVD Player ................................. E-9
External Speaker Connections ............................. E-10
Mini D-Sub 15 Pin RGB Signal Composition ......... E-12
Basic Operations ..........................................E-13
POWER ............................................................. E-13
To turn the unit ON and OFF:............................... E-13
VOLUME ........................................................... E-13
To adjust the volume: ............................................ E-13
MUTE ................................................................ E-13
To cancel the sound:.............................................. E-13
DISPLAY............................................................. E-13
To check the settings:............................................ E-13
VISUAL CONTROL ............................................. E-13
To adjust the picture's contrast: ............................. E-13
To adjust the picture's brightness:......................... E-13
To adjust the picture's color: ................................. E-13
To adjust the picture's tint (NTSC only): .............. E-13
To adjust the picture's sharpness: .......................... E-13
OFF TIMER......................................................... E-14
To set the off timer: ............................................... E-14
To check the remaining time: ................................ E-14
Canceling the off timer ......................................... E-14
WIDE Operations ..........................................E-15
Watching with a wide screen (manual)................. E-15
When watching videos or high definition
laser discs .............................................................. E-15
Watching computer images with a wide screen..... E-16
OSM Controls ...............................................E-17
Menu Operations ............................................... E-17
Picture Settings Menu.......................................... E-19
Setting the picture mode according to the
brightness of the room .......................................... E-19
Adjusting the picture............................................. E-20
Setting the color temperature ................................ E-21
Adjusting the color to the desired quality ............. E-22
Reducting noise in the picture .............................. E-23
Sound settings menu ............................................. E-24
Adjusting the treble, bass and left/right balance ... E-24
Screen Settings Menu.......................................... E-25
Adjusting the position and size of the wide screen
... E-25
Adjusting the Position, Fine Picture, Picture Adj
and Auto picture of the computer image............... E-26
Adjusting the position of the menu display .......... E-28
Function Settings Menu ....................................... E-29
Setting the power management for computer images
... E-29
POWER/STANDBY indicator .............................. E-30
Setting a computer image to the correct RGB
select screen .......................................................... E-31
Setting high definition image to the suitable
screen size ............................................................. E-32
Setting the on-screen display ................................ E-32
Setting the gray level for the sides of the screen .. E-33
Setting the brightness level to the minimum ........ E-33
Setting the wide screen display............................. E-34
Resetting to the default values .............................. E-34
Information Menu ............................................... E-35
Checking the frequencies and polarities
of input signals...................................................... E-35
Setting the language for the menus....................... E-36
Setting the video signal format .............................E-37
External Control ..........................................E-38
Table for Signals Supported..........................E-50
Supported resolutions ......................................... E-50
Troubleshooting ...........................................E-51
Specifications...............................................E-52
Page 5
E – 1
How to Attach Options to the Plasma Monitor
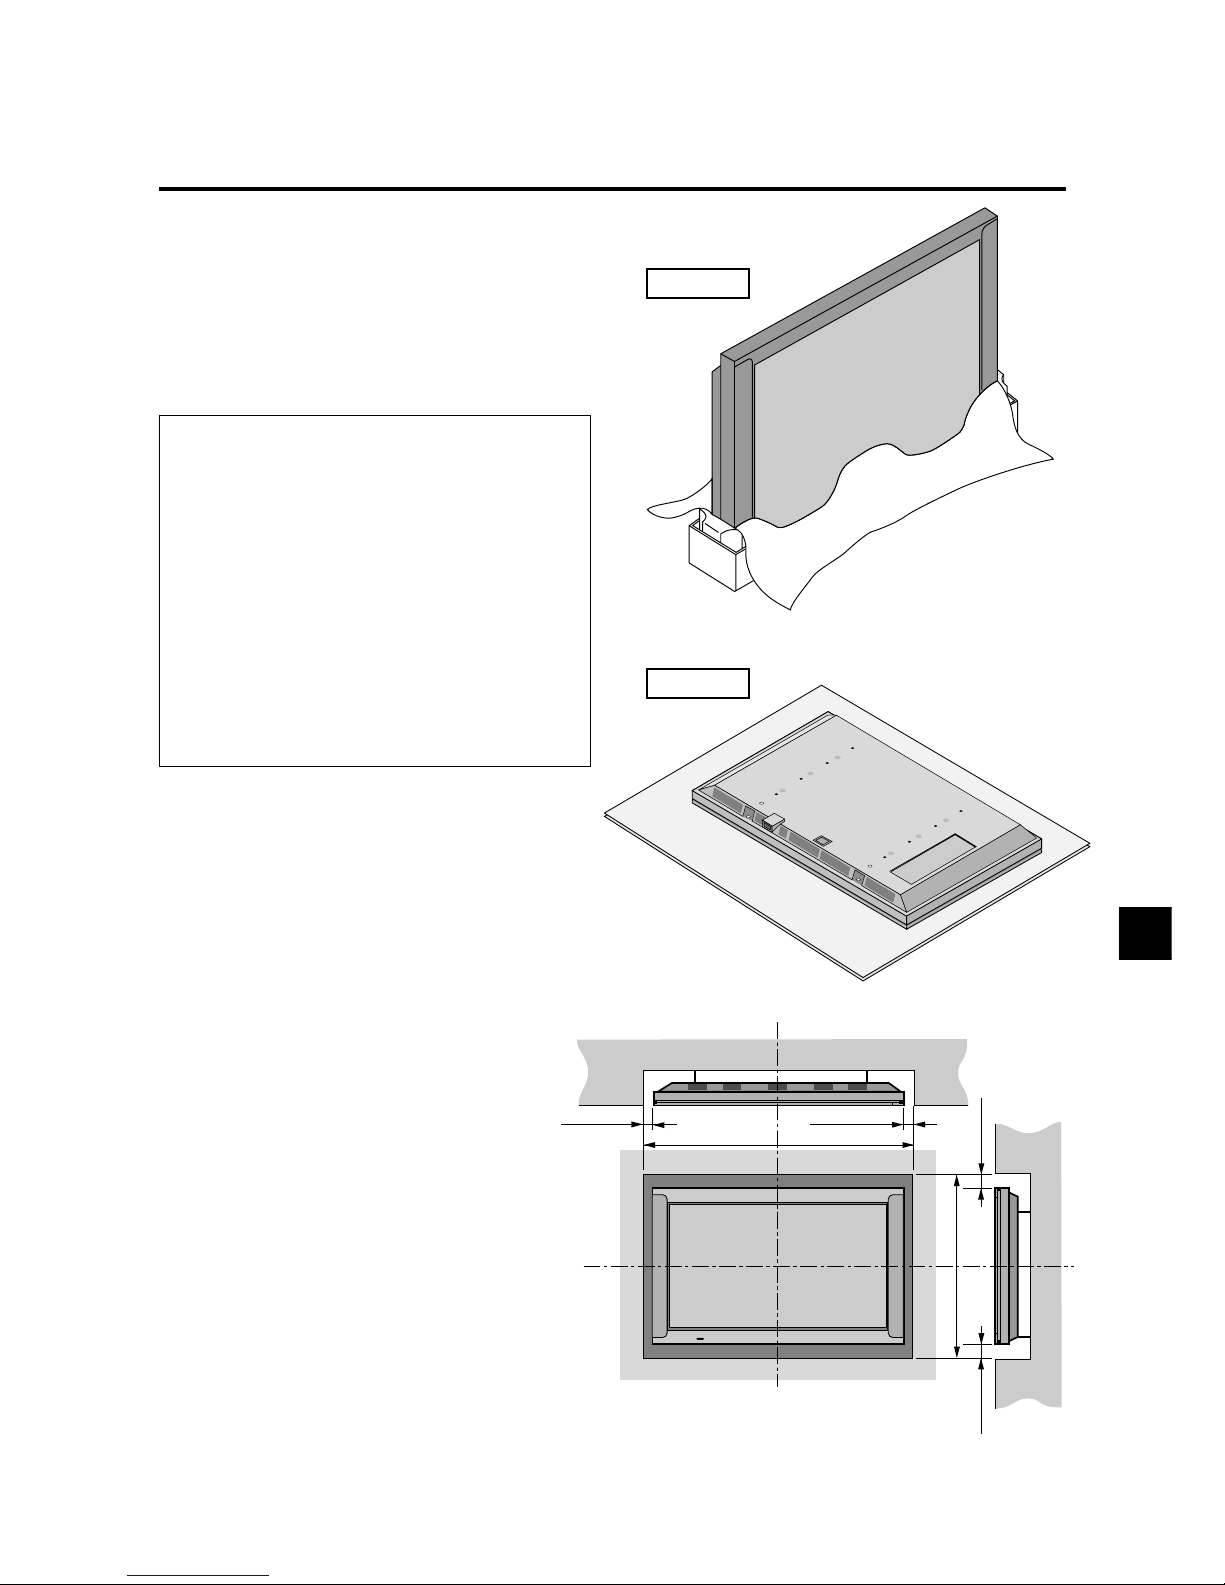
Drawing A
Drawing B
50mm (2")
1340mm (52.8")
866
mm
(34.1")
50mm (2")
50
mm
(2") 50
mm
(2")
Wall
Wall
V entilation Requirements for
enclosure mounting
To allow heat to disperse, leave space between
surrounding objects as shown on the diagram below when installing.
Y ou can attach your optional mounts or stand to the plasma
monitor in one of the following two ways:
* As it is made upright. (See Drawing A)
* As it is laid down with the screen face down (See Draw-
ing B). Lay the protective sheet, which was wrapped
around the monitor when it was packaged, beneath the
screen surface so as not to scratch the screen face.
• This device cannot be installed on its own.
Be sure to use a stand or original mounting
unit. (Wall mount unit, Stand, etc)
* See page E-2.
• For correct installation and mounting it is
strongly recommended to use a
trained,authorized NEC dealer.
Failure to follow correct mounting procedures could result in damage to the equipment or injury to the installer.
Product warranty does not cover damage
caused by improper installation.
Page 6

E – 2
Introduction
Introduction to the PlasmaSync 50–inch
Plasma Monitor
NEC's PlasmaSync is a seamless blend of cutting-edge
visual technology and sophisticated design. At 50-inches,
with a 16:9 aspect ratio, the PlasmaSync certainly makes a
big impression. However, at a mere 4.2 inches/ 107mm
thin, the monitor's sleek techno-art lines blend in well with
your environment. PlasmaSync's crisp, vivid image quality will transform data from any graphic medium from PCs
to DVD players- into art. And weighing only 127.6 lbs/
58.0 kg, it actually can be hung almost anywhere. NEC
has made sure that a host of multimedia resources can be
easily connected and displayed as brilliantly as intended
on the PlasmaSync™ monitor.
The features you'll enjoy include:
• 50-inch screen
• 16:9 aspect ratio
• Capsulated Color Filter (CCF) and black matrix
• 4.2 inch / 107 mm thin
• 127.6 lbs/ 58.0 kg light
• High-resolution screen: 1365⳯768 pixels
• 160-degrees of off-axis viewing, horizontally and vertically.
• Flicker - and warp - free display provides excellent image geometry even in screen corners
• Not affected by magnetic fields, no color drift or edge
distortion.
• VGA, SVGA, XGA, SXGA, computer signal compatibility
• NTSC, PAL, SECAM, composite and S-Video signal
compatibility
• 480P, 1080I, 720P and HDTV signal compatibility
• PCs, VCRs, Laser Disc and DVD pla yer source compatibility
• Softscaling automatically converts VGA, SVGA and
SXGA signals to the panel's native resolution
• RGB input(1), Video/S-Video input(1), DVD/ HD input(1), audio output(1), external control input(1)
• AccuColor control system provides user selectable onscreen color temperature settings
• New Drive Technology
• Component video input terminal for D VD, 15.75kHz (Y,
CB, CR)
• NEC's OSM menu-driven on screen control system that
makes image adjustments a snap
• Seven languages (English, German, French, Italian,
Spanish, Swedish, and Japanese)
Contents of the Package
䡺 PlasmaSync 5000W plasma monitor
䡺 Power cord
䡺 RGB cable (Mini D-Sub 15-pin to Mini D-Sub 15-
pin connector)
䡺 Adapter for Macintosh
䡺 Remote control unit with two AA Batteries
䡺 User's manual
䡺 Wired remote cable
䡺 Ferrite core
* These are hooks for fastening the unit to a wall to
prevent tipping due to external shock when using the
stand (option). Pass ropes or chains through the hooks
and fasten to a wall or pillar.
Options
• Wall mount unit
• Ceiling mount unit
• Tilt mount unit
• Tabletop stand
• LCD touch screen learning remote controler
(A multi function LCD Remote Control that makes operation
of connected VCR, Laser Disc, and DVD possible from a single unit. It also has a "learning function" that turns it into a
total remote control.)
• Others
Note
These instructions are for both the standard (included)
remote control unit and the optional LCD remote controller (PX-RC1E). For details on operating the LCD
remote controller, refer to the operating instructions
included with LCD remote controller.
Page 7
E – 3
Part Names and Function
Front View
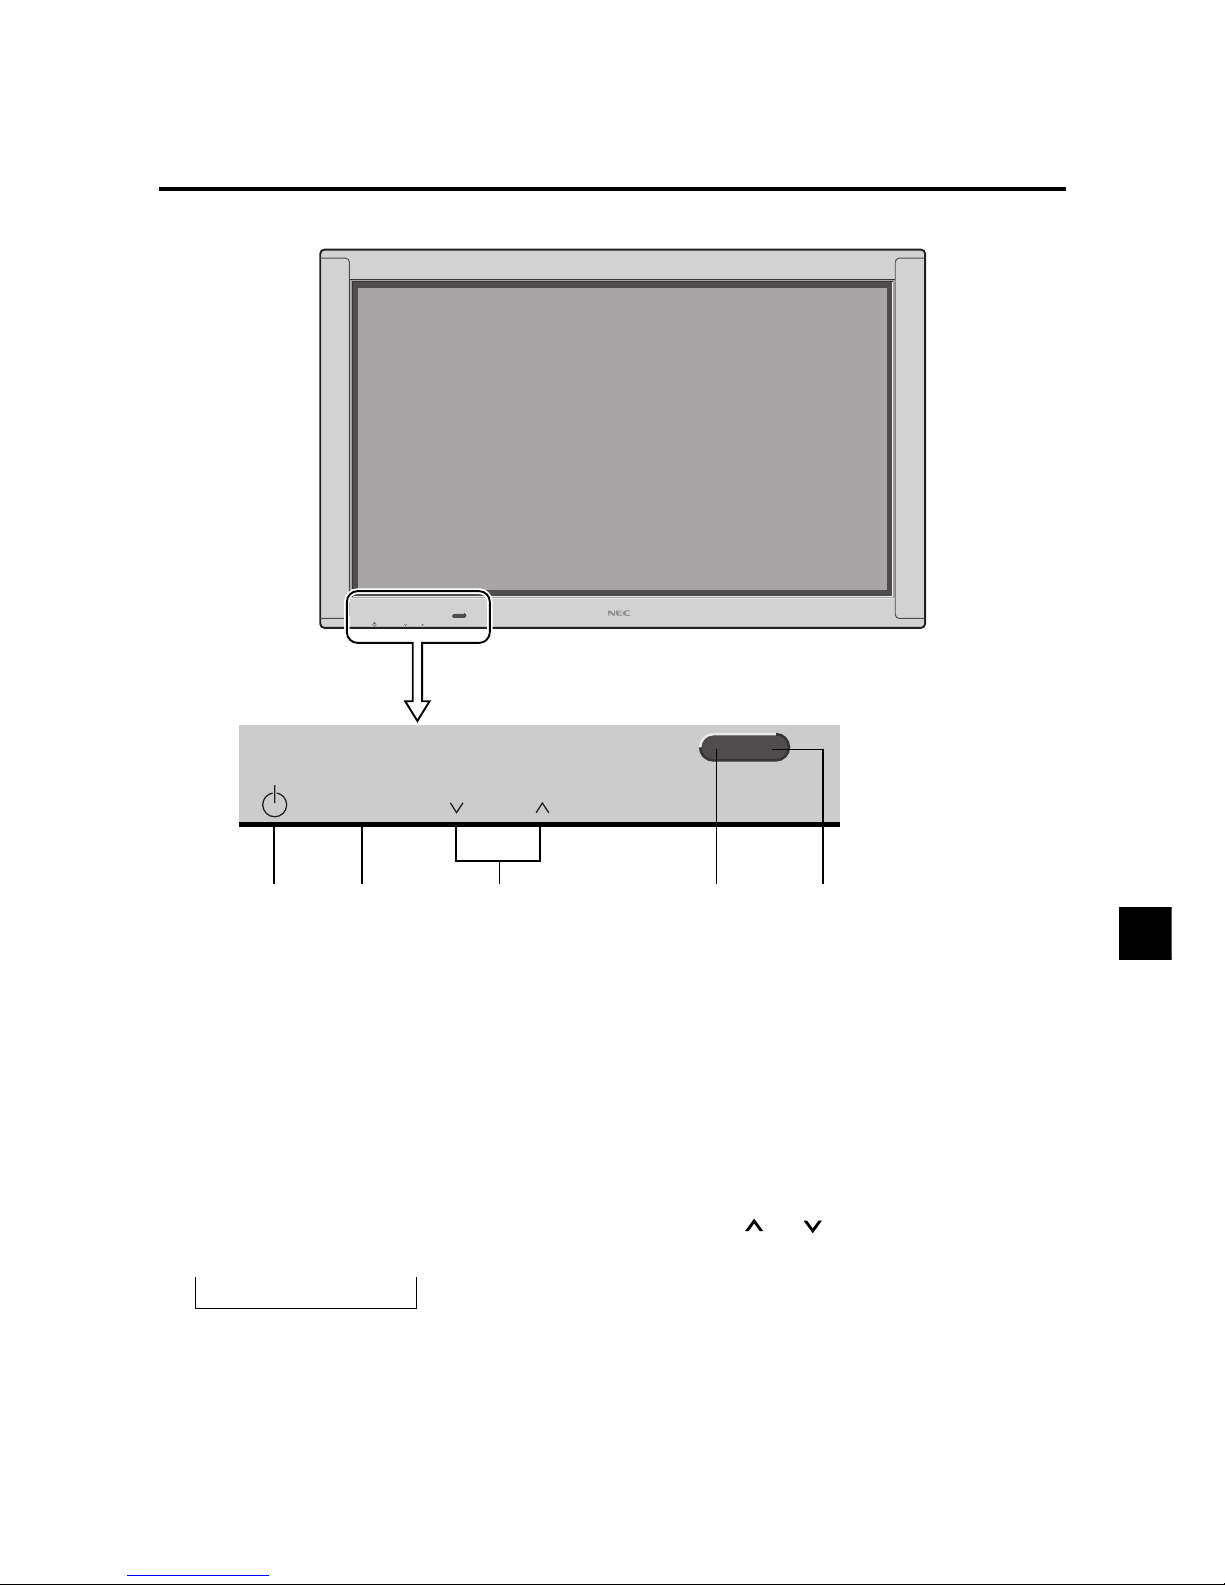
INPUT SELECT VOLUME
POWER/STANDBY
INPUT SELECT
POWER/STANDBY
VOLUME
12 3 45
1 Power
Turns the monitor's power on and off.
2 INPUT SELECT
Switches the input, in the following order:
→ VIDEO → DVD/HD → RGB
3 POWER/STANDBY indicator
When the power is on ............................Lights green.
When the power is in the standby mode ... Lights red.
4 Remote sensor window
Receives the signals from the remote control unit.
5 VOLUME and
Adjust the volume.
Page 8
E – 4
Rear View/ Terminal Board
R SPEAKERS L
S-VIDEO IN
V
I
D
E
O
R
G
B
H
D
/
D
V
D
A
U
D
I
O
VIDEO IN
RGB IN
EXTERNAL
CONTROL
REMOTE
CONTROL
Y/Y
Pb/Cb
Pr/Cr
L
R
AUDIO IN
(MONO)
L
R
AUDIO IN
(MONO)
L
R
AUDIO IN
L
R
AUDIO OUT
VIDEO IN
AUDIO IN
Y/Y
C
B/PB
CR/P
R
RGB IN
S-VIDEO IN
V
I
D
E
O
H
D
/
D
V
D
R
G
B
A
U
D
I
O
EXTERNAL
CONTROL
REMOTE
CONTROL
L
R
AUDIO IN
L
R
AUDIO IN
L
R
AUDIO OUT
L
R
(VARIABLE)
(MONO)
(MONO)
H
B
A
D
F
G
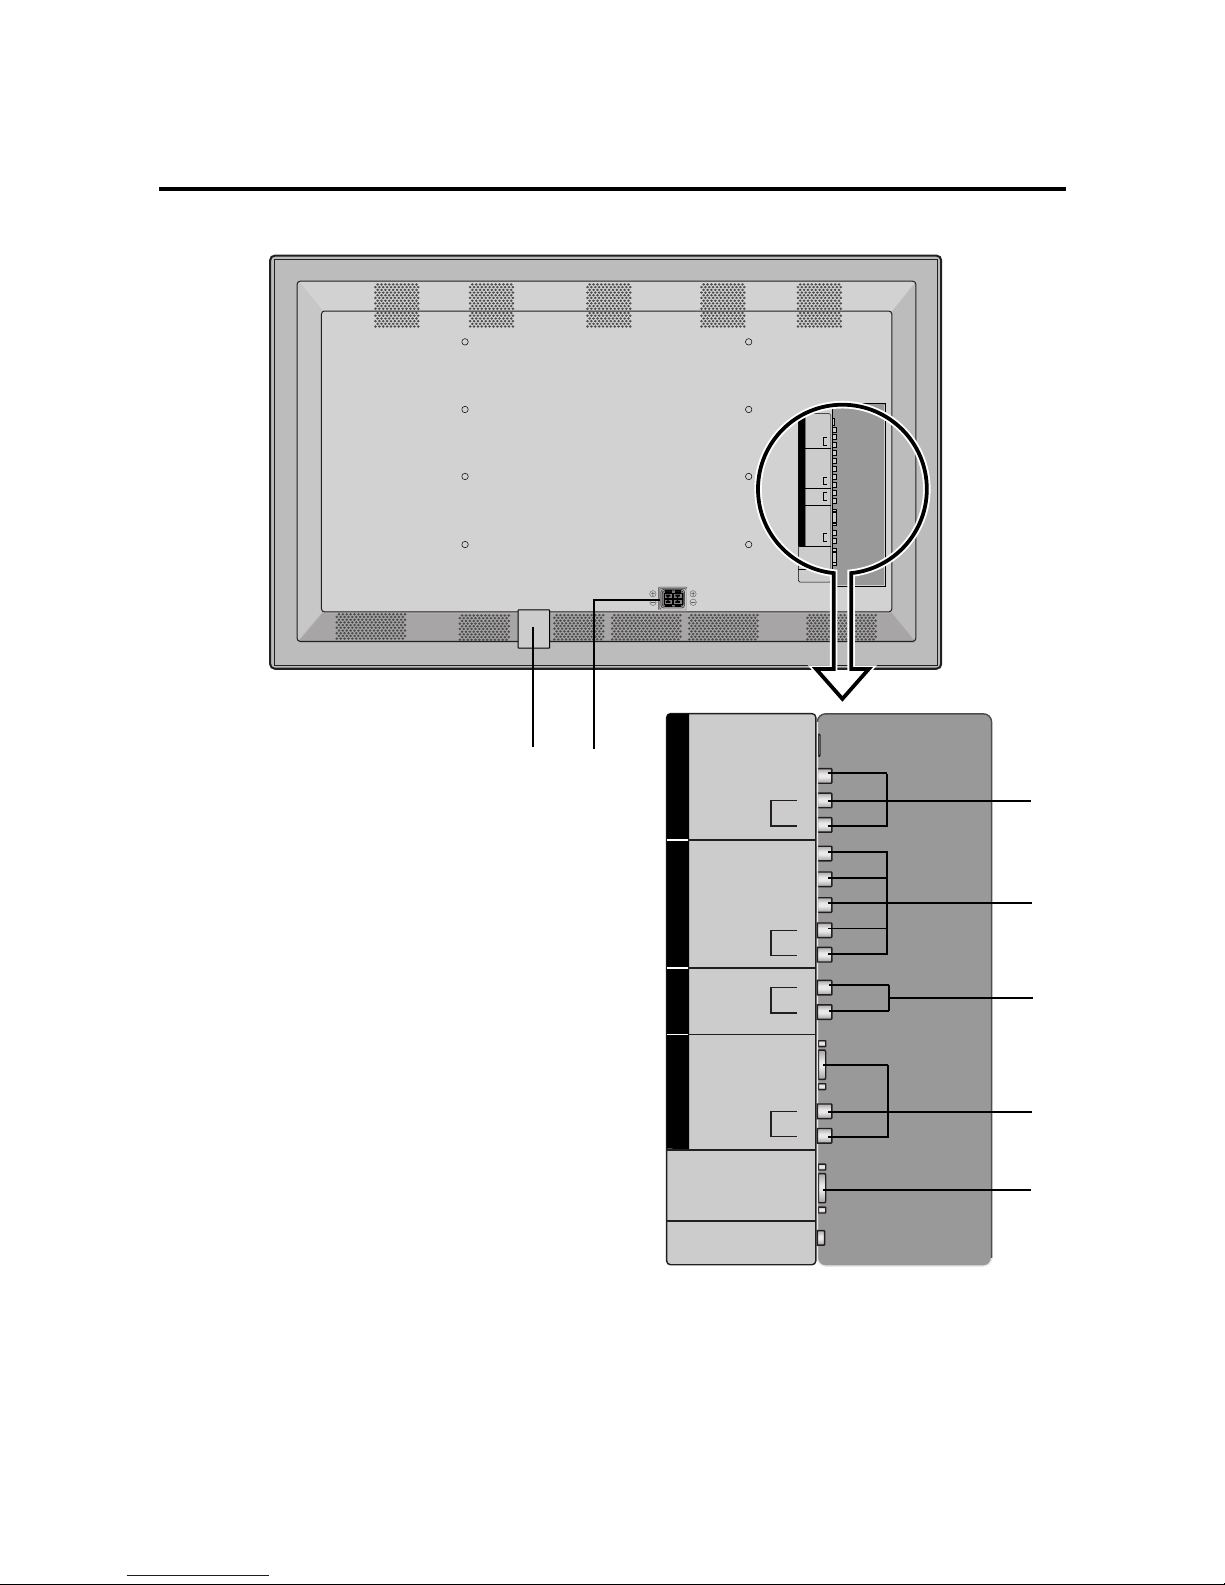
A VIDEO IN/AUDIO IN
Connect VCR's, DVD's or Laser Discs, etc. here.
B DVD/HD (Y/Y, CB/PB and CR/PR) IN/ AUDIO IN
Connect DVD's, high definition Laser Discs, etc. here.
C AUDIO OUT
Connect the external amplifier only for woofer.
The output level depends on the volume setting.
D RGB IN/ AUDIO IN
Connect Computer Source here.
E REMOTE CONTROL
Connect the supplied remote cable here.
F EXTERNAL CONTROL
This terminal is used when power ON/OFF, input selection and AUDIO MUTE and other controls are operated externally (by external control). See also page 38
for external control.
G AC IN
Connect the included power cord here.
H EXT SPEAKER L and R
Connect speakers here.
C
Page 9
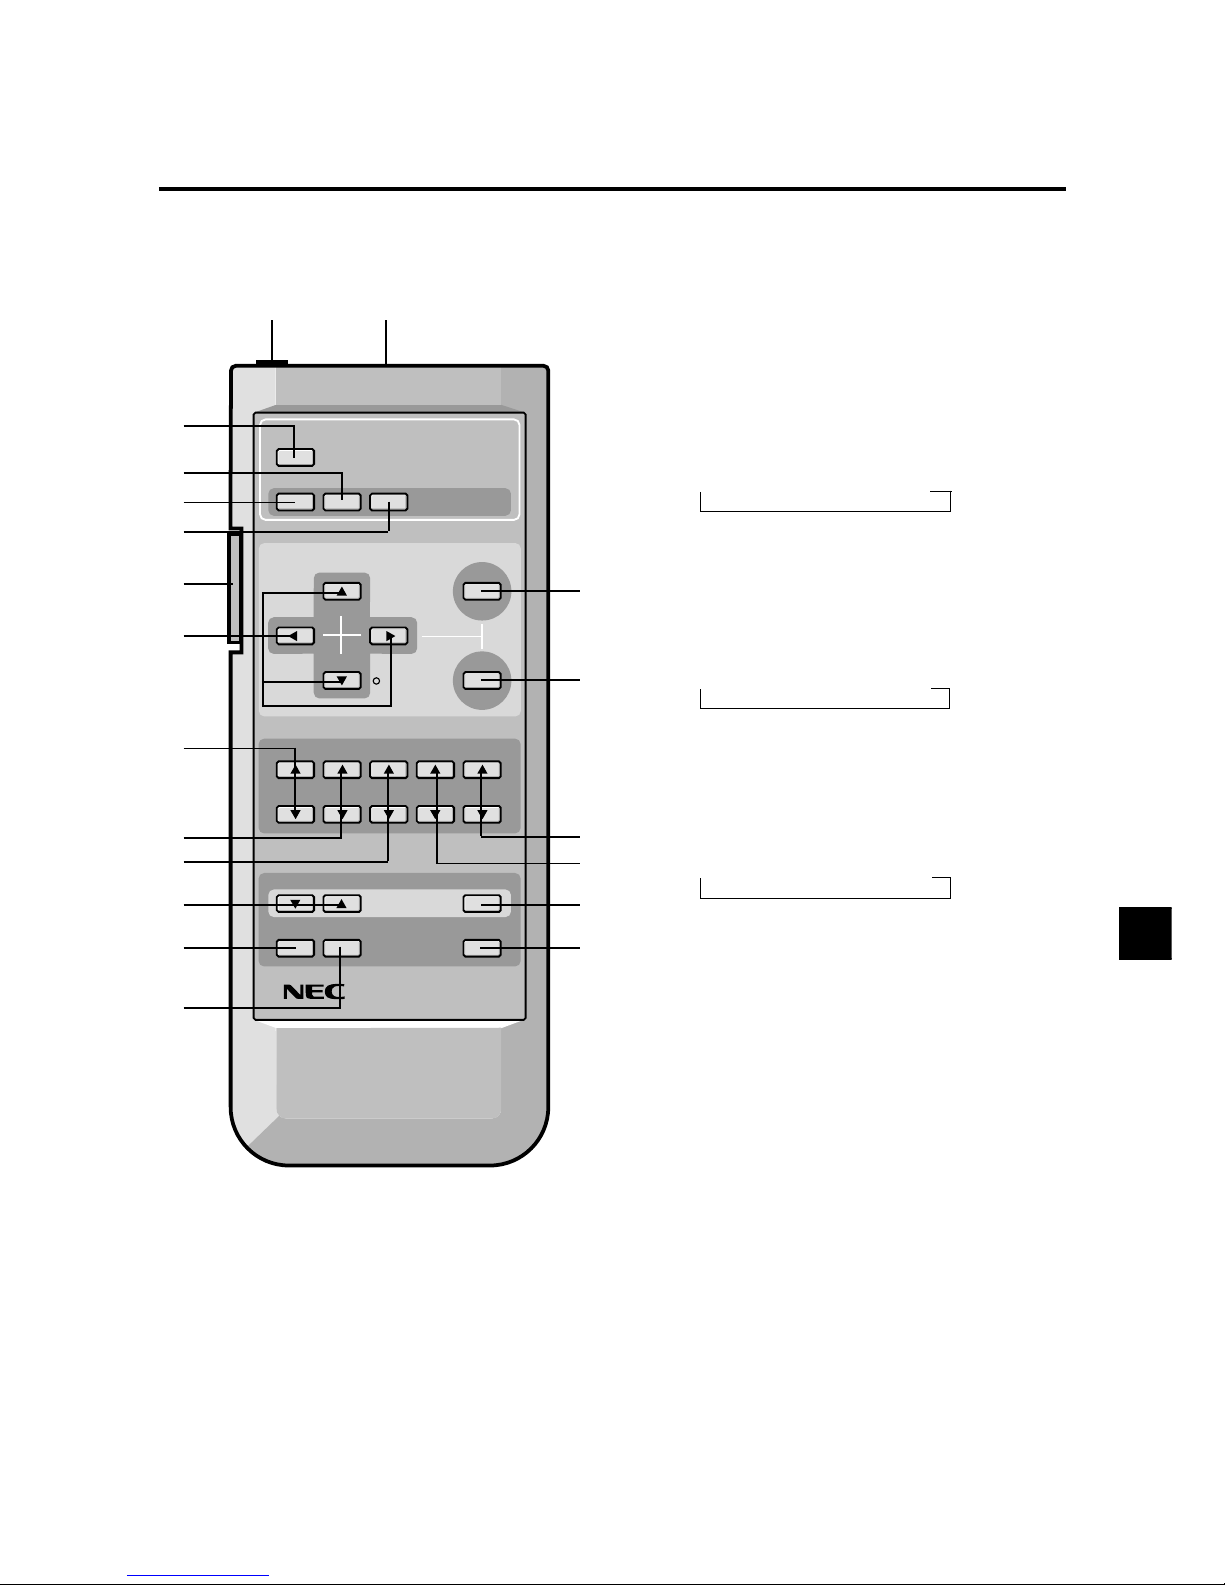
E – 5
Remote Controller
1 POWER
Turns the monitor's power on and off.
2 RGB/PC
Press this button to select RGB/PC as the source.
RGB/PC can also be selected using the INPUT SELECT
button on the monitor. The input switches as follows
each time the button is pressed:
→ VIDEO → DVD/HD → RGB/PC
3 VIDEO
Press this button to select VIDEO as the source.
VIDEO can also be selected using the INPUT SELECT
button on the monitor. The input switches as follows
each time the button is pressed:
→ VIDEO → DVD/HD → RGB/PC
4 DVD / HD
Press this button to select DVD/HD as the source.
DVD/HD can also be selected using the INPUT SE-
LECT button on the monitor . The input switches as follows each time the button is pressed:
→ VIDEO → DVD/HD → RGB/PC
5 MENU
Use this button to turn the main menu on/off.
6 OK
Use this button to approve selections and settings.
7 CURSOR (▲ / ▼ / 䊴 / 䊳)
Use these buttons to select items or settings and to adjust settings.
8 CONTRAST (▲ / ▼)
Adjusts the picture's contrast.
9 BRIGHT (▲ / ▼)
Adjusts the picture's brightness.
0 COLOR (▲ / ▼)
Adjusts the color density.
A TINT (▲ / ▼)
Adjusts the picture's tint.
B SHARPNESS (▲ / ▼)
Adjusts the picture's sharpness.
POWER
RGB/PC VIDEO DVD/HD
CURSOR
CONTRAST
BRIGHT COLOR
VOLUME
WIDE DISPLAY OFF TIMER
MUTE
TINT
SHARPNESS
POSITION / CONTROL
VISUAL CONTROL
OK
MENU
BACKLIGHT SYSTEM
REMOTE CONTROLLER
RD-327
1
3
2
4
H
7
8
9
0
C
E
F
5
6
B
A
D
G
I J
Page 10
E – 6
C VOLUME (▲ / ▼)
Adjust the volume.
D MUTE
Mutes the sound.
E WIDE
The type of broadcast is detected automatically , and the
recommended wide screen mode is set.
F DISPLAY
Displays the source settings on the screen.
G OFF TIMER
Activates the off timer for the unit.
H BACK LIGHT switch
Turns the back light on and off.
Turn on when using the remote control in dark rooms.
Note:
The backlight key characters may not be vis-
ible in a bright-lit room. Make sure that the backlight
switch is OFF when the remote contr ol unit is not used.
If no button operation is made within 30 seconds when
the backlight is lit in the wireless condition, the
backlight will go off automatically to conserve battery
life. To turn the backlight on again, set the switch to
the OFF position, then set it to the ON position.
I Remote Jack
Insert the plug of the supplied remote cable when using
the supplied remote control unit in the wired condition.
Note:
Connecting the monitor and the remote control unit with the supplied remote cable turns on the
backlight independent of the backlight switch setting
when the monitor is powered on.
J Remote control signal transmitter
Transmits the remote control signals.
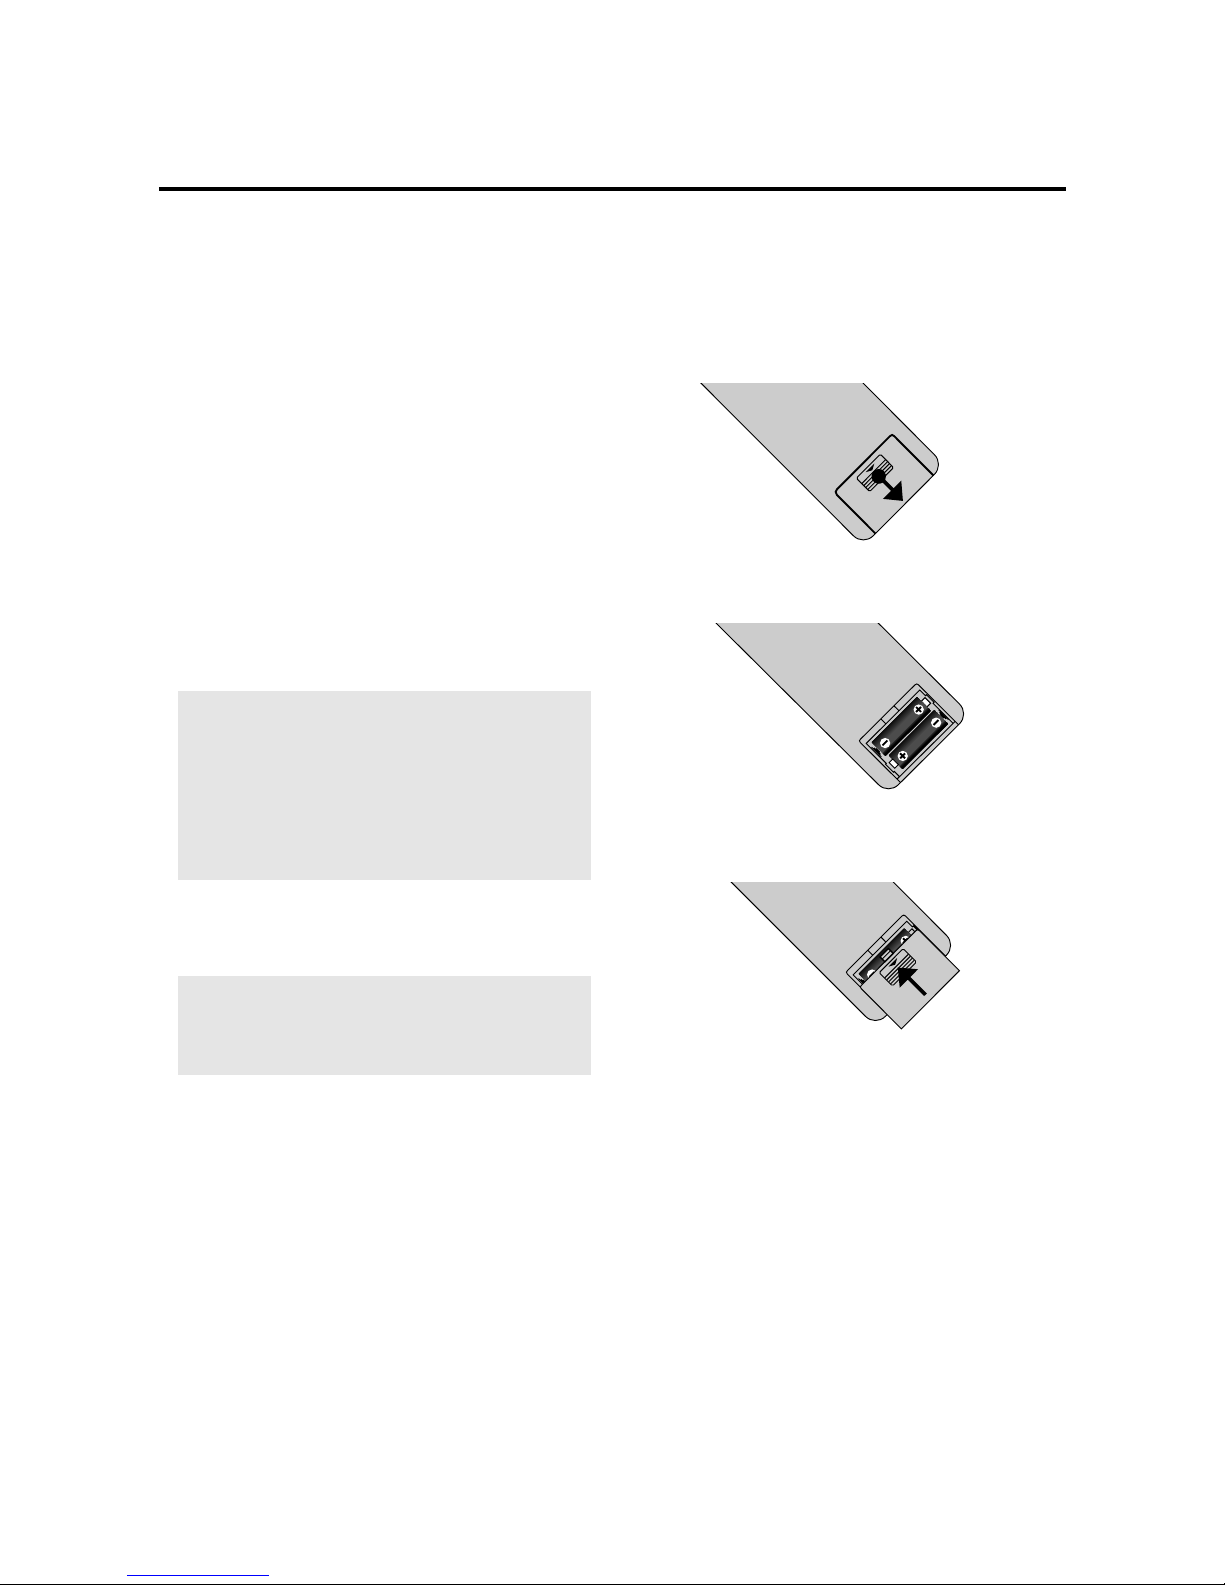
Battery Installation and Replacement
Insert the 2 "AA" batteries, making sure to set them in
with the proper polarity.
1.Press and pull.
2. Load the batteries in the direction indicated by the "+"
and "–" marks in the case.
3.Put the lid back on.
Page 11
E – 7
S L
S-VIDEO IN
V
I
D
E
O
R
G
B
H
D
/
D
V
D
A
U
D
I
O
VIDEO IN
RGB IN
EXTERNAL
CONTROL
REMOTE
CONTROL
Y/Y
Pb/Cb
Pr/Cr
L
R
AUDIO IN
(MONO)
L
R
AUDIO IN
(MONO)
L
R
AUDIO IN
L
R
AUDIO OUT
REMOTE
CONTROL
EXTERNAL
CONTROL
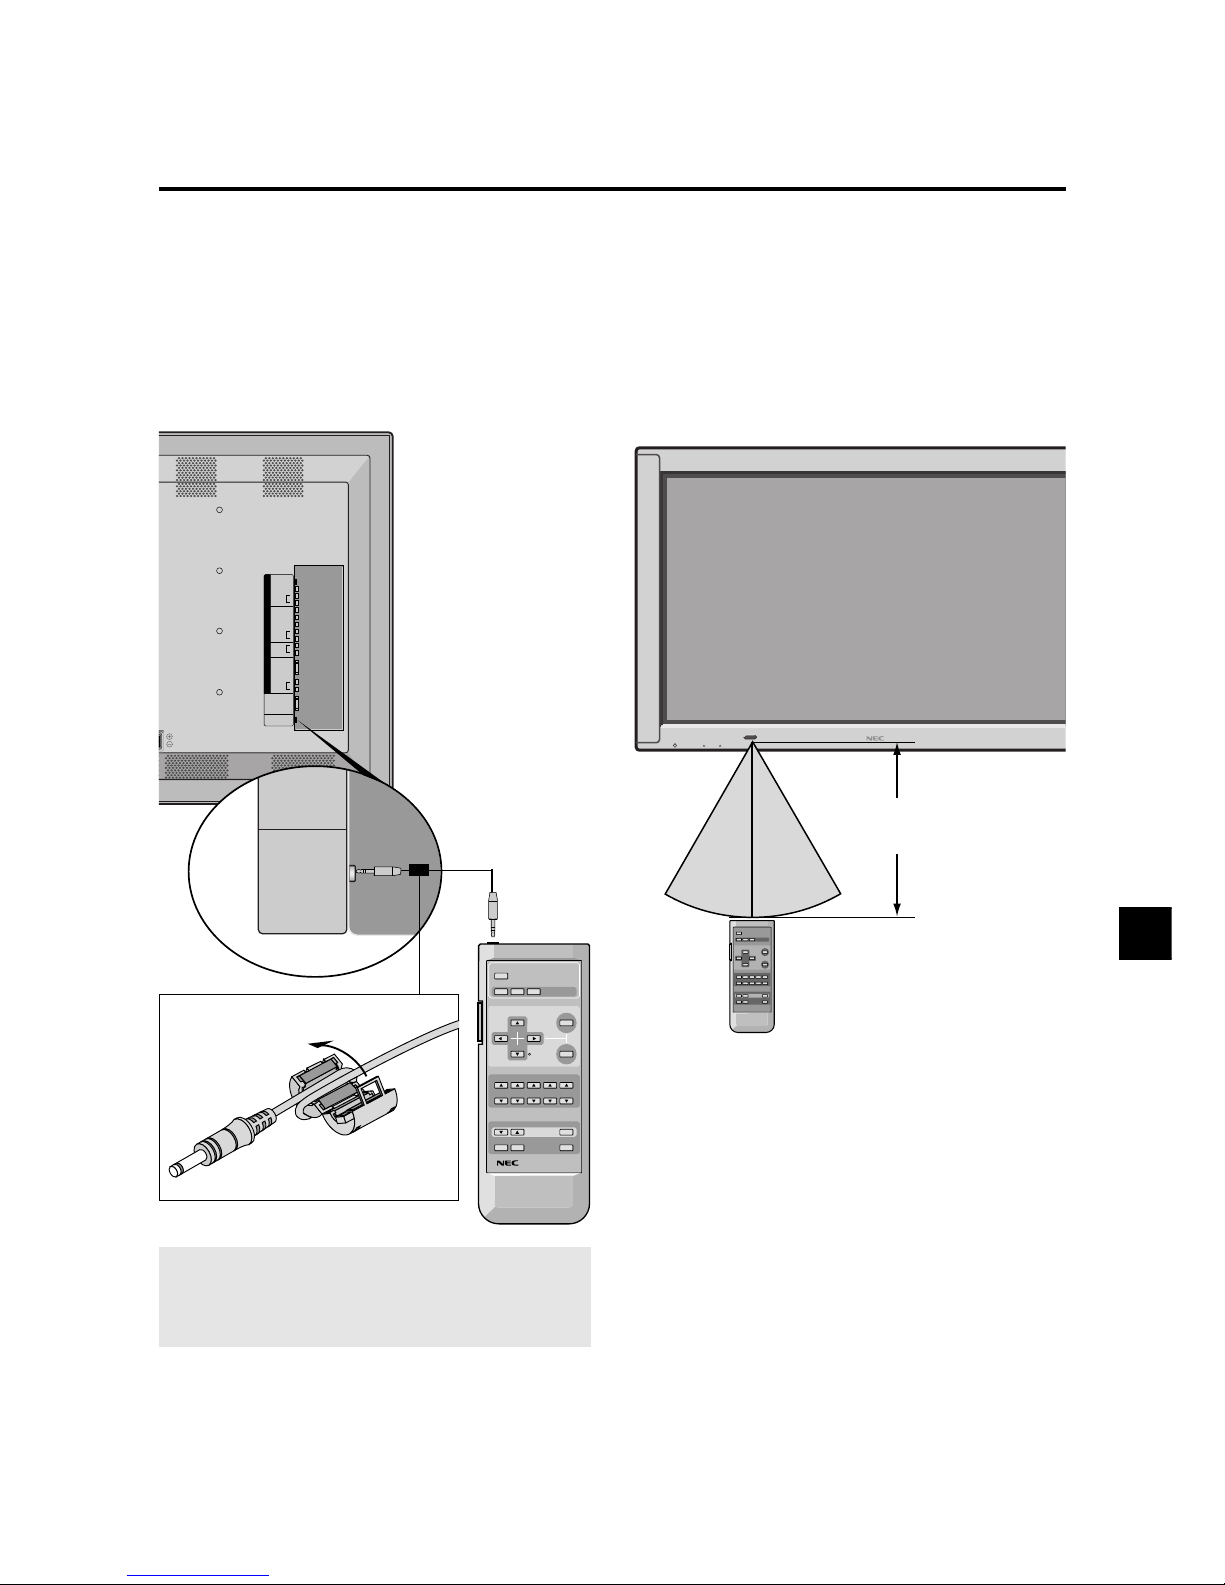
Using the wired remote control mode
Connect the included remote control cable to the remote
control unit's "REMOTE CONTROL" terminal.
When the cable is connected, the mode automatically
switches to wired remote control.
When the wired remote control mode is used, the remote
control unit can be operated even if no batteries are loaded.
POWER
RGB/PC VIDEO DVD/HD
CURSOR
CONTRAST
BRIGHT COLOR
VOLUME
WIDE DISPLAY OFF TIMER
MUTE
TINT
SHARPNESS
POSITION / CONTROL
VISUAL CONTROL
OK
MENU
BACKLIGHT SYSTEM
REMOTE CONTROLLER
RD-327
Remote Control Cable
To Remote Jack
INPUT SELECT
POWER/STANDBY
VOLUME
30˚
30˚
Approx.
7m/ 23ft
Operating Range
* Use the remote controller within a distance of about 7 m
/ 23ft. from the front of the monitor's remote control sensor and at a horizontal angle of within 30°.
* The remote control operation may not function if the
monitor's remote control sensor is exposed to direct sunlight or strong artificial light, or if there is an obstacle
between the sensor and the remote control unit.
Handling the remote controller
• Do not drop or mishandle the remote control unit.
• Do not get the remote control unit wet. If the remote
gets wet, wipe it dry immediately.
• Avoid heat and humidity.
• When not using the remote control unit for a long period, remove the batteries.
• Do not use ne w and old batteries together, or use different types together.
• Do not take apart the batteries, heat them, or throw them
into a fire.
• When using the remote control unit in the wireless condition, be sure to unplug the remote cable from the REMOTE CONTROL terminal on the monitor.
Note:
When you connect a remote control cable to
this monitor , attach the supplied ferrite core. If you do
not do this, this monitor will not conform to mandatory
CE(EN55022) C-Tick (AS/NZS3548) standards.
Attaching the ferrite core
Set the ferrite core on the end of the remote control
cable(Monitor side).
T wist this cable around the ferrite core one time. Close the
lid tightly until the clamp click.
Page 12
E – 8
R SPEAKERS L
S-VIDEO IN
V
I
D
E
O
R
G
B
H
D
/
D
V
D
A
U
D
I
O
VIDEO IN
RGB IN
EXTERNAL
CONTROL
REMOTE
CONTROL
Y/Y
Pb/Cb
Pr/Cr
L
R
AUDIO IN
(MONO)
L
R
AUDIO IN
(MONO)
L
R
AUDIO IN
L
R
AUDIO OUT
VIDEO IN
AUDIO IN L
(MONO)
AUDIO IN R
AUDIO IN L
(MONO)
AUDIO IN R
REMOTE CONTROL
S-VIDEO IN
Y/Y
CB/PB
CR/PR
RGB IN
EXTERNAL
CONTROL
VIDEO
AUDIO OUT L
AUDIO OUT R
AUDIO IN L
AUDIO IN R
AUDIO
HD/DVD
RGB
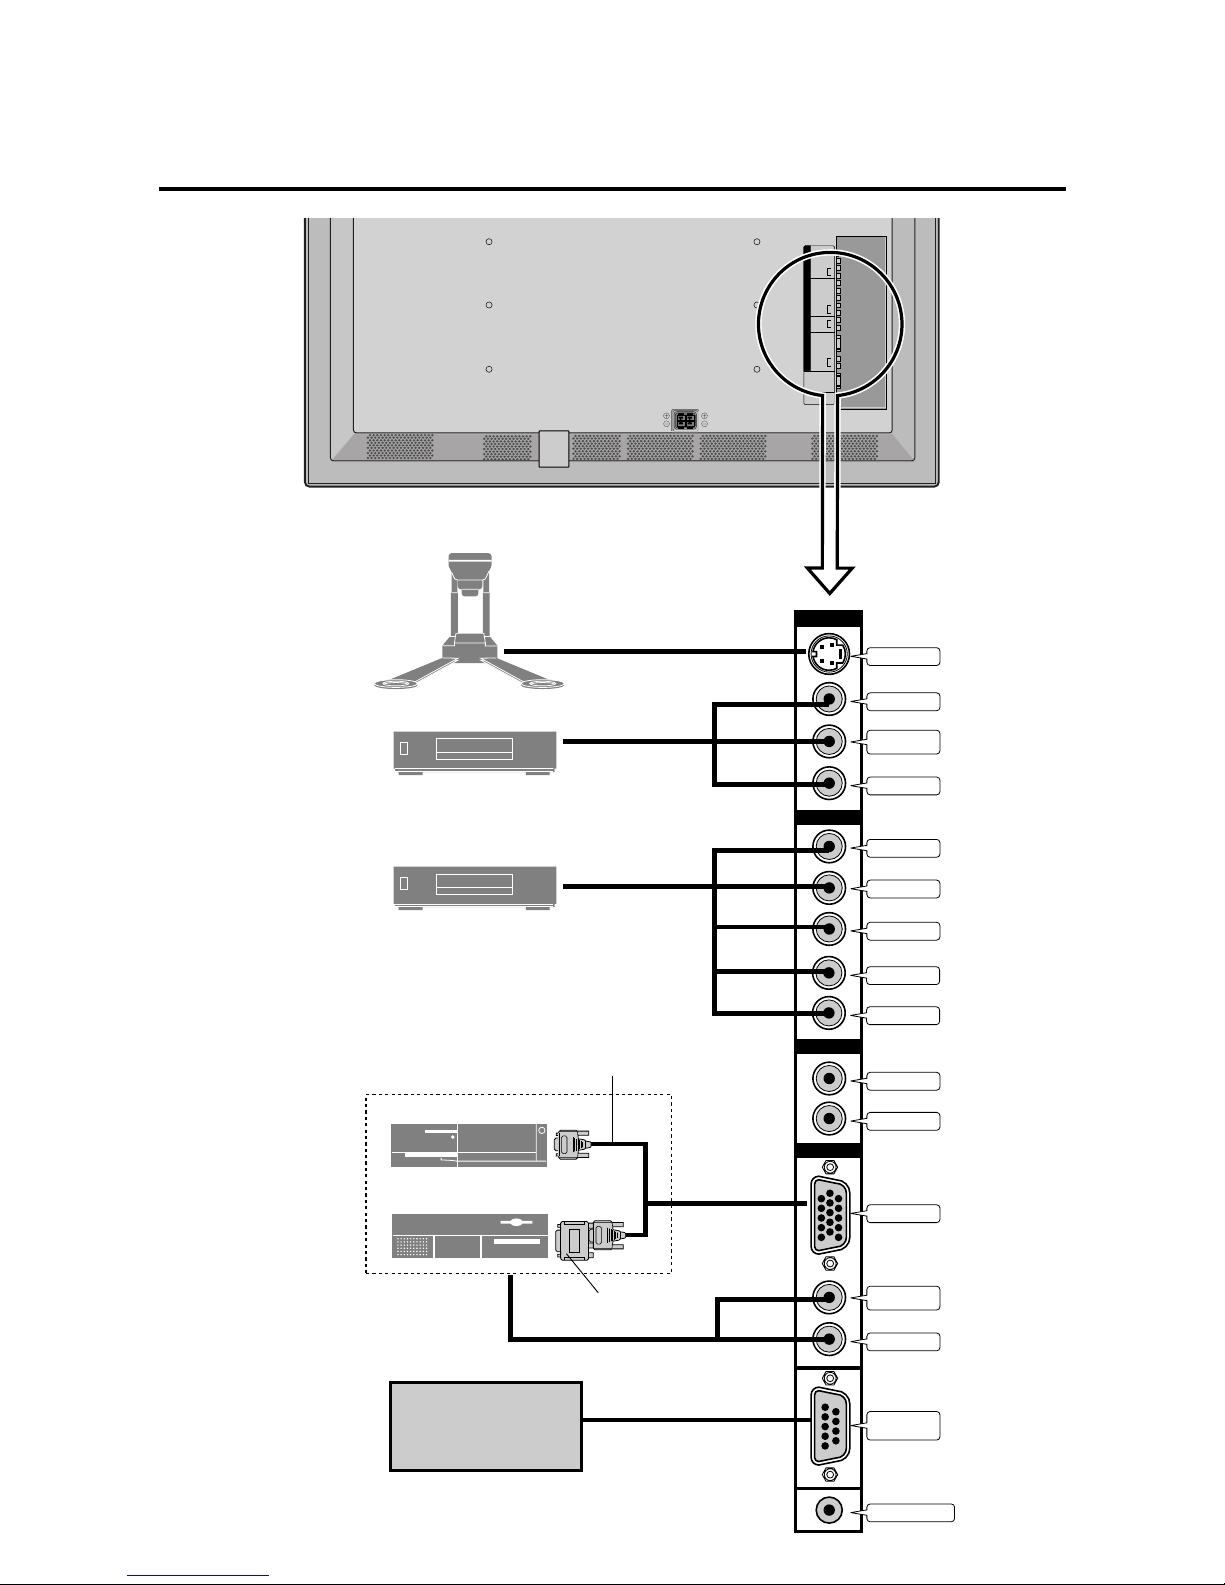
Installation
To video, S-video inputs on
the PlasmaSync 5000W
Document Camera
VCR or Laser Disc Player
DVD Player
Signal cable (supplied)
To Mini D-Sub 15 pin connector
on the PlasmaSync 5000W
Monitor adapter for
Macintosh (supplied)
IBM VGA or Compatibles
Macintosh or Compatibles
(Desk top type)
External
Control
Page 13

E – 9
Connecting Your PC Or Macintosh
Computer
Connecting your PC or Macintosh computer to your
PlasmaSync 5000W will enable you to display your
computer's screen image for an impressive presentation. The
PlasmaSync 5000W supports the signals described on page
50.
To connect to a PC, Macintosh or compatible graphics
adapter, simply:
1. Turn off the power to your PlasmaSync 5000W and
computer.
2.
If your PC does not support XGA/SVGA/VGA you will
need to install an XGA/SVGA/VGA graphics board. Consult your computer's owner's manual for your XGA/SVGA/
VGA configuration. If you need to install a new board, see
the manual that comes with your new graphics board for
installation instructions.
3. The PlasmaSync 5000W provides signal compatibility up
to VESA 1280⳯1024@85Hz (SXGA). However, some
signals are only displayed in the normal mode (5:4). See
page 50 for more details.
4. Use the signal cable that's supplied to connect your PC or
Macintosh computer to the PlasmaSync 5000W. For
Macintosh, use the supplied monitor adapter to connect
to your computer's video port.
5. T urn on the PlasmaSync 5000W and the computer.
6. If the PlasmaSync 5000W goes blank after a period of
inactivity , it may be caused by a screen saver installed on
the computer you've connected to the PlasmaSync
5000W.
When using a Macintosh with the PlasmaSync 5000W, the
following four display standards are supported using the
included Macintosh adapter :
13" fixed mode
16" fixed mode
19" fixed mode
21" fixed mode
The 19" fixed mode is recommended for the PlasmaSync
5000W.
Connecting Y our Document Camera
You can connect your PlasmaSync 5000W to a document
camera. To do so, simply:
1. Turn off the power to your PlasmaSync 5000W and
document camera.
2. Use a standard video cable to connect your document
camera to the V ideo input on your PlasmaSync 5000W .
3. Turn on the PlasmaSync 5000W and the document cam-
era.
Note:
Refer to your document camera's owner's
manual for more information about your camera's video
output requirements.
Connecting Y our VCR Or Laser Disc Player
Use common RCA cables (not provided) to connect your
VCR or laser disc player to your PlasmaSync 5000W. To
make these connections, simply:
1. Turn off the power to your PlasmaSync 5000W and
VCR or laser disc player.
2. Connect one end of your RCA cable to the video output connector on the back of your VCR or laser disc
player, connect the other end to the V ideo input on your
PlasmaSync 5000W. Use standard RCA audio patch
cords to connect the audio from your VCR or laser disc
player to your PlasmaSync 5000W (if your VCR or
laser disc player has this capability). Be careful to keep
your right and left channel connections correct for stereo
sound.
3. Turn on the PlasmaSync 5000W and the VCR or laser
disc player.
Note:
Refer to your VCR or laser disc player owner's
manual for more information about your equipment's
video output requirements.
Connecting Your DVD Player
Y ou can connect your PlasmaSync 5000W to a D VD player .
To do so, simply:
1. Turn off the power to your PlasmaSync 5000W and
DVD player.
2. Use a standard video cable to connect your DVD player
to the Y, Cb, and Cr inputs on your PlasmaSync 5000W.
Or use the DVD-player's S-Video output. Use a standard S-Video cable to connect to the S-Video input on
the PlasmaSync 5000W.
3. Turn on the PlasmaSync 5000W and the DVD player.
Page 14

E – 10
External Speaker Connections
External speakers may be connected to the PlasmaSync
5000W to reproduce sound from VIDEO, DVD or RGB
signal sources.
External speakers may be connected directly to the SPEAKERS terminals or indirectly by connecting a stereo system
amplifier to the audio outputs.
CAUTION:
Unplug the PlasmaSync 5000W and all
connected components before connecting external
speakers. Use only speakers with 6-ohm impedance and
a power output rating of 7 watts or more.
To connect external speakers directly to the PlasmaSync
5000W:
1. Strip the ends of the speaker wires.
2. Press down the tabs below the SPEAKERS terminals,
insert the speaker wire and release the tab to secure the
speaker wire connection:
[a] Connect the right speaker (located at right side
of the monitor when viewed from the front)
positive (+) wire to RIGHT +.
[b] Connect the right speaker negative (–) wire to
RIGHT -.
[c] Connect the left speaker negative (–) wire to
LEFT–.
[d] Connect the left speaker positive wire (+) to
LEFT+.
R SPEAKERS L
S-VIDEO IN
V
I
D
E
O
R
G
B
H
D
/
D
V
D
A
U
D
I
O
VIDEO IN
RGB IN
EXTERNAL
CONTROL
REMOTE
CONTROL
Y/Y
Pb/Cb
Pr/Cr
L
R
AUDIO IN
(MONO)
L
R
AUDIO IN
(MONO)
L
R
AUDIO IN
L
R
AUDIO OUT
R SPEAKERS L
Page 15
E – 11
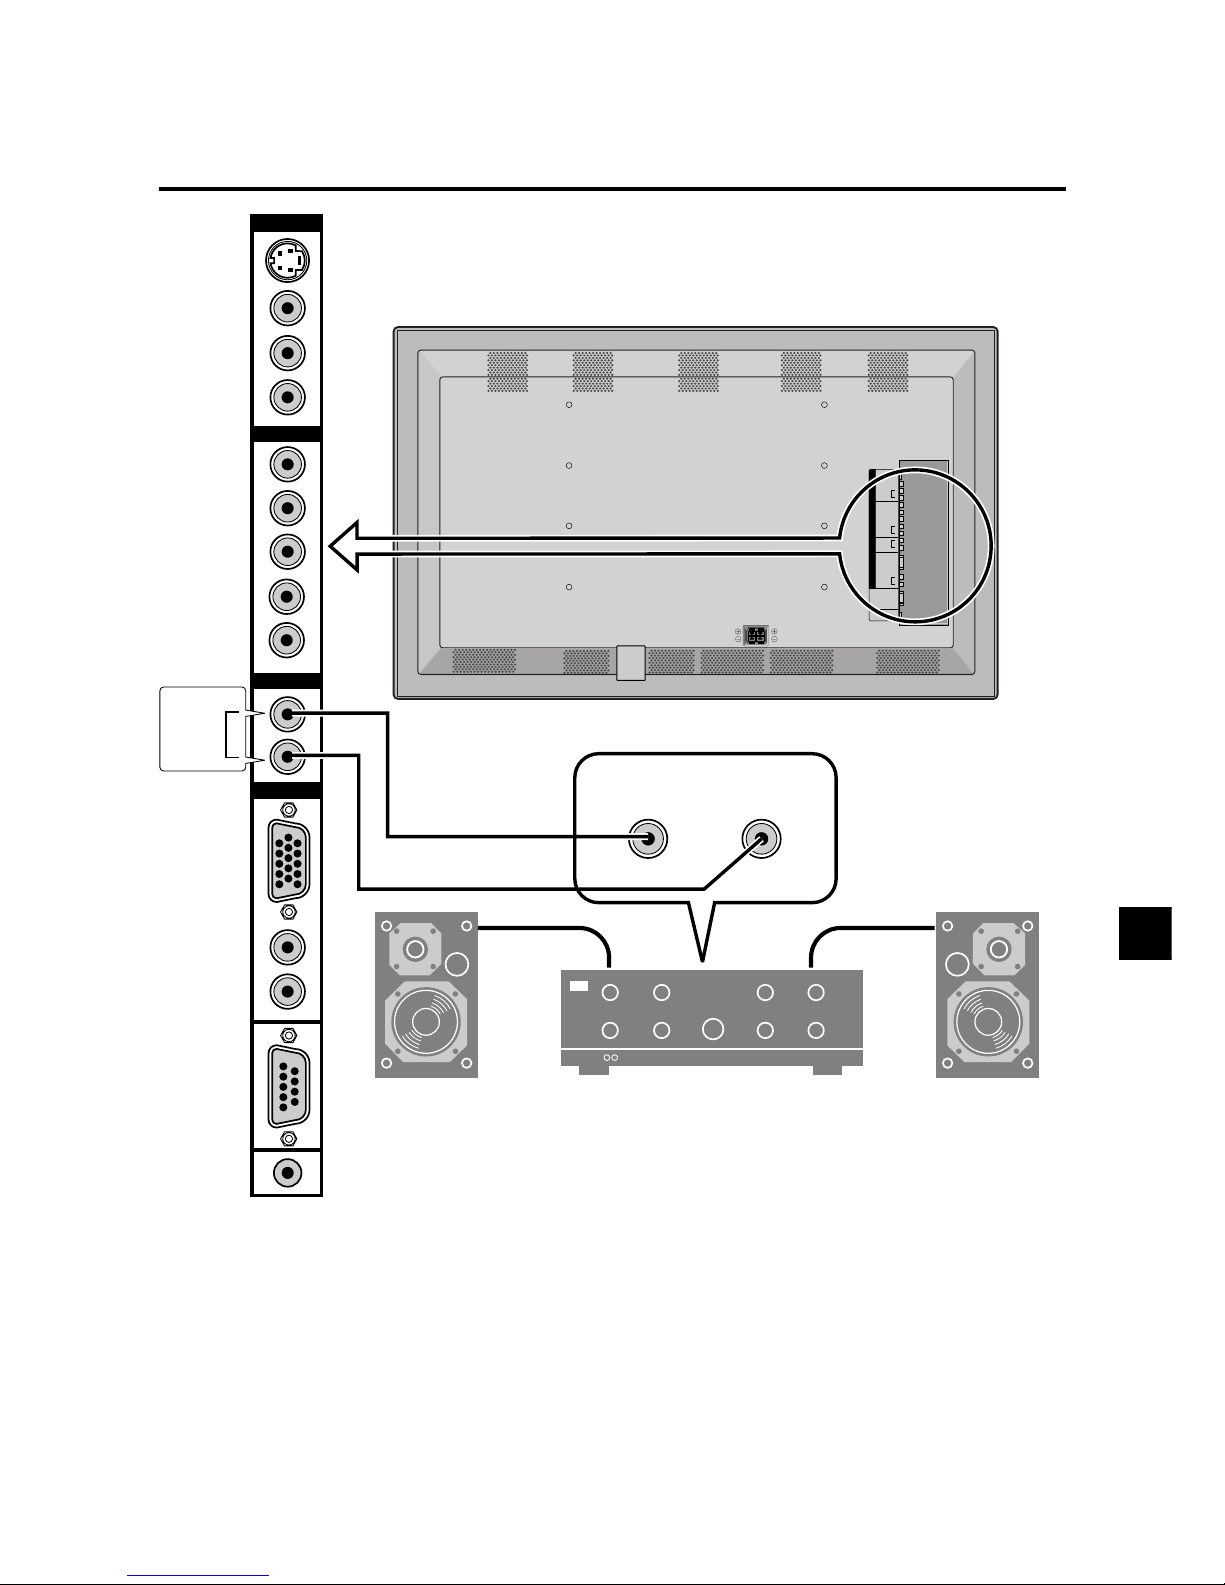
T o connect the PlasmaSync 5000W to stereo system speakers:
1. Connect AUDIO OUT L to the stereo amplifier AUX
INPUT L.
2. Connect AUDIO OUT R to the stereo amplifier AUX
INPUT R.
VIDEO
AUDIO
HD/DVD
RGB
R SPEAKERS L
S-VIDEO IN
V
I
D
E
O
R
G
B
H
D
/
D
V
D
A
U
D
I
O
VIDEO IN
RGB IN
EXTERNAL
CONTROL
REMOTE
CONTROL
Y/Y
Pb/Cb
Pr/Cr
L
R
AUDIO IN
(MONO)
L
R
AUDIO IN
(MONO)
L
R
AUDIO IN
L
R
AUDIO OUT
R
L
LINE OR
AUX INPUT
LINE OR
AUX INPUT
STEREO AMP
AUDIO OUT
L
(VARIABLE)
R
Page 16
E – 12
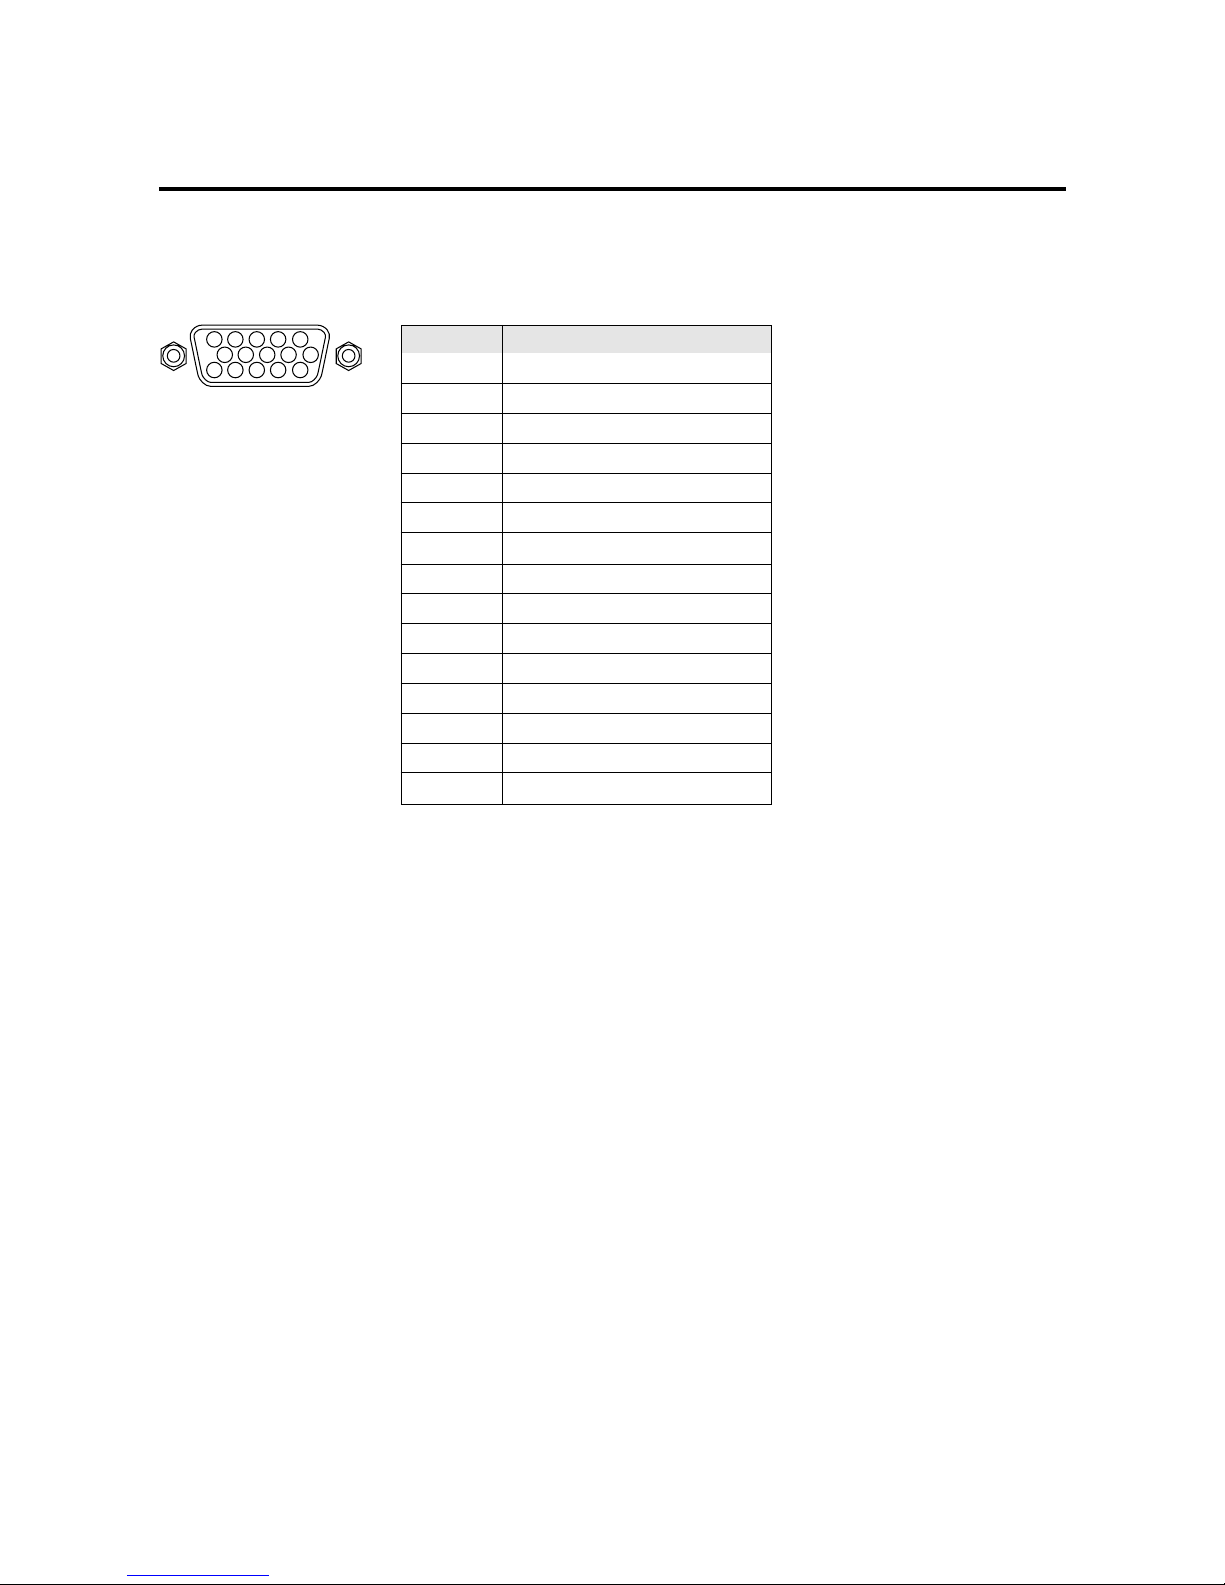
Pin Assignments and Signal Levels for 15 pin RGB (Analog)
Mini D-Sub 15 Pin RGB Signal Composition
5 4 3 2 1
15 14 13 12 11
10 9 8 7 6
Pin No.
1
2
3
4
5
6
7
8
9
10
11
12
13
14
15
Signal to be connected
RED
GREEN or Sync. on Green
BLUE
No Connection
GND
RED (GND)
GREEN (GND)
BLUE (GND)
No Connection
SYNC (GND)
No Connection
SDA
H. sync
V. sync
SCL
Page 17

E – 13
Basic Operations
POWER
To turn the unit ON and OFF:
1. Plug the power cord into an active AC power outlet.
2. Press the POWER button (on the remote controller) to
turn on.
The monitor’s PO WER/ST ANDBY indicator will light
up(green) when the unit is on.
3. Press the POWER button (on the remote controller or
the unit) to turn off.
The monitor’s PO WER/ST ANDBY indicator turns red
and the standby mode is set (only when turning off the
unit with the remote control).
VOLUME
To adjust the volume:
1. Press and hold the V OLUME ▲ b utton (on the remote
controller or the unit) to increase to the desired level.
2. Press and hold the V OLUME ▼ b utton (on the remote
controller or the unit) to decrease to the desired level.
MUTE
To cancel the sound:
Press the MUTE button on the remote controller to cancel
sound; press again to restore.
DISPLAY
To check the settings:
1. The screen changes each time the DISPLAY button is
pressed.
2. If the button is not pressed for approximately three seconds, the menu turns off.
VISUAL CONTROL
TO adjust the picture's contrast:
1, Press and hold the CONTRAST ▲ button for higher
contrast.
2, Press and hold the CONTRAST ▼ button for lower
contrast.
TO adjust the picture's brightness:
1, Press and hold the BRIGHT ▲ button for a brighter
picture.
2, Press and hold the BRIGHT ▼ button for a darker pic-
ture.
TO adjust the picture's color: (except RGB mode)
1, Press and hold the COLOR ▲ button for more color
saturation.
2, Press and hold the COLOR ▼ button for less color satu-
ration.
TO adjust the picture's tint :(when NTSC or HD/
DVD input is selected)
1, Press and hold the TINT ▲ button for a greener tint.
2, Press and hold the TINT ▼ button for a redder tint.
TO adjust the picture's sharpness: (except RGB
mode)
1, Press and hold the SHARPNESS ▲ button for a sharper
picture.
2, Press and hold the SHARPNESS ▼ button for a softer
picture.
*If no key operation is made within five seconds, the OSM
display will disappear.
Page 18

E – 14
OFF TIMER
To set the off timer:
The off timer can be set to turn the power off after 30,
60, 90 or 120 minutes.
1. Press the OFF TIMER button to start the timer at 30
minutes.
2. Press the OFF TIMER button to the desired time.
3. The timer starts when the menu turns off.
→ 30 → 60 → 90 → 120 → 0
To check the remaining time:
1. Once the off timer has been set, press the OFF TIMER
button once.
2. The remaining time is displayed, then turns off after a
few seconds.
3. When five minutes remain the remaining time appears
until it reaches zero.
OFF TIMER30
OFF TIMER28
OFF TIMER0
Canceling the off timer
1. Press the OFF TIMER button twice in a row.
2. The off timer is canceled.
Note:
After the power is turned off with the off timer ...
A slight current is still supplied to the monitor. When
you are leaving the room or do not plan to use the system for a long period of time, turn off the power of the
monitor.
Page 19
E – 15
Watching with a wide screen (manual)
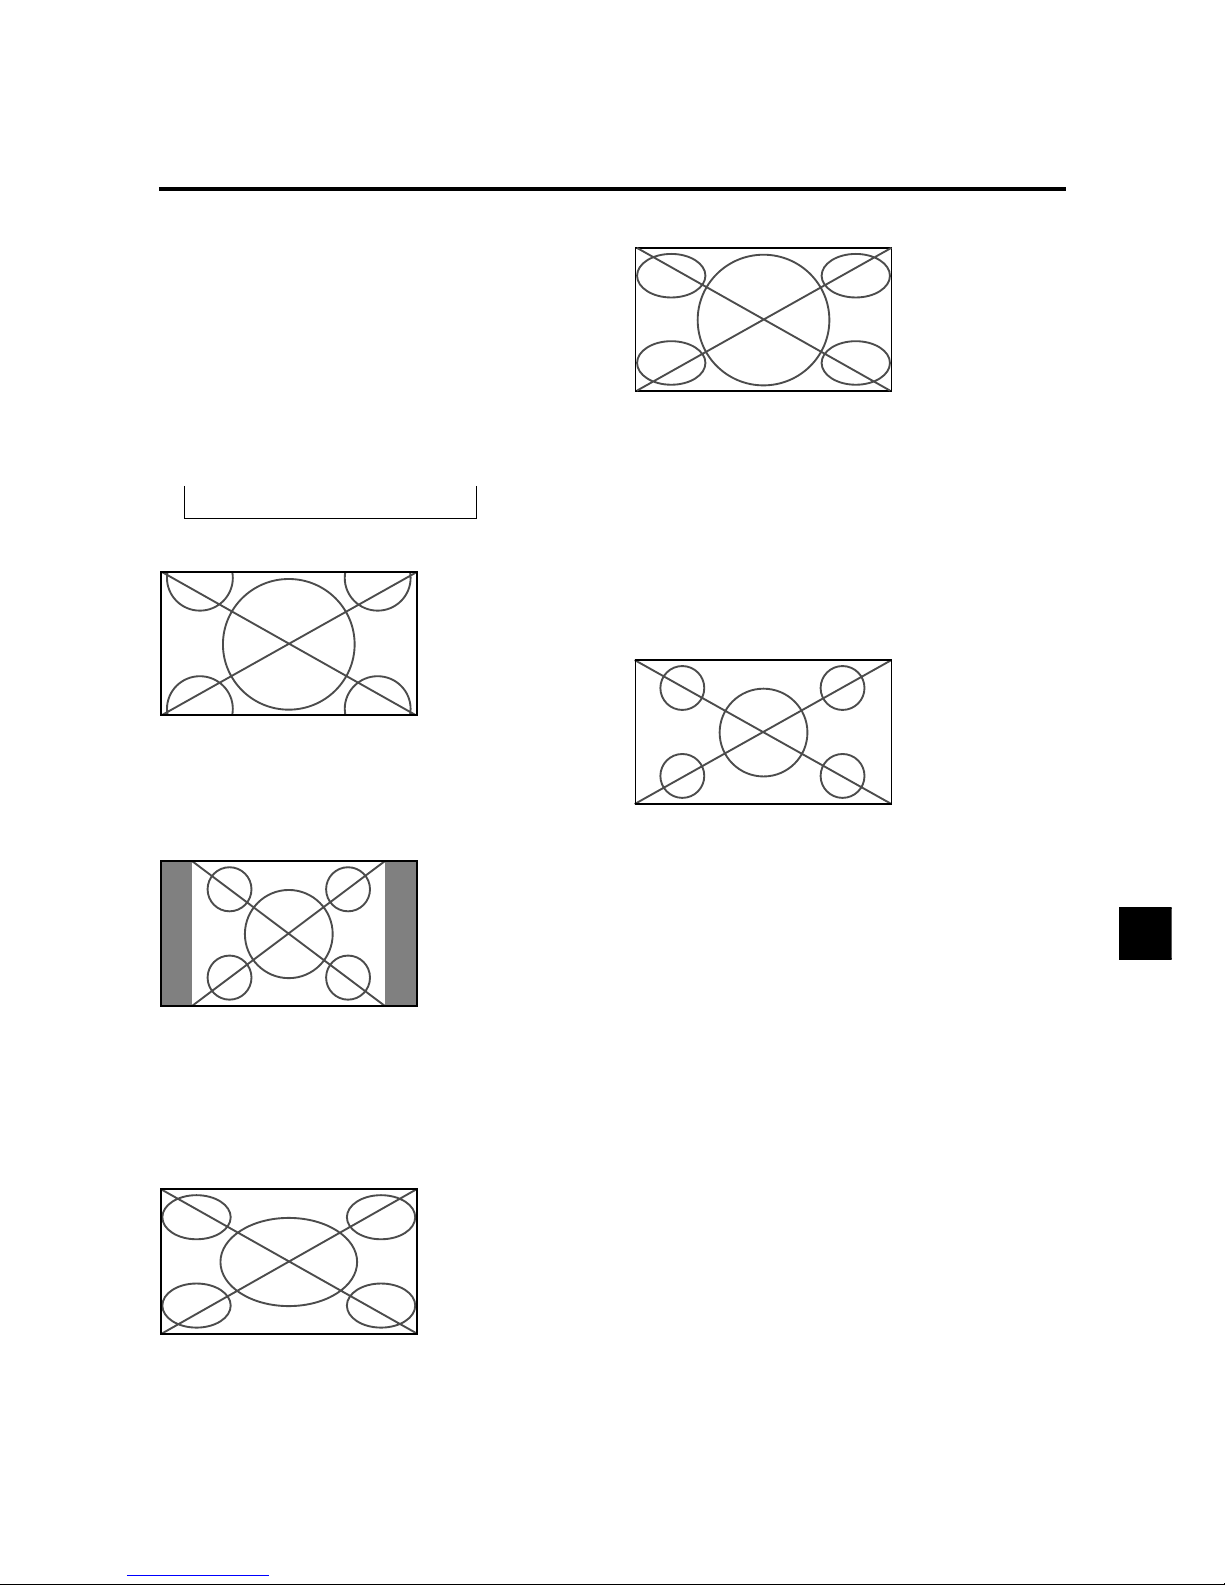
With this function, you can select one of four screen sizes.
When watching videos or digital video discs
1. Press the "WIDE/AUTO WIDE" button on the remote
controller.
2. Within 3 seconds ...
Press the "WIDE/AUTO WIDE" button again.
The screen size switches as follows:
→ ZOOM → NORMAL → FULL → STADIUM
ZOOM size screen
WIDE Operations
The picture is expanded in the horizontal and vertical direction, maintaining the original proportions.
* Use this for theater size (wide) movies, etc.
NORMAL size screen (4:3)
The normal size screen is displayed.
* The picture has the same size as video pictures with a
4 : 3 aspect ratio.
FULL size screen
The image is expanded in the horizontal direction.
* Images compressed in the horizontal direction ("squeezed
images") are expanded in the horizontal direction and
displayed on the entire screen. (Normal images are expanded in the horizontal direction.)
STADIUM size screen
The picture is expanded in the horizontal and vertical directions at different ratios.
* Use this for watching normal video programs (4:3) with
a wide screen.
When watching high definition video source
1. Press the "WIDE/AUT O WIDE" button on the remote
controller.
FULL size screen (16 : 9)
The full size screen is displayed.
* The picture has the same size as video pictures (16 : 9).
Page 20
E – 16
W atching computer images with a
wide screen
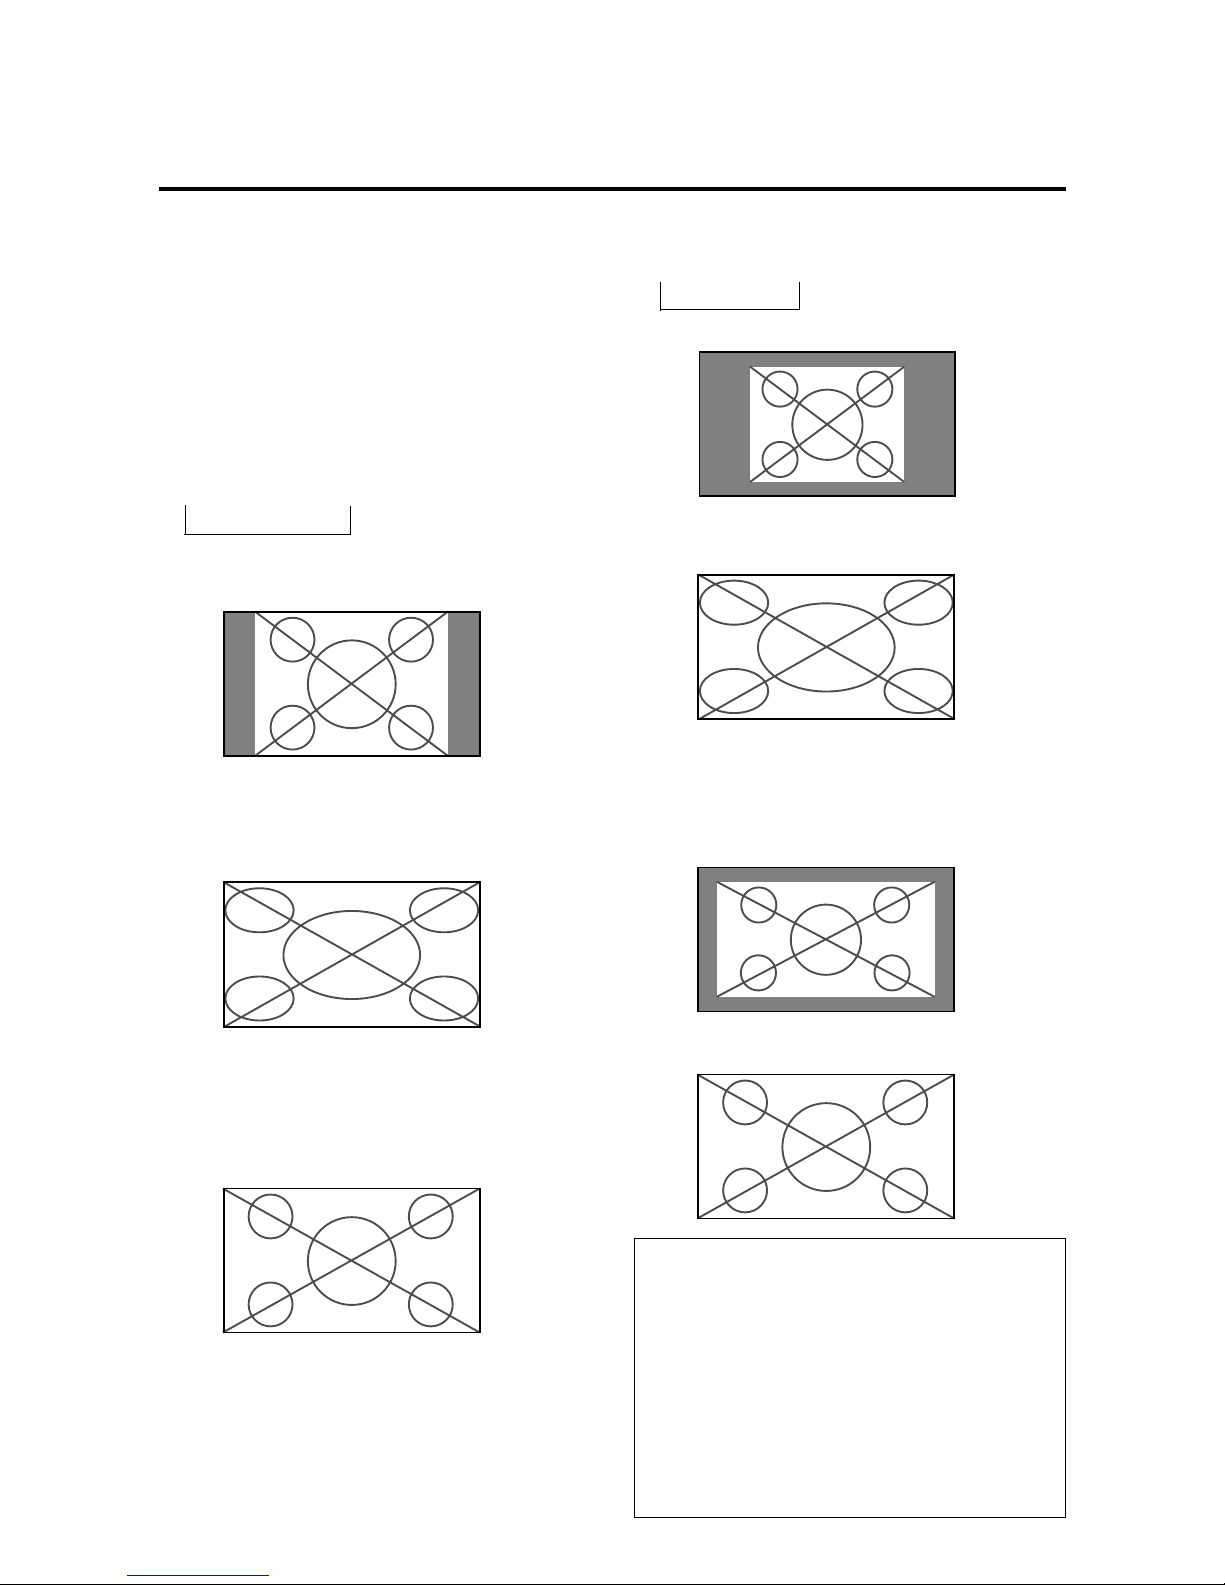
Switch to the wide screen mode to expand the 4 : 3 image
to fill the entire screen.
When "PICTURE SIZE" is set to "ON":
1. Press the "WIDE / A UTO WIDE" button on the remote
controller.
2. Within 3 seconds ...
Press the "WIDE/AUTO WIDE" button again.
The screen size switches as follows:
→ NORMAL → FULL
NORMAL size screen (4:3 or SXGA 5:4)
Information
䡵 Supported resolution
•
See page E-50 for details on the display output of the various VESA signal standards supported by the monitor.
•
When 852 dot⳯480 line wide VGA (*) signals with a
vertical frequency of 60 Hz and horizontal frequency of
31.72 kHz are input, select "WIDE" for the "RGB SELECT" setting. Since selecting an 848⳯480 signal automatically displays the image in correct size, it is not
necessary to change the RGB SELECT setting.
* "IBM PC/AT" and "VGA" are registered trademarks of IBM, Inc.
of the United States.
The picture has the same size as the normal computer image.
FULL size screen
The image is expanded in the horizontal direction.
When using a graphic accelerator board that is capable of
displaying 848⳯480 or 1360⳯765.
FULL size screen
When "PICTURE SIZE" is set to "OFF":
The screen size switches as follows:
→ TRUE → FULL
TRUE size screen (VGA, SVGA 4:3)
The image is true resolution.
FULL size screen
The image is expanded in the horizontal and vertical
direction.
When using a graphic accelerator board that is capable of
displaying 848⳯480.
TRUE
The image is true resolution.
FULL
Page 21
E – 17
The following describes how to use the menus and the selected items.
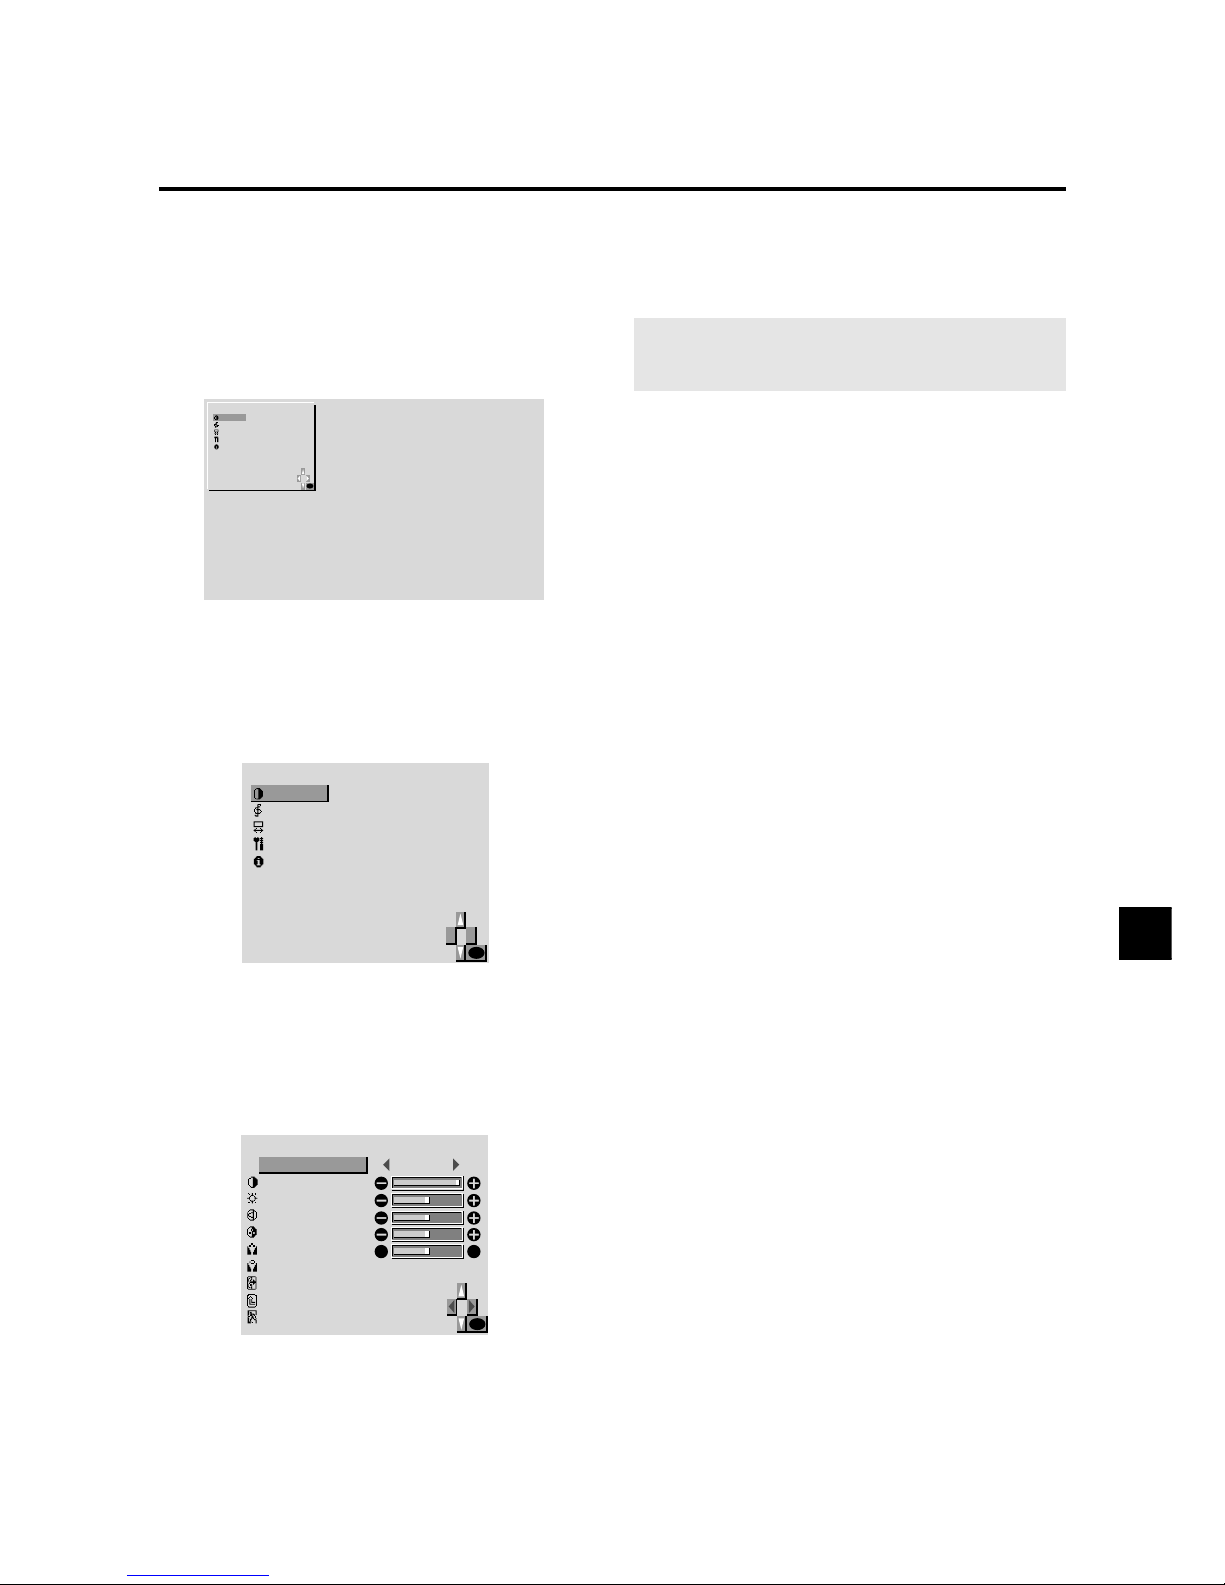
1. Press the MENU button on the remote controller to display the MAIN MENU.
2. Press the cursor buttons ▲ ▼ on the remote controller
to highlight the menu you wish to enter.
3. Press the OK button on the remote controller to select
a submenu or item.
4. Adjust the level or change the setting of the selected
item by using the cursor buttons 䊴 䊳 on the remote
controller.
OSM(On Screen Menu) Controls
Menu Operations
The OSM window is displayed with respect to the
screen as shown on the diagram.
* Depending on the screen's mode, the OSM may be dis-
played slightly differently.
In the explanation, the OSM section is shown close up.
MAIN MENU
PICTURE
SOUND
SCREEN
FUNCTION
INFORMATION
OK
5. The change is stored until you adjust it again.
6. Repeat steps 2 – 5 to adjust an additional item, or press
the MENU button on the remote controller to exit the
menu display.
MAIN MENU
PICTURE
SOUND
SCREEN
FUNCTION
INFORMATION
OK
PICTURE
PICTURE MODE
CONTRAST
BRIGHTNESS
SHARPNESS
COLOR
TINT
COLOR TEMP.
NR
RETURN
EXIT
MEMORY
2
NR-1
:
:
:
OK
RG
Note:
You can also exit the menu display by selecting the
“EXIT” icon and pressing the “OK”.
Page 22

E – 18
Main menu Sub menu Functions
PICTURE PICTURE MODE Sets the picture mode according to the VIDEO environment and
image software.
CONTRAST Adjust the contrast.
BRIGHTNESS Adjust the brightness.
SHARPNESS Adjust the sharpness.
COLOR Adjust the color.
TINT Adjust the tint.
COLOR TEMP Adjust the color temperature and white balance.
NR Reduces noise visible in image.
Main menu Sub menu Functions
SOUND BASS Sets the bass.
TREBLE Sets the treble.
BALANCE Sets the left/right balance.
Main menu Sub menu Functions
SCREEN WIDE ADJ. Adjusts the wide screen's vertical position and size.
RGB ADJ. Adjusts the computer image's vertical and horizontal positions,
fine picture, picture adj, Auto picture.
OSM ADJ. Adjusts the vertical and horizontal positions of the menu display.
Main menu Sub menu Functions
FUNCTION POWER MGT Sets the monitor for use as an energy-saving display when used
with a computer.
RGB SELECT Sets the appropriate mode for the computer image.
RGB (VGA signals), VIDEO (Moving picture), WIDE (WIDE VGA)
DTV .
HD SELECT Sets the digital broadcasting (1080I) or the High Vision (1035I).
OSM Turns the on-screen display (screen mode, etc.) off (when set to
"OFF").
When set to "ON", the on-screen display is displayed.
GRAY LEVEL In case of 4 : 3, sets the luminance of both sides.
PLE Setting the brightness level to the minimum. Normaly set to AUT O .
PICTURE SIZE Setting the wide screen display.
RESET Resets all the settings (PICTURE, SOUND, WIDE adjustments,
RGB adjustments, OSM adjustments) to the factory default val-
ues.
Main menu Sub menu Functions
INFORMATION FREQUENCY Used to check the frequency and synchronizing polarities of the
signal currently being inputted.
LANGUAGE Sets the language of the menus (Japanese, English, German,
French, Swedish, Italian or Spanish).
COLOR SYSTEM Sets the VIDEO f ormat (P AL, SECAM, 4.43 NTSC or 3.58 NTSC).
Page 23
E – 19
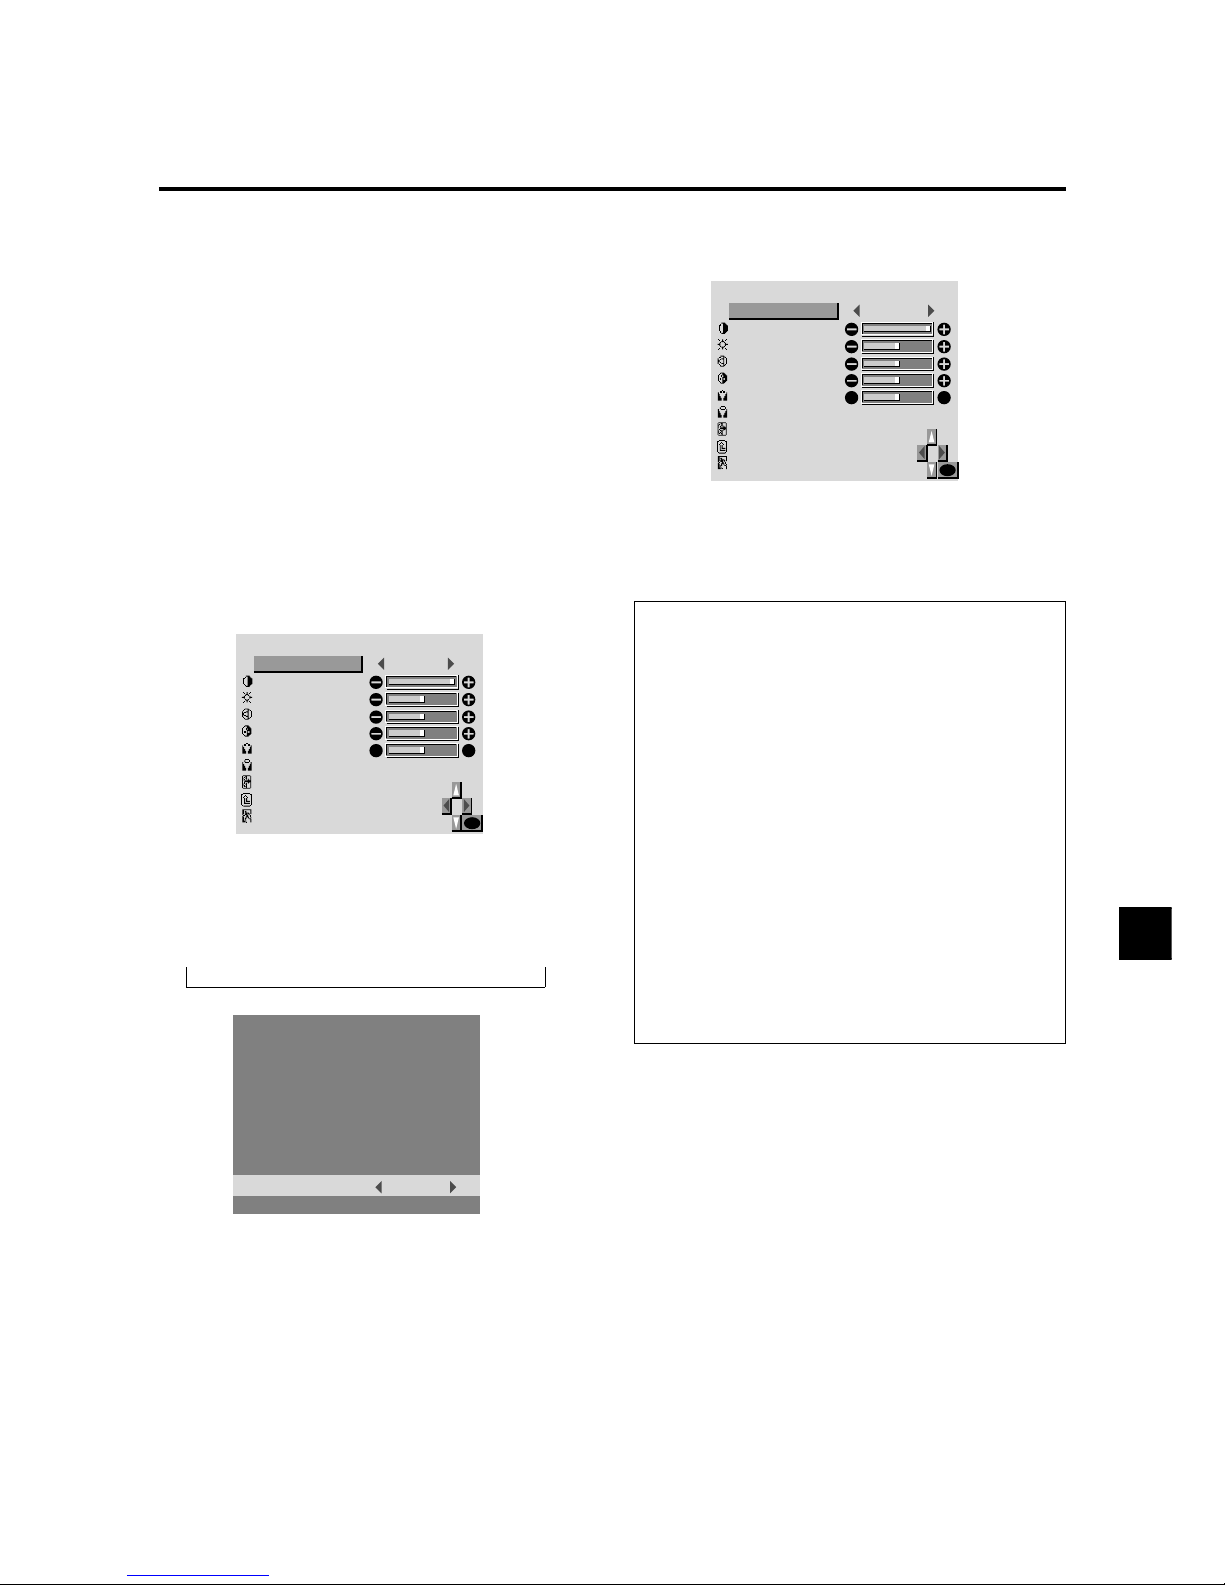
Setting the picture mode according to the brightness of the room
There are four picture modes that can be used effectively
according to the environment in which you are viewing
the display.
Example: Setting the “THEATER” mode
Press the MENU button on the remote controller to display the MAIN MENU on the screen, then...
1. Use the ▲ and ▼ buttons to select “PICTURE”, then
press the “OK” button.
The “PICTURE” screen appears.
2. Use the ▲ and ▼ buttons to select “PICTURE MODE”.
4. Press the “OK” button.
The picture mode is set to “THEATER”.
5. Once the adjustment is completed ...
Press the “MENU” button.
All menus disappear.
Information
䡵 Types of picture modes
MEMORY......The last picture adjustments are stored
here.
THEATER......Set this mode when watching video in
a dark room.
This mode provides darker, finer pictures, like the screen in movie theaters.
CONTRAST = 80% for RESET mode
BRIGHTNESS = 95% for RESET mode
NORMAL.......Set this mode when watching video in
a bright room.
This mode provides dynamic pictures
with distinct differences between light
and dark sections.
CONTRAST = 96% for RESET mode
RESET ..........Use this to reset the picture to the fac-
tory default settings.
PICTURE
PICTURE MODE
CONTRAST
BRIGHTNESS
SHARPNESS
COLOR
TINT
COLOR TEMP.
NR
RETURN
EXIT
THEATER
2
NR-1
:
:
:
OK
RG
PICTURE MODE
THEATER:
3. To set to “THEATER” ...
Use the 䊴 and 䊳 buttons to select “THEATER”.
The mode switches as follows when the 䊴 and 䊳 buttons are pressed:
→ MEMORY ↔ THEA TER ↔ NORMAL ↔ RESET ←
* If neither the 䊴 or 䊳 button is pressed within 5 sec-
onds, the current selection is set and the previous
screen reappears.
PICTURE
PICTURE MODE
CONTRAST
BRIGHTNESS
SHARPNESS
COLOR
TINT
COLOR TEMP.
NR
RETURN
EXIT
MEMORY
2
NR-1
:
:
:
OK
RG
Picture Settings Menu
Page 24
E – 20
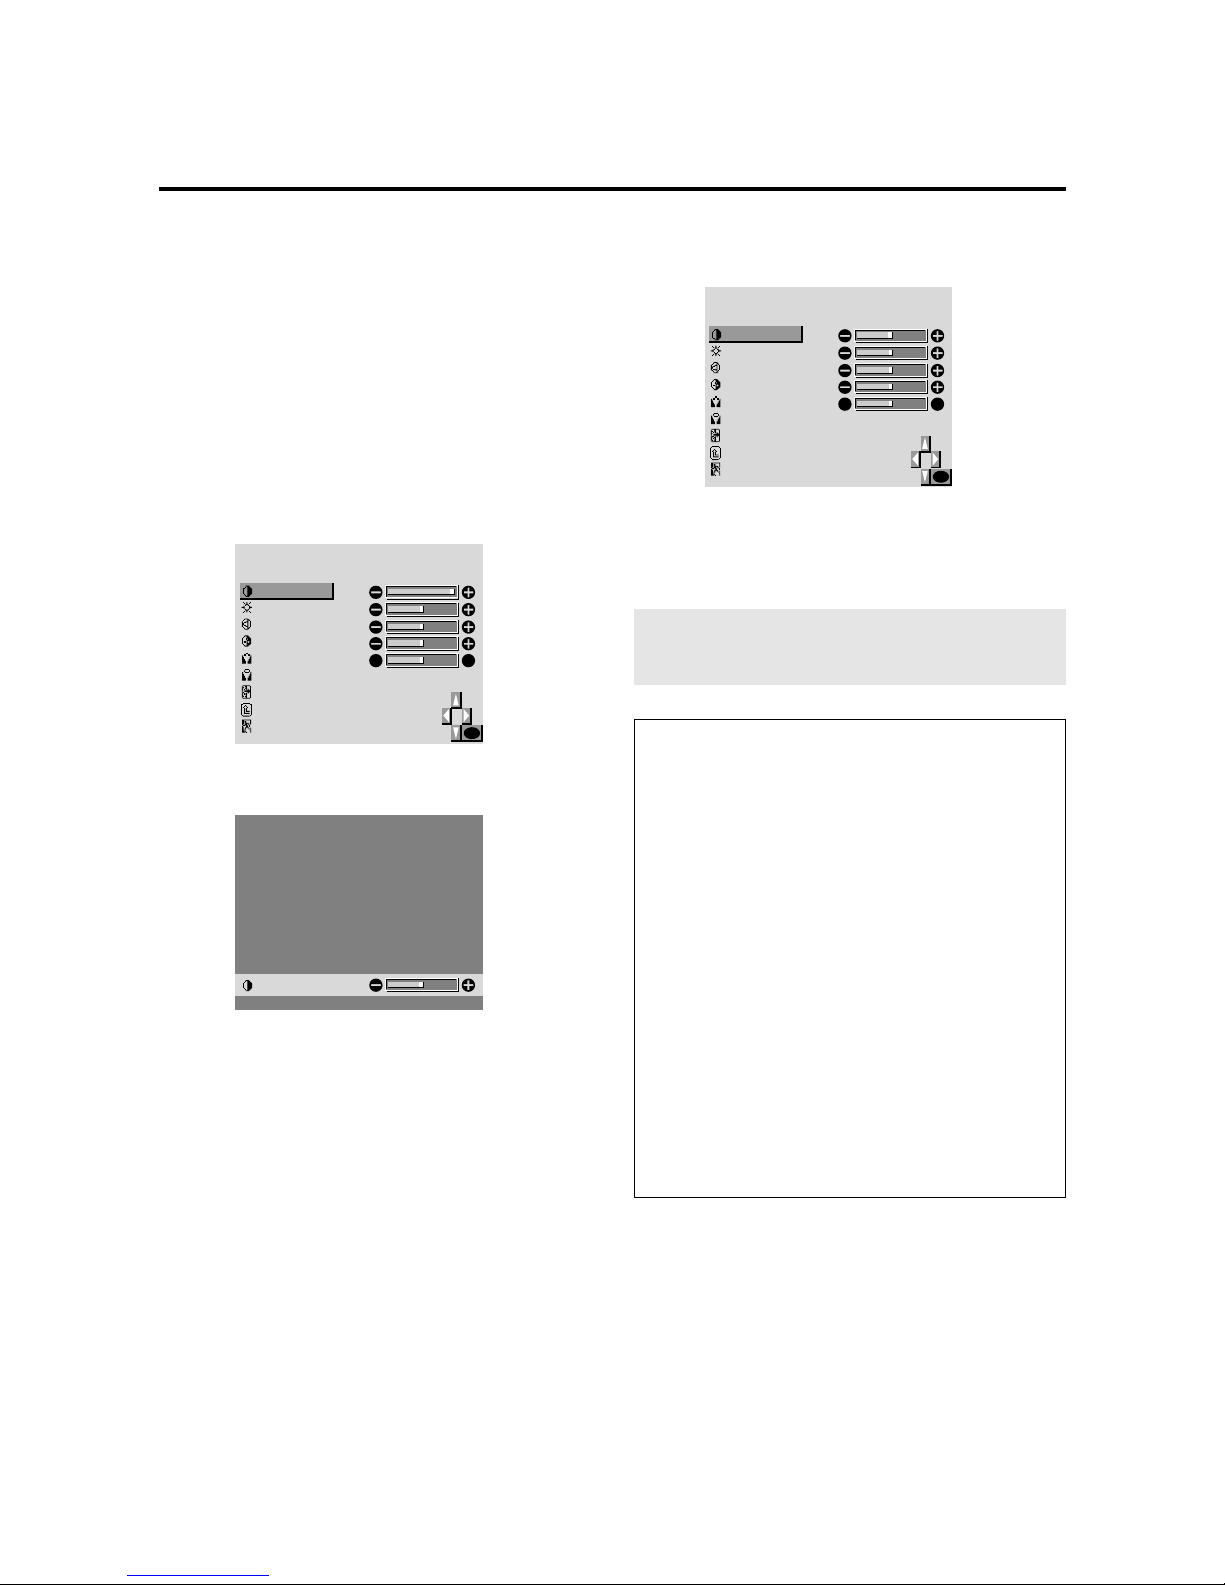
Adjusting the picture
The contrast, brightness, sharpness, color and tint can be
adjusted as desired.
Example: Adjusting the contrast
Press the MENU button on the remote controller to display the MAIN MENU on the screen, then...
1. Use the ▲ and ▼ buttons to select “PICTURE”, then
press the “OK” button.
The “PICTURE” screen appears.
2. Use the ▲ and ▼ buttons to select “CONTRAST”.
4. Press the “OK” button.
The contrast adjustment is completed.
PICTURE
PICTURE MODE
CONTRAST
BRIGHTNESS
SHARPNESS
COLOR
TINT
COLOR TEMP.
NR
RETURN
EXIT
MEMORY
2
NR-1
:
:
:
OK
RG
3. Use the 䊴 and 䊳 buttons to adjust the picture.
CONTRAST
* If neither the 䊴 or 䊳 button is pressed within 5 sec-
onds, the current setting is set and the previous screen
reappears.
5. Once the adjustment is completed ...
Press the “MENU” button.
All menus disappear.
Note:
If “CAN NOT ADJUST” appears ...
When trying to enter the PICTURE submenu, make sure
PICTURE MODE is set to MEMORY.
Information
䡵 Picture adjustment screen
CONTRAST .......Changes the picture’s contrast.
BRIGHTNESS....Changes the picture’s brightness.
SHARPNESS.....Changes the picture’s sharpness.
Adjusts picture detail of VIDEO
display.
COLOR .............. Changes the color density.
TINT ...................Changes the picture’s tint. Adjust
for natural colored skin, background, etc.
䡵 Adjusting the computer image
Only the contrast and brightness can be adjusted when
a computer signal is connected.
䡵 Restoring the factory default settings
Select “RESET” under the “PICTURE MODE” settings.
PICTURE
PICTURE MODE
CONTRAST
BRIGHTNESS
SHARPNESS
COLOR
TINT
COLOR TEMP
NR
RETURN
EXIT
MEMORY
2
NR-1
:
:
:
OK
RG
Page 25
E – 21
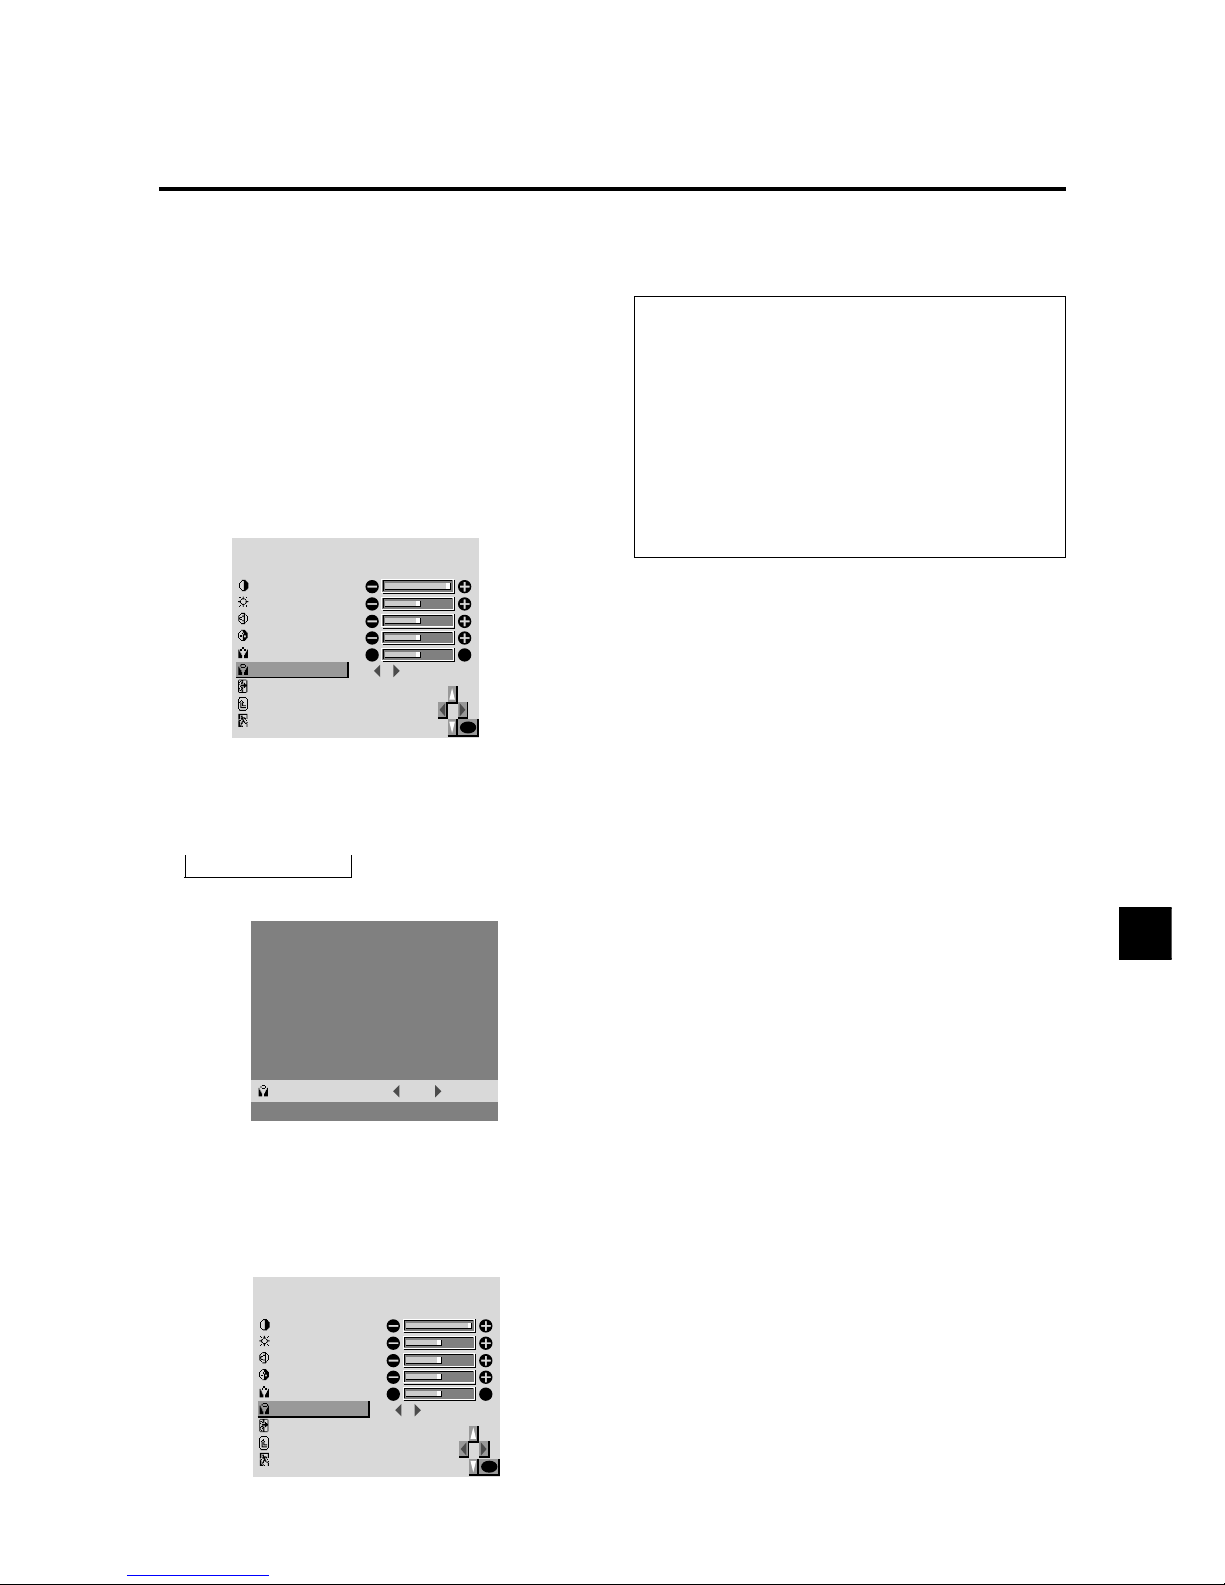
Setting the color temperature
Use this procedure to set color tone produced by the plasma
display.
Example: Setting "1"
Press the MENU button on the remote controller to display the MAIN MENU on the screen, then...
1. Use the ▲ and ▼ buttons to select “PICTURE”, then
press the “OK” button.
The “PICTURE” screen appears.
2. Use the ▲ and ▼ buttons to select “COLOR TEMP”.
PICTURE
PICTURE MODE
CONTRAST
BRIGHTNESS
SHARPNESS
COLOR
TINT
COLOR TEMP.
NR
RETURN
EXIT
MEMORY
2
NR-1
:
:
:
OK
RG
3. Use the 䊴 and 䊳 buttons to select "1".
The mode switch as follows when the 䊴 and 䊳 buttons
are pressed:
→ 1 ↔ 2 ↔ 3 ↔ PRO ←
* See page E-22 to set "PRO".
PICTURE
PICTURE MODE
CONTRAST
BRIGHTNESS
SHARPNESS
COLOR
TINT
COLOR TEMP.
NR
RETURN
EXIT
MEMORY
1
NR-1
:
:
:
OK
RG
If neither the 䊴 or 䊳 button is pressed within 5 seconds,
the current selection is set and the previous screen
reappears.
4. Press the “OK” button.
The “COLOR TEMP.” is set to “1”.
Information
䡵 Setting the color temperature
1 .........................High (bluer)
2 .........................Middle (Standard)
3 .........................Low (redder)
䡵 Restoring the factory default settings
Select “RESET” under the function menu. Note that this
also restores other settings to the factory defaults.
COLOR TEMP.
1
:
5. Once the setting is completed...
Press the “MENU” button.
All menus disappear.
Page 26
E – 22
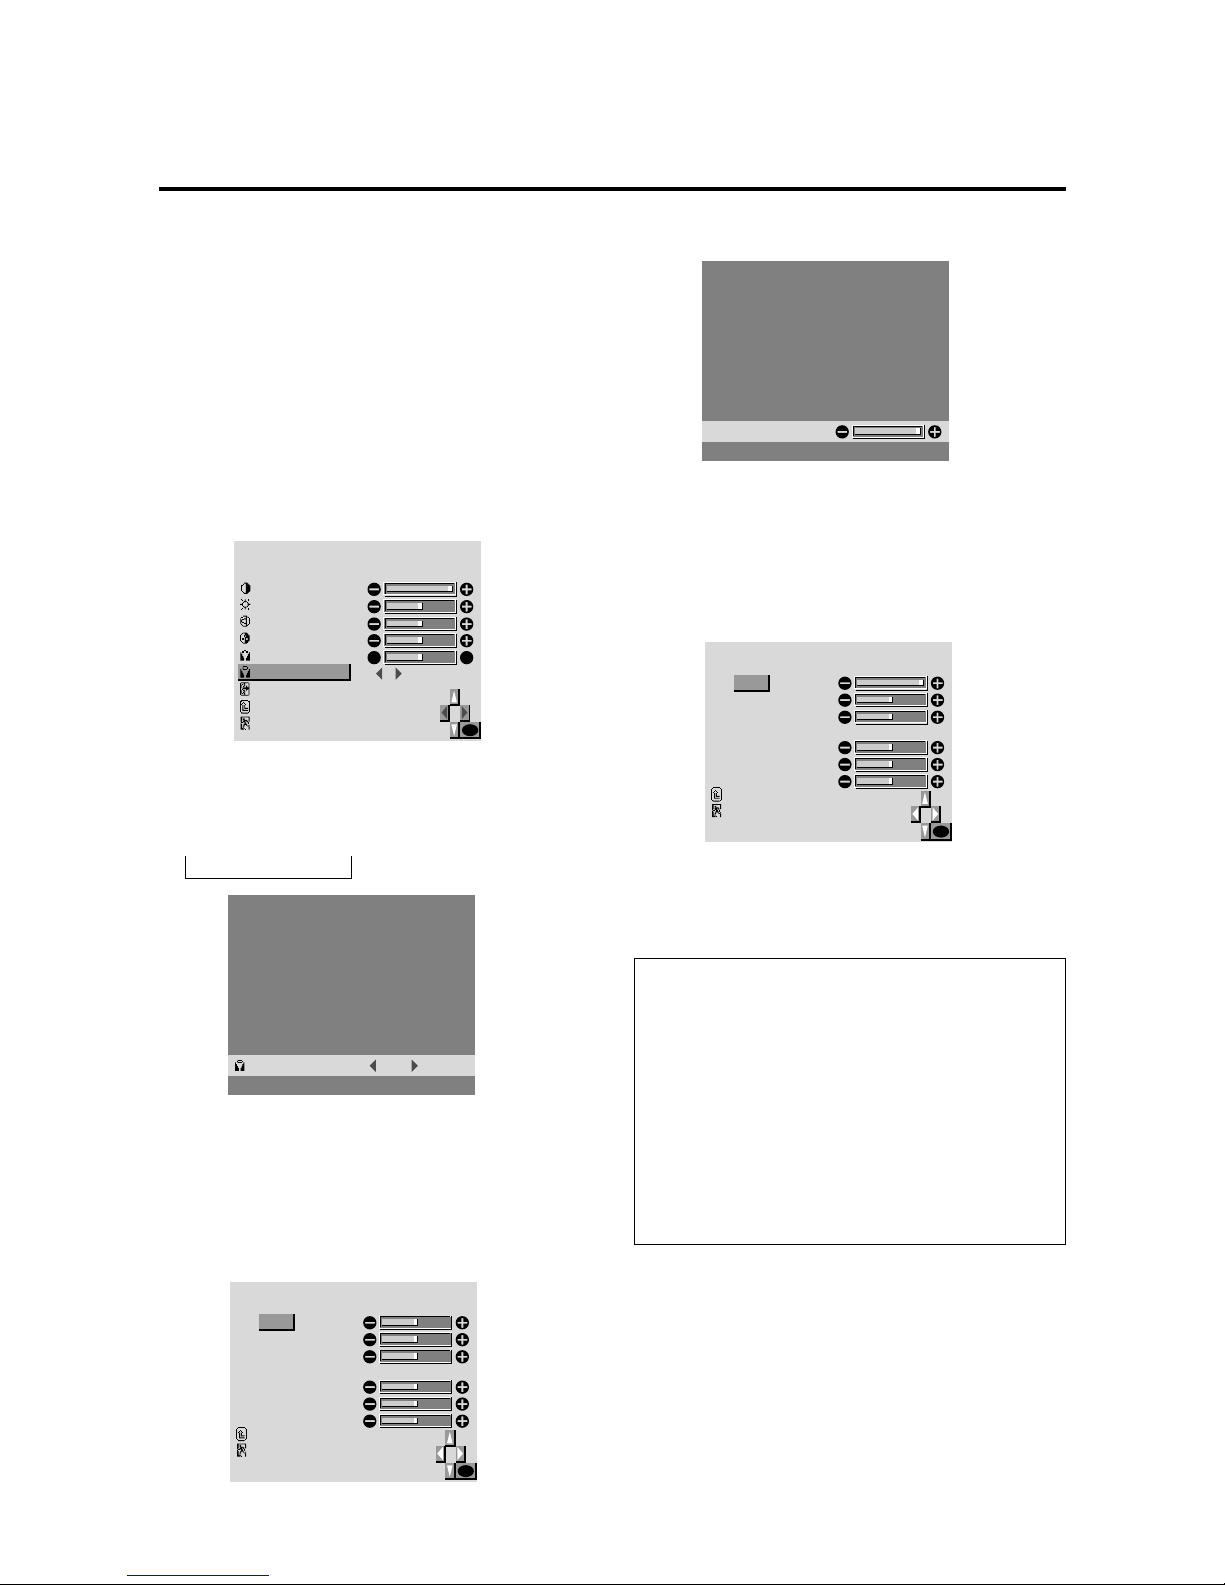
Adjusting the color to the desired quality
Use this procedure to adjust the white balance for bright pictures and dark pictures to achieve the desired color quality.
Example: Adjusting the "WHITE BALANCE"
Press the MENU button on the remote controller to display the MAIN MENU on the screen, then...
1. Use the ▲ and ▼ buttons to select “PICTURE”, then
press the “OK” button.
The “PICTURE” screen appears.
2. Use the ▲ and ▼ buttons to select “COLOR TEMP”.
PICTURE
PICTURE MODE
CONTRAST
BRIGHTNESS
SHARPNESS
COLOR
TINT
COLOR TEMP.
NR
RETURN
EXIT
MEMORY
2
NR-1
:
:
:
OK
RG
3. Use the 䊴 and 䊳 buttons to select "PRO".
The mode switch as follows when the 䊴 and 䊳 buttons
are pressed:
→ 1 ↔ 2 ↔ 3 ↔ PRO ←
If neither the 䊴 or 䊳 button is pressed within 5 seconds,
the current selection is set and the previous screen
reappears.
4. Press the “OK” button.
The "WHITE BALANCE" screen appears.
5. Use the ▲ and ▼ buttons to select "R-GAIN".
6. Adjusts the white balance using the 䊴 and 䊳 buttons.
WHITE BALANCE
GAIN
RED
GREEN
BLUE
BIAS
RED
GREEN
BLUE
RETURN
EXIT
OK
R-GAIN
* If neither the 䊴 or 䊳 button is pressed within 5 sec-
onds, the current setting is set and the previous screen
reappears.
7. Press the “OK” button.
The white balance has now been adjusted.
WHITE BALANCE
GAIN
RED
GREEN
BLUE
BIAS
RED
GREEN
BLUE
RETURN
EXIT
OK
8. Once the adjustment is completed...
Press the “MENU” button.
All menus disappear.
Information
䡵 Adjusting the white balance
RGB-GAIN ....White balance adjustment for signal
level
RGB-BIAS..... White balance adjustment for black
level
䡵 Restoring the factory default settings
Restoring the factory default settings
Select “RESET” under the function menu. Note that this
also restores other settings to the factory defaults.
COLOR TEMP.
PRO
:
Page 27
E – 23
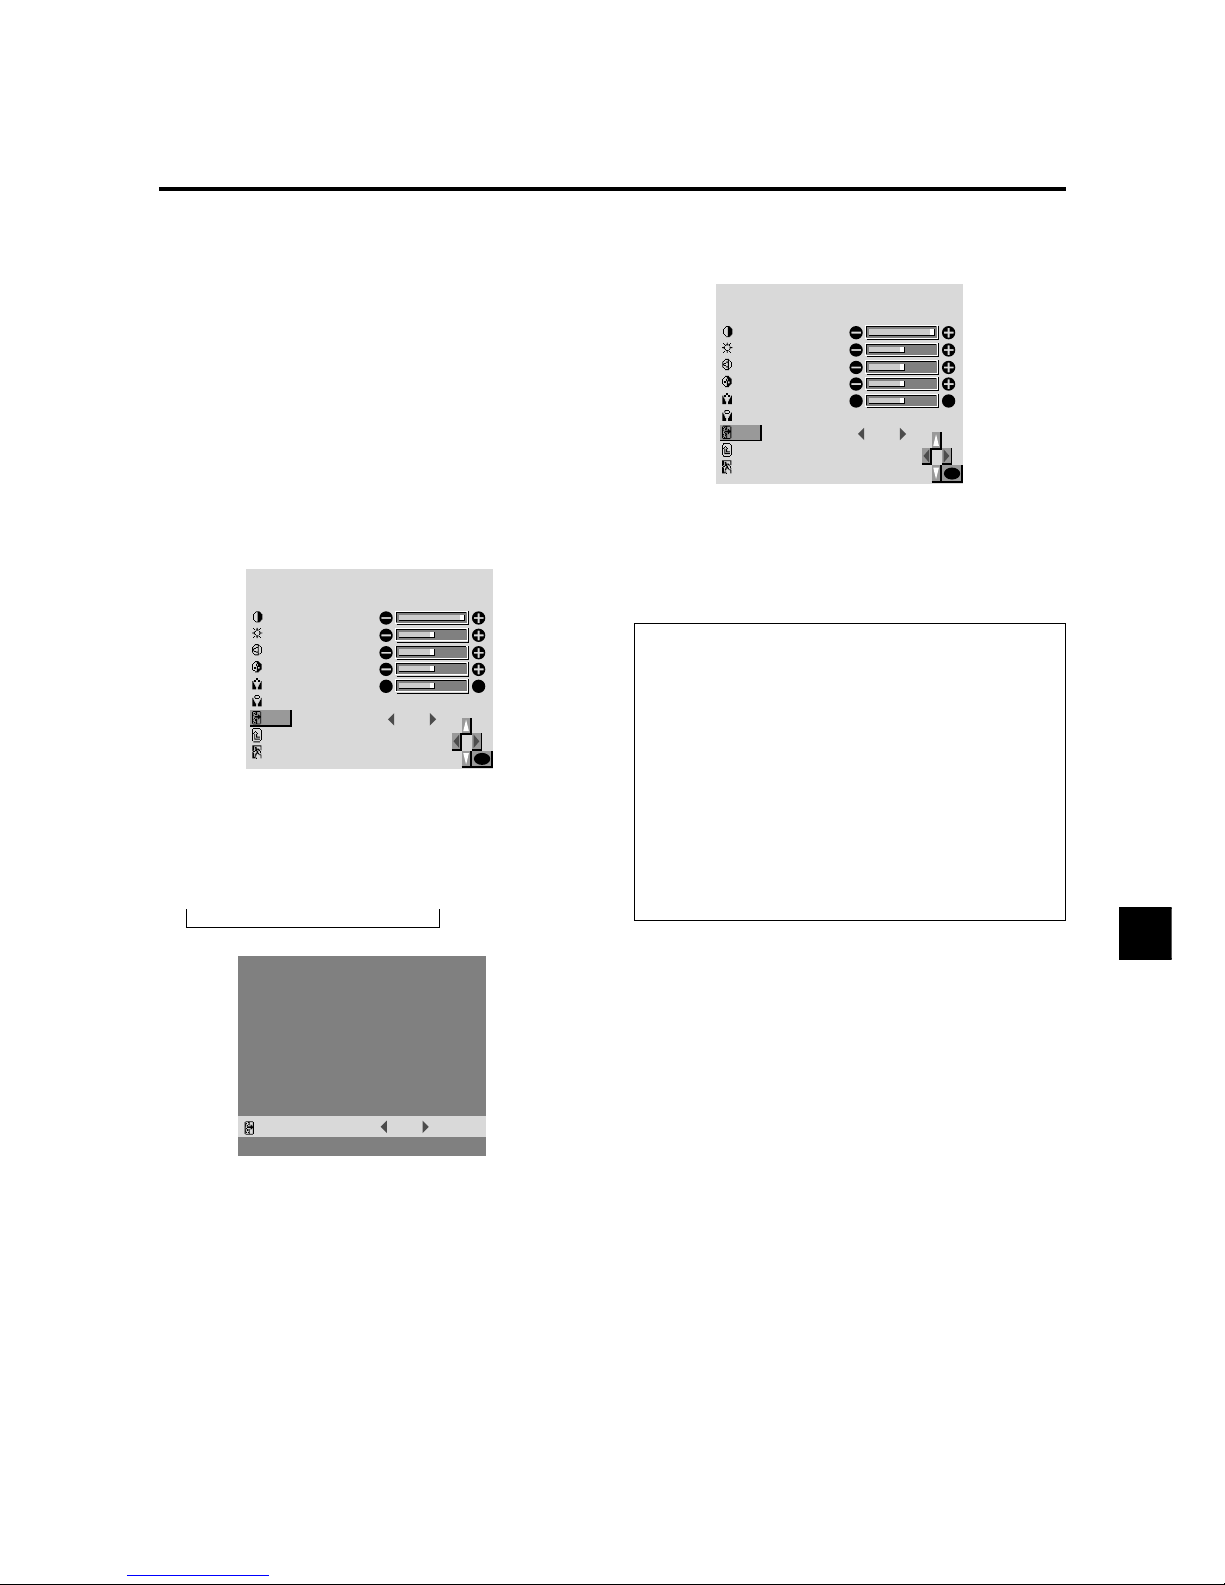
Reducing noise in the picture
Use these settings if the picture has noise due to poor reception or when playing video tapes on which the picture
quality is poor.
Example: Setting “NR-2”
Press the MENU button on the remote controller to display the MAIN MENU on the screen, then...
1. Use the ▲ and ▼ buttons to select “PICTURE”, then
press the “OK” button.
The “PICTURE” screen appears.
2. Use the ▲ and ▼ buttons to select “NR “.
4. Press the “OK” button.
The noise reduction mode is set to “NR-2”.
NR
NR-2
:
3. Use the 䊴 and 䊳 buttons to select “NR-2”.
The mode switches as follows when the 䊴 and 䊳 buttons are pressed:
→ OFF ↔ NR–1 ↔ NR–2 ↔ NR–3 ←
* If neither the 䊴 or 䊳 button is pressed within 5 sec-
onds, the current selection is set and the previous
screen reappears.
5. Once the setting is completed ...
Press the “MENU” button.
All menus disappear.
Information
䡵 NR
* “NR” stands for Noise Reduction.
* This function reduces noise in the picture.
䡵 Types of noise reduction
There are three types of noise reduction. Each has a different level of noise reduction.
The effect becomes stronger as the number increases
(in the order NR-1 → NR-2 → NR-3).
OFF..........Turns the noise reduction function off.
PICTURE
PICTURE MODE
CONTRAST
BRIGHTNESS
SHARPNESS
COLOR
TINT
COLOR TEMP.
NR
RETURN
EXIT
MEMORY
2
NR-1
:
:
:
OK
R
G
PICTURE
PICTURE MODE
CONTRAST
BRIGHTNESS
SHARPNESS
COLOR
TINT
COLOR TEMP.
NR
RETURN
EXIT
MEMORY
2
NR-2
:
:
:
OK
RG
Page 28
E – 24
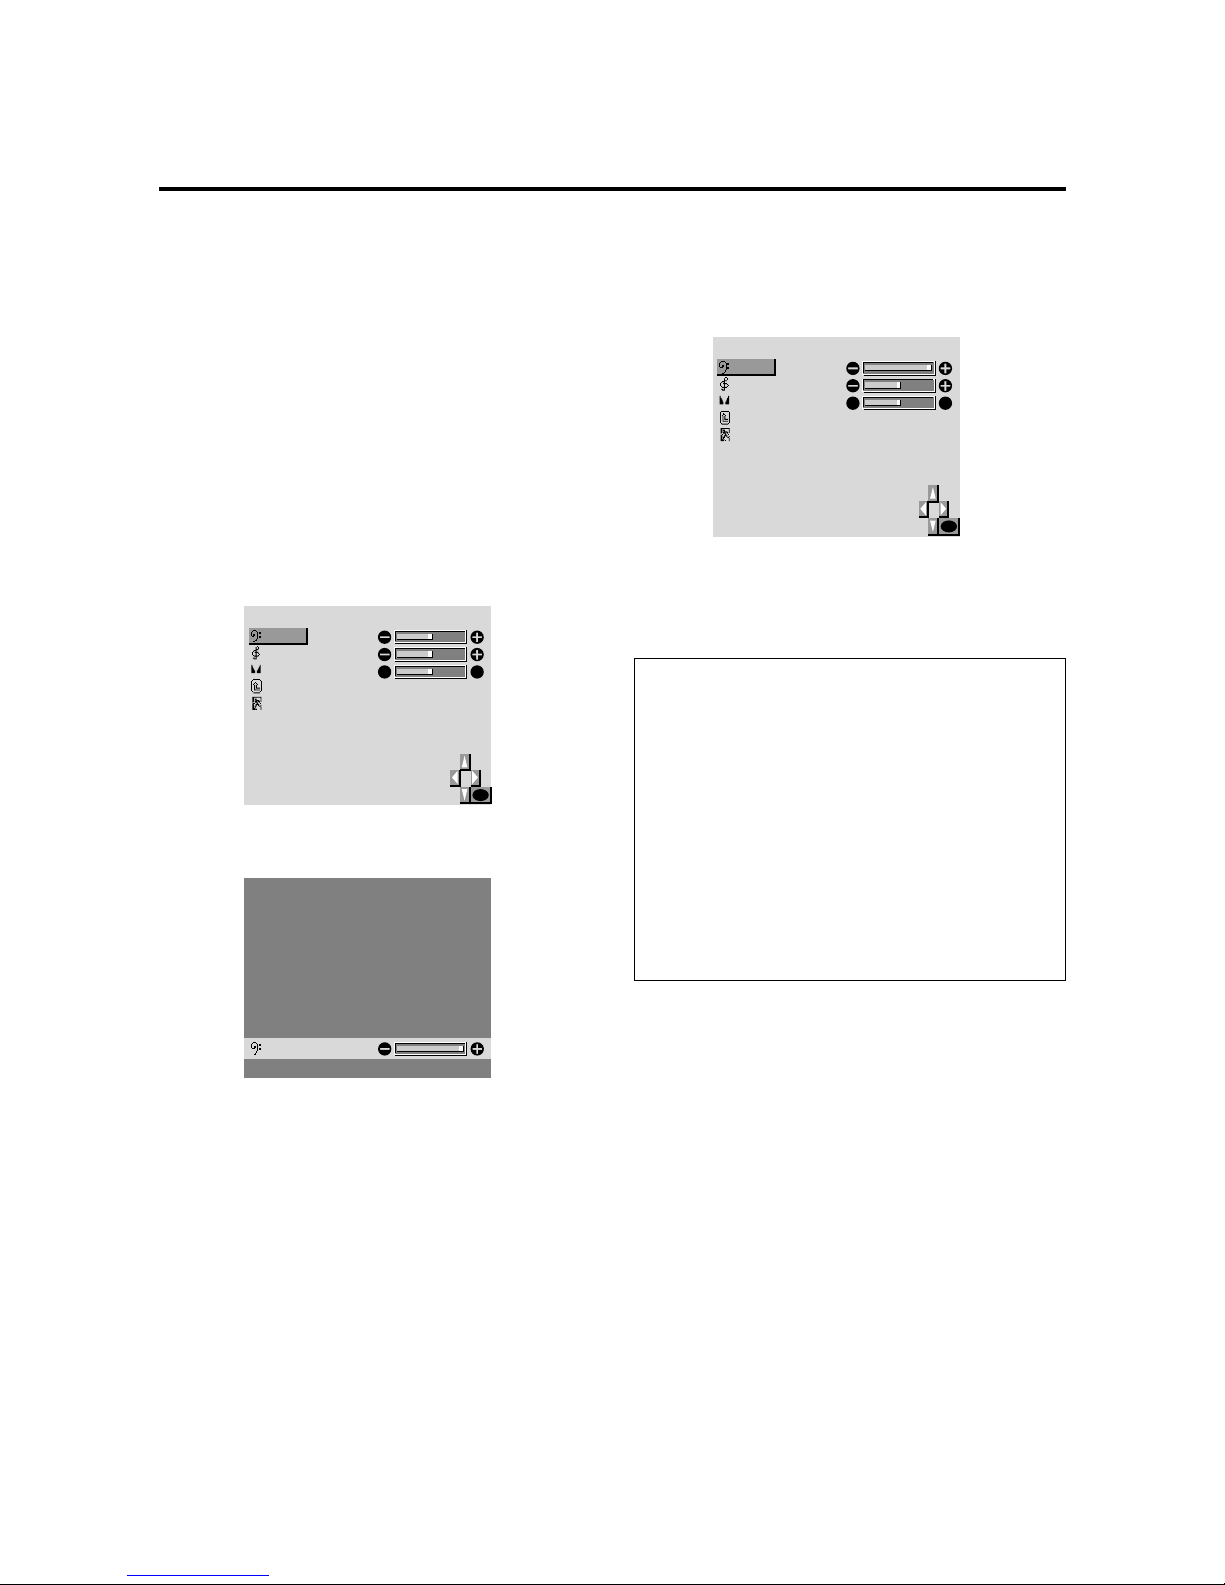
Adjusting the treble, bass and left/right balance
The treble, bass and left/right balance can be adjusted to
suit your tastes.
Example: Adjusting the bass
Press the MENU button on the remote controller to display the MAIN MENU on the screen, then...
1. Use the ▲ and ▼ buttons to select “SOUND”, then
press the “OK” button.
The “SOUND” screen appears.
2. To adjust the bass ...
Use the ▲ and ▼ buttons to select “BASS”.
To continue adjusting the sound ...
Repeat from step 2.
4. Press the “OK” button.
The bass has now been adjusted.
5. Once the adjustment is completed ...
Press the “MENU” button.
All menus disappear.
Information
䡵 Sound settings menu
BASS ................. Changes the level of low frequency
sound.
TREBLE .............Changes the level of high frequency
sound.
BALANCE ..........Changes the balance of the left and
right channels.
䡵 Restoring the factory default settings
Select “RESET” under the function menu. Note that this
also restores other settings to the factory defaults.
3. Adjust the bass using the 䊴 and 䊳 buttons.
BASS
* If neither the 䊴 or 䊳 button is pressed within 5 sec-
onds, the current selection is set and the previous
screen reappears.
SOUND
BASS
TREBLE
BALANCE
RETURN
EXIT
OK
LR
SOUND
BASS
TREBLE
BALANCE
RETURN
EXIT
OK
LR
Sound Settings Menu
Page 29
E – 25
Screen Settings Menu
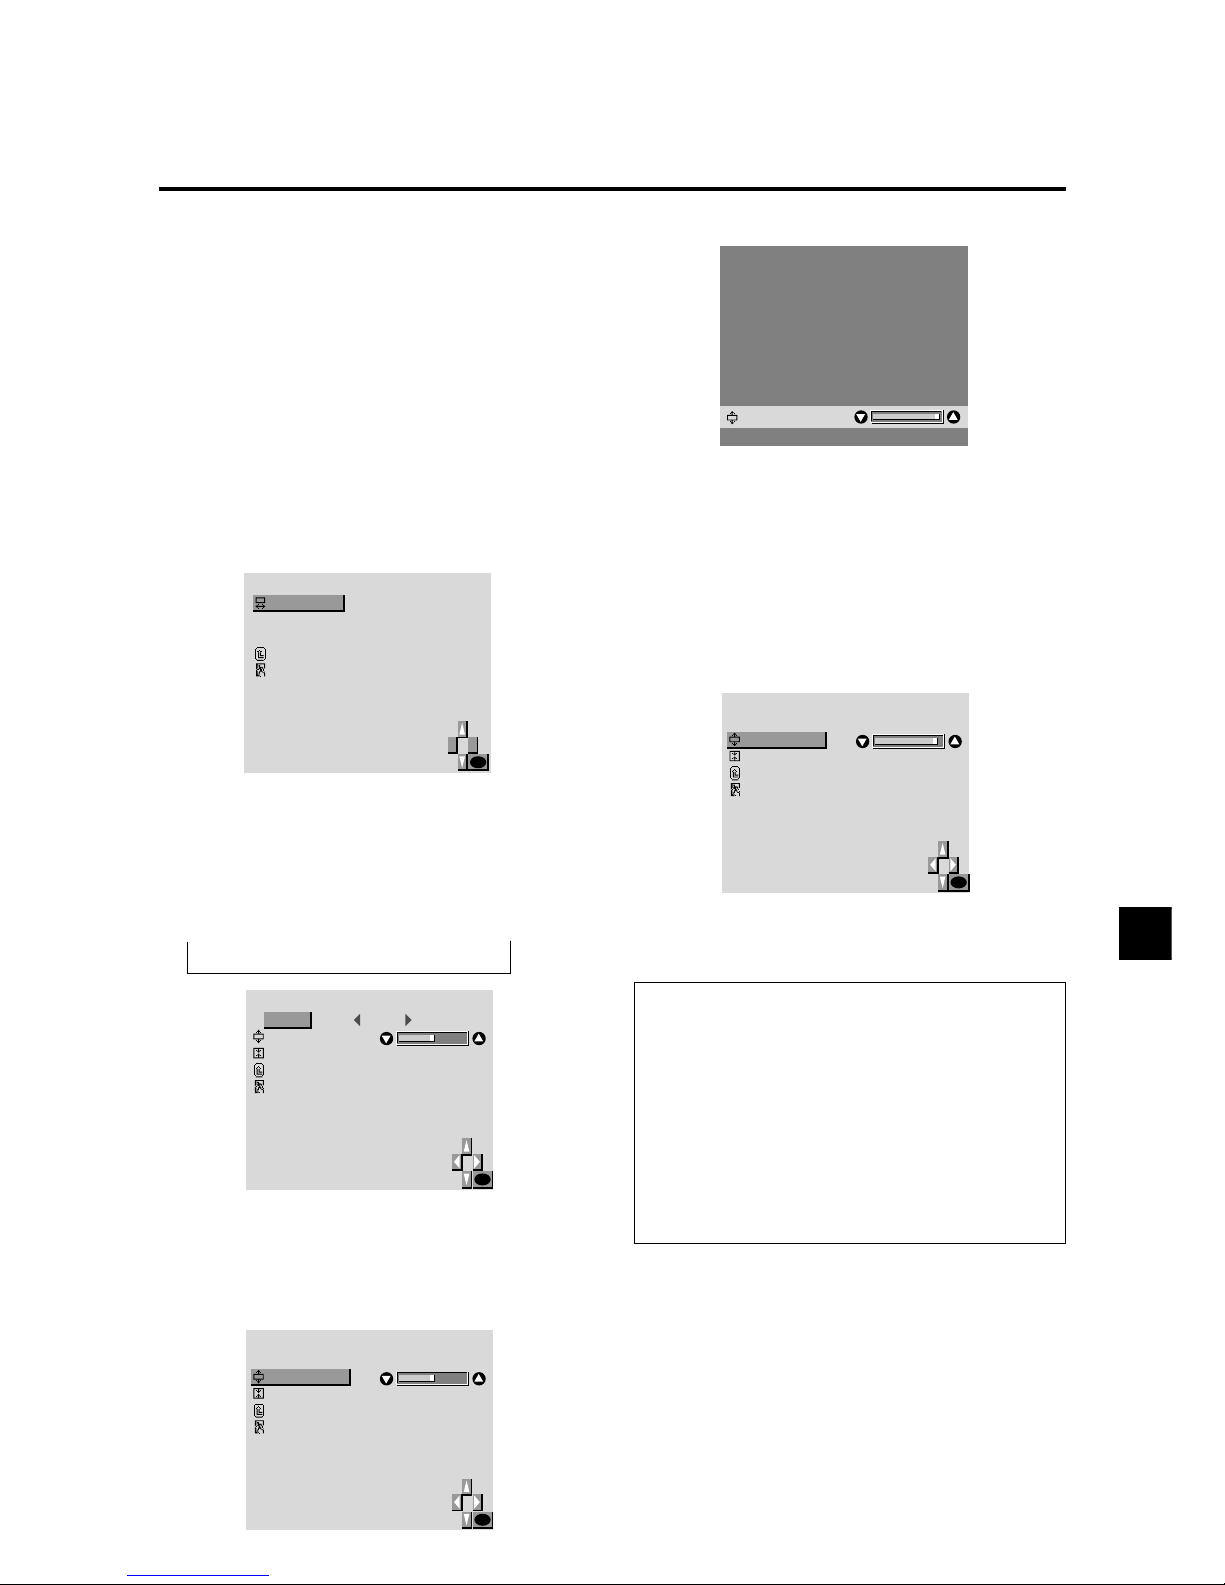
Adjusting the position and size of the wide screen
The position and size of the wide screen can be fine-adjusted.
Example: Adjusting the v ertical position in the zoom mode
Press the MENU button on the remote controller to display the MAIN MENU on the screen, then...
1. Use the ▲ and ▼ buttons to select “SCREEN”, then
press the “OK” button.
The “SCREEN” screen appears.
2. Use the ▲ and ▼ buttons to select “WIDE ADJ .”, then
press the “OK” button.
SCREEN
WIDE ADJ.
RGB ADJ.
OSM ADJ.
RETURN
EXIT
OK
The “WIDE ADJ.” screen appears.
3. To adjust the zoom mode ...
Use the 䊴 and 䊳 buttons to select “ZOOM”.
The mode switches as follows when the 䊴 and 䊳 buttons are pressed:
→ ZOOM ↔ NORMAL ↔ FULL ↔ STADIUM ←
WIDE ADJ.
MODE
V–POSITION
V–HEIGHT
RETURN
EXIT
ZOOM
3
:
:
OK
*The mode can also be switched by pressing the “WIDE/
AUTO WIDE” button on the remote controller.
4. To adjust the vertical position ...
Use the ▲ and ▼ buttons to select “V-POSITION”.
5. Adjust using the 䊴 and 䊳 buttons.
* If neither the 䊴 or 䊳 button is pressed within 5 sec-
WIDE ADJ.
MODE
V–POSITION
V–HEIGHT
RETURN
EXIT
ZOOM
3
:
:
OK
V–POSITION
onds, the current adjustment is set and the previous
screen reappears.
To continue making other wide screen adjustments ...
Repeat from step 4.
6. Press the “OK” button.
The wide screen’s vertical position has now been adjusted.
7. Once the adjustment is completed ...
WIDE ADJ.
MODE
V–POSITION
V–HEIGHT
RETURN
EXIT
ZOOM
3
:
:
OK
Press the “MENU” button.
All menus disappear.
Information
䡵 Adjusting the wide screen
V-POSITION ......Adjusts the vertical position of the
picture.
V-HEIGHT ..........Adjusts the vertical size of the pic-
ture.
䡵 Restoring the factory default settings
Select “RESET” under the function menu. Note that this
also restores other settings to the factory defaults.
Page 30
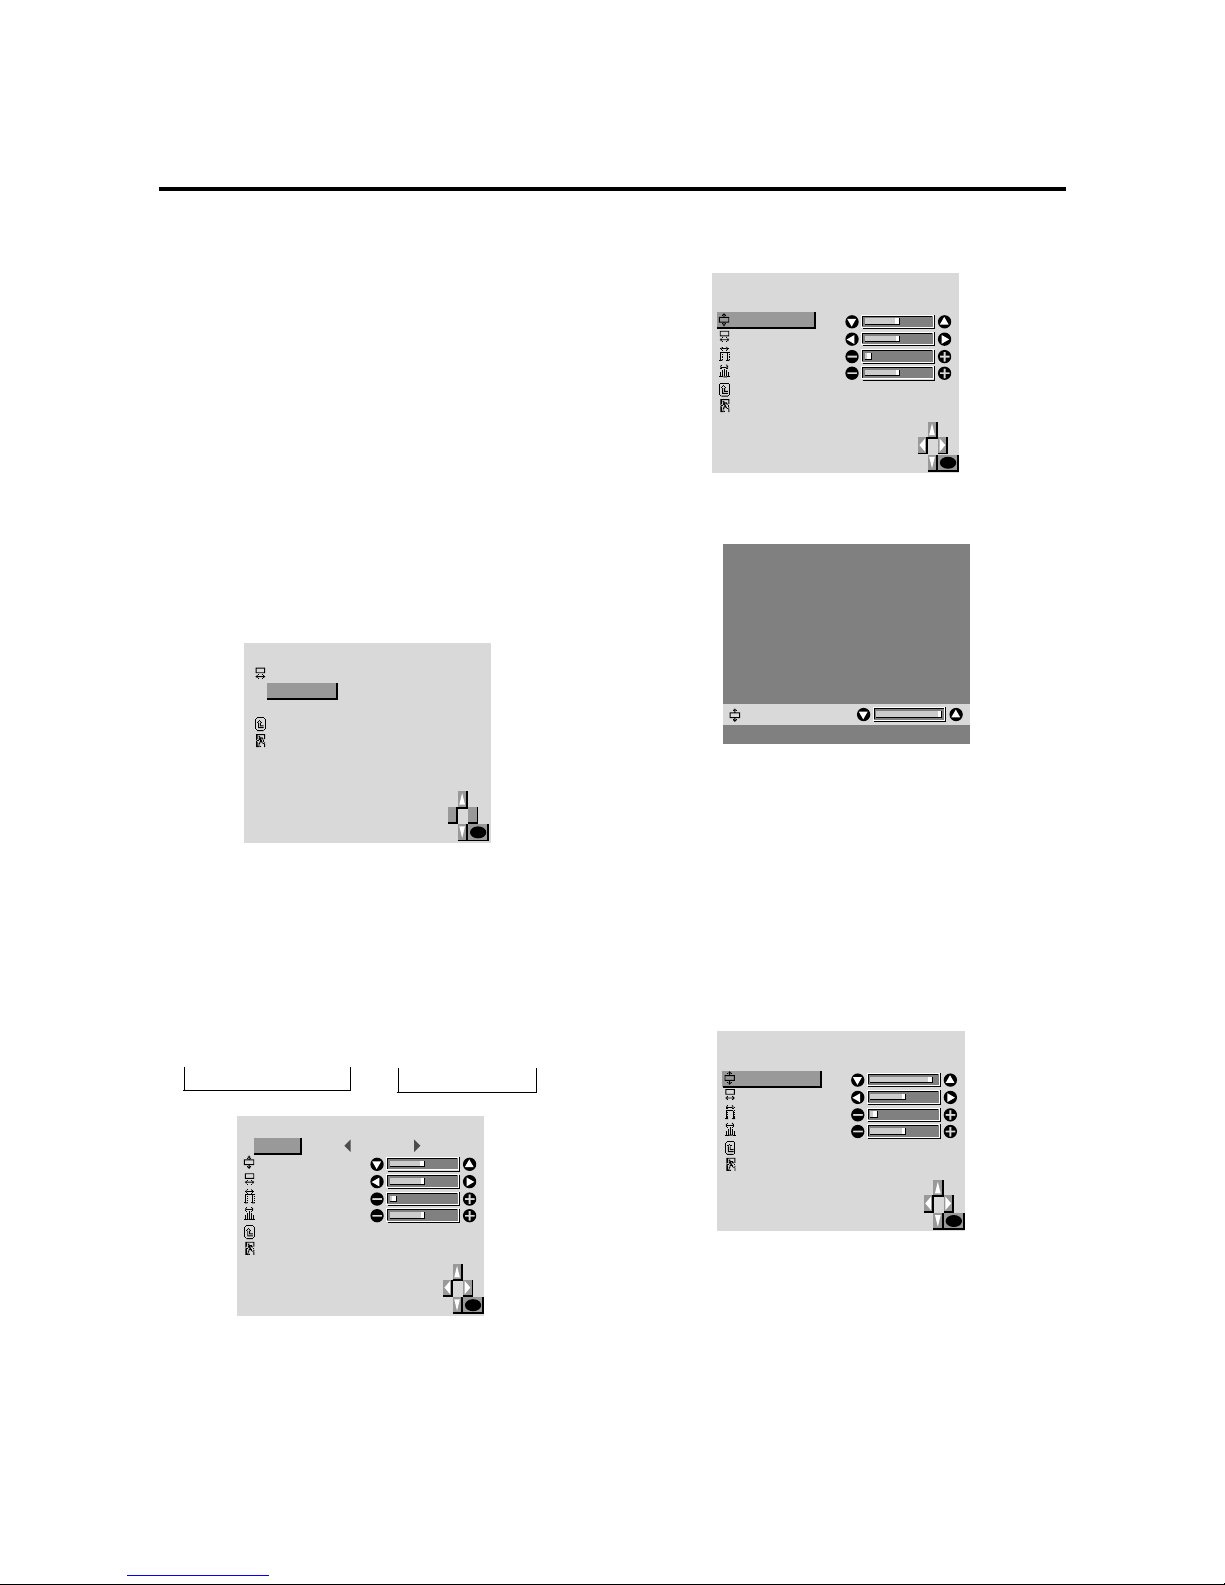
E – 26
Adjusting the Position, Fine Picture and Picture
Adj of a computer image
When a computer image is displayed, the position of the
image can be adjusted and flickering of the image can be
corrected.
Example: Adjusting the v ertical position in the normal
mode
Press the MENU button on the remote controller to display the MAIN MENU on the screen, then...
1. Use the ▲ and ▼ buttons to select “SCREEN”, then
press the “OK” button.
The “SCREEN” menu appears.
2. Use the ▲ and ▼ buttons to select “RGB ADJ.”, then
press the “OK” button.
4. To adjust the vertical position ...
Use the ▲ and ▼ buttons to select “V-POSITION”.
RGB ADJ.
MODE
V–POSITION
H–POSITION
FINE PICTURE
PICTURE ADJ.
RETURN
EXIT
NORMAL:
OK
SCREEN
WIDE ADJ.
RGB ADJ.
OSM ADJ.
RETURN
EXIT
OK
The “RGB ADJ.” screen appears.
3. To adjust the normal mode ...
Use the 䊴 and 䊳 buttons to select “NORMAL”.
The mode switches as follows when the 䊴 and 䊳 buttons are pressed:
PICTURE SIZE : ON PICTURE SIZE : OFF
→ NORMAL ↔ FULL ←→ TRUE ↔ FULL ←
RGB ADJ.
MODE
V–POSITION
H–POSITION
FINE PICTURE
PICTURE ADJ.
RETURN
EXIT
NORMAL:
OK
* The mode can also be switched by pressing the
“WIDE/AUTO WIDE” button on the remote controller.
V–POSITION
* If neither the 䊴 or 䊳 button is pressed within 5 sec-
onds, the current adjustment is set and the previous
screen reappears.
T o continue making other computer image adjustments
...
Repeat from step 4.
6. Press the "OK" button.
The vertical position of the computer's image has now
been adjusted.
RGB ADJ.
MODE
V–POSITION
H–POSITION
FINE PICTURE
PICTURE ADJ.
RETURN
EXIT
NORMAL:
OK
7. Once all adjustments are completed ...
Press the “MENU” button.
All menus disappear.
5. Adjust using the 䊴 and 䊳 buttons.
Page 31

E – 27
Information
䡵 Screen modes
FULL*.................The image is displayed over the
entire screen. Set this mode for wide
images. (16 : 9)
NORMAL* ..........Set this mode for the same size as
video pictures with a 4:3 or 5:4 aspect ratio.
TRUE*................The image is true resolution.
* For compatibility set Table for Signals Supported on
page 50.
Adjusting the position of the computer image
V-POSITION ......Adjusts the vertical position of the
image.
H-POSITION ......Adjusts the horizontal position of
the image.
FINE PICTURE ..Adjusts for flickering.
PICTURE ADJ....Adjusts for striped patterns on the
image.
䡵 Restoring the factory default settings
Select “RESET” under the function menu. Note that this
also restores other settings to the factory defaults.
Page 32
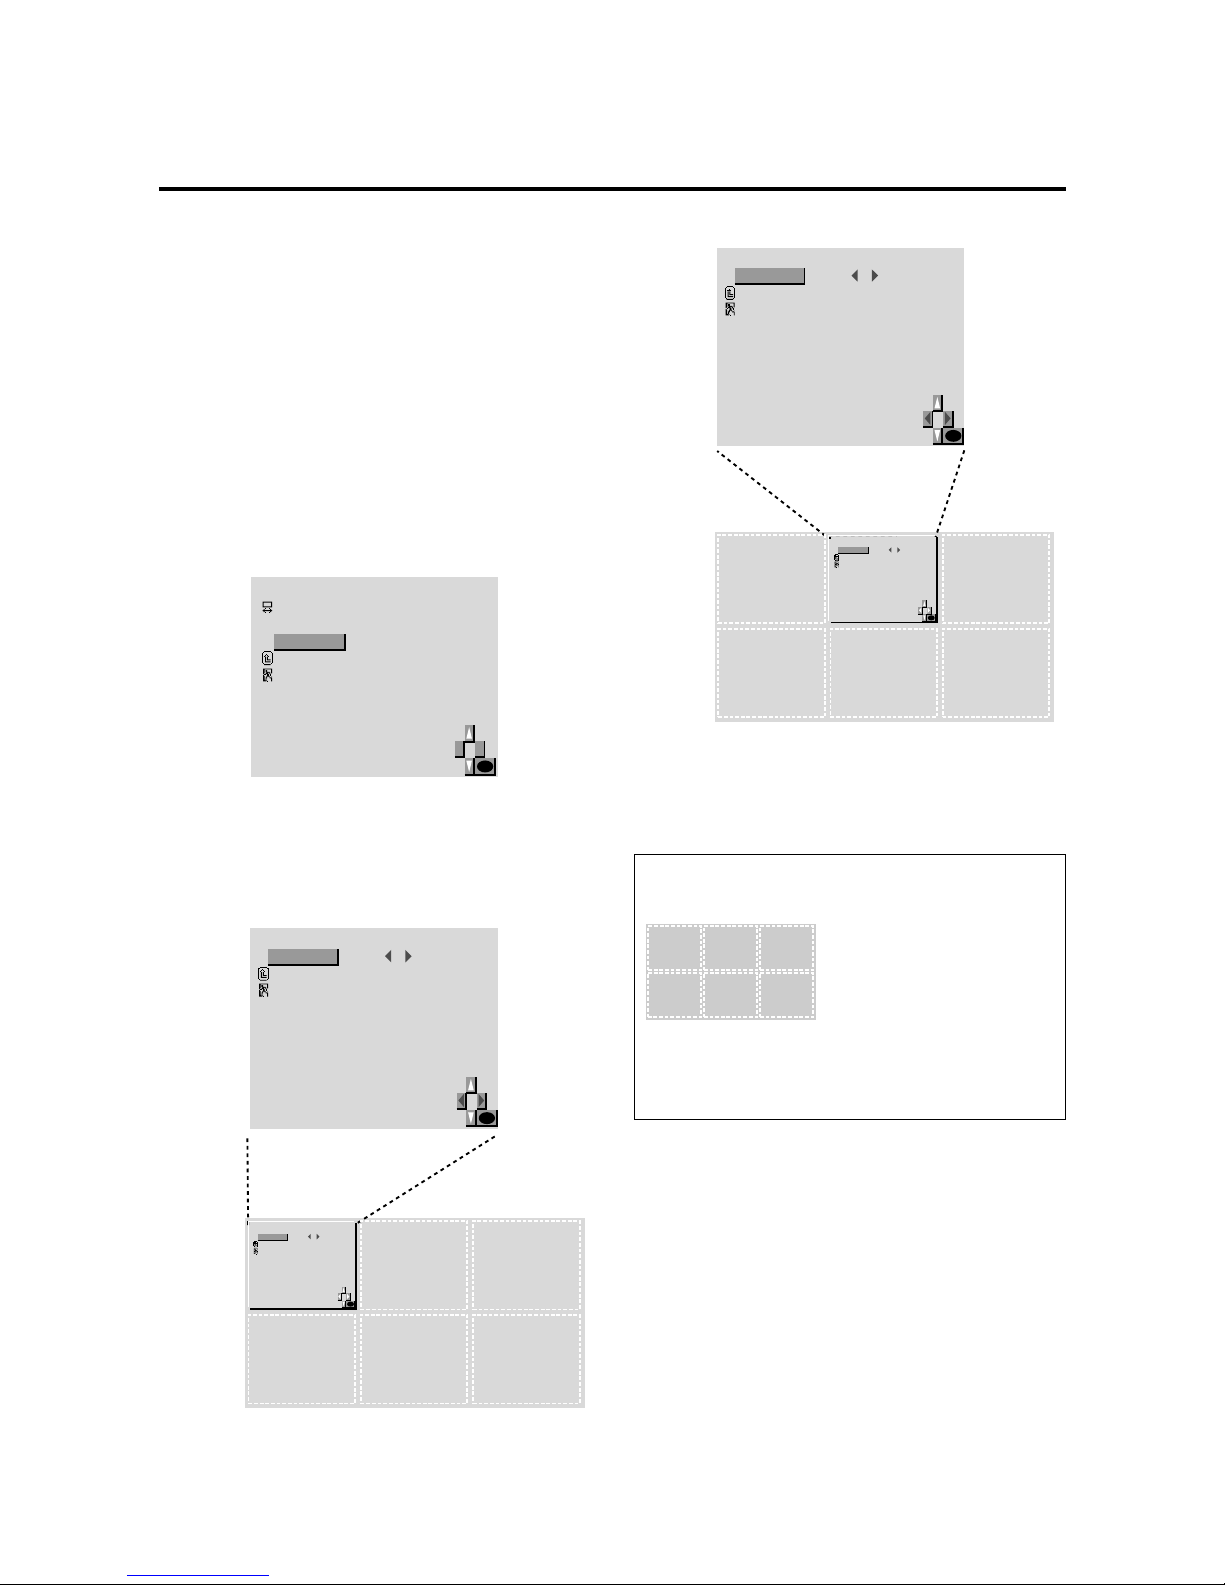
E – 28
OK
OSM ADJ.
POSITION
RETURN
EXIT
1:
Adjusting the position of the menu display
Use these operations to adjust the position of the menus
that appear on screen.
Example: Adjusting the position of the menu display
Press the MENU button on the remote controller to display the MAIN MENU on the screen, then...
1. Use the ▲ and ▼ buttons to select “SCREEN”, then
press the “OK” button.
The “SCREEN” menu appears.
2. Use the ▲ and ▼ buttons to select “OSM ADJ.”, then
press the “OK” button.
SCREEN
WIDE ADJ.
RGB ADJ.
OSM ADJ.
RETURN
EXIT
OK
OSM ADJ.
POSITION
RETURN
EXIT
OK
1:
The “OSM ADJ.” screen appears.
3. To adjust the position ...
Use the ▲ and ▼ buttons to select “POSITION”.
4. Adjust using the 䊴 and 䊳 buttons.
OK
OSM ADJ.
POSITION
RETURN
EXIT
2:
5. Once all adjustments are completed ...
Press the “MENU” button.
The menu disappears.
Information
䡵 Adjusting the position of the menu display
The position can be set between 1 and 6.
䡵 Restoring the factory default settings
Select “RESET” under the function menu. Note that this
also restores other settings to the factory defaults.
OSM ADJ.
POSITION
RETURN
EXIT
OK
2:
123
456
Page 33
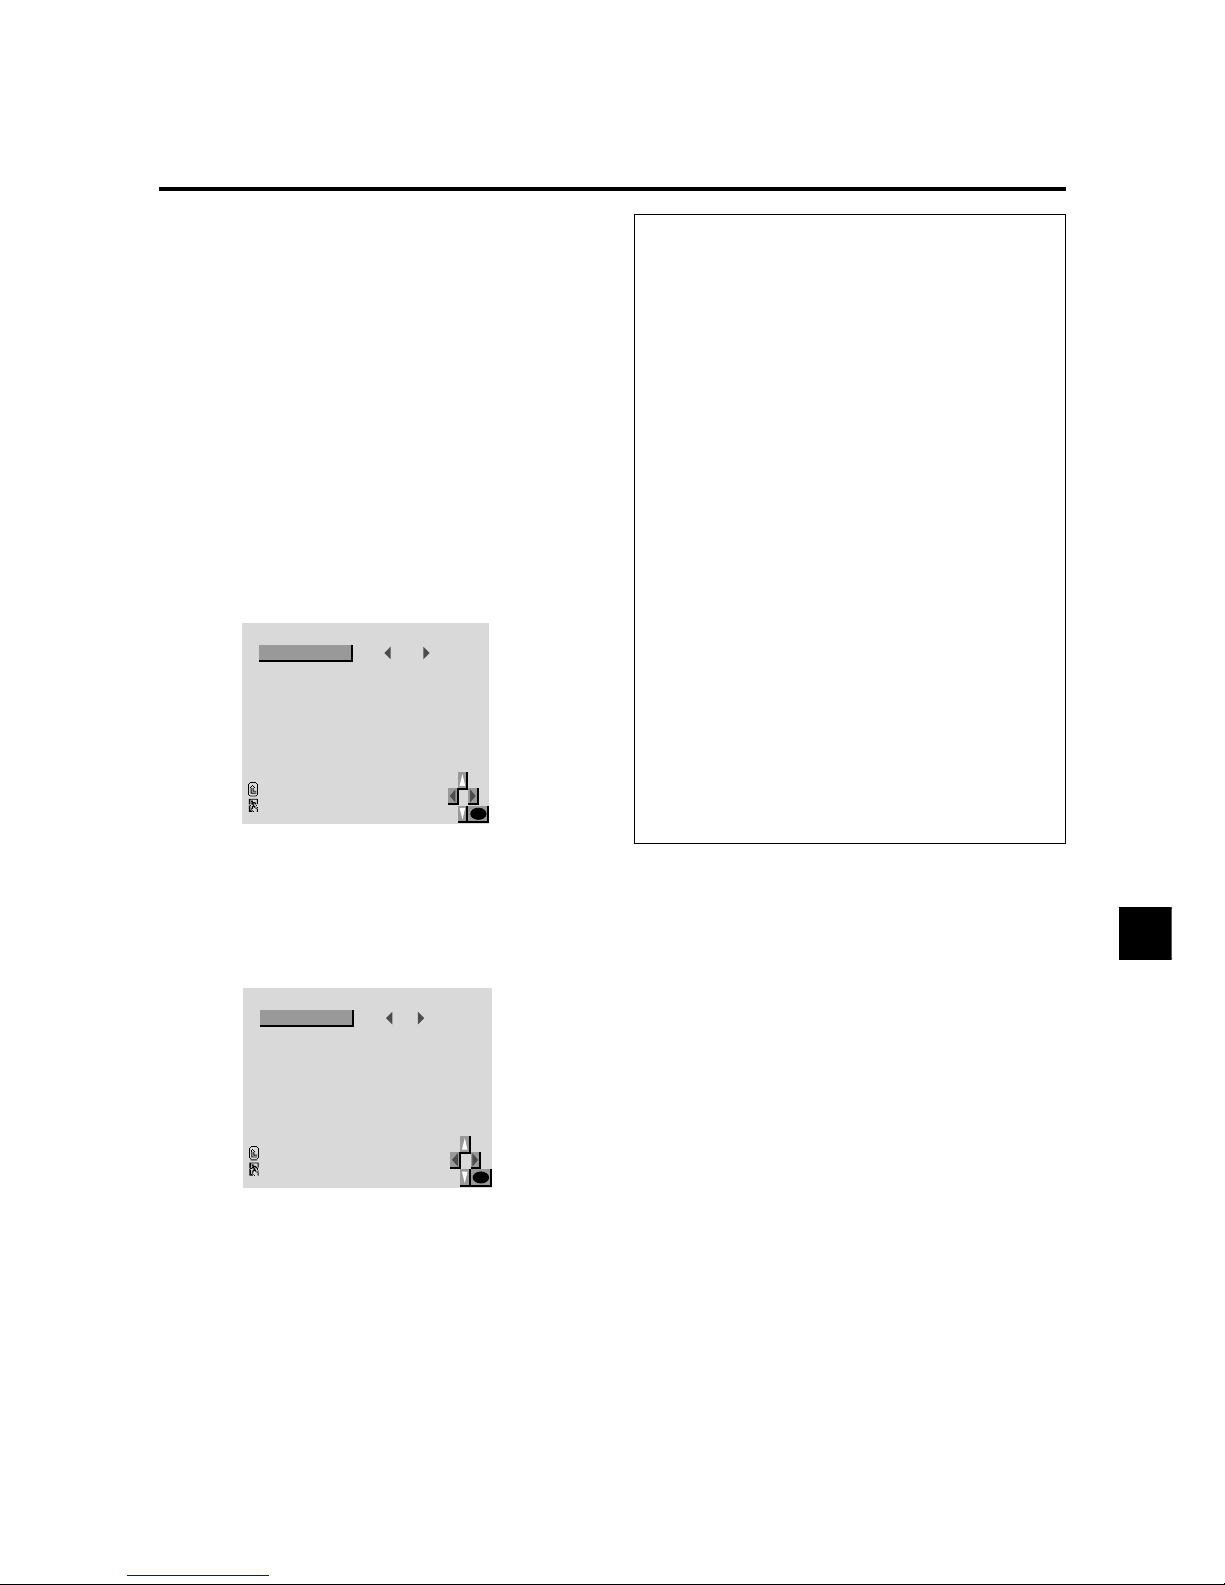
E – 29
Function Settings Menu
Setting the power management for computer images
This energy-saving (power management) function automatically reduces the monitor’s power consumption if no
operation is performed for a certain amount of time.
Example: Tur ning the power management function
on
Press the MENU button on the remote controller to display the MAIN MENU on the screen, then...
1. Use the ▲ and ▼ buttons to select “FUNCTION”, then
press the “OK” button.
The “FUNCTION” screen appears.
Information
䡵 Power management function
* The power management function automatically re-
duces the monitor’s power consumption if the
computer’s keyboard or mouse is not operated for a
certain amount of time. This function can be used
when using the monitor with a computer conforming
to the VESA DPMS format.
* If the computer’s power is not turned on or if the com-
puter and monitor are not properly connected, the system is set to the off state.
* For instructions on using the computer’s power man-
agement function, refer to the computer’s operating
instructions.
䡵 Power management settings
ON............In this mode the power management func-
tion is turned on.
OFF..........In this mode the power management func-
tion is turned off.
䡵 Power management function and POWER/
STANDBY indicator
The POWER/STANDBY indicator indicates the status
of the power management function. See page E-30 for
indicator status and description.
2. Use the ▲ and ▼ buttons to select “POWER MGT”.
3. To turn the power management function on ...
Use the 䊴 and 䊳 buttons to select “ON”.
The mode switches as follows each time the 䊴 or 䊳
button is pressed:
FUNCTION
POWER MGT
RGB SELECT
HD SELECT
OSM
GRAY LEVEL
PLE
PICTURE SIZE
RESET
RETURN
EXIT
ON
RGB
1080I
ON
3
AUTO
ON
:
:
:
:
:
:
:
OK
ON ↔ OFF
4. Once the setting is completed ...
Press the “MENU” button.
The power management function is turned on, and the
menu disappears.
FUNCTION
POWER MGT
RGB SELECT
HD SELECT
OSM
GRAY LEVEL
PLE
PICTURE SIZE
RESET
RETURN
EXIT
OFF
RGB
1080I
ON
3
AUTO
ON
:
:
:
:
:
:
:
OK
Page 34
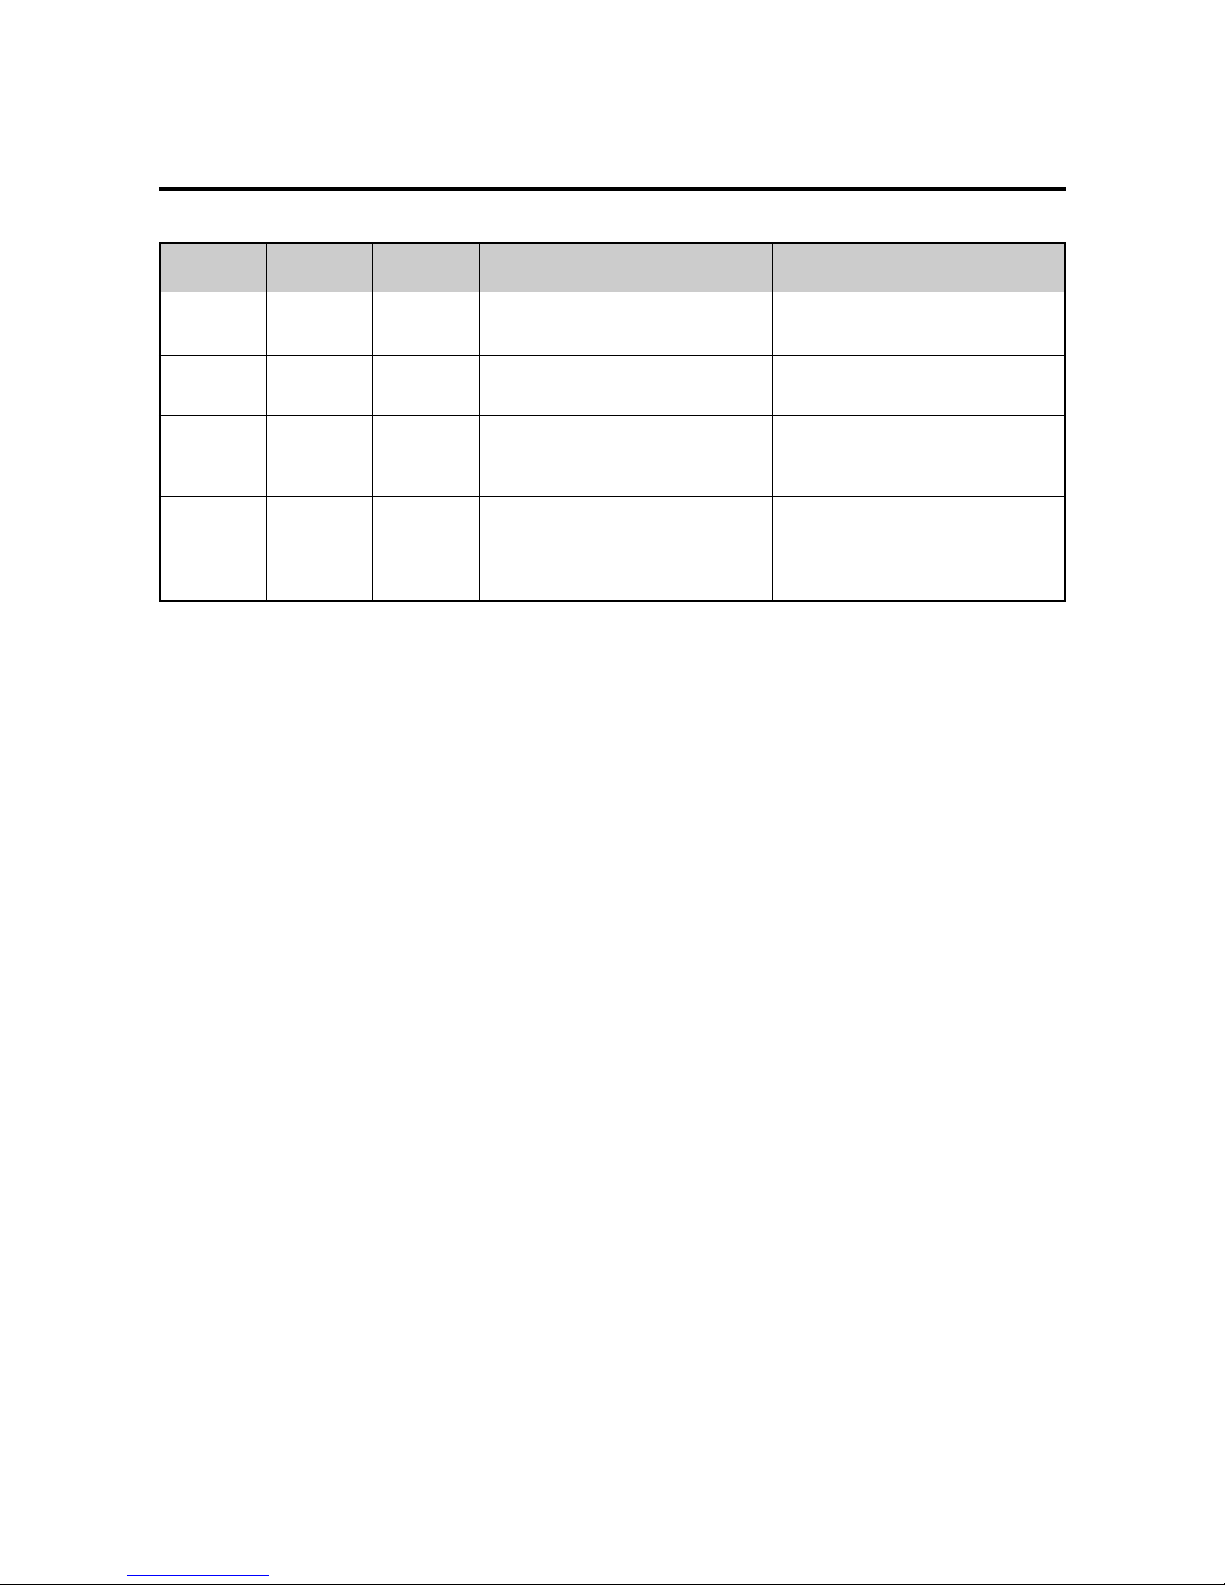
E – 30
POWER/STANDBY indicator
Power management
mode
Power management
operating status
POWER/STANDBY
indicator
Description
Turning the picture back on
Picture already on.
Operate the keyboard or mouse. The picture reappears immediately.
Operate the keyboard or mouse. The picture reappears, but more time is required
than from the standby mode.
Operate the keyboard or mouse. The picture reappears, but more time is required
than from the standby mode or suspend
mode.
Horizontal and vertical synchronizing signals are present from the computer.
No horizontal synchronizing signals are
sent from the computer.
No vertical synchronizing signals are sent
from the computer.
No horizontal or vertical synchronizing
signals are sent from the computer.
On
Standby
Suspend
Green
Orange
Red
Not activated.
Activated.
Activated.
Off Red Activated.
Page 35
E – 31
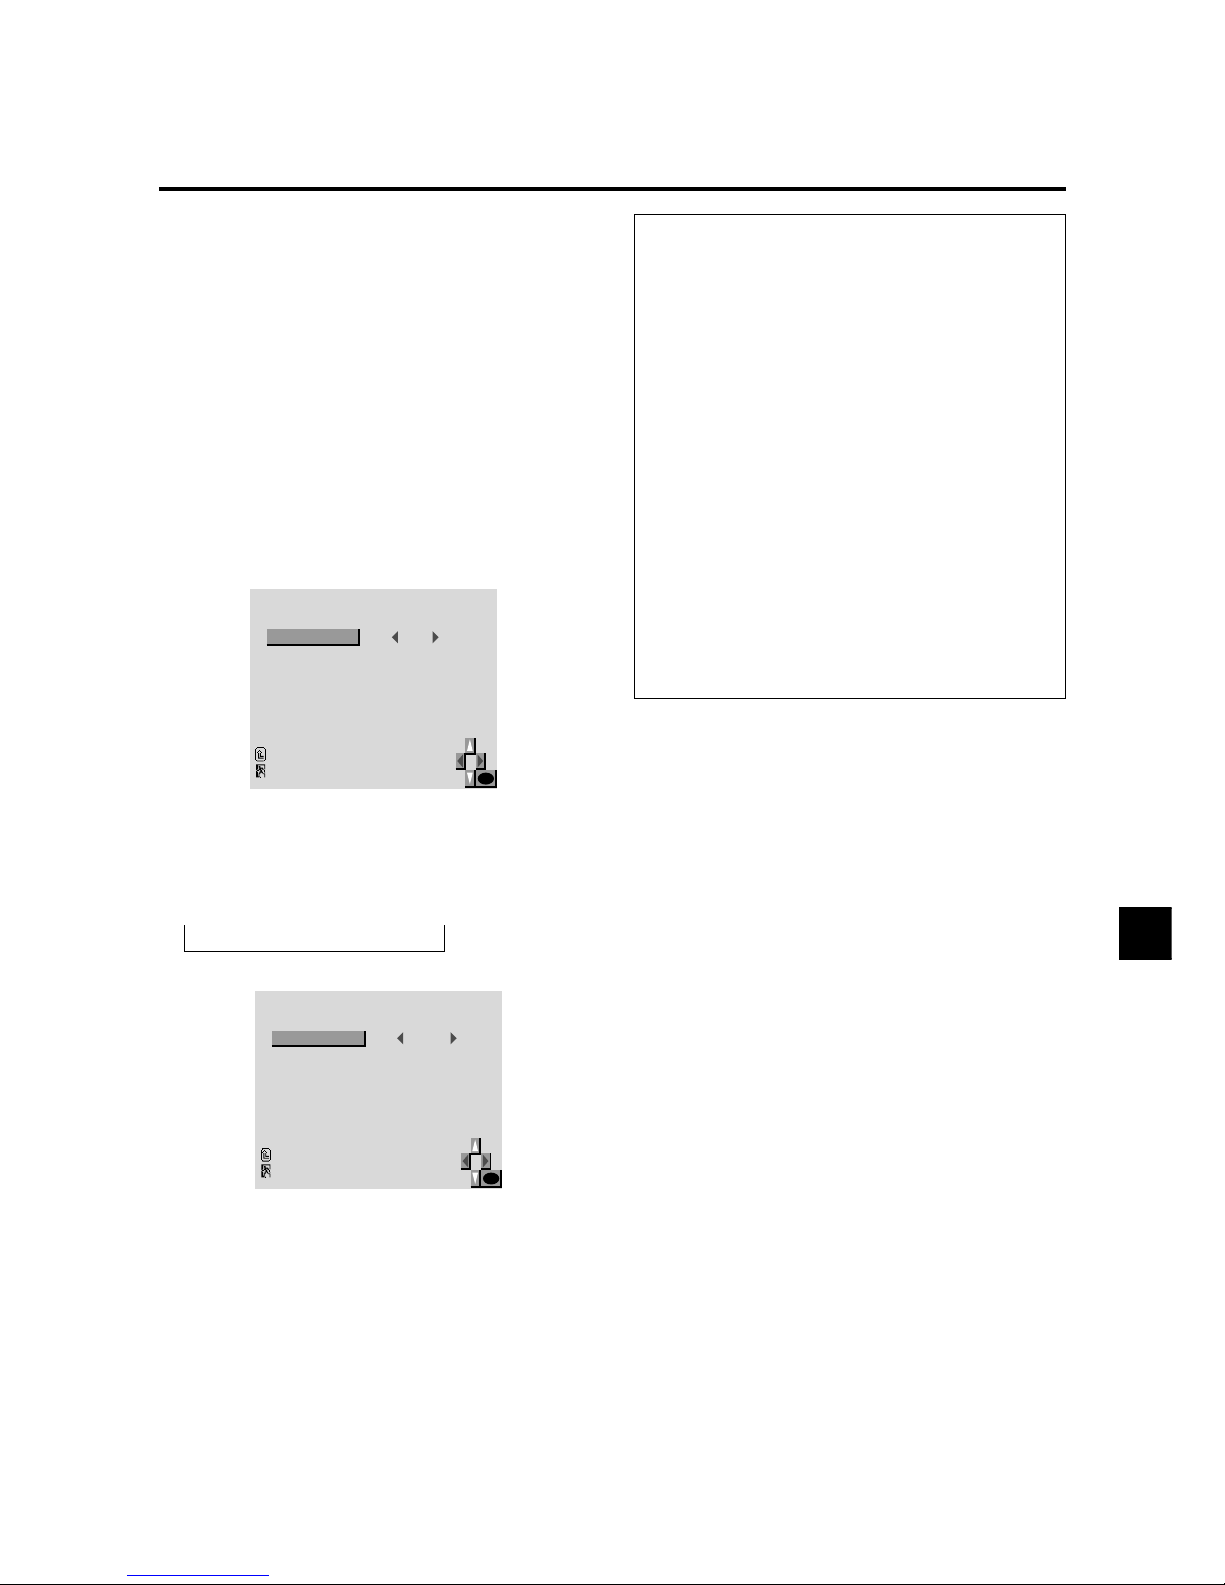
Setting a computer image to the correct RGB select screen
On the computer image select the RGB mode, moving image (video) mode, wide mode or digital broadcast.
Example: Setting the RGB SELECT mode to “VIDEO”
Press the MENU button on the remote controller to display the MAIN MENU on the screen, then...
1. Use the ▲ and ▼ buttons to select “FUNCTION”, then
press the “OK” button.
The “FUNCTION” screen appears.
2. Use the ▲ and ▼ buttons to select “RGB SELECT”.
Information
䡵 RGB SELECT modes
These 4 mode are not displayed in correct image automatically.
RGB .........VESA 640⳯480@60Hz (Use this mode
for normal computer images.)
VIDEO ......To display the video signal that is conv erted
to the RGB signal, set this mode.
WIDE........When an 852 dot⳯ 480 line signal with a
vertical frequency of 31.72 KHz is input,
the image may be compressed horizontally.
To prevent this, set RGB SELECT to
WIDE.
DTV.......... Set this model when watching digital broad
casting (480P).
䡵 Restoring the factory default settings
Select “RESET” under the function menu. Note that this
also restores other settings to the factory defaults.
3. To set the RGB select mode to “VIDEO” ...
Use the 䊴 and 䊳 buttons to select “VIDEO”.
The mode switches as follows each time the 䊴 or 䊳
button is pressed:
RGB ↔ VIDEO ↔ WIDE ↔ DTV
FUNCTION
POWER MGT
RGB SELECT
HD SELECT
OSM
GRAY LEVEL
PLE
PICTURE SIZE
RESET
RETURN
EXIT
OFF
VIDEO
1080I
ON
3
AUTO
ON
:
:
:
:
:
:
:
OK
4. Once the setting is completed ...
Press the “MENU” button.
The RGB select mode is set to “VIDEO”, and the menu
disappears.
FUNCTION
POWER MGT
RGB SELECT
HD SELECT
OSM
GRAY LEVEL
PLE
PICTURE SIZE
RESET
RETURN
EXIT
OFF
RGB
1080I
ON
3
AUTO
ON
:
:
:
:
:
:
:
OK
Page 36
E – 32
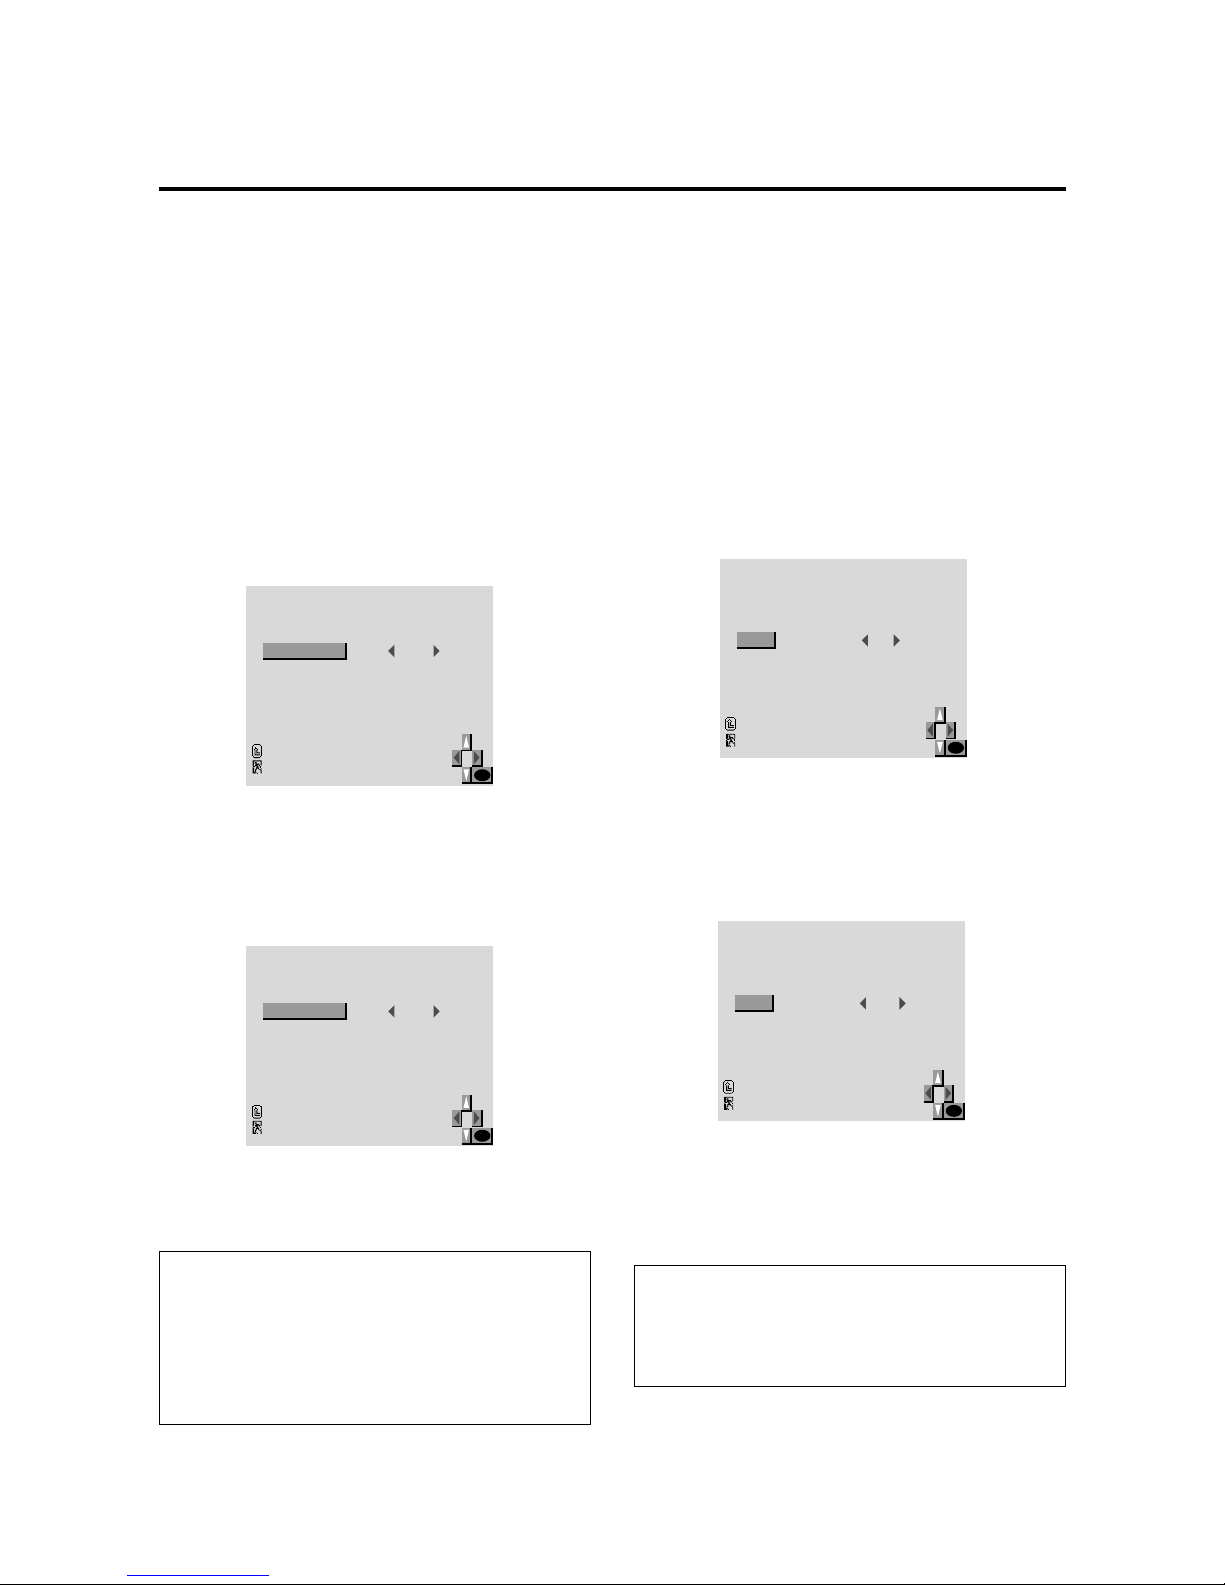
Setting high definition images to the suitable
screen size
Use this procedure to set whether the number of vertical
lines of the input high definition image is 1035 or 1080.
Example: Setting the "1035I" mode to "1080I"
Press the MENU button on the remote controller to display the MAIN MENU on the screen, then...
1. Use the ▲ and ▼ buttons to select “FUNCTION”, then
press the “OK” button.
The “FUNCTION” screen appears.
2. Use the ▲ and ▼ buttons to select “HD SELECT”.
5. Once the setting is completed ...
Press the “MENU” button.
All menus disappear.
Information
䡵 HD SELECT modes
These 2 mode are not displayed in correct image automatically.
1080I......... Digital broadcasts
1035I......... Japanese "High Vision" signal format
3. To set the HD select mode to “1080I” ...
Use the 䊴 and 䊳 buttons to select “1080I”.
The mode switches as follows each time the 䊴 or 䊳
button is pressed:
1080I ↔ 1035I
FUNCTION
POWER MGT
RGB SELECT
HD SELECT
OSM
GRAY LEVEL
PLE
PICTURE SIZE
RESET
RETURN
EXIT
OFF
RGB
1035I
ON
3
AUTO
ON
:
:
:
:
:
:
:
OK
FUNCTION
POWER MGT
RGB SELECT
HD SELECT
OSM
GRAY LEVEL
PLE
PICTURE SIZE
RESET
RETURN
EXIT
OFF
RGB
1080I
ON
3
AUTO
ON
:
:
:
:
:
:
:
OK
Setting the on-screen display
When using the monitor for presentations, etc., the monitor can be set so that the input source, screen mode, etc.,
do not appear.
Example: Tur ning the on-screen display mode off
Press the MENU button on the remote controller to display the MAIN MENU on the screen, then...
1. Use the ▲ and ▼ buttons to select “FUNCTION”, then
press the “OK” button.
The “FUNCTION” screen appears.
2. Use the ▲ and ▼ buttons to select “OSM”.
3. To turn the on-screen display mode off ...
Use the 䊴 and 䊳 buttons to select “OFF”.
The mode switches as follows each time the 䊴 or 䊳
button is pressed:
ON ↔ OFF
FUNCTION
POWER MGT
RGB SELECT
HD SELECT
OSM
GRAY LEVEL
PLE
PICTURE SIZE
RESET
RETURN
EXIT
OFF
RGB
1080I
OFF
3
AUTO
ON
:
:
:
:
:
:
:
OK
4. Once the setting is completed ...
Press the “MENU” button.
The on-screen display mode is turned off, and the menu
disappears.
Information
䡵 OSM modes
ON.................The on-screen display appears.
OFF...............The on-screen display does not appear.
FUNCTION
POWER MGT
RGB SELECT
HD SELECT
OSM
GRAY LEVEL
PLE
PICTURE SIZE
RESET
RETURN
EXIT
OFF
RGB
1080I
ON
3
AUTO
ON
:
:
:
:
:
:
:
OK
Page 37
E – 33
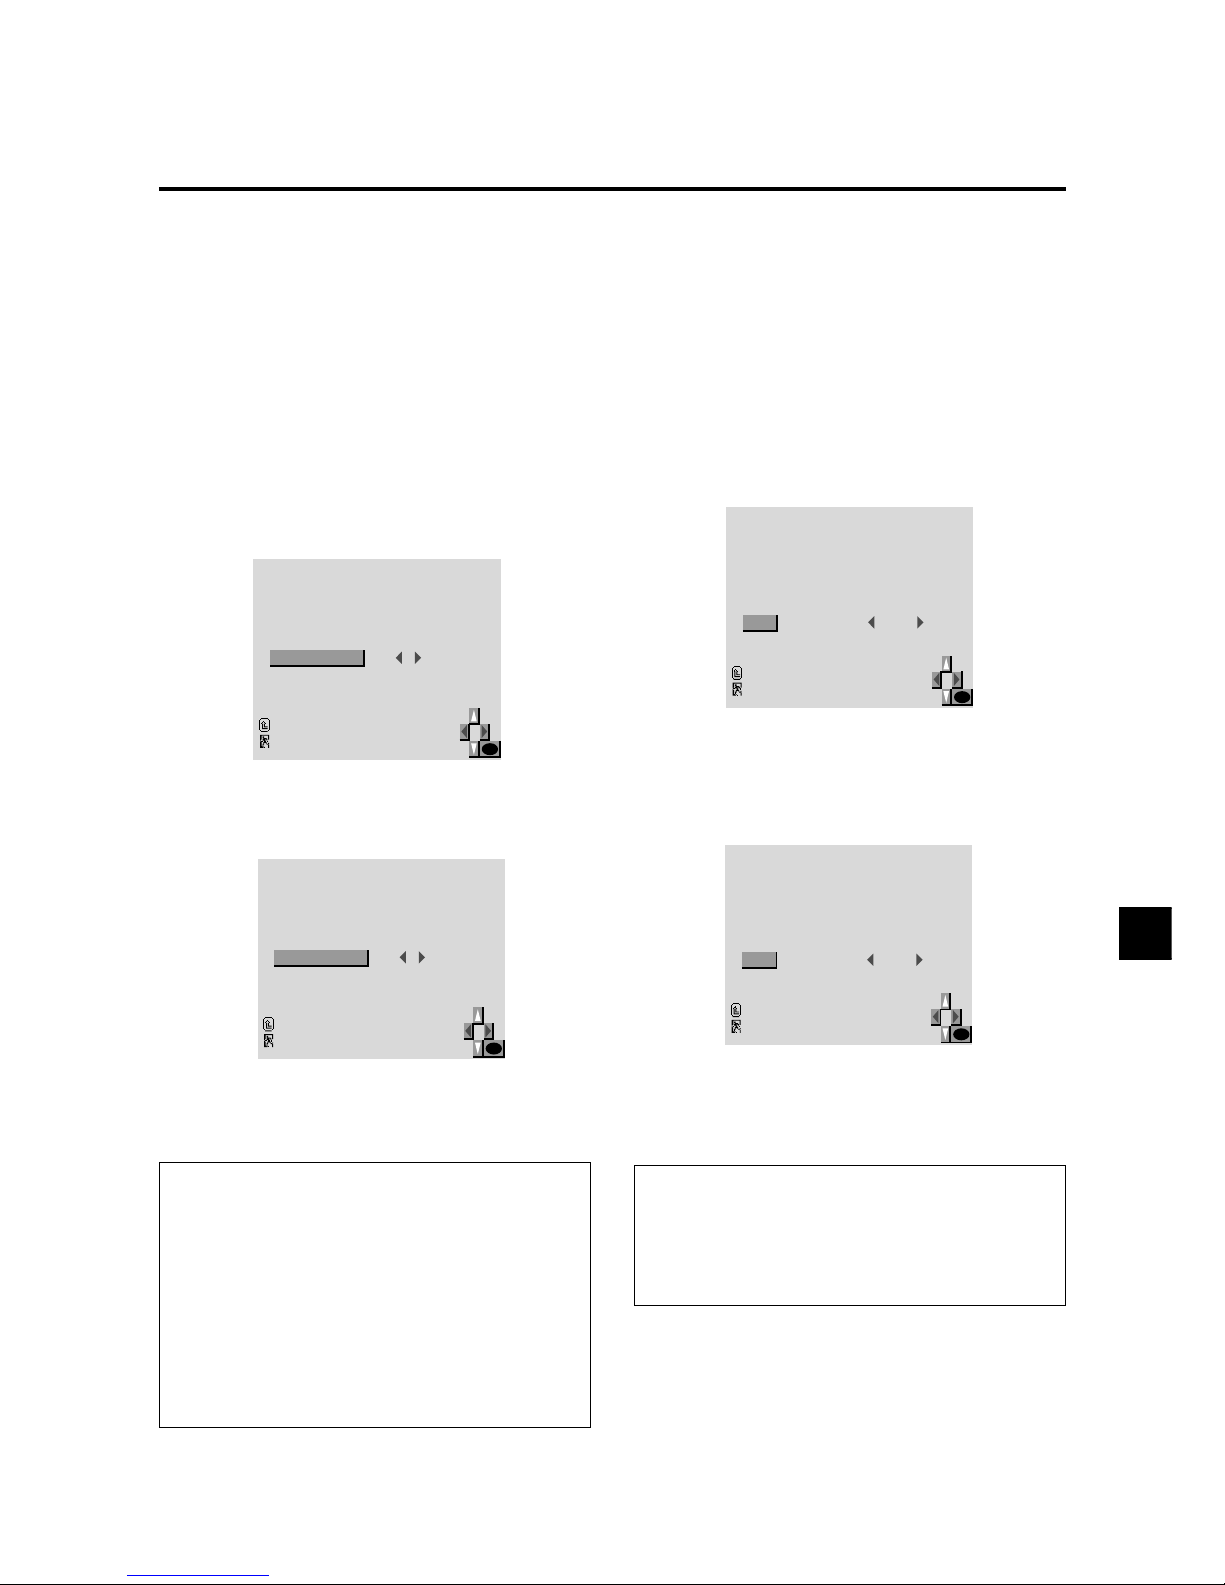
Setting the gray level for the sides of the screen
Use this procedure to set the gray level for the parts on the
screen on which nothing is displayed when the screen is
set to the 4:3 size.
Example: Adjusting the "GRAY LEVEL"
Press the MENU button on the remote controller to display the MAIN MENU on the screen, then...
1. Use the ▲ and ▼ buttons to select “FUNCTION”, then
press the “OK” button.
The “FUNCTION” screen appears.
2. Use the ▲ and ▼ buttons to select “GRAY LEVEL”.
3. To adjust the "GRAY LEVEL"...
Adjust the GRAY LEVEL use the 䊴 and 䊳 buttons.
5. Once the setting is completed ...
Press the “MENU” button.
All menus disappear.
Information
䡵 GRAY LEVEL
This adjusts the brightness of the black (the gray level)
for the sides of the screen.
The standard is 0 (black). The level can be adjusted from
1 to 15. The factory setting is 3 (dark gray).
䡵 Restoring the factory default settings
Select “RESET” under the function menu. Note that this
also restores other settings to the factory defaults.
FUNCTION
POWER MGT
RGB SELECT
HD SELECT
OSM
GRAY LEVEL
PLE
PICTURE SIZE
RESET
RETURN
EXIT
OFF
RGB
1080I
ON
3
AUTO
ON
:
:
:
:
:
:
:
OK
FUNCTION
POWER MGT
RGB SELECT
HD SELECT
OSM
GRAY LEVEL
PLE
PICTURE SIZE
RESET
RETURN
EXIT
OFF
RGB
1080I
ON
5
AUTO
ON
:
:
:
:
:
:
:
OK
Setting the brightness level to the minimum
Locking this mode allows you to dim the picture.
Example: Setting the “PLE” to “LOCK”
Press the MENU button on the remote controller to display the MAIN MENU on the screen, then...
1. Use the ▲ and ▼ buttons to select “FUNCTION”, then
press the “OK” button.
The “FUNCTION” screen appears.
2. Use the ▲ and ▼ buttons to select “PLE”.
3. To set the PLE to "LOCK" ...
Use the 䊴 and 䊳 buttons to select “LOCK”.
The mode switches as follows each time the 䊴 or 䊳
button is pressed:
AUTO ↔ LOCK
4. Once the setting is completed ...
Press the “MENU” button.
All menus disappear.
Information
䡵 PLE
AUTO ............Normally set to AUTO.
LOCK ............Sets the brightness level to the mini-
mum.
FUNCTION
POWER MGT
RGB SELECT
HD SELECT
OSM
GRAY LEVEL
PLE
PICTURE SIZE
RESET
RETURN
EXIT
OFF
RGB
1080I
ON
3
AUTO
ON
:
:
:
:
:
:
:
OK
FUNCTION
POWER MGT
RGB SELECT
HD SELECT
OSM
GRAY LEVEL
PLE
PICTURE SIZE
RESET
RETURN
EXIT
OFF
RGB
1080I
ON
3
LOCK
ON
:
:
:
:
:
:
:
OK
Page 38
E – 34
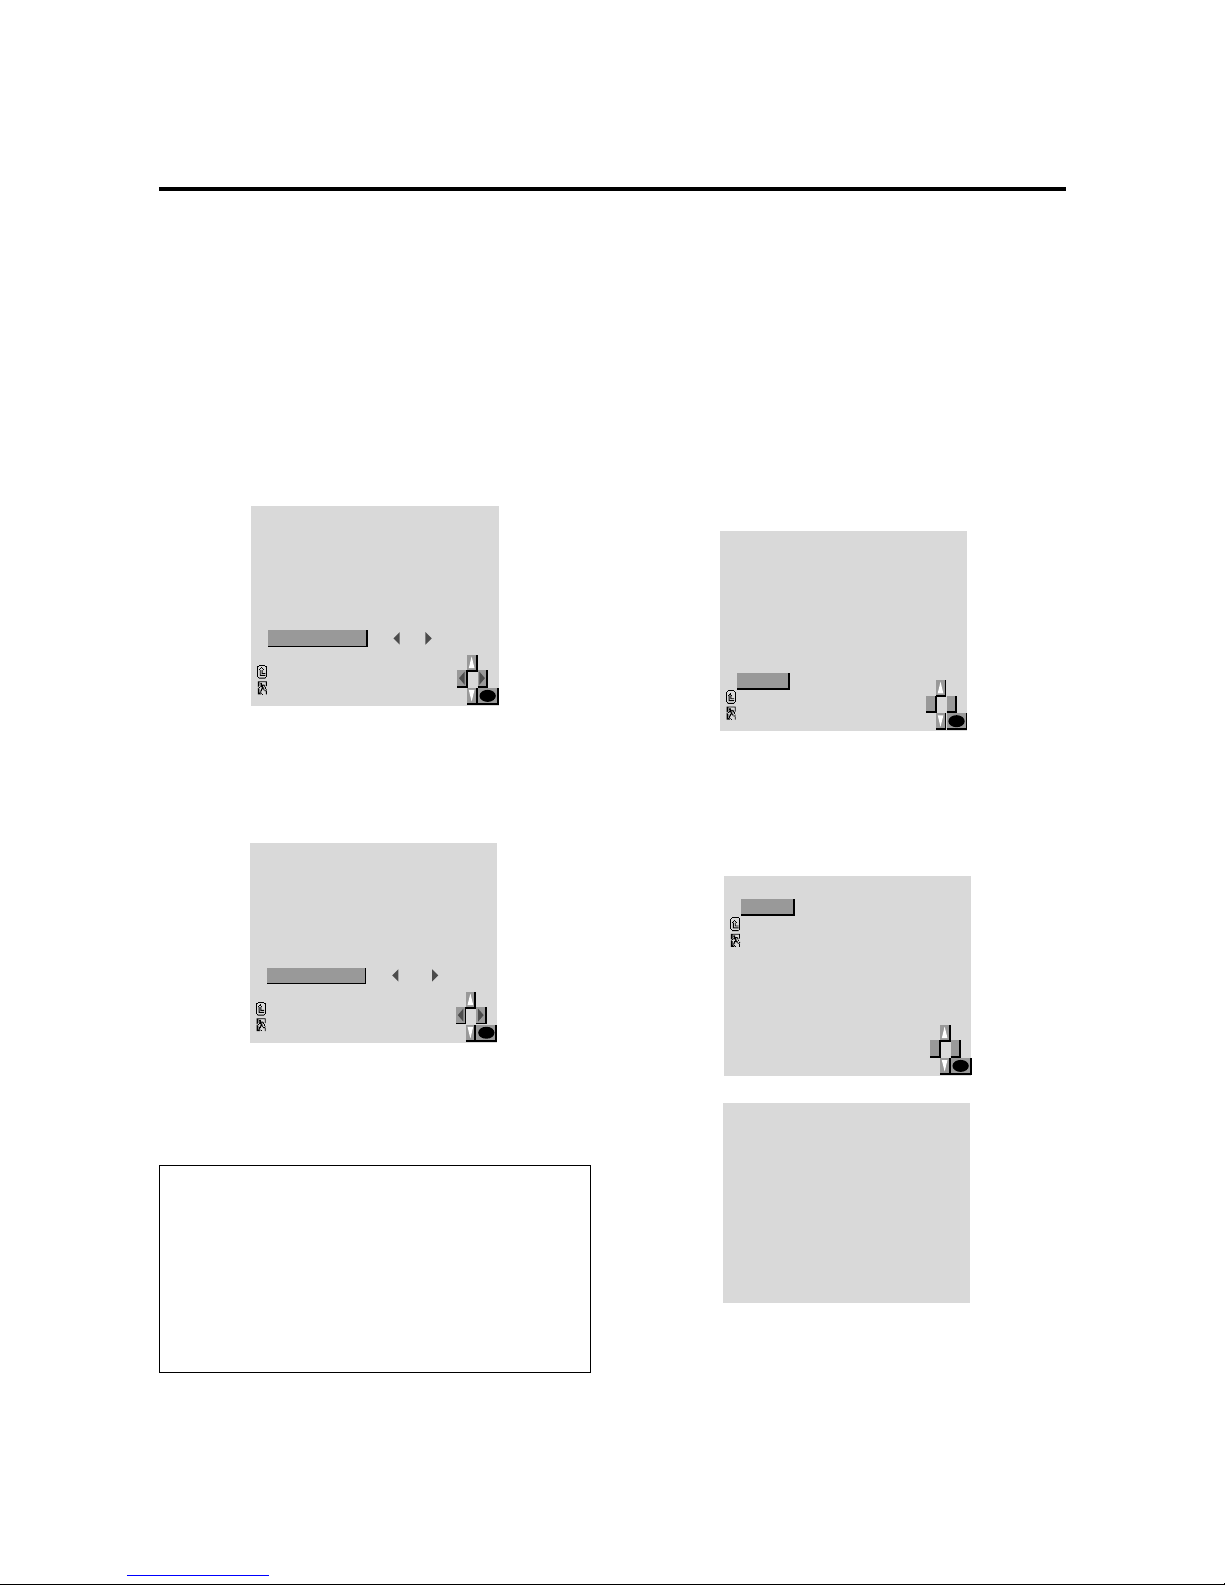
Resetting to the default values
Use these operations to restore all the picture adjustments,
audio settings, wide adjustments, RGB adjustments, OSM
adjustments, etc., to the factory default values.
Press the MENU button on the remote controller to display the MAIN MENU on the screen, then...
1. Use the ▲ and ▼ buttons to select “FUNCTION”, then
press the “OK” button.
The “FUNCTION” screen appears.
2. Use the ▲ and ▼ buttons to select “RESET”, then press
the “OK” button.
The “RESET” screen appears.
3. Use the ▲ and ▼ buttons to select “RESET”, then press
the “OK” button.
RESET
RESET
RETURN
EXIT
OK
When the "SETTING NOW" screen disappears, the
screen will be restored to the previous "RESET" mode,
then all the settings are restored to the default values.
4. Once the setting is completed ...
Press the “MENU” button.
The menu disappears.
FUNCTION
POWER MGT
RGB SELECT
HD SELECT
OSM
GRAY LEVEL
PLE
PICTURE SIZE
RESET
RETURN
EXIT
OFF
RGB
1080I
ON
3
AUTO
ON
:
:
:
:
:
:
:
OK
Setting the wide screen display
Example: Setting the “PICTURE SIZE” to “OFF”
Press the MENU button on the remote controller to display the MAIN MENU on the screen, then...
1. Use the ▲ and ▼ buttons to select “FUNCTION”, then
press the “OK” button.
The “FUNCTION” screen appears.
2. Use the ▲ and ▼ buttons to select “PICTURE SIZE”.
3. To set the PICTURE SIZE to "OFF" ...
Use the 䊴 and 䊳 buttons to select “OFF”.
The mode switches as follows each time the 䊴 or 䊳
button is pressed:
ON ↔ OFF
4. Once the setting is completed ...
Press the “MENU” button.
All menus disappear.
Information
䡵 PICTURE SIZE
ON.................For RGB Input: “NORMAL” and
“FULL” can be selected for the Wide
Screen switching.
OFF ...............For RGB Input: “TRUE” and “FULL”
can be selected for the Wide Screen
switching.
FUNCTION
POWER MGT
RGB SELECT
HD SELECT
OSM
GRAY LEVEL
PLE
PICTURE SIZE
RESET
RETURN
EXIT
OFF
RGB
1080I
ON
3
AUTO
ON
:
:
:
:
:
:
:
OK
FUNCTION
POWER MGT
RGB SELECT
HD SELECT
OSM
GRAY LEVEL
PLE
PICTURE SIZE
RESET
RETURN
EXIT
OFF
RGB
1080I
ON
3
AUTO
OFF
:
:
:
:
:
:
:
OK
RESET
SETTING NOW
Page 39
E – 35
Information Menu
Checking the frequencies and polarities of input
signals
Use this function to check the frequencies and polarities of
the signals currently being inputted from a computer, etc.
Press the MENU button on the remote controller to display the MAIN MENU on the screen, then...
1. Use the ▲ and ▼ buttons to select “INFORMA TION”,
then press the “OK” button.
The “INFORMATION” screen appears.
2. Use the ▲ and ▼ buttons to select “FREQUENCY”,
then press the “OK” button.
INFORMATION
FREQUENCY
LANGUAGE
COLOR SYSTEM
RETURN
EXIT
OK
3. The frequency is displayed.
FREQUENCY
OK
H. FREQ
V. FREQ
H. POL
V. POL
EXIT
48.36KHz
60.0Hz
NEG.
NEG.
:
:
:
:
* Press the “OK” button to return to the previous screen.
4. Once you have checked the frequency ...
Press the “MENU” button.
The menu disappears.
Page 40
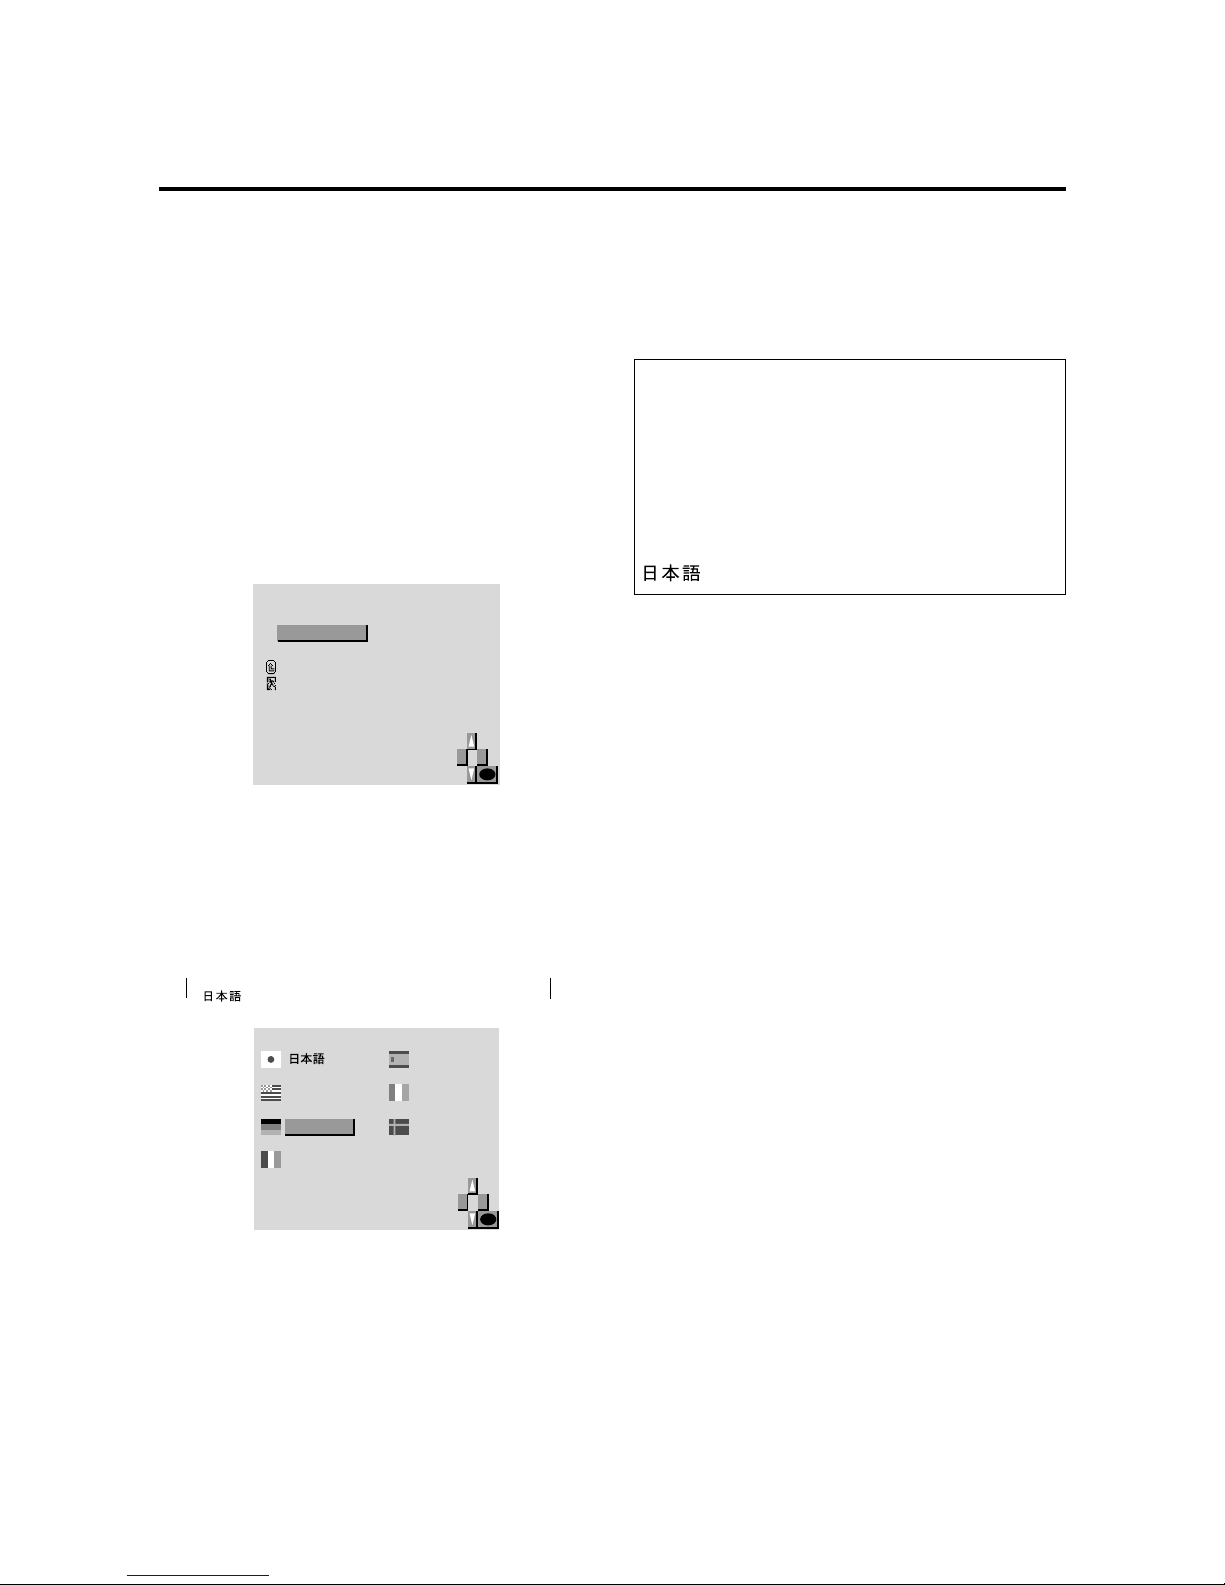
E – 36
Setting the language for the menus
The menu display can be set to one of seven languages:
Japanese, English, German, French, Swedish, Italian or
Spanish.
Example: Setting the menu display to “DEUTSCH”
Press the MENU button on the remote controller to display the MAIN MENU on the screen, then...
1. Use the ▲ and ▼ buttons to select “INFORMA TION”,
then press the “OK” button.
The “INFORMATION” screen appears.
2. Use the ▲ and ▼ buttons to select “LANGUAGE”,
then press the “OK” button.
INFORMATION
FREQUENCY
LANGUAGE
COLOR SYSTEM
RETURN
EXIT
OK
The “LANGUAGE” screen appears.
3. To select “ DEUTSCH “ ...
Use the ▲ and ▼ buttons to select “ DEUTSCH “.
The mode switches as follows when the ▲ and ▼ buttons are pressed:
→ ENGLISH ↔ DEUTSCH ↔ FRANÇAIS ←
→ ↔ SVENSKA ↔ ITALIANO ↔ ESPAÑOL ←
4. Press the “OK” button.
The display language is switched to Deutsch.
5. Once the setting is completed ...
Press the “MENU” button.
The menu disappears.
SPRACHE
ENGLISH
DEUTSCH
FRANÇAIS
ESPAÑOL
ITALIANO
SVENSKA
OK
Information
䡵 Language settings
ENGLISH............. English
DEUTSCH ........... German
FRANÇAIS .......... French
ESPAÑOL ............ Spanish
ITALIANO ........... Italian
SVENSKA ........... Swedish
.................. Japanese
Page 41
E – 37
COLOR SYSTEM
COLOR SYSTEM
RETURN
EXIT
3.58NTSC:
OK
Setting the video signal format
Use these operations to set the video signal format (PAL,
SECAM, 4.43 NTSC or 3.58 NTSC).
Example: Setting the video signal format to “3.58
NTSC”
Press the MENU button on the remote controller to display the MAIN MENU on the screen, then...
1. Use the ▲ and ▼ buttons to select “INFORMA TION”,
then press the “OK” button.
The “INFORMATION” screen appears.
2. Use the ▲ and ▼ buttons to select “COLOR SYSTEM”, then press the “OK” button.
4. To select “3.58 NTSC” ...
Use the 䊴 and 䊳 buttons to select “3.58 NTSC”.
The mode switches as follows when the 䊴 and 䊳 buttons are pressed:
→ AUTO ↔ PAL ↔ SECAM ←
→ 3.58NTSC ↔ 4.43NTSC ←−−
5. Once the setting is completed ...
Press the “MENU” button.
The color system is set to “3.58 NTSC”, and the menu
disappears.
Information
䡵 Video signal formats
Different countries use different formats for video signals. Set to the format used in your current country.
AUTO ............The video signals are automatically de-
tected and the format is set accordingly.
P AL................This is the standard format used mainly
in the United Kingdom and Germany.
SECAM .........This is the standard format used mainly
in France and Russia.
4.43 NTSC ....This format is used for videos in coun-
tries using P AL and SECAM video signals.
3.58 NTSC ....This is the standard format used mainly
in Japan and the United States.
INFORMATION
FREQUENCY
LANGUAGE
COLOR SYSTEM
RETURN
EXIT
OK
The “COLOR SYSTEM” screen appears.
3. Use the ▲ and ▼ buttons to select “COLOR SYSTEM”.
COLOR SYSTEM
COLOR SYSTEM
RETURN
EXIT
AUTO:
OK
Page 42
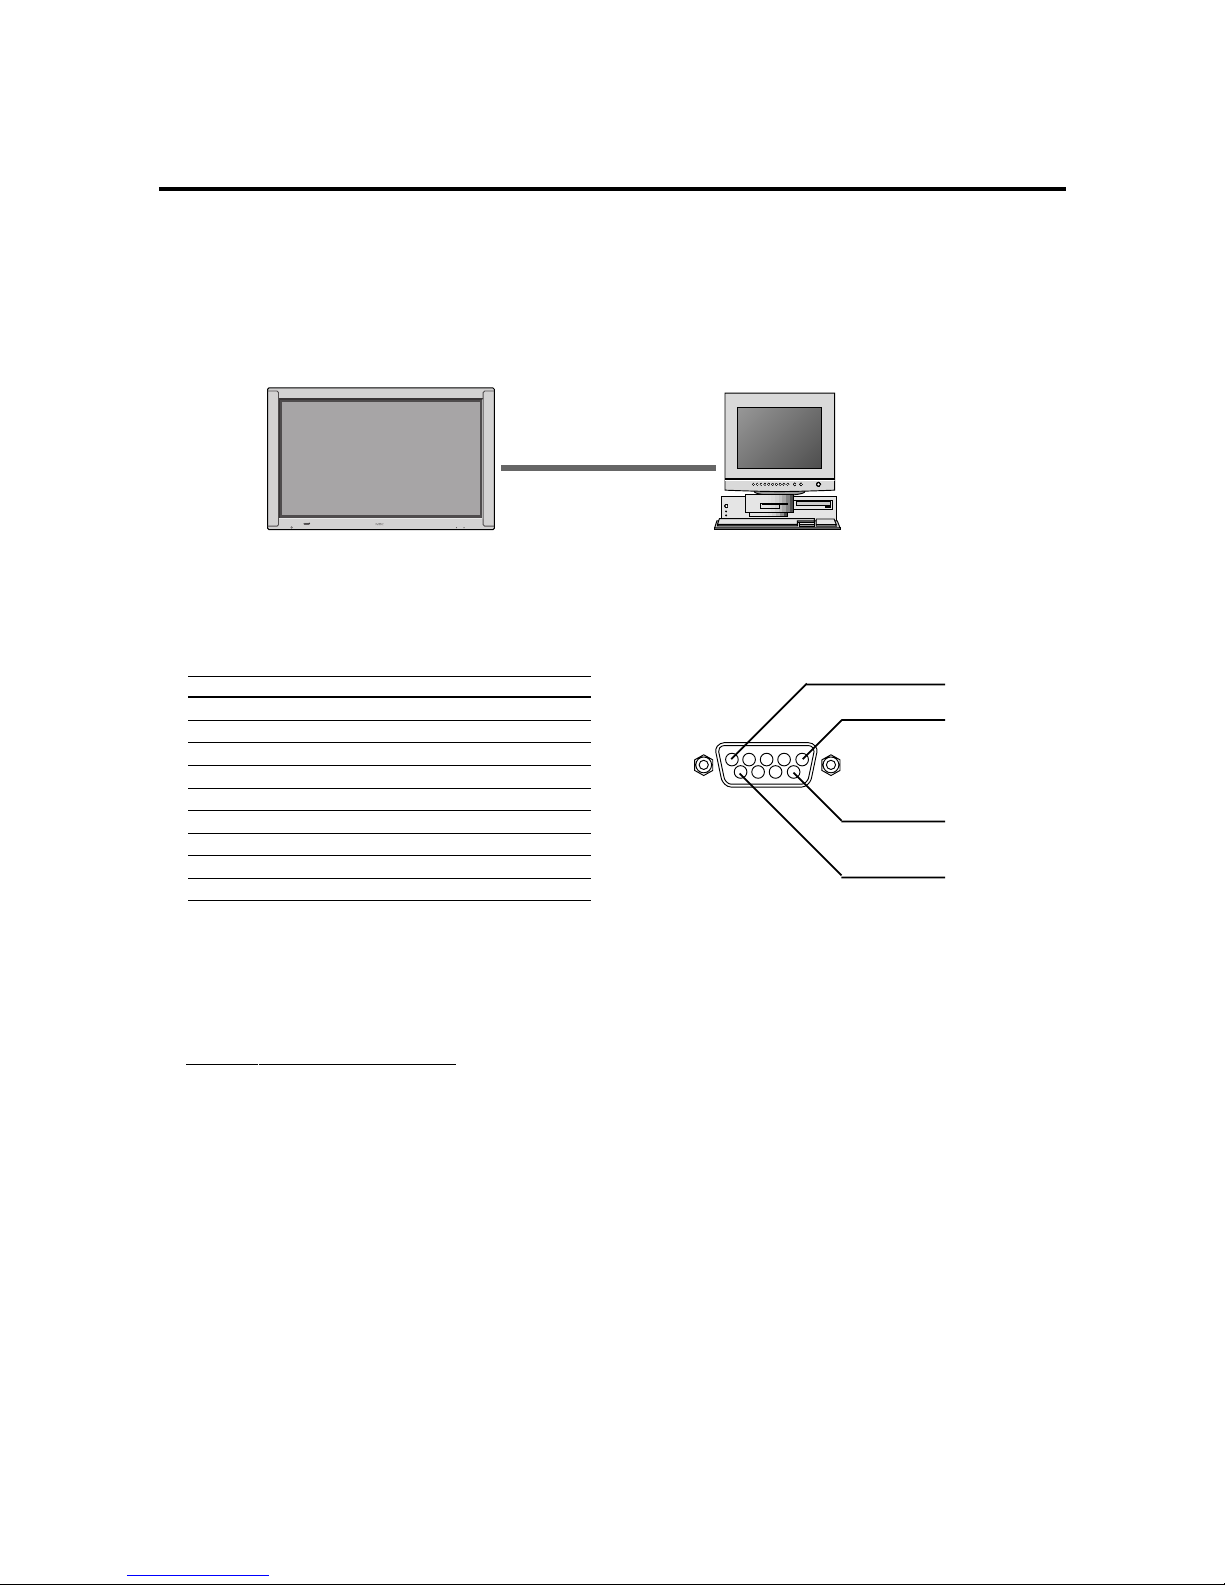
E – 38
External Control
POWER/STANDBY
INPUT SELECT VOLUME
PlasmaSync 5000W
External equipment
e.g., Personal computer
1) Connector on the PlasmaSync 5000W side: EXTERNAL CONTROL connector.
Type of connector: D-Sub 9-pin male
No. Pin Name
1 No Connection
2 RXD (Receive data)
3 TXD (Transmit data)
4 DTR (DTE side ready)
5 GND
6 DSR (DCE side ready)
7 RTS (Ready to send)
8 CTS (Clear to send)
9 No Connection
1
5
9
6
Application
These specifications cover the communications control of the PlasmaSync 5000W by external equipment.
Connections
Connections are made as described below.
2) Connector on the external equipment side: Serial port (RS-232C) connector
See the specifications of the equipment that is to be connected for the type of connector and the pin assignment.
3) Wiring
Use a crossed (reverse) cable.
Wire the cable so that each pair of data lines cross between the two devices. These data line pairs are RXD (Receive
data) and TXD (Transmit data), DTR (DTE side ready) and DSR (DCE side r eady), and R TS (Ready to send) and CTS
(Clear to send).
Communication Parameters
(1) Communication system Asynchronous
(2) Interface RS-232C
(3) Baud rate 9600 bps
(4) Data length 8 bits
(5) Parity Odd
(6) Stop bit 1 bit
(7) Communication code Hex
Page 43
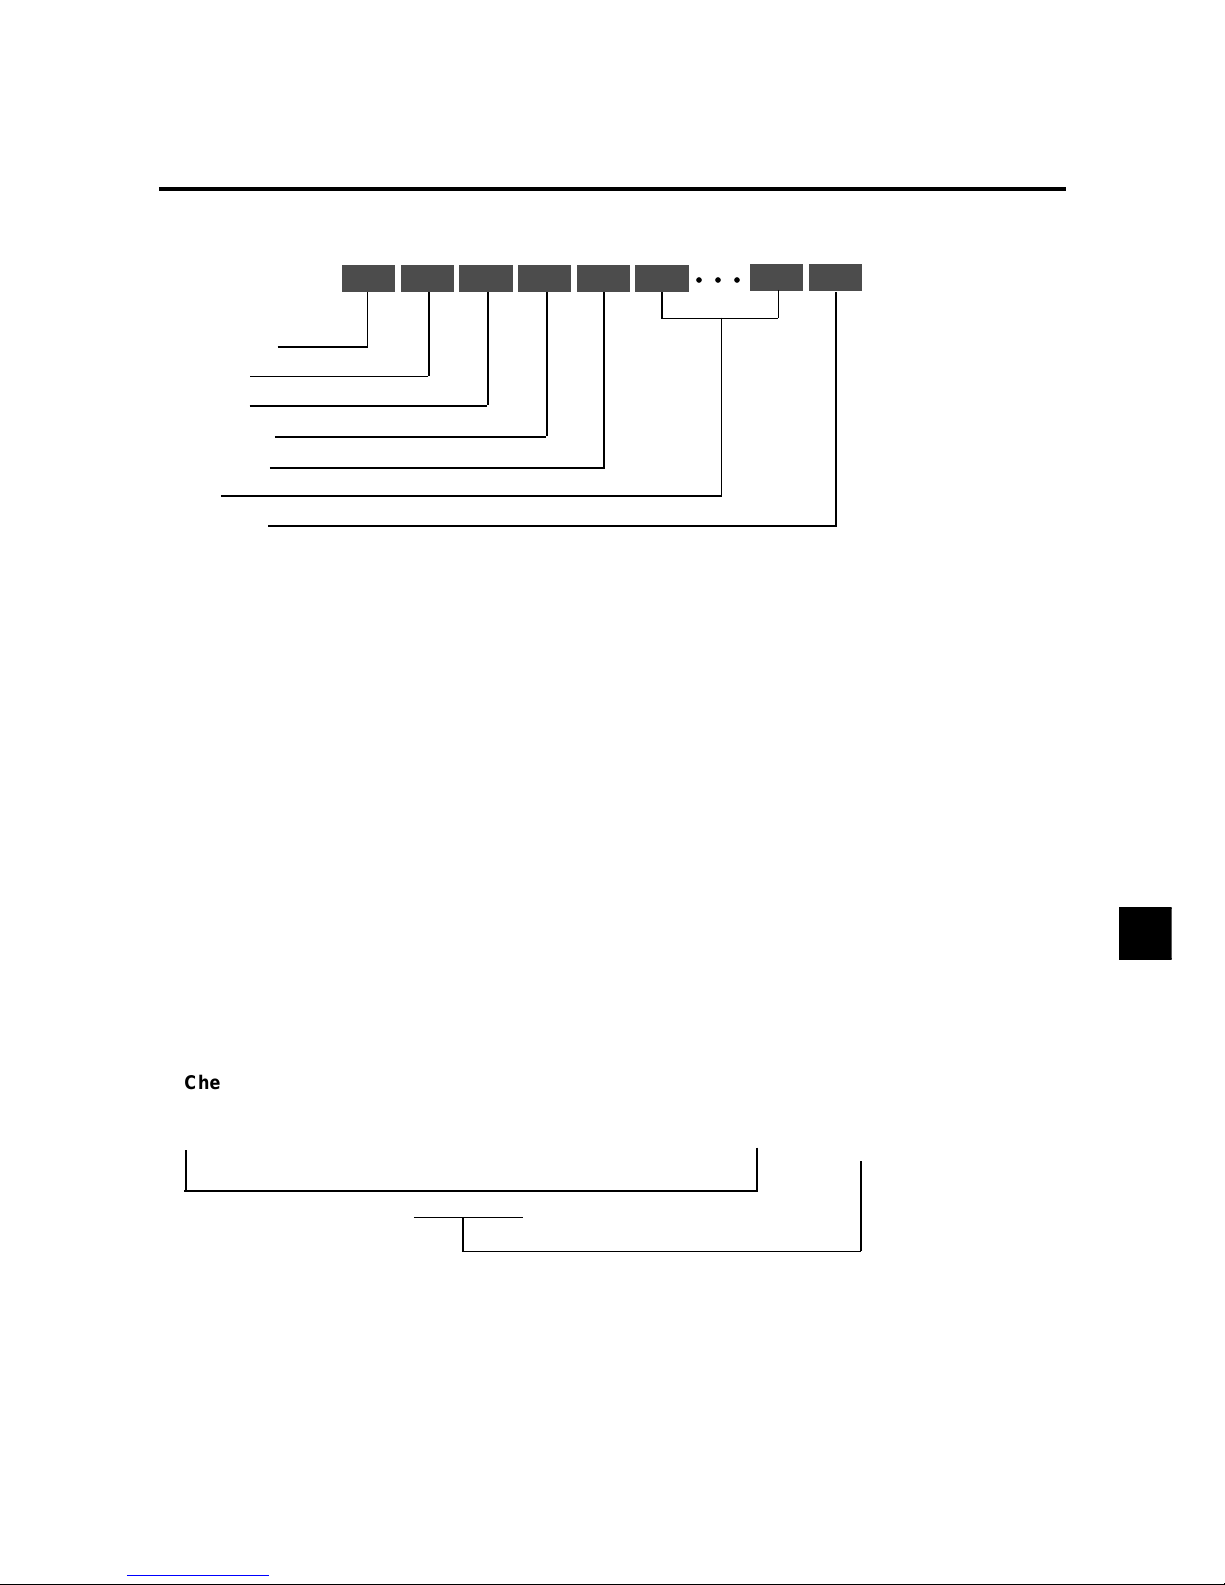
E – 39
8 bit 8 bit 8 bit 8 bit 8 bit 8 bit
8 bit 8 bit
○○○
Check Sum Example
DFH 80H 60H 47H 01H 01H 08H
Command 1 Unit ID 1 Unit ID 2 Command 2 Data Length Data Check Sum
Communication Format
Command 1
Unit ID 1
Unit ID 2
Command 2
Data length
Data
Check sum
Command 1
Command 1, along with command 2, is a number used to distinguish each command.
In the case of ACK, when the lower order 4 bits is FH (as in 3FH and 7FH), this indicates that the commands and data of
the supported equipment have been received. When the lower order 4 bits is BH (as in 3BH and 7BH), this indicates that
unsupported commands and data have been received.
Unit ID 1 and Unit ID 2
Unit ID 1 and unit ID 2 are numbers used to identify the equipment that is to be connected.
60H is used for the PlasmaSync 5000W and 80H is used for external control equipment such as a personal computer.
1) Unit ID 1: Indicates the equipment sending the signal
2) Unit ID 2: Indicates the equipment receiving the signal
Command 2
Command 2, along with command 1, is a number used to distinguish each command.
Check Sum (CKS), Error Processing, and ACK
1) The check sum described below and RS-232C odd parity are used together for a check of the received data.
The check sum is the lower order 8 bits of one frame of sent or received data comprising the sum total of Command 1,
Unit ID 1 and 2, Command 2, Data Length, and Data.
Total 208H
▲
2) Error Processing
• When the communication interval is vacant for more than 4 ms, thereafter a received Command 1 will be recognized.
If, at this time, meaningful data cannot be recognized, that data will not be recognized (as valid data).
• An ACK will not be returned unless the receive da ta err or, the check sum error, and the receive data are all taken in.
Page 44
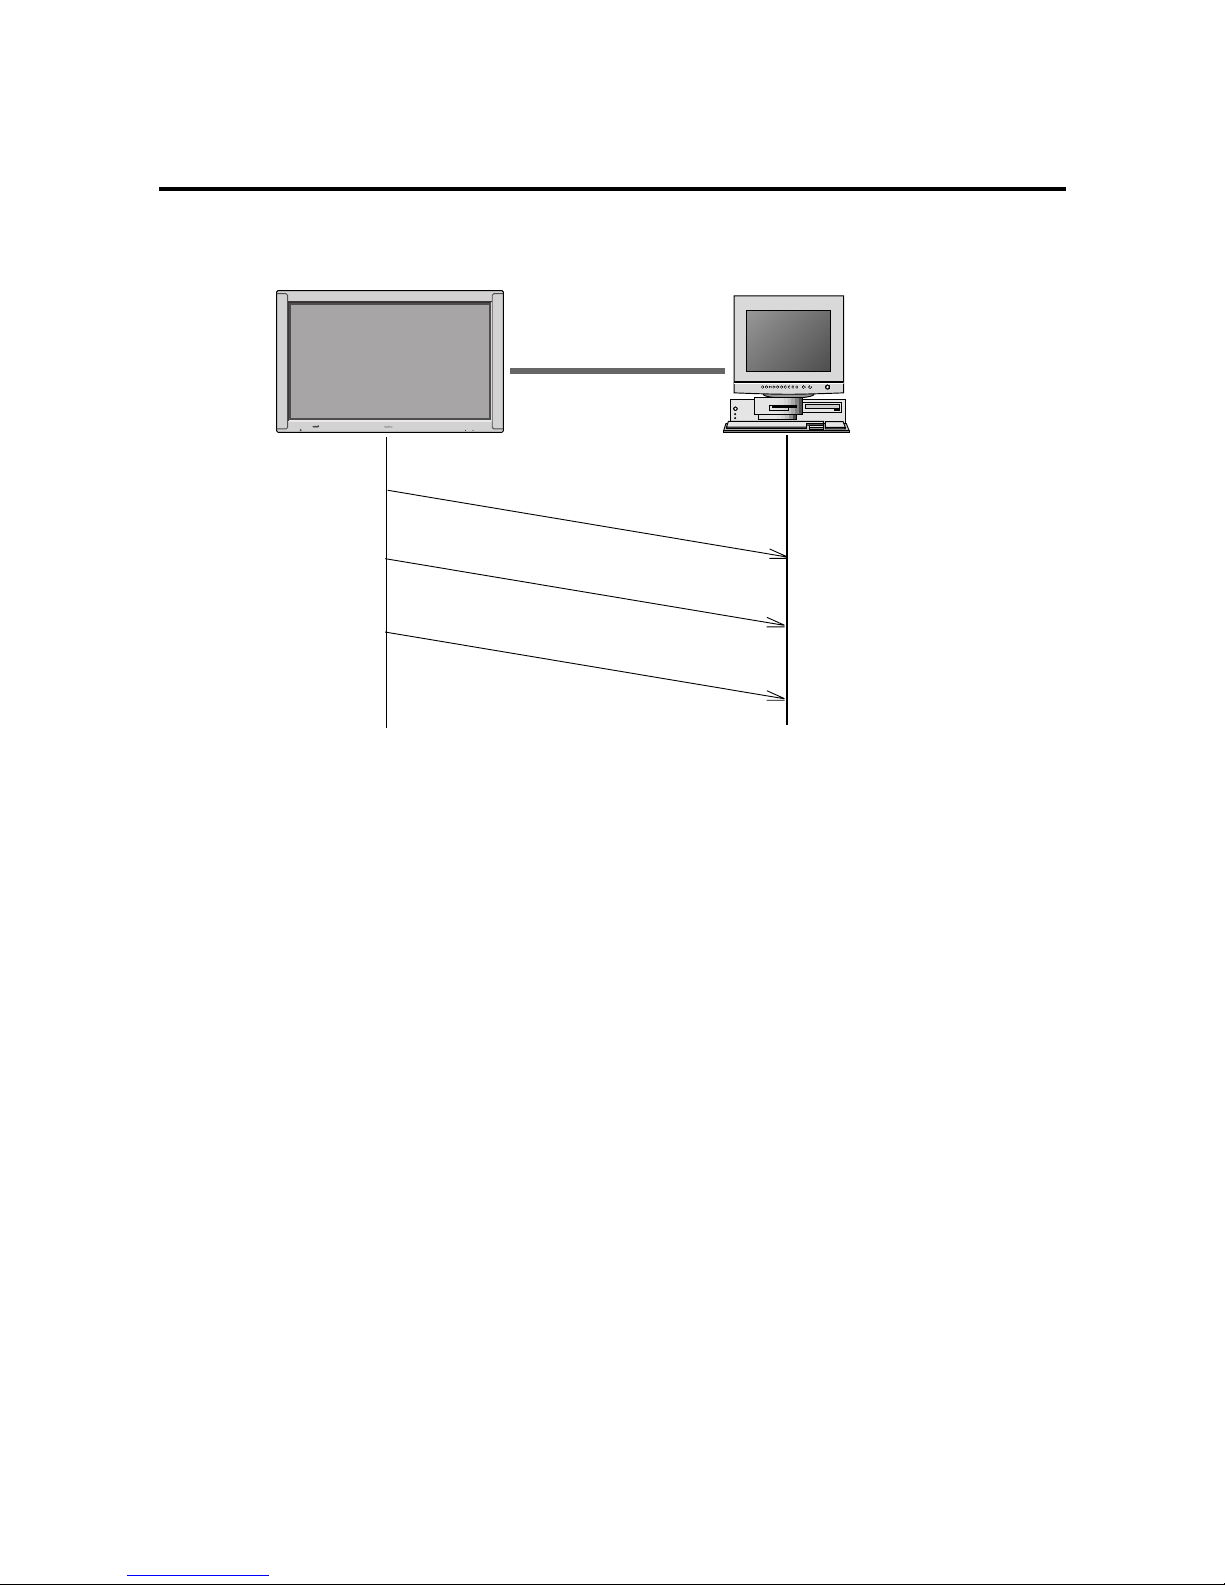
E – 40
POWER/STANDBY
INPUT SELECT VOLUME
PlasmaSync 5000W
External equipment
e.g., Personal computer
Running Sense
Running Sense
Running Sense
Communications Flow
The PlasmaSync 5000W regularly transmits a Running Sense command at an interval of approximately 1 second.
(Running Sense command: 1FH 60H E0H 88H 00H E7H)
This command is used to recognize optional equipment. The return of an ACK is not required when external equipment
such as a personal computer has been connected.
Note that destruction of this data is recommended when it is taken in.
When various commands are to be sent from external equipment such as a personal computer, the PlasmaSync 5000W is
always receive enabled.
Note that when an ACK has not been returned from the PlasmaSync 5000W in 1.5 seconds, a resending of the command
is recommended.
Page 45

E – 41
01. Power ON
Function
The external control equipment switches on the power of the PlasmaSync 5000W.
Transmission Data
9FH 80H 60H 4EH 00H CKS
ACK
The PlasmaSync 5000W returns the following ACK when the power is switched on.
3FH 60H 80H 4EH 00H CKS
02. Power OFF
Function
The external control equipment switches off the power of the PlasmaSync 5000W.
Transmission Data
9FH 80H 60H 4FH 00H CKS
ACK
The PlasmaSync 5000W returns the following ACK when the power is switched off.
3FH 60H 80H 4FH 00H CKS
03. Input Switch Change
Function
The external control equipment switches the input of the PlasmaSync 5000W.
Transmission Data
DFH 80H 60H 47H 01H DATA00 CKS
DATA00 01H: V ideo
05H: HD (DVD, DTV)
07H: PC
ACK
The PlasmaSync 5000W returns the following ACK when the input is switched.
3FH 60H 80H 47H 00H CKS
Command Reference List
CMD1 CMD2 LEN
01. Power ON 9FH 4EH 00H
02. Power OFF 9FH 4FH 00H
03. Input Switch Change DFH 47H 01H
04. VOLUME Gain Data DFH 7FH 03H
05. SCREEN MODE Select DFH 51H 01H
06. AUDIO Mute On 9FH 3EH 00H
07. AUDIO Mute Off 9FH 3FH 00H
08. OSM Select DFH 58H 01H
09. Color Gain Data DFH 7FH 03H
10. TINT Gain Data DFH 7FH 03H
11. SHARPNESS Gain Data DFH 7FH 03H
12. CONTRAST Gain Data DFH 7FH 03H
13. BRIGHT Gain Data DFH 7FH 03H
14. Input MODE Request 1FH 41H 00H
15. RESET 1FH 54H 00H
16. COLOR TEMP SELECT DFH 00H 01H
17. RED Gain Data DFH 7FH 04H
18. GREEN Gain Data DFH 7FH 04H
19. BLUE Gain Data DFH 7FH 04H
20. VIDEO ADJ Request 1FH 45H 00H
Page 46

E – 42
04. VOLUME Gain Data
Function
The external control equipment changes the VOLUME gain data of the PlasmaSync 5000W.
Transmission Data
DFH 80H 60H 7FH 03H DATA00 DATA01 DATA02 CKS
DATA00: USER SOUND Gain Flag 05H
DATA01: VOLUME Gain Flag 01H
DATA02: VOLUME Gain
00H: Step 0
0AH: Step 10 (Default)
2AH: Step 42
ACK
7FH 60H 80H 7FH 02H DATA00 DATA01 CKS
DATA00: USER SOUND Gain Flag 05H
DATA01: VOLUME Gain Flag 01H
05. SCREEN MODE Select
Function
The external control equipment switches the screen mode of the PlasmaSync 5000W.
Transmission Data
DFH 80H 60H 51H 01H DATA00 CKS
DATA00 02H : STADIUM
03H : ZOOM
04H : NORMAL
05H : FULL
06H : TRUE
ACK
7FH 60H 80H 51H 01H DATA00 CKS
DATA00 02H : STADIUM
03H : ZOOM
04H : NORMAL
05H : FULL
06H : TRUE
06. AUDIO Mute On
Function
The external control equipment switches on AUDIO Mute of the PlasmaSync 5000W.
Transmission Data
9FH 80H 60H 3EH 00H CKS
ACK
3FH 60H 80H 3EH 00H CKS
07. AUDIO Mute Off
Function
The external control equipment switches off AUDIO Mute of the PlasmaSync 5000W.
Transmission Data
9FH 80H 60H 3FH 00H CKS
ACK
3FH 60H 80H 3FH 00H CKS
Page 47
E – 43
08. OSD Select
Function
The external control equipment switches on or off the on-screen display (OSD) of the PlasmaSync 5000W.
Transmission Data
DFH 80H 60H 58H 01H DATA00 CKS
DATA00 01H : Screen display On
02H : Screen display Off
ACK
7FH 60H 80H 58H 01H DATA00 CKS
DATA00 01H : Screen display On
02H : Screen display Off
* Screen display On/Off is equivalent to the screen display On/Off function of the convenient function settings.
Operation is as described in the table below.
Display of items and adjustments on the menu
On-Screen Display (OSD)
Operation
Remote control operation Yes Yes Yes No
Personal computer control operation No No Yes No
When screen display is ON
Volume display, input display, and screen size display
When screen display is OFF When screen display is ON When screen display is OFF
09. COLOR Gain Data
Function
The external control equipment changes the COLOR gain data of the PlasmaSync 5000W.
Transmission Data
DFH 80H 60H 7FH 03H DATA00 DATA01 DATA02 CKS
DATA00: USER PICTURE Gain Flag 01H
DATA01: COLOR Gain Flag 04H
DATA02: COLOR Gain EAH: -22
FFH: -01
00H: 0
01H: +01
16H: +22
ACK
7FH 60H 80H 7FH 02H DATA00 DATA01 CKS
DATA00: USER PICTURE Gain Flag 01H
DATA01: COLOR Gain Flag 04H
Page 48

E – 44
10. TINT Gain Data
Function
The external control equipment changes the TINT gain data of the PlasmaSync 5000W.
Transmission Data
DFH 80H 60H 7FH 03H DATA00 DATA01 DATA02 CKS
DATA00: USER PICTURE Gain Flag 01H
DATA01: TINT Gain Flag 05H
DATA02: TINT Gain EAH: -22
FFH: -01
00H: 0
01H: +01
16H: +22
ACK
7FH 60H 80H 7FH 02H DATA00 DATA01 CKS
DATA00: USER PICTURE Gain Flag 01H
DATA01: TINT Gain Flag 05H
11. SHARPNESS Gain Data
Function
The external control equipment changes the SHARPNESS gain data of the PlasmaSync 5000W.
Transmission Data
DFH 80H 60H 7FH 03H DATA00 DATA01 DATA02 CKS
DATA00: USER PICTURE Gain Flag 01H
DATA01: SHARPNESS Gain Flag 06H
DATA02: SHARPNESS Gain F0H: -16
FFH: -01
00H: 0
01H: +01
10H:+16
ACK
7FH 60H 80H 7FH 02H DATA00 DATA01 CKS
DATA00: USER PICTURE Gain Flag 01H
DATA01: SHARPNESS Gain Flag 06H
12. CONTRAST Gain Data
Function
The external control equipment changes the CONTRAST gain data of the PlasmaSync 5000W.
Transmission Data
DFH 80H 60H 7FH 03H DATA00 DATA01 DATA02 CKS
DATA00: USER PICTURE Gain Flag 01H
DATA01: CONTRAST Gain Flag 07H
DATA02: CONTRAST Gain 00H : 0
34H: +52
ACK
7FH 60H 80H 7FH 02H DATA00 DATA01 CKS
DATA00: USER PICTURE Gain Flag 01H
DATA01: CONTRAST Gain Flag 07H
Page 49

E – 45
13. BRIGHT Gain Data
Function
The external control equipment changes the BRIGHT gain data of the PlasmaSync 5000W.
Transmission Data
DFH 80H 60H 7FH 03H DATA00 DATA01 DATA02 CKS
DATA00: USER PICTURE Gain Flag 01H
DATA01: BRIGHT Gain Flag 08H
DATA02: BRIGHT Gain EAH: -22
FFH: -01
00H: 0
01H: +01
16H: +22
ACK
7FH 60H 80H 7FH 02H DATA00 DATA01 CKS
DATA00: USER PICTURE Gain Flag 01H
DATA01: BRIGHT Gain Flag 08H
14. Input MODE Request
Function
The display returns the current input information by the external control equipment’ s request.
Transmission Data
1FH 80H 60H 41H 00H CKS
ACK
7FH 60H 80H 41H 01H DATA00 CKS
DATA00: Input Select
01H: Video
04H: HD, DTV
05H: PC
0AH:DVD
15. RESET
Function
The external control equipment resets the user adjustment of the PlasmaSync 5000W.
Transmission Data
1FH 80H 60H 54H 00H CKS
ACK
3FH 60H 80H 54H 00H CKS
Page 50

E – 46
16. COLOR TEMP SELECT
Function
The external control equipment changes the COLOR TEMP of the PlasmaSync 5000W.
Transmission Data
DFH 80H 60H 00H 01H DATA00 CKS
DATA00
00H: 1
01H: 2
02H: 3
03H: PRO
ACK
7FH 60H 80H 00H 01H DATA00 CKS
DATA00:
00H: 1
01H: 2
02H: 3
03H: PRO
NOTE: Set so that at the selection of 1, 2, or 3 of COLOR TEMP change of the follo wing R/G/B GAIN data cannot be
accepted. (This must be operated in the same way as OSD menu.)
17. RED Gain Data
Function
The external control equipment changes the RED Gain Data of the PlasmaSync 5000W.
Transmission Data
DFH 80H 60H 7FH 04H DATA00 to DATA03 CKS
DATA00: USER PICTURE Gain Flag 01H
DATA01: RED Gain Flag 01H
DATA02: RED Gain 1 (Bias) F0H: -16
FFH: -1
00H: 0
10H: +16
DATA03:RED Gain 2 (Drive) F0H: -16
FFH: -1
00H: 0
10H: +16
ACK
7FH 60H 80H 7FH 02H DATA00 DATA01 CKS
DATA00: USER PICTURE Gain Flag 01H
DATA01: RED Gain Flag 01H
Page 51

E – 47
18. GREEN Gain Data
Function
The external control equipment changes the GREEN Gain Data of the PlasmaSync 5000W.
Transmission Data
DFH 80H 60H 7FH 04H DATA00 to DATA03 CKS
DATA00: USER PICTURE Gain Flag 01H
DATA01: GREEN Gain Flag 02H
DATA02: GREEN Gain 1 (Bias) F0H: -16
FFH: -1
00H: 0
10H: +16
DATA03: GREEN Gain2 (Drive) F0H: -16
FFH: -1
00H: 0
10H: +16
ACK
7FH 60H 80H 7FH 02H DATA00 DATA01 CKS
DATA00: USER PICTURE Gain Flag 01H
DATA01: GREEN Gain Flag 02H
19. BLUE Gain Data
Function
The external control equipment changes the BLUE Gain Data of the PlasmaSync 5000W.
Transmission Data
DFH 80H 60H 7FH 04H DATA00 to DATA03 CKS
DATA00: USER PICTURE Gain Flag 01H
DATA01: BLUE Gain Flag 03H
DATA02: BLUE Gain1(Bias) F0H:-16
FFH:-1
00H: 0
10H: +16
DATA03: BLUE Gain2(Drive) F0H:-16
FFH:-1
00H: 0
10H:+16
ACK
7FH 60H 80H 7FH 02H DATA00 DATA01 CKS
DATA00: USER PICTURE Gain Flag 01H
DATA01: BLUE Gain Flag 03H
Page 52

E – 48
20. VIDEO ADJ Request
Function
The display returns the video adjustments information by the external control equipment's request.
Transmission Data
1FH 80H 60H 45H 00H CKS
ACK
7FH 60H 80H 45H 0CH DATA00 to DATA0B CKS
DATA00: RED Gain(Bias) F0H: -16
FFH: -1
00H: 0
10H: +16
DATA01: GREEN Gain(Bias) F0H: -16
FFH: -1
00H: 0
10H: +16
DATA02: BLUE Gain(Bias) F0H: -16
FFH: -1
00H: 0
10H: +16
DATA03: COLOR Gain EAH: -22
FFH: -01
00H: 0
01H: +01
16H: +22
DATA04: TINT Gain EAH: -22
FFH: -01
00H: 0
01H: +01
16H: +22
DATA05: SHARPNESS Gain F0H: -16
FFH: -01
00H: 0
01H: +01
10H: +16
Page 53

E – 49
DATA06: CONTRAST Gain 00H: 0
34H: +52
DATA07: BRIGHT Gain EAH: -22
FFH: -01
00H: 0
01H: +01
16H: +22
DATA08: RED Gain(Drive) F0H: -16
FFH: -1
00H: 0
10H: +16
DATA09: GREEN Gain(Drive) F0H: -16
FFH: -1
00H: 0
10H: +16
DATA0A: BLUE Gain(Drive) F0H: -16
FFH: -1
00H: 0
10H: +16
DATA0B: COLOR TEMP 00H: 1
01H: 2
02H: 3
03H: PRO
Page 54
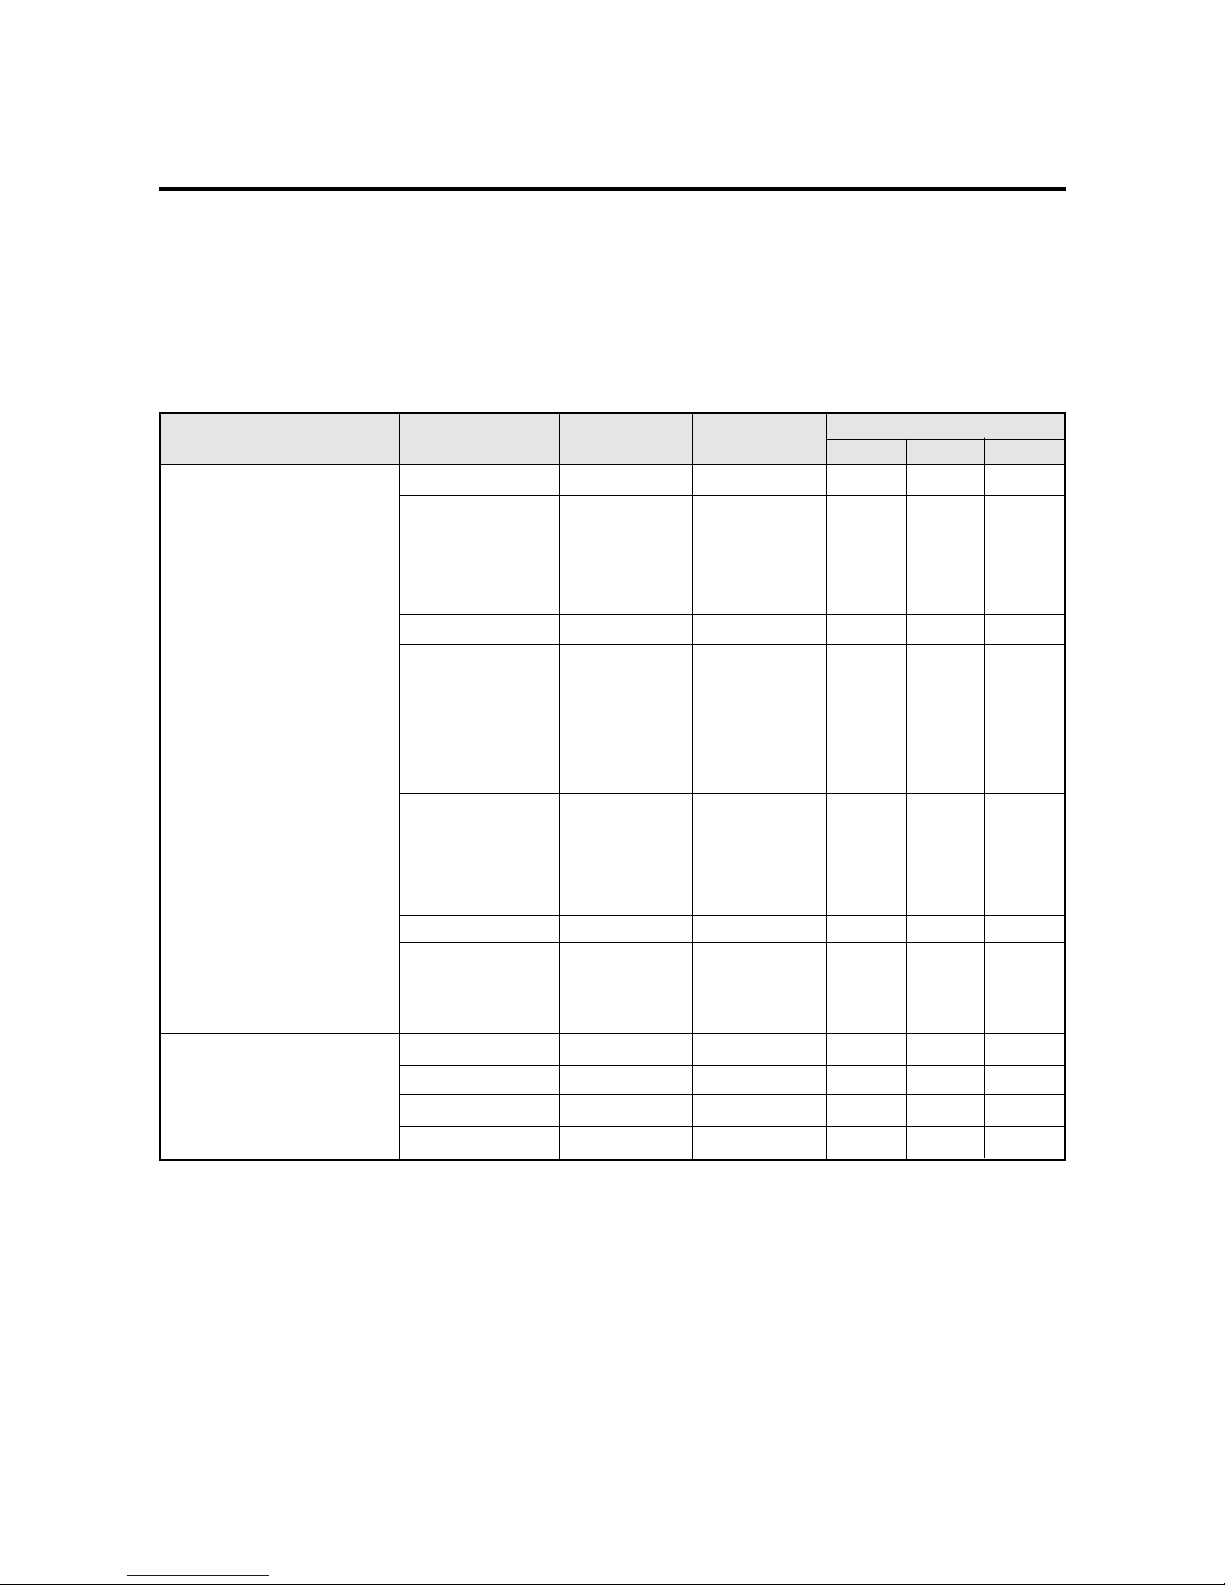
E – 50
Table for Signals Supported
Supported resolution
• When screen mode is NORMAL, each signal is converted to a 1024 dot⳯768 signals. (Except for 3, 4, 5 and 6).
• When screenmode is TRUE, the image is true resolution.
• When screen mode is FULL, each signal is converted to a 1364 dot⳯768 signals. (Except for *7).
Computer input signals supported on this system
Screen mode
Horizontal
frequency (kHz)
31.5
31.5
37.9
37.5
43.3
31.0
35.2
37.9
48.1
46.9
53.7
48.4
56.5
60.0
68.7
47.7
64.0
80.0
91.1
35.0
49.7
60.2
68.7
Vertical
frequency (Hz)
Dots ⳯ lines
640⳯400
640⳯480
848⳯480*
2
800⳯600
1024⳯768
1360⳯765*
2
1280⳯1024
*
1
*
1
640⳯480
832⳯624
1024⳯768
1152⳯870
Model
NORMAL TRUE
*IBM PC/AT compatible
computers
*Apple Macintosh
*1 Signals with these frequencies are only displayed in the normal mode (5:4).
*2 Only when using a graphic accelerator board that is capable of displaying 848⳯480 or 1360⳯765.
*3 This signal is converted to a 1228⳯768 signal.
*4 This signal is true resolution.
*5 This signal is converted to a 960⳯768 signal (5:4).
*6 This signal is converted to a 1016⳯768 signal.
*7 This signal is true resolution (1360⳯765).
* “IBM PC/A T” and “VGA” are a r egistered trademark of International Business Machines, Inc. of the United
States.
* “Apple Macintosh” is a registered trademark of Apple Computer, Inc. of the United States.
YES*
3
YES
YES
YES
YES
NO
YES
YES
YES
YES
YES
YES*
4
YES*
4
YES*
4
YES*
4
NO
YES*
5
YES*
5
YES*
5
YES
YES
YES*
4
YES*
6
YES
YES
YES
YES
YES
YES
YES
YES
YES
YES
YES
NO
NO
NO
NO
NO
NO
NO
NO
YES
YES
NO
NO
70.1
59.9
72.8
75.0
85.0
60.0
56.3
60.3
72.2
75.0
85.0
60.0
70.0
75.0
85.0
60.0
60.0
75.0
85.0
66.6
74.6
74.6
75.1
FULL
YES
YES
YES
YES
YES
YES
YES
YES
YES
YES
YES
YES
YES
YES
YES
YES*
7
YES
NO
NO
YES
YES
YES
YES
Page 55
E – 51
Picture is disturbed.
Sound is noisy.
Remote control unit operates erroneously.
The remote controller does not work.
Monitor’s po wer does not turn on when
the remote controller’s power b utton is
pressed.
Monitor does not operate when the remote controller’s buttons are pressed.
No sound or picture is produced.
Picture appears but no sound is produced.
Tint is poor or colors are weak.
Nothing appears on screen.
Part of picture is cut off or picture is
not centered.
Image is too large or too small.
Picture is unstable.
• Is a connected component set directly in
front or at the side of the display?
• Are the remote controller’s batteries
worn out?
• Is the monitor’s po wer cord plugged into
a power outlet?
• Are all the monitor’s indicators off?
• Are the remote controller’s batteries
worn out?
• Is the remote controller pointed at the
monitor, or is there an obstacle between
the remote controller and the monitor?
• Is direct sunlight or strong artificial light
shining on the monitor’s remote control
sensor?
• Are the remote controller’s batteries
worn out?
• Is the monitor’s po wer cord plugged into
a power outlet?
• Is the volume set at the minimum?
• Is the mute mode set?
• Are the speakers properly connected?
• Are the tint and colors properly adjusted?
• Is the computer’s power turned on?
• Is a source connected?
• Is the power manager function in the
standby or off mode?
• Is the position adjustment appropriate?
• Is the screen size adjustment appropriate?
• Is the computer’s resolution setting appropriate?
Troubleshooting
If the picture quality is poor or there is some other problem, check the adjustments, operations, etc., before requesting
service.
• Leave some space between the display and
the connected components.
• Replace both batteries with new ones.
• Plug the monitor’s pow er cord into a power
outlet.
• Press the power button on the monitor to
turn on the power.
• Replace both batteries with new ones.
• Point the remote controller at the monitor’s
remote control sensor when pressing buttons, or remove the obstacle.
• Eliminate the light by closing curtains, pointing the light in a different direction, etc.
• Replace both batteries with new ones.
• Plug the monitor’s pow er cord into a power
outlet.
• Increase the volume.
• Press the remote controller’s mute button.
• Connect the speakers properly.
• Adjust the tint and color (under “PICTURE”).
• Turn on the computer’s power.
• Connect source to the monitor.
• Operate the computer (move the mouse,
etc.).
• Adjust the “RGB ADJ.” properly.
• Press the “WIDE/AUTO WIDE” button on
the remote controller and adjust properly.
• Set to the proper resolution.
Symptom Checks Remedy
Page 56
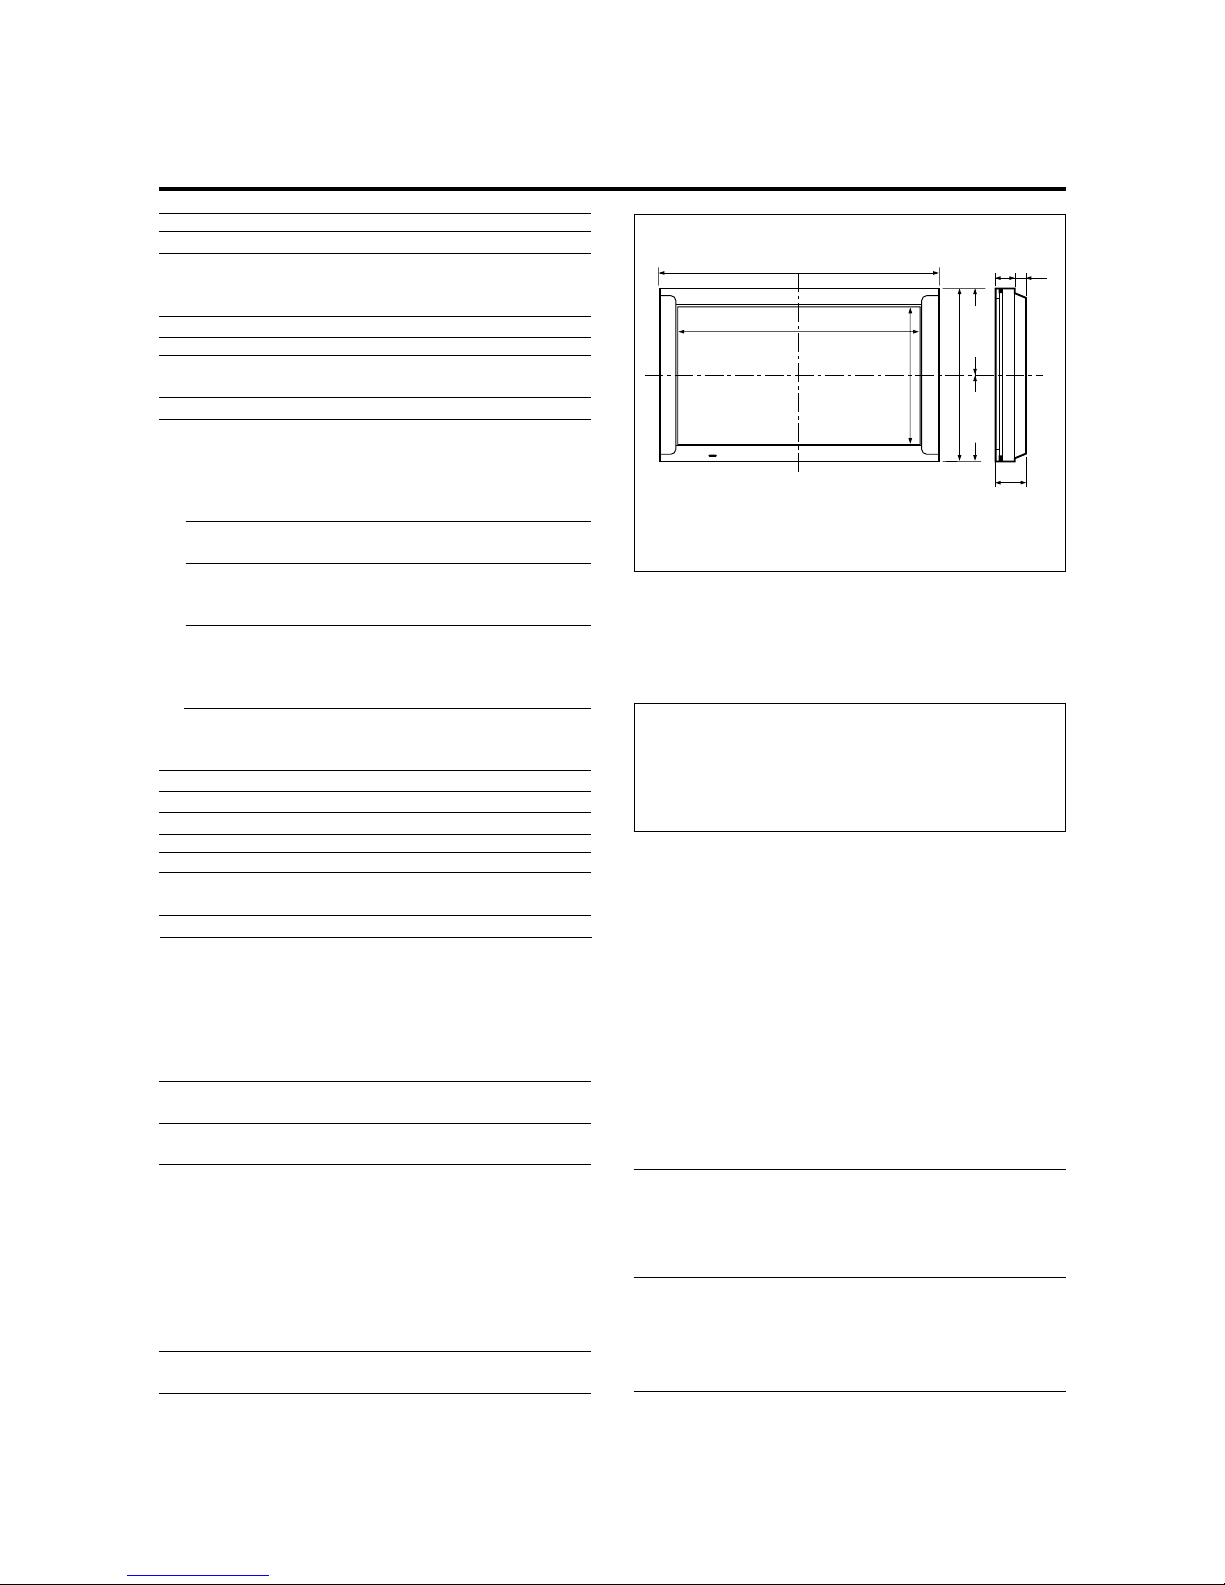
E – 52
Specifications
The features and specifications may be subject to change without
notice.
Units are in mm
(inch)
Product Name
Product Code
Screen Size
Aspect Ratio
Resolution
Pixel Pitch
Color Reproduction
Signals
Synchronization Range
Input Signals
RGB Input terminals
Visual
Audio
Video Input terminals
Visual
Audio
DVD/HD Input terminals
Visual
Audio
External Control
Sound output
Power Supply
Current Rating
Power Consumption
Dimensions
Weight
Environmental Considerations
Operating Temperature
Humidity
Altitude
Storage Temperature
Humidity
Altitude
Front Panel User Controls
Remote Control Functions
OSM Functions
Other Features
PlasmaSync 5000W Plasma Monitor
PX-50M5G
43.5"(H)⳯24.5"(V) inches
1106(H)⳯622(V) mm
diagonal 50"
16 : 9
1365(H)⳯768(V) pixels
0.032"(H)⳯0.032"(V) inches
0.81(H)⳯0.81(V) mm
256 levels : 16,770,000 colors
Horizontal : 15.5 to 91.1 kHz
(automatic : step scan)
Vertical : 50.0 to 85.0 Hz
(automatic : step scan)
RGB, NTSC, PAL, SECAM, HD, DVD,
DTV*
mini D-sub 15-pin⳯1
Stereo RCA⳯1
RCA⳯1
(S-Video: 4-pin DIN⳯1)
Stereo RCA⳯1
RCA (Y/Y, CB/PB, CR/PR)
Stereo RCA⳯1
D-sub 9-pin
7W+7W at 6 ohm
AC100 – 240V 50/60Hz
7.5A (maximum)
540W (typical)
1240 (W)⳯766 (H)⳯107 (D) mm
48.8 (W)⳯30.2 (H)⳯4.2 (D) inch
58.0 kg / 127.6 lbs
0°C to 35°C / 32°F to 95°F
20 to 80%
0 to 1900m / 0 to 6230ft
-10°C to 50°C / 14°F to 122°F
10 to 90%
0 to 3000m / 0 to 9840ft
Power on/off, Input source select,
Volume up/down
Input select, OSM control, V isual control, Volume control, Wireless/ Wired remote control
Picture (Contrast / Brightness / Sharpness
/ Color / Tint / Picture mode/ Color temperature / Noise reductions), Sound (Bass
/ Treble / Balance), Screen adjustment
(Wide adjustment / RGB adjustment / OSM
adjustment), Function (Power management
/ RGB select / HD select / OSM / Gray level
/PLE / Picture Size /Reset), Information
(Frequency / Language / Color system)
Power management, plug and play (DDC1,
DDC2b)
107
(4.2")
72.5
(2.85")
34.5
(1.35")
1240 (48.8")
1106 (43.5")
766 (30.2")
388 (15.3") 378 (14.9")
622 (24.5")
* DTV input signals supported on this system
1080I (60 Hz)
480P (60 Hz)
480I (60 Hz)
720P (60 Hz)
Remote controller with two AA batteries, Wired
remote cable, Adapter for Macintosh, RGB cable (Mini D-Sub 15-pin to Mini D-Sub 15-pin
connector), Power code, User's Manual, Ferrite
core
Meets EMC Directive (EN55022, EN610003-2, EN61000-3-3, EN50082-2)
Meets AS/NZS 3548 Class B,
Meets Low Voltage Directive (EN60950,
SEMKO Approved)
Accessories
Regulations
 Loading...