

Page 1
Quick Connect Guide
MultiSync MT Series LCD Projectors
Step1
M
E
N
U
C
A
N
C
E
L
SELECT
SOURCE AUTO ADJUST
USB
AC IN
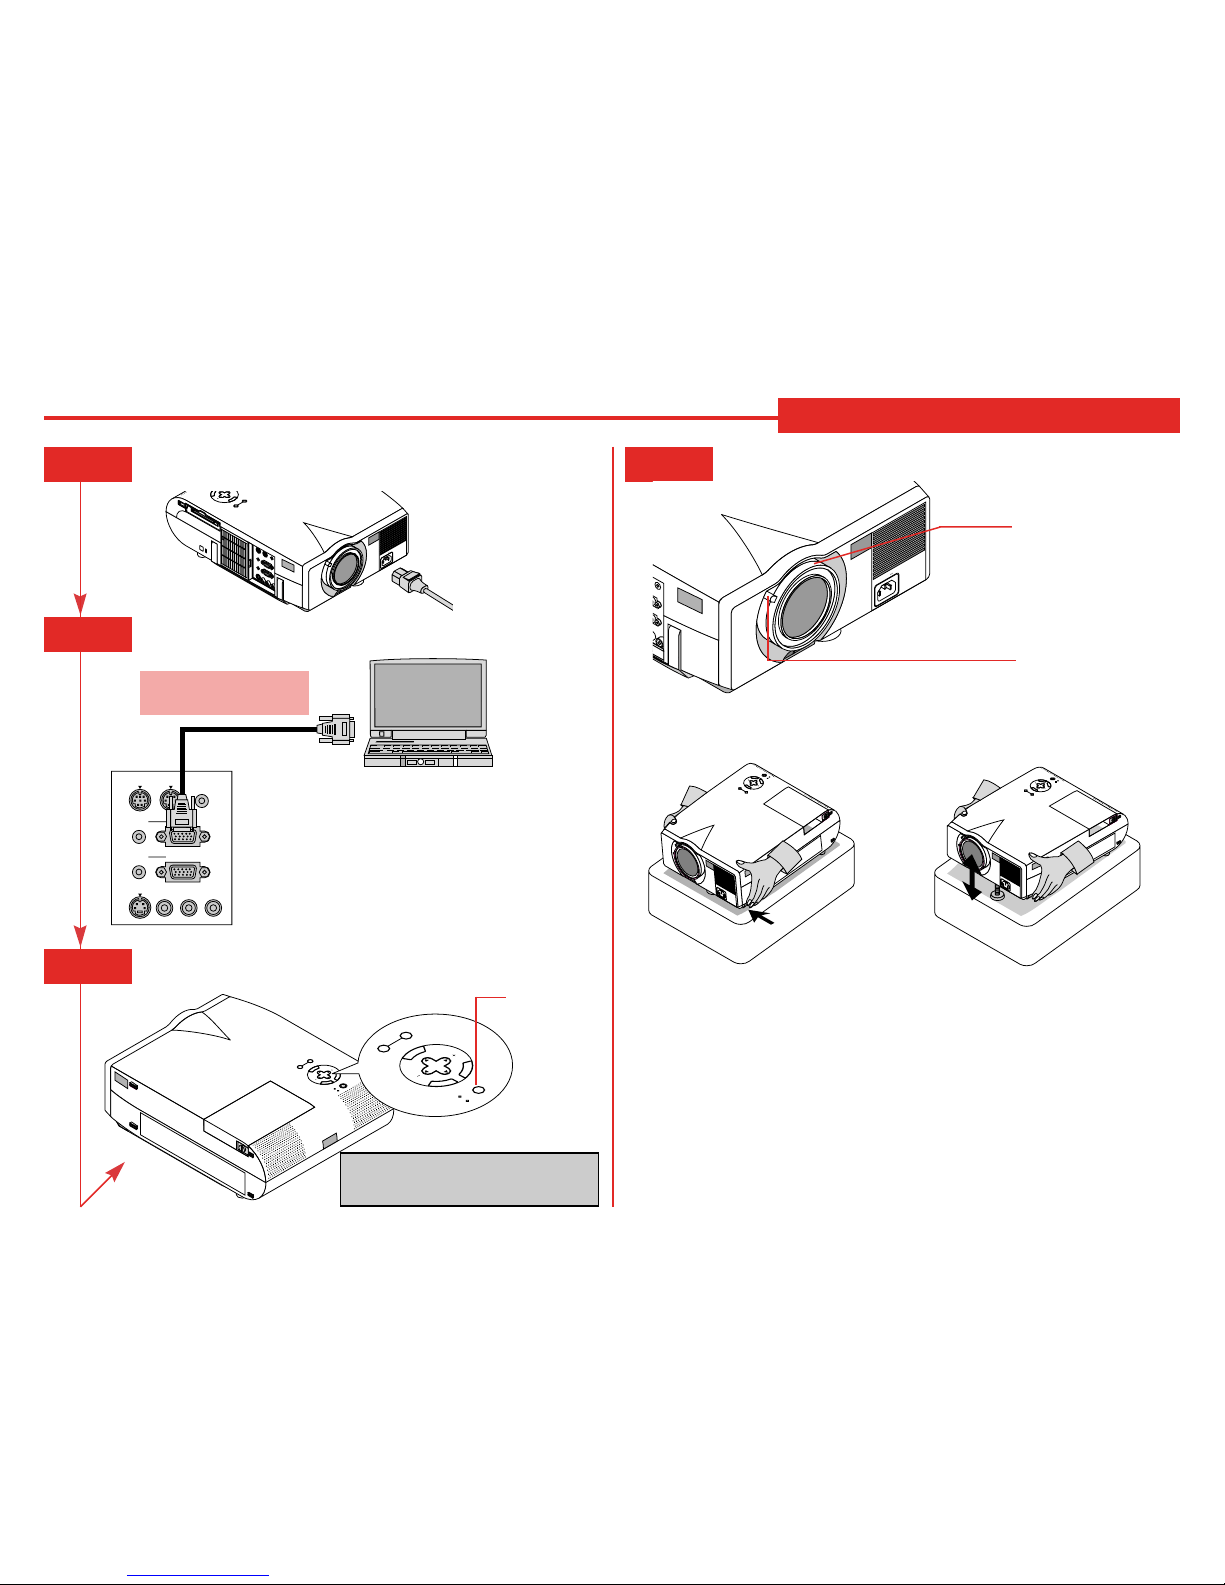
Connect the supplied power cable.
Connect the supplied 15pin-15pin signal cable.
Always power down
before you hook up.
PC CONTROL
REMOTE
CONTROL
INPUT
MOUSE
OUT
S-VIDEO
VIDEO
AUDIO RGB INPUT 2
AUDIO RGB INPUT 1
L
/
MONO
R
For Mac, use the supplied
pin adapter to connect to the
computer 's video port.
Step2
Step3
Turn on the projector.
M
E
N
U
E
N
T
E
R
C
A
N
C
E
L
SELECT
POWER
STATUS
ON
/
OFF
SOURCE AUTO ADJUST
M
E
N
U
E
N
T
E
R
C
A
N
C
E
L
SELECT
POWER
STATUS
ON
/
OFF
SOURCE
AUTO ADJUST
NOTE: To turn off the projector , press and
hold the POWER button for a minimum
of two seconds.
Power button
Step4
Set up the Projector
AC IN
Zoom ring
Focus ring
To adjust the projector' s focus or to zoom in and out, use
the Focus/Zoom ring on the lens.
If necessary, adjust the front f oot to properly
position the projected image on the screen.
If the projected image does not appear
square to the screen then use keystone correction for proper adjustment.
M
E
N
U
E
N
T
E
R
C
A
N
C
E
L
SELECT
POWER
STATUS
ON
/
OFF
SOURCE
AUTO ADJUST
AC IN
M
E
N
U
E
N
T
E
R
C
A
N
C
E
L
SELECT
POWER
STATUS
ON
/
OFF
SOURCE
AUTO ADJUST
AC IN
Printed in Japan
78038451
Page 2
Remote Control Features
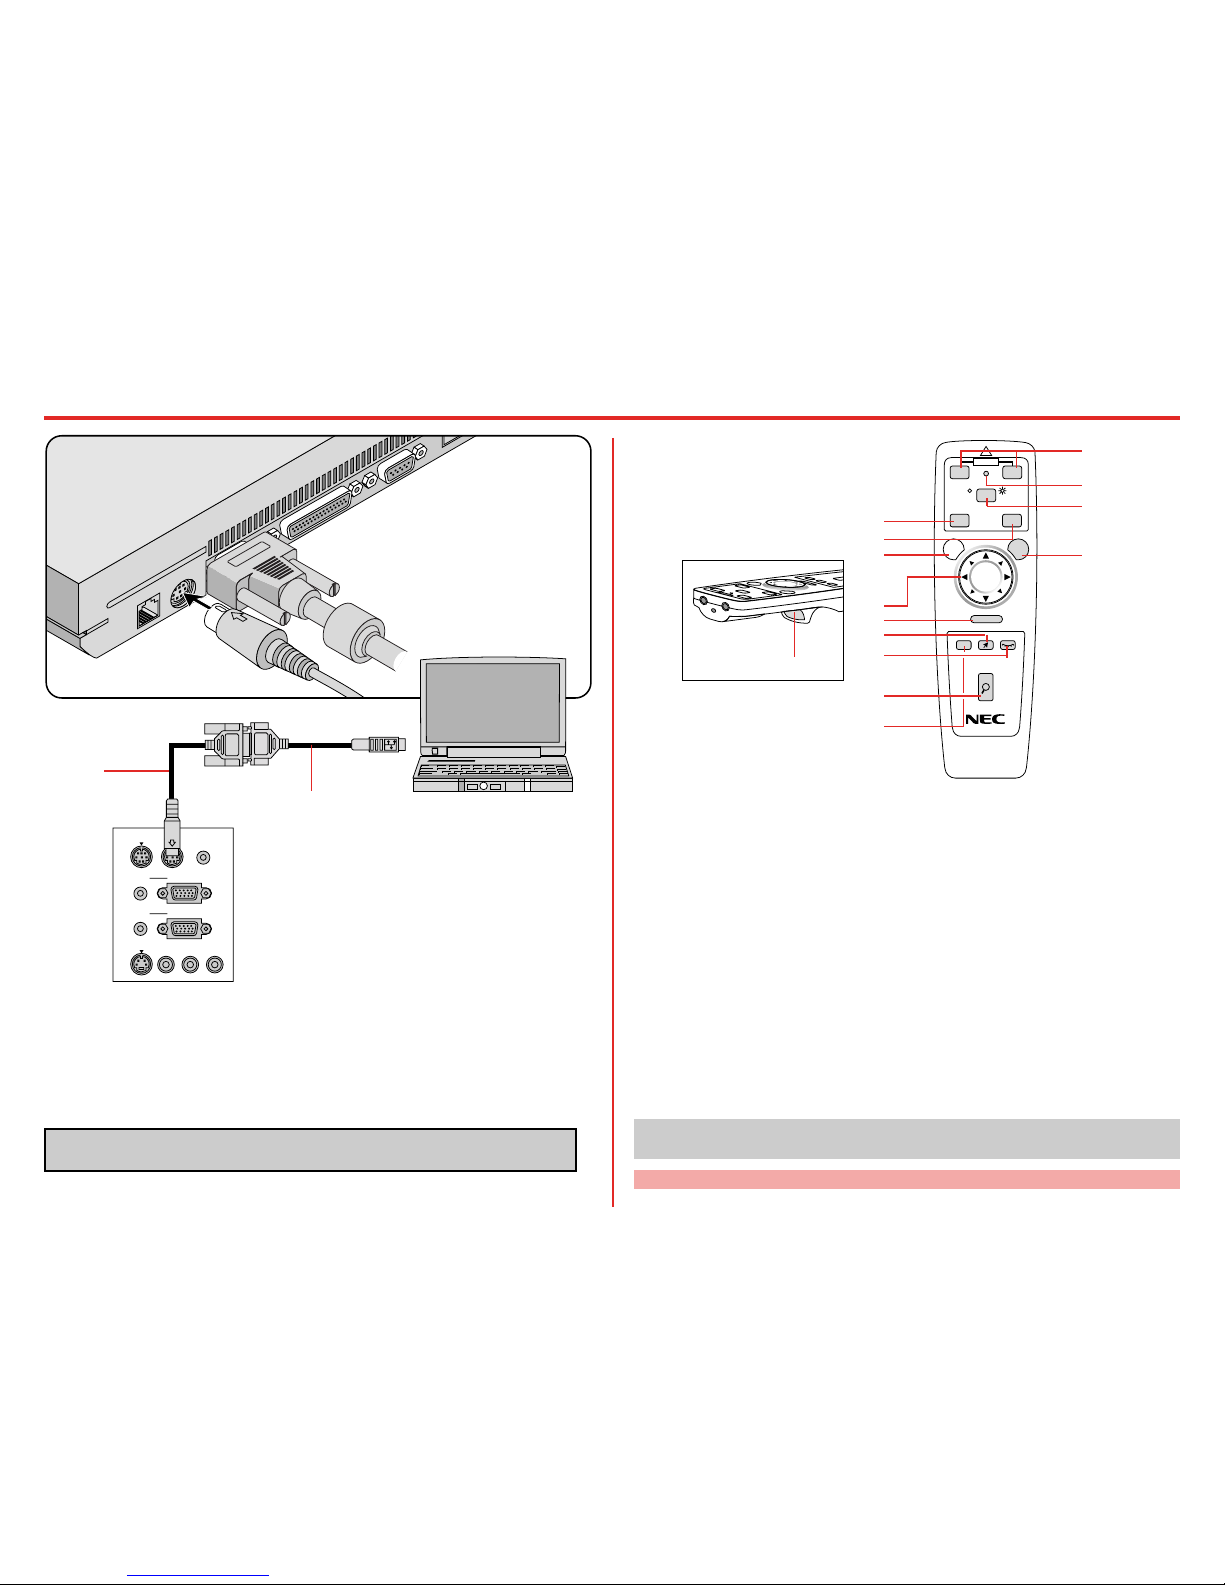
1 SOURCE Selects video source from VCR, laserdisc, computer, DVD player or PC card. (RGB-
VIDEO-S-VIDEO-VIEWER).
2 AUTO ADJUST
Press to adjust H/V position, Pixel and resolution of the current image for the optimal.
3 MENU Calls up On-Screen Menu so you can adjust and set the image.
4 SELECT Selects an item or option.
MOUSE PAD for full function r emote Works as a mouse to select sub menus, adjust levels. Left click (under-
neath) works as “ENTER”.
5 CANCEL/R-CLICK Use to exit menus or adjustment.
6 ENTER/ Left Click Press to execute selected items. The Left Click button is underneath.
7 MAGNIFY Use to magnify image up to 400%.
8 POINTER Points to an area on screen to be magnified.
9 PICTURE MUTE Turns off the image and the sound for a short period of time. Press again to
restore the image and sound.
10 HELP Displays information for the current menu or how to use the menu.
11 POWER ON/OFF Turns the projector on or off.
12 LED Flashes when any button is pressed.
13 COMPUTER/PJ SELECT Select COMPUTER if you want to use the remote mouse pad as your
PC’ s mouse.
14 LASER Press and hold to activate red laser pointer.
* Some buttons on the remote control perform the same functions as the corresponding but-
tons on the projector cabinet. The remaining buttons are on the remote control unit only.
See your User's Manual for more information on features and operation.
Full Function Remote Control
R-CLICK
HELP
PIC-MUTEPOINTER
MAGNIFY
SOURCE
AUTO ADJ.
COMPUTER PROJECTOR
POWER
+
-
+
-
MENU
PJ
SA
?
OFF ON
LASER
CANCEL
1
2
3
4
8
9
7
10
11
12
13
14
5
6
PC CONTROL
REMOTE
CONTROL
INPUT
MOUSE
OUT
S-VIDEO
VIDEO
AUDIO RGB INPUT 2
AUDIO RGB INPUT 1
L
/
MONO
R
Connect the Remote Mouse
The MOUSE OUT port allows you to
remotely operate your PC's mouse.
It makes clicking through your computer-generated presentations easy .
Serial cable
(supplied)
Mouse adapter for IBM PS/2 or
Macintosh (supplied)
1. Make sure that both the computer and projector are turned off.
2. Connect the cables as shown in the illustration.
3. Turn on the projector.
4. Turn on the computer.
NOTE: To reactivate your computer's on-board mouse control, power the computer
down and unplug the serial cable.
 Loading...