


NEC MobilePro 900c
Release Notes
Congratulations on purchasing an NEC MobilePro™ 900c Handheld PC. Before
using your MobilePro 900c, please read the following important information.
Installing the NEC USB Sync Drivers
NEC USB Sync drivers are required to recognize the NEC MobilePro 900c when
the MobilePro is connected to the host PC via a USB cable. The NEC USB Sync
drivers come on the NEC MobilePro 900c Application and Driver CD.
Use the following procedure to install the drivers on the host/companion PC.
Note The following procedure replaces the section “Loading USB Files” in
Chapter 1 of the NEC MobilePro 900c User’s Guide.
1. Insert the NEC MobilePro 900c Application and Driver CD in the
CD-ROM drive of your host PC. If auto-insert is enabled on your host
PC, the CE Setup menu appears. If auto-insert is not enabled, go to Start,
Run, and browse for the CD-ROM drive.
2. Select “NEC 900 Drivers” from the displayed menu.
3. Follow the on-screen instructions to complete the driver installation.
4. Connect the USB PC Link cable from the MobilePro 900c to the host PC.
Microsoft
5. Click Next to install the USB drivers. The installation prompts you for the
wceusbsh.sys file.
6. Browse to the system32\drivers\ directory within Windows.
7. Select the wceusbsh.sys file and click “Open” to complete the driver
®
Windows® now detects the new hardware (USB device).
installation.
Connecting to ActiveSync via the Network
To connect to ActiveSync® using a network connection, do the following:
Check that the MobilePro is already partnered with the host system.
Make sure the MobilePro and the host system are on the SAME network.
Ensure that Outlook is open on the host system BEFORE
synchronization.
To connect to ActiveSync using the network, click the Start button and select Run.
Type
repllog.exe /remote.
1
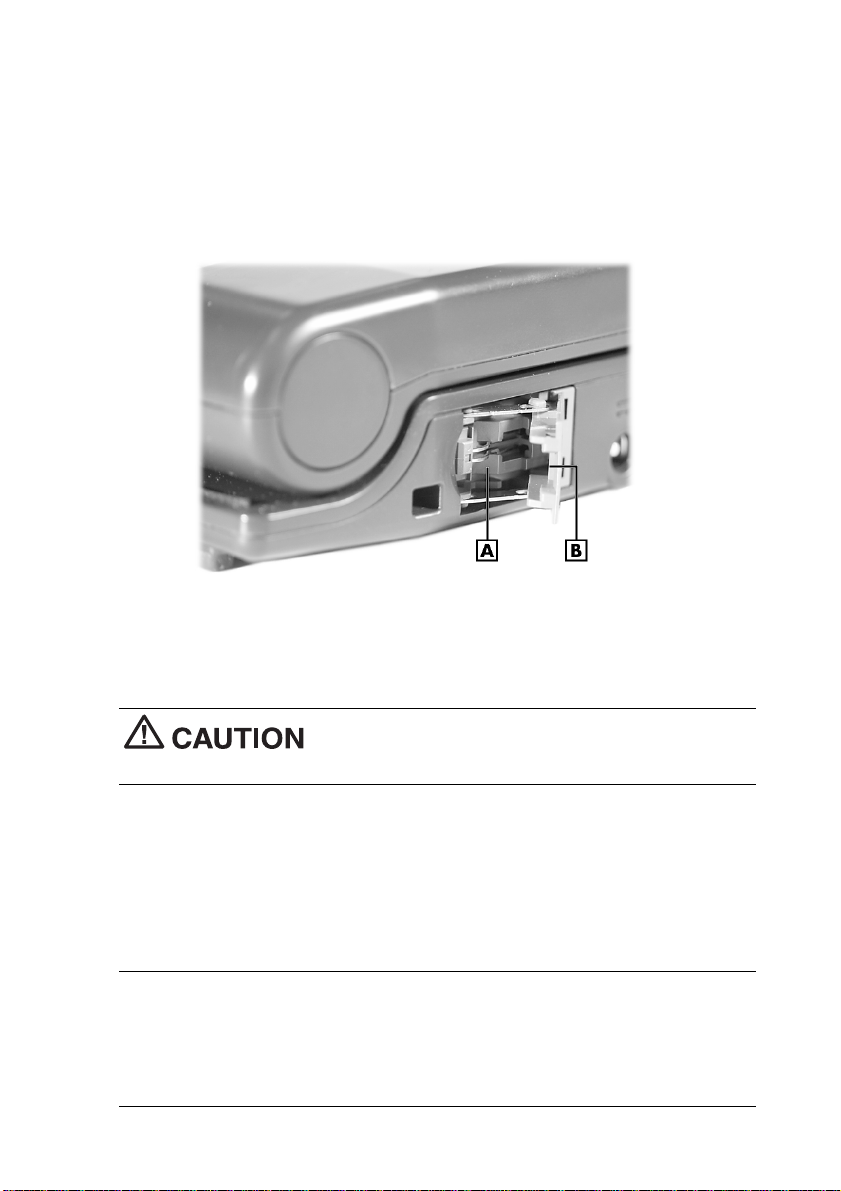
Opening the Modem Cover
To connect a telephone cable to your MobilePro 900c, open the modem cover to
about a 45-degree angle from the side of the MobilePro. Insert the clip side of the
telephone cable into the modem cover (see the following figure).
See your NEC MobilePro 900c User’s Guide for detailed modem connection
information.
A – Modem Connector
B – Modem Cover at 45-Degree Angle;
Clip Side of Telephone Cable Connector Goes Here
To prevent damage to the modem cover, do not open
the modem cover more than the 45-degree angle.
Connecting a Device to the USB Port
Before connecting a USB device to the MobilePro 900c, install a ferrite core on
the USB cable. Installation of the ferrite core on the USB cable reduces radio
interference when you use a USB device connected to the MobilePro 900c. Ferrite
cores ship with the MobilePro 900c.
Note The USB PC Connect cable that ships with the MobilePro 900c
comes with a ferrite core installed. You do not need to install a ferrite core on
this cable.
Install a ferrite core on any other USB cable you connect to the MobilePro,
including the cable attached to a USB mouse or USB keyboard.
2
To reduce radio interference when using a USB
device, be sure the USB cable has a ferrite core installed.
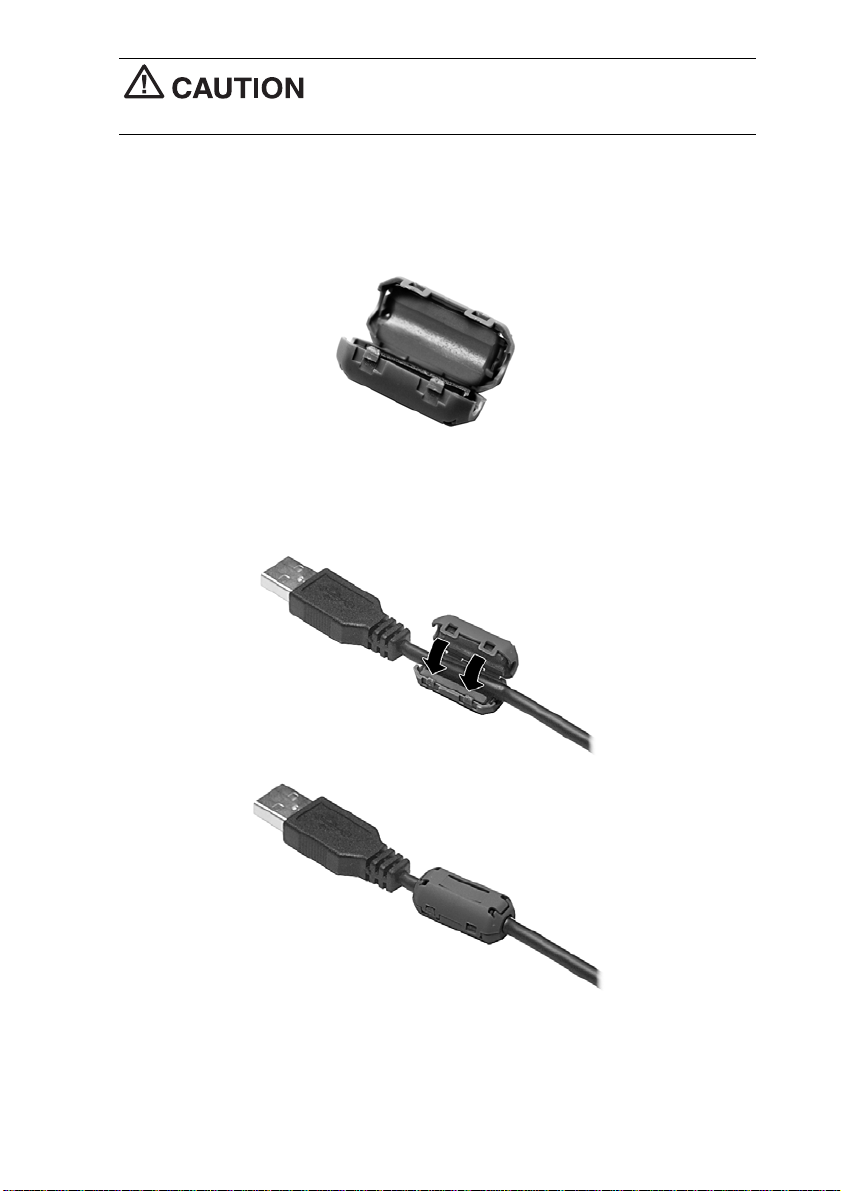
Use the following procedure to install the ferrite core.
1. Locate one of the ferrite cores that ships with the MobilePro 900c.
Ferrite Core
2. Place the USB cable in the center of the core. Close the core and press
tightly to secure the core tabs in the fasteners.
Installing the Cable in the Core
3

Note Connect the cable end with the ferrite core to the Mobil ePro USB port.
Connecting an Optional Headphone
Before connecting an optional headphone to the MobilePro 900c, install a ferrite
core on the connector end of the headphone cable. Installation of the ferrite core on
the headphone cable reduces radio interference when you connect the headphone
to the MobilePro headphone jack. Ferrite cores ship with the MobilePro 900c.
To install the ferrite core, follow the procedure for installing the core on the USB
cable (see the previous section, “Connecting a Device to the USB Port”). The
procedure for installing the ferrite core is the same for both cables.
Performing a Hard Reset
A hard reset restores your MobilePro 900c system to its original shipping
configuration, erasing all information and settings you have entered.
Use a hard reset only when your unit does not respond after doing all of the
following procedures:
1. Install a charged battery.
2. Verify that the battery lock is in the locked position.
3. Connect the unit to an AC power source.
4. Use the soft reset button to reset the system (see “Resetting the
MobilePro” in Chapter 4 of the NEC MobilePro 900c User’s Guide).
Note A soft reset lets you restart the MobilePro operating system while
preserving any saved data.
4

Using the hard reset returns your MobilePro to its
original shipping configuration. All data and applications are erase d from RAM.
All open/unsaved files are lost and all user specific data such as contacts and
tasks are erased.
You can only restore data that has been backed up to your host PC.
If a hard reset is necessary, use the following procedures to perform the reset:
1. Save your data, turn off unit power, and close the display panel.
Disconnect any cable attached to the unit, such as the AC adapter and PC
connect cables.
2. Remove the installed main battery pack (see “Replacing the Main
Battery” in Chapter 2 of the NEC MobilePro 900c User’s Guide).
3. Remove the backup battery (see “Replacing the Backup Battery” in
Appendix A of the NEC MobilePro 900c User’s Guide).
4. Wait a full minute after removing the backup battery. Then reinstall the
backup battery (see “Replacing the Backup Battery” in Appendix A of the
NEC MobilePro 900c User’s Guide).
The hard reset requires that you wait a full minute
before you reinstall the backup battery.
5. Replace the main battery pack (see “Replacing the Main Battery” in
Chapter 2 of the NEC MobilePro 900c User’s Guide).
6. Open the display panel and power on the Mob ilePro 900c.
Note If the system does not power on after reinstalling the batteries, wait
five seconds and then press the power button again.
Copying Files
When copying a file to or from a CompactFlash™ Card or PC Card, be sure to
wait until the copying is done before powering down the MobilePro system. If you
power off before the copying of a file has finished, you lose the copy of the file.
Using the Right Click with Microsoft Viewers
The right click feature does not work with Microsoft viewers.
5

Installing bUSEFUL Backup Plus
The installation of BSQUARE® bUSEFUL™ Backup Plus requires you to answer
YES to confirm the replacement of files (bsqCompress.dll, ParentTopic.bmp,
SeeArrow.bmp).
Using Infrared within Contacts
Using infrared transfer to send and receive a file within Contacts requires the
selection of the “Windows CE Handheld PC” option for each Microsoft
Windows
®
CE .NET system.
®
Selecting Passwords
The Password Properties window in Control Panel displays an option for a screen
saver. This option is not supported. Do not choose this option when it appears after
entering a password and enabling it at powe r on.
Using Word Documents
To use the Word Viewer, open ActiveSync on the host system. To view some
Word documents, you might need to deselect the “Conversion” setting within
ActiveSync as follows:
1. Select the Tools menu in ActiveSync.
2. Choose the Rules tab and click Conversion settings.
3. Deselect the “convert files when synchronized” setting.
Displaying Help for Citrix ICA Client
There is no help file for the Citrix ICA client. You can find and download this file
from http://www.citrix.com/download/.
Changing External Video Features
All “viewers” on the system support manipulation of external video features (for
example, resolution). However, these settings are grayed out and unavailable.
There is no support for this feature in Windows CE .NET.
Getting MobilePro 900c Updates and Documentation
For the latest MobilePro 900c software updates and documentation, go to
http://www.necsam.com/. Select Support. At the Support page, select
Handhelds then select the MobilePro 900c.
Using Windows CE Help
The following table lists discrepancies within the Windows CE help file.
6

Windows CE Help Discrepancies
Topic/Option Discrepancy
Microsoft Excel Viewer
Change Row Height and Column
Width
Microsoft Image Viewer
Locate the Images
Microsoft PowerPoint Viewer
View Notes
Save Show Settings
Remote Connections
Create a new connection on
your device
Connect to a network
Settings
Accessibility
StickyKeys
To change StickeyKeys options
ToggleKeys
SoundSentry
HighContrast
To change HighContrast options
MouseKeys
To turn on MouseKeys
To turn on MouseKeys using
keystrokes
To click by using MouseKeys
To drag by using MouseKeys
To move the mouse pointer using
MouseKeys
Resetting the Device Management
Server
Provisioning the device
Polling the Management Server
Installing Optional Packages
Viewing Installed Packages
Information about Device
Management
Input Panel
Set up your power schemes
Check the power levels of your
system devices
No option is available to change the
parameters.
The menu item name has changed from Locate
the Images to Browse.
A Notes menu is not available within the View
menu.
The settings fail to be saved when requested.
Remote connection option is not available
within the Communication folder.
Icon is not present.
Option is not available since Accessibility is not
present.
Icon is not present.
Option is not available since Device
Management is not present.
Icon is not present.
No tab provided; Passive PM is active.
No tab provided; Passive PM is active.
7

Windows CE Help Discrepancies (cont’d)
Topic/Option Discrepancy
Settings (cont’d)
Bluetooth
Scanning for Bluetooth Devices
Device Authentication
Remove device from trusted list
Making a device active
Windows CE Basics
Opening a Context Menu
Use the Go menu
Transfer a file using infrared
Connect to the Internet
Set up an Automatic Internet
Connection
Set up a proxy server
Enable cookies
Search for an Internet site
View previously visited sites
Stop loading a page
View current page properties
Change home and search page
settings
View a cached page while
disconnected
Adjust settings for cache memory
Select security options
Change the font size
Display a page in a new window
Fit the page to the window
Change the default appearance
of pages
Icon is not present.
Option is not available since Bluetooth is not
present.
This menu sometimes does not appear.
There is no History option available from the menu.
The Infrared Recipient option is not available.
Remote connection option is not available within
the Communication folder.
Option is not available.
Option has changed in format.
Option is not available.
Option is not available.
Option has changed in format.
Option is not available.
Information in this publication is subject to change without notice. NEC, MobilePro, and
Empowered by Innovation are either registered trademarks or trademarks of NEC
Corporation. All other trademarks and registered trademarks are the property of their
respective owners. Copyright ©2004 NEC Solutions (America), Inc. All Rights Reserved.
NEC Solutions (America), Inc.
www.necsam.com
*819-201033-001*
819-201033-001
8
 Loading...