

Page 1

Software Guide
2-1
Page 2

2nd.Edition
1-2004
2-2
Page 3

Software Installation and Configuration Notes
Before setting
z Partition size
Minimum size of the partition can be calculated from the following formula.
1635MB + paging file size + dump file size
1635MB = required for installation
Paging file size (recommendation) = installed memory size x 1.5 Dump
file size = installed memory size + 12MB
.
重要
Paging file size is required to collect debug information (memory dump). In
case paging filesize is below recommendation, there might be a case that
correct debug information (memory dump) can not be available.
For example, when installation size is 1024MB, minimum partition size is as follows.
1635MB + (1024MB × 1.5) + (1024MB + 12MB) = 4207MB
When partition size is smaller than “required size for installation + paging file size”,
please enlarge partition or add disks
Even if enough dump file size is not available, allocation of it to several disks can be
the solution.
1. Set up required size + paging file size when installation
2. Set up debug information (for dump file size) to other disk. Please refer to the
later mentioned set up method for failure treatment.
(If enough space to write dump file size is not available in the disk, add new disk
after installing “required size for installation + paging file size”.)
2-3
Page 4

z
Preparation for set up
z
Before setting up, please prepare following disk and manual.
□ 64bit version Microsoft Windows Server 2003 Enterprise Edition CD-ROM
or 64 bit version Microsoft Windows Server 2003 Datacenter Edition CD-ROM
□ EXPRESSBUILDER CD-ROM
□ Users guide
BIOS Setting
Before you install the Windows 2003 Server, confirm the BIOS setting.
Regarding the System Interruption mode
Confirm the BIOS setting of the system interruption mode corresponding to the OS type.
Regarding the BIOS setting, refer to the Hardware Guide;
"System Hardware -> Shrink total number of interrupt vectors".
If the setting is not correct, set the correct setting as follows.
Type of OS’s Value
--------------------------------------------------- -----Windows Server 2003 Datacenter Edition OFF
Windows Server 2003 Enterprise Edition ON
PHow to install
1. Power the system on
2. Set up DVD-ROM drive in Express server “64bit version Microsoft Windows Server
2003 Enterprise Edition CD-ROM or 64bit version Microsoft Windows Server 2003
Datacenter Edition”
3. After setting up “64bit version Microsoft Windows Server 2003 Enterprise Edition CDROM or 64bit version Microsoft Windows Server 2003 Datacenter Edition” in DVDROM drive, please reset. (Press <Ctl> + <Alt> + <Delete>) or Power OFF/ON and
reboot Express server.
If you want to re-install, follow the below procedure and delete the previous
entry from EFI Boot manager, the go to step 4.
(1)Go to EFI Boot manager, select “Boot Option maintenance menu", press
<Enter>
(2)Go to Main menu, select "Delete Boot Option(S)", press <Enter>
(3)Select "Windows Server 2003, Enterprise" or "Windows Server 2003,
Datacenter", press <Enter>
(4)Press <Y> when "Delete selected Boot Option[Y-Yes, N-No] is shown,
(5)Press <Y> when "Are you sure (Y or N)? " is shown.
(6)G to Boot Option(S), select "Exit", press <Enter>
(7)Press <Y> when "Save NVRAM?" shown.
(8)Go to Main Menu and select "Exit"
2-4
Page 5

4. Go to EFI Boot Manager, select "EFI Shell [Built-in]", press <Enter>.
ppy
Shell screen will be shown.
5. Check the
Master)/CDROM(Entry0)
"X" is "0", follow go to 6.
IF
"X" number in fsX: fsX:Acpi(PNP0A03,0)/Pci(1F|1)/Ata(Primary,
6. Input
"fs0:」after Shell>, press <Enter>
Shell>fs0:
Command prompt will change to fs0:\
7. Input 「setupldr」 after fs0:\>, press <Enter>
fs0:\>setupldr
When a SCSI/RAID adapter needs a driver other than OS standard driver, Please use the driver diskette
appended to the adapter, or the driver diskette which copied the driver files of EXPRESSBUILDER inclusion,
and execute OS installation in the following procedures.
For details, refer to the document appended to the adapter, or included on EXPRESSBUILDER.
(1) Press <F6> when the following message appears on the screen.
"Press F6 if you need to install..."
(2) Press <S> to specify an additional device when the following message appears on the screen.
Setup could not determine the type of one or more mass storage devices
installed in your system, or you have chosen to manually specify an adapter.
Currently, Setup will load support for the following mass storage devices(s):
:
:
(3) Insert the driver diskette and press <Enter> when the following message appears on the
screen.
Manufacturer-supplied hardware support disk
Please insert the disk labeled
into Drive A:
* Press ENTER when ready.
(4) Select the appropriate driver from the list by arrow key. Press <Enter> to proceed.
(5) Press <S> when the following message appears on the screen. And advance the OS
installation according to message of the screen.
The driver you provided seems to be older than the Windows
default driver.
:
:
S=Use the driver on flo
ENTER=Use the default Windows driver
(6) Press <Enter> when the reading from the Driver FD device is finalized, continue setup.
2-5
Page 6
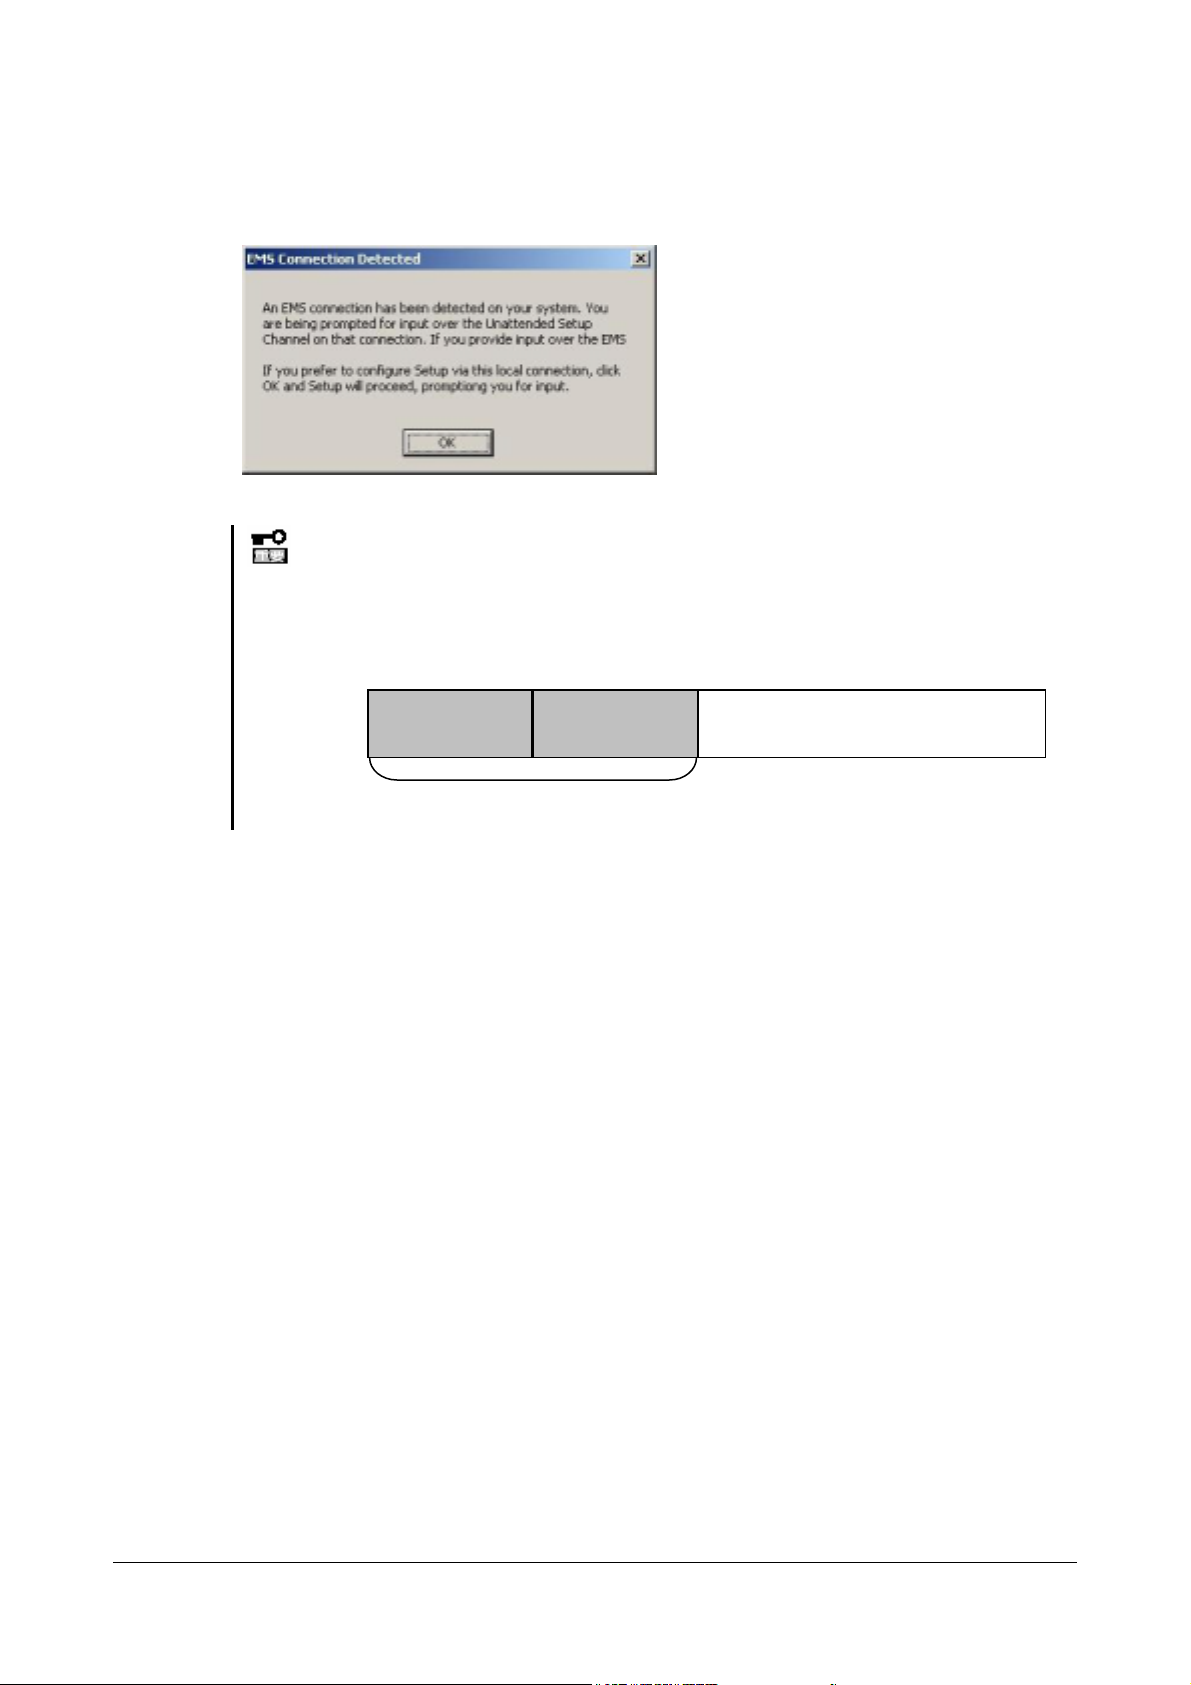
When following dialog is shown, press [OK] and continue
8. Continue set up following the message and complete installation.
When following message is shown, press [Enter] and continue.
"System partition can not be found"
At the initial set up, Hard disk configuration is as follows. Please do not delete
"Partition 1[FAT] " and "Partition 2[reserved]".
Partition1
Do not delete
Partition2
When install is completed, go to "Windows Server 2003 Hot fix install"
Open area
2-6
Page 7

Installation and setup of the drivers
This section describes installation and setup of the standard devices' drivers.
After completion of the driver setup, go to "Setup of obstacle processing" section.
The device developed by NEC
Installation of the driver for the device developed by NEC for Express5800 1320Xd/1160Xd/1080Xd is
executed from "Software Setup Menu" of NEC EXPRESSBUILDER.
1. Insert the NEC EXPRESSBUILDER CD-ROM in the CD-ROM drive.
The NEC EXPRESSBUILDER Master Control Menu appears.
2. Select the “Setup”.
The Software Setup Menu appears.
3. Click “start up the installer” of the device developed by NEC for Express5800
1320Xd/1160Xd/1080Xd to run the set up program.
The [Download] dialog box appears.
4. Click [Open].
5. When the [installation completed] dialog appears, click [OK].
The driver installation for devices developed by NEC is completed.
Other devices
Installation and setup of the driver for other devices, please refer to the document attached to the device, and
provided in the NEC EXPRESSBUILDER CD-ROM.
Be sure to update a driver according to the document, although Windows standard driver will
be installed automatically in these devices. System may become unstable unless the driver has
not updated.
The standard devices which are listed below, use Windows standard driver.
Network device (Additional Setup)
Set up link speed and Duplex mode after installing a network driver.
Floppy disk drive
・
DVD-ROM drive (ATAPI)
・
USB
・
COM port
・
Mouse
・
Keyboard
・
System devices
・
If you deleted the network driver, reboot the system. Then, network drivers will be installed
automatically.
· We recommend you to add a [network monitor] from [Add/Remove Windows Components] of
a control panel. The network monitor can supervise the message sending/receiving frame (or
packet) of a computer on which it is installed. It is a tool effective in the analysis of a network
obstacle etc.
· Refer to the section of "Setup of obstacle processing" next to this part.
· Here is the procedure, provided it is indicated in the described way.
- Select "taskbar's properties" and "Start Menu" tab, click "Classic Start menu".
- Select "explorer's folder options", click "Show common tasks in folders".
- Select “display’s properties” and “Setting” tab, select “Windows Classic style” from
“windows and buttons” pull-down menu.
2-7
Page 8
1. Click Start menu, Click [Settings] and Click
[Network Connections].
The [Network Connections] dialog box
appears.
2. Right-click [Local Area Connection] and click
[Properties] from pop-up menu.
The [Local Area Connection Properties]
dialog box appears.
3. Click [Configure].
The property dialog box for network adapter
appears.
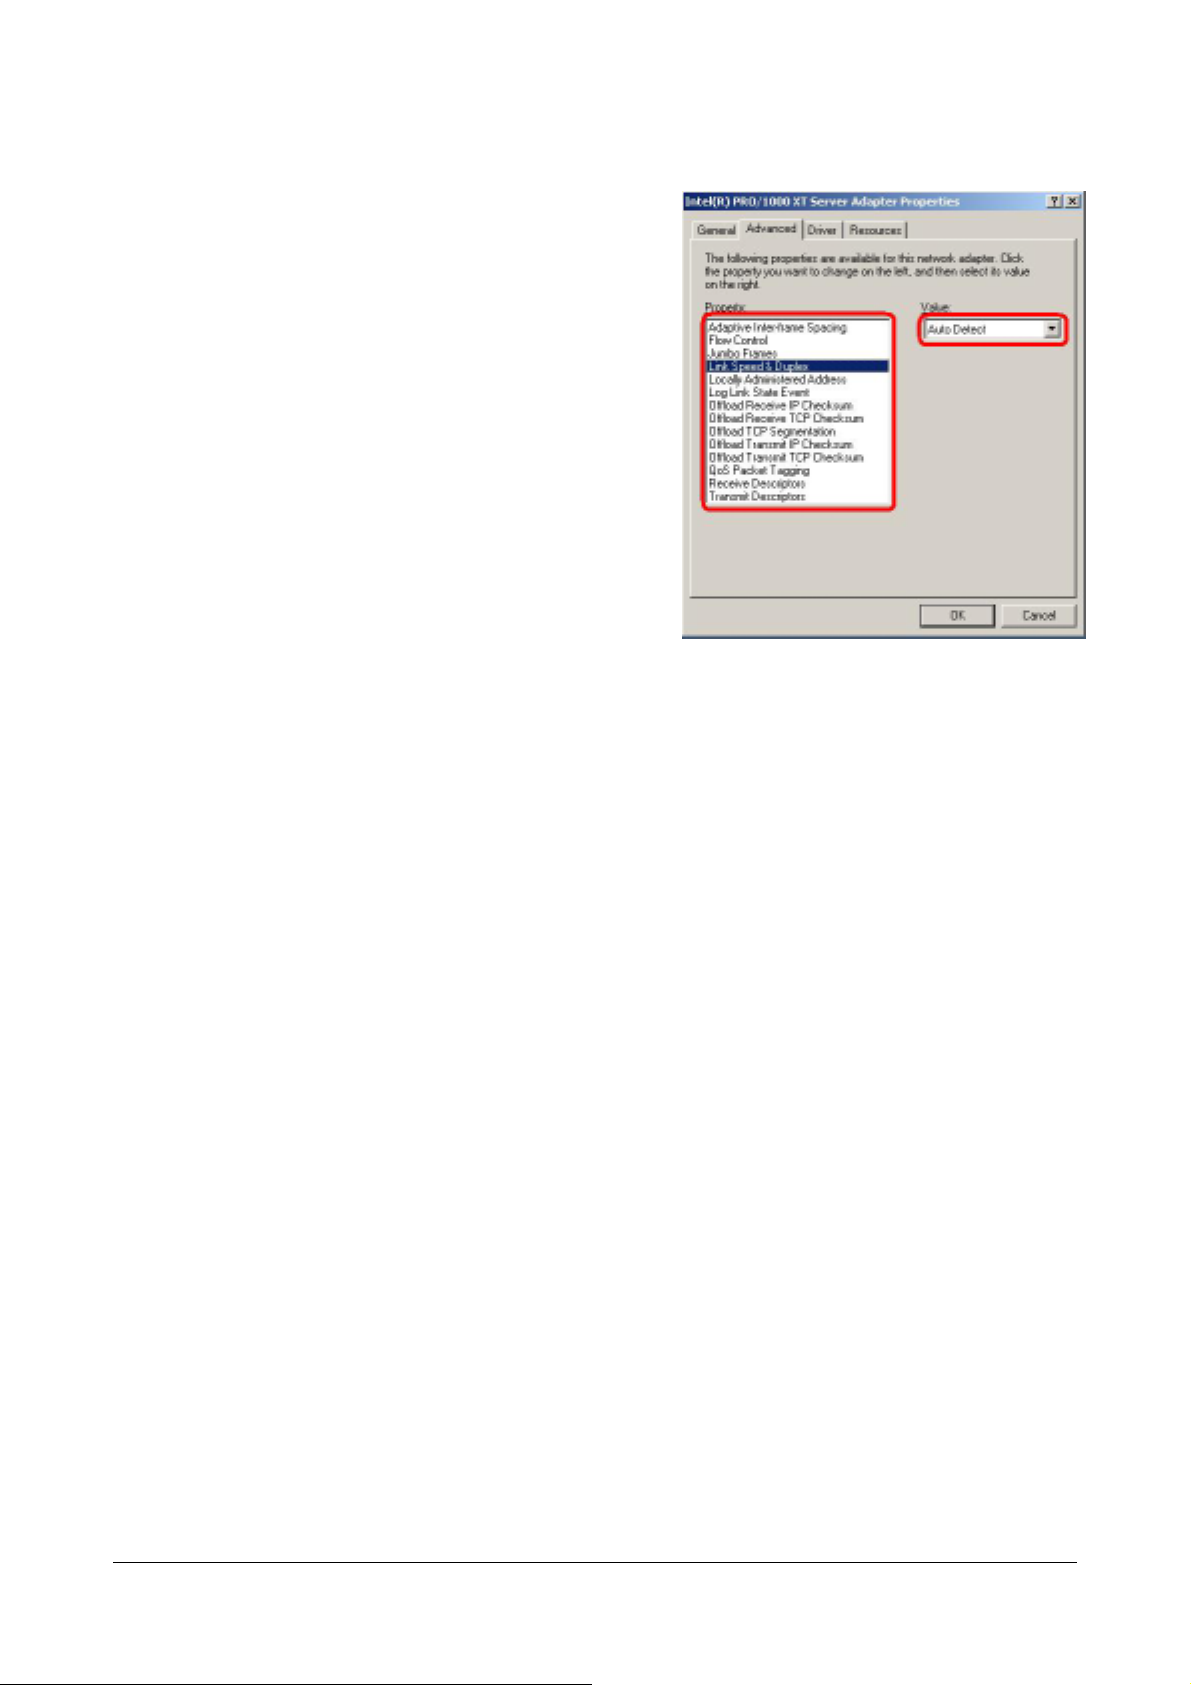
4. Select [Advanced] tab and set the [Link Speed
& Duplex] value the same as the value
specified for HUB.
5. Click [OK] on the property dialog box for
network adapter.
The network driver setup is completed.
2-8
Page 9

Setup for the trouble shooting
In order to recover the system from the unexpected trouble, please finish the following
setup in advance. When you finish the following setup, please go on with the section
重要.
重要.
of "Installation of Management utility".
Here is the procedure, provided it is indicated in the described way.
- Select "taskbar's properties" and "Start Menu" tab, click "Classic Start menu".
- Select "explorer's folder options", click "Show common tasks in folders".
- Select “display’s properties” and “Setting” tab, select “Windows Classic style”
from “windows and buttons” pull-down menu.
Setup of the Backup Tool
The periodical backup by the OS standard backup tool (Ntbackup) or other backup
tools on market is highly recommended. Please send your inquiries to the shop where
you bought the tool or the service company for the details about the backup tool which
could be used in this equipment.
Setup of Memory Dump (Information for Debug)
This setup is for collecting the Memory Dump (Information for Debug) of the
Express server.
Notice for the Memory Dump
z The collection of Memory Dump could be done only by the workers of the
service company. Please set up the memory dump only yourself.
z After the setup introduced here, if the machine is rebooted to keep the
memory dump while trouble occurs, sometimes the message of
insufficient virtual memory appears. Please go on with your reboot. After
the reboot, sometimes the memory dump could be kept correctly.
z
It is necessary to reset the memory dump when the memory is enhanced.
2-9
Page 10

Here is the procedure of Memory Dump
Setup.
1. Click the "Control Panel" from the
start menu.
The "Control Panel" window appears.
2. Double click the "System" icon in the
window of "Control Panel". The
window of "System Property"
appears.
3. Click the "Detailed Setup" tag.
4. Click the "Setup" tag of the "Start and
Recovery" box.
5. Enter the debug information into the
text box for text input, and click "OK".
For example, if you want to record
your information into the file of
MEMORY.DMP under D drive, input
D:¥MEMORY.DMP
While the memory was enhanced,
select "None" in the box for text input.
After clicking "OK", please set the
"Kernel Memory Dump" again.
z Please specify the "Debug Information Record" to the "Kernel Memory Dump".
z Please specify the drive whose free space is at least 12MB more than the memory.
z Provided the memory is enhanced, the size of collected debugs information (Memory
Dump) changes. Please confirm the free space where the debug information will be
recorded in advance.
z The whole memory dump could not be selected if the equipped memory size
becomes larger than 2GB.
2-10
Page 11

6. Click the "Setup" tag of the
"Performance" box. The window of
"Performance Option" appears.
7. Click the "Detailed Setup" tag of the
"Performance Option" window.
8. Click the "Change" tag of the "Virtual
Memory" box.
2-11
Page 12

9. Change the "Initial Value" larger than
the recommended value in the
"Paging File Size of the Selected
Drive", and Click the "Setup" tag.
Please set the "Initial Value" of the
paging file to about 1.5 times of the
equipped memory.
z Please be sure to create the
paging file in the OS partition.
z Correct information might not
be collected if the initial size is
set smaller than the
recommended value.
z Please set the paging file again
according to the new memory
capacity when memory is
enhanced.
z Provided the paging file is set
again, sometimes it is created in the partition other than the OS partition. Please
change the drive on which paging file is created at will.
10. Click "OK".
Depending on the modification of the setup, message for system reboot appears.
Please reboot your system according to the message.
Memory Dump
When the system stalls unexpectedly, you can dump system memory as follows:
How to invoke the dump command on the SP console:
iSPyz:---> dp <ENTER>
Refer to the Hardware Guide "SP command reference, DP (System Dump)"
about the details of the command;
2-12
Page 13

Dr. Watson
“Dr Watson” is the debugger for Application error. When an application error is detected, it diagnoses the
EXPRESS server and logs the diagnosis information. To extract the diagnosis information, set up as follows.
Dr. Watson is set up when you buy EXPRESS server or re-set up the EXPRESS server.
1. Click [Run.] in Start menu.
2. Input “drwtsn32.exe” in the name box.
3. Specify the location where the diagnosis massages will be saved in [Log File Path] (L).
Network Path can not be specified.
Specify the path on the local computer.
4. Specify the location where the Crash Dump File will be saved.
Crash Dump File is a binary file readable for Windows Debugger.
5. Set “ON” for following check box in [Option] box
z Dump Symbol Table
z Dump All Thread Contexts
z Append to Existing Log File
z Create Crash Dump File
6. Click [OK].
2-13
Page 14

Remote Desktop
Following is the explanation for the validation of the remote desktop connection and the connection method
from the client.
The validation of remote desktop connection on EXPRESS server
Set as follows.
1. Select [Control Panel] in Start menu. Then Control Panel Window is displayed.
2. Double Click [System] in the window.
3. Click [Remote] tab.
4. Check [Allow users to connect remotely to this computer].
2-14
Page 15

5. When the following message is displayed, Click [OK] and set the password of the user who executes the
remote desktop connection.
2-15
Page 16

Sharing Setup Folder of the remote client
To execute the remote desktop connection from Windows95, Windows 98, Windows NT 4.0 or Windows 2000,
the installation of Remote Desktop Client is needed.
The client software is available from the following folder on the EXPRESS server.
%SystemRoot%¥System32¥Clients¥Tsclient¥win32
In order to install the client easily to other computer, make a shared folder on the server with following procedure.
1. Move to the below folder by Window Explorer.
%SystemRoot%¥System32¥Clients¥Tsclient
Mostly, “%SystemRoot%” is “C:¥Windows” folder.
2. Click “Win32” folder by right button and click [Sharing and Security].
3. Click [Sharing this folder].
4. Click [OK].
2-16
Page 17

Client of Remote Desktop connection feature
”Remote Desktop connection feature” have been installed as default at Windows XP and
all version of Windows Server 2003.
The installation will be started by connecting above feature when you use Microsoft
Windows 95, Microsoft Windows 98, Microsoft Windows Millennium Edition (Me), Microsoft
Windows NT 4.0 and Microsoft Windows 2000.
Connect to above feature. The share name is “\\Server‘s_name\TSC Client”.
“\\Server’s_name” should be set to the computer’s name which is set up the Remote
Desktop connection feature. There is no needed to recognize the Capital letters and Small
letters.
Installation
Install the client of Remote Desktop connection feature by following procedure.
1. Connect to “\\Server’s_name\TSClient” which is made by above.
If it is not set the password for administrator of Express server yet, set the password
at first for a security.
At the case of the Headless installation, the password has to be set.
2. Double click the “win32\Setup.exe”.
[Remote desktop connect -InstallShield wizard] dialog box is displayed.
Clock the “Next”.
2-17
Page 18

3. Check the [Accept the license Agreement], and click the [Next]
4. Type the [User name] and [Organization] at [User Information] dialog box. And click
[Next].
2-18
5.
Page 19

Click [Install] when the [completion of program installation] is displayed.
2-19
Page 20

How to connect to Server from the Remote Desktop Client
This is displayed.
1. Select [Program] -> [Accessories] -> [Communications] -> [Remote Desktop Connection]
from startup menu.
2. [Remote Desktop Connection] is started.
IP address or computer name should be typed.
Recovery of System
The Recovery console should be used for system repair when the system cannot to
bootup by something. But please note that this procedure is suggested only for power
users who have a lot of knowledge or system administrators.
Please refer to the online manuals for details.
2-20
Page 21

Trouble shooting
When the Windows Server 2003 does not work well, please check the following check list
before you will ask maintainer to repair the PC. When the PC’s
matched to items, obey to the confirmation and the transactions.
But it does not work well, please call maintenance service after the display messages
should be written down.
A hard disk drive cannot be initialized.
The Windows DiskManager of Windows Server 2003 have been stalled.
□ Have you tried to initialize the plural hard disk drives?
➞ Windows Disk Manager is stalled when the plural hard disk drives are
initialized in same time from Windows Disk Manager of Windows Server 2003.
Please initialize an unused hard disk drive in
Cannot recognized in network.
□ The network cable is connected?
➞ Please certainly connect the network cable to the back panel of Express
server. And please also confirm that the network cable is
network interface standardization.
□ Have you finished setup the protocols and services?
➞ Please install the network drives this is
And please confirm the setting for a protocol of TPC/IP etc. and
services which are certainly set.
Cannot collect the dump when the memory have been attached.
□ Have the memory dump setting been reconfigured?
➞ Please reconfigure the memory dump setting referring to “memory dump”
section of Software guide.
individually.
characteristic for Express Server.
condition has been
conformed to the
various
2-21
Page 22

NEC EXPRESSBUILDER
The CD-ROM that comes with your server contains a setup utility called "NEC EXPRESSBUILDER."
When you have first installed the server or append features to the server, use the NEC EXPRESSBUILDER
to set up your server.
The major functions of the NEC EXPRESSBUILDER are:
To install the utilities.
It installs the management utilities.
To install device drivers.
To read the online documents.
It opens the online document files (".pdf" files or “.html” files).
Starting NEC EXPRESSBUILDER
Insert NEC EXPRESSBUILDER CD-ROM into the CD-ROM drive.
Master Control Menu appears on the screen automatically. If the CD-ROM Autorun function is invalid in
your system, open “index.html” in the CD-ROM directly.
NOTES:
Master Control Menu requires Microsoft Windows98 SE (or later) or Windows
NT 4.0 (or later).
To read documents (HTML and PDF files) in the NEC EXPRESSBUILDER CD-
ROM, the HTML browser (Microsoft Internet Explorer Version 5.0 (or later) or
Netscape Communicator Version 4.0 (or later)), and Adobe Acrobat Reader
Version 5.05 (or later) are required in your system.
2-22
Page 23

(c)
NEC Corporation 2003-2004
To use Master Control Menu, click [Online Document], [Setup] or [Quit]. These items are as follows:
z Online Document
You can refer to installation guides and online document on each utility.
z Setup
You can install utilities.
For installation procedure and detailed explanations on each utility, please refer to the online document.
z Quit
Master Control is closed.
IMPORTANT: Do not remove the NEC EXPRESSBUILDER CD-ROM while NEC
EXPRESSBUILDER is running.
2-23
Page 24

Troubleshooting problems
If NEC EXPRESSBUILDER does not operate as expected, read and check the following:
The master control menu fails to appear:
(1) Is your system Windows NT 4.0 or later, or Windows 98 SE or later?
→ The Master Control menu is supported by Windows NT 4.0 or later and Windows 98 SE or
later.
(2)Is
Shift pressed?
→ Setting the CD-ROM with Shift pressed down cancels the Autorun feature.
(3) Is the system in the proper state?
→ The menu may not appear depending on the system registry setting or the timing to set the
CD-ROM. In such a case, start the Explorer and open ”index.html” in the CD-ROM.
(4)Did you install the HTML browser on your server?
→Master Control Menu is “.html” file. Please install the HTML browser on
Windows in advance.
(5) Is “.html files or .htm files” linked to the HTML browser correctly?
→ Make sure that “.html files or .htm files” is linked to the HTML browser
correctly as the following way (e.g. Internet Explorer).
1. Open Internet Explorer
2. Click [tools] tab. Then Tools menu opens. Select [Internet options] item.
Then “Internet Options“ window is displayed.
3. Make sure that “Internet Explorer should check to see whether is the
default browser” is checked.
Cannot read the online documents
Did you install Adobe Acrobat Reader to the server or client computers?
2-24
→ Some of online documents are “.PDF” files. Please install Adobe Acrobat Reader to
the server or client computers in advance. You can install Adobe Acrobat Reader
from NEC EXPRESSBUILDER.
Insert the NEC EXPRESSBUILDER CD-ROM into the CD-ROM drive of to the
server or client computers. Master Control Menu is displayed. Click “Setup”. Then
Software Setup Menu is displayed. Select “Adobe Acrobat Reader”.
NOTE: As of 2004/1, Adobe Acrobat Reader has not supported Windows Server
2003 yet. If you install it on Windows 2003 Server, it is not guarantee in action.
Difficult to see NEC EXPRESSBUILDER menu image
Is the number of colors displayed on monitor 256 or more?
→ If the number of colors displayed on monitor is less than 256, it is difficult to see
images on monitor. Please change to the color settings or change a monitor which
you can set the number of the colors displayed on to 256 or more.
Page 25

NEC ESMPRO Agent (Windows)
NEC ESMPRO lets a system administrator manage remote servers across a network. NEC ESMPRO
monitors server hardware and software configurations, failures, and performance. With log data collected by
NEC ESMPRO, a system administrator can track long-term and short-term performance, monitor server
usage, create graphs to record trends, and check server failure rates. The administrator can use the
information collected to create more efficient data routing procedures and optimize server usage.
For installation procedure and detailed explanations on NEC ESMPRO, refer to the online
document in the NEC EXPRESSBUILDER CD-ROM.
IMPORTANT:
"SNMP system ID" should be set before installation of NEC ESMPRO Agent. It is used for automatic
discovery of NEC ESMPRO Manager and integration with SystemGlobe GlobalMaster. The SG (SP
Settings) in a maintenance manual explains how to set it.
SystemGlobe GlobalMaster Agent
“SystemGlobe GlobalMaster Agent” is management software for partition. The partition installed this
software can be controlled by management PC. (The management PC has to be installed “SystemGlobe
GlobalMaster Manager”.)
For installation procedure and detailed explanations on “SystemGlobe GlobalMaster Agent”, refer
to the online document in the NEC EXPRESSBUILDER CD-ROM.
NEC ESMPRO Manager
NEC ESMPRO lets a system administrator manage remote servers across a network. NEC ESMPRO
monitors server hardware and software configurations, failures, and performance. With log data collected by
NEC ESMPRO, a system administrator can track long-term and short-term performance, monitor server
usage, create graphs to record trends, and check server failure rates. The administrator can use the
information collected to create more efficient data routing procedures and optimize server usage.
For installation procedure and detailed explanations on NEC ESMPRO, refer to the online
document in the NEC EXPRESSBUILDER CD-ROM.
In use of NEC ESMPRO on this system, please note the followings in addition to the notes in the online
document.
About the Memory Bank
In DataViewer, [Module Information] on "Memory Bank" shows that the total size of memory mounted
in CELL as one module.
In case one CELL mounts 32GB or more memories, [Module Size] shows "0KB." and [Bank Size] shows
the sum of each [Module size].
About the power supply information
Unit Status Information, which is displayed on [ESMPRO]-[Enclosure]-[PowerSupply]-[Main chassis] of
2-25
Page 26

DataViewer, corresponds with DPS in the following cabinet:
Unit Name Chassis
power supply 0-5, 8-13 Main Cabinet
power supply 32-37, 40-45 IO Expansion Cabinet
*Information on non-mounted DPS is not displayed.
About a setting of temperature and fan monitoring
Temperature and fan monitoring, [ESMPRO]-[Enclosure]-[Temperature] or [Fan] of DataViewer, return
to the default setting of being checked on the check box when a system is rebooted with the setting
cleared.
SystemGlobe GlobalMaster Manager
“SystemGlobe GlobalMaster Manager” is management software for management PC. The management PC
installed this software can control partition. (The partition have to be installed “SystemGlobe GlobalMaster
Agent”.)
For installation procedure and detailed explanations on “SystemGlobe GlobalMaster Manager”,
refer to the online document in the NEC EXPRESSBUILDER CD-ROM.
2-26
 Loading...