

Page 1
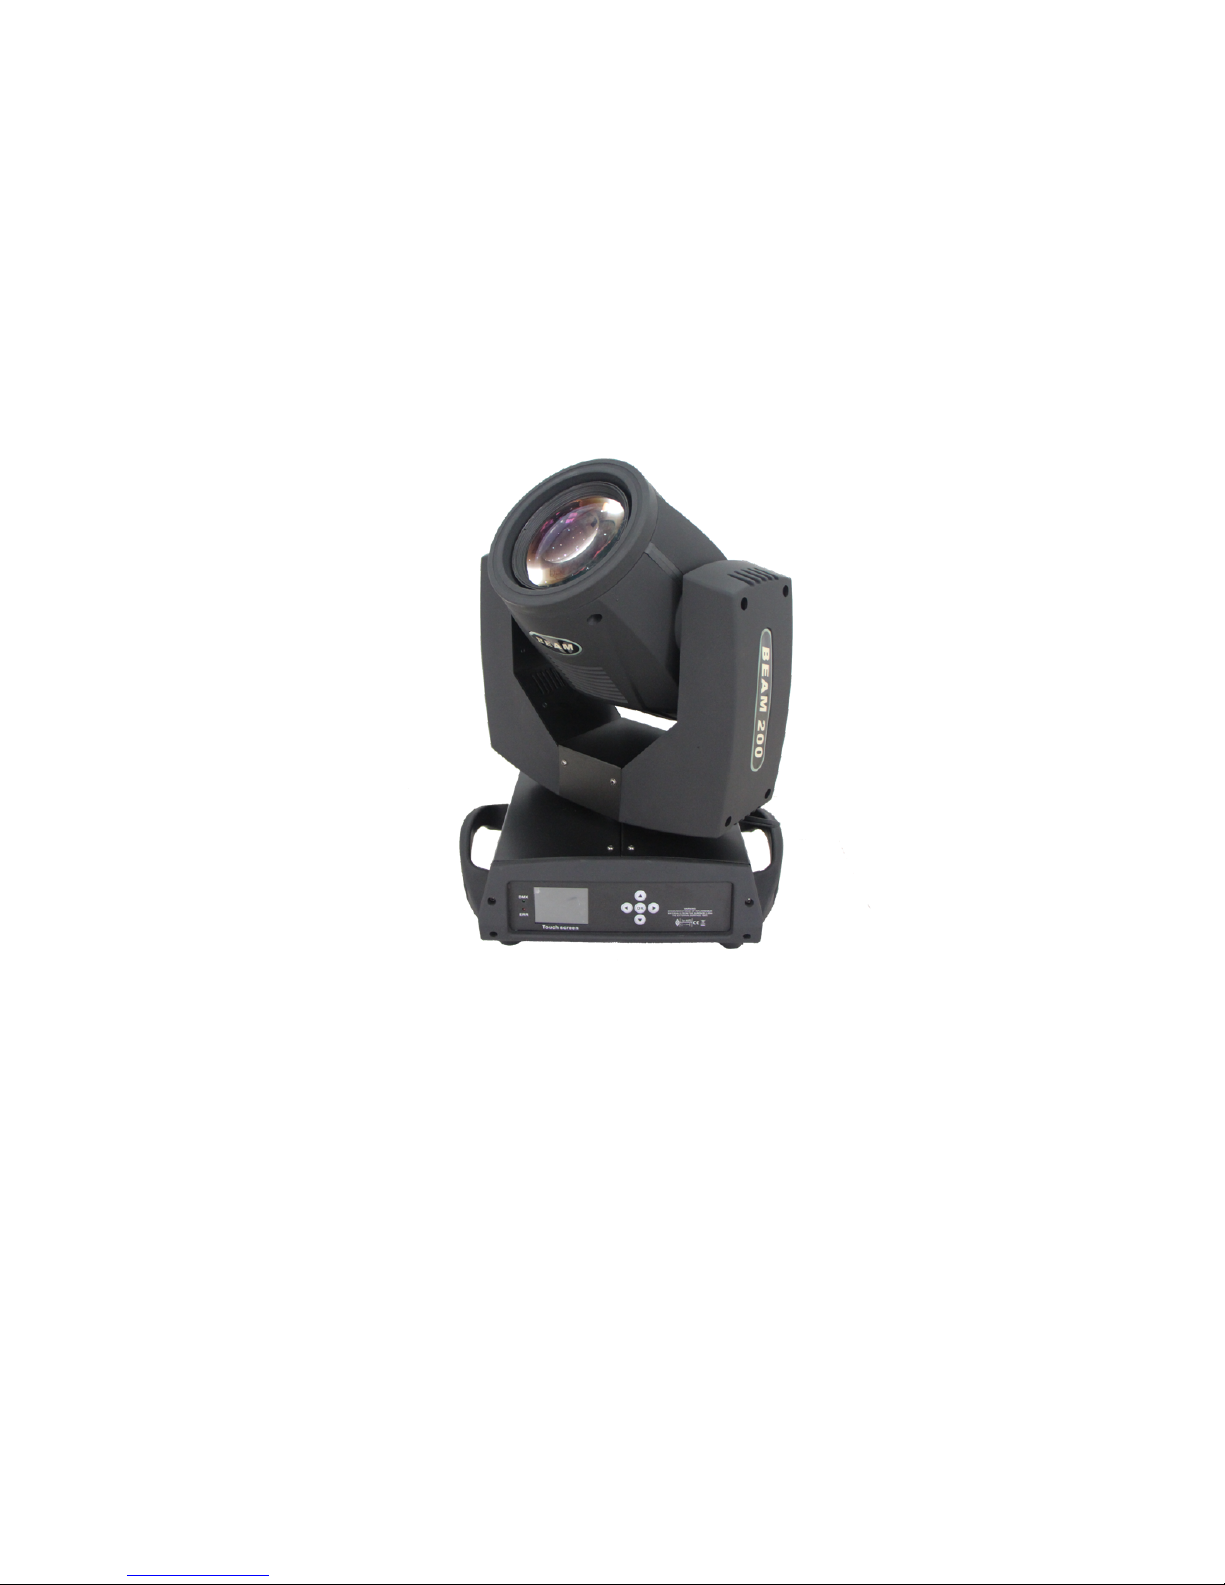
200W Beam Moving Head
User Manual
Please Read Over This Manual Before Operating The Light Fixture
Page 2
Please read this user manual carefully, and check every instruction and operation
requirements.
- Make sure the installation, operation, transportation, warehouse inventory and others are
made by the qualified mount guard staffs;
- Observe whether there is damage of the products in transportation, please immediately
contact with your suppliers, DON NOT use in electricity.
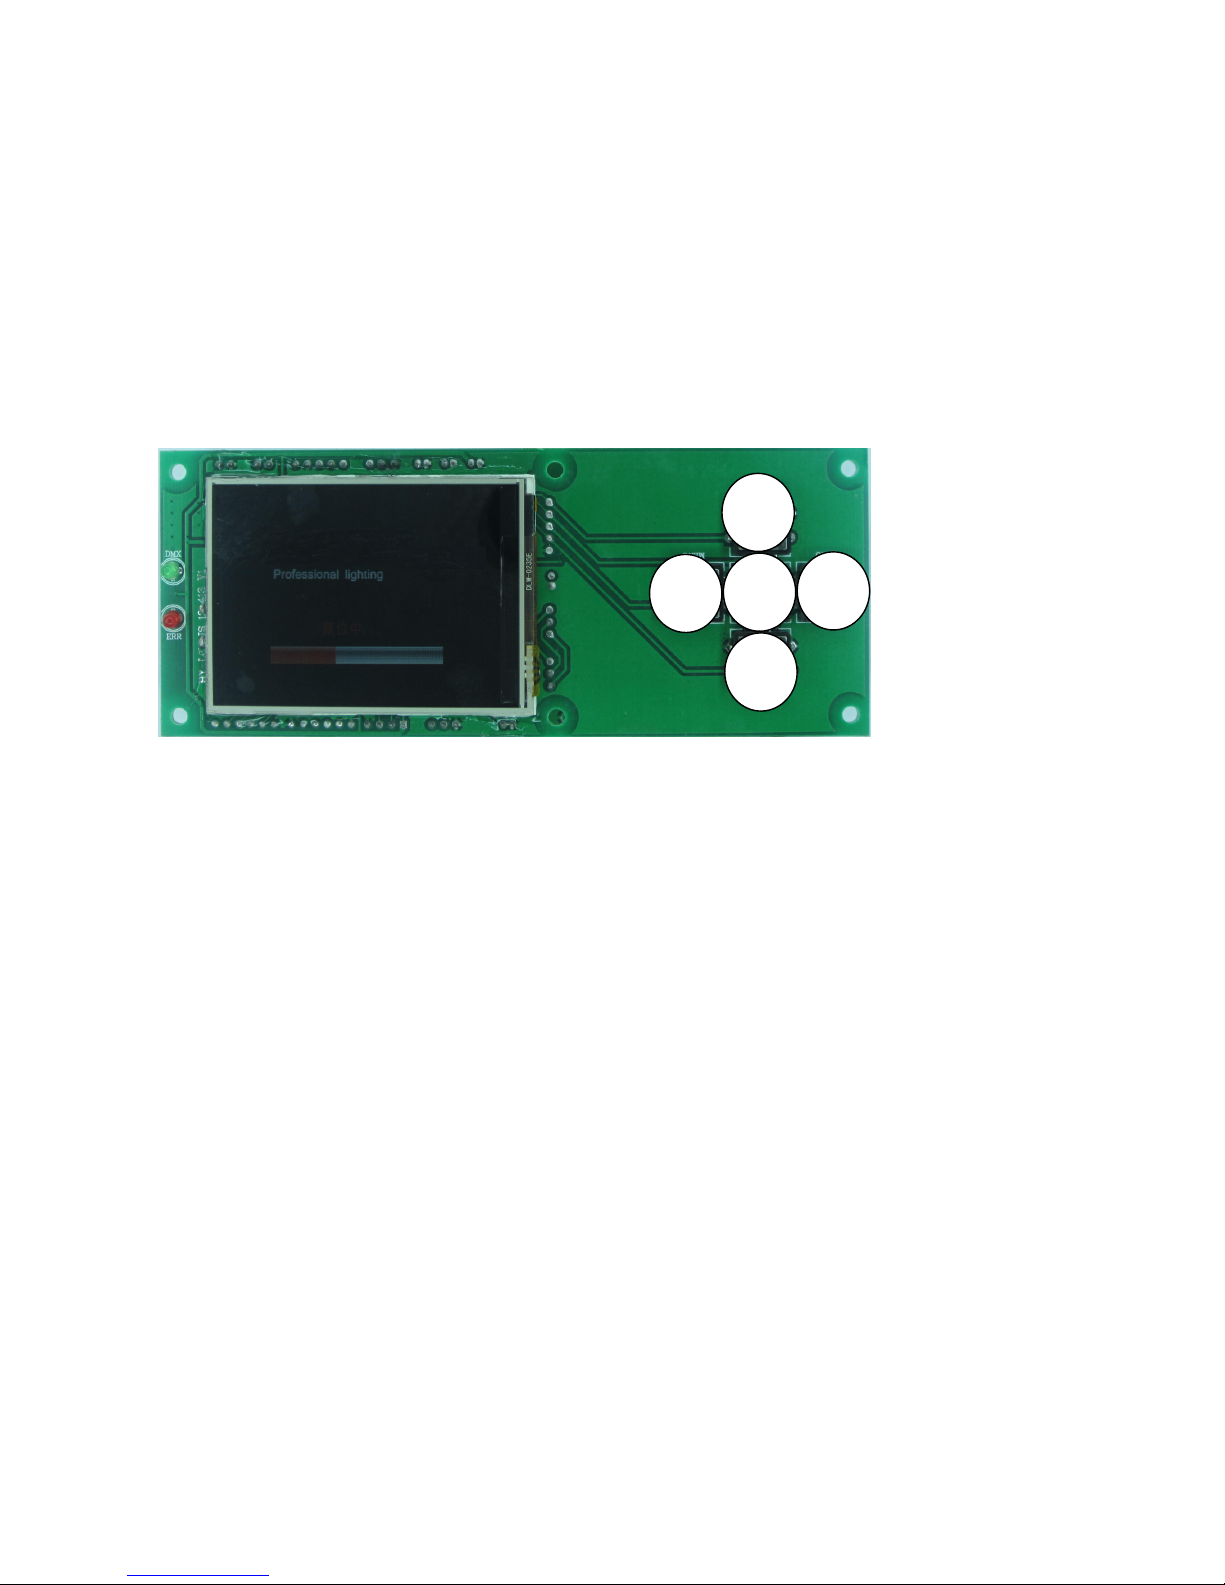
1. Button Instruction
The function of “L” (Left) and “R” (Right) is the same:
Back to last interface
“Up”、“Down” button
Choose、edit
“OK” button :
Executive function、 start editing、 exit editing
Take the "modify DMX address code" as an example, show the use of button as below:
1. If the current interface is not the main one, press the "Left" button (one or multiple) can
get back to the main interface
2. In the main interface, press the "Up" key or "Down" button to select the "Settings" button
3. Press the "OK" button, enter the "Settings" interface
4. In the "Settings" interface, press the "Up" button or "Down" button to select "DMX
address"
5. Press the "OK" button to enter edit state
6. Press the "Up" button or "Down" button to modify the DMX address code
7. Press the "OK" button to exit editing state
If use the touch screen, the process is more convenient.
1. In the main window touch "Settings" button to enter the "Settings" interface
2. It is the same with 4 ~ 7 steps (can use the true buttons, also can use the touch button),
no longer talk about them in details.
OK
Down
Up
L
R
Page 3
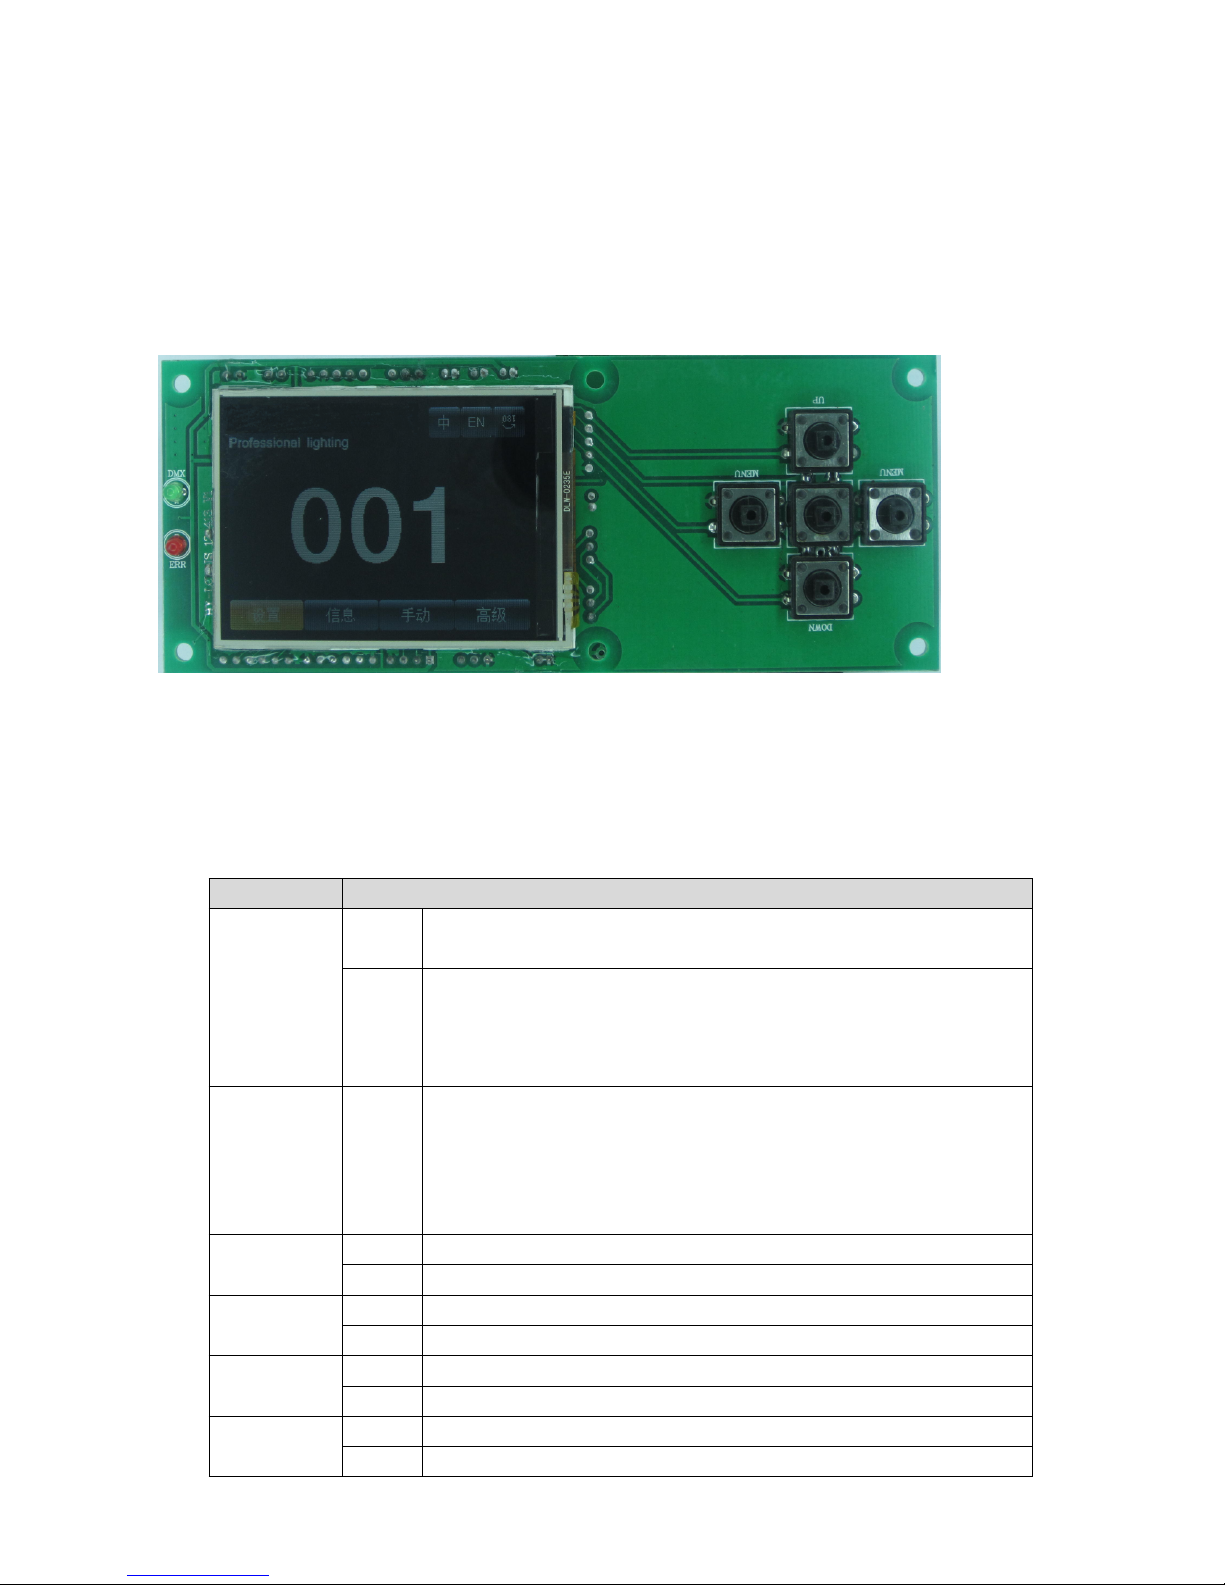
2. Interface Instruction
2.1.Main Interface
The 3 top right buttons are used for language switching and screen rotation.
The corresponding interface instruction of the 4 bottom buttons is as below.
2.2.Setting Interface
Option Instruction
Operation
Mode
DMX
Slave state:Receive the DMX signal from controller or the
host one
Auto
Master state:Auto run, and send DMX signal to slave one
Notice: If the lamp is off before, it can’t light the lamp by
itself. If you need the observe the lamp effect, please light
the lamp firs, then enter the auto state.
DMX
address
1~512Press the "OK" button to enter edit state. And it chosen the
hundred position, press the "Up" and "Down" button to
change address code. Press "OK" button once again to
select ten position editing. Click "OK" button twice again to
select the unit editing. Click again exit editing state.
CH mode 16 CH17~20 no function
20 CH17~20 control the speed(See the channel table)
X inversion Off
On
Y inversion Off
On
XY
exchange
Off
On Exchange XY channels(Included fine adjustment)
Page 4

2.3.Information Interface
Option Instruction
Software version Current software version
Total usage time Total usage time is accurate to minutes
Usage time of this
time
Usage time of this time is accurate to minutes
DMX channel value Enter into the son interface from this, shows the numerical
and percentage channel value for check
System error record
If the red ERR light shine, it means the light has operation
error, the details can be view in son interface. After the
check, can click "OK" button, the error record will empty
Note: Sometimes it's not really the installation problem of
hall or optocoupler, but the motor line are reversed.
2.4.Manual Control Interface
The interface is used to control the current light, not only does not belongs to the slave
state (don’t receive DMX signal), but also does not belong to the master state (don’t
send DMX signal).
Option Instruction
Reset
Press the “OK” button, see the confirmation dialog box,
click" OK "button again, enter reset interface, all motor
reset
Color wheel 0~255
Press the "OK" button to enter edit state. And it chosen
the hundred position, press the "Up" and "Down" button to
change address code. Press "OK" button once again to
select ten position editing. Click "OK" button twice again
…… 0~255
Gobo speed 0~255
XY coder On Use the coder(optocoupler) to judge whether out of step,
and correct position automatically
Off Don’t use the coder( optocoupler ) to correct position
NO DMX
signal
RetainAccording to the original state to continue running
Reset Motors return, stop running
Screen
protection
On No operation for 30 seconds, the backlight will be off
Off The backlight will be on all the time
Lamp on Off After power on reset directly, bulb doesn’t light up(need to
use the menu or controller to manual light bulb)
On
After power on, bubble light automatically, and to wait on
the bulb light successfully, then reset.
Default
Settings
Click "OK" button, see the confirmation dialog box, click
"OK" button again to recover default Settings
Page 5

to select the unit editing. Click again exit editing state.
Lamp
control
On
Off
2.5.Advanced Interface
The password is "up and down up and down". Operation process is: press the "Up" key
(appear first "*"), click again "Down" key (appear the second "*"), then press the "Up" key
(appear third "*"), click again "Down" key (appear fourth "*"), and press the "ok" button to
verify password.
Option Instruction
screen calibration
Into the calibration interface, according to cross cursor
indication to touch the corresponding position, if four position
to receive the correct data, then complete calibration and
keep calibration data.
If calibration fail, this process will continue cycle down, can
by press the "OK" button at any time to stop calibration
Reset calibration
Enter the son interface, can adjust the X, Y motor reset
position, to make up for the hardware installation error.
Be different from the address code and channel value, reset
calibration does not support unit, ten, hundred separate
editing, also does not support long press, and must be
calibrated step by step as 1 for unit.
Note: please do not do reset calibration when the motor is
running! If the motors are running, please reset calibrate after
the motors stop
When necessary, please perform a reset operation before
reset calibration.
CHANNEL
CHANNEL MODE
16 20
1 COLOUR WHEEL COLOUR WHEEL
2 STOP/STROBE STOP/STROBE
3 DIMMER DIMMER
4
STATIC GOBO CHANGE
STATIC GOBO CHANGE
5 PRISM INSERTION PRISM INSERTION
6 PRISM ROTATION PRISM ROTATION
7 EFFECTS MOVEMENT
(UNUSED)
EFFECTS MOVEMENT (UNUSED)
8 FROST FROST
9 FOCUS FOCUS
10 PAN PAN
11 PAN FINE PAN FINE
12 TILT TILT
Page 6

COLOUR WHEEL - channel 1
BIT EFFECT Remark
255 FAST ROTATION
…… ……
150 SLOW ROTATION
145 BLUE + WHITE
In order to facilitate the memory,
color value is always a multiple of
5.
Color ratio can be adjusted, such
as: when numerical is 5, white
50% red 50%, if the value is 4,
white60% red 40%; If the value is
6, white 40% red 60%
140 BLUE
135 CTB 8000 + BLUE
130 CTB 8000
125 CTO 190 + CTB 8000
120 CTO 190
115 CTO 260 + CTO 190
110 CTO 260
105 CYAN + CTO 260
100 CYAN
95 MAGENTA + CYAN
90 MAGENTA
85 YELLOW + MAGENTA
80 YELLOW
75 PINK + YELLOW
70 PINK
65 LAVENDER + PINK
60 LAVENDER
55 LIGHT GREEN + LAVENDER
50 LIGHT GREEN
45 GREEN + LIGHT GREEN
40 GREEN
13 TILT FINE TILT FINE
14 FUNCTION (UNUSED) FUNCTION (UNUSED)
15 RESET RESET
16 LAMP CONTROL LAMP CONTROL
17 PAN-TILT TIME
18 COLOUR TIME
19 DIMMER-PRISM-FROST TIME
20 GOBO TIME
Page 7

35 AQUAMARINE + GREEN
30 AQUAMARINE
25 ORANGE + AQUAMARINE
20 ORANGE
15 RED + ORANGE
10 RED
5 WHITE + RED
0 WHITE
STOP/STOBE - channel 2
BIT EFFECT Remark
252-255 OPEN Controlled by dimmer channel
239-251 RANDOM FAST STROBE
226-238 RANDOM MEDIUM STROBE
213-225 RANDOM SLOW STROBE
208-212 OPEN Controlled by dimmer channel
207 FAST PULSATION
…… ……
108 SLOW PULSATION
104-107 OPEN Controlled by dimmer channel
103 FAST STROBE
…… ……
4 SLOW STROBE
0-3 CLOSED
DIMMER - channel 3
BIT EFFECT Remark
255 100%
…… ……
0 0%
STATIC GOBO CHANGE - channel 4
BIT EFFECT Remark
255 GOBO 17 SHAKE, FAST SPEED
Every 5 values is
Page 8

corresponding to a gobo…… ……
251 GOBO 17 SHAKE, SLOW SPEED
250 GOBO 16 SHAKE, FAST SPEED
…… ……
246 GOBO 16 SHAKE, SLOW SPEED
…… ……
180 GOBO 2 SHAKE, FAST SPEED
…… ……
176 GOBO 2 SHAKE, SLOW SPEED
175 GOBO 1 SHAKE, FAST SPEED
…… ……
171 GOBO 1 SHAKE, SLOW SPEED
170 FAST ROTATION
…… ……
135 SLOW ROTATION
130-134 STOP
129 SLOW ROTATION
…… ……
90 FAST ROTATION
85 GOBO 17 The value is always multiple
of 5
80 GOBO 16
75 GOBO 15
70 GOBO 14
65 GOBO 13
60 GOBO 12
55 GOBO 11
50 GOBO 10
45 GOBO 9
40 GOBO 8
35 GOBO 7
30 GOBO 6
25 GOBO 5
20 GOBO 4
15 GOBO 3
10 GOBO 2
5 GOBO 1
0 WHITE
PRISM INSERTION - channel 5
BIT EFFECT Remark
128-255 PRISM INSERTED
0-127 PRISM EXCLUDED
Page 9

PRISM ROTATION - channel 6
BIT EFFECT Remark
255 FAST ROTATION
…… ……
193 SLOW ROTATION
191-192 STOP
190 SLOW ROTATION
…… ……
128 FAST ROTATION
0-127 POSITION
EFFECTS MOVEMENT - channel 7 (NOUSED)
FROST - channel 8
BIT EFFECT Remark
128-255 FROST INSERTED
0-127 FROST EXCLUDED
FOCUS - channel 9
BIT EFFECT Remark
255 Focus 100%
…… ……
0 Focus 0%
PAN - channel 10
(Omit)
PAN FINE - channel 11
(Omit)
TILT - channel 12
(Omit)
TILT FINE - channel 13
(Omit)
FUNCTION - channel 14 (NOUSED)
RESET - channel 15
BIT EFFECT Remark
128-255 COMPLETE RESET Stay 5 seconds in
corresponding area, then
begin to reset.
77-127 PAN/TILT RESET
26-76 EFFECTS RESET
0-25 UNUSED RANGE
Page 10

LAMP CONTROL- channel 16
BIT EFFECT Remark
101-255 LAMP ON Stay 5 seconds in
corresponding area, then
begin to switch the lamp.
10-100 LAMP OFF
0-9 UNUSED RANGE
TIMING CHANNELS
Timing
Channel
Channel function Remark
17 Pan-Tilt time Pan-Tilt-(Pan
fine-Tilt fine)
255 SLOW SPEED
…… ……
0 FAST SPEED
18 Colour time Colour wheel
19 Beam time Dimmer-Prism
-Frost
20 Gobo time Static Gobo
 Loading...