

Page 1
NDT Supply.com
7952 Nieman Road
Lenexa, KS 66214 USA
Phone: 913-685-0675
Fax: 913-685-1125
www.ndtsupply.com
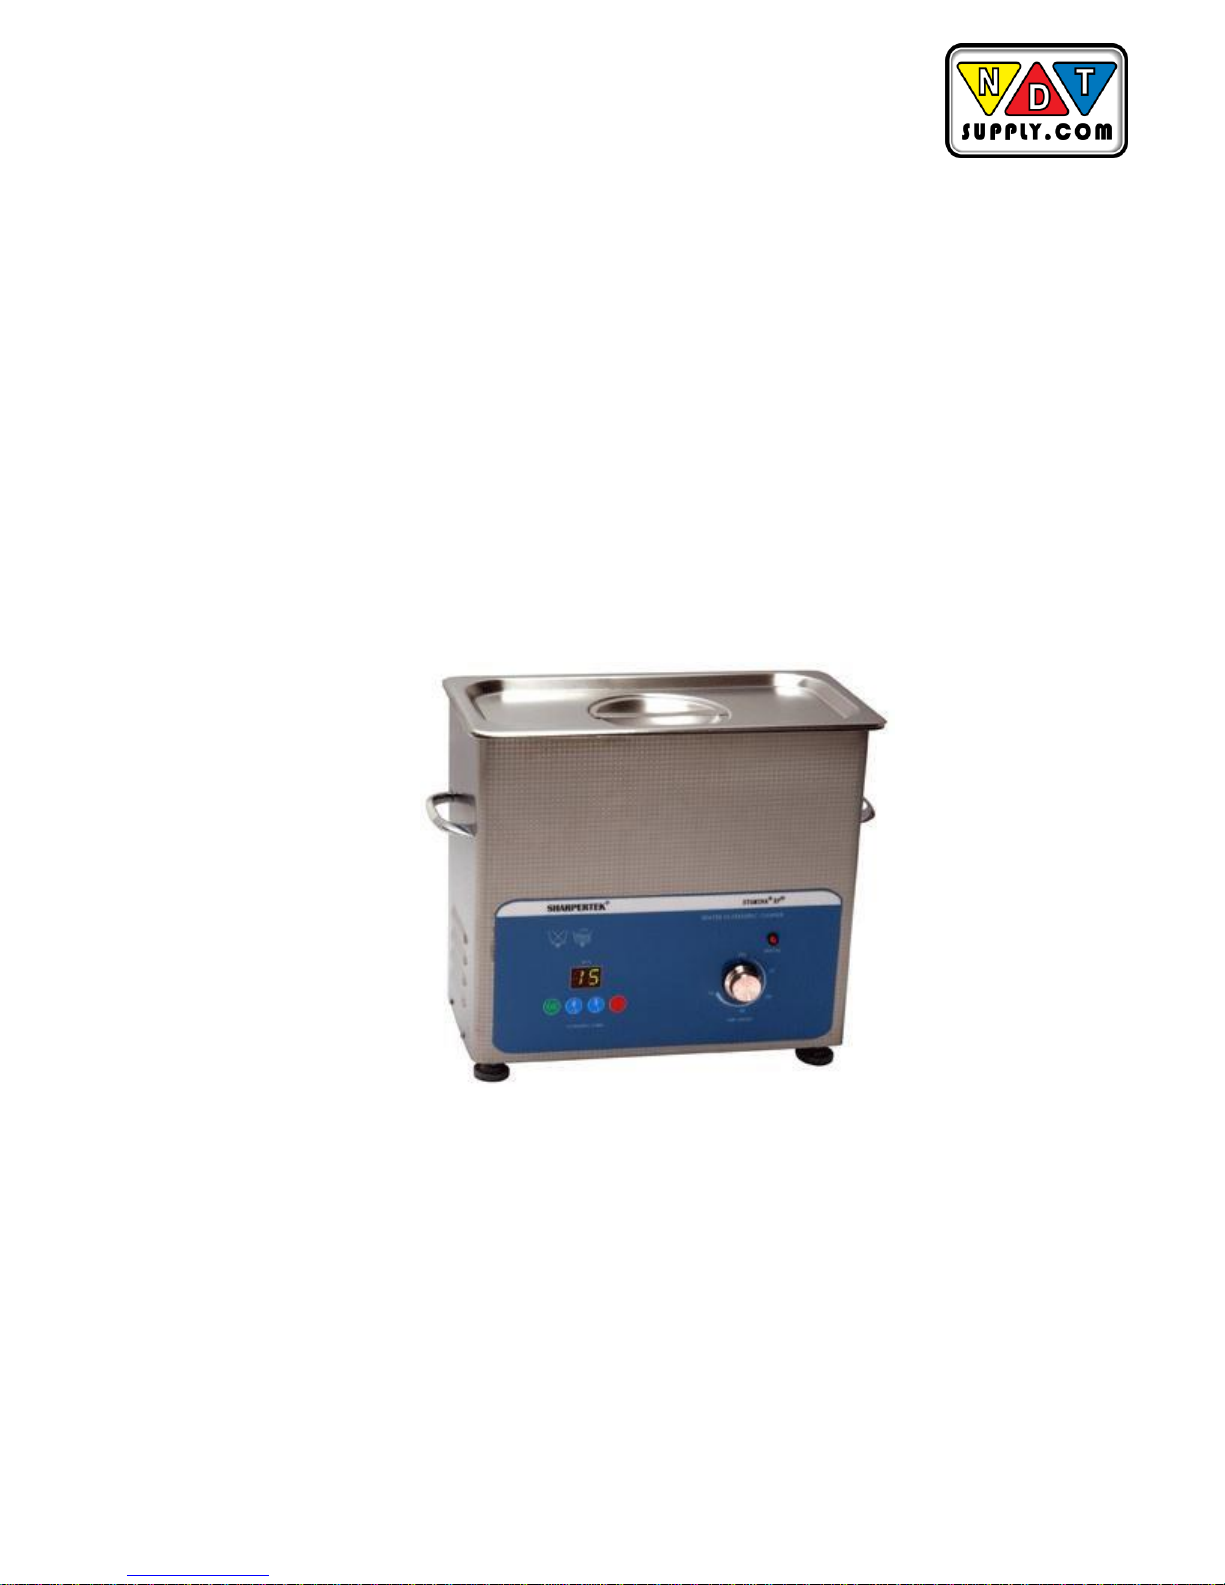
Ultrasonic Cleaners
User Manual
SH-Series
Page 2
NDT Supply.com
7952 Nieman Road
Lenexa, KS 66214 USA
Phone: 913-685-0675
Fax: 913-685-1125
www.ndtsupply.com
Warranty
Ultrasonic Cleaners, when used in accordance with manufacturer's instructions and under
normal use, are guaranteed for one year parts and labor and an additional year of parts
only. Within the period guaranteed, manufacturer will repair or replace free of charge, at its
sole discretion, all parts that are defective because of material or workmanship, not including
costs for removing or installing parts. Liability, whether based on warranty, negligence or other
cause, arising out of and/or incidental to sale, use or operation of the transducer elements, or
any part thereof, shall not in any case exceed the cost of repair or replacement of the defective
equipment, and such repair or replacement shall be the exclusive remedy of the purchaser,
and in no case will we be responsible for any and/or all consequential or incidental damages
including without limitation, and/or all consequential damages arising out of commercial losses.
CAUTION
Do not place parts or containers directly on the bottom of the cleaning tank; use a
tray or wire to suspend items.
Do not allow the solution to drop more than 1”1/2 inch below the top of the tank.
Do not ever use alcohol, gasoline, or flammable solutions. Doing so could cause
a fire or explosion. Use only water-based solutions.
Do not use mineral acids. These could damage the tank.
Contents
Page 3

NDT Supply.com
7952 Nieman Road
Lenexa, KS 66214 USA
Phone: 913-685-0675
Fax: 913-685-1125
www.ndtsupply.com
Front Cover WARRANTY
1. Safety Precautions
2. Introduction
3. Ultrasonic Cleaners
4. Accessories
5. Unpacking Your Cleaner
6. Installing Your Cleaner
7. Equipment Specifications
8. How Ultrasonic Cleaning Works
9. Operating Your Cleaner
10. Draining Your Cleaner
11. Optimizing Your Cleaner
12. Application Hints
13. Cleaning Methods
14. Cleaning Solution
15. Trouble Shooting
16. Service Information
SAFETY PRECAUTIONS
Page 4

NDT Supply.com
7952 Nieman Road
Lenexa, KS 66214 USA
Phone: 913-685-0675
Fax: 913-685-1125
www.ndtsupply.com
Before using your Ultrasonic Cleaner, please read and thoroughly understand these safety
precautions. Failure to follow them may result in serious personal injury or property damage.
To avoid electrical shock:
• Unplug from power source before filling or emptying the tank.
• Keep the control panel and the area around the cleaner clean and dry -- wipe up solution
which spills over the tank brim. Water and high voltage can cause electrical shock.
• Do not operate the cleaner without proper grounding.
• Do not remove the grounding prong on the line cord plug.
• Do not disassemble your cleaner -- high voltage inside the cleaner is dangerous.
• Do not immerse the cleaner in water.
To prevent personal and/or property damage:
• Operate the cleaner with a vented cover or no cover.
• Use water-based solutions.
• Do not ever use alcohol, gasoline, or flammable solutions. Doing so could cause a fire or
explosion and will void your warranty. Use only water-based solutions.
• Do not ever use mineral acids. These could damage the tank.
• Do not touch the stainless steel tank or cleaning solution -- they may be hot.
• Do not allow fluid temperature to exceed 70°C (160°F).
• Do not place your fingers or hands into the tank while the cleaner is operating. Doing so
may cause discomfort and possible skin irritation. Avoid contact with solutions and provide
adequate ventilation.
• Do not use solutions containing chlorine bleach.
To prevent damage to the cleaner:
• Change your solution regularly.
• Do not cover vents on the housing.
• Do not operate the cleaner dry.
• Do not place parts or containers directly on the bottom of the cleaning tank; use a tray or
wire to suspend items. Failure to comply may cause transducer damage and will void your
warranty.
• Do not allow the solution to drop more than 1½ inch from top of tank with heat or
ultrasonics on. Failure to comply may cause transducer and/or heater damage and will
void your warranty. The fill line is 1” from top of the tank.
Introduction
Page 5
NDT Supply.com
7952 Nieman Road
Lenexa, KS 66214 USA
Phone: 913-685-0675
Fax: 913-685-1125
www.ndtsupply.com
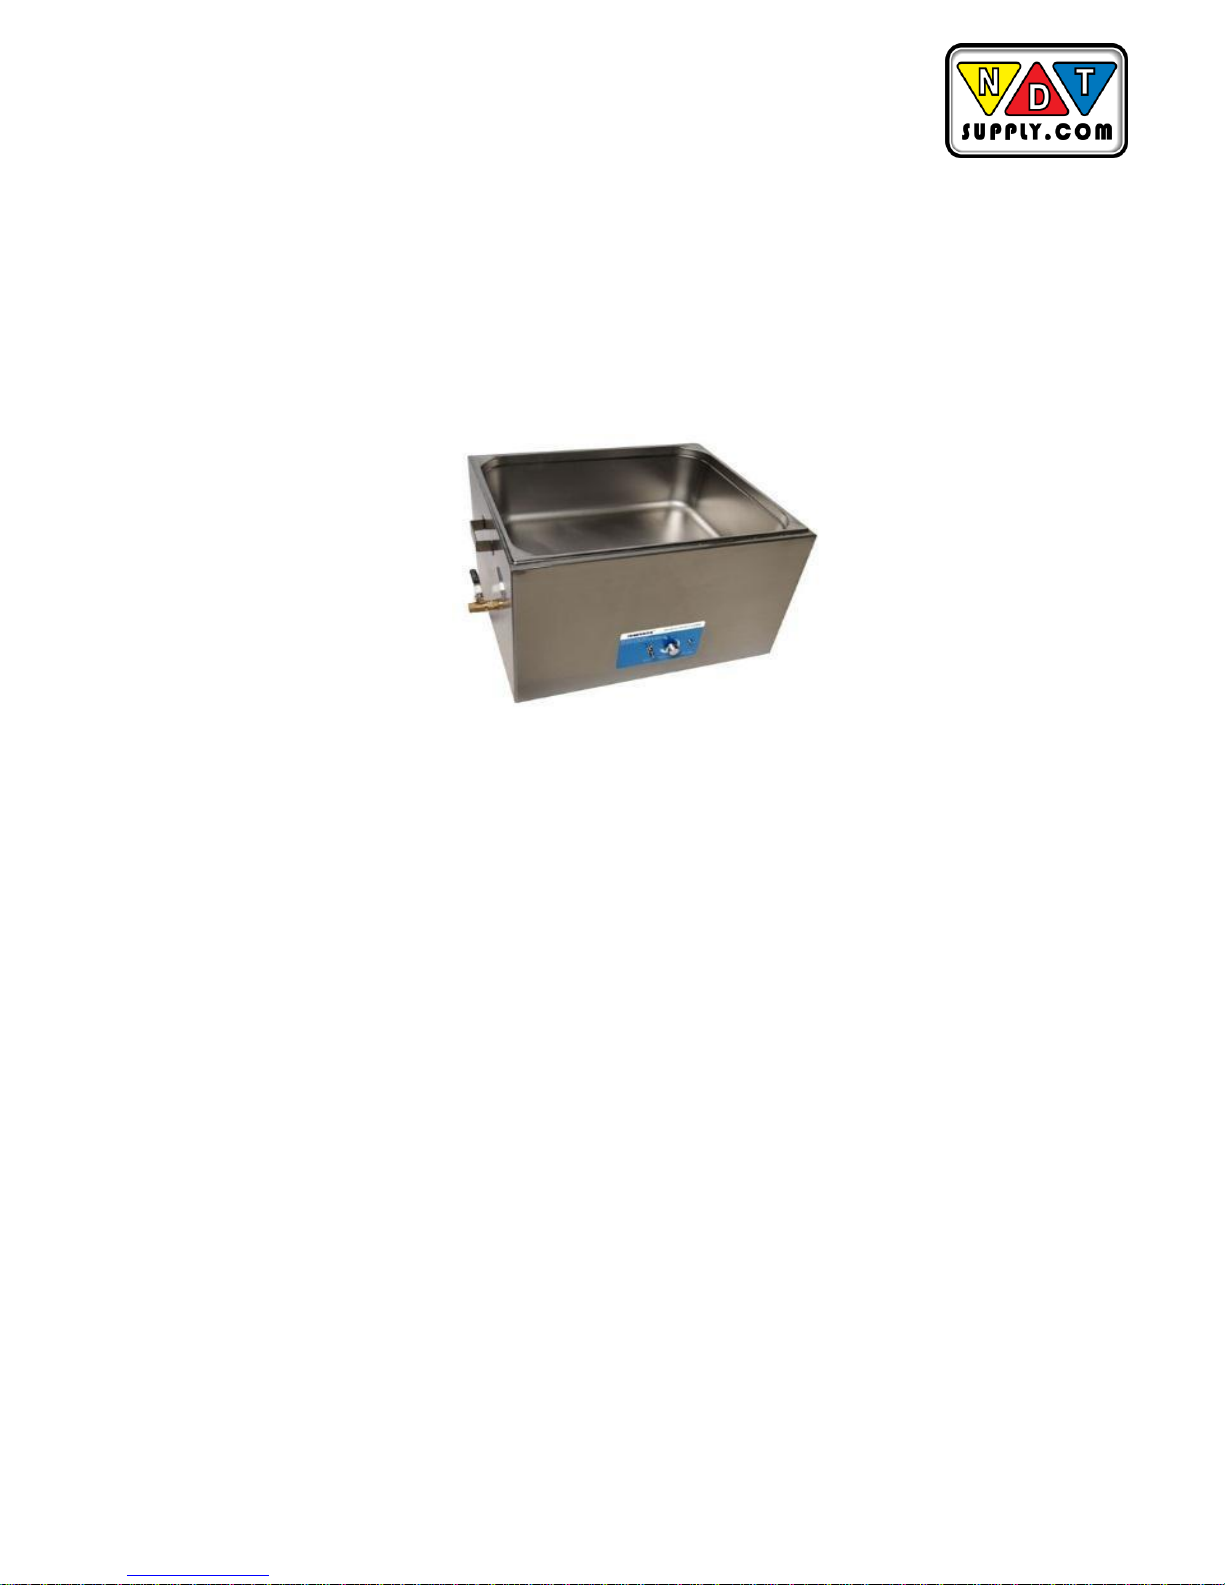
Ultrasonic Cleaners
These SH-Series line of ultrasonic cleaners includes seven models with sizes ranging from
46 Liter (18 gallon), 28 Liter (7.5 gallon), 17 Liter, 15 Liter (4 gallon), 10 Liter, 6 liter, 4 liter,
3 Liter, 2 liter, and 0.7 liter. Each model is constructed using durable industrial style 40
kHz transducers. These provide increased cleaning power along with built in sweep
frequency to ensure uniform cleaning activity throughout the bath. The five larger sizes
have built in drains. Each model has a digital timer and mechanical thermostat, with a
power switch/fuse in the rear of the machine.
When you first fill your unit, or refill it with fresh solution, use warm water for the solution.
Turn on the heater (Rotate the HEAT knob to 45, if available. The 0.7 liter units don’t have
a heater.), turn on the ultrasonics (press the green on touch screen button, and use the
arrow buttons for timing purposes), add the cover, and the solution will heat quickly to
temperature.
Accessories For Your Cleaner
Accessories include a cover and a mesh basket.
Unpacking Your Cleaner
Please check your cleaner and its carton carefully for any external or internal damage. If
you find damage, contact your shipping carrier immediately, before contacting your
distributor. Please retain your packaging for future use.
Installing Your Cleaner
Check the plate on the back of the cleaner for correct power requirements. Position your
cleaner within easy reach of a standard grounded electrical outlet. Do not place the cleaner
on a circuit which could become overloaded.
If your cleaner does not operate correctly, first refer to the troubleshooting section for
possible causes, or contact an authorized service center listed at the back of this manual,
for additional information.
Page 6
NDT Supply.com
7952 Nieman Road
Lenexa, KS 66214 USA
Phone: 913-685-0675
Fax: 913-685-1125
www.ndtsupply.com
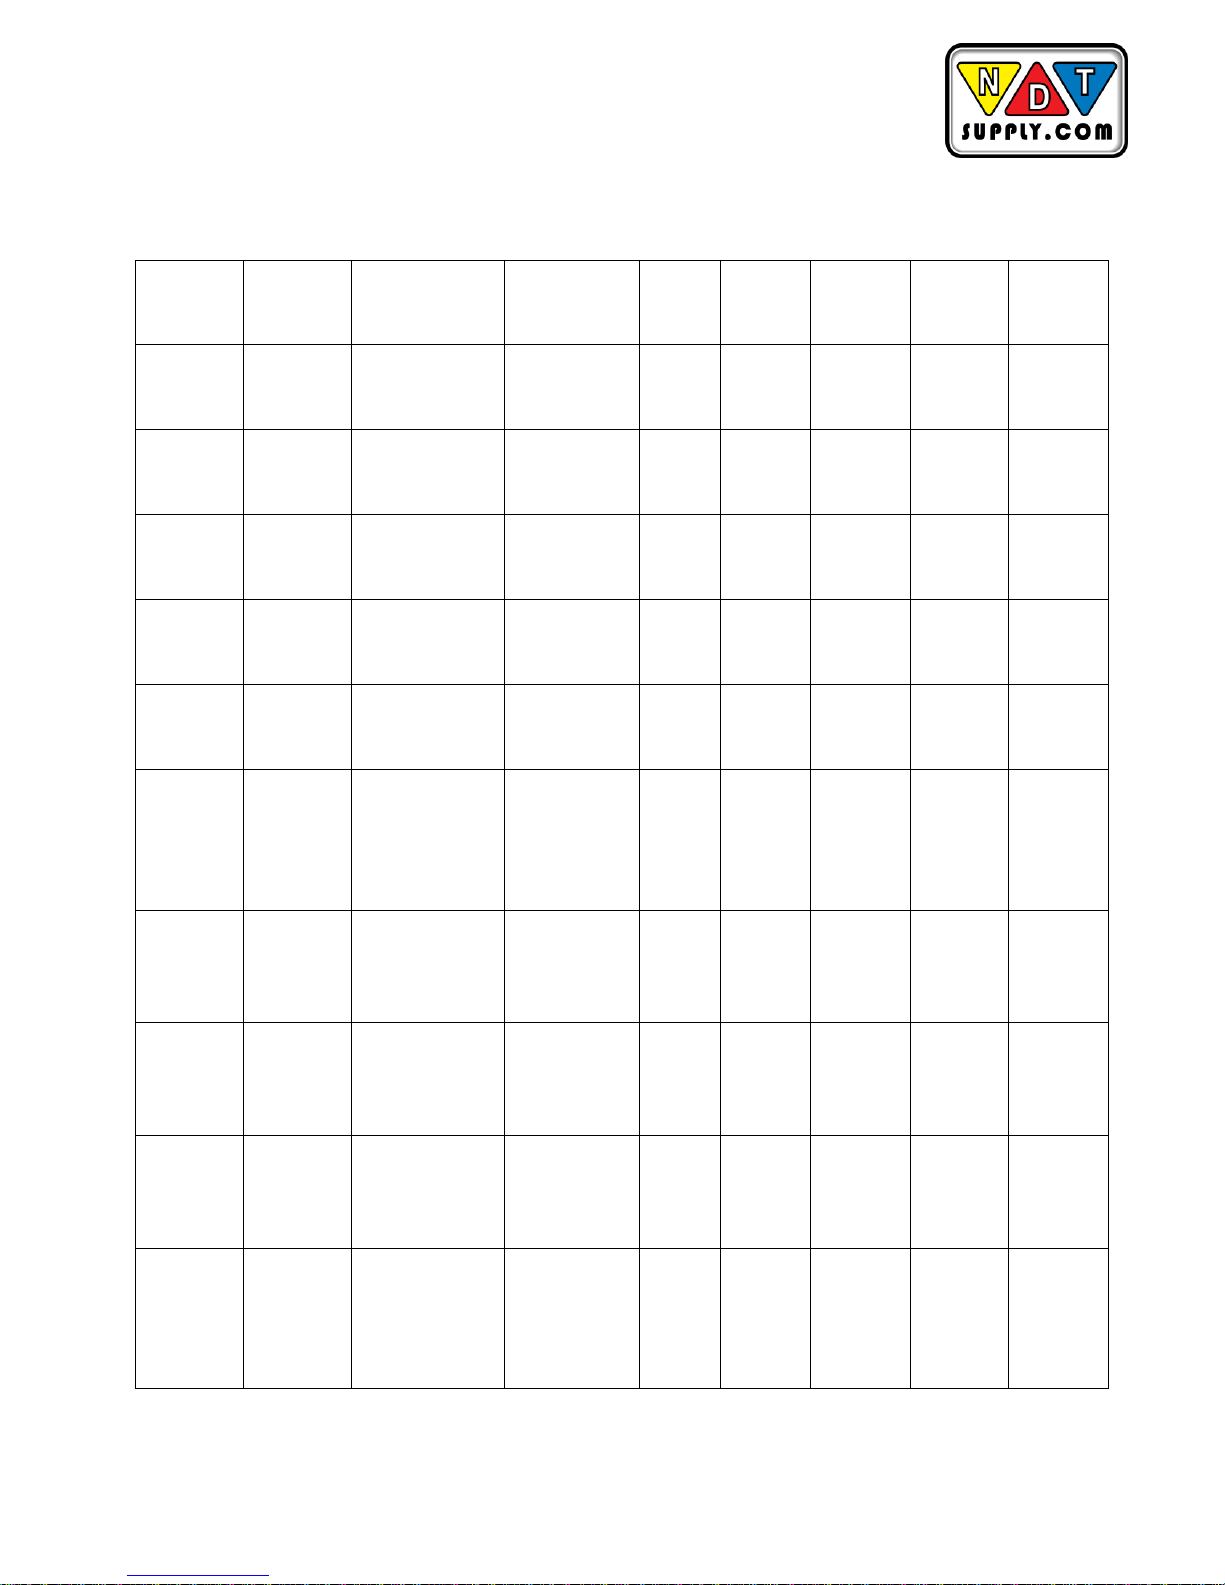
Equipment Specifications:
Tank
Capacity
Ultrasonic
Frequency
Khz
Unit Dimensions
(L x W x H)
Tank
Dimensions
(L x W x H)
Weight
Power
Supply
U.S.
Power
(Watts)
Warranty
Heat (w/
Temp
Control)
0.7 Liter
40 Khz
6.5” x 4.5” x 6.5”
(L x W x H)
6” x 3.5” x 2.5”
(L x W x H)
3 lbs.
AC 100 ~
120v, 50
/ 60Hz
40 W
1yr prts/lbr
+ 1 yr
parts.
No
2 Liter
40 Khz
7.5” x 7” x 8.5”
(L x W x H )
6 x5.25”x3.75”
(L x W x H)
5.5 lbs.
AC 100 ~
120v, 50
/ 60Hz
80 W
1yr prts/lbr
+ 1 yr
parts.
Yes
3 Liter
40 Khz
10.5” x 8” x 8.5”
(L x W x H )
9” x 5.5” x 4”
(L x W x H)
8 lbs.
AC 100 ~
120v, 50
/ 60Hz
120 W
1yr prts/lbr
+ 1 yr
parts.
Yes
4 Liter
40 Khz
13” x 7.7” x 10
(L x W x H)
12” x 6” x 3.75”
(L x W x H)
10.5 lbs.
AC 100 ~
120v, 50
/ 60Hz
180 W
1yr prts/lbr
+ 1 yr
parts.
Yes
6 Liter
40 Khz
14” x 8” x 11.5”
(L x W x H)
12” x 6” x 6”
(L x W x H)
12 lbs.
AC 100 ~
120v, 50
/ 60Hz
180 W
1yr prts/lbr
+ 1 yr
parts.
Yes
10 Liter
(2.5 Gallon)
40 Khz
13"×11"×14.5"
(L×W×H)
11.5"×9"×6"
(L×W×H)
18 lbs.
AC 100 ~
120v, 50
/ 60Hz
600 W
(300W
Ultra &
300W
Heat)
1yr prts/lbr
+ 1 yr
parts.
Yes
15 Liter
(4 Gallon)
40 Khz
13.5 x12.5 x15.5”
(L x W x H)
12” x 11” x 6”
(L x W x H)
40 lbs.
AC 100 ~
120v, 50
/ 60Hz
1000 W
(500 Ultra
& 500
Heat)
1yr prts/lbr
+ 1 yr
parts.
Yes
17 Liter
(4.6 Gallon)
40 Khz
13"×14"×15"
(L×W×H)
12"×11"×8"
(L×W×H)
40 lbs
AC 100 ~
120v, 50
/ 60Hz
900 W
(500 Ultra
& 400
Heat)
1yr prts/lbr
+ 1 yr
parts.
Yes
28 Liter
(7.5 Gallon)
40 Khz
24“ x 13 “ x 15“
(L x W x H)
19.5” x 11” x 8”
(L x W x H)
60 lbs.
AC 100 ~
120v, 50
/ 60Hz
1120 W
(720 Ultra
& 500
Heat)
1yr prts/lbr
+ 1 yr
parts.
Yes
46 Liter
(18 Gallon)
28/40 Khz
26” x 22” x 15”
(L x W x H)
24” x 19” x 9”
(L x W x H)
180 lbs.
AC 100 ~
120v, 50
/ 60Hz or
220/240
V
2400 W
(1200
Ultra &
1200
Heat)
1yr prts +
lbr + 1 yr
parts.
Yes
Page 7

NDT Supply.com
7952 Nieman Road
Lenexa, KS 66214 USA
Phone: 913-685-0675
Fax: 913-685-1125
www.ndtsupply.com
How Ultrasonics Work
Dirty items come clean in ultrasonic cleaning systems when millions of superheated
bubbles scrub grime and oxidation away with stunning results. How? Through the process
of de-cavitation.
Ultrasonic cleaning systems send high frequency sound waves ripping through an
ultrasonic cleaning solution leaving superheated bubbles in the waves’ wake. When these
bubbles, called cavitations, collapse, called decavitation, the heat and energy of their
implosions work with the specially formulated ultrasonic cleaning solution to remove dirt,
oils, residue, and oxidation from the surface of the contaminated item.
Imagine the ability to get into the tiniest of nooks and crannies where dirt and grime hide,
and then imagine scrubbing that surface ultra clean. With conventional cleaning – brushes,
rags and elbow grease – this task seems impossible. But the cavitating cleaning action of
an ultrasonic cleaning system does just that – It goes where brush bristles can’t.
What is Ultrasonic Cleaning Technology?
Ultrasonic cleaning technology is high frequency sound waves creating a phenomenon in a
fluid called cavitating action, or cavitations. Cavitations, the superheated bursting of
bubbles in a fluid, are what make ultrasonic cleaning work.
How Can Sound Waves and Ultrasonic Cavitations Clean?
When a sound wave travels through fluid, it stretches and compresses the fluid to transmit
sound. When the sound wave's amplitude increases to a threshold level, when the fluid
cannot hold the “stretch” of the sound wave, the sound wave energy literally tears the water
apart and vacuum bubbles are formed.
Each vacuum bubble grows in size until it can grow no more – equilibrium is reached
between the bubble and the fluid – at equilibrium, the bubble is compressed by the
surrounding fluid pressure until it collapses. At collapse, a tiny liquid jet is created in the
bubble’s place.
Each liquid jet creates estimated temperatures and pressures of over five thousand
degrees Celsius and ten thousand PSI when the collapse occurs. The extreme pressure
and temperature of the jet provides the phenomenon responsible for the effective ultrasonic
cleaning action. This action occurs millions of times, over and over, while the sound waves
are traveling through the fluid.
Ultrasonic Cleaning Cleans Every Nook and Cranny
When the item being cleaned is submerged in the ultrasonic tank’s fluid, the millions of jets
created by ultrasonic energy are capable of reaching into fine depressions and intricate
details. Every surface area is exposed to the ultrasonic cleaning action; cracks, crevices
Page 8
NDT Supply.com
7952 Nieman Road
Lenexa, KS 66214 USA
Phone: 913-685-0675
Fax: 913-685-1125
www.ndtsupply.com
and hard to reach corners of every nook and cranny get cleaned by the ultrasonic cavitating
action. Ultrasonic sweep cleaning technology enhances the system’s ability to clean.
Ultrasonic Cleaning Power and Frequency
Ultrasonic system power is rated in how much energy, in watts, is generated in the
ultrasonic tank. Higher power systems generally mean shorter part immersion times in the
fluid.
The ideal cleaning frequency is determined by the size of dirt being cleaned. Simply
speaking, higher frequencies are more capable it is of removing smaller particles, lower
frequencies are better suited for large dirt particles. Many SharperTek® ultrasonic systems
can be configured with multi-frequency technology, giving you the benefit of multiple
cleaning frequencies in a single design package.
Operating Your Cleaner
If this is the first time you are using the cleaner, please read this whole section before
operating your cleaner.
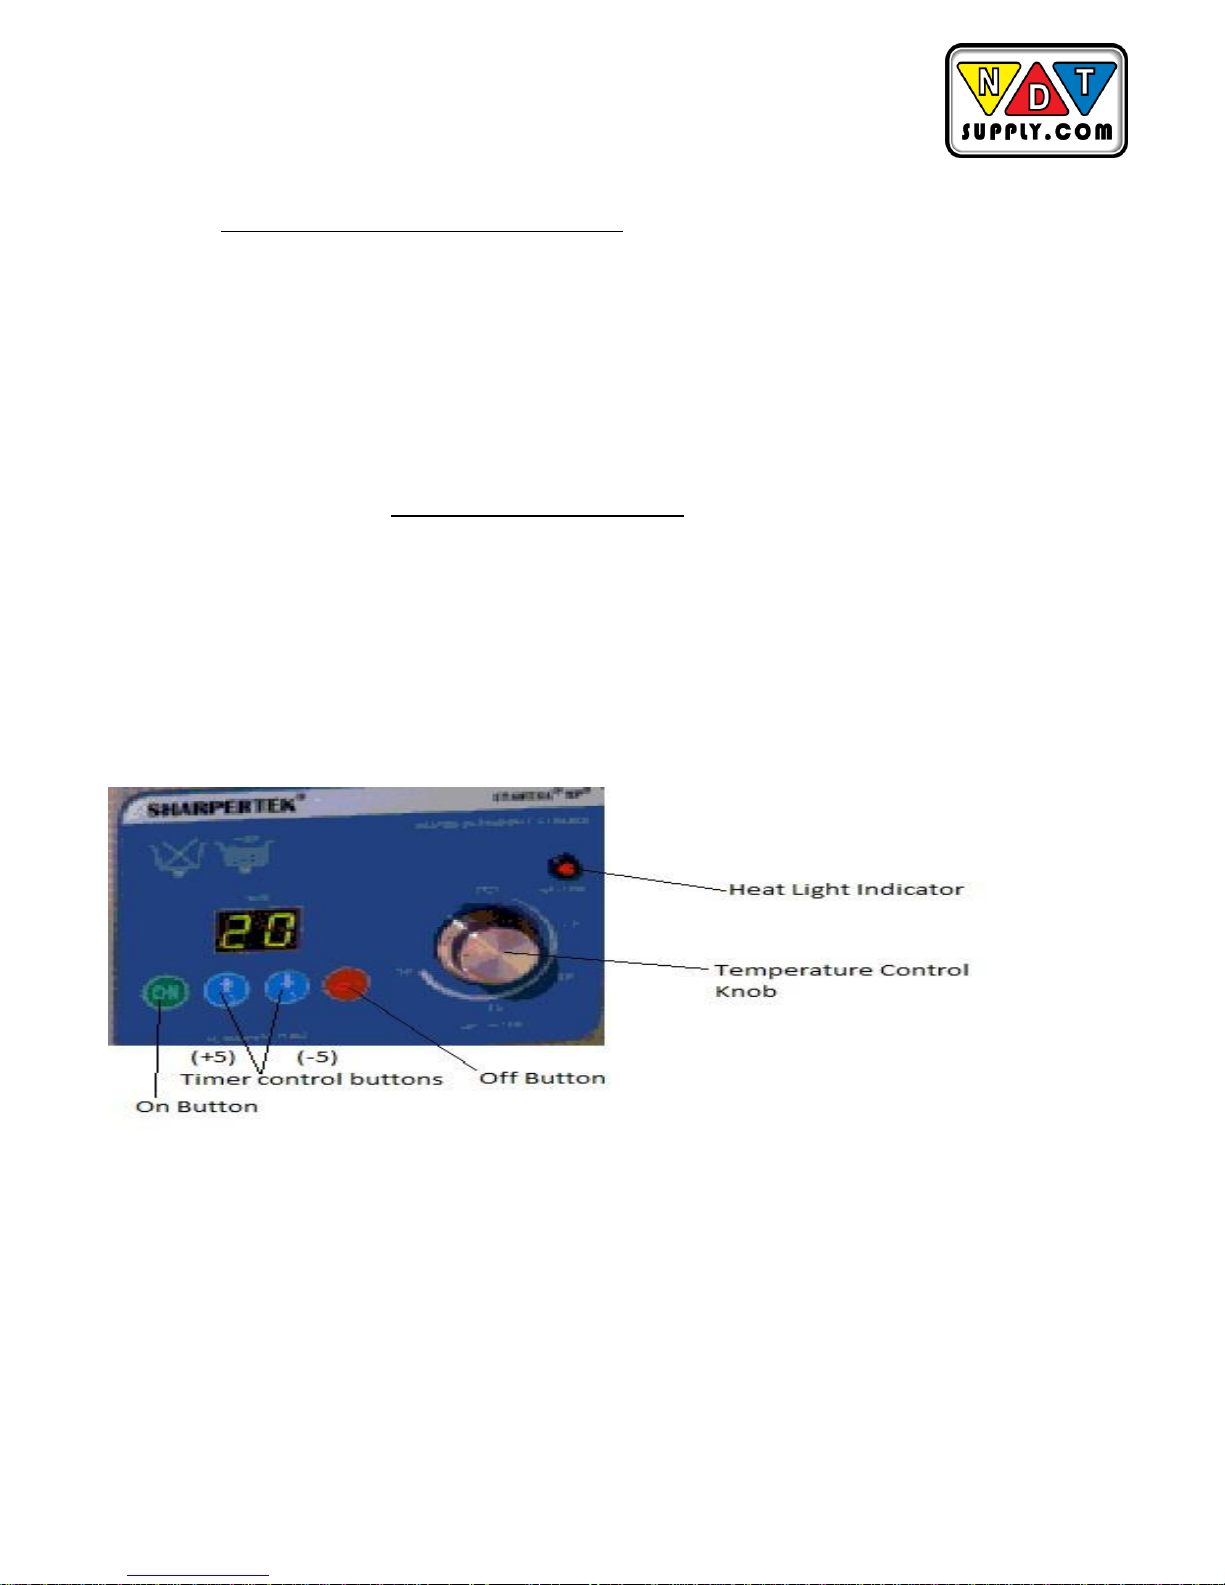
Operating Your SH-Series Cleaner
SH-SERIES Panel (Note: there is no heat light indicator or temp control knob for 0.7 L)
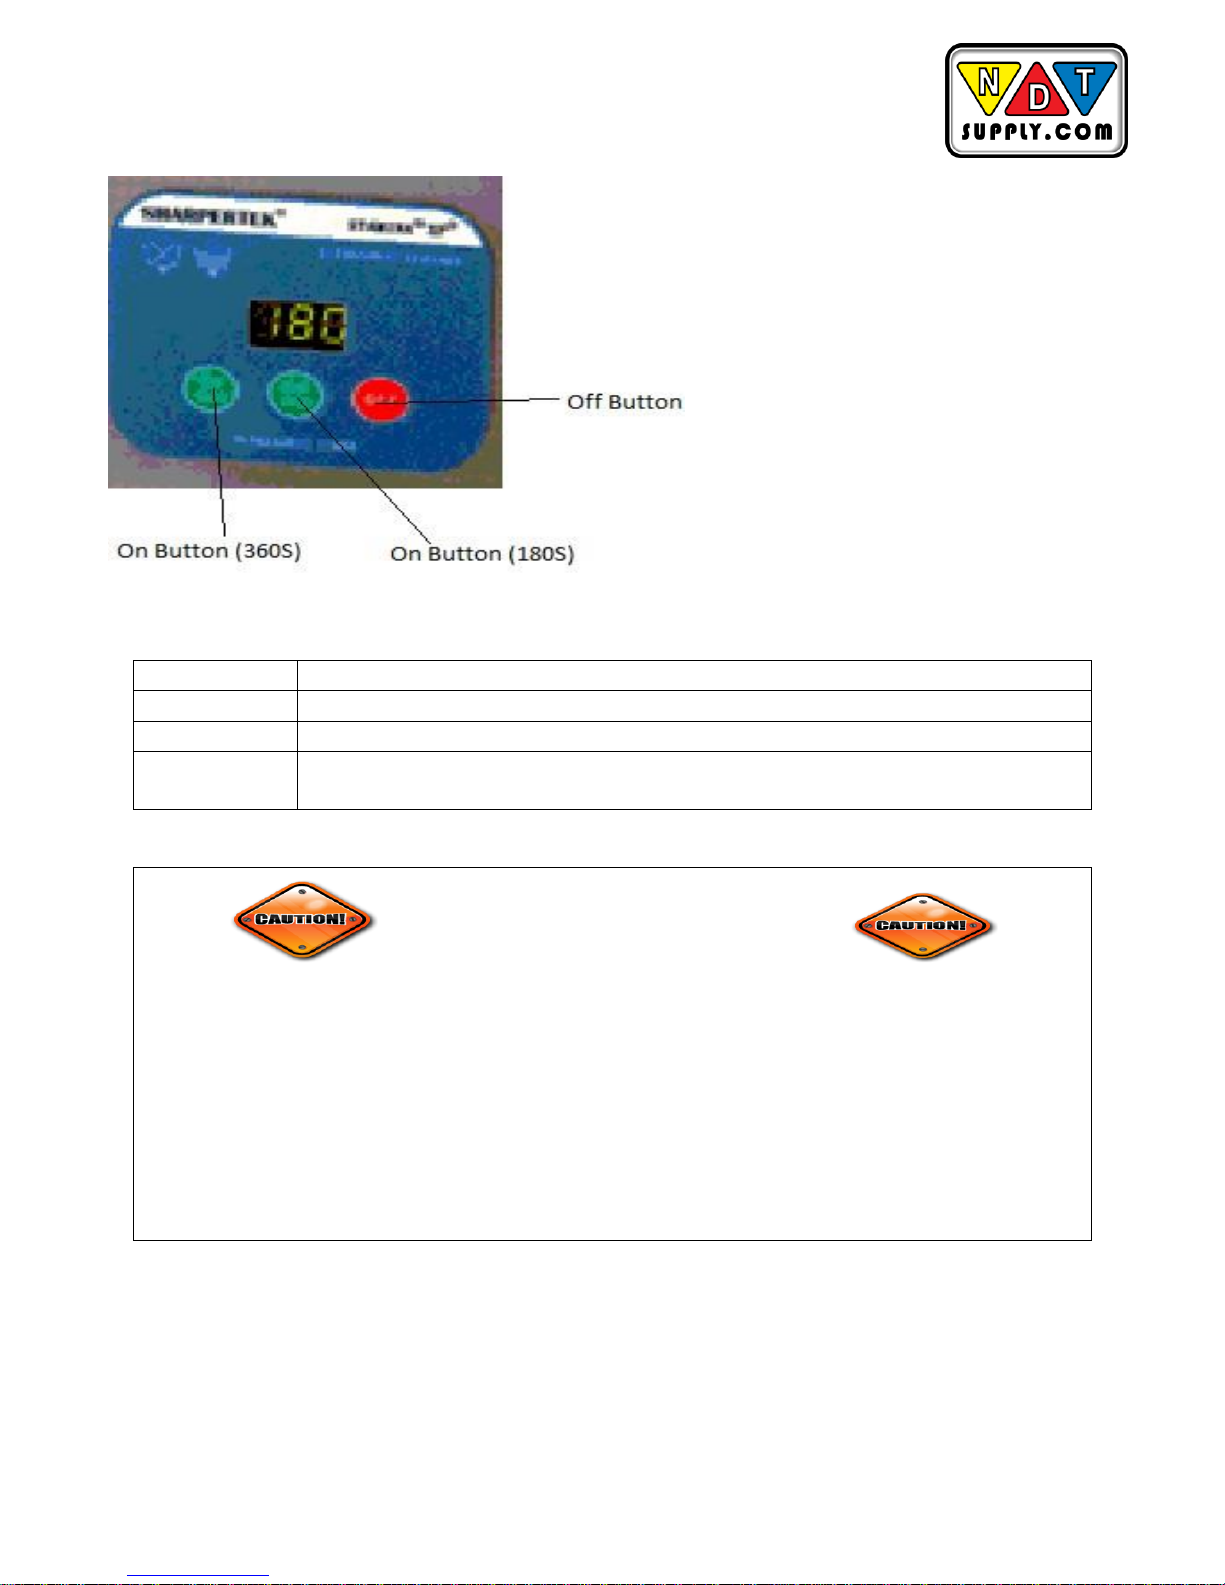
SH-Series 0.7 Liter (No Heat)
Page 9
NDT Supply.com
7952 Nieman Road
Lenexa, KS 66214 USA
Phone: 913-685-0675
Fax: 913-685-1125
www.ndtsupply.com
Explanation of Controls
Control
Function
HEAT
Activates heat to 70 C Maximum.
TIMER
Activates ultrasonics and sets time.
Turn Knob to desired heat. Turn clockwise to hold position for
continuous heat operation.
Before You Start Cleaning
CAUTION!
• Do not place parts or containers directly on the bottom of the cleaning tanks; use a
tray or wire to suspend items.
• Do not allow the solution to drop more 1 ½” from top of tank.
• Do not ever use alcohol, gasoline or flammable solutions. Doing so could cause a fire
or explosion. Use only water-based solutions.
• Do not ever use mineral acids. These could damage the tank.
Failure to comply with these cautions will void your warranty.
Page 10
NDT Supply.com
7952 Nieman Road
Lenexa, KS 66214 USA
Phone: 913-685-0675
Fax: 913-685-1125
www.ndtsupply.com
Step
Action
1
Select your cleaning solution (refer for solution effects on metals)
2
Allowing for the volume of the parts you will be cleaning and operation level line
(one inch from the top)
3
Add cleaning solution to the tank of water
4
Plug the cleaner into a ground outlet
NOTE:
If this is the first time you are running the cleaner, or if you have changed cleaning solution,
you must degas the solution. If not, skip to “Cleaning Items”.
Degassing
Step
Action
1
Turn the HEAT ON (Unless its 0.7 Liter)
2
Turn the TIMER to 5-10 and let the cleaner run to allow the solution to
“degas”.
Cleaning Items
NOTE: To stop ultrasonics at any time, press red off button.
Step
Action
1
Set the TIMER for the amount of time you wish the items to be cleaned.
2
Place the items into a basket.
3
Slowly lower the basket into the tank. Do not allow items to contact the tank
bottom.
4
When items are clean and time is up, slowly remove them from the cleaner.
5
Rinse the clean items with clean water and dry them, if necessary.
Operating Your Cleaner
Page 11
NDT Supply.com
7952 Nieman Road
Lenexa, KS 66214 USA
Phone: 913-685-0675
Fax: 913-685-1125
www.ndtsupply.com
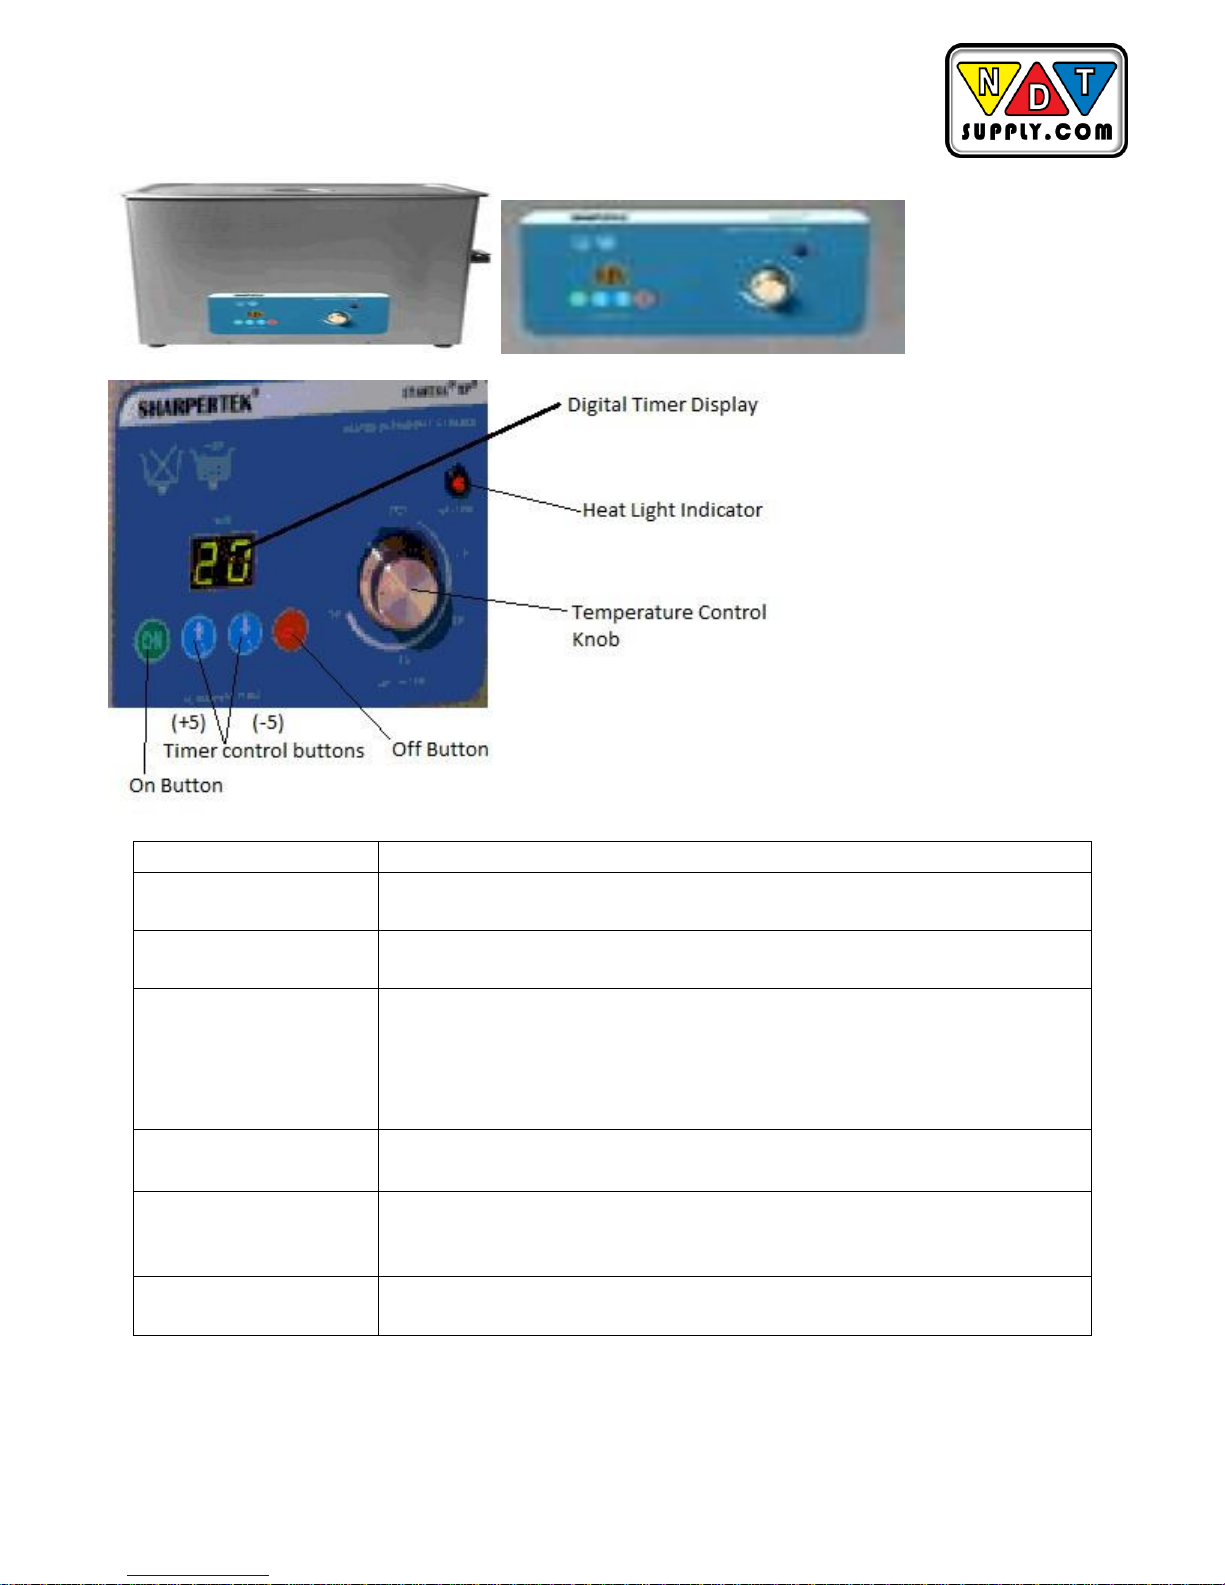
Control
Function
On button
Green touch button located on the left lower half of panel. Press
to activate power to cleaner.
Off button
Red touch button located on the middle lower half of panel.
Press to deactivate power to cleaner.
Timer control buttons
The two blue touch buttons located in between the on/off
buttons. Use to select the amount of time you want the machine
to run. Up arrow increases time by 5 minutes and down arrow
decreases time by 5 minutes. Note: machine will power off when
timer is finished.
Digital Timer Display
Displays select time for cleaning.
Temperature Knob
Located on the right side of panel. Used to set cleaner at desired
temperature (In Celsius). The temperature ranges from O°
Celsius to 70° Celsius.
Heat Light Indicator
Red “Heat Light Indicator” turns on indicating that the heat on
cleaner is active.
Draining Your Cleaner
Page 12
NDT Supply.com
7952 Nieman Road
Lenexa, KS 66214 USA
Phone: 913-685-0675
Fax: 913-685-1125
www.ndtsupply.com
Warning
Do not immerse the cleaner in water.
Unplug the cleaner from the power source.
0.7L, 2L, 3L, 4L, and 6L models do not have a drain. To empty, use the side of the rim to
pour the used solution into a waste disposal unit, rinse the tank thoroughly and refill with
new solution.
The 10 Liter, 15 Liter (4 gallon), 17 Liter, 28 Liter (7.5 gallon), and 46 Liter (18 gallon)
models include a drain. (Drain not attached. Thread sealant and do not over tighten.)
Step
Action
1
Place the cleaner to allow easy reach of the drain tube into a waste disposal
unit.
2
Remove the thread protecting cap from the end of the cleaner's drain pipe.
This will expose the white Teflon sealing tape on the drain pipe's threads.
3
Hand tighten the drain valve onto the drain pipe over the white Teflon sealing
tape. Finish tightening the valve in place using on adjustable or a 21mm
wrench. Tighten the valve no more than one full turn when using the wrench
until the handle is on top.
CAUTION: Over tightening of the valve can cause damage to the ultrasonic
tank. Always use Teflon sealing tape or a sealing paste designed for use
with stainless steel if retightening or refitting of the drain valve is required.
4
Hand tighten the hose adaptor into the end of the drain valve. Slide the drain
tube over the barbed hose adaptor end.
5
Close the drain valve by turning the handle perpendicular to the valve body
and the cleaner is ready to fill with solution. To open the valve and drain the
cleaner, turn the handle so that it is in line with the valve body.
Optimizing Your Cleaner
Tanks:
Cleaning - check the tank for contamination whenever you change solution. If necessary,
remove contaminants with a nonabrasive cloth and water.
Emptying - always unplug the cleaner before emptying the tank. Empty the solution into a
waste disposal unit.
Filling - always unplug the line cord before filling the tank. Fill the cleaner to the operating
level (one inch from the top with beaker/tray in place), using warm tap water.
Page 13

NDT Supply.com
7952 Nieman Road
Lenexa, KS 66214 USA
Phone: 913-685-0675
Fax: 913-685-1125
www.ndtsupply.com
Low solution level - will cause the cleaner to fail. When you remove heavy or bulky loads
from the cleaner, the solution level may drop below the operating level. If so, be sure to
replace lost solution and degas, if necessary, depending on the amount used.
Overload - do not rest any items on the tank bottom. Weight on the tank bottom dampens
sound energy and will cause damage to the transducer. Instead, use a tray and/or beaker
positioning cover to support all items. Allow at least one inch between the tank bottom and
the beaker or receptacle for adequate cavitation.
Covers - allow the cleaner to heat up faster, to a higher temperature, and avoid excessive
liquid evaporation.
Temperature
Heater - the heater may cause some discoloration of the tank wall. This is normal and will
not affect the performance of the unit.
Solution - the fastest method to heat your cleaner is to fill with warm solution, use heat,
ultrasonics (which also adds heat), and a cover.
Solution activity - the amount of visible activity is not necessarily related to optimum
cavitation for cleaning.
Degassing - fresh solutions contain many dissolved gases (usually air), which reduce
effective ultrasonic action. Although solutions will naturally degas over time. Solutions that
have been sitting unused for 24 hours or longer have reabsorbed some gases.
Heat - increases the chemical activity of cleaning solutions.
Surface tension - can be reduced by adding solution to the bath. Reduced surface tension
will increase cavitation intensity and enhance cleaning.
Solvents - never use solvents. Vapors of flammable solutions will collect under the cleaner,
where ignition is possible from electrical components.
Renewal- replace cleaning solutions often to increase ultrasonic cleaning activity.
Solutions, as with most chemicals, will become depleted over time. Solutions can become
contaminated with suspended soil particles which coat the tank bottom, inhibiting ultrasonic
activity.
Page 14

NDT Supply.com
7952 Nieman Road
Lenexa, KS 66214 USA
Phone: 913-685-0675
Fax: 913-685-1125
www.ndtsupply.com
Application Hints
CAUTION
Never clean novelty or inexpensive jewelry in the cleaner. The combination of heat and
vibration may loosen a cement-held setting.
Never clean gemstones such as emerald, amethyst, pearl, opal, coral, turquoise,
peridot or lapis lazuli in the cleaner.
First time cleaning - first experiment with one piece, then proceed with the remainder.
Solution level- Be sure to maintain solution level within 1 ½” of top of the tank. Surface
activity can vary with liquid level.
Load size - It is faster and more efficient to run several small loads rather than a few big
loads.
Placing items - Never allow items to sit on the bottom of the tank. Always place them in a
tray or beaker or suspend in the solution.
Rinsing items - After cleaning, use a clean water bath to rinse away chemicals adhering to
items.
Lubricating items - When necessary, re-Iubricate items immediately after cleaning.
Drying items - Air drying at room temperature works for some items. Place parts requiring
faster drying time under hot air blowers or in ovens.
Cleaning Methods
There are two methods of cleaning - direct and indirect. Each has advantages and
disadvantages. When in doubt, run test samples using both methods to decide which one
produces the best results for you.
Direct method
• Items in perforated insert tray
• Item suspended
Page 15

NDT Supply.com
7952 Nieman Road
Lenexa, KS 66214 USA
Phone: 913-685-0675
Fax: 913-685-1125
www.ndtsupply.com
How it works:
• Fill the tank with warm water and a cleaning solution.
• Place the items to be cleaned in a perforated tray and lower them into the tank. You
can also suspend items on a wire and then immerse them in the solution.
The advantages of this method are the simplicity of operation and cleaning effectiveness.
Indirect method
• Items laid randomly in solid insert tray
• Items placed in beakers
How it works:
• Fill the tank with warm water and a cleaning solution.
• Pour your solution medium into one or more beakers or into a solid insert tray.
• Place the beakers in a beaker positioning cover or a solid insert tray to fit your cleaner.
Beakers should not touch the tank's bottom.
The advantages of this method are:
• Removed soil stays in the beaker or tray so you can easily examine, filter or discard it.
• You can use one or more solutions at the same time.
o Two completely different cleaning solutions.
o One beaker or tray with a cleaning solution and one with a rinse solution.
• Cleaning solution in your tank needs to be changed less often.
Cleaning Solutions
CAUTION
Do not use alcohol, gasoline, bleach, mineral acids, solutions with a flash point,
semi-aqueous or combustible liquids in ultrasonic tanks, or you will void the warranty.
Only use non-flammable solutions and water-based solutions.
Solution Types
Water-based solutions are either slightly acidic or alkaline. They include detergents, soaps
and industrial cleaners designed to remove specific soils.
Acidic water-based solutions: remove rust, tarnish or scale. They range from mild solutions
that remove tarnish, to concentrated, and inhibited acidic solutions that remove investment
plaster, milk-stone, zinc oxide and rust from steel and cast iron as well as smut and heattreat scale from hardened steel.
Page 16
NDT Supply.com
7952 Nieman Road
Lenexa, KS 66214 USA
Phone: 913-685-0675
Fax: 913-685-1125
www.ndtsupply.com
Alkaline water-based solutions: include carbonates, silicates and caustics. These cause
emulsifying action, which keeps soil from redepositing on the cleaned surface, and
improves cleaning action in hard water.
Alkaline strength
Removes:
Mild
Light oils and greases, cutting oils and coolant compounds.
Mild to Strong
Heavy grease and oil, waxes, vegetable oils, inks, wax or fatbase
buffing and polishing compounds, milk residues and
carbohydrates.
Heavy-duty
Mill scale; heat-treat scale, corrosion or oxides.
Change the cleaning solution periodically. Cleaning solutions can become contaminated
with suspended soil particles which coat the tank bottom. This coating dampens the
ultrasonic action and reduces cleaning efficiency. Certain solutions will cavitate better than
others. Contact your local distributor for further information.
Heat and cavitation: increase the chemical activity of cleaning solutions. Some materials
may be damaged by this stronger chemical action. When in doubt, test run samples of
items to be cleaned. Caustic solutions: used to remove rust from steels, metal alloy
corrosion and a variety of tenacious soils.
Solution Amounts
Solution amounts may vary. The amount you use depends on the detergent and the type
of soil to be removed. Follow instructions on the solution container and refer to the table
below for the effects of solutions on metals.
Chemicals Harmful to Your Tank
The following chemicals will harm your ultrasonic tank and the action of ultrasonics and
higher operating temperatures will increase their chemical activity. Do not use these or
similar chemicals directly or in dilution in your ultrasonic tank or you will void your
warranty.
Page 17
NDT Supply.com
7952 Nieman Road
Lenexa, KS 66214 USA
Phone: 913-685-0675
Fax: 913-685-1125
www.ndtsupply.com
(1) =
Alkaline; (2) = ACidic; and (3) = Caustic.
Warning
*Free hydrogen may be released if solution comes in contact with reactive
metals.
** no effect if solution temperature is less than 140°F.
Acetophenone
Aluminum Chloride
Aluminum Fluoride
Aluminum Sulphate
Ammonium Bifluoride
Ammonium Chloride
Ammonium Hydroxide
Amyl Chloride
Antimony Trichloride
Aqua Regia
Bromine
Calcium Bisulfate
Calcium Bisulfite
Calcium Hypochloride
Chloracetic Acid
Solution Effects on Metals
Chloric Acid
Chlorine, Anhydrous
Chromic Acid
Copper Chloride
Copper Fluoborate
Ethyl Chloride
Ferric Chloride
Ferrous Chloride
Ferris Sulfate
Fluoboric Acid
Fluorine
Hydrobromic Acid
Hydrochloric Acid
Hydrocyanic Acid
Hydrofluoric Acid
Hydrofluosilicic Acid
Iodoform
Mercuric Chloride
Muriatic Acid
Phosphoric (crude)
Sodium Hypochlorite
Potassium Chloride
Stannic Chloride
Stannous Chloride
Sulfur chloride
Sulfuric Acid
Zinc Chlorid
Cleaning
Steel
Brass
Alumi-
Magne
Zinc
S.
Steel
Tin
Agent
num
sum
Optical (1)
None
none
none
none"
none"
none
none"
Jewelry (1)
None
none
none
none
none
none
none
Oxide (2)
Slight
none
slight
attacks
attacks
none
none
Remover
1831
Etch
attack
Electronic
None
none
slight
none
none
none
none
cleaner
1220
attack
General(1)
none
none
slight
none
none
none
none
Purpose
1220
attack
Metal (1)
1852
none
none
none
none
none
none
none
Rust (3)
none
none
attacks
attacks
attacks
none
slight
stripper
attack
Page 18
NDT Supply.com
7952 Nieman Road
Lenexa, KS 66214 USA
Phone: 913-685-0675
Fax: 913-685-1125
www.ndtsupply.com
Troubleshooting
If your cleaner does not operate satisfactorily, please check the tables below for possible
causes before calling your authorized service center.
Warning
High voltage inside - dangerous shock hazard.
DO NOT attempt to disassemble or repair the cleaner.
Problem
Cause
What to do
Cleaner will not
start.
Cleaner not plugged in properly
Plug into functioning electrical outlet.
Rear power switch not in on position.
Press power switch ON.
Lose terminal.
Bad touch pad panel.
Digital timer - Start button malfunctioning.
Call nearest authorized service center.
Blown fuse.
Replace with identical fuse or Call
service center. nearest authorized
Cleaner operates
but does not heat
solution.
Heater malfunction
Call nearest authorized service center.
Mechanical Thermostat - HEAT not set to ideal
temperature
Lose terminal or bad heater.
Turn heat ON.
Clogged drain
Clogged drain.
Open drain.
Warning
High voltage inside - dangerous shock hazard.
DO NOT attempt to disassemble or repair the cleaner.
Page 19
NDT Supply.com
7952 Nieman Road
Lenexa, KS 66214 USA
Phone: 913-685-0675
Fax: 913-685-1125
www.ndtsupply.com
Problem
Cause
What to do
Cleaner operates but does not
maintain set temperature.
Malfunctioning heater or
sensor components.
Call nearest authorized service center.
Cleaner operates but display does
not function.
Interrupted calibration
sequence.
Timer board malfunctions.
Bad touchpad panel.
Press SET DISPLAY.
Call nearest authorized service center.
Decreased ultrasonic activity.
Solution is not degassed.
Solution is spent.
Solution level is incorrect for
load.
Tank bottom is covered with
soil particles.
Using deionized water in the
tank.
Make sure that tank was filled with warm
tap water plus cleaning solution and has
run 5-10 minutes.
Change solution.
Adjust solution to within 1 ½” from top of
tank, filled with warm tap water.
Empty, then clean tank with warm water.
Wipe with a nonabrasive cloth.
Deionized water does not cavitate as
actively as soapy tap water.
Service Information
With normal use, your Ultrasonic Cleaner should not require servicing. However, if it fails to
operate satisfactorily, first try to diagnose the problem by following the suggestions in the
Troubleshooting Guide.
Warning
High voltage inside the cleaner is dangerous.
If you find that your cleaner needs repair, carefully pack and return it to Sharpertek. If under
warranty, remember to include proof of purchase.
Your cleaner will be shipped by ground service unless you specify otherwise.
Page 20

NDT Supply.com
7952 Nieman Road
Lenexa, KS 66214 USA
Phone: 913-685-0675
Fax: 913-685-1125
www.ndtsupply.com
Technical Support:
Sharpertek
2005 Pontiac Rd Bldg A
Tel: 248-340-0593
Auburn Hills MI 48326
Fax: 248-340-6189
USA
 Loading...