

NCM PRAGUE, Munich N8C Owner's Manual
PRAGUE
36V
OWNER’S MANUAL
Important information enclosed: please read before your first ride!

1. GENERAL INTRODUCTION
1.1 Welcome .................................................................................................................................................................. 01
1.2 Use of the Manual .................................................................................................................................................... 01
1.3 Service and Technical Support ................................................................................................................................. 01
1.4 Choosing the Right Size ........................................................................................................................................... 01
1.5 Bike Components ..................................................................................................................................................... 02
1.6 Range ...................................................................................................................................................................... 03
1.7 Shifting Recommendations ....................................................................................................................................... 03
2. SAFETY
2.1 Battery & Charger ..................................................................................................................................................... 04
2.2 Bike Usage ............................................................................................................................................................... 04
2.3 Transport .................................................................................................................................................................. 06
2.4 Keys ......................................................................................................................................................................... 06
3. INSTALLATION AND ADJUSTMENT
3.1 Handlebar and Stem Assembly ................................................................................................................................. 07
3.2 Assembly of the Pedals ............................................................................................................................................ 08
3.3 Seat Position ............................................................................................................................................................ 09
3.4 Saddle Height ........................................................................................................................................................... 10
3.5 Saddle Adjustment ................................................................................................................................................... 10
3.6 Brakes ...................................................................................................................................................................... 10
3.7 Shifter and Derailleur Adjustment ............................................................................................................................. 12
4. E-PARTS OVERVIEW
4.1 Explanation .............................................................................................................................................................. 13
4.2 Battery & Charger .................................................................................................................................................... 13
4.2.1 Overview ............................................................................................................................................................... 13
4.2.2 General Remarks .................................................................................................................................................. 14
4.2.3 Installing and Removing the Battery ...................................................................................................................... 14
4.2.4 Charging ............................................................................................................................................................... 15
4.2.5 Usage .................................................................................................................................................................... 15
4.2.6 Storage .................................................................................................................................................................. 15
5. DISPLAY .................................................................................................................................................................... 16
6. RECOMMENDATIONS AND MAINTENANCE
6.1 General Requirements ............................................................................................................................................. 23
6.2 Maintenance Schedule ............................................................................................................................................. 23
6.3 Troubleshooting ........................................................................................................................................................ 25
6.4 Definition of Tampering and Recommendations ........................................................................................................ 26
7. TECHNICAL DATA .................................................................................................................................................... 27
8. WARRANTY .............................................................................................................................................................. 27
CONTENTS
NCM
PRAGUE 36V
01
1. GENERAL
1.1 Welcome
We would like to thank you for your purchase of an NCM E-bicycle and welcome you to our fast-growing family of E-bike
enthusiasts. Bicycles offer unparalleled practicality and excitement, and our E-bikes at NCM are supercharged versions of
this amazing invention. As bikes have evolved so have we, standing at the forefront of innovation in E-cycling technology,
aiming to offer something new and thrilling while keeping and promoting the soul of cycling.
1.2 Use of the Manual
We encourage you to read this manual thoroughly before you take your new NCM E-bike for a ride. It is important not to
overlook the safety instructions and explanations of both traditional and non-traditional bike parts, as this will offer you a
general understanding of your new NCM E-bike. This manual is designed to help you get the most out of your E-bike, and
so we have attempted to answer as many of your potential questions as possible. Please take a moment to read through
the various sections before you get in the saddle.
1.3 Service and Technical Support
This manual is intended as a general overview of your new NCM E-bike, and is therefore not an extensive reference. For
technical support, including information about service, maintenance and repairs, please consult your dealer. You can visit
our website (www.ncmbikes.com) for more information about our products and technology, or to find a dealer close to you.
You can also email us your inquiries at support.au@ncmbikes.com, support.uk@ncmbikes.com.
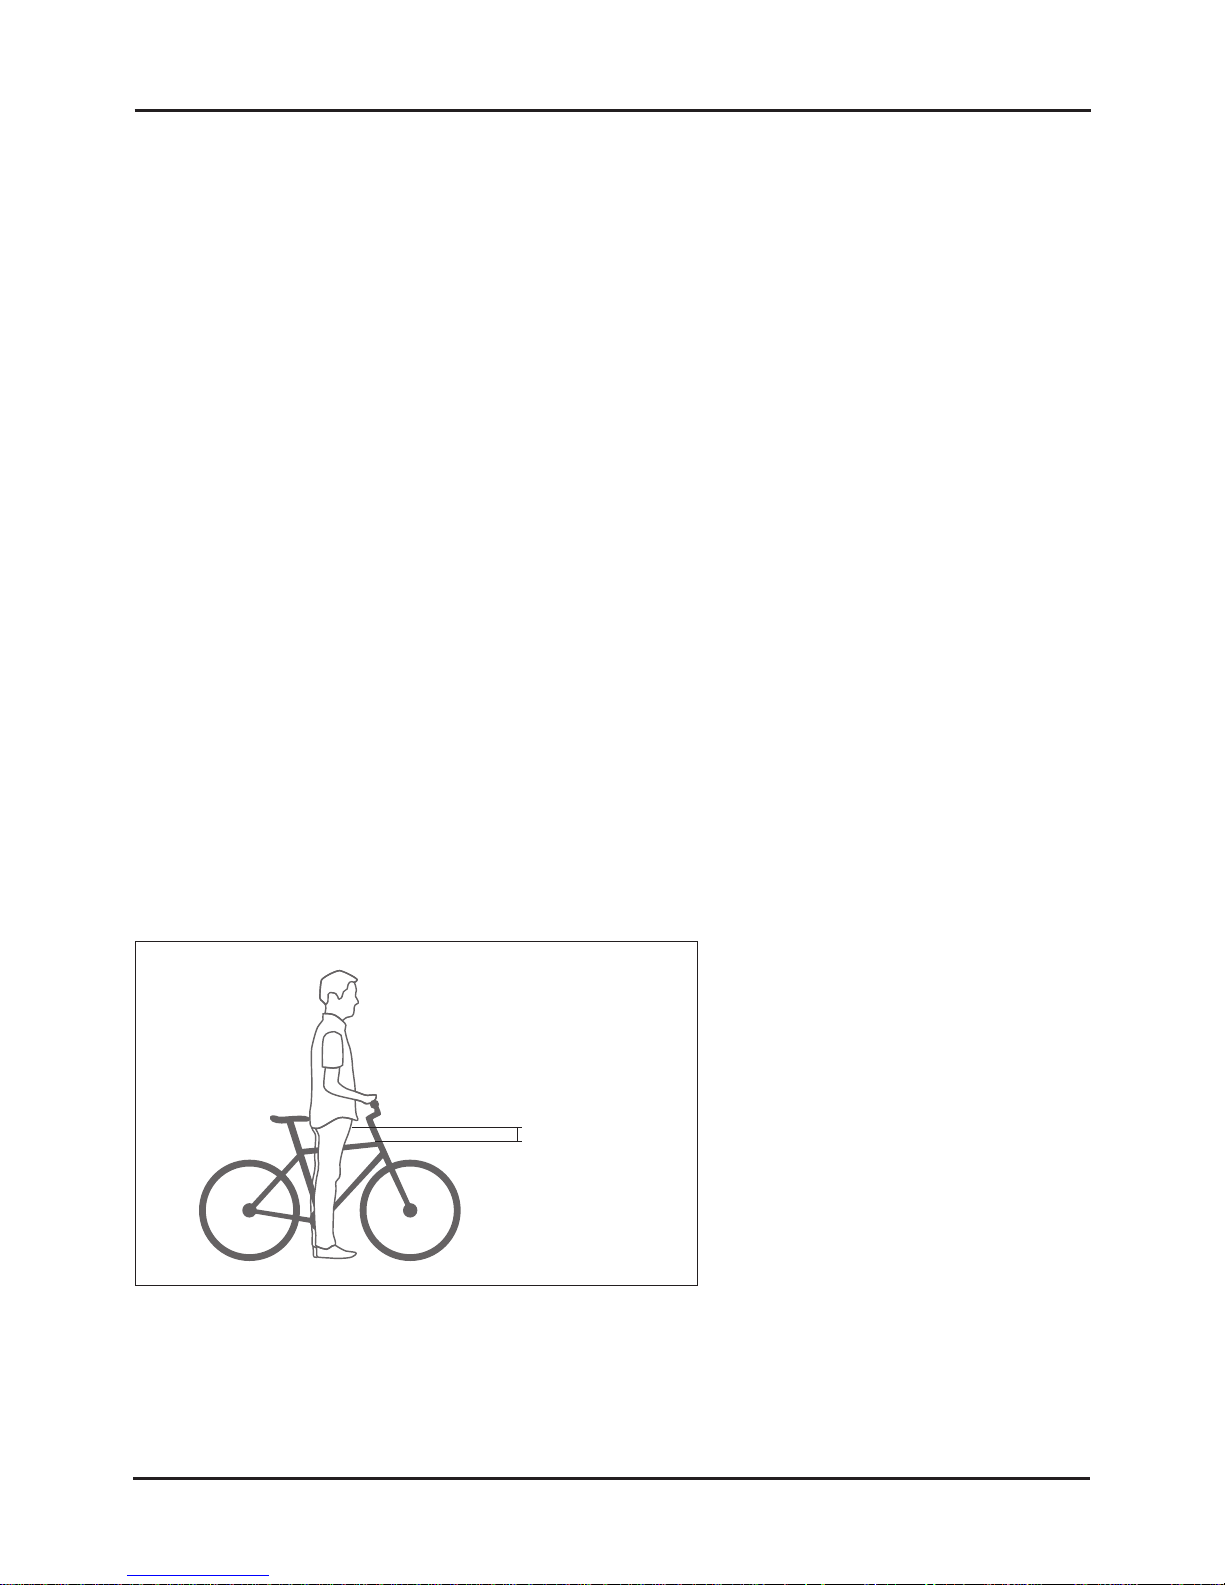
1.4 Choosing the Right Size
An important consideration when selecting the size of your new bike is the stand-over clearance: the distance between
you and the top tube of the bike when you stand over it with your feet flat on the ground. For most bicycles, this distance
should be at least 1" (25 mm). If you are choosing a mountain bike, it is recommended to have at least 2” (50 mm) of
space. Your bike dealer can assist you in finding a bicycle with the correct dimensions for you.
Figure 1
H = stand-over clearance
Minimum: 1" for most bicycle types
2" for mountain bicycles
H
GENERAL
NCM
PRAGUE 36V

3
02
For some bicycles, like low-step cruisers, stand-over clearance measurement cannot be used as they either do not have a
top tube or it is sloped very low. For these bikes the height of the seat post should be used to select the correct size. You
should be able to touch the ground comfortably while sitting in the saddle when it is at its lowest point in the seat tube.
Adjusting the saddle can further improve the comfort, fit and performance of your bike.
The load limit for your bicycle is 275.5 lbs (including bike). Certain parts have their own load limits, such as the rear
carrier; please consult your dealer if you are unsure of the load limits of your bike’s parts.
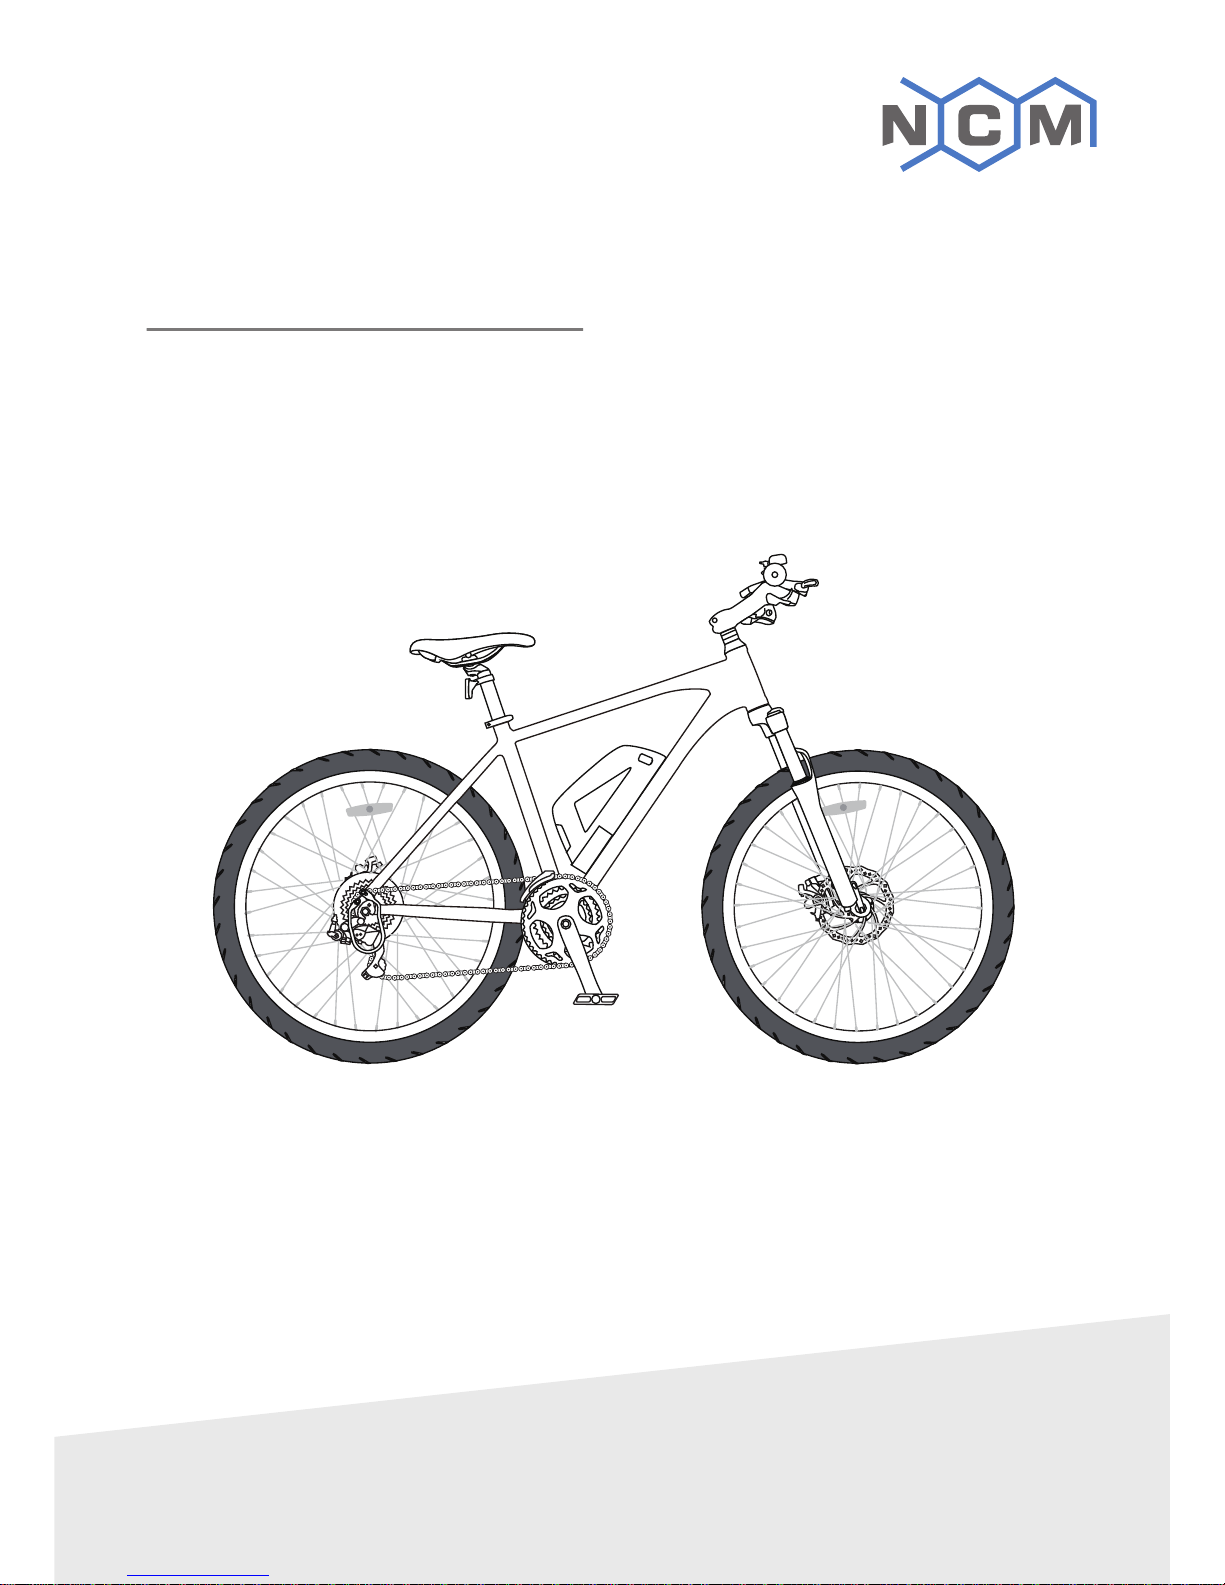
1.5 Bike Components
1 Rear Reflector
2 Rear Disc Brake
3 Freewheel
4 Motor
5 Rear Derailleur Protector
6 Rear Derailleur
7 Chain
8 Pedal
9 Crankset
10 Front Derailleur
11 Front Disc Brake
12 Battery
13 Tyre
14 Front Fork
15 Frame Number
16 Stem
17 Saddle
18 Saddle Quick Release
19 Wheel Reflector
(reflectors may differ by country)
18
19
16
15
11
8
7
6
4
2
17
1
12
9
10
14
13
5
NCM
PRAGUE 36V
GENERAL
03
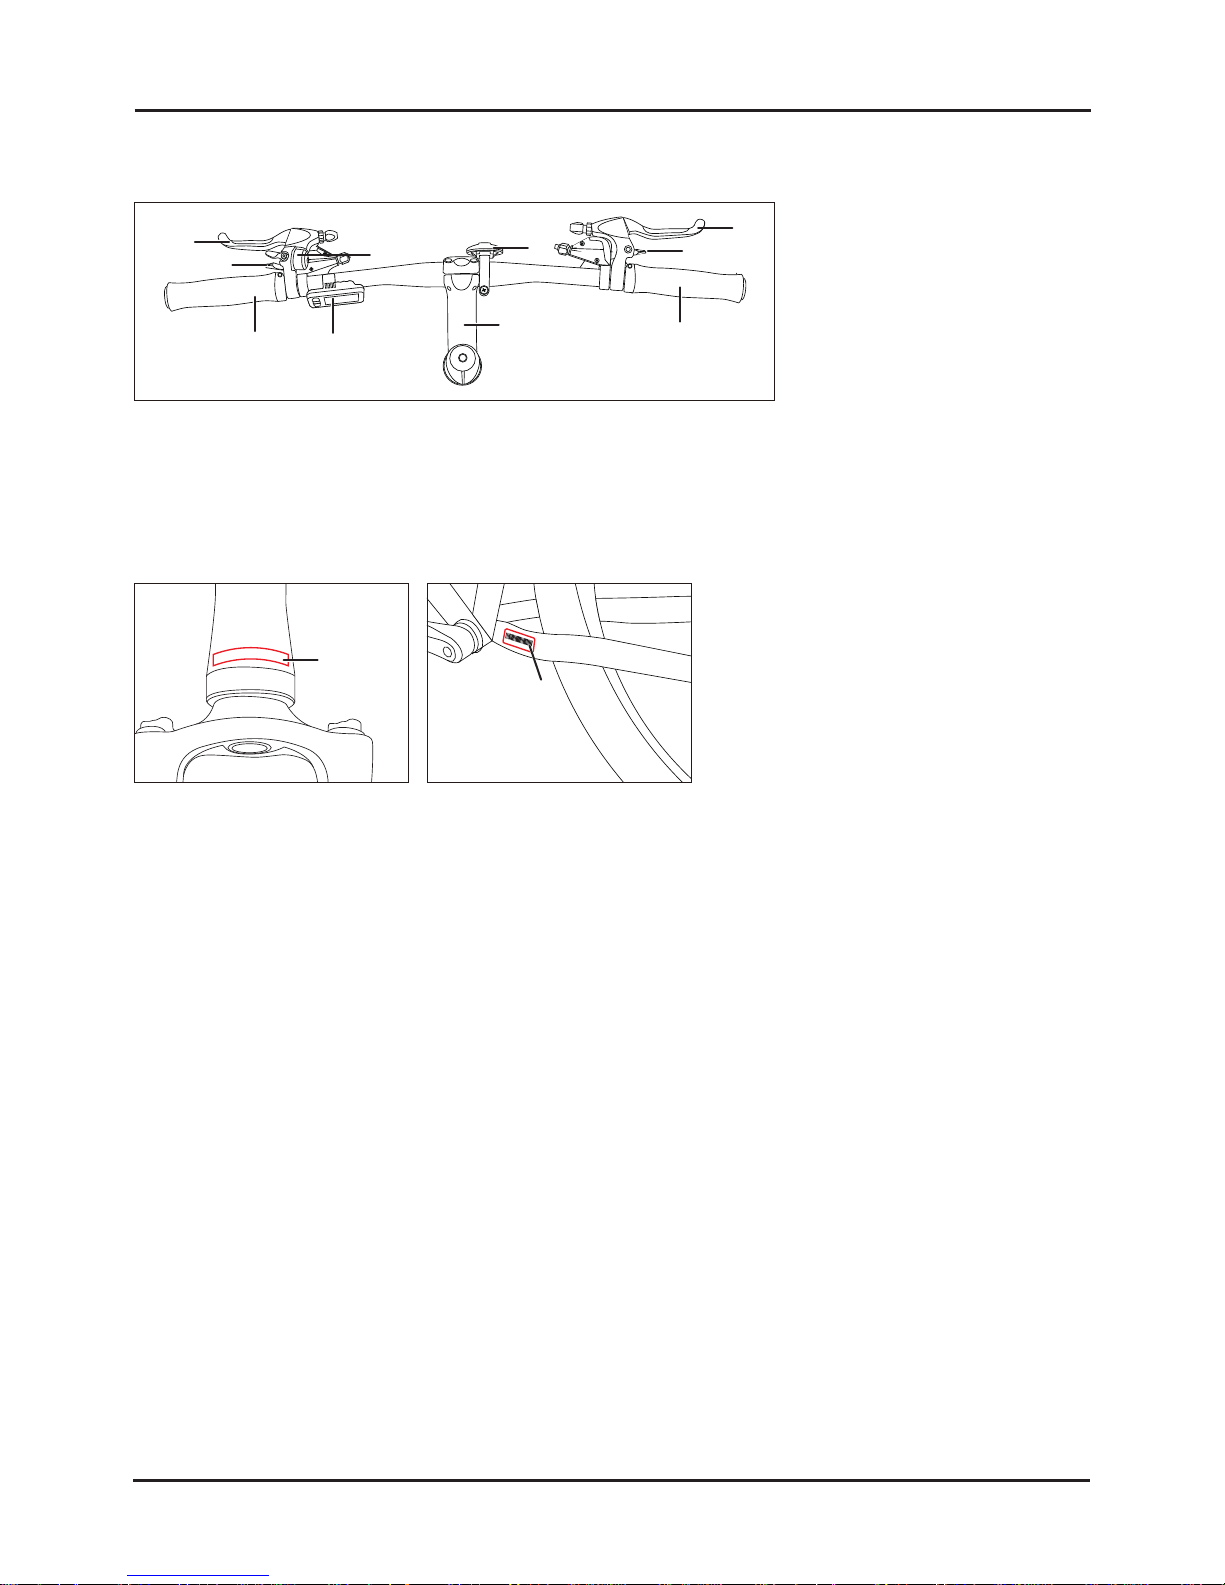
5 Right Grip
6 7-Speed Rear Shifter
7 Rear Brake Lever
8 Front Reflector
9 Bell
10 Stem
Handlebar Attachments
1 Display
2 Left Grip
3 3-Speed Front Shifter
4 Front Brake Lever
Frame Number
1 Frame Number (head tube)
2 Frame Number (sticker)
1.6 Range
The range on one battery charge strongly depends on several conditions, such as (but not limited to):
● Road conditions, such as road surface and slope.
● Weather conditions, such as temperature and wind.
● Bike conditions, such as tyre pressure and maintenance level.
● Bike usage, such as acceleration, shifting, and motor assistance level.
● Weight of rider and cargo.
● Number of charge and discharge cycles.
1.7 Shifting Recommendations
For improved range, we advise shifting according to speed. For setting off and traveling at low speeds, a lower gear is
best. At higher speeds a higher gear should be chosen. Releasing pressure from the pedals while shifting will allow for
smooth support and improved range.
● High speed, high gear
● Low speed, low gear
● Reduce pedal pressure when shifting
2
4
3
5
6
8
7
9
10
HM19G000000
H
M
1
9
G
0
0
0
0
0
0
1
2
1
GENERAL
NCM
PRAGUE 36V

04
SAFETY
NCM
PRAGUE 36V
2. SAFETY
2.1 Battery & Charger
● Keep the battery and charger away from water and heat sources.
● Do not connect positive and negative terminals.
● Keep the battery away from children and pets.
● Use the battery and charger only for their intended purpose as part of your E-bike.
● Do not cover the battery and charger, place objects on top of it or rest objects against it.
● Do not subject the battery and charger to shocks (e.g. by dropping).
● Stop the charging procedure immediately if you notice anything unusual.
In the unlikely event of the battery catching fire, DO NOT attempt to put it out with water. Use sand or another fire
retardant instead and call emergency services immediately.
Avoid contact with the battery and charger during the charging procedure; the charger heats up considerably.
Please take note of the additional information on the rear of the battery case.
2.2 Bike Usage
Try all settings on the E-bike and become accustomed to their various results in a safe and controlled environment before
you try riding the bike on the open road. Bicycles with pedaling support may handle somewhat differently depending on
the settings being used.
IMPORTANT SAFETY INFORMATION
1. Always wear a helmet while riding. Make sure your helmet complies with local laws.
2. Keep body parts and other objects away from moving bicycle parts which may cause you harm, such as the wheels and
chain. Do not rest any objects on the battery or motor. Do not impede the drivetrain in any way.
3. Always wear shoes that will stay on your feet and will grip the pedals securely. Never ride barefoot or when wearing
sandals.
4. Be thoroughly familiar with the controls of your bike.
5. Wear bright, visible clothing that is not so loose that it may accidentally catch on moving parts of the bike or be snagged
by objects at the side of the road or trail.
6. Do not jump with your bike. Jumping with a bike puts incredible stress on most components, such as the spokes and
pedals. One of the most vulnerable parts to jumping-related damage is your front fork. Riders who insist on jumping a bike
risk serious damage to the bike as well as to themselves.
7. Be mindful of your speed and keep it at a level which is consistent with conditions. Always keep in mind that there is a
direct relationship between speed and control, and also between speed and component stress.
8. Always follow local traffic laws.
9. Never ride while under the influence of alcohol, medication or drugs.
10. If you suffer from any health conditions, please consult your doctor before riding.
11. Never endanger yourself or others through reckless riding.
12. Please keep in mind that braking distance increases with imperfect road conditions, such as gravel or wet surfaces.
13. Please check the cable routing of the brakes before cycling. Ensure that both brakes are operational and in good
condition.
14. The e-bike is mainly suitable for rides on paved roads and paths. It is recommended not to use the e-bike for extreme
mountain tours with multiple climbs, as the system is not designed for these climbs due to the torque of the motor.

05
WARNING:
● Please do not touch the hot surfaces after heavy use, such as the disc brake rotor or V-brake rim side edge.
● Please follow local laws regarding age restrictions for cyclists.
Inflating the Tyres
WARNING:
You should always check the tyre pressure before you start riding, or once a week at the minimum. Check the side
wall of the tyre for the minimum and maximum inflation pressures, and always ensure that your tyres are inflated to a
pressure within the indicated range. If the pressure is too low, your wheel may be damaged, or the inner tube may be
pinched, resulting in a flat tyre. If the pressure exceeds the maximum recommended number, the tyre may blow off
the rim, resulting in damage to the bike and injury to the rider and those nearby.
To ensure that you always have the correct and desirable tyre pressure, use a bicycle pump with a built-in pressure
gauge.
Country
Austria
Brazil
Canada
Denmark
France
Germany
Italy
Netherlands
Portugal
Poland
Spain
South Korea
Switzerland
Russia
USA
Country
Left lever controls front brake,
Right lever controls rear brake
Left lever controls rear brake,
Right lever control front brake
Australia
Indonesia
Japan
Hongkong
Malaysia
New Zealand
Singapore
UK
Cable Routing Cable Routing
It is customary for countries with right-hand traffic to have the front brake on the left-hand brake lever and the rear brake
on the right-hand lever. The opposite is generally true for countries with left-hand traffic. The table below shows several
examples.
SAFETY
NCM
PRAGUE 36V

06
2.3 Transport
Transport by car
Batteries should be removed from the bike during transport by car, as they may be damaged through excessive and
repeated shocks or by foreign objects striking the bike at high speed.
Please remove the batteries and keep them inside the car during transport.
Remove the front wheel for transport
- Open the quick release lever (1) and loosen the axle nut (2) a few turns.
- Remove the front wheel (3) from the fork downwards.
Install the front wheel
- Insert the front wheel (3) into the dropouts (4) of the fork.
- Tighten the axle nut (2) and close the quick release lever (1).
- The lever must be pointed upwards (and aligned with the fork to prevent snagging) and should be closed with noticeable
counter pressure.
WARNING:
● To avoid any danger, after you have installed the wheel, please test the brake system before cycling.
● If the quick release lever is not completely closed, it may fully open again easily. This can cause the wheel to fall off the
bike, leading to serious falls and bike damage. To ensure that your wheel is securely in place, the quick release lever
should offer considerable resistance when closing by hand and must always be fully closed before riding.
2.4 Keys
Each NCM E-bike comes with two copies of the battery lock key. Bikes with rim locks are delivered with extra keys (not the
same key as the battery). Onboard charging of the battery will likely lead to infrequent usage of the battery lock key; it is
needed for maintenance and repair, however, so please keep this in mind when storing the key.
● Make sure to always have at least one spare key.
● Keep spare key(s) in a safe place for repairs, maintenance and emergencies.
● Please bring the key when going to your NCM dealer for maintenance or repairs.
4
1
2
3
4
NCM
PRAGUE 36V
SAFETY

07
NCM
MOSCOW PLUS 48V
INSTALLATION AND ADJUSTMENT
Then remove the top cap
(and washers, if adjustments
to stem height are necessary).
During installation, make
sure that there is no gap
between the head tube and
the front fork.
S5
1. Remove the upper screw of the fork steerer tube.
M
S5
S5
3. INSTALLATION AND ADJUSTMENT
3.1 Handlebar and Stem Assembly
2. Put on the conical washer, 2 thick washers and 1 thin
washer on the exposed steerer of the fork.
3. Install the handlebar and stem as shown in the above
image, making sure none of the cables are twisted or too
tight (you may have the handlebar twisted). Put the top
cap with screw into the stem and fasten the screw (or the
ball-bearings could get damaged) to secure the stem down
onto the headset.
4. Align the handlebar vertically with the wheel (you may
need to loosen the screw from step 3 to make small
adjustments) and tighten the bolts on both sides of the
stem.

08
R
L
L
R
3.2 Assembly of the Pedals
- Identify your pedals: check the letters on the pedals, "L" or "R".
- The "R" marked pedal is for the right (when facing the forward direction). For attachment to the crank, tighten clockwise.
- The "L" marked pedal is for the left. For attachment, tighten counterclockwise when facing directly.
WARNING:
First screw on the pedals by hand, then tighten with the wrench provided.
NCM
PRAGUE 36V
INSTALLATION AND ADJUSTMENT
 Loading...