

Operating Manual
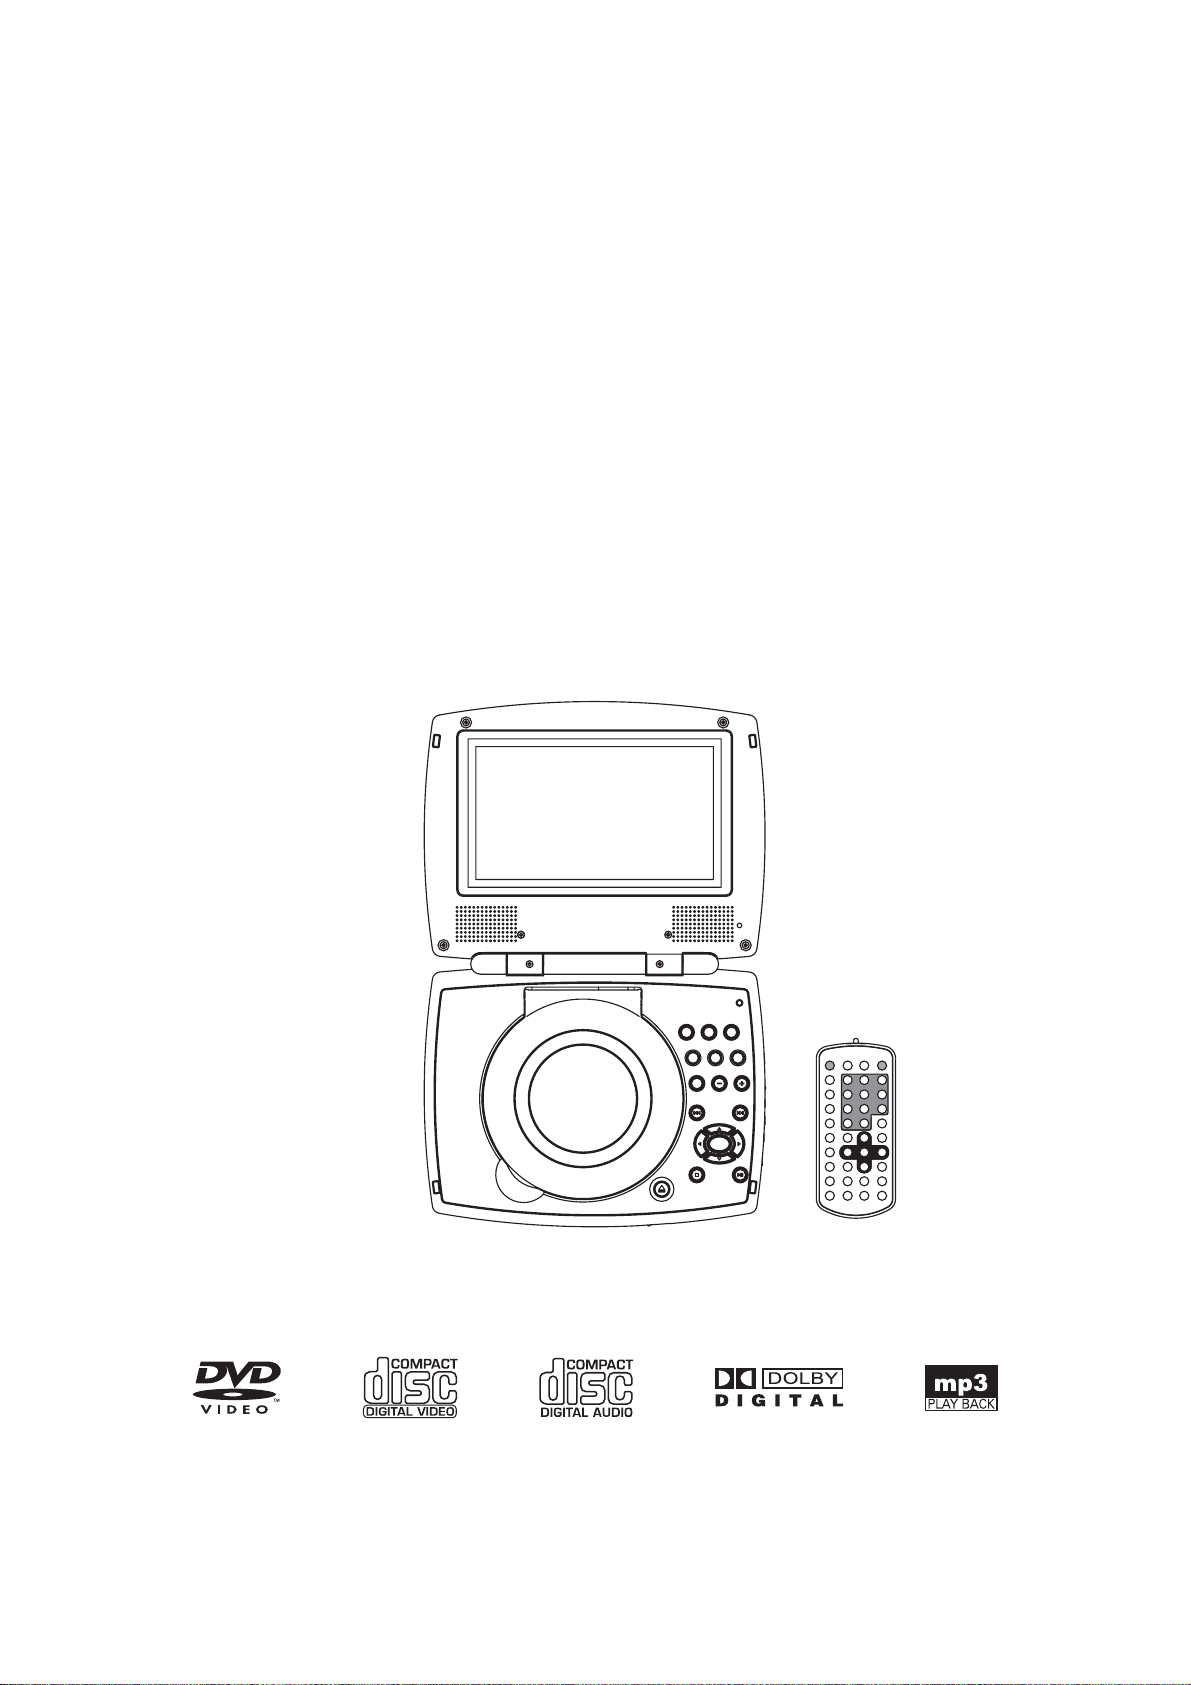
PORTABLE LCD DVD PLAYER
Model: NX-827
READ THESE INSTRUCTIONS INCLUDED IN THIS IM THOROUGHLY PRIOR TO CONNECTING AND OPERATING.
THE ILLUSTRATIONS & GRAPHICS HEREIN ARE FOR REFERENCE ONLY AND SUBJECT TO CHANGE WITHOUT NOTICE.
PLEASE RETAIN THIS MANUAL IN CASE YOU MAY NEED IT FOR FUTURE REFERENCE.
OVERVIEW OF THE DVD PLAYER:
1
2
13
14
15
16
17
18
19
20
24
21
8
10
3
22
23
6
4
5
7
12
9
11
26
25
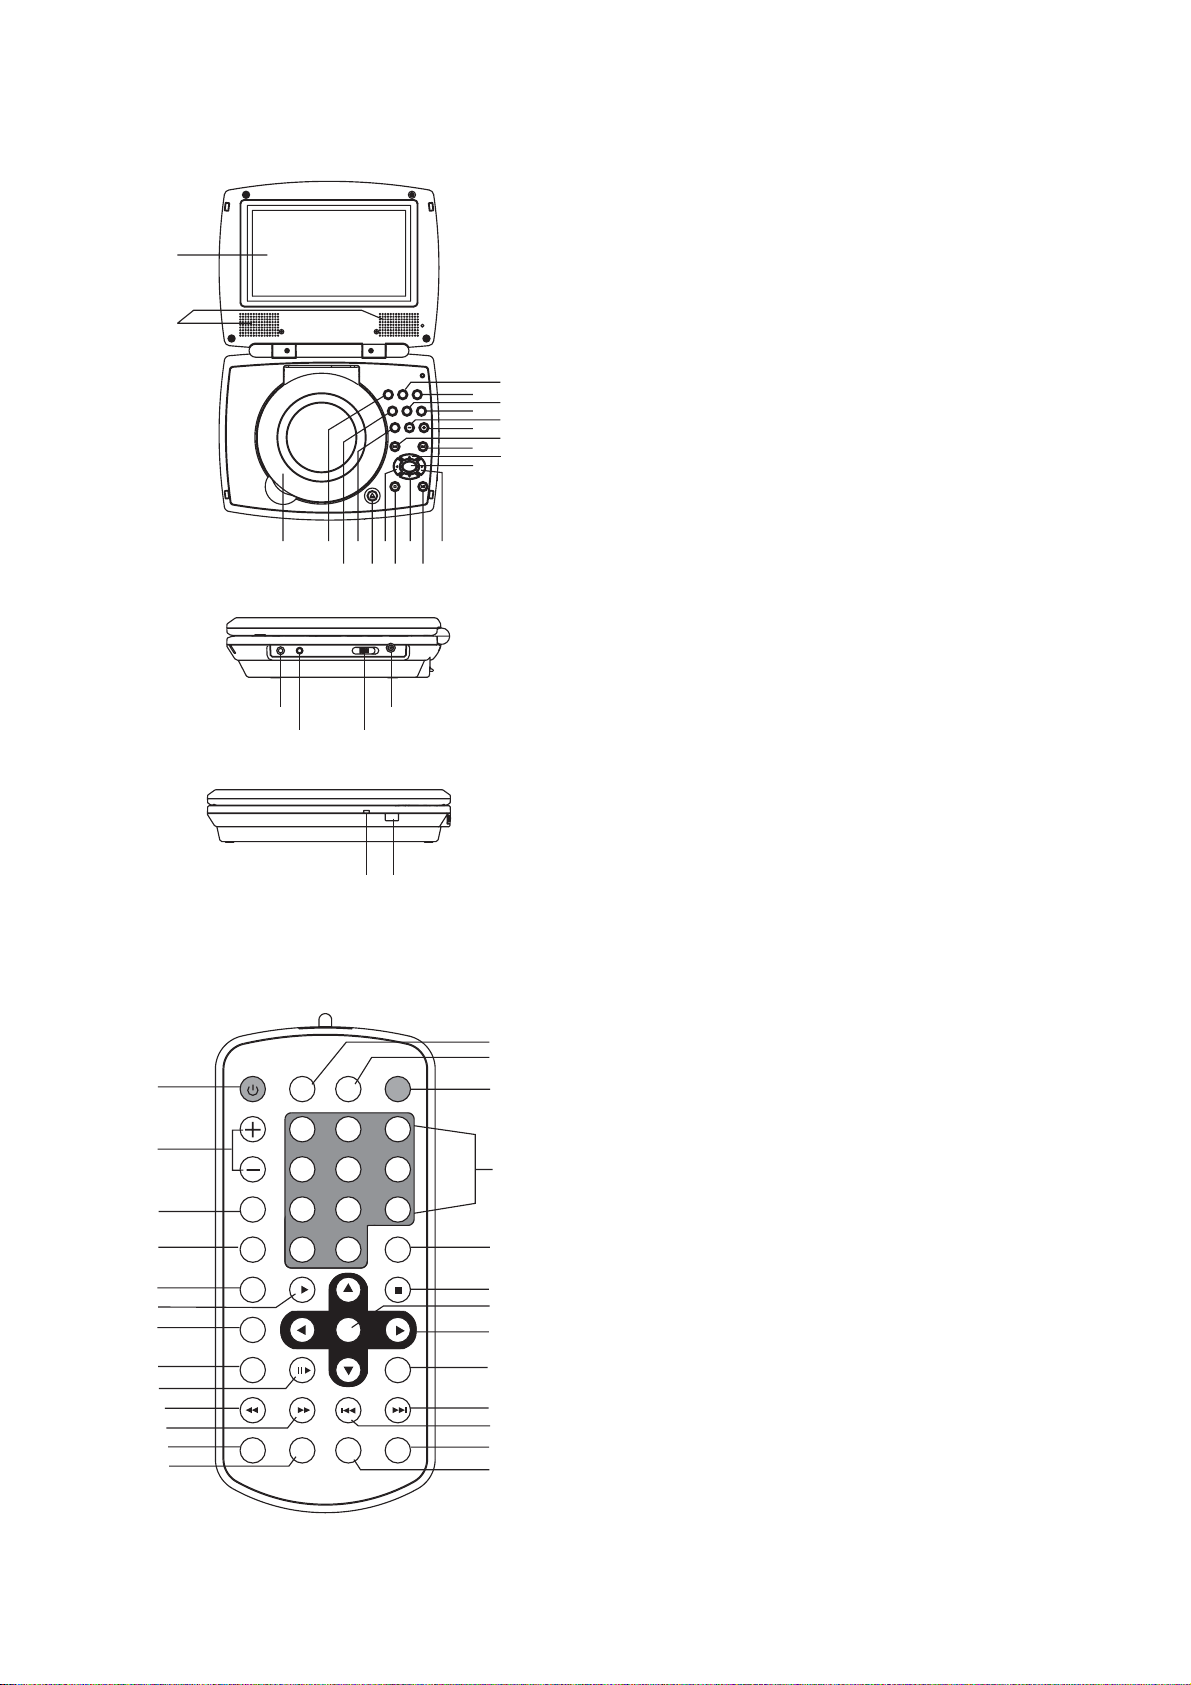
1. TFT SCREEN
2. L&R SPEAKERS
3. DISC COVER
4. DISPLAY KEY
5. SUBTITLE KEY
6. SETUP KEY
7. DISC COVER OPEN KEY
8. NAVIGATION LEFT& FAST BACKWARD KEY
9. STOP KEY
10. NAVIGATION DOWN KEY
11. PLAY/PAUSE KEY
12. NAVIGATION RIGHT& FAST FORWARD KEY
13. SEARCH KEY
14. MENU KEY
15. TITLE KEY
16. AUDIO KEY
17. VOLUME - KEY
18. VOLUME + KEY
19. PREVIOUS KEY
20. NEXT KEY
21. OK/ENTER KEY
22. PHONES SOCKET
23. VIDEO/AUDIO OUT SOCKET
24. NAVIGATION UP KEY
25. POWER ON/OFF SWITCH
26. DC 9V INPUT SOCKET
27. POWER INDICATOR
28. REMOTE SENSOR
27 28
GET A QUICK GLANCE AT THE REMOTE CONTROLLER
1. POWER button
2. VOLUME buttons
3. REPEAT button
4. MENU button
5. SUBTITLE button
6. PLAY button
7. TITLE button
8. AUDIO button
9. PAUSE/STEP button
10. F.BWD button
11. F.FWD button
12. ANGLE button
13. ZOOM button
14. DISPLAY button
15. SETUP button
16. SCREEN ON/OFF& COL/BRI button
17. NUMERIC buttons
18. CLEAR button
19. STOP button
20. OK/ENTER button
21. NAVIGATION buttons
22. SLOW button
23. NEXT button
24. PREV button
25. SEARCH button
26. PROGRAM button
1
1
2
3
4
5
6
7
8
9
10
11
12
13
SCREEN
POWER DISPLAY SETUP
VOLUME
REPEAT
SUBTITLE PLAY STOP
1
4
7
MENU
0
TITLE
PAUSE/STEP SLOW
AUDIO
F.B WD
F.FWD PREV NEXT
ANGLE ZOOM
ON/OFF
COL/BRI
2
5
8
CLEAR
+10
OK/ENTER
SEARCHPROGRAM
14
15
16
3
6
9
17
18
19
20
21
22
23
24
25
26
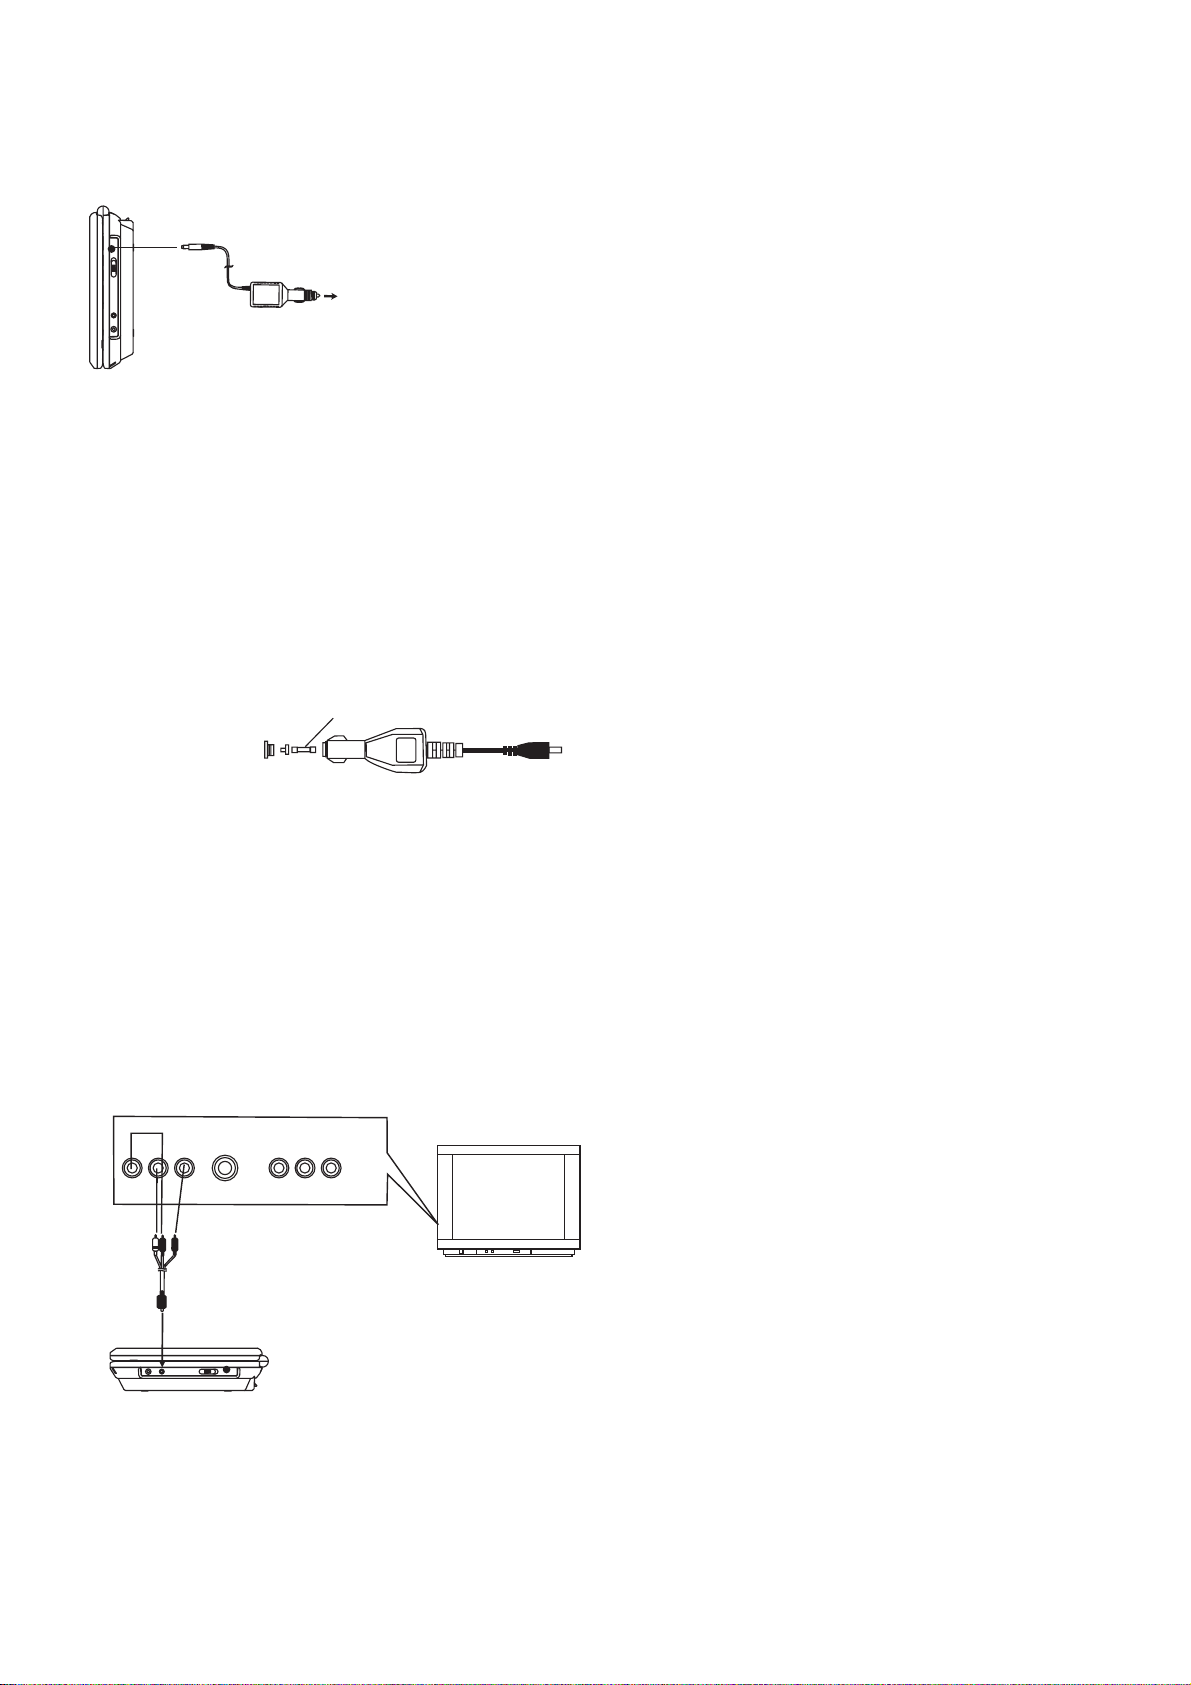
CONNECTING TO A CAR ADAPTOR
The 9V car power adaptor is designed for use with vehicles
that have a 12V, negative ground electrical system.
WARNING:
Disconnect the car power adaptor when not in
use. Not in use in 24V vehicles.
To the cigarette lighter socket
CAUTIONS:
! Use the unit only with 9V car power adaptor, use with other
car power adaptor could damage the unit.
The recommended 9V car power adaptor is for use with
!
this unit only. Do not use it with other equipment.
In the interests of road traffic safety, do not operate the unit
!
or view video software while driving a vehicle.
!
Make sure the unit is fastened securely to prevent from
moving about inside the vehicle in the event of an accident
!
When the inside of the cigarette lighter socket is dirty with
ashes or dust, the plug section may become hot due to
poor contact. Be sure to clean the cigarette lighter socket
before use.
!
After use, disconnect the 9V car power adaptor from both
the unit and cigarette lighter socket.
FUSE REPLACEMENT
FUSE
OPERATIONS
PREPARATION
Power on the TV set and select video input mode.
Power on the audio system which is connected to the player.
GET STARTED
1. Press POWER switch to turn on the player.
2. Press CD cover Open to open the disc tray.
3. Place a disc onto the disc tray.
4. Press CD cover to close the disc tray and the playback starts
automatically.
5. When a menu screen appears on the TV, move the navigation
buttons or press the numeric buttons to select a preferred
track number, then press OK/ENTER button to start playback.
ADJUST THE VOLUME
Press the VOLUME+ button to increase or VOLUME- button
to reduce the volume.
SKIPAHEAD OR BACK
Press NEXT SKIP or PREV SKIP button once during play to
skip a chapter(DVD) or a track (Video CD/CD) ahead or
backwards.
RAPID ADVANCE/ REVERSE
During playback, press F.FWD button or F. BWD button
several times to scan the disc forward or backward at X2, X4,
X8, X20 normal speed.
Press PLAY button to resume normal play.
CONNECT DVD PLAYER TO OTHER
APPLIANCES
It is recommended you connect the player to a multi-system
TV.
Ensure that this player and other appliances (TV set and
amplifier) that will be connected to the player are set to OFF
mode and that the AC cords are disconnected from the wall
outlet.
Avoid blocking ventilation holes of the connected appliances
and make sure air around there can circulate freely.
Read carefully and follow the instructions before connecting
other appliances.
Observe the color coding when connecting audio and video
cables.
AUDIOL
AUDIOR
AVAUDIO/VIDEO INPUT
S-VIDEO
VIDEOIN
A/V cable
After connection is firmed and securely done, plug AC
ADAPTER to an applicable wall outlet and turn on the player.
YUVINPUT
TV SET
PAUSE OR STEP PLAY
During playback, press PAUSE/STEP button to pause; in
pause mode, each time the PAUSE/STEP button is pressed,
the player will only play one frame; to resume normal play,
press PLAY button again.
STOP PLAYBACK
Press STOP button during playback to stop playback; the
player activates its resume function when STOP is pressed in
STOP mode; press PLAY button again, playback resumes at
the point it stopped previously; open the disc tray or press the
STOP button one more time to clear the resume function.
SLOW-MOTION PLAY (DVD/VCD)
Press SLOW button on the remote control during playback,
the disc will be played at 1/ 2 normal speed at first, each time
this button is pressed, the play speed becomes slower (down
to 1/7 normal speed.)
Press PLAY button, normal play will resume.
REPEAT
Press REPEAT button during play, it will repeat play one
chapter/title or repeat all(for DVD disc), or repeat play a track
or all tracks (for VCD / CD), or repeat the contents between
specific two points (A-B).
NOTE: repeat function for VCD/CD disc will ONLY work in
PBC OFF mode.
SEARCH FOR PREFERRED SCENE
1. Press SEARCH button during play and highlight the item to
be played (Title, Chapter, or Chapter time)by navigation
buttons
2. Input the desired number or time via the numeric buttons.
3. Press OK/ENTER button to confirm and the playback from
the located scene starts.
4. To exit search menu, press SEARCH button directly.
2

PROGRAM PLAY (UP TO 16 MEMORIES)
1. Press PROGRAM during playback to display the program
menu.
2. Select location(s) to be memorized via navigation buttons and
then enter desired Titles/Chapters numbers via numeric
buttons.
Note: Inputting leading zero is not necessary. Press +10 key
to be on the tenth chapter/title/track. If the chapter/title/track
number is behind the cardinal 10, press +10 key first and then
the unit digit. Some figureinputs may be useless, because it 's
greater figure than total title/chapter/track numberonthe disc.
Example: Track 3, press "3"
Track 12, press "+10" and then "2"
Track 21, press "+10" twice and then "1"
3. To start programmed playback, select PLAY on themenu;
pressing PROGRAM button again to exitprogramming.
4. To clear programmed items, select the items and then press
CLEAR button on the remote control. To clear all items, select
the <CLEAR> on the menu, and then press OK/ENTER
button on remote control.
5. You can also cancel program mode by clearing all the items
in the program menu.
ZOOM PLAY
Press the ZOOM key continuously to zoom in the picture by 2,
3, and 4 times, zoom out by 1/2, 1/3, 1/4 normal size.
Press this key once more when the picture is at 1/4 size to
return to the normal size display.
Scroll to view the enlarged picture using Navigation buttons.
ON SCREEN DISPLAY INFORMATION
When the player is in operation, press DISPLAY button
continuously on the remote control, the screen will
display parts of information(current disc type, title number,
chapter number, playtime, audio language, audio type, subtitle
language and multi angle, etc) in a sequence.
CHANGING AUDIO SOUNDTRACK LANGUAGE(DVD/VCD
DISC)
It is possible to change the audio soundtrack language to a
different language from the one selected at the initial settings
(This operation works only with discs on which multiple audio
soundtrack languages are recorded).
Press AUDIO button during DVD disc play, the sound track
language changes with the current sound track number
shown on the TV screen.
Pressing AUDIO button during VCD disc play will change
audio output mode: MONO L, MONO R and stereo.
NOTE: When no soundtrack languages are recorded,
pressing this button will not work.
MULTI-ANGLEVIEWING (DVD ONLY)
Press ANGLE button during playback to display the number of
angles being played and then select a desired angle to view
the scene.
Note: only the DVDs shot with multi-angle scenes have this
function.
CHANGING SUBTITLE LANGUAGE (DVD ONLY)
Press SUBTITLE button during playback, the subtitle
language shown on the screen will change as a response to
each press;
When the desired language appears, release the button to
view the subtitle in that language.
Note: this function only works on the DVDs recorded with
multi-language subtitles.
ENJOYING VIDEO CDS WITH PBC FEATURE
After loading a VCD 2.0/1.0 with PBC, the TV screen shows
the Disc formats and then a menu.
Select desired track by means of numeric buttons: use one
corresponding key of numeric buttons 1~ 9 to choose track 1
to track9;0keytochoose track 10; If the track number
exceeds 10, press +10 button first, and then numeric buttons
1~9.
During playback,
menu(DVD). press this button to select PBC ON/OFF
mode(VCD)
TITLE button: Play the title (DVD).
MP3 PLAYBACK
Load the Mp3 disc onto the disc tray and the TV screen will
1.
show all its folders after a few seconds.
2. Select the folder you want by the navigation buttons and
then OK/ENTER button to confirm.
3. The files in this folder are displayed and select your
favourable song via navigation buttons and press
OK/ENTER button to start playback.
Press NEXT and PREV button to select track directly.
4.
Press REPEAT button change play mode.
5.
REPEAT 1- repeat one file.
REPEAT DIR- repeat all tracks in the current album
REPEAT ALL- repeat all tracks in current disc.
REPEAT OFF-cancel repeat modes.
KODAK PICTURE CD / JPEG CD PLAYBACK
Slide show of Kodak Picture CD after being loaded begins
automatically;
Folders of JPEG picture CD after being loaded are displayed
on the TV screen; use the navigation buttons to select the
desired folder and then press OK/ENTER button to confirm.
The files in this folder are displayed and you can select your
favourable pictures using the up/down navigation buttons and
press OK/ENTER button to start playback.
Preview of the picture will be displayed while you scroll across
the filenames.
KODAK PICTURE CD / JPEG CD OPERATIONS
1. PLAY MODES
Press REPEAT button during play to change the play modes.
REPEAT 1- repeat one file
REPEAT DIR- repeat all picture in the current album
REPEAT ALL- repeat all pictures in current disc.
REPEAT OFF- cancel repeat modes.
During playback, press STOP to enter preview mode.
SKIP TO NEXT/PREVIOUS PICTURE
2.
Press NEXT button to skip to the next picture or PREV
button to the previous picture.
If no key is pressed for a few seconds, it will skip to next
picture automatically.
PICTURE ROTATIONS
3.
Press RIGHT and LEFT navigation buttons to rotate the
picture Clockwise and anti-clockwise respectively.
PICTURE FLIPS
4.
Press UP navigation button to flip the picture vertically.
Press DOWN navigation button to flip the picture horizontally
PICTURE ZOOM IN/OUT
5.
Press ZOOM button continuously ,the picture zooms in by 2,
3, 4 times or zooms out by 1/2, 1/3, 1/4 the original size.
Press this button once more when the picture getting 1/4 size
to return to the normal play.
If the picture is enlarged, you may use the navigation buttons
to view blocked parts of the picture.
press MENU button to return main
3

6. SLIDE SHOW TRANSITION MODES
During slide show playback, press the PROGRAM button
cyclically to select one of the following modes to play.
WIPE TOP
WIPE BOTTOM
WIPE LEFT
WIPE RIGHT
DIAGONAL WIPE LEFT TOP
DIAGONAL WIPE RIGHT TOP
DIAGONAL WIPE LEFT BOTTOM
DIAGONAL WIPE RIGHT BOTTOM
EXTEND FROM CENTER H
EXTEND FROM CENTER V
COMPRESS TO CENTER H
COMPRESS TO CENTER V
WINDOW H
WINDOW V
WIPE FROM EDGE TO CENTER
RANDOM
NONE
COLOR AND BRIGHTNESS ADJUSTMENT(FOR THE LCD
SCREEN)
Press SCREEN ON/OFF button on the remote control to
adjust the color intensity and brightness respectively.
Press and hold this button for a moment to open or close the
TFT display.
INITIAL SETTINGS
Initial settings page is for you to make your preferred settings
up for your player. Once the initial settings are done they are
retained in the CPU of the player until otherwise modified.
COMMON PROCEDURES FOR INITIAL SETTINGS
1. Press SETUP button.
2. Use the navigation buttons to select the item you want to
modify, press button to confirm, setting page
with further setting items displayed shows on the TV
screen. Again use navigation buttons to make changes.
Press again button to confirm modifications.
3. Use navigation buttons to switch to another setting on the
main setting page.
4. Press SETUP button to exit main setting page.
1. SYSTEM SETUP
OK/ENTER
OK/ENTER
SYSTEM SETUP
TV SYSTEM
LCD MODE
TV TYPE
PASSWORD
RATING
DEFAULT
1.4 PASSWORD
- input password to unlock the system. The
steps are as follows:
1.4.1 Enter SYSTEM SETUP, select the PASSWORD item by
scrolling the down navigation button, and then press the
right navigation button to select the input box.
1.4.2 Input user's password"0000" to unlock it, in this case,
select the input box again to change the password by
inputting another new four numeric numbers and then
press OK/ENTER button to confirm. When the password
is changed, you are needed to input the new one to
unlock the system.
1.4.3 Once you forget your own password, use the
supervisor's password "8200" to unlock it.
NOTE
: If wrong password was input in unlock status, the
system will lock.
1.5 RATING -
Set the rating of this player. If you want to
change the rating of parental lock, please input the
password to unlock first.
Options:
1KIDSAFE/2G/3PG/4PG13/5PG-R/
6R / 7 NC-17 / 8 ADULT
1.6 DEFAULT -
Reset to factory settings.
Options: RESTORE
2. LANGUAGE SETUP
LANGUAGE SETUP
OSD LANGUAGE
AUDIO LANG
SUBTITLE LANG
MENU LANG
EXIT SETUP
2.1 OSD LANGUAGE - It is used to select different On
Screen Display language for different user.
2.2 AUDIO LANG -
select preferred audio language.(DVD
only, need disc software support)
2.3 SUBTITLE LANG-
Select preferred subtitle language.
(DVD only, need disc software support)
2.4 MENU LANG -
Select preferred disc menu language.
(DVD only, need disc software support)
3. VIDEO SETUP
VIDEO SETUP
BRI
CON
HUE
SATURATION
EXIT SETUP
EXIT SETUP
1.1 TV SYSTEM
Options:
- it is used to select the TV mode.
NTSC / PAL/ AUTO
Please select this option as per your TV set.
1.2 LCD MODE
Options: 4:3 16:9
1.3 TV TYPE-
it is used to select the TV scan mode, please
set as per your TV set.
Options: Normal Pan & scan mode
4:3PS :
4:3LB :
16:9 :
normal Letter box mode
16:9 wide screen mode
3.1 BRI-- to set the brightness for the display.
Options: 0/2/4/6/8/10/12
3.2 CON--to set the contrast effect for display.
Options:
0/2/4/6/8/10/12
3.3 HUE--to set the colour impression for display.
Options: -6/-4/-2/0/+2/+4/+6
3.4 SATURATION--to set the saturation level for display.
Options: 0/2/4/6/8/10/12
4

4. SPEAKER SETUP
SPEAKER SETUP
DOWNMIX
EXIT SETUP
4.1 DOWNMIX
Options: Left/Right mix mode
LT/RTSTEREO-
Select this option if you don't have a
5.1 channels amplifier.
DISC HANDLING PRECAUTIONS
Hold the disc by the edge so the surface will not
be soiled with finger prints. Finger prints, dirt and
scratches can cause skipping and distortion.
Do not write on the label side with a ball-point
pen or other writing utensils.
Do not apply benzine, thinner, and liquid that
prevents against static electricity.
Be careful not to drop or bend the disc.
Instal only one disc on the disc tray.
Do not try to close the disc tray when the disc is
not in stalled properly.
Be sure to store the disc in it's case when not in
use.
TROUBLESHOOTING
If your DVD player does not seem to be functioning properly, check the items below before you contact an authorized service center
Symptom Check
Power does not turn on or
suddenly turns off.
Battery pack is in place but
the power does not turn on
or suddenly turns off
Make sure the AC adapter is securely plugged into an AC outlet.
Turn the power off and then back on.
Check that the battery pack is charged. If not, recharge it.
Remote control won't work
No picture or sound
No picture
No sound
No picture and sound
Distorted video or sound
Check that the battery is inserted in the
The battery may be flat. Replace it with a new one.
Check that the signal transmission is directed at the remote control sensor on the DVD player.
Remove the obstacle between the remote controller and remote control sensor.
Check that the A/V cables are securely connected.
Check that the disc is a DVD (region number 1 or all), DVD-RW, VIDEO CD or AUDIO CD.
Do not use a disc that has scratches or dirt.
Check that the label-side of the disc is facing up.
The pick-up lens of the DVD player may be dirty. Contact the service center for lens cleaning.
Check that the TV channel is set to VIDEO or AV if viewing with a TV.
Check that the LCD display is turned on.
Check that the display panel is open. If it is closed, audio will not be output to the speakers.
Check the volume setting. If set to zero, turn up volume level.
Check that the headphones are plugged into the PHONES socket.
Speakers cannot be used with the headphones.
Check that the battery is properly installed and AC Adapter is properly connected.
Use a disc without scratches or dents.
and direction properly.
5

Manual de Operación
REPRODUCTOR DE DISCO VERSÁTIL DIGITAL (DVD)
CON PANTALLA DE CRISTAL LIQUIDO (LCD) INTEGRADA
Modelo: DPX3270H
3
1
2
4
5
6
7
8
9
0
+10
FAVOR DE LEER ESTE MANUAL COMPLETAMENTE ANTES DE OPERAR Y/O CONECTAR ESTE PRODUCTO.
CONSERVAR EL MANUAL PARA FUTURAS REFERENCIAS.
LOS DIBUJOS Y GRÁFICAS EN EL MANUAL SON PARA REFERENCIA SOLAMENTE Y PUEDEN ESTAR SUJETOS
A CAMBIOS SIN PREVIO AVISO

LOCALIZACIÓN DE LOS BOTONES Y CONECTORES EN EL DVD
1. PANTALLA LCD-TFT
2. BOCINAS IZQUIERDA Y DERECHA
1
2
13
14
15
16
17
18
19
20
24
21
3
22
23
8
6
10
4
5
7
12
9
11
26
25
3. CUBIERTA DEL DISCO
4. BOTÓN DE DESPLIEGUE "DISPLAY"
5. BOTÓN DE SUBTITULO "SUBTITULE"
6. BOTÓN DE AJUSTES "SETUP"
7. BOTÓN PARA ABRIR LA CUBIERTA DEL DISCO "5"
8. BOTÓN DE NAVEGACIÓN IZQUIERDA / REGERSO RÁPIDO "3"
9. BOTÓN DE DETENER "<"
10. BOTÓN DE NAVEGACIÓN ABAJO "6"
11. BOTÓN DE REPRODUCIR/PAUSAR "4;"
12. BOTÓN DE NAVEGACIÓN DERECHA / AVANCE RÁPIDO "4"
13. BOTÓN DE BUSCAR "SEARCH"
14. BOTÓN DE MENÚ "MENÚ"
15. BOTÓN DE TITULO "TITLE"
16. BOTÓN DE AUDIO "AUDIO"
17. DISMINUIR VOLUMEN "-"
18. AUMENTAR VOLUMEN "+"
19. PREVIO "9"
20. SIGUIENTE ":"
21. BOTÓN DE ENTRAR "OK/ENTER"
22. CONECTOR PARA AUDÍFONOS "PHONES"
23. CONECTOR DE SALIDA DE AUDIO/VIDEO "A/V"
24. BOTÓN DE NAVEGACIÓN ARRIBA "5"
25. INTERRUPTOR DE PODER "ON/OFF"
26. CONECTOR DE ENTRADA DE 9 Vcc
27. INDICADOR DE PODER
28. SENSOR REMOTO
27 28
LOCALIZACIÓN DE LOS BOTONES EN EL CONTROL REMOTO
1. BOTÓN DE PODER "POWER"
2. BOTONES DE VOLUMEN "VOLUME"
1
2
3
4
5
6
7
8
9
10
11
12
13
SCREEN
POWER DISPLAY SETUP
VOLUME
REPEAT
SUBTITLE PLAY STOP
1
4
7
MENÚ
0
TITLE
AUDIO
PAUSE/STEP SLOW
F.B WD
F.FWD PREV NEXT
ANGLE ZOOM
ON/OFF
COL/BRI
2
5
8
CLEAR
+10
OK/ENTER
SEARCHPROGRAM
14
15
16
3
6
9
17
18
19
20
21
22
23
24
25
26
3. BOTÓN DE REPETIR "REPEAT"
4. BOTÓN DE MENÚ "MENÚ"
5. BOTÓN DE SUBTITULO "SUBTITULE"
6. BOTÓN DE REPRODUCCIÓN "4"
7. BOTÓN DE TITULO "TITLE"
8. BOTÓN DE AUDIO
9. BOTÓN DE PAUSA/PASOS ";4"
10. BOTÓN DE REGRESO RÁPIDO "7"
11. BOTÓN DE AVANCE RÁPIDO "8"
12. BOTÓN DE ÁNGULO "ANGLE"
13. BOTÓN DE ACERCAMIENTO "ZOOM"
14. BOTÓN DE DESPLIEGUE "DISPLAY"
15. BOTÓN DE AJUSTES "SETUP"
16. ENCENDER/APAGAR PANTALLA "ON/OFF" Y
BOTÓN DE COLOR/BRILLO "COL/BRI"
17. BOTONES NUMÉRICOS "0-9, +10"
18. BOTÓN DE LIMPIAR "CLEAR"
19. BOTÓN DE DETENER "<"
20. BOTÓN DE ACEPTAR/ENTRAR "OK/ENTER"
21. BOTONES DE NAVEGACIÓN "3 4 5 6"
22. BOTÓN DE LENTO "SLOW"
23. BOTÓN DE SIGUIENTE ":"
24. BOTÓN DE PREVIO "9"
25. BOTÓN DE BUSCAR "SEARCH"
26. BOTÓN DE PROGRAMA "PROGRAM"
1

CONECTANDO AL ADAPTADOR PARA AUTOMÓVIL
El adaptador para automóvil de 9 Vcc esta diseñado para uso en
automóviles que tienen 12 Vcc con sistema de tierra negativo.
ADVERTENCIA:
De scone ctar e l adap tador para a utomó vil
c u a n d o n o es t e e n u s o . N o u s a r e n
automóviles de 24 Vcc.
Al encendedor de cigarro del
automóvil.
PRECAUCIONES:
Usar la unidad solo con un adaptador para automóvil de 9 Vcc, el
=
uso de otro adaptador puede dañar la unidad.
El adaptador para automóvil de 9 Vcc recomendado es para uso
=
con esta unidad solamente. No usarlo con otra unidad.
Por seguridad durante trafico vehicular, no operar la unidad o ver
películas cuando maneja el automóvil.
Asegurarse que la unidad esta fijada de manera segura para
=
prevenir que esta se mueva en el interior del automóvil en caso de
un accidente.
Cuando el interior del encendedor de cigarro esta sucio con polvo
=
o cenizas, la conexión puede ser inadecuada debido al pobre
contacto. Asegurarse de limpiar el encendedor de cigarro antes
de cada uso.
Después de cada uso, desconectar el adaptador para automóvil
=
de 9 Vcc de la unidad y del encendedor de cigarro.
REEMPLAZANDO EL
FUSIBLE
FUSIBLE
CONECTANDO EL DVD A OTROS APARATOS
Se recomienda el DVD sea conectado aun multi sistema de TV.
Asegurarse que este reproductor y otros equipos a ser conectados
(televisión y amplificador) a la unidad estén en el modo de apagado
y desconectar el cordón de alimentación del tomacorriente antes de
hacer las conexiones.
No bloquear las ranuras y perforaciones de ventilación de este
DVD y asegurarse que el aire circule libremente.
Leer completamente las instrucciones antes de conectar otros
aparatos.
Asegurarse de observar el código de colores cuando conecte los
cables de audio y video.
AUDIOL
AUDIOR
AVAUDIO/VIDEO INPUT
S-VIDEO
VIDEOIN
CABLE DE AUDIO/VIDEO "A/V"
YUVINPUT
TELEVISIÓN
OPERACIÓN
PREPARACIÓN
Encender la unidad de televisión y seleccionar el modo de entrada de
vid e o. E n cen d er e l si s t em a d e a u d io q u e e s t a c o n ec t a do a l
reproductor.
INICIANDO
1. Presionar "POWER" para encender el reproductor de DVD.
2. Abrir la bandeja del disco.
3. Colocar un disco dentro de la bandeja.
4 . C e r r a r l a b a n d ej a d e l d i s c o y l a r e p r o d u c c i ó n i n i c i a
automáticamente.
5. Cuando un menú se despliega en la pantalla de la televisión, mover
los botones de navegación o presionar los botones numéricos para
se lecc ionar el nu mero d e la p ista d esea da, en tonc es pre sion ar
"OK/ENTER" para iniciar la reproducción.
AJUSTE DEL VOLUMEN
Presionar "VOLUME+" para incrementar el volumen o "VOLUME-"
para disminuirlo.
SALTAR HACIA ATRÁS O HACIA DELANTE
Presionar "9" (PREV) o ": " (NEXT) durante la reproducción para
salta r a l c apit u l o ( DVD) o p i s ta (CD / V C D) pre v i o o sigu i e n t e
respectivamente.
REGRESO Y AVANCE RÁPIDO
Durante la reproducción, presionar "F.BWD" o "F:FWD" varias veces
para regresar o avanzar el disco rápidamente a una velocidad de X2,
X4, X8, X20 de la velocidad normal.
Presionar "PLAY" para volver a la reproducción normal.
PAUSAR Y REPRODUCCIÓN POR PASOS
Durante la reproducción, presionar "PAUSE/STEP" para pausar la
reproducción. Estando en el modo de pausa, cada vez que presiona
"PAUSE/STEP" el reproductor reproduce cuadro a cuadro.
Presionar "PLAY" para volver a la reproducción normal.
DETENER REPRODUCCIÓN
Dur a n te la repr o d u cción, pr e s i onar "STO P " para deten e r la, el
reproductor activa la función de regresar; presionar "PLAY" para volver
a la reproducción desde el punto donde se detuvo previamente. Abrir
la bandeja del disco o presionar "STOP" una vez para borrar la función
de regreso.
REPRODUCCIÓN A VELOCIDAD LENTA (DVD/VCD)
Durante la reproducción, presionar "SLOW" en el control remoto y el
disco será reproducido a un 1/2 de la velocidad normal la primera vez,
cada vez que "SLOW" es presionado, la velocidad de reproducción
disminuye (hasta 1/7 de la velocidad normal).
Presionar "PLAY" para volver a la reproducción normal.
REPETIR UNA / REPETIR TODAS LAS PISTAS
Du rante la repr oducc ión, p resion ar "RE PEAT" , esta repeti rá la
reproducción de un capitulo/titulo o repite todo (para un disco DVD) o
repite una o todas las pistas (para un disco CD/VCD). También repite
el contenido entre una sección definida por dos puntos A-B.
Nota: La función de repetir para discos CD/VCD solo OPERA con el
modo de PBC desactivado "OFF".
Después de que las conexiones están firmes y seguras, conectar el
adaptador ca/cc al tomacorriente y encender el reproductor de
DVD.
BUSCAR UN PUNTO ESPECÍFICO
1. Durante la reproducción, presionar "SEARCH" y remarcar el articulo
a ser reproducido (titulo, ca pitu lo o t iemp o del capi tulo ) con los
botones de navegación.
2. Ingresar e l número o tiempo de seado a través de lo s bo tones
numéricos.
3. Presionar "OK/ENTER" para confirmar e iniciar la reproducción del
punto seleccionado.
4. P ar a s al i r d e l me n ú d e b ús q ue d a , p re s io n a r " S EA R C H"
directamente.
2

P R OG RA M AC IÓ N DE LA R EP RO D UC CI Ó N (H AS T A 1 6
MEMORIAS)
1. Durante la reproducción, presionar "PROGRAM" para desplegar el
menú de programación.
2. Seleccionar el lugar donde se memo rizara a través de los botones
de navegación y entonces ingresar el numero del titulo/capitulo a
través de los botones numéricos.
Nota: Ingresar "0" no es necesario. Presionar "10+" para ingresar el
capitulo/pista/titulo numero 10. Si el numero es mayor a 10, presionar
"10+" primero y enseguida ingresar el segundo dígito.
Por ejemplo:
Pista 3, presionar "3";
Pista 12, presionar "10+" y entonces presionar "2";
Pista 21, presionar "10+" dos veces y entonces presionar "1".
3. Para iniciar la reproducción del programa, seleccionar "PLAY" en el
menú. Presionar "PROGRAM" para salir del programa.
4. Para borrar una memoria del programa, seleccionar el numero de
memoria y presionar "CLEAR" en el control remoto. Para borrar toda la
memoria, seleccionar "CLEAR" en el menú y presionar "OK/ENTER"
en el control remoto.
5. También puede cancelar el modo de programa, borrando todas las
memorias en el menú de programa.
ACERCAMIENTO DE LA REPRODUCCIÓN
Durante la reproducción, presionar "ZOOM" continuamente para tener
un acercamiento de la imagen en 2, 3 y 4 veces o en 1/2, 1/3, 1/4 del
tamaño normal. Presionar "ZOOM" nuevamente cuando la imagen
esta a 1/4 del tamaño para volver al tamaño de la imagen normal.
Para desplazarse a través de la imagen engrandecida presionar los
botones de navegación.
DESPLIEGUE DE LA INFORMACIÓN EN LA PANTALLA
Cuand o el repr oductor esta en oper ación, p resiona r "DISPLAY"
continuamente en el control remoto, la pantalla despliega parte de la
información en secuencia (tipo del disco actual, numero de titulo,
numero de capitulo, tiempo de reproducción, idioma de audio, tipo de
audio, idioma del subtitulo, multi ángulos, etc.).
CAMBIANDO EL IDIOMA DE AUDIO (DISCOS DVD/VCD)
Es posible cambiar el idioma del audio de ambiente a un diferente
idioma del seleccionado en el ajuste inicial (esta función opera solo en
disco grabados con múltiples idiomas de audio).
= Durante la reproducción de un DVD, presionar "AUDIO", el idioma
de a u dio cambi a del númer o d e audio a c t ual desp l e gado en la
pantalla.
= Durante la reprodu cción de un VCD, pres ionar "AUDI O" para
cambiar el modo de salida de audio en: MONO L (Izquierdo), MONO R
(derecho) y estéreo.
Nota: Cuando reproduce discos sin idiomas de audio grabados, al
presionar este botón la función no operara.
VER LOS DIFERENTES ÁNGULOS (SOLO DISCOS DVD)
Durante la reproducción, presionar "ANGLE" para desplegar el número
de ángulos que pueden ser reproducidos y entonces seleccionar el
ángulo deseado para ver la escena.
Nota: Cuando se reproducen discos sin escenas de múltiples ángulos,
al presionar este botón la función no operara.
CAMBIANDO EL IDIOMA DEL SUBTITULO (SOLO PARA DISCOS
DVD)
Du r a nte la re p roducci ó n, presi o n ar "SUBT I TULE", e l subtitu l o
desplegado en la pantalla cambia cada vez que presiona el botón.
Cuando el idioma deseado se despliega, liberar el botón para ver los
subtítulos en dicho idioma.
No t a : Cuando se r e producen d i s cos sin id i o m as de subt í t ulos
grabados, al presionar este botón la función no operara.
DISFRUTANDO DISCOS VCD CON FUNCIÓN DE CONTROL DE
REPRODUCCIÓN (PBC)
Después de colocar un disco VCD 2,0/1,0 con control de reproducción
(PBC), la pantalla despliega el formato del disco y el menú.
Seleccionar la pista deseada a través de los botones numéricos:
Presionar del 1 - 9 para seleccionar una pista menor a 10, si el numero
de la pi sta es mayor a 10, presi onar prime ro "1 0+" y e nseguida
presionar el segundo dígito "1-9".
Durante la reproducción, presionar "MENÚ" para regresar al menú
principal (DVD). Presionar este botón para seleccionar el modo de
PBC activado "ON" o desactivado "OFF" (VCD).
BOTÓN DE TITULO "TITLE"
Reproduce el titulo (DVD).
REPRODUCCIÓN DE MP3
1. Cargar un disco MP3 en la bandeja del reproductor y la pantalla de
la te levisión despliega las carpetas en el disco después de unos
segundos.
2. Sele ccionar la carp eta qu e des ea a través de lo s botones d e
naveg ación, enton ces pres ionar "OK/EN TER" par a confirmar l a
selección.
3. Los archivos dentro de la carpeta se despliegan, seleccionar la
canción deseada a través de los botones de navegación y entonces
presionar "OK/ENTER" para iniciar la reproducción.
4. P re s io n ar "P R E V " o " NE X T" p ar a se le c c i o na r l a s p i st a s
directamente.
5. Presionar "REPEAT" para cambiar el modo de reproducción.
Repeat 1: Repite un archivo
Repeat Dir: Repite todas las pistas de la carpeta actual.
Repeat All: Repite todas las pistas del disco actual.
Repeat Off: Cancela los modos de repetición.
REPRODUCCIÓN DE DISCOS DE IMÁGENES KODAK / JPEG
Después de cargar un disco de imágenes Kodak en el reproductor, las
imágenes se deslizan automáticamente en la pantalla de la televisión.
Después de cargar un disco de imágenes JPEG en el reproductor, las
carpetas de imágenes se despliegan automáticamente en la pantalla
de la televisión. Usar los botones de navegación para seleccionar una
carpeta y ent o n c e s p r esionar "OK/ E N T E R " p a ra confirma r l a
sel e c c ión. Los arch i v o s en la carpet a s e d espliegan y p u e d en
seleccionar la imagen deseada usando los botones de navegación,
entonces presionar "OK/ENTER" para iniciar la reproducción.
Una vista preliminar de las imágenes se despliega cuando se desplaza
a través de los nombres de los archivos.
OPERACIÓN DE UN DISCO DE IMÁGENES KODAK / JPEG
1. MODO DE REPRODUCCIÓN
Durante la reproducción, presionar "REPEAT" para cambiar el modo
de reproducción:
Repeat 1: Repite un archivo
Repeat Dir: Repite todas las imágenes de la carpeta actual.
Repeat All: Repite todas las imágenes del disco actual.
Repeat Off: Cancela los modos de repetición.
Durante la reproducción, presionar "STOP" para entrar al modo de
vista preliminar.
2. SALTAR HACIA ATRÁS / HACIA DELANTE EN LAS IMÁGENES
Presionar "NEXT" para saltar a la imagen siguiente o "PREV" para
saltar a la imagen anterior.
Si ningún botón es presionado durante unos segundos, salta a la
imagen siguiente automáticamente.
3. ROTACIÓN DE LAS IMÁGENES
Presionar los botones de navegación "3" o "4" para rotar la imagen
en sentido de las manecillas del reloj o en sentido contrario de las
manecillas del reloj.
4. VOLTEAR LAS IMÁGENES
Presionar el botón de navegación "5 " para voltear la imagen de
manera vertical.
Presionar el botón de navegación "6 " para voltear la imagen de
manera horizontal.
5. ACERCAMIENTO/ALEJAMIENTO DE LA IMAGEN
Durante la reproducción, presionar "ZOOM" continuamente para tener
un acercamiento de la imagen en 2, 3 y 4 veces o un alejamiento en
1/2, 1/3, 1/ 4 del tamaño normal. Presio nar "ZOOM" nuevamente
cuando la imagen esta a 1/4 del tamaño para volver al tamaño de la
imagen normal.
Si la imagen es agrandada presionar los botones de navegación "3
4 5 6" para desplazarse sobre las partes no visibles de la imagen
3

6. MODOS DE DESPLAZAMIENTO DE LAS IMÁGENES
Durante la reproducción de las imágenes, presionar "PROGRAM"
cíclicamente para seleccionar uno de los modos de desplazamiento de
las imágenes:
Desplazamiento de arriba
Desplazamiento de abajo
Desplazamiento de izquierda
Desplazamiento de derecha
Desplazamiento diagonal de izquierda arriba
Desplazamiento diagonal de derecha arriba
Desplazamiento diagonal de izquierda abajo
Desplazamiento diagonal de derecha abajo
Extensión del centro horizontal
Extensión del centro vertical
Compresión del centro horizontal
Compresión del centro vertical
Ventana horizontal
Ventana vertical
Borde central
Aleatoria (al azar)
Ninguno
1.4 CONTRASEÑA "PASSWORD" - Ingresar la contraseña para
desbloquear el sistema, los pasos son los siguientes:
1.4.1 Entrar al ajuste del sistema, seleccionar PASSWORD a través
de los botones de navegación, presionar "4" para seleccionar el
cuadro de dialogo.
1.4.2 Ing resar la cla ve "0000" para d esbloquear lo, en este caso
seleccionar el cuadro de dialogo para cambiar la contraseña, ingresar
la nue va contr aseña y presionar "O K/ENTER " para co nfirmar la.
Cuando la con t r a s e ñ a e s c a m b i a d a , n e c e s i t a i n g r e s a r l a p ara
desbloquear el sistema.
1.4.3 Una vez que ha ingresado la nu e v a c o n t r a s e ñ a , u s a r l a
contraseña de supervisión "8200" para desbloquear.
Nota: Si se ingresa una contraseña incorrecta en el modo de
desbloqueo, el sistema permanece bloqueado.
1.5 RANGO "RATING" - Ajustar el rango del reproductor. Si desea
cambiar el seguro de padres, favor de ingresar la contraseña para
desbloquearlo primero. Opciones:
1 KID SAFE / 2G / 3 PG / 4 PG 13 / 5 PG-R / 6 R / 7 NC-17 / 8 ADULT
1.6 PREDEFINIDOS "DEFAULT" - Restablece los ajustes de fabrica.
A J U S T E D E L C O L O R Y B R I L L O ( P A R A L A
PANTALLA DE CRISTAL LIQUIDO)
Presionar "SCREEN ON/OFF" en el control remoto para ajustar la
intensidad del color y el brillo respectivamente.
Presionar y sostener "SCREEN ON/OFF" por unos momentos para
abrir o cerrar la pantalla LCD-TFT.
AJUSTES INICIALES
La página de ajustes iniciales es para realizar los ajustes iniciales en
el reproductor. Una vez que los ajustes iniciales son realizados estos
permanecen hasta que son modificados.
PROCEDIMIENTO PARA LOS AJUSTES INICIALES
1. Presionar "SETUP"
2. Usar los botones de navegación para seleccionar uno de los menús
de ajustes, presionar "OK/ENTER" para confirmarlo. La página de
ajustes con los ajustes disponibles se despliegan en la pantalla de la
TV . Nue vamen te us ar los boto nes de nave gaci ón par a hac er el
cambio y presionar "OK/ENTER" para confirmar la modificación.
3. Usar los botones de navegación para seleccionar otros ajustes en el
menú principal de ajustes.
4. Presionar "SETUP" para salir del menú principal de ajustes.
1. AJUSTES DEL SISTEMA "SYSTEM SETUP"
SYSTEM SETUPSYSTEM SETUP
TV SYSTEM
LCD MODE
TV TYPE
PASSWORD
RATING
DEFAULT
2. AJUSTES DEL IDIOMA "LANGUAGE SETUP"
LANGUAGE SETUPLANGUAGE SETUP
OSD LANGUAGE
AUDIO LANG
SUBTITLE LANG
MENÚ LANG
EXIT SETUP
2.1 IDIOMA DE DESPLIEGUE "OSD LANGUAGE" - Esta función es
usada para seleccionar el idioma de despliegue en la pantalla.
2.2 IDIOMA DE AUDIO "AUDIO LANG" - Esta función es usada para
seleccionar el idioma de audio (Solo para DVD con múltiples idiomas
de audio).
2.3 IDIOMA DE SUBTITULO "SUBTITULE LANG" - Esta función es
usada para seleccionar el idioma del subtitulo (Solo para DVD con
múltiples idiomas de subtitulo).
2.4 IDIOMA DEL MENÚ "MENÚ LANG" - Esta función es usada para
seleccionar el idioma del menú (Solo para DVD con múltiples idiomas
del menú).
3. AJUSTES DE VIDEO "VIDEO SETUP"
VIDEO SETUPVIDEO SETUP
BRI
CON
HUE
SATURATION
EXIT SETUP
EXIT SETUP
1.1 MODO DE TV "TV MODE" - Es usado para seleccionar el modo
de televisión. NTSC, PAL, AUTO.
Para México el sistema es NTSC.
1.2 MODO LCD "LCD MODE" -
Opciones: 4:3 16:9
1.3 TIPO DE TV "TV TYPE" - Esta es usado para seleccionar el modo
de rastreo de la televisión.
4:3PS - Modo normal.
4:3LB - Modo normal de caja de letras
16:9 - Modo de pantalla extendida 16:9
3.1 BRILLO "BRI" - Para ajustar el brillo de las imágenes en: 0 / 2 / 4 /
6 / 8 / 10 / 12.
3.2 CONTRASTE "CON" - Para ajustar el contraste de las imágenes
en: 0 / 2 / 4 / 6 / 8 / 10 / 12.
3.3 COLOR "HUE" - Para ajustar el color de las imágenes en:
-6 / -4 / -2 / 0 / +2 / +4 / +6.
3.4 SATURACI Ó N " S A T U R A TION" - Para a j u s t a r e l nivel de
saturación de las imágenes en: 0 / 2 / 4 / 6 / 8 / 10 / 12.
4

4. AJUSTES DE LAS BOCINAS "SPEAKER SETUP"
SPEAKER SETUPSPEAKER SETUP
DOWNMIX
EXIT SETUP
4.1 MEZCLA "DOWNMIX"
LT/RT: Mezcla del modo Izquierdo / Derecho.
STEREO: Seleccionar esta opción si no tiene un amplificador de 5,1
canales.
SALIR DE AJUSTES "EXIT SETUP"
Para salir de cualquier submenú de ajustes y volver al menú principal.
PRECAUCIONES EN EL MANEJO DE LOS DISCOS
COMPACTOS
=
Sujetar los discos compactos por el borde nunca tocar
la superficie de reproducción para evitar ensuciarlos
con las huellas digitales. La suciedad, ralladuras y
huellas digitales pueden causar saltos y distorsión
durante la reproducción.
=
Para limpiar los discos compactos hacerlo con una tela
suav e , lim p i a y li b r e de p e l usa . L impi a r los c o n
movimientos rectos del centro hacia el borde, nunca
hacerlo con movimientos circulares.
=
No pegar cintas o etiquetas adheribles sobre los discos
compactos.
=
No escribir sobre los discos compactos con plumones
u otros utensilios de escritura.
=
No aplicar productos quí m i c o s s o b r e l o s d i s c os
compactos como benceno, thiner y rocíos antiestaticos
ya que pueden dañarlos.
=
Tener cuidado de no golpear o doblar los discos.
Instalar solo un disco compacto en la bandeja.
=
No intentar cerrar la bandeja cuando el disco no esta
instalado adecuadamente.
=
As e gurar s e de alm acenar e l disco en su es t uche
cuando no esta en uso.
GUÍA RÁPIDA PARA SOLUCIÓN DE PROBLEMAS
Si el reproductor no funciona adecuadamente, favor de consultar la siguiente guía antes de contactar al centro de servicio autorizado
Problema Posible solución
La unidad no enciende o se
apaga súbitamente
El paquete de baterías esta
colocada en su lugar pero la
unidad no se enciende o se
apaga subditamente.
El control remoto no opera
No hay imagen o sonido
No hay imagen
No hay sonido
No hay imagen y sonido
Imagen o audio distorsionado
Asegurarse que el cordón de alimentación esta conectado de manera segura al tomacorriente.
Apagar la unidad y enseguida volver a encenderla.
Verificar que el paquete de baterías esta cargado. En caso de no ser así, recargar el paquete de baterías.
Verificar que las baterías están colocadas con la polaridad "+" y "-" de manera adecuada.
Las baterías pueden estar desgastadas. Reemplazar las baterías por unas nuevas.
Verificar que la señal de transmisión del control es dirigida directamente al sensor remoto del reproductor.
Retirar cualquier obstáculo entre el control y sensor remoto.
Verificar que el cable de A/V esta conectado adecuadamente.
Verificar que el disco es DVD (región 4 o multiregión), DVD-RW, VCD o CD de audio.
No usar discos que están rallados o sucios.
Verificar que el disco fue colocado de manera adecuada.
El captador óptico del láser puede estar sucio. Contactar al centro de servicio para su limpieza.
Verificar que la TV esta ajustada en el modo de Video o A/V.
Verificar que la TV esta encendida.
Verificar que el panel de despliegue este abierto. Si esta cerrado, no hay salida de audio en las bocinas.
Verificar el ajuste del volumen. Si el volumen esta en "0", incrementar el volumen.
Verificar que los audífonos están conectados al conector de "PHONES".
Las bocinas son desconectadas internamente al estar conectados los audífonos.
Verificar que las unidades están encendidas y que las conexiones son adecuadas.
Usar discos que no estén rallados o sucios.
5
 Loading...