

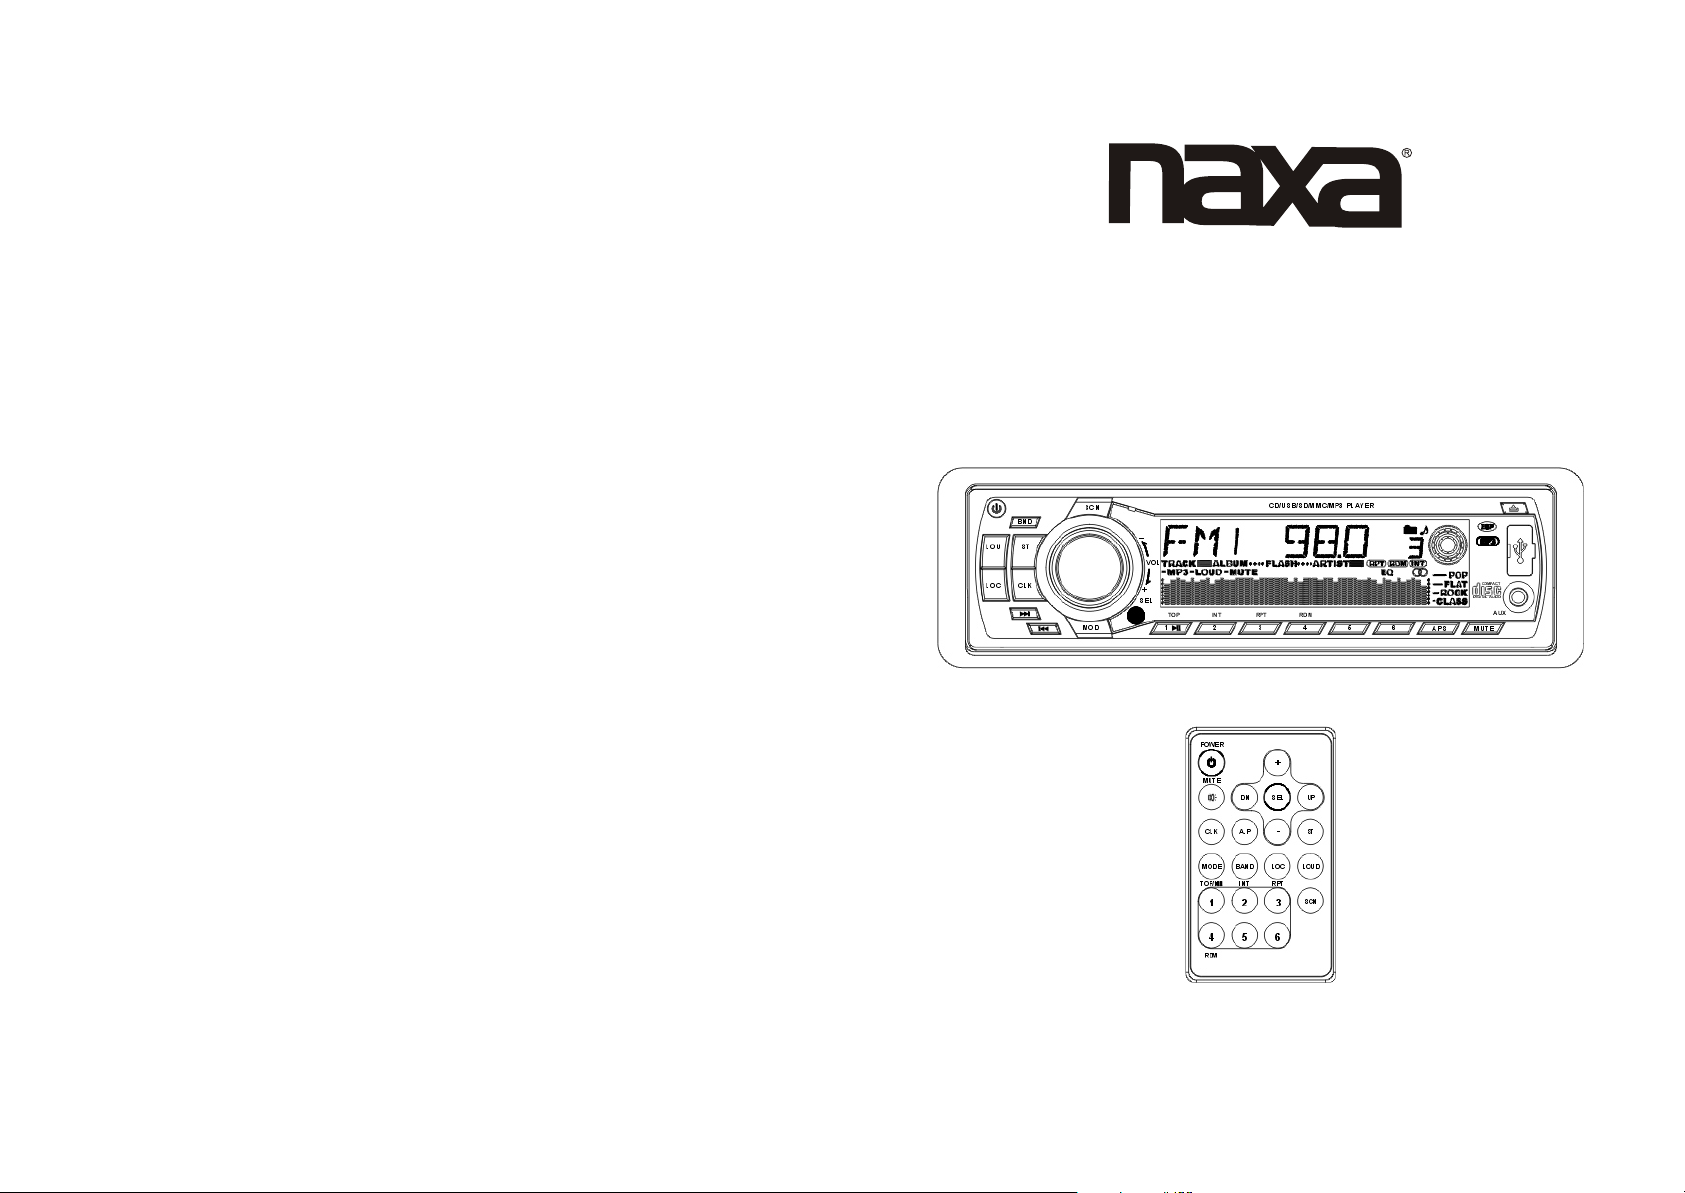
MODEL: NX-683
INSTRUCTION MANUAL
PLL ELECTRONIC TUNING STEREO AM/FM RADIO WITH
MP3/CD PLAYER, USB/SD/MMC INPUTS & REMOTE CONTROL

Preface
Thank you for purchasing this car audio product.
Please read this manual carefully before operating this car audio product.
Please keep this manual for future use. It will be helpful to you if you are encounter any
operational problem.
Selecting fine audio equipment is only the start of your musical enjoyment.
Now it is time to consider how to maximize the enjoyment you will get from
knowing how to work your new car stereo receiver.
We hope you enjoy using this product and encourage you to always listen at
a moderate, safe sound level to avoid any possible hearing damage or loss.
If you listen to excessively loud sound over time, your hearing can adapt to
higher volumes and what sounds "normal" to you may be quite harmful and
can cause you to have permanent hearing loss. So please practice "safe sound"
and always listen at moderate sound levels only.
Start with your volume control at the lowest setting, and slowly increase the level
until you can hear it comfortably and clearly, free from distortion.
Once you have established this comfortable sound level, leave it there.
WARNING!
SPECIFICATION
GENERAL
Supply Voltage DC 12 V. Negative Ground
Current Consumption Max.15A
Power Output 40Watts X 4 (Measured at DC 14.4 V)
Number of channels 2 STEREO channels.
Unit Dimensions 178[W] X 165[D] X 50[H] mm.
FM SECTION
Frequency range 87.5MHz -108.0MHz
Effective sensitivity 3uV.
I.F Frequency 10.7MHz.
AM SECTION
Frequency range 522KHz - 1620KHz
Effective sensitivity 40dB.
I.F Frequency 450KHz
RCA LINE OUT
Output 1200mV @ CD MAX.
CD PLAYER
System MP3 Audio System.
Suitable CDs MP3, WMA, CD,CD-R,CD-RW Disc
Frequency characteristics 20Hz-100Hz < 5dB
10KHz-20KHz < 5dB.
S/N Ratio to CD 50dB [1KHz]
\
\
To reduce the risk of fire or electric shock, do not use the unit in the rain or moisture
environment.
To prevent direct exposure to laser beam, do not try open the enclosure.
Visible and invisible laser radiation when open and interlocks defeated.
To protect our environment, do not dispose of electrical equipment in the domestic waste.
Please return any electrical equipment that you will no longer use to the collection points
provided for their disposal.
This helps avoid the potential effects of incorrect disposal on the environment and human
health. This will contribute to the recycling and other forms of reutilization of electrical and
electronic equipment. Information concerning where the equipment can be disposed of can
be obtained from your local authority.
Page 1
Page 14
TROUBLE SHOOTING
Before using the check list please make all the connections first.
If you still have questions after going through the checklist, please consult
your local customer service representative.
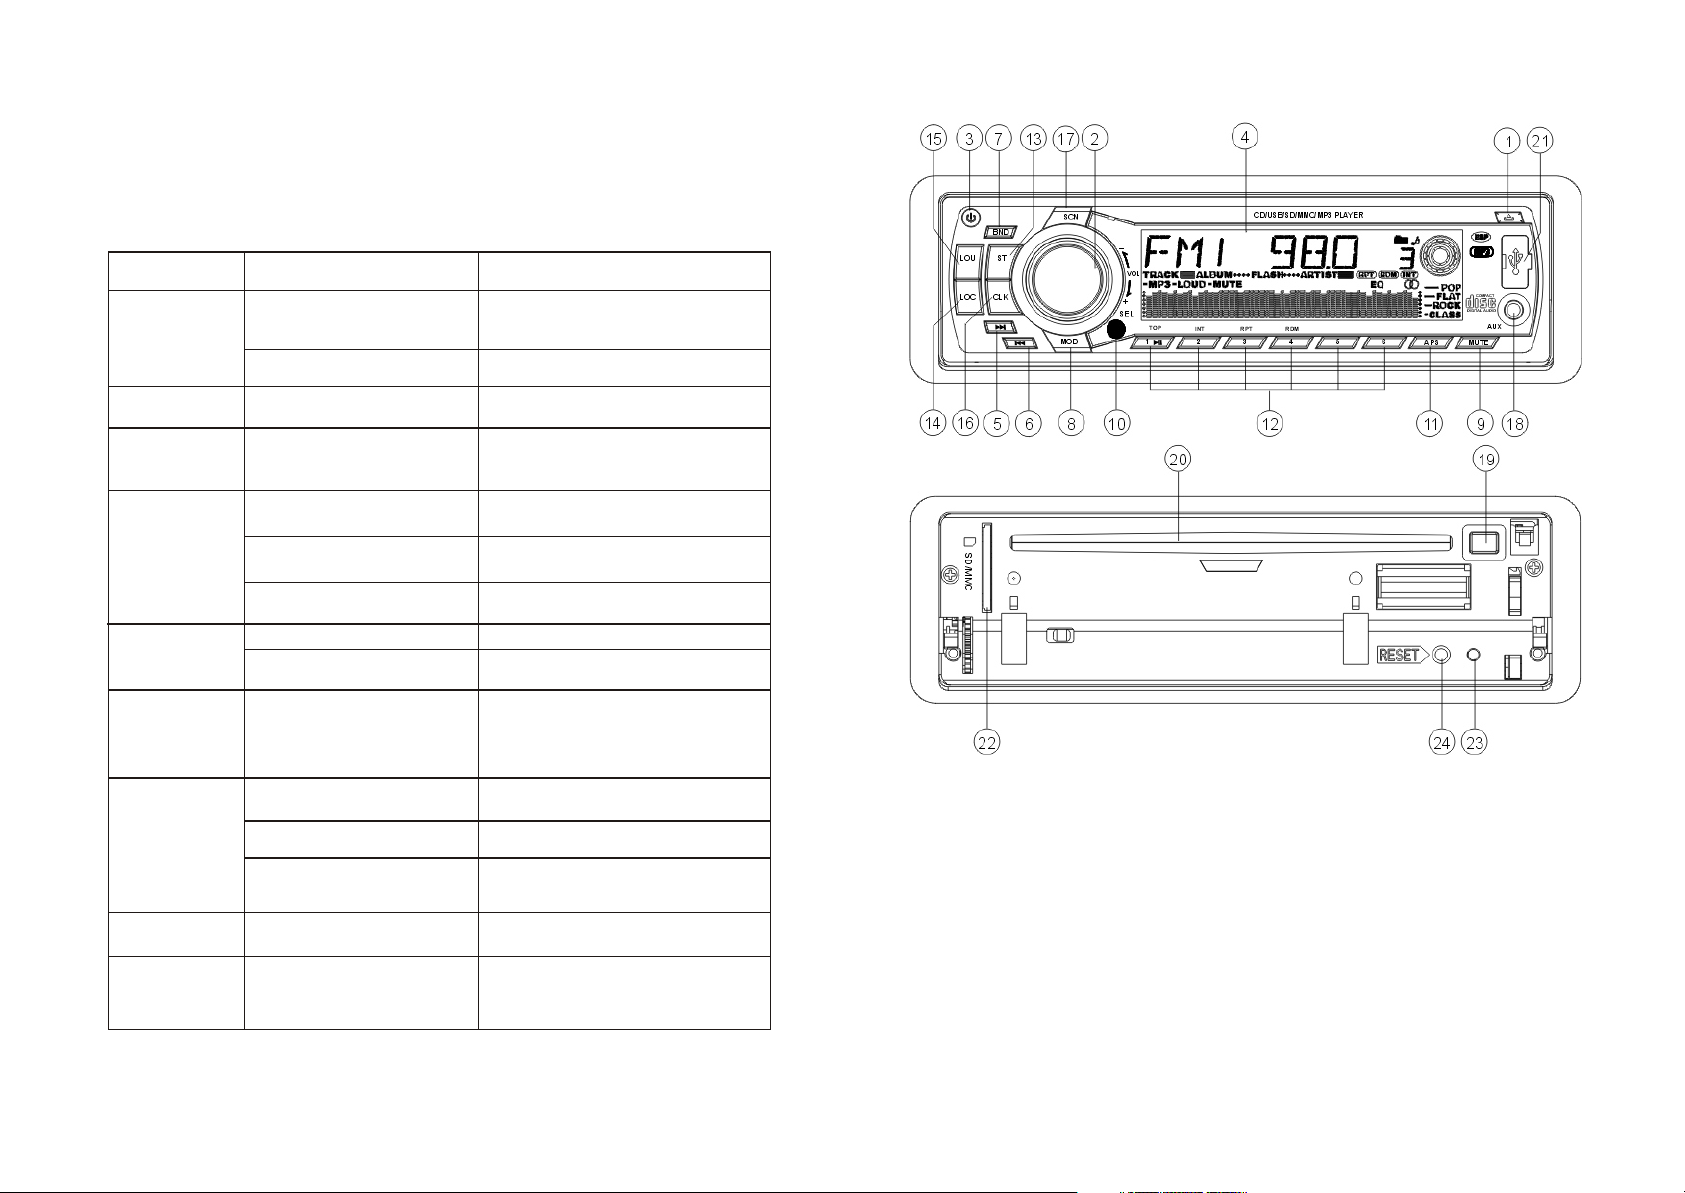
LOCATION AND FUNCTION OF CONTROLS
Common Symptoms
There is no power.
The CDs cannot
be loaded.
The CDs are loaded
only halfway into
the CD tray.
The device does
not work correctly
(EJECT, LOAD,
PLAY)
There is no sound.
The operation keys
do not work
The sound of the
CD player skips
No radio reception.
In automatic search
mode the radio does
not stop at a transmitting station.
Cause
The car ignition is switched off.
The fuse has blown.
Presence of CD disc inside the player
The transport screws have not been
removed.
Inserting the disc in upside down
The surface of CD is extremely dirty
or it is damaged.
Temperature inside the car is too
high.
The volume control is set too low.
The device has not been correctly
connected.
1.The built-in microcomputer is not
operating properly due to noise
2.Front panel is not properly fix into
its place
The installation angle is more than
30 degrees
The surface of the road is uneven.
The surface of CD is extremely dirty
or it is damaged.
The antenna cable is not connected. Insert the antenna cable firmly into the
weak.
If the power supply is properly connected to
the car accessory, switch the ignition key to
ON or " ACC " " " .
Replace another fuse according to the wiring
diagram.
Remove the disc in the player then put a new
upward.
Remove the transport screws before using.
Insert the compact disc with the label facing
upward
Clean the CD or try another CD, if this works
correctly, the first CD is properly damaged.
Cool off until the ambient temperature returns
to normal
Turn up the volume properly.
Check the power and earth connection
according to the wiring diagram.
1. Switch the device off and on again. Or press
the RESET button to resume the program.
2. Reinstall the front panel
Adjust the installation angle to less than 30
degrees
Wait until the road becomes smoother before
playing the CD.
Clean the CD or try another CD, if this works
correctly, the first CD is properly damaged.
antenna socket of the device.
Tune in to a radio station manually.The transmission signals are too
Solution
1. OPEN BUTTON
Press the OPEN button to fold down the front control panel.
Then a disc can be inserted into the disc slot or ejected by pressing the EJ button.
After flipping down the front panel, push it leftwards, then pull the right side of the
panel outwards to remove it from the unit chassis.
2. SEL BUTTON (Select) AND VOL KNOB
a) Press the SEL button briefly, it is activated as selecting each mode of E. VOL.
-> VOLUME ->BASS ->TREBLE -> BALANCE -> FADER ->
In each mode, the waiting time is about 5 seconds, and the time waiting time
is over, it returns to the last display mode of tuner, disc, MMC/SD or USB mode.
VOLUME CONTROL
1) The volume can be adjusted at any time by rotating the VOL knob as select
mode has been initially defaulted at volume mode.
2)The volume can be also obtained by continuously pressing the SEL button
until the character VOL appear on the LCD display, then rotate the VOL knob
to adjust the volume.
Page 13
Page 2

BASS CONTROL
1) Press SEL button to select the bass mode until BAS appears on the display.
2) Rotate the VOL knob to adjust the bass.
TREBLE CONTROL
1) Press SEL button to select the treble mode until TRE appears on the display.
2) Rotate the VOL knob to adjust the treble.
BALANCE CONTROL
1) Press SEL button to select the balance mode until BAL appears on the display.
2) Rotate the VOL knob to adjust the left/right speaker balance.
FADER CONTROL
1) Press SEL button to select the fader mode until FAD appears on the display.
2) Rotate the VOL knob to adjust the front/rear speaker balance.
b) When pressed longer 2 seconds, it is activated as cyclical mode of following
functions for user’s selection.
-> BEEP (2nd/ALL/OFF) ->SEEK1/ 2 -> DSP(OFF/FLAT/POP/CLASSICS/
ROCK)->VOL LAST/VOL ADJ ->ESP 25 / 6 mode.
After selecting the desired mode, rotate the VOL knob to select one setup item
of the desired mode.
BEEP 2ND, BEEP ALL, BEEP OFF MODE
The situation of beep sound is selected. The 3 mode is selected as also rotating
the VOL knob.
- Beep 2nd mode: The beep is only generated when an allotted double key is
pressed long (1 second).
- Beep all mode: The beep is generated when every key is pressed.
- Beep off mode: The beep sound is disabled when a key is pressed.
SEEK 1/SEEK 2 mode:( Only available during radio operation)
After entering this mode by pressing the SEL button, rotate the VOL knob to
choose SEEK 1 or SEEK 2 mode.
SEEK 1: Press and hold the >>| or |<< button to seek up or down for
the strong signal stations. And the seek stops when received a strong
signal station.
SEEK 2: Press and hold the >>| or |<< button to seek up or down for the strong
signal stations. But the seek does not stop when received a strong
signal stations excepting release the >>| or |<< button.
DSP(OFF/FLAT/POP/CLASSICS/ROCK):
The unit is equipped with 4 preset equalization modes. After entering this mode
by pressing the SEL button, rotate the VOL knob to choose one of the preset
EQ’s in the above order. When using preset EQ modes you will not have
access to Bass and Treble settings.
VOL LAST/VOL ADJ:
After entering this mode by pressing the SEL button, rotate the VOL knob to
choose VOL LAST or VOL ADJ.
VOL LAST: The radio switches on at the actual volume it had when it was last
switched off.
VOL ADJ: Rotating the VOL knob you can pre-select a constant switch-on
volume after entering into this mode.
ESP 25 / 6:
P ress the SEL button to access the ESP function which improves playback if
there are shocks or vibrations, you can choose between two lengths of time
for ESP, either 25 seconds or 6 seconds by rotating the VOL knob.
ÒÉÄѽâ³ý
CARE FOR USING CD'S:
About CD-R/CD-R/W discs:
In addition to commercially-recorded audio CD's, this unit can play CD-R and
CD-R/W discs. In come cases, particularly when recorded on older CD burners,
some CD-R and CD-R/W discs may not play. Also, whenever you are recording
a CD for playback in this receiver, it is recommended that you record at 24x or
slower speed for CD-R and 4x or slower for CD-R/W to achieve higher signal
quality and better playback performance.
1. To keep the disc clean:
Do not attach any sticker or adhesive tape on the disc.
Handle the disc by its edge to keep the disc clean and do not touch the surface.
Before playing a disc, wipe it off with a clean, dust-free cleaning cloth.
Wipe the disc outwards from the disc center.
2. When one has already been inserted. Doing so may damage the unit
with labeled surface up, or it will damage the unit.
3. Do not expose the disc to direct sunlight or nearby heat sources such as heating vents,
caliduct which can cause the disc to warp.
Do not leave disc in a car if it is parked in direct sunlight as that will lead to a
considerable rise in the temperature inside the car.
4. Do not use any secondhand or rented disc, usually, there is glue on the surface of
those discs, it will stop the unit working and damage it.
5. Always store the disc in its case for protection. Scratched up discs will produce poor
sound performance and cause CD player to skip.
6. In raining day or wet area, the moisture may form on the disc or the optical parts, The
playback may not be possible. If moisture forms on the disc, wipe it off with a soft cloth.
If moisture forms on the optical parts of the unit, allow the unit to sit for about one hour
with power on.
7. Do not use solvents such as benzine or thinners. Commercially available cleaners or
anti-static spray will damage the unit.
Page 12 Page 3
. Insert a disc

INSTALLATION
INSTALLATION METHOD
This is an anti-theft installation method.
The main unit wears a METAL MOUNTING SLEEVE.
Please connect the wiring, eg, the Power Supply, the Speakers and the Antenna
according to the requirements of this Instruction Manual, then install the metal
mounting sleeve into the car as per the diagram illustrated below.
METAL SUPPORT STRAP
DASHBOARD
METAL MOUNTING SLEEVE
To remove the unit out of the metal mounting sleeve,
insert the two supplied KEYS into the left and right side
slots of the chassis at the same time. Then pull the chassis
out of the metal mounting sleeve as shown in the right
illustration.
NOTE
Before mounting and operating
the CD player, remove the metal
mounting sleeve illustrated by the
arrows.
To boost up the capability of anti-jamming,
please make sure fix tightly the metal support
strap into the metal joint that connect to the
chassis of the car.
Remove the two screws that
fix the CD deck mechanism player
during transportation before
mounting the player.
Bend the tabs on the metal mounting
sleeve against the DASHBOARD with
a screwdriver.
UNIT CHASSIS
PLASTIC TRIM RING
FRONT PANEL
3. POWER ON/OFF
When the unit is power off, the unit comes to ON by pressing any button on the
front panel (except the OPEN key). It also can turn on the unit to insert a disc,
MMC/SD card or USB stick into their slots or port. When the unit is power on,
press and hold the power button for more than 0.5 seconds, the unit goes into
power off mode.
4. LCD Display
5&6. TUNE, SEEK, TRACK, SKIP UP / DOWN BUTTONS
a) During RADIO mode:
Press the >>| or |<< button shortly to manual tune up or down for the desired
radio station frequency with step by step.
Press and hold the >>| or |<< button for longer 0.5 seconds, to automatically
tune up or down for the radio station frequency of strong signal.
b) During disc, MMC/SD, USB playback mode:
Press the >>| button briefly to play next track. Press the |<< button once to
play the current track from the beginning of the current track.
Press the |<< button twice continuously to play the previous track.
When the >>| or |<< button is pressed long (more than 1 seconds) for skip
forwards or backwards.
7. BAND BUTTON
Press the BND button briefly to select the radio broadcasting band you would
like to hear. The AM/FM band is toggled cyclically through the tuning bands
->FM 1-> FM 2 -> FM 3 -> AM 1->AM 2 ->.
In MP3/WMA disc, MMC/SD, USB mode, if you press BND button repeatedly,
the file name, folder name, song’s title, artist and album information will be
scrolling on the LCD display. As long as the current playing MP3/WMA music
contains relevant ID3 tag information in version 1.0/2.0 format, the 3 item
s underlined above will be scrolling on the LCD display; otherwise, they will not.
In CD & MP3 & WMA mixed-formatted disc playback mode, pressing the BND
button for more than 2 seconds will change from playing the CD formatted songs
to MP3/WMA formatted songs and vice versa.
8. MODE BUTTON
Press the MODE button to change among tuner (radio), disc (when a disc is
loaded), MMC/SD card (when an MMC/SD card is inserted) , USB (when an
USB stick is inserted) and AUX mode.
Push this reset button with a cuspidal
object to renovate the distorted program
once the program is distorted.
EJECT KEY
RESET BUTTON
9. MUTE BUTTON
This button serves to switch the MUTED state on/off.
Press the MUTE button to suppress the loudspeaker temporarily, and press
again to resume listening. The muted state will be also released when the
MODE, BAND, SEL button is pressed and VOL knob on the front panel is used.
10. INFRARED REMOTE CONTROL SENSOR
Page 4 Page 11

11. APS BUTTON (Auto-storage /Preset scan)
During radio mode:
1) when long pressing for more than 1 seconds, the radio searches from the
current frequency and checks the signal strength level until 1 cycle search
is finished. And then 6 strongest stations frequency are preset to the cor responding preset memory numbered bank. The auto-storage operation is
implemented in the each selected band. When the auto-storage operation
is finished, the radio execute the Preset Scan.
2) when short pressing, the radio searches for each preset station in the
current band, and holds at that preset number for 5 seconds with
releasing mute, and then search again.
During MP3/WMA file in disc, MMC/SD card or USB stick mode:
Press the APS button short, it is activated as cyclical selecting song mode as
following: -> TRACK SEARCH -> THE FIRST CHARACTER SEARCH ->
DIRECTORY SEARCH ->
1) In TRACK SEARCH selecting song mode, the TRK T 000 will be visible on
the LCD display and the biggest digit 0 that the current MP3/WMA disc,
MMC/SD card or USB contain will flash.
Rotate the VOL knob to select and enter the number on the flashing digit
place from 0 to 9.
Then press the SEL button to confirm the entered number and the 0 on the
next smaller digit will be flashing.
With the same means, select the number of the flashing digit.
After finishing enter all the number of the song serial number on the flashing
digit, press the SEL button to play the corresponding track.
2) In the FIRST CHARACTER SEARCH selecting song mode, the A--......, will
be visible on the LCD display. (If there are files names its first character are
A, the......is the first file name its first character is A by the order of A~Z and
0~9; otherwise, the ......is NONE.)
Rotate the VOL knob to select files that the first character by the order of
A~Z and 0~9.
Then press the >>| or |<< button to select one file its first character is the
selected one. Finally press the SEL button to play the selected file.
3) In DIRECTORY SEARCH selecting song mode, the root folder will be visible
on the LCD will display. (If there is not a root folder in the current MP3/WMA
disc, MMC/SD card or USB, you will find a root named ROOT.)
Then rotate the VOL knob to select a desired folder.
And then press the >>| or |<< button to select a desired track in the folder.
Finally press the SEL button to play the selected track.
WIRES CONNECTION
RED R
WHITE L
BLACK
RCA LINE OUT
GRAY
ANTENNA LINE OUT
CONNECTOR A
1.
2.
3.
4. Memory +12V
5. Auto Antenna Output
6.
7. 12V (To Ignition Key)
8. GROUND
ISO SOCKET
CONNECTOR B
1. Rear Right Speaker (+)
2. Rear Right Speaker (-)
3. Front Right Speaker (+)
4. Front Right Speaker (-)
5. Front Left Speaker (+)
6. Front Left Speaker (-)
7. Rear Left Speaker (+)
8. Rear Left Speaker (-)
FUSE 15 A
ISO SOCKET SKETCH
12. PRESET STATION MEMORY AND TOP/>||, INT, RPT, RDM BUTTONS
a) During radio mode:
Go to any preset station by pressing one of the 6 preset station buttons (1-6).
Pressing the preset station button for longer than 2 seconds will store the
station you are currently on.
Page 5
Page 10

MAINTENANCE OF REMOTE CONTROL
An insulation tag was installed in your remote by the manufacturer to prevent the
battery from draining. Removing the tag from the remote before using.
BATTERY INFORMATION:
Lithium Battery: CR2025 3V
Battery Life: Approximately 6 months.
b) During disc, MMC/SD or USB mode:
Press the TOP/>|| button briefly to interrupt the playback of the disc, MMC/SD
or USB. Press again to resume normal playback of the disc, MMC/SD or USB.
Press the TOP/>|| button and hold for approximately 0.5 seconds to play the
first track of the disc, MMC/SD or USB.
c) In CD/MP3/WMA disc mode, press the INT button shortly to sample the first
10 seconds of each track of current disc, the S-INT will be visible on the LCD
display.
In MMC/SD or USB mode, press the INT button shortly to sample the first 10
part of each track of all, and the M-INT will be visible on the LCD display.
In MP3/WMA disc, MMC/SD or USB mode, press the INT button and hold for
more than 0.5 seconds to sample the first 10 seconds part of each track of
current folder, and the D-INT will be visible on the LCD display.
In the process of INT, pressINT button again to stop sampling and to continue
playing the current track.
Replacing the Battery from the Remote Controller:
1) Remove the battery holder by pressing the locking tab with your thumb
and pulling it out.
2) Replace the battery with the same type and the side facing up.
¡° + ¡±
3) Gently push in the holder until securely locked into place.
B
A
+ side up
WARNING:
Do not recharge, disassemble or dispose of in fire.
Battery leakage may cause damage to the unit.
To avoid the risk of accident, keep batteries out of reach of children.
d) In CD/MP3/WMA disc mode, press the RPT button shortly to play the current
track repeatedly and the S-RPT will be visible on the LCD display.
In MMC/SD or USB mode, press the RPT button shortly to play the current
track repeatedly and the M-RPT will be visible on the LCD display.
In MP3/WMA disc, MMC/SD or USB mode, press the RPT button and hold for
more than 0.5 seconds to play the track of current folder repeatedly, and the
D-RPT will be visible on the LCD display.
In the process of RPT, press RPT button again to stop playing repeatedly mode.
e) In CD/MP3/WMA disc mode, press the RDM button shortly to play all tracks
on the current disc in random order, and the S-RDM will be visible on the LCD
display.
In MMC/SD or USB mode, press the RPT button shortly to play all tracks of the
MMC/SD card or USB in random order, and the M-RDM will be visible on the
LCD display.
In MP3/WMA disc, MMC/SD or USB mode, press the RDM button and hold for
more than 0.5 seconds to play all tracks of current folder in random order, and
the D-RDM will be visible on the LCD display.
In the process of RDM, press RDM button again to stop playing in random order.
f) During the normal playback of MP3/WMA disc, MMC/SD, USB:
Press the radio preset button 6 and 5 to move up and down10 tracks at a time.
13. ST/MO BUTTON
In FM mode, press the ST briefly to select stereo or mono sound mode.
14. LOC/DX BUTTON
Radio station search mode is divided by this LOC/DX switch, this button can
be used to control an attenuator in the tuner during search. The detecting level
of seek, scan, auto-memory will be reduced as much as the attenuated level
of the tuner. In radio mode, press the LOC button to change local reception or
distance reception. Note: This button is only for FM reception. In AM mode,
LOC is void.
Page 6 Page 9

15. LOUDNESS BUTTON
When press shortly, the LOUD mode is turned on, its to enhance the bass sound
effect when the volume level is low. Press again to cancel the loudness effect.
16. CLOCK BUTTON
Press the CLK button briefly to display time for 5 seconds on the display, and
then returns to its previous display unless the button is pressed again.
Then press the CLK button and hold for more than 1 seconds until the real time
flashes on the display. Then you can adjust HOUR or MINUTE by rotating the
VOL knob.
17. SCAN BUTTON
Press the SCAN button to scan the radio frequency. If a valid signal has
detected, the current frequency will be hold and blinked for 5 seconds, then
press this button again to stop scanning and remain the current frequency;
otherwise, the radio will go on to scan the other radio frequency five
seconds later.
18. AUX INPUT JACK
Press the mode button to select auxiliary input playing mode. Then you can
connect any matched external audio device to this socket. Use the volume
knob to adjust volume.
19. EJECT KEY
In the power on state, the loaded disc can be ejected by pressing the EJ key.
20. CD SLOT
21. USB PORT
When needing to play the file in the USB stick, turn over the plastic cover cap
then insert the USB stick into the USB port. The system will change into the
USB mode automatically, and then play the first file in the USB.
When no needing to do USB operation, please cover the plastic cover cap.
22. MMC/SD CARD SLOT
When you need to play the file in the MMC/SD card, insert the MMC/SD card
into the MMC/SD card slot. The system will change into the MMC/SD mode
automatically, and then play the first file in the MMC/SD.
Note:
When MMC/SD card and USB stick are both inserted into their slot or port,
the system will change into the playback mode of the latter one.
23. FLASHING LED
When the front control panel is removed this indicator flashes.
OPERATION OF REMOTE CONTROL
1. Power On/Off.
2. Mute Button
3.
Loudness Button
Audio Level & Menu UP(+) Button
4.
5. SEL/MENU
Button
6. Audio Level & Menu Down(-) Button
7. MO/ST Button
8. A.P Button
9.Band Button
10. Mode Button
11.Tune/Seek Up And Track Skip Up/FF Button
12.Tune/Seek Down And Track Skip Down/REW Button
13.SCAN Button
14. Clock Display /Setting Button
15. LOC/DX Button
16. CD Track TOP/>||/Radio Preset 1
17. CD Track INT/Radio Preset 2
18. CD Track RPT/Radio Preset 3
19. CD Track RDM/Radio Preset 4
20. Radio Preset 5
21. Radio Preset 6
1
2
8
14
9
10
16
17
19
20
POWER
MUTE
CLK A.P
MODE
TOP/
1
4
RDM
12
DN
BAND
2
5
4
+
SEL
-
LOC LOUD
RPTINT
SCN
3
6
5
UP
11
6
ST
7
15
3
13
18
21
24. RESET BUTTON
Before operating the unit for the first time, or after replacing the car battery or
changing the connections. You must reset the unit.
Press this button with a cuspidal object. This operation will erase the clock
setting and some stored contents.
Page 7
Page 8

A
A
Modelo: NX-683
MANUAL DEL USUARIO
43
ST
SCN
MP3/CD PLAYER USB/SD/MMC
65
PS
COMPACT
DIGITAL AUDIO
MUTE
UX
BND
LOU
ST
LOC
CLK
SCN
_
VOL
+
SEL
TOP
INT RDM
POWER
MUTE
CLK A.P
MODE BAND
TOP/
1
4 5
RDM
RPT
+
SELDN UP
-
LOC LOUD
RPTINT
32
6
MOD
1 2
REPRODUCTOR CD/MP3/WMA CON ESP / ANTISHOCK -
RADIO AM/FM CON SINTONIZADOR DIGITAL –
LECTOR TARJETAS MMC/SD – PUERTO ENTRADA USB
Apreciado cliente:
Le agradecemos la adquisición de este producto.
La adquisición de un equipo audio de alta calidad como éste le permitirá disfrutar de la
música en su verdadera dimensión.
Para obtener el mayor rendimiento del aparato, manéjelo de forma segura.
Se aconseja ajustar sus controles de modo que el sonido suene alto y claro, sin
distorsiones y, sobre todo, sin perjudicar al sistema auditivo.
Pasar demasiadas horas escuchando música hace que el oído se acostumbre, de
forma que niveles de sonido demasiado elevados o incluso perjudiciales para el
sistema auditivo pueden llegar a parecer normales. Para prevenir cualquier problema,
ajuste el volumen antes de que el oído se acostumbre a un nivel demasiado elevado.
·Para establecer un nivel seguro de volumen:
Encienda el reproductor con el volumen al mínimo, y súbalo gradualmente hasta que
logre escuchar el sonido adecuadamente y sin distorsiones.
·Una vez establecido un nivel de volumen confortable:
Ajuste el control del volumen.
Utilizar un minuto de su tiempo en ajustar el volumen prevendrá daños o futuras
pérdidas en su capacidad auditiva.
·SOBRE ESTE MANUAL
Las características de este aparato y la incorporación de algunas funciones
sofisticadas le aseguran una recepción y funcionamiento óptimos.
Todas las funciones han sido diseñadas para facilitar el manejo del aparato; no
obstante, algunas requieren una lectura atenta de este manual, que le ayudará a
conseguir un perfecto funcionamiento y un máximo disfrute.
·Se recomienda familiarizarse con el uso de las funciones antes de empezar a utilizar
el aparato. En este manual encontrará una explicación de las funciones básicas de
cada fuente de sonido.
Nota:
·Este aparato reproduce discos CD, CD-R y CD-R/W. No obstante, y dependiendo de
las condiciones del equipo de grabación, del programa de grabación o de los tipos de
discos tanto CD-R como CD-R/W utilizados, algunos no podrán ser reproducidos.
·La grabación de música con discos CD-R o CD-R/W a una velocidad muy alta puede
producir una pérdida de calidad. Se recomienda seleccionar una velocidad de
grabación de x 24 o inferior para la grabación de discos CD-R, y de x 4 o inferior para
la grabación de discos CD-R/W.
1

LOCALIZACIÓN Y FUNCIONAMIENTO DE LOS BOTONES
A
A
7 3 14 13 2
17
SCN
_
VOL
+
SEL
MOD
8 10
6 11 12
TOP
1 2
15
LOU
LOC
16
BND
ST
CLK
5
SD/MMC
1. BOTÓN DE APERTURA
Presione este botón para soltar el panel frontal.
Para colocar el CD, introdúzcalo en la ranura y para sacarlo, presione el botón EJ.
Una vez que el pane frontal se haya abatido, tire el panel hacia delante para separarlo del
cuerpo de la unidad.
2. BOTÓN DE SELECCIÓN (SEL) y PERILLA de VOL(MENU)
a) Presionar “SEL” brevemente, este activa para seleccionar cada modo de
ECUALIZAR VOLUMEN → VOLUMEN → BAJOS → AGUDOS → BALANCE →
DESVANECIMIENTO →
Cuando selecciona un modo de audio deseado, girar la perilla de volumen para ajustar el
efecto de audio.
En cada modo el tiempo de espera es de aproximadamente 5 segundos, si el tiempo de
espera es pasado este retorna al ultimo modo de despliegue del modo de radio o CD
automáticamente.
El modo de control para ECUALIZAR VOLUMEN es operado con los siguientes despliegues
numéricos:
VOLUMEN: (MINIMO) 00, 01, ….., 46, 47 (MAX)
4
INT RDM
RPT
2
43
MP3/CD PLAYER USB/SD/MMC
65
PS
DIGITAL AUDIO
MUTE
232422
COMPACT
9
1920
21
1
UX
18
BAJOS/AGUDOS: -07, -06, ….., 00, ….., +07, +07
BALANCE: 0LR9, 1LR9, ...., 9LR9, ...., 9LR1, 9LR0
DESVANECIMIENTO: 0FR9,1FR9, ...., 9FR9, ...., 9FR1, 9FR0
b) Presionar el botón por dos segundos o más, esto activa las funciones en modo cíclico para
selección del usuario:
→ SONIDO (ACTIVAR “ON”/DESACTIVAR “OFF”) → AJUSTES DE USUARIO
(PLANO/CLASICA/ROCK/POP) → VOLUMEN (ULTIMO/AJUSTADO) →
ESTEREO/MONOAURAL (SOLO PARA RECEPCION EN FM) → RELOJ (ACTIVAR
“ON”/DESACTIVAR “OFF”) → MODO DE RELOJ (12/24 HORAS).
Después de seleccionar el modo deseado, girar el control de volumen para seleccionar el
ajuste del modo deseado.
SONIDO “BEEP” (ACTIVAR “ON”/DESACTIVAR “OFF”)
Modo de activado “ON”: El sonido se escucha cuando cualquier tecla es presionada.
Modo desactivado “OFF”: El sonido es deshabilitado.
VOLUMEN ULTIMO “LAST” / VOLUMEN AJUSTADO “DEFA”
VOLUMEN ÚLTIMO: El radio se enciende al volumen en que se encontraba al apagarlo la
última vez.
VOLUMEN AJUSTADO: después de presionar “SEL”, la pantalla despliega “AVOL”, entonces
puede ajustar el volumen presionando “+” o “– “.
ESTEREO / MONOAURAL
ESTEREO: En radio FM, seleccionar este modo para un buen efecto de sonido.
MONOAURAL: En radio FM, seleccionar este modo para disminuir el ruido y hacer el sonido
más claro cuando la señal de la estación es débil.
RELOJ “CLK” (ACTIVAR “ON”/DESACTIVAR “OFF”)
Modo activado “ON”: El reloj se despliega en la pantalla cuando el poder esta desactivado.
Modo desactivado “OFF”: El reloj desaparece de la pantalla cunando el poder es desactivado.
MODO DE RELOJ (12/24 HORAS)
En este modo puede seleccionar el formato de despliegue del reloj en la pantalla de 12 o 24
horas.
3. ENCENDIDO / APAGADO
Cuando el aparato esté apagado, si pulsa cualquier botón del panel frontal (excepto los de
apertura o expulsión), el aparato se encenderá. También se encenderá cuando introduzca un
CD en el compartimento del disco. La unidad se enciende automáticamente al insertar un CD
o al introducir una tarjeta MMC/SD o lector USB. Cuando el aparato está encendido,
mantenga pulsado el botón PWR durante 0.5 segundo para apagar el aparato.
4. LCD (EXHIBICIÓN DEL CRISTAL LÍQUIDO)
5. Y 6. BOTONES DE SINTONIZACIÓN (TUNE), BÚSQUEDA (SEEK), PISTA (TRACK) y
SALTO HACIA ARRIBA / HACIA ABAJO (SKIP UP / DOWN).
a) En el modo de radio:
Pulse brevemente el botón >>| o el botón |<< para sintonizar manualmente, hacia arriba o
hacia abajo, la emisora de radio deseada.
Mantenga presionado el botón >>| o el botón |<<, durante más de 0,5 segundos, para
sintonizar automáticamente, hacia arriba o hacia abajo, una emisora con señal potente.
b) En el modo de reproducción MMC/SD, USB o CD/MP3/WMA,
Presionar “” brevemente para saltar a la pista siguiente.
Presionar “” brevemente para volver al inicio de la pista actual si esta lleva mas de 2
segundos en reproducción.
Presionar “” brevemente para saltar al inicio de la pista anterior si el tiempo de
3

reproducción es menor a 2 segundos.
Presionar y sostener “” o “” para regresar o avanzar rápidamente la reproducción de la
pista. Liberar el botón para volver al modo de reproducción normal.
.
7. SELECTOR DE BANDA
Pulse brevemente el selector de banda (BND) para seleccionar la banda de radio que desee
escuchar. Las bandas AM / FM cambiarán según el siguiente orden: ->FM 1 -> FM 2 -> FM 3
->A M 1 -> AM 2 ->.
En el modo MMC/SD, USB o modo de disco MP3/WMA, presionar “BND” para activar el
modo de selección de la canción y el número de la pista “TRK 000” se despliega en la pantalla
(si el número de las pistas es menor a 100, la pantalla despliega “TRK 00”) y destellara el
digito “0” correspondiente a las centenas.
Girar “VOL” para seleccionar e ingresar el numero del 0 al 9 en el digito que esta destellando,
entonces presionar “BND” para confirmar el numero y el digito “0” correspondiente a las
decenas empieza a destellar.
Girar “VOL” para seleccionar e ingresar el numero del 0 al 9 en el digito que esta destellando,
entonces presionar “BND” para confirmar el numero y el digito “0” correspondiente a las
unidades empieza a destellar.
Girar “VOL” para seleccionar e ingresar el número del 0 al 9 en el digito que esta destellando,
entonces presionar “BND” para confirmar el número.
Después de ingresar todos los números correspondientes a la canción, presionar “SEL” para
iniciar la reproducción de la pista seleccionada.
8. BOTÓN MODE
Púlselo para seleccionar el modo RADIO, CD, CARD (después de introducir la tarjeta
MMC/SD), USB (después de introducir el lector USB) y AUXILIAR.
9. BOTÓN DE ANULACIÓN DEL SONIDO (MUTE)
Mediante este botón podrá activar o desactivar la función de anulación del sonido.
Pulse el botón de anulación del sonido (MUTE) para eliminar temporalmente el sonido de los
altavoces. Vuelva a pulsar este botón para recuperarlo. La función de anulación del sonido
también se cancelará cuando pulse, en el panel frontal, los botones de modo (MOD), banda
(BND), selección (SEL) o rotando la perilla del VOL..
10. VENTANA DE RECEPCIÓN DE SEÑAL INFRAROJA
11. BOTÓN DE PRESINTONIZACIÓN AUTOMÁTICA / BÚSQUEDA DE EMISORAS
PRESINTONIZADAS (APS)
Durante el modo de radio:
1) Al presionarlo por más de 1 segundo, el radio busca desde la frecuencia actualy verifica la
potencia de la señal hasta que el cilco 1 esté terminado. Luego son preseleccionadas 6
estaciones con frecuencia fuerte y van enumeradas en el banco de memoria del radio y de
forma ordenada. La operación de auto guardado se implementa en la b´suqeda de cada
banda. Cuando termina esta operación el radio ejecuta Preset Scan.
2) Cuando se presiona el botón brevemente, el radio busca las estaciones
predefinidas en la banda en la que esté operando. Cuando excede el nivel de la memoria,
el radio se detiene por 5 segundos y reinicia la búsqueda.
12. BOTONES DE PRESINTONÍA, REPRODUCCIÓN (TOP/>||), REPRODUCCIÓN
INTRODUCTORIA(INT) , REPETICIÓN(RPT) y REPRODUCCIÓN ALEATORIA(RDM).
a) Durante el modo radio, al presionar estos botones de forma rápida, seleccionan una
estación predeterminada. Si se presionan los seis botones por más de 2 segundos, la
estación que se esté escuchando quedará guardada en las preseleccionadas.
4
b) Durante la reproduccion de un MMC/SD, USB o disc:
• Presionar “TOP/” para pausar la reproduccion del disco, presionar “TOP/”
nuevamente para volver a la reproduccion normal.
• En el modo detenido, presionar y sostener “TOP/” por aproximadamente 0,5 segundos
para reproducir la primera pista del disco.
• Presionar “INT” para reproducir los primeros 10 segundos de cada una de las pistas del
disco y la pantalla despliega “INT ON”. Presionar “INT” nuevamente para detener la
reproduccion de la introduccion cuando la pista ha seleccionar es reproducida y la pantalla
despliega “INT OFF”.
• En el modo de CD: Presionar “RPT” para reproducir la pista actual repetidamente y la
pantalla despliega “RPT ONE”. Presionar “RPT” nuevamente para cancelar la función y la
pantalla despliega “RPT OFF”.
• En el modo de MMC/SD, USB o MP3/WMA: Presionar “RPT” repetidamente hasta que la
pantalla despliega “RPT ABM”, entonces seleccionar la carpeta que desea repetir.
• Presionar “RDM” para reproducir todas las piatas del disco de manera aleatoria (al azar)
definida por el reproductor y la pantalla despliega “RDM ON”. Presionar “RDM” nuevamente
para cancelar la función y la pantalla despliega “RDM OFF”.
c) En modo de disco MMC/SD, USB o MP3/WMA:
• Presione el botón de preselección de radio 6 y 5 para para mover las pistas arriba / abajo.
13. BOTÓN ESTÉREO / MONO (ST)
En el modo de radio, pulse brevemente el botón ST para seleccionar entre los modos de
sonido estéreo o mono.
14. El BOTÓN de LOC
En el modo de radio, presiónelo para cambiar a la recepción local o a la recepción de la
distancia. La voluntad del LOC que demuestra en la exhibición del LCD cuando el receptor
detectó una cierta señal de la estación local estable. Note: Esta operación está solamente
para la recepción de FM. En modo de la, el LOC es vacío.
15. BOTÓN LOUDNESS
Pulse brevemente este botón para activar el modo loudness. Este modo refuerza el efecto de
los tonos graves. Vuelva a pulsar este botón para desactivar este modo.
16. BOTÓN DEL RELOJ (CLK)
Pulse brevemente el botón del reloj (CLK) para visualizar la hora en la pantalla, durante 5
segundos. Después, la pantalla volverá a la visualización anterior, a no ser que vuelva a
pulsar el botón.
Mantenga presionado el botón del reloj (CLK), durante más de 1 segundo, hasta que la hora
real parpadee en la pantalla LCD.
Ahora, podrá ajustar las horas o los minutos mediante los rotando la perilla del vol,
respectivamente.
17. BUSQUEDA AUTOMÁTICA(SCN)
Apriete el botón para explorar cada canal con detención de estación. Si una señal válida tenga
sido detectada, la curriente frecuencia brillará dentro de 5 segundos, luego apriete
nuevamente para parar la exploración y mantener la curriente frecuencia, de otra manera la
unidad continuará a explorar cada canal con detención de 5 segundos más trarde.
18. CONECTOR DE AUXILIAR
19. BOTÓN CD EJECT
Oprima este botón para expulsar el disco compacto del compartimiento.
5

20. RANURA PARA COLOCAR LOS DISCOS COMPACTOS
21. y 22. COMPARTIMIENTO MMC/SD y CONNECTOR USB y SU OPERACIÓN
Cuando se necesita hacer tocar MMC/SD o USB, inserte la tarjeta MMC/SD o barra USB en el
compartimiento MMC/SD o conector USB. Luego el modo de tocar se cambiara a modo
MMC/SD o USB y muestra CARD o USB en LCD (Cuando la tarjeta MMC/SD y barra USB
están ambas insertadas en sus compartimentos o conectores, el modo de tocar será cambiado
al ultimo modo), y luego toca la primera pista de MMC/SD o USB.
23. LED
24. BOTÓN RESET
Presione el botón RESET para inicializar el programa cuando la pantalla o los botones no
funcionan correctamente.
6
FUCION DEL CONTROL REMOTO:
1- Power (Boton de encendido y apagado)
2- Mute ( Sin sonido)
3- LOUD (Sonido)
4 - ( +) / MENU ( Boton de nivel hacia arriba)
5 - SEL / MENU (Boton selector)
6 -(-)/MENU (Boton de nivel hacia abajo)
7 - ST (Boton mono/ stereo )
8 - A.P
9 - Band
10 - Mode
11 - UP (Sintonia / busqueda hacia arriba y avance )
12 - DN ( Sintonía / Busqueda hacia abajo y retroceso)
13 - SCN (Busqueda automática )
14 - CLK (Relog y boton de ajuste)
15 - El botón de LOC
16 - TOP/>|| / CD track preset 1
17 - INT / CD Track INT/Radio Preset 2
18 - RPT / CD Track /Radio Preset 3
19 - RDM / CD Track/Radio Preset 4
20 - Radio Preset 5
21 - Radio Preset 6
7
17
1
2
8
9
10
16
19
POWER
MUTE
CLK A.P
MODE BAND
TOP/
1
4 5
RDM
12
4
+
SELDN UP
-
LOC LOUD
RPTINT
32
6
5
ST
6
7
15
3
SCN
13
18
21

MANTENIMIENTO DEL CONTROL REMOTO
Antes de usar el control remoto, retire la película aislante, la cual previene que la
batería se gaste antes de ser usado.
ACERCA DE LAS BATERÍAS
Batería de Litio: CR2025 3V
Duración de la batería: aproximadamente 6 meses.
REMPLAZAR LA BATERÍA DEL CONTROL REMOTO
1) Retire la tapa del compartimiento de la batería presionando el seguro con el dedo y
tirando hacia fuera.
2) Coloque una batería del mismo tipo, teniendo en cuenta la marca de polaridad
positiva “+” quede hacia arriba.
3) Coloque con suavidad la tapa del compartimiento hasta que quede fija en su lugar.
B
A
Signo “+” hacia arriba
CUIDADO
·No recargue, desarme o arroje al fuego las baterías.
·Si la batería se derrama podría dañarse la unidad.
·Para evitar accidentes, mantenga las baterías lejos del alcance de los niños.
8
 Loading...