


尺寸:210*143mm
材质:55g书纸 黑白印刷
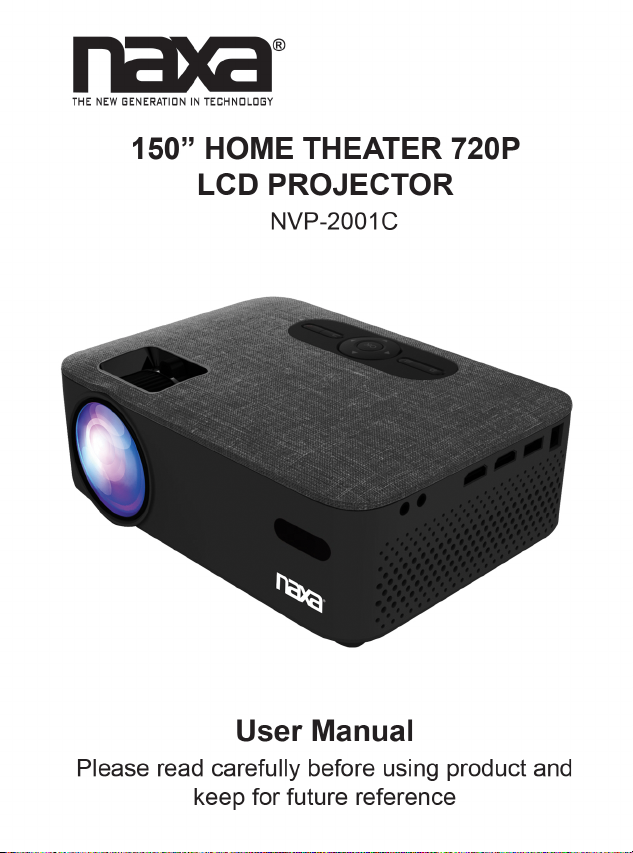

Table of Contents
Introduction.......................................................3
Safety Instructions............................................4
Additional Warnings..........................................5
Package Contents............................................6
Projector Setup.................................................7
Placing Projector..............................................8
Image Adjustments...........................................9
Angle Adjustments..........................................10
Remote Overview...........................................11
Projector Overview.........................................12
Main Operation...............................................14
Bluetooth Operation.......................................15
HDMI Operation.............................................17
Audio / Video Input.........................................18
Computer Video (VGA)..................................19
External Audio................................................20
Micro SD & USB Inputs..................................21
Specifications.................................................22
Support...........................................................23
2

Introduction
Congratulations, and thank you for choosing Naxa’s 150”
Home Theater 720P LCD Projector. This manual will
help you operate your new device.
We know you have many choices when it comes to technology; thank you for choosing us here at Naxa Electronics. Established in 2001 in Los Angeles, California,
we are dedicated to delivering products that entertain
and delight.
We trust that you will be happy with your purchase.
Please read this manual carefully and save it for refer-
ence. You may also nd the latest FAQ, documentation,
and other product material at our website. Come visit us
on the web at www.naxa.com and see all that we have
to oer!
3

Safety Instructions
1. Read these instructions.
2. Keep these instructions.
3. Heed all warnings.
4. Follow all instructions.
5. Do not use this apparatus near water.
6. Clean only with a dry cloth.
7. Do not block any ventilation openings. Install in accordance with the manufacturer’s instructions.
8. Do not install near any heat sources, such as radiators, heat registers, stoves, or other apparatus (including
amplier) that produce heat.
9. Protect the power cord from being walked on or
pinched, particularly at plugs, convenience receptacles,
and the point where they exit from the apparatus.
10. Only use attachments / accessories specied by the
manufacturer.
11. Unplug this apparatus during lightning storms or
when unused for long periods of time.
12. Refer all servicing to qualied service personnel.
Servicing is required when the apparatus has been damaged in any way, such as power-supply cord or plug is
damaged, liquid has been spilled or objects have falled
into the apparatus, the apparatus has been exposed to
rain or moisture, does not operate normally, or has been
dropped.
13. Use only with a cart, stand, tripod, bracket, or table
specied by the manufacturer or sold with the apparatus.
When a cart is used, use caution when moving the cart /
apparatus combination to avoid injury from tip-over.
4

Additional Warnings
1. Do not look directly into the projector light.
2. Do not touch the projector lens.
3. Mains adapter is used as disconnect and it should
remain readily operable during intended use. In order
to disconnect the apparatus from the mains completely,
the mains plug should be disconnected from the mains
socket completely.
4. CAUTION: Use of controls or adjustments or perfor-
mance of procedures other than those specied may
result in hazardous radiation exposure.
5. WARNING: Changes or modied to this unit not
expressly approved by the party responsible for compliance could void the user’s authority to operate the
equipment.
6. WARNING: Use of this unit near uorescent lighting
may cause interference regarding use of the remote. If
the unit is displaying erratic behavior move away from
any uorescent lighting, as it may be the cause.
7. WARNING: Shock hazard - DO NOT OPEN.
8. Caution and marking information is located at the rear
or bottom of the apparatus.
9. WARNING: To reduce the risk of re or electric shock,
do not expose this apparatus to rain, moisture, dripping,
or splashing.
10. Objects lled with liquids, such as vases, shall not be
placed on the apparatus.
5

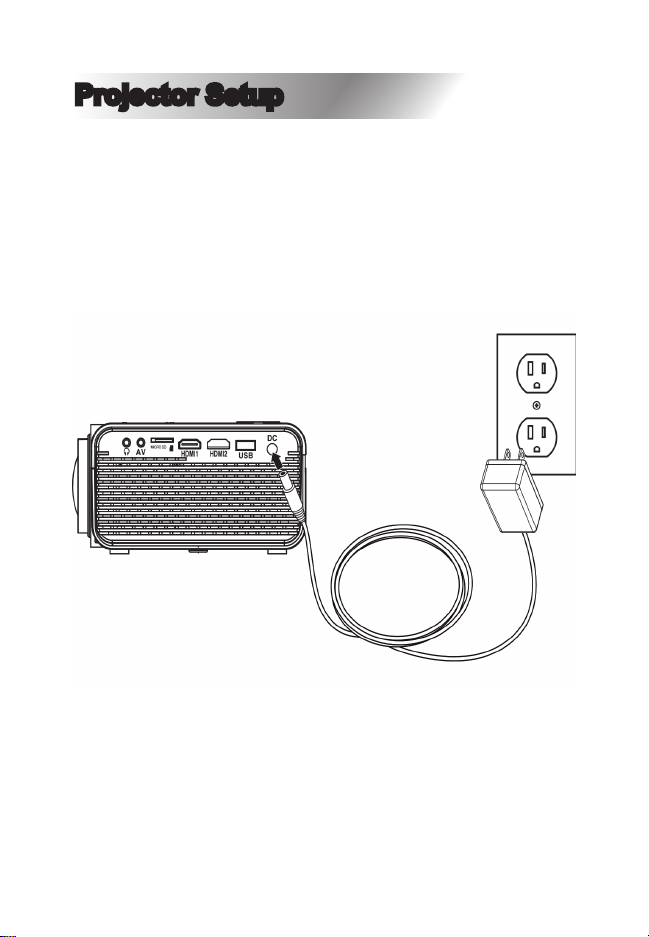
Projector Setup
Power
Plug the AC / DC power adapter (inlcuded) into a standard wall outlet and the DC power input on the rear of
the unit. After connecting power, please allow approximately 5 seconds to pass before powering the unit on.
7

Placing Projector
Your projector can be installed in four dierent congurations (see picture below).
Front Table:
Select this location with the projector
placed near the oor in front of the
screen. This is the most common way
to position the projector for quick
setup and portability.
Front Ceiling:
Select this location with the projector
suspended upside-down from the
ceiling in front of the screen.
NOTE: A projector mount is required
to install the projector on the ceiling.
Rear Table:
Select this location with the projector
placed near the oor behind screen.
NOTE: A special rear projection
screen is required.
Rear Ceiling:
Select this location with the projector
suspended upside-down from the
ceiling behind the screen.
NOTE: A projector mount and a
special rear projection screen is
required.
8

Image Adjustments
Follow the pictures below to adjust the focus and trapezoidal screen. Adjust the focus by turning the knob
while observing the image pixels near the center of the
screen. Optimal focus is obtained when the pixels are
clearly visible. Depending on the projected screen size,
the focus near the screen edges may be less sharp than
the screen center.
Keystone image is created when the projector beam is
projected to the screen in an angle. Keystone correction will restore the distorted image to a rectangular or
square shape.
FOCUS ADJ.KNOB
Then sharpen the image
by rotating focus knob.
TRAPEZOIDAL ADJ.KNOB
9

For the best results, place the projector in a dark room,
or other dimly lit area.
Use the unit with a dedicated projector screen for optimal picture resolution. If placing the projector behind
the viewing screen (unit in front of / projecting toward
viewers), a special screen will be required. Projector
screens are not included. If you are not using the unit
with a screen, a smooth, white or lighly colored surface
will provide the best results.
Angle Adjustments
Use the Angle Adjustment Knob to ne tune the projector’s height to suit your needs.
10

Remote Overview
NVP-2001C
1
1

Projector Overview
12

Projector Controls
3
1

Main Operation
14

Bluetooth® Operation
Pairing is the term used when two Bluetooth devices
are connected wirelessly for the rst time. This allows
the devices to see each other and sets up a one-to-one
communication channel between both devices.
Bluetooth Connection
1. Press the Power button to turn on the unit.
2. Press the Menu button to enter the menu screen.
3. Use the left / right directional arrows to select right
side menu.
4. Use the up / down directional arrows to select Bluetooth column.
5. Press the “OK” button to enter Bluetooth menu.
6. Use the lef/right directional arrows to select “ON”.
7. Turn on your external Bluetooth speaker and select
Bluetooth pairing mode.
8. A few seconds later, an audio sound will prompt to
notify you that the projector and speaker are connected.
9. After connecting, the projector will sound through the
external Bluetooth speaker.
15

NOTE: When the BT can’t connect to this device automatically, please enter the Bluetooth setup menu and
select to resest BT. Then, the BT device will connect to
the projector automatically
Disconnecting Bluetooth Device
1. Press the Menu button to enter the menu screen.
2. Use the left / right directional arrows to select above
menu.
3. Use the up / down directional arrows to select Bluetooth column.
4. Press the “OK” button to enter Bluetooth menu.
5. Use the left/right directional arrows to select “OFF”
and disconnect Bluetooth.
16

HDMI Operation
HDMI oers superior sound and picture quality, and is
the easiest way to play media from a computer, Blu-Ray
player, or other device with an HDMI output.
Requires an HDMI cable (not included) and a device
with an HDMI output.
1. Using an HDMI cable, connect the HDMI 1 or 2 Input
on the projector to the HDMI output on your media player or computer.
2. Set the projector’s Source to the connected HDMI
Input and use the controls on the connected device to
select and play media.
17

Audio / Video Input
Requires a 3.5mm to RCA audio / video cable.
1. Connect the 3.5mm to RCA audio video cable to the
AV input on the projector.
2. Connect the 3.5mm to RCA audio / video cable tot he
RCA stereo audio outputs and composite video output
on the media player.
3. Set the projector’s Source to AV and use the control
on the connected player to select and play media.
18

Computer Video (VGA)
NOTE: VGA connections do not support audio. You will
need to use the computer’s speakers to hear audio.
Requires a VGA cable (not included) and a desktop PC
or laptop with a VGA output.
1. Using a VGA cable, connect the VGA Input on the
projector to the VGA output on your computer.
2. Set the projector’s Source to PC and use the controls
on the computer to select and play media.
19

External Audio
NOTE: Speakers must have their own power supply.
Requires a 3.5mm to RCA audio / video cable.
1. Using a 3.5mm to RCA stereo cable, connect the
external powered speakers to the headphone jack on
the projector.
2. The projector will automatically detect the connection
and send audio signal to the speakers.
20

Micro SD & USB Inputs
Supports Micro SD cards and USB ash drives up to
32GB.
Supports AVI, MOV le formats.
1. Load a USB drive into the USB port.
2. Set the Source to Media Player, then use the arrow
buttons to select “C:Drive” or “D:Drive” (C;Drive is the
SD card, D:Drive is the USB).
3. Use the arrow buttons to select Music / Photo / Movie,
then press the “OK” button to begin playing content from
the connected storage device.
21

Specications
Wireless Source Bluetooth®
Projection Type LED & 4” LCD Display
Resolution 1280 x 720
Projection Distance 31.9” - 150” Viewable
Screen Size
Supported Content Quality
Supported Media MHL Mobile Connection,
Inputs HDMI x 2, USB, Memory
Image Correction +/- 15 Degrees
Contrast Ratio 500:1
Bulb Life Up to 20,000 Hours
1080P, 1080i, 720p, 576i,
480p, and 480i
USB 2.0, Memory Card,
HDMI, AV IN
Card, AV IN, VGA, 3.5mm
Headphone, DC IN
22

Support
If you have problems with your device, please consult
the instructions in this manual. Please also visit us on
the web at www.naxa.com to get up to the minute news,
alerts, and documentation for your device. For additional
assistance, please contact Naxa Technical Support.
NAXA Technical Support
2320 East 49th St. Vernon, CA 90058
http://www.naxa.com/naxa_support/
MADE IN CHINA
23
 Loading...