

Page 1

TFT LCD Digital Photo Frame with
7”
peaker and USB/SD/MMC Card Slot
S
M
ODEL NO.:NF-519
USER MANUAL
Thank you very much for selecting our product.
Please enjoy the wonderful features of the latest digital technology.
You will learn how to use it within this user manual.
Page 2

IMPORTANT INSTRUCTION
Caution: To reduce the risk of electric shock.
Do not remove cover (or back).
No user serviceable parts inside.
Use the recommended accessories only.
Refer servicing to qualified service personnel.
-The digital photo frame is for indoor use only!
-To avoid the risk of fire or electric shock do not expose this appliance to rain or moisture.
-Do not block the ventilation holes on the back of the unit at any time.
-Keep the product out of strong sunlight. Direct sunlight may cause damage.
-Do not open the cover of the digital photo frame. There are no user serviceable parts inside.
-Unplug AC adaptor from power socket if the unit is not in use.
Maintenance:
-Touch the screen gently. The screen in the digital photo frame is made of glass and is can be
easily scratched or broken.
-Disconnect the AC adaptor before maintaining the player.
-Wipe the player with a dry, soft cloth.
-If the surface is extremely dirty, wipe it with a clean cloth which has been dipped into a weak
solution. Use another cloth to dry up the surface.
-Never use alcohol, benzine, thinner, cleaning fluid or other chemicals. And do not use
compressed air to remove dust.
Page 1
Page 3

FEATURES
THANKS FOR YOUR PURCHASING THIS DIGITAL PHOTO FRAME.
THESE INSTRUCTIONS CAN HELP YOU TO MAKE THE BEST USE OF
THIS PLAYER. THE UNIT SUPPORTS THE FOLLOWING MEMORY CARD
FORMATS: SD, MMC, MS
- 7 inch TFT LCD
- Resolution: 480X234
- Support SD, MMC, MS card reader.
- Support USB (cannot connect with removable HDD) .
- Support format: JPG, MP3/WMA, DAT/MPEG/AVI -Input and
output signal: one road AV OUT one road EARPHONE JACK.
- Support static image: slide display, zoom, rotate and miniature.
Support active image.
-
- Support background music.
- Support different screen display mode switch.
- Support menu language: English.
- Support clock.
- Support file editing: copy or delete files.
-Built in loudspeaker(16ohmx2).
Page 2
Page 4
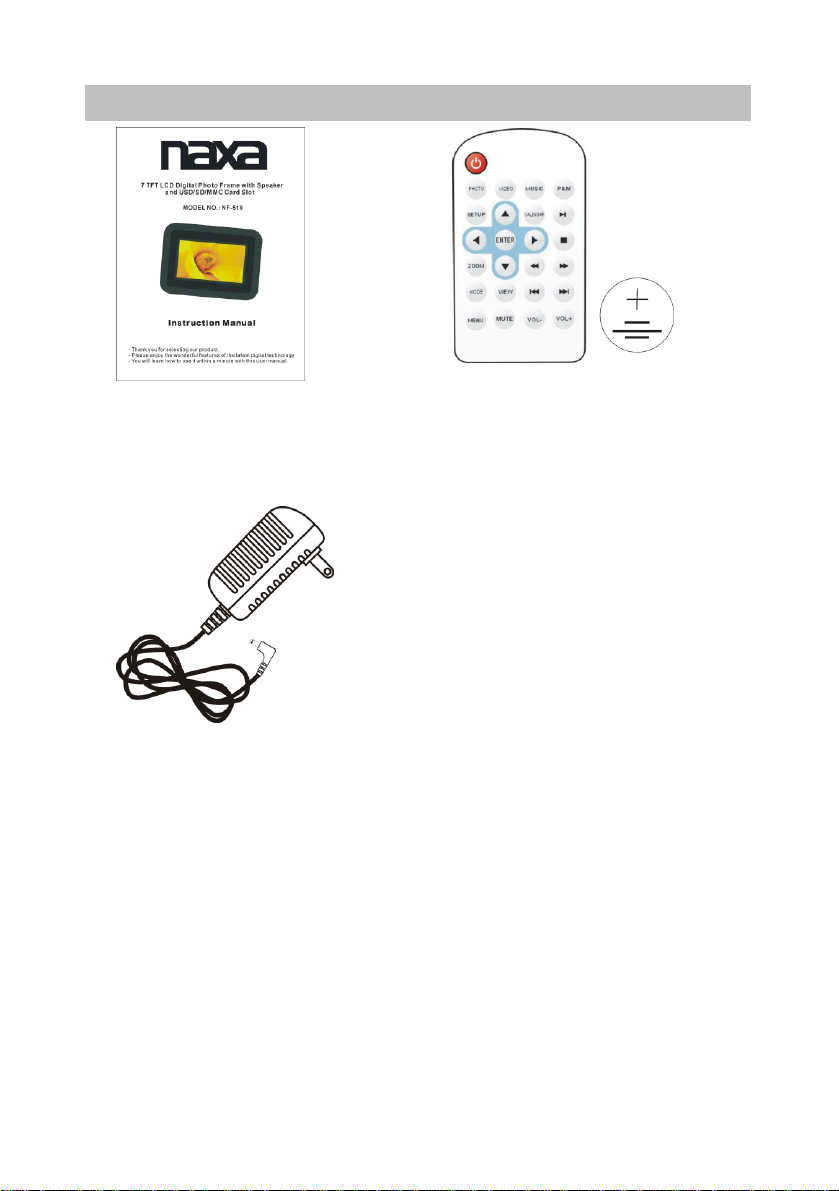
ACCESSORIES
Instruction manual
……………………..1
Remote control with battery
………………………………...1
AC adaptor
……….…..1
All the pictures in the instruction manual are just for your reference,
specification should refer to actual accessories.
Page 3
Page 5
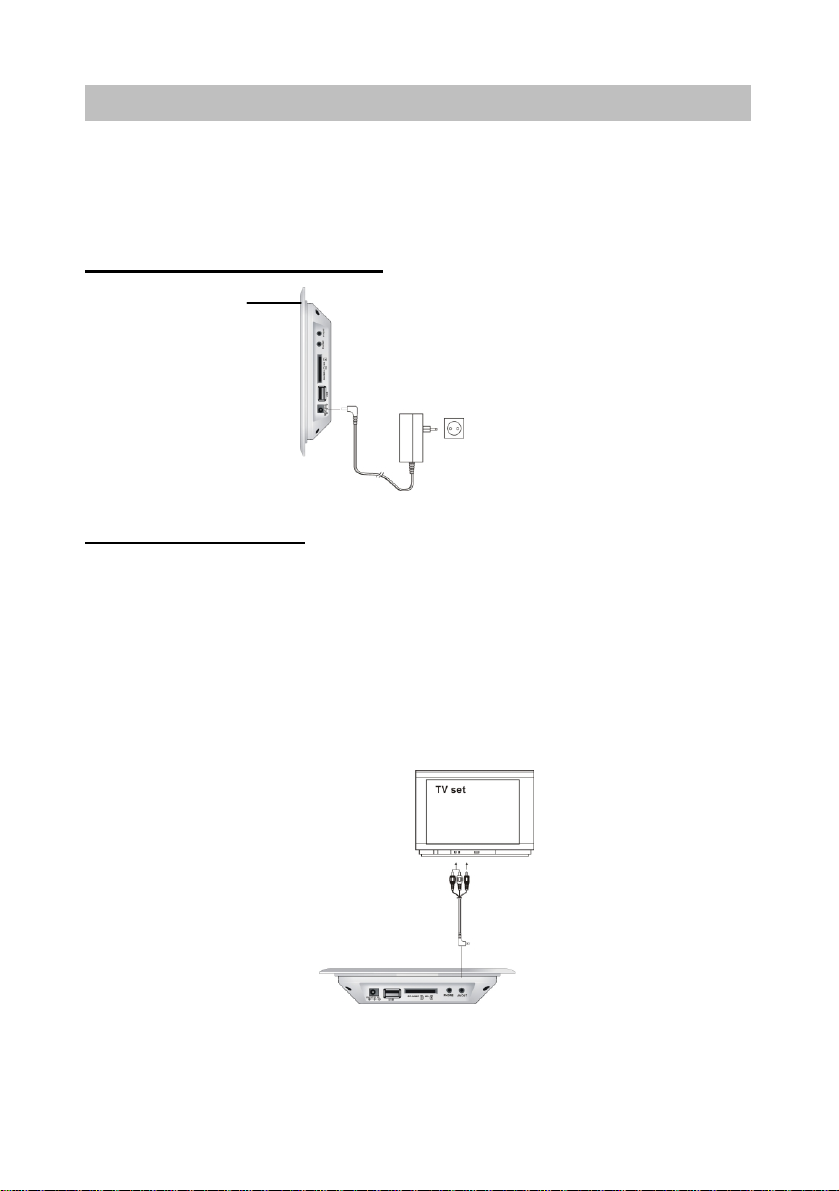
BASIC CONNECTION
Ensure all the cables are disconnected from the main unit before connecting to AC
power source by AC power adaptor.
Read through the instructions before connecting other equipment.
Connecting to power source
Main unit
To power outlet
AC adaptor
Connecting to TV set
-It is recommended to connect TV.
-Ensure that this player and other equipments to be connected are set to off
mode and disconnect the AC adaptor before commencing connection.
-Do not block ventilation holes of equipment and arrange them so that air
can circulate freely.
-Read through the instructions before connecting other equipment.
To video input connector (yellow)
To audio input connectors (red, white)
Video/Audio cable (optional)
Page-4
Page 6
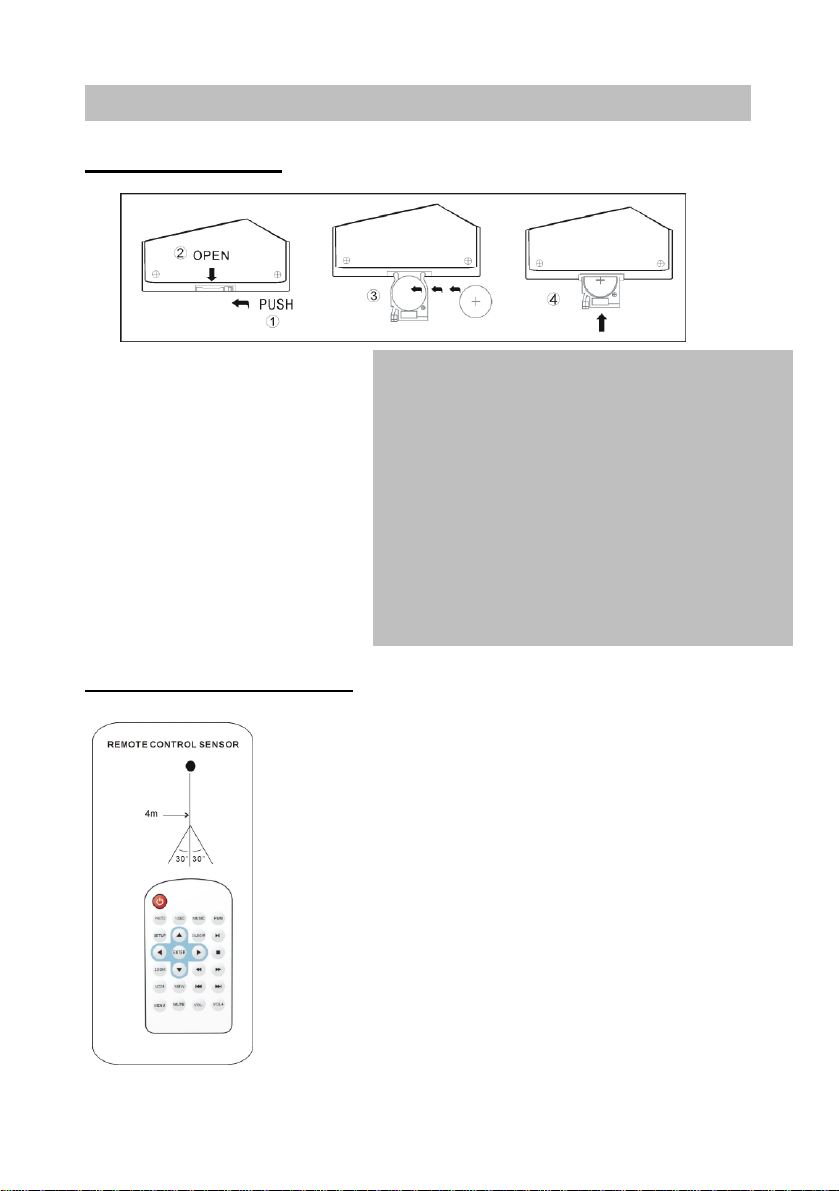
PREPARE FOR REMOTE CONTROL
Battery installation
Insert the battery according to the
pictures as above while observing
the correct (+) and (-) polarities.
Service life of batteries
●The batteries normally last for
about one year although it
depends on how often the
remote control is used.
●If the remote control fails to work
even when it is operated near the
player, replace the batteries.
●Use one size CR2025 type battery
Using control preparation
BATTERY USAGE AND HANDING:
●Do not use rechargeable (Ni-Cd) batteries.
●Do not attempt to recharge.
●Do not place the battery near to heat or
expose to sunshine, and never throw the
battery into the fire.
●Do not drop, step on or otherwise impact
the remote control. This may damage the parts or lead
to malfunction.
●Keep battery away from children and pets.
●Remove the battery when the remote control is not in
use.
1. Remove the protective plastic tab before
operating the remote control.
2. Point the remote control from no more than 4 m from
the player and within about 60°of the front of the
player(refer to the picture at right)
NOTE:
-The operating distance may vary according to the
brightness of the room.
-Do not point bright lights at remote control sensor.
-Do not place objects between the remote control and
the remote control sensor.
-Do not use this remote control while simultaneously
operating the remote control of any other equipment.
Page 5
Page 7

TABLE OF CONTENTS
IMPORTANT INSTRUCTION.....................................................................................................................
FEATURES..................................................................................................................................................
ACCESSORIES...........................................................................................................................................
BASIC CONNECTION................................................................................................................................
PREPARE FOR REMOTE CONTROL.....................................................................................................
MAIN UNIT....................................................................................................................................................
REMOTE CONTROL...................................................................................................................................
OPERATION..........................................................................................................................................
MAIN MENU.......................................................................................................................................
SETUP...............................................................................................................................................
SPECIFICATION........................................................................................................................................
TROUBLESHOOTING...............................................................................................................................
9-14
9-11
11-14
1
2
3
4
5
7
8
15
16
Page 6
Page 8

MAIN UNIT
FRONT VIEW
TOP VIEW
LEFT VIEW
1.TFT DISPLAY WINDOW
2.REMOTE CONTROL SENSOR
3.SETUP
4.u (RIGHT)
5.t (LEFT)
6.p (UP)
7.q (DOWN)
8.MENU
9.ENTER
10.STANDBY
11.AV OUT JACK
12.PHONE JACK
13.CARD SLOT
14.USB SLOT
15.DC IN JACK(5V INPUT)
16.BUILT-IN SPEAKER
17.STAND HOLDER
BACK VIEW
SETUP To enter setup menu page
u
t
p
q
MENU To return to previous menu page.
ENTER To play or pause, or to confirm a selection.
STANDBY ON/OFF button,
To move right.
To move left.
To move up.
To move down.
Page 7
Page 9

REMOTE CONTROL
STANDBY BUTTON Press this button to turn on the unit or set it in standby mode.
VIDEO BUTTON To display the video files directly.
PHOTO BUTTON To display all the photo files in current card.
UP BUTTON To move up.
SETUP BUTTON To enter the setup menu display.
ENTER BUTTON To confirm a selection.
LEFT BUTTON To move left.
DOWN BUTTON To move down.
ZOOM BUTTON To enlarge picture size.
VIEW BUTTON To display the photo miniature for 6 pieces(3×2)in one screen.
MODE BUTTON
MUTE BUTTON To mute the sound.
MENU BUTTON To return to the previous menu page.
MUSIC BUTTON To display all music files in current card.
P&M BUTTON To display the photo and music in one card simultaneously.
CALENDAR BUTTON To display the current date and time.
PLAY/PAUSE BUTTON
RIGHT BUTTON To move right.
STOP BUTTON To stop playing and return to play list page.
FR BUTTON To play the file backward(for AV files only)
FF BUTTON To play the file forward(for AV files only)
PREV BUTTON To play the previous file.
NEXT BUTTON To play the next file.
VOLUME+ BUTTON To increase the volume level.
VOLUME- BUTTON To decrease the volume level.
To switch the screen display mode: Panel scan, Auto fit or
Optimal (for picture files). Full, Original or Screen (for picture
files).
To start or pause playing the file. Or to enter the submenu of the
setup menu.
Page 8
Page 10

OPERATION
1 ON and OFF
After install the unit and connect it to the power socket, then the unit will turn
on. If you want to turn off the unit you should press STANDBY button. Also
press STANDBY button again to turn on the unit.
2 MAIN MENU OPERATION
Turn on the unit and press MENU button twice, then
the screen will display main menu page (shown as left
picture).
There are five functions consist of Slideshow,
Video, Photo, Music and Calendar. You can
press LEFT/RIGHT navigation button to select
desired function and press ENTER button to enter.
Note:
1. Insert the SD/MMC/MS card and USB contains picture and music files in it before turn on the
unit, when turn on the unit, it will automatically play the pictures and music files in the USB.
Moreover, it only play the files in the USB continuously. But when connect the AC adapter, turn
on the unit first, then insert the CARD/USB in the unit, the unit will only play the files in the NOR
FLASH memory continuously if the memory contains picture or music files. If you want to play
files in other card, press MENU button till to enter card select interface and select the card as
desired, then press ENTER button to confirm. The unit will start play the files in the card you
select.
2. If there is no card/USB in the unit, or NOR FLASH of unit contains no files, the Slideshow,
Video, Photo and Music have no function.
The media formats which unit supports consists of:
-Photo: JPG; -Music: MP3/WMA; -Movie: DAT/MPEG/AVI.
2.1 Slide show
Insert card(SD/MMC/MS)or USB into the card/USB slot, then select the SLIDESHOW item in
the main menu, press ENTER button to confirm. Then the unit will play the photo and music
stored in one device simultaneously. And the formats supported are JPG and MP3/WMA. (Or
you can press P&M button on the remote control to enter this mode directly)
2.2 Video
-Press left or right button to select VIDEO icon, then press ENTER button to enter the below
page.(Or you can press VIDEO button on the remote control to enter video file playback
directly)
-In the VIDEO item, it only supports the movie playing and the formats are DAT/MPEG/AVI.
Page 9
Page 11

-Press up or down button to select the file what you want to play and press ENTER button to start
playback. Press STOP button to stop playing and return to play list page.
-Press PLAY/PAUSE button to pause the playing and press it again to resume playback.
-Press PREV/NEXT button to playback the previous/next video file.
-During file playback, press SETUP button first, then press FR/FF button to fast backward/fast forward
playback the file, and press PLAY/PAUSE button to resume normal playback.
-Press VOL+/VOL- button to adjust the volume level from 0 to 16.
2.3 Photo
-Press left or right button to select PHOTO icon, then press ENTER button to enter the below page.(Or
you can press PHOTO button on the remote control to enter photo file playback directly)
-In the PHOTO item, it only supports the movie playing and the format is JPG.
-Press navigation buttons to select the file what you want to play and press ENTER button to start
playback.
-Press PLAY/PAUSE button to pause the playing and press it again to resume playback.
-Press STOP or VIEW button to stop playing and return to play list page.
-Press LEFT/RIGHT navigation button to playback the previous/next photo file.
2.4 Music
-Press left or right button to select MUSIC icon, then press ENTER button to enter the below page.(Or
you can press MUSIC button on the remote control to enter music file playback directly)
-In the VIDEO item, it only supports the movie playing and the formats are MP3/WMA.
Page 10
Page 12

-Press up or down button to select the file what you want to play and press ENTER button to start
playback.
-Press STOP button to stop playing and return to previous menu page.
-Press PLAY/PAUSE button to pause the playing and press it again to resume playback.
-During file playback, press UP/DOWN button to playback the previous/next music file.
-Press VOL+/VOL- button to adjust the volume level from 0 to 16.
2.5 Calendar
-Press LEFT or RIGHT button to select CALENDAR icon, then press ENTER button to enter the
below page:
-Press CALENDAR button to switch the display mode.
-Press LEFT/RIGHT button to move the date landscape orientation.
-Press UP/DOWN button to move the date portrait.
3 SETUP OPERATION
Please confirm there is no other operation on the screen, then press SETUP button to setup page as
below:
-Press UP/DOWN button to select the desired item and press ENTER button to enter sub-menu
-Press UP/DOWN button to select the desired option.
-Press MENU button to return to previous menu page.
3.1 Image size
This item is used for setting the display mode on the screen when playing picture.
Option: Auto fit, Optimal or Full.
3.2 Slide show effect
This item is used for setting the picture circular play mode.
Options: Random, Windows, Jalousie, Fade, Insert, Reel, Brick, 3DFloat, Release, 3DMix, Comb,
3DCircle and 3DCube.
3.3 Slide show interval
This item is used to set the interval time for picture display.
Page 11
Page 13

3.4 Split slide show
This item is used for setting the split slide show mode for picture display.
Options: On or Off.
3.5 Music play mode
This item is used for setting the music play mode.
Options: Single repeat, Circular, No repeat or Single.
3.6 Music as alarm
This item is used for setting the music you select as alarm sound.
In music pause interface, select one music as desired. Press SETUP button, use UP/DOWN button to
select MUSIC AS ALARM item, then press ENTER button to confirm. When the alarm clock time you
set elapses, the music will play.
3.7 Start slide show
This item is used for starting to play the pictures.
Use UP/DOWN button to select this item, then press ENTER button to confirm. Then the
screen will slide show the picture in any mode.
3.8 Rotate
This item is used for rotating the picture clockwise when playing the picture. Use UP/DOWN button to
select this item, then press ENTER button to confirm. The picture will rotate 90° clockwise by one press
ENTER button.
3.9 Zoom
This item is used to zoom in the picture when playing the picture.
Use UP/DOWN button to select this item, then press ENTER button to confirm. The picture will zoom
some proportion by one press ENTER button and press navigation buttons to see other portions of
picture.
3.10 Save picture
This item is used to copy the picture to the unit.
Use UP/DOWN button to select this item, then press ENTER button to confirm and the
screen will display as below:
Press UP/DOWN button to select YES/NO.
-YES: is to copy the picture to the unit,
-NO: is to cancel.
NOTE: The copy function can only copy the photos to the unit.
Page 12
Page 14

3.11 Delete file
This item is used to delete the picture you select.
Use UP/DOWN button to select this item, then press ENTER button to confirm and the screen will
display as below:
Press UP/DOWN button to select Delete one or Delete select as desired and press ENTER button to
confirm.
NOTE: Press navigation buttons to select the picture you want to delete and press ZOOM button to
confirm.
3.12 Format memory
This item is used to format memory of unit.
Use UP/DOWN button to select this item, then press ENTER button to confirm and the screen will
display as below:
Press UP/DOWN button to select YES/NO.
-YES: is to format the memory of unit.
-NO: is to cancel.
3.13 Reset setting
This item is used to reset to factory default settings.
Use UP/DOWN button to select this item, then press ENTER button to confirm and the
screen will display as below:
Press UP/DOWN button to select YES or NO.
-YES: is go to factory default settings.
-NO: is to cancel.
3.14 Language
This item is used to set the menu display language. You can select ENGLISH or other languages.
3.15 Brightness
This item is used to set the level of TFT brightness. The level can be adjusted from 0 to 16.
3.16 Contrast
This item is used to set the level of TFT contrast. The level can be adjusted from 0 to 16.
3.17 Color
This item is used to set the level of TFT color. The level can be adjusted from 0 to 16.
3.18 Tint
This item is used to set the level of TFT tint. The level can be adjusted from 0 to 16.
Page 13
Page 15

3.19 Alarm
This item is used to set the alarm time.
Use UP/DOWN button to select this item, then press ENTER button to confirm and the screen wil
display as below:
-Press UP/DOWN button to select the desired item and press ENTER button to confirm, then press
LEFT/RIGHT button to adjusted the number as desired.
-Select the desired mode: Once, Each day or self define. If you select self define, you can set time from
MONDAY to SUNDAY as desired.
-Select STATUS item and press ENTER button to confirm, then press LEFT/RIGHT button to switch
the alarm function ON/OFF.
-Press MENU button to exit.
3.20 Time
This item is used to change the date and time.
Use UP/DOWN button to select this item, then press ENTER button to confirm and the screen will
display as below:
-Press UP/DOWN button to select the desired item and press ENTE button to confirm, then press
LEFT/RIGHT button to adjust the number as desired.
-Select the SAVE TIME item and press ENTER button to save all settings.
-Press MENU button to exit.
3.21 Video mode
This item is used to set the video file display mode.
In video play list page, press SETUP button and use UP/DOWN button to select this item, then press
ENTER button to confirm.
You can select: Original, Screen or Full.
Page 14
Page 16

SPECIFICATIONS
DISPLAY DEVICE: 7 INCH COLOUR TFT LCD
POWER SOURCE: AC adaptor
POWER INPUT: AC100-240V~ 50/60HZ DC 5V 1000mA
AC POWER CONSUMPTION: ≤5W
RESOLUTION:480(H) X 234(V)
SPEAKER: 16ohmx2
VIDEO OUTPUT LEVEL: 1 Vp-p
AUDIO OUTPUT LEVEL: 2.6V
EARPHONE OUTPUT LEVEL: (0.7V )
MEASUREMENT: 230X166X30MM
WEIGHT: Approx. 850g
Specifications are subject to change without notice.
Page 15
Page 17

TROUBLESHOOTING
Before requesting service for this player, check the chart below for a possible cause of the
problem you are experiencing. Some simple checks or an adjustment on your part may
eliminate the problem and restore proper operation.
Symptom Remedy
No power. Insert the AC adaptor securely into the power outlet.
The player is automatically
set to the standby mode.
No picture. Ensure that the equipment is connected properly.
-No sound.
-Distorted sound.
Picture is distorted during
rapid
Advance or rapid reverse.
No operations can be
performed with the remote
control unit.
No key operations (by the
main unit and/or the remote
control unit) is effective.
Disconnect the power source and connect them again.
-Ensure that the equipment is connected properly.
-Ensure that the input setting for the TV and stereo
system are correct.
-Adjust the master volume to a suitable volume by press
VOL button.
The picture will be somewhat distorted at times: this is
normal.
Check the battery is installed with the correct polarities.
The battery is exhausted: replace it with new one.
- Point remote control at the remote control sensor and
operate.
- Operate the remote control unit at a distance of no
more than 4m from the remote control sensor.
- Remove the obstacles between the remote control and
remote control sensor.
Press STANDBY to set the player to the standby mode
and then back to ON. Alternatively, press STANDBY to
set the
Player to the standby mode, disconnect the power
adaptor and then reconnect it. (The play may not be
operating properly due to lighting, static electricity or
some other external factor.
Page 16
 Loading...