

JR, BM
Kit Contents
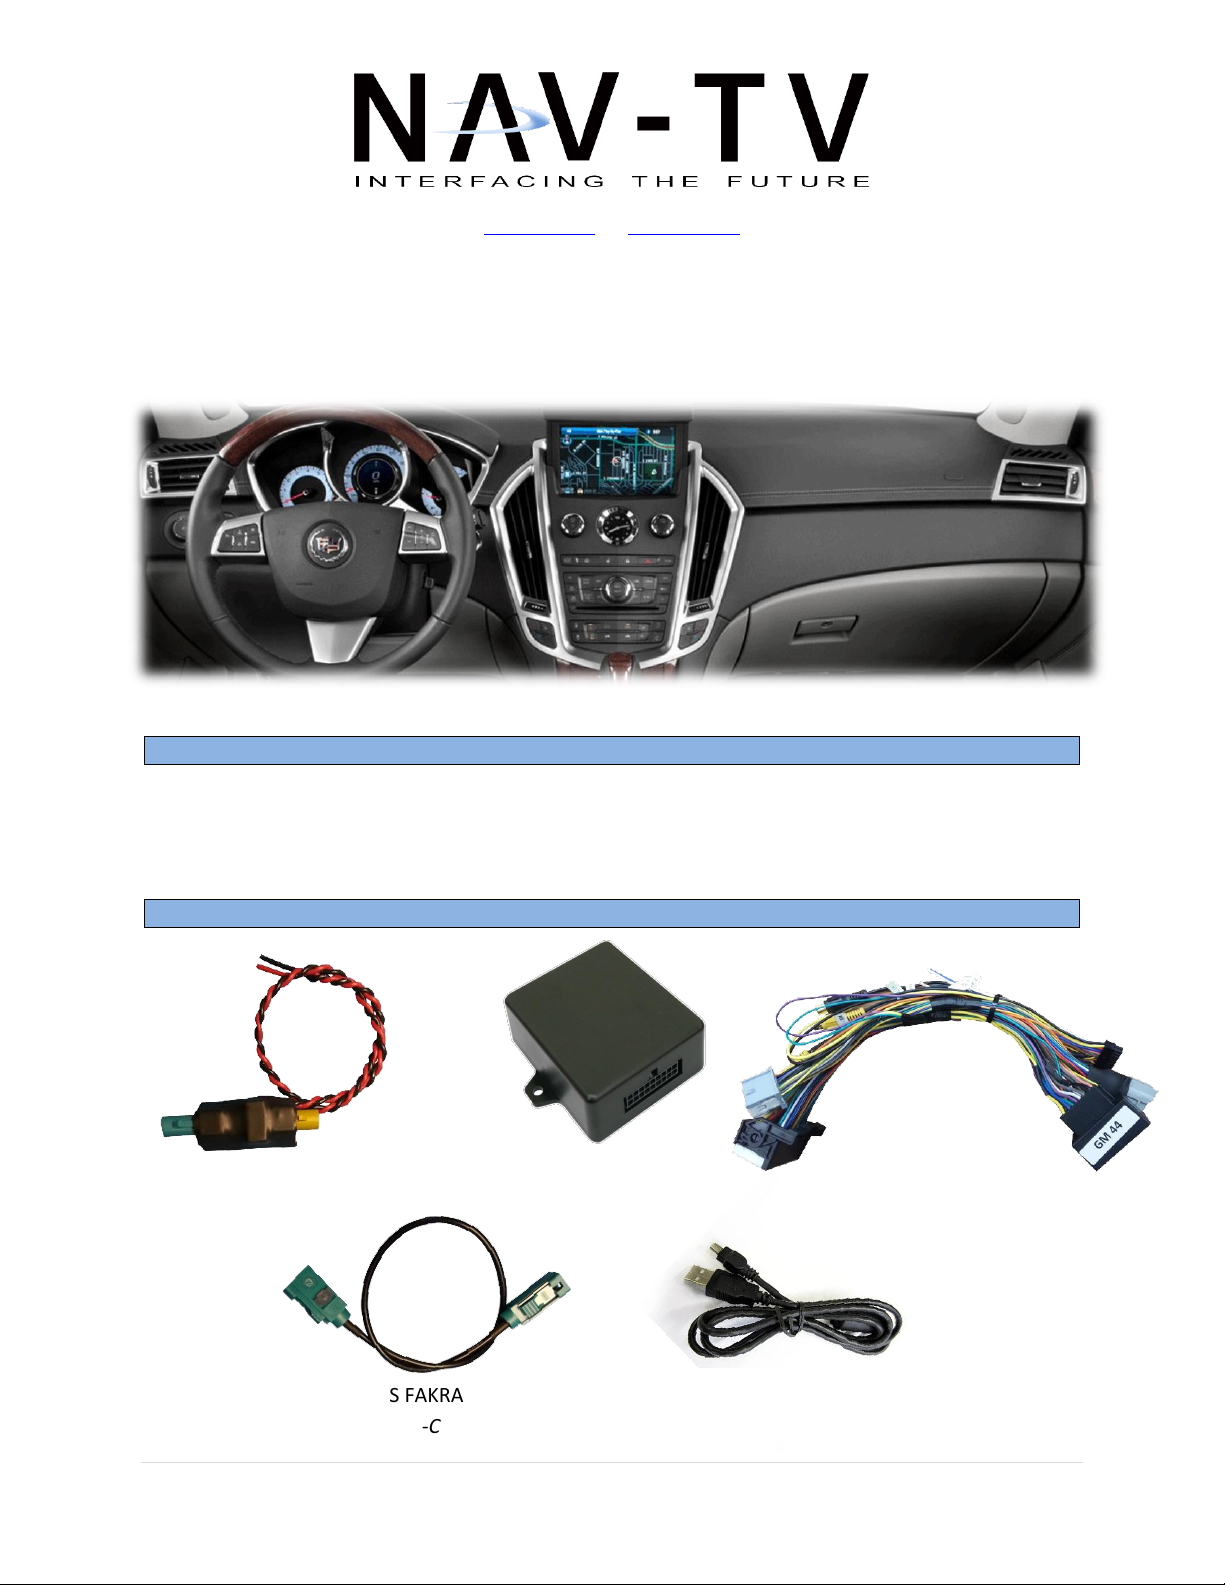
Overview
SRX VIM Module
NTV-ASY192
Plug and Play T-Harness
NTV-HAR-185
GPS-Break Relay
NTV-ASY165
GPS FAKRA Cable
NTV-CAB037
USB Cable
NTV-CAB009
05/17/2016
120 NW 120th Ave, Coral Springs, FL 33065 TEL 561-955-9770 FAX 561-955-9760
www.nav-tv.com info@nav-tv.com
NTV-DOC105
SRX VIM
(NTV-Kit394)
The SRX VIM enables video in motion (VIM), navigation control in motion (CIM) and forced rear camera
capability to the 2010+ Cadillac SRX vehicles. When VIM is enabled, GPS tracking will not be available.
Agreement: End user agrees to use this product in compliance with all State and Federal laws. NAV-TV Corp. would not be held liable for
misuse of its product. If you do not agree, please discontinue use immediately and return product to place of purchase. This product is
intended for off-road use and passenger entertainment only.
1 | P a g e

JR, BM
SRX VIM Module pin outs
Pin #
Description
Color 1 12v (+) Constant
Yellow
2
INPUT 1 (Send 12v for VIM act)
Red 9 GM LAN (Radio side)
Green
10
Ground (-)
Black
11
Reverse OUT
White/Red
12
OUTPUT A (GPS Break)
White/Blue
13
OUTPUT B (ACC Out)
White/Purple
18
GM LAN (Car side)
Purple
Installation
Wire Side
05/17/2016
NTV-DOC105
Dash Disassembly
1. Using a plastic pry tool, remove the carpeted side covers on either side of the center console.
2. Once the side covers are removed, there will be (2x) 7mm screws on either side that hold the
vinyl trim panels in place. After the screws are removed gently pry up the trim on either side of
the console.
3. With the trim panels removed, (2x) 10mm bolts will be exposed next to the pocket under the
radio. Remove these 2 bolts.
4. Gently pry up the silver trim panel around the cup holder and shift plate. This will expose 4)
screws around the cup holder and 2) screws in front of the pocket under the radio. Remove
these screws.
5. Open the center console lid. Using a pick tool, remove the (2x) rubber stops to the front of the
console pocket. Remove the (2x) screws.
6. From the back seat, remove the rear HVAC panel and set to the side. There will be (3x) 10mm
nuts securing the lid to the console. Remove these 3 bolts.
7. Remove the shifter knob by pulling down the silver ring attaching the boot to the shifter knob.
Using a pick tool, remove the C-clip holding the shifter in place. Pull off the shifter knob and set
to the side.
8. Gently pry up the top of the center console/shifter plate. Detach any wiring and set aside.
9. Remove the (2x) 7mm screws holding the pocket under the radio in place.
10. Remove the pocket to expose (2x) 7mm screws securing the radio/HVAC trim in place.
11. Turn on the radio and motorize the screen out of the dash. With the screen open, GENTLY with
two hands pull the vinyl cover off the screen. Turn off the radio and wait for the screen to
motorize down.
12. Gently pry around the trim to remove. Disconnect the wiring and set aside.
13. The DVD drive will have (4x) 7mm screws. Remove the drive, disconnect all connections and set
aside.
Agreement: End user agrees to use this product in compliance with all State and Federal laws. NAV-TV Corp. would not be held liable for
misuse of its product. If you do not agree, please discontinue use immediately and return product to place of purchase. This product is
intended for off-road use and passenger entertainment only.
2 | P a g e

05/17/2016
NTV-DOC105
Module Installation
1. Locate the main factory 44-pin radio harness. Connect the male
end of this harness into the female end of the provided SRX VIM
T-Harness. Connect the factory gray 10-pin harness to the female
end of this T-Harness as well.
2. Connect the factory GPS antenna cable (blue FAKRA) to the
yellow side of the provided GPS-Break board. Connect the
provided GPS Fakra cable to the green side of the GPS-Break board;
plug the other end into the blue FAKRA on the back of the radio.
3. Connect the red wire from the GPS-Break board to the white/blue, OUTPUT (A) wire from the
18-pin SRX VIM module harness. Splice the black wire from the GPS-Break board to ground.
4. On the provided main 44-pin T-Harness, the RCA labeled
‘Rear Cam’ must be connected to the RCA labeled ‘Factory
Cam’, or you will lose the SRX factory rear camera image!
5. Optional: If you want to be able to force the factory rear camera (if equipped) at any time, you
must interrupt the SRX rear camera power wire. This green wire is located in the passenger rear
quarter panel, in a gray harness (test first!).*
a. Cut the green wire in half, connect an extension wire (to the camera side) to run to the
front 18-pin SRX VIM module harness. Insulate the exposed cut end.
b. Connect the extension line to the white/purple, (OUTPUT B: ACC out) wire on the 18-pin
SRX VIM module harness.
*Note: This wire is also located in the driver’s kick/sill panel, but shares the same line
as the reverse lights. DO NOT cut/connect to this location!
6. Optional: Sending 12v (through a toggle) to the red, ‘INPUT 1’ wire will toggle VIM/CIM as well
as the standard steering wheel control functions.
7. Connect the SRX VIM module to the 18-pin connector located on the provided T-Harness.
Reconnect all harnesses to the radio (including the new T-Harness and GPS Fakra cable);
reassemble the dash to a point where you can test all functions before completing the
installation.
JR, BM
3 | P a g e
Agreement: End user agrees to use this product in compliance with all State and Federal laws. NAV-TV Corp. would not be held liable for
misuse of its product. If you do not agree, please discontinue use immediately and return product to place of purchase. This product is
intended for off-road use and passenger entertainment only.

JR, BM
Operation
Hold (3 secs):
Enable
Double Tap:
Enable forced cam
-End User Quick Reference-
05/17/2016
NTV-DOC105
VIM/CIM toggle: Press and hold the PHONE/VOICE button on the steering wheel for 3 seconds.
Forced Rear Camera toggle: Press the MUTE button on the steering wheel twice within 1
second.
Note: When VIM is enabled, GPS tracking will not be available.
Agreement: End user agrees to use this product in compliance with all State and Federal laws. NAV-TV Corp. would not be held liable for
misuse of its product. If you do not agree, please discontinue use immediately and return product to place of purchase. This product is
intended for off-road use and passenger entertainment only.
4 | P a g e
 Loading...