

Telephone: + 44 (0)870 801 0440
Fax telephone: + 44 (0)870 801 0441
technical@nav.tv
Unit R4
Capital Business Park
Wentloog
Cardiff
CF3 2PU
OPV-1LR
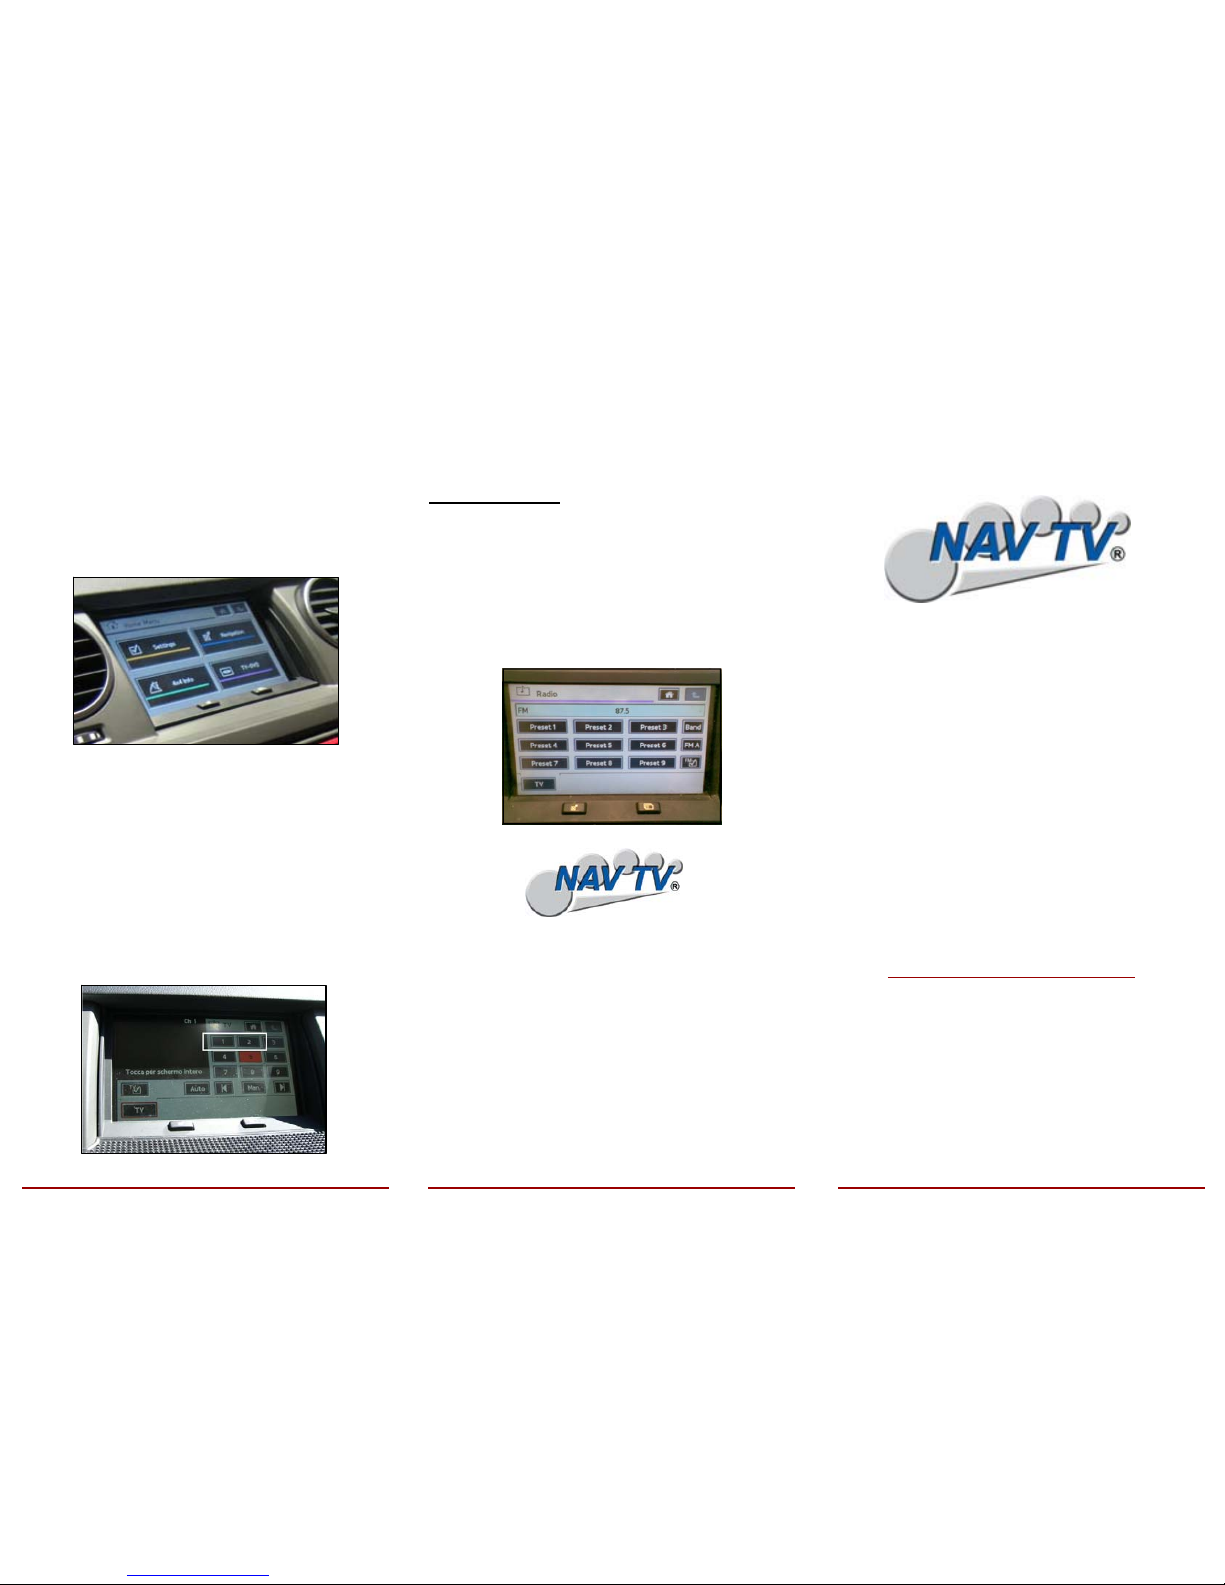
From the main menu of the car system you will now
have an additional box on the touch screen titled TV /
DVD.
To select your added source touch the TV / DVD box
which will give you a small screen version of your picture, this will then switch the audio source to TV
(displayed on radio)
To switch the picture format from NTSC to PAL you can
use the numbered presets on the right opposite the
small screen picture;
NAV TV (UK) LTD
NAV TV (UK) LTD
A/V INPUT & VIDEO IN MOTION
RANGE ROVER SPORT / LR3
Without TV Tuner / DVD
OPERATING INSTRUCTIONS
e11*72/245*2004/104*4020*00
RoHS 2002/95/EC—2002/96/EC
Disclaimer
NAV TV (UK) Ltd is not liable for any incidental, consequential or indirect damages. In case of erratic behavior of the vehicle’s electrical
system please disconnect the NAV TV product and contact our technical support Team. NAV TV (UK) Ltd does not assume liability for any
diagnostic fees.
IMPORTANT NOTE
If when you select TV-DVD from the home screen (fig 1)
you are directed to the screen shown below to select TV
again, then you will need to see a LANDROVER dealer
for a INFOTAINMENT FIRMWARE UPDATE as your
unit has an old version of firmware which will cause audio switching problems with the OPV-1LR installed.
OPERATING INSTRUCTIONS
FIG 1
FIG 2
FIG 3
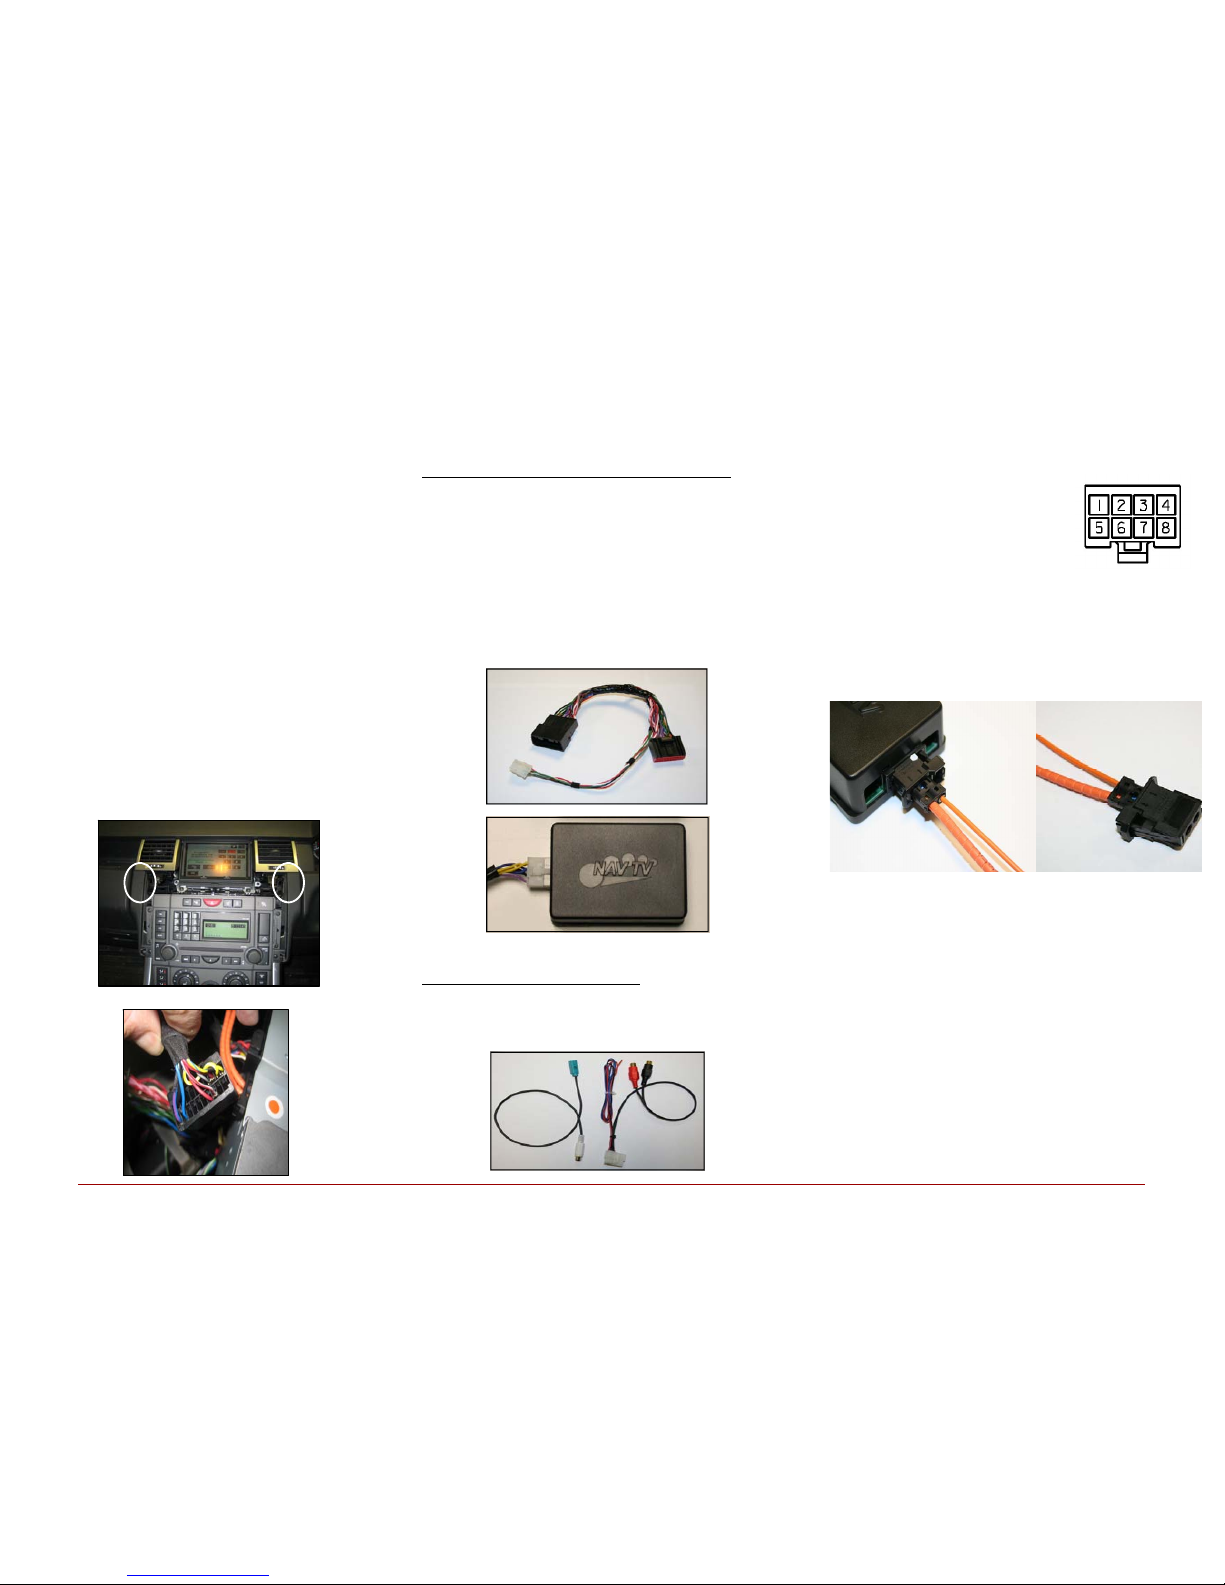
Installation is made at the front monitor and radio.
Remove the radio surround trims and the radio top trim
on Sport, then pull forward the leather side trims that
cover the bottom screws of the air vents (circled below)
Remove the 4 screws holding the air vents and
remove,
Remove the screen.
Access is now available to the rear of the radio to
connect the supplied loom.
On LR3 you may remove the radio by removing the 4
screws and unit above housing hazard button.
LOCATION & REMOVAL
Installation for VIMCANROV / OPV-1LR CAN:
For Range Rover sport and LR3 The supplied loom is to
be inserted into the radio,
(there is no need to remove the radio on RR sport)
Plug the black plug from the radio into the female side
of the supplied harness, then plug in the male side of
the supplied harness to the radio. Plug in and mount the
interface.
Installation for OPV-1LR MOST
Connect the supplied VIDEO input lead to the GREEN
socket on the rear or the SCREEN and insert your video
lead.
INSTALLATION INSTALLATION
Fig 1
Fig 2
In the case of the car having a factory
reverse camera, using a standard relay,
you will need to use the car’s 12v+ reverse signal to break PIN5 of the OPV1LR CAN harness. This means when in
reverse the power to PIN 5 is lost an so
switches off the interface.
Insert the OPTICAL leads into OPV-1LR loom and car loom
AT THE SCREEN to create loop, see diagram below;
To remove the (out) fibre optic cable from the factory connector you will need to remove the black outer casing and push
out the blue locking insert. You will need to do the same to
insert the cable into the supplied loom. (shown in previous fig)
Other Connections
Connect the RED cable to 12v+ PERM
Connect the BLACK cable to 12v- GROUND
Connect the cable AUDIO sockets on the OPV-1LR to your
audio source.
Plug in and mount the interface.
INTERFACE CAR CONNECTOR
OUT cable from screen
IN cable from interface
 Loading...