

LOCATION & REMOVAL
INSTALLATION
OPERATING INSTRUCTIONS
Installation is made at the Command unit, the unit will need to be removed and disconnected from the car, ensure the vehicle is off and the key is removed.
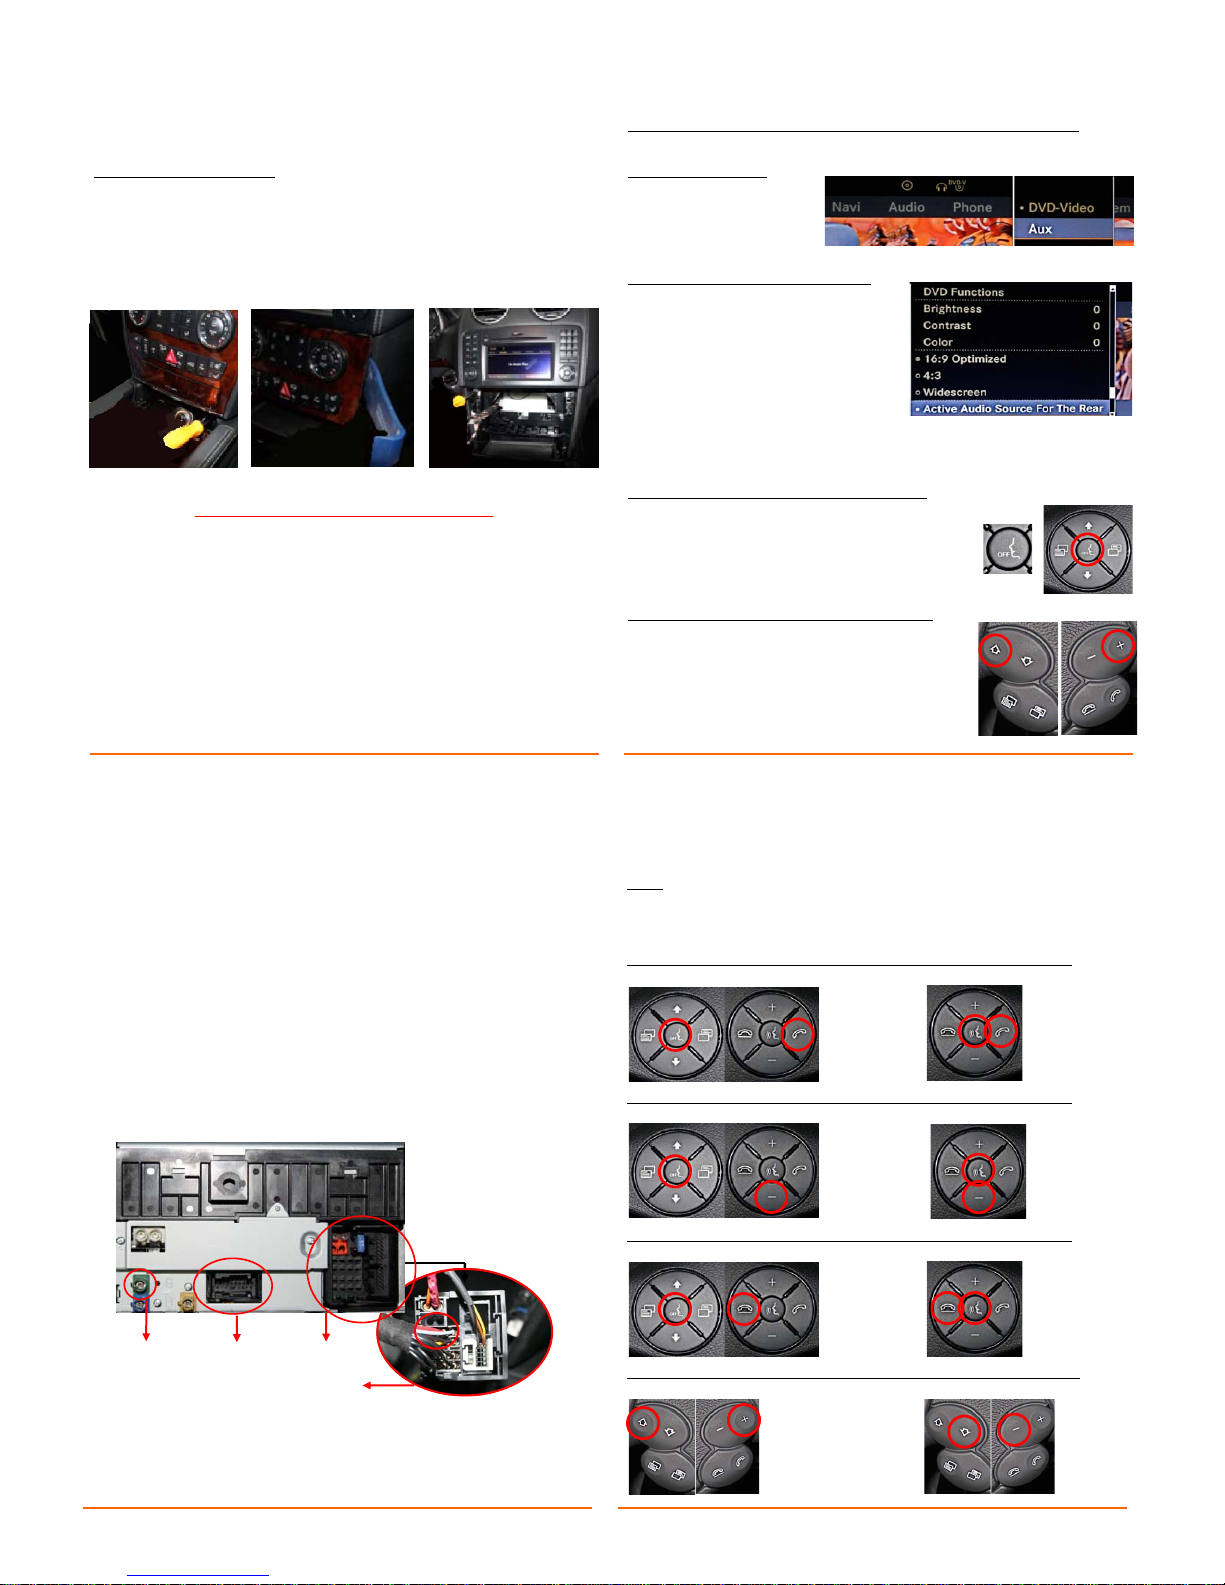
Removing the COMMAND unit
ML example,
Open the ashtray door and remove two screws holding the ashtray, close the ashtray, unplug and remove.
Next pull the “climate control” trim below the Command unit (trim clips only) unplug
and remove.
Remove the two screws securing the silver Command unit locking tabs and slide the
locking tabs down to unlock the Command unit.
MERAV-NTG3 INTERFACE PROGRAMS
THERE ARE TWO PROGRAMS AVAILABLE FOR THE MERAV-
NTG3 INTERFACE (loaded via USB)
*COMPATIBLE WITH GL / ML / R CLASS MERCEDES*
&
*COMPATIBLE WITH CLS / E / SL / SLK CLASS MERCEDES*
INTERFACE PROGRAMS CAN BE DOWNLOADED AT
www.nav.tv
To activate Rear View Camera (For vehicles without a factory fitted camera);
With the Brake pedal depressed and the engine running, engage reverse gear.
To Activate AUX Audio;
Select
“Video”
then select
“Aux”
To set Active Audio Source For the Rear;
Select the source name at the bottom-left of
the screen
(for example “
DVD-Video
”)
Select
“Active Audio Source For The Rear”
Selected Audio source and DVD / AUX Video are now available for rear headphones
and rear screens (if installed)
To Activate “Video In Motion” for GL / ML / R Class
Double Click the “
Voice off
” button
Repeat to de-activate “
Video In Motion”
NOTE; Navigation does not track whilst “video in motion”
is active
To Activate “Video In Motion” for E / CLS / SL Class
Press “
VOL UP”
and “
SEEK UP
” simultaneously
Repeat to de-activate “
Video In Motion”
NOTE; Navigation does not track whilst “video in motion”
is active
1 Unplug the factory 40 way power connector from the radio.
2 Remove the Optical Fibre connector from the factory plug and insert it
into the Male side of the supplied 40 Way harness.
(repeat for Black
and White 12-way plugs if present)
3 Plug in the factory Male 40 way harness into the female of the
supplied 40 way harness, and connect the
MERAV-NTG3
interface.
4 If you are installing a Rear View Camera, plug the supplied Video
cable into the GREEN Fakra socket.
5 Plug the supplied A/V harness into the BLACK 18-pin socket.
Connect the
A/V OUT, AUX VIDEO IN, Secondary REAR OUT
and
REAR AUDIO IN
as required. Factory AUX 3.5 jack is used for Audio in
Note;
The 3.5mm jack in the glove-box is shared for both AUX modes, AUX Audio and Audio of AUX A/V. If you are installing an additional A/V source such as TV Tuner or
DVD Player etc, the Factory AUX Audio port will need to be used. You may use the
secondary AUX Audio labelled REAR in the Audio menu as a replacement.
Note: Prior to programming, turn off the vehicle and remove the key for 30 seconds,
Then turn the key to FULL IGNITION ON (Not Running). Be sure that the Cluster
display is in AUDIO MODE. During programming, the radio screen will display DIAGNOSIS, Then restart.
REAR VIEW CAMERA GL / ML / R (Press and hold for 6 seconds)
ON OFF
REAR OUT GL / ML / R (Press and hold for 6 seconds)
ON OFF
AUX VIDEO GL / ML / R (Press and hold for 6 seconds)
ON OFF
ALL FEATURES E / CLS / SL (Press and hold for 30 seconds)
ON OFF
PROGRAMMING
4 5 1
2
MERAV-NTG3
NAV TV (Europe) LTD
REAR CAMERA / AV INPUT /
VIDEO IN MOTION / VIDEO OUTPUT
MERCEDES 2008>
GL/ML/R/E/CLS/SL/SLK
COMPATIBLE PRODUCTS
N/A
PROGRAMMING
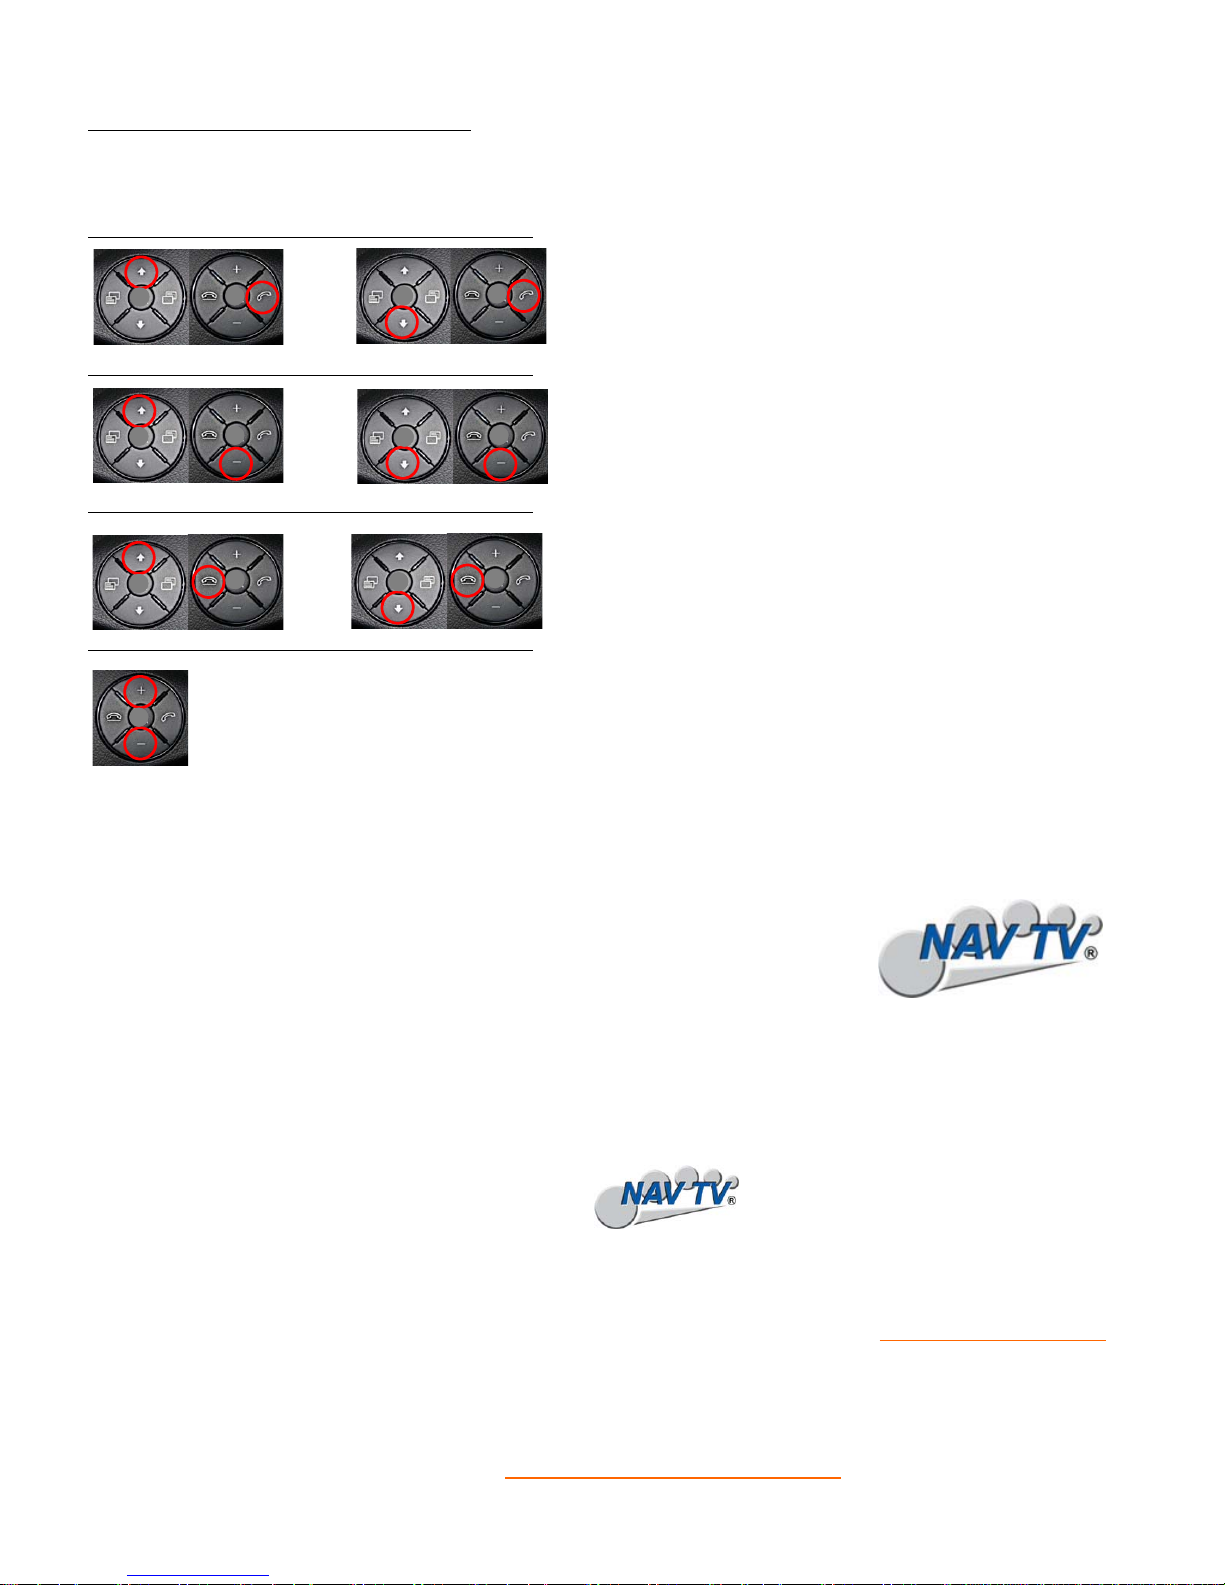
Programming for 2008 E / CLS / SL models with no centre button
Note:
Prior to programming, turn off the vehicle and remove the key for 30 seconds, Then
turn the key to FULL IGNITION ON (Not Running). During programming, the radio
screen will display DIAGNOSIS, Then restart.
REAR VIEW CAMERA (Press and hold for 6 seconds)
ON OFF
REAR OUT (Press and hold for 6 seconds)
ON OFF
AUX VIDEO (Press and hold for 6 seconds)
ON OFF
“VIDEO IN MOTION” (Press and hold for 6 seconds)
ON
NOTE; Navigation does not track whilst “video in motion”
is active
Telephone: + 44 (0)8445
783 783
Distribution Centre
Unit 21B Vale Business
NAV TV (Europe)
Disclaimer
NAV TV (Europe) Ltd is not liable for any incidental, consequential or indirect damages. In case of erratic behavior of the vehicle’s
electrical system please disconnect the NAV TV product and contact our technical support Team. NAV TV (Europe) Ltd does not assume
liability for any diagnostic fees.
 Loading...