

NAV-TV HD-LINK Adapter Installation Manual

BHM
02/14/17
NTV-DOC287
Agreement: End user agrees to use this product in compliance with all State and Federal laws. NAV-TV Corp. would not be held liable for misuse of its product.
If you do not agree, please discontinue use immediately and return product to place of purchase. This product is intended for off-road use and passenger
entertainment only.
1 | P a g e
3950 NW 120th St. Coral Springs, FL 33065 TEL 561-955-9770 FAX 561-955-9760
www.nav-tv.com info@nav-tv.com
HD-LINK Adapter
NTV-KIT800
Overview
The HD-LINK Adapter converts an HDMI source to Digital-RGB and is only used when combined with select
NAV-TV kits (Digital-RGB built-in). See compatibility chart below.
Kit Content
Current Compatibility*
NAV-TV SKU
NAV-TV KIT NAME
MAKE
NTV-KIT700
AUDI DYNAMIC-INT
AUDI
NTV-KIT701
AUDI DYNAMIC-EXT
AUDI
NTV-KIT702
AUDI DYNAMIC-A3
AUDI
NTV-KIT717
BMW12-N
BMW
NTV-KIT725
BMW09-N
BMW
NTV-KIT749
PCM3.1N
PORSCHE
NTV-KIT780
GM-LVDS
CHEVY/GMC/CADDY
NTV-KIT793
W204-H
MERCEDES
NTV-KIT794
W205-H
MERCEDES
NTV-KIT798
IOB-RVC
CHEVY/GMC
NTV-KIT804
BMW-EVO
BMW
NTV-KIT805
GVIF-VOLVO
VOLVO
NTV-KIT837
BMW-EVO ID6
BMW
HD-LINK Adapter
HDMI Cable
Power/Audio Cable
*NOTE: Any other smart interface not listed
here with a (HDMI) port labeled ‘HDMI’ has
HDMI input built-in to the interface. For
those modules, this adapter is not needed.
BHM
02/14/17
NTV-DOC287
Agreement: End user agrees to use this product in compliance with all State and Federal laws. NAV-TV Corp. would not be held liable for misuse of its product.
If you do not agree, please discontinue use immediately and return product to place of purchase. This product is intended for off-road use and passenger
entertainment only.
2 | P a g e
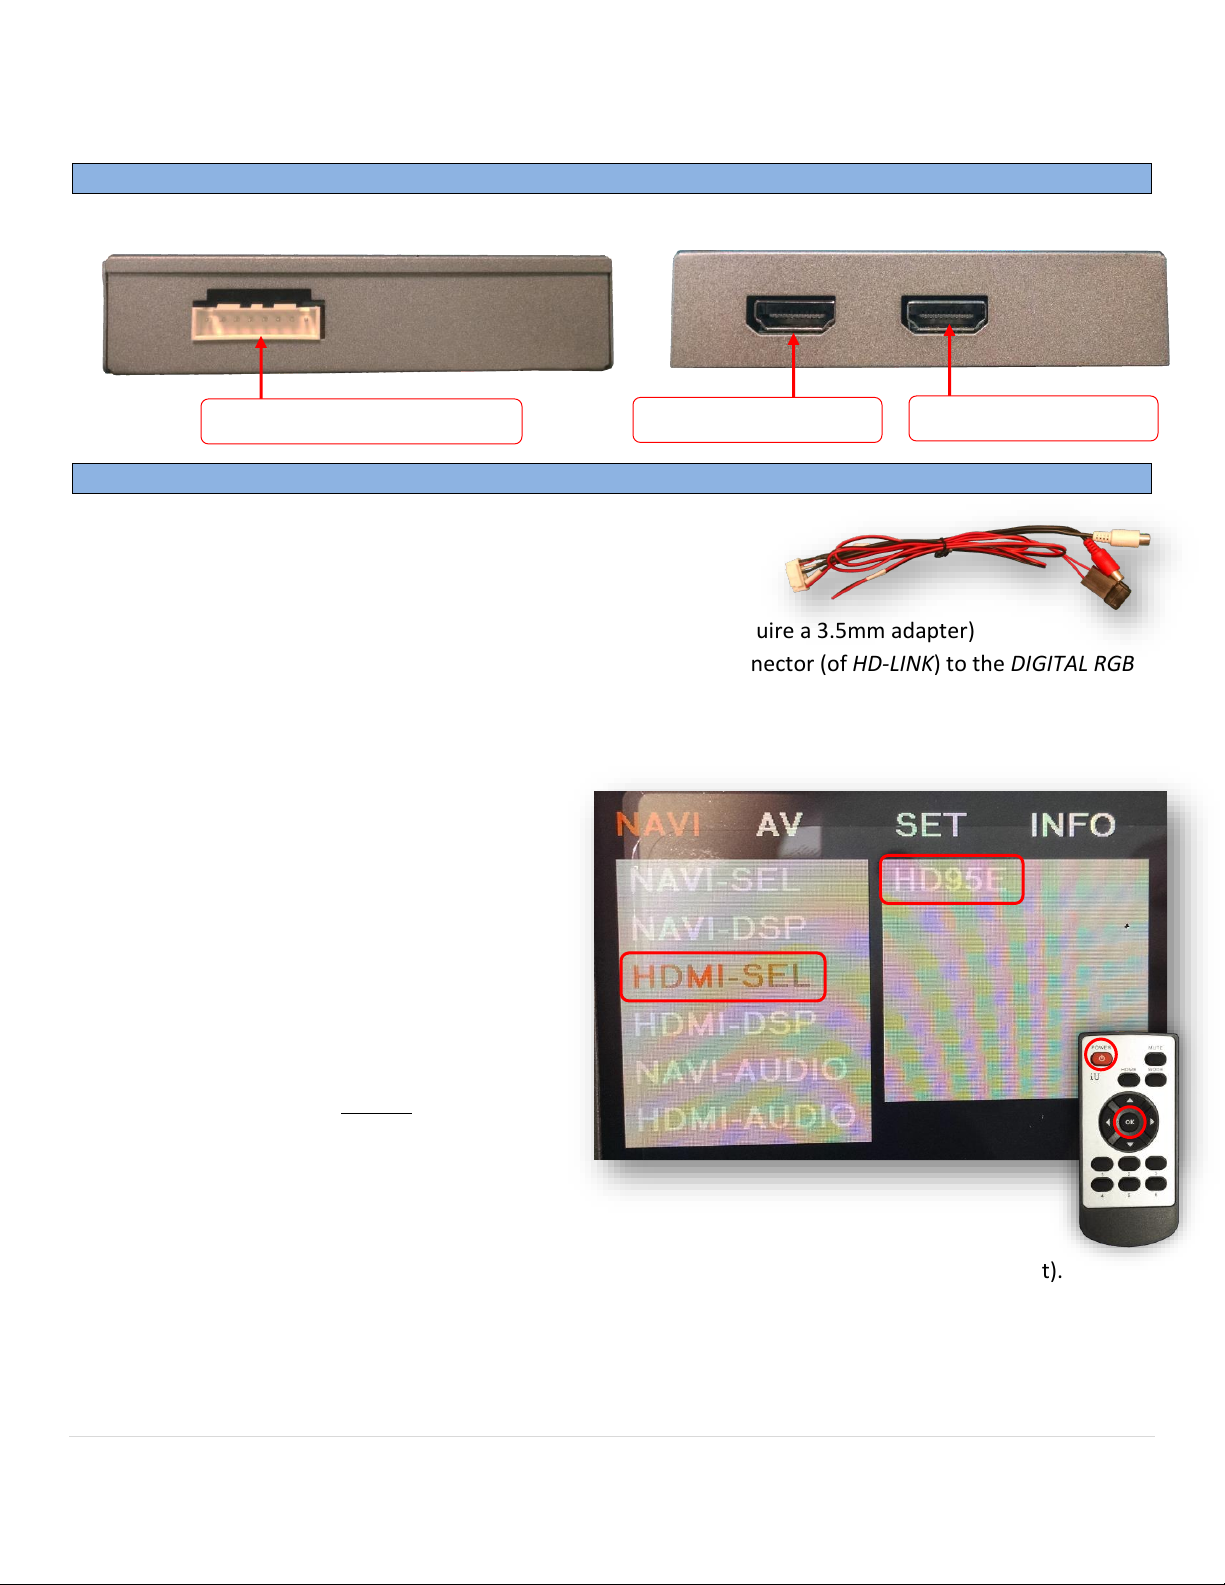
Interface Connectors
HD-LINK Installation
1. Connect the black wire to chassis ground (-)
2. Connect the red wire to ACC 12v (+)
3. Connect the RCAs to the AUX input of the vehicle (this may require a 3.5mm adapter)
4. Connect the provided HDMI Cable to from the VIDEO OUT connector (of HD-LINK) to the DIGITAL RGB
or LVDS connector (HDMI port) of a compatible NAV-TV interface.
5. Connect HDMI source cable to the HDMI IN port of the HD-LINK.
6. Follow the steps below to set up the
Interface’s OSD menu:
a. Put dip switch #1 in the DOWN
position.
b. Activate the ‘NAV INPUT’ by
pressing the proper button on the
steering wheel or dash (see
interface manual)
c. Once ‘NAV INPUT’ shows on the
screen, on the remote press the
OK BUTTON 4 times, then press
POWER.
d. Navigate to the ‘NAVI’ section.
a. Select ‘HDMI-SEL’
b. Choose ‘HD95E’
c. Press MODE on the remote to return and exit the OSD menu (or let it time out).
e. Replace dip switch #1 to the UP position.
7. Once complete, pressing the OEM button assigned for AV switching (button to switch to cycle AV
sources – see interface manual) will activate the provided HDMI input source to the OEM screen.
Power/Audio OUT Connector
HDMI FROM SOURCE
HDMI TO INTERFACE
 Loading...