

NAV-TV BMW-EVO KIT Instruction Manual

BHM
10/17/18
NTV-DOC290
Agreement: End user agrees to use this product in compliance with all State and Federal laws. NAV-TV Corp. would not be held liable for
misuse of its product. If you do not agree, please discontinue use immediately and return product to place of purchase. This product is
intended for off-road use and passenger entertainment only.
1 | P a g e
3950 NW 120th Ave, Coral Springs, FL 33065 TEL 561-955-9770 FAX 561-955-9760
www.nav-tv.com info@nav-tv.com
BMW-EVO KIT
NTV-KIT804
Overview
The BMW-EVO kit interfaces 2 video inputs (including a backup camera) to the factory media
screen in select 2017 BMWs with the NEW GUI (NON-TOUCH SCREEN). This interface generates
steering-based guidelines while in reverse for added convenience. NOTE: the touch-screen
models with this OEM system are not compatible.
Kit Contents
Optional extension cables
7 Series LVDS
extension cable
with coupler:
NTV-CAB122
5 Series LVDS
extension cable
with coupler:
NTV-CAB121
Power/CAN Harness
LVDS Video
cable
BMW-EVO Interface
Remote
(menu control)
IR Eye
Harness
Screen
Connector
BHM
10/17/18
NTV-DOC290
Agreement: End user agrees to use this product in compliance with all State and Federal laws. NAV-TV Corp. would not be held liable for
misuse of its product. If you do not agree, please discontinue use immediately and return product to place of purchase. This product is
intended for off-road use and passenger entertainment only.
2 | P a g e
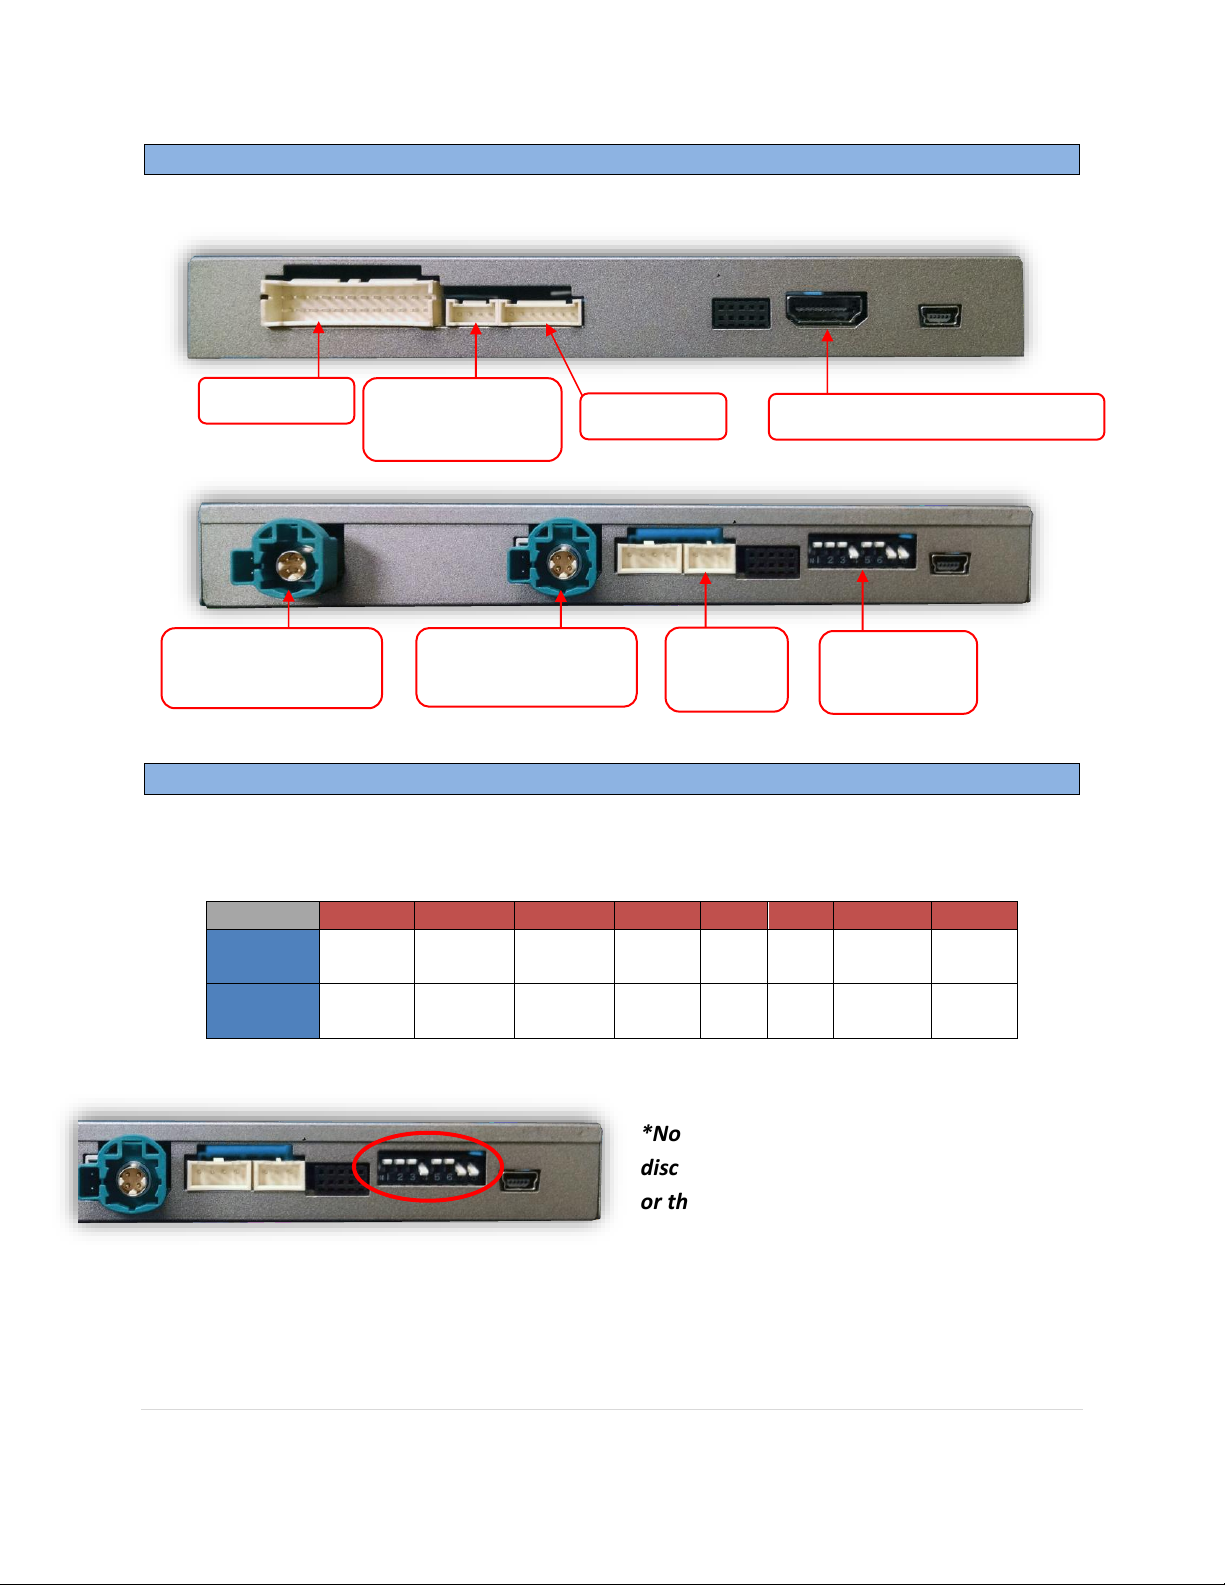
Interface Connectors
Dip Switch settings*
Dip SW:
1 2 3 4 5 6 7
8
UP
NO NAV
N/A
N/A
RVC
OFF
N/A
N/A
KEEP
DOWN
KEEP
DOWN
DOWN
ADDING
NAV
N/A
N/A
RVC
ON
N/A
N/A
KEEP
DOWN
KEEP
DOWN
*Note: after adjusting Dip Switches, you must
disconnect and reconnect power to the interface
or the change will not be implemented.
Expansion board
control (optional)
LCD IN (LVDS from
OEM screen)
Dip Switches
(see below)
Power/CAN
RGB INPUT
Digital RGB input (HDMI Adapter)
LCD OUT (Provided
LVDS Cable)
Infrared
Receiver
BHM
10/17/18
NTV-DOC290
Agreement: End user agrees to use this product in compliance with all State and Federal laws. NAV-TV Corp. would not be held liable for
misuse of its product. If you do not agree, please discontinue use immediately and return product to place of purchase. This product is
intended for off-road use and passenger entertainment only.
3 | P a g e
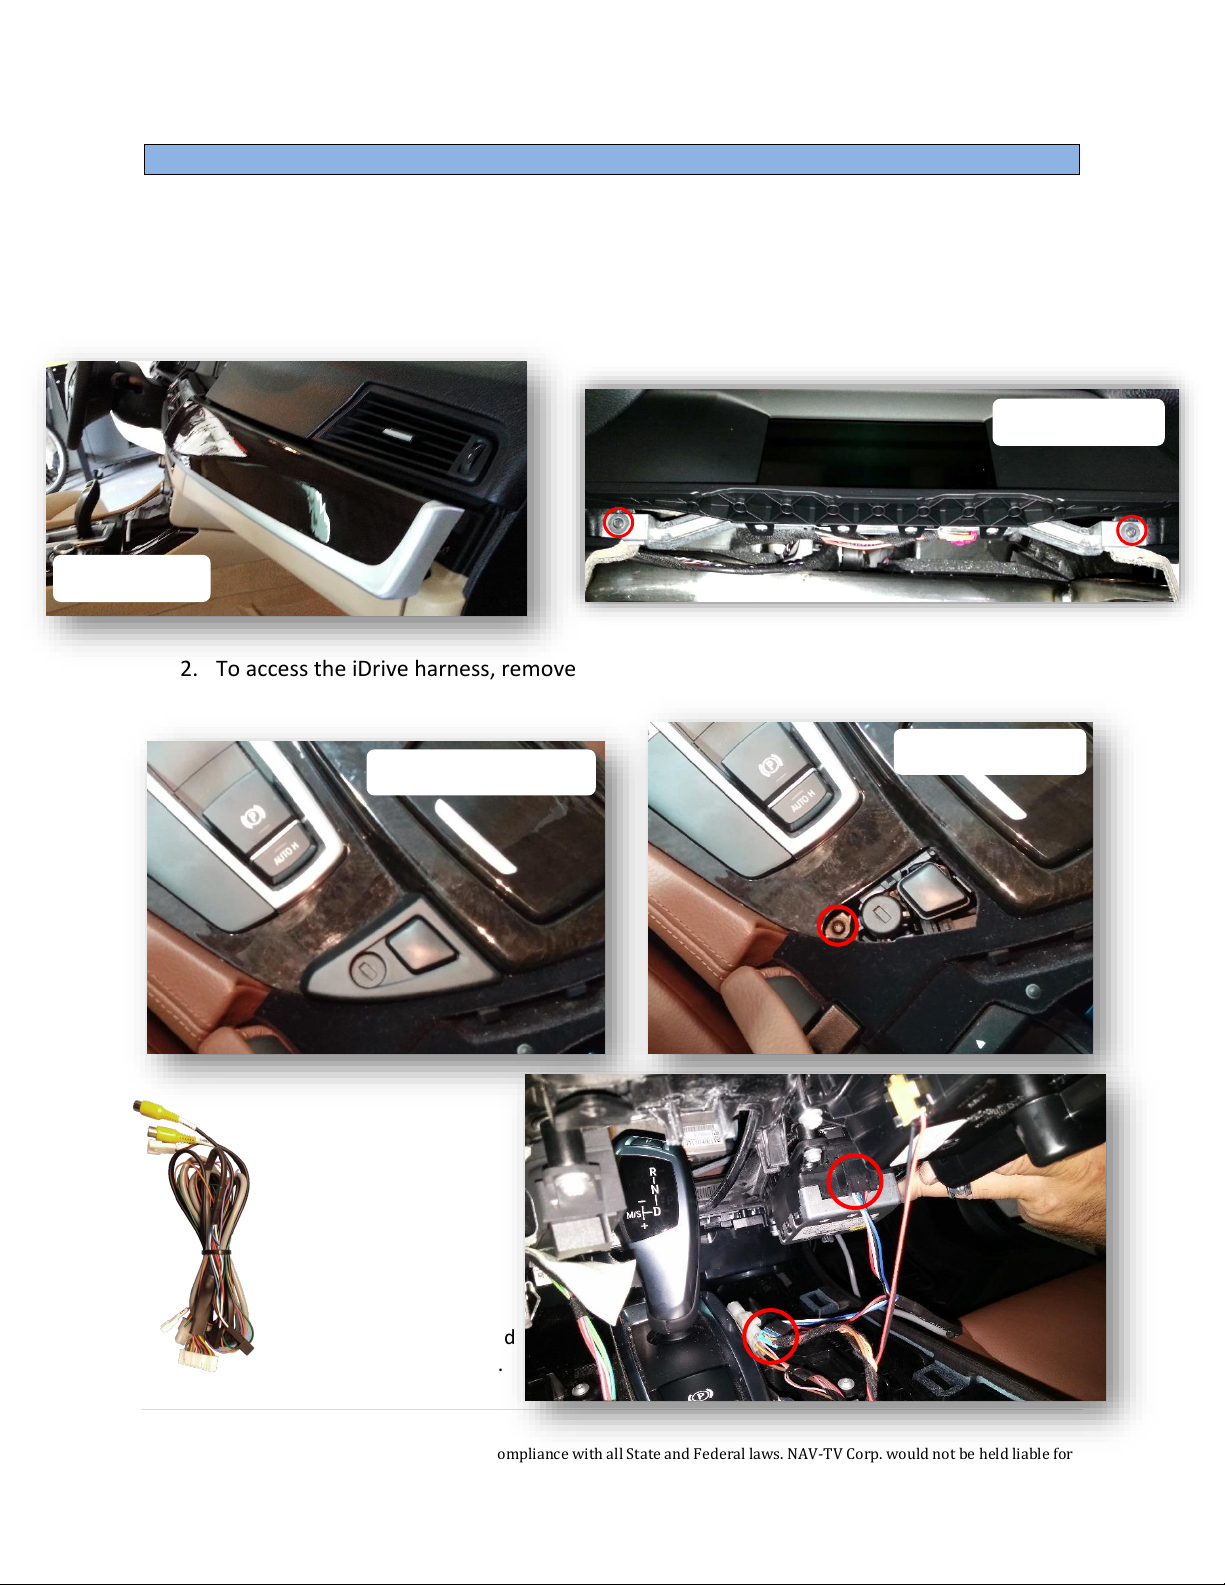
BMW-EVO Interface Installation (5 Series example)
1. The BMW-EVO intercepts two OEM plugs in two locations: the iDRIVE knob and the
screen. You must gain access to both places for proper installation.
a. Access the rear of the screen by removing the dashboard panel (clips only) and
then removing (2x) Torx T20 screws securing the screen to the sub-dash.
2. To access the iDrive harness, remove the panel surrounding it (may have Torx screw
securing to sub dash)
3. Lift up the lower
dash panel and
disconnect 4-PIN plug
powering the iDrive
knob.
4. Connect provided 4-
PIN T-Harness in
between iDrive knob and
OEM harness as shown.
Remove dash
Screen flips up
Remove plastic cover
Remove Torx T20
 Loading...