


Hardware Manual
NAVIGON 3100 | 3110

Trademarks
All brand and product names are trademarks or registered trademarks of the
respective companies.
Note
The information in this manual is subject to change without notice.

Table of Contents
1 Warnings and Notices ................................................................................ 3
2 Getting Started ............................................................................................ 5
2.1 Getting to Know the Hardware Components......................................... 5
Front Components................................................................................. 5
Back Components ................................................................................. 6
Right-Side Components ........................................................................ 6
Top Components ................................................................................... 7
Bottom Components.............................................................................. 7
2.2 Switching On for the First Time ............................................................. 8
2.3 Using Your Device in a Vehicle ............................................................. 9
Attaching the Device's Cradle ............................................................... 9
Connecting the Vehicle Charger ......................................................... 10
2.4 Basics of Operation ............................................................................. 11
Switching the Device On and Off ........................................................ 11
Using the Touchscreen to Operate the Device ................................... 11
Carrying Out a Reset........................................................................... 12
2.5 Inserting a SD/MMC Card ................................................................... 12
3 Troubleshooting and Maintenance.......................................................... 13
3.1 Troubleshooting................................................................................... 13
Problems with the Power Supply......................................................... 13
Problems with the Screen.................................................................... 13
Problems when Connecting to a Computer......................................... 14
GPS Problems..................................................................................... 14
3.2 Maintenance of the Navigation Device................................................ 15
4 Declaration of Conformity and Additional Information......................... 16
4.1 Declaration of Conformity.................................................................... 16
European Union................................................................................... 16
4.2 Safety Precautions .............................................................................. 17
Charger................................................................................................ 17
Charging .............................................................................................. 17
Battery ................................................................................................. 17
i


1 Warnings and Notices
z For your safety, do not operate this product while driving.
z
Use this product with caution. The product is a navigation aid. Information
regarding direction, distance, location or topography may not always be
correct.
z ference only. Always follow traffic signs, speed
The calculated route is for re
limits and road restrictions.
z hicle. This may
Do not leave the device in direct sunlight when leaving your ve
cause the battery to overheat and the device to malfunction.
z
The Global Positioning System (GPS) is operated by the United States
government, which is solely responsible for its performance. Any changes
made to the
world-wide.
z cept
As a rule, GPS satellite signals cannot pass through solid materials (ex
glass). For this reason; GPS positioning is not
buildings, tunnels, or underground car parks.
z m
In order to calculate your position, signals must be received from a minimu
of 4 GPS satellites. Reception of GPS signals can be affected by adverse
weather conditions or other obstructions (e.g. dense foliage or tall buildings).
GPS system can affect the accuracy of all GPS equipment
usually available inside
z re with the reception of
Other wireless devices in the vehicle may interfe
satellite signals or cause intermittent reception.
3
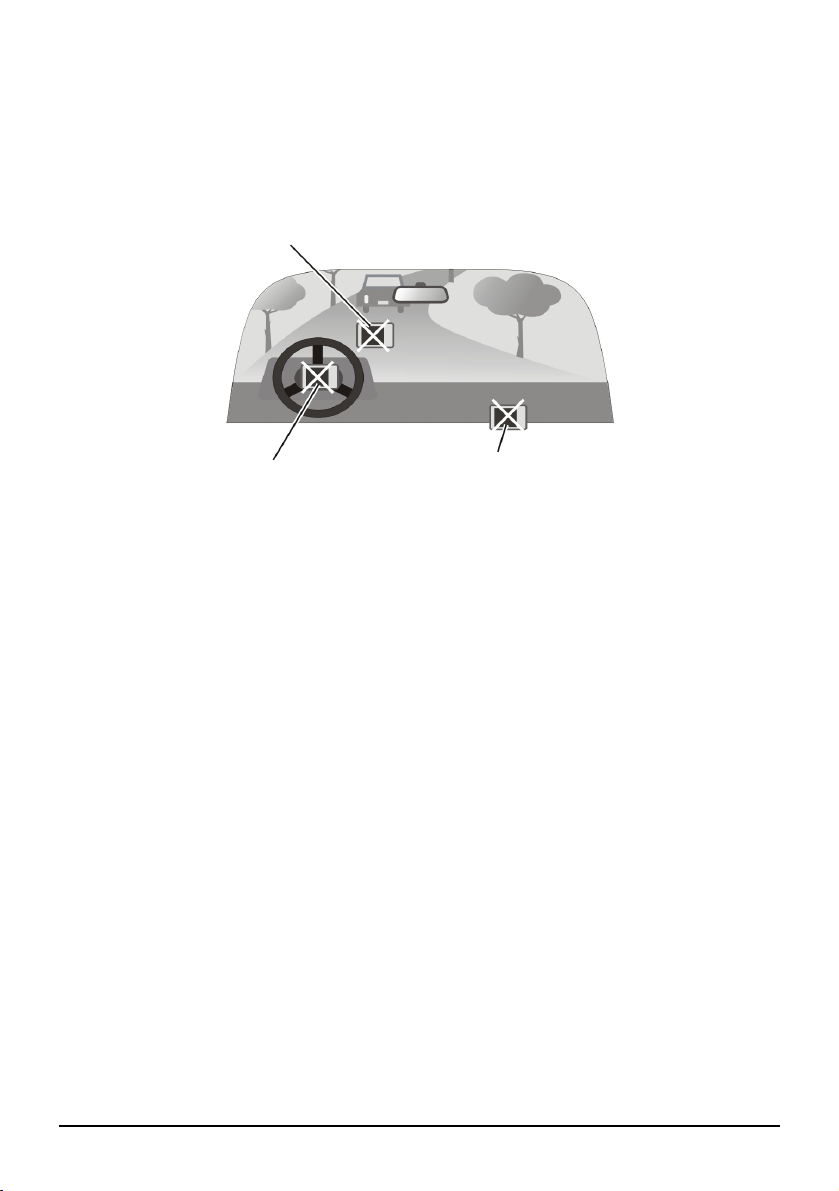
z A cradle is needed when using the device in a vehicle. Mount the device in an
appropriate place, so as not to obstruct the driver’s view, or the deployment of
airbags.
The drivers field of vision must not
be restricted.
Do not attach the cradle in front of
airbag panels.
Do not place the device
unsecured on the
dashboard.
Do not attach the cradle within the
deployment zone of airbags.
4

2 Getting Started
2.1 Getting to Know the Hardware Components
NOTE: The colour of your device may not exactly match the colour of the device shown in
this manual.
Front Components
Ref Component Description
Touchscreen
n
Charge Indicator
o
Displays information. Tap the screen to
menu commands or enter information.
Lights bright yellow when the battery is being
charged. Lights green when the battery is fully
charged.
select
5

Back Components
Ref Component Description
Loudspeaker
n
Sound and speech output.
Right-Side Components
Ref Component Description
SD/MMC Slot
n
Headphone socket
o
For the insertion of SD (Secure Digital) or MMC
(MultiMediaCard) cards for accessing data such as
map data.
Socket for stereo headphones.
6

Top Components
Ref Component Description
Socket for an external
n
antenna
I/O-Button
o
This connector (under rubber dust cover) allows
use of an optional, external GPS antenna with a
magnetic mounting. By placing this antenna on the
roof of your vehicle, it is possible to improve
reception of satellite signals in regions where GPS
reception is poor.
Turns the device on and off.
Bottom Components
Ref Component Description
n
Mini-USB-Socket
Socket for power supply or USB cable.
7

2.2 Switching On for the First Time
1. Make sure that your device is connected to the power supply. (See the next
section)
2. Press and hold the I/O Button for 6 seconds when switching the device on for
the first time.
NOTE: During normal operation, the device can be turned on and off by briefly pressing the
power button.
8

2.3 Using Your Device in a Vehicle
Attaching the Device's Cradle
Caution:
z Select an appropriate location for the device's cradle. On no account is the driver’s field of
vision to be restricted.
z If the car’s windshield is tinted with a reflective coating, an external antenna (optional)
mounted on the roof of the vehicle may be needed. Ensure that you do not damage the
external antenna cable when closing the car window or door.
Use the device cradle to fix your device safely in a vehicle. Make sure that the
GPS antenna has a "clear view" of the sky.
9

Connecting the Vehicle Charger
The charger supplies power to your device when you are using the device in a
vehicle.
CAUTION: To protect your device against power surges, only connect the car charger after
the car engine has been started.
1. Insert the vehicle charger's USB
connector into the corresponding socket
of the navigation device.
2. Insert the other end of the charger into
the cigarette lighter. The LED on the
charger lights green to indicate that
power is being supplied to the device.
CAUTION: To ensure optimal performance of the Li-Ion battery, take account of the
following:
z Do not charge the battery when the temperature is high (e.g. in direct sunlight).
z There is no need for the battery to be completely flat before recharging. It is possible to
charge the battery before it is flat.
z If you are not going to use the device for a longer period of time, be sure to charge the
battery at least once every two weeks. Repeatedly running the battery flat can affect its
capacity to charge.
NOTE: The navigation device can also be charged via the USB connector of a computer. In
order to reduce the time taken to charge the device, switch the device off during charging.
To cigarette lighter
jack
10

2.4 Basics of Operation
Switching the Device On and Off
To turn the navigation device off, briefly press the I/O Button. The device's
operating mode switches to standby. As soon as you switch the device on again,
operation starts at the point where you switched the device off.
NOTE: If, when turning the device off, you pressed the I/O button for 6 seconds or longer, it
will be necessary to press the I/O button for 6 seconds the next time you turn the device on.
Using the Touchscreen to Operate the Device
To operate the device, tap the screen with your fingertip. You can perform the
following actions:
z Tap
Touch the screen with your fingertip to open
menus or select options.
z Drag
Place your fingertip on the screen and move it
in the desired direction.
11

Carrying Out a Reset
Note: Carry out a reset under the following circumstances:
z Operation of the software is impaired.
z You are prompted to do so by an instruction manual or one of our service staff
1. If the navigation device is switched off, switch it on.
2. Switch the device off by pressing the I/O button for at least 6 seconds.
3. Ensure that the memory card with the navigation software has been inserted.
4. Switch the device on again by pressing the I/O button for at least 6 seconds.
The navigation software will be reinstalled. All settings will be kept.
The navigation device is subsequently ready for use.
2.5 Inserting a SD/MMC Card
The navigation device has a SD/MMC
slot into which a SD (Secure Digital) or
MMC (MultiMediaCard) memory card can
be inserted.
Insert the memory card as illustrated in
the diagram (with the sticker on the top
and the bevelled corner in the device).
Slide the card into the device until it locks
into place.
Before removing the card, ensure that it is not being used. To remove the card,
press it gently into the device until it unlocks. You may now remove the card from
the slot.
NOTE:
z The slot must remain free of foreign objects.
z Keep memory cards in a protective casing to protect them from dust and humidity.
12

3 Troubleshooting and
Maintenance
3.1 Troubleshooting
NOTE: If you encounter a problem that persists, contact an authorized service centre for
assistance.
Problems with the Power Supply
The device cannot be switched on without an external power supply
z The battery charge may be too low to run the device. Charge the battery.
Problems with the Screen
The navigation device responds very slowly when the screen is touched.
z battery is sufficiently charged. If the problem persists,
Make sure that the
reset the device.
The screen "freezes"
z
Reset the device.
The screen is difficult to read
z
Increase the brightness of the display.
z Move to a location with more light.
The screen responds imprecisely to touch
z Re-calibrate the screen.
13

Problems when Connecting to a Computer
Problems with the cable connections
z Make sure that both the device and the computer are turned on before trying
to establish a connection.
z Make sure that the USB cable is correctly plugged into both the computer and
the device. Connect the USB cable directly to the computer—do not connect
the device via a USB hub.
z Reset your device before connecting the cable. Unplug the cable before
restarting the computer.
GPS Problems
z If you cannot receive GPS signals, pay attention to the following:
z Make sure that the GPS antenna has a "clear view" of the sky.
z Note that GPS reception can be affected by the following factors:
9 bad weather
9 Line-of-sight obstruction of satellites (e.g. due to dense foliage or tall
buildings)
9 other wireless devices
9 windscreens with a reflective coating
14

3.2 Maintenance of the Navigation Device
Careful maintenance of your device will aid trouble-free operation and reduce the
risk of damage to the device.
z Do not expose the navigation device to levels of high humidity or extreme
temperatures.
z Do not expose the device to direct sunlight or strong ultraviolet light for
extended periods of time.
z Do not place anything on top of the navigation device or drop objects onto it.
z Do not drop the navigation device or subject it to severe shock or vibrations.
z Do not subject the navigation device to sudden, severe temperature changes.
This could cause moisture to condense inside the device. In the event of
condensation, allow the device to dry out completely before use.
z Do not sit on the device. We advise you not to carry the device in your back
pocket.
z The screen surface can easily be scratched. Avoid contact with sharp objects.
Universal protectors designed specifically for use with LCD panels may be
used to help protect the screen from minor scratches.
z Do not clean the navigation device when it is turned on. To clean the device,
use a soft, fluff-free cloth which has been moistened with water (Do not use
cleaning agents).
z Do not use paper towels to clean the screen.
z Any attempt to disassemble, repair or make any modifications to the
navigation device, risks injury to yourself and damage to the device. The
consequences of such actions are not covered by the warranty.
z Do not store or carry flammable liquids, gases or explosive materials together
with the navigation device, its parts or accessories.
15

4 Declaration of Conformity
and Additional Information
NOTE: Labels located on the back of the navigation device indicate the regulations and
standards with which it complies. Inspect the labels on your device and refer to the
corresponding explanations in this chapter. Some notes apply to specific models only.
4.1 Declaration of Conformity
European Union
Products with the CE marking comply with Radio & Telecommunication Terminal
Equipment Directive (R&TTE) (1999/5/ECC), the Electromagnetic Compatibility
Directive (89/336/ECC) and the Low Voltage Directive (73/23/ECC) – as amended
by Directive 93/68/ECC - issued by the European Community Commission.
Accordance with these directives implies conformity with the following European
Standards:
EN301489-1
EN301489-3
EN55022
EN55024
EN61000-3-2
EN61000-3-3
EN60950 / IEC 60950
The manufacturer is not liable for modifications made by the user which m
the device's conformity with the CE label, nor the consequences thereof.
16
ay alter

4.2 Safety Precautions
Charger
z Only use the charger provided with your device (ATECH, ATPI-68
HT0501-NC1.0). Use of another charger may result in malfunction and/or
danger.
z This product is intended to be supplied by a charger labelled “LPS”, “Limited
Power Source” with an output rating of 5V DC/1.0A.
Charging
z Do not use the charger in a high humidity environment. Do not touch the
charger if your hands or feet are wet.
z Ensure that the charger is adequately ventilated when using it to operate the
device or charge the battery. Do not cover the charger with paper or other
objects that could obstruct ventilation. Do not use the charger while it is inside
a carrier case.
z Connect the charger to a suitable power source. The voltage requirements
can be found on the device case and/or the packaging.
z Do not use the charger if the cable is damaged.
z Do not attempt to service the unit. There are no serviceable parts inside.
Replace the unit if it is damaged or has been exposed to excessive moisture.
Battery
z Only use a charger that has been approved by the manufacturer.
CAUTION: This unit contains a non-replaceable internal Li-Ion battery. The battery can burst
or explode, releasing hazardous chemicals. To reduce the risk of fire or burns, do not
disassemble, crush, puncture, or dispose of in fire or water.
17
 Loading...