

Page 1

User Manual
NAVIGON Mobile Navigator
December 2006
Page 2

Imprint
NAVIGON Inc.
Chicago
Illinois
The information contained herein may be changed at any time without prior notification. This manual nor any
parts thereof may not be reproduced for any purpose whatsoever without the express writ ten consent of
NAVIGON Inc., nor transmitted in any form either electronically or mechanically, including photocopying and
recording. All technical information, illustrations etc. are subject to copyright law.
© 2006, NAVIGON Inc.
All rights reserved.
Page 3

User Manual NAVIGON Mobile Navigator
User Manual Table of Contents i
Table of Contents
1 Introduction................................................................5
1.1 About this manual............................................................ 6
1.1.1 Arrangement........................................................ 6
1.1.2 Conventions.........................................................6
1.1.3 Symbols .............................................................. 6
1.2 Legal notice .................................................................... 7
1.2.1 Warranty .............................................................7
1.2.2 End User License Agreement ("EULA") ..................... 7
1.2.3 Trademarks..........................................................8
1.3 Support.......................................................................... 8
1.3.1 Telephone Support................................................ 8
1.4 Terms used..................................................................... 9
2 Before You Start........................................................11
2.1 How your navigation system works................................... 12
2.2 Important safety instructions........................................... 12
2.2.1 Safety instructions for navigation .......................... 12
2.2.2 Safety instructions for a switch-on in the vehicle ..... 13
3 Operating the Navigation Software...........................15
3.1 Navigation device keys................................................... 16
3.2 Volume ........................................................................ 16
3.3 Information................................................................... 16
3.3.1 GPS .................................................................. 17
3.3.2 Energy .............................................................. 17
3.3.3 TMC (Traffic Information)..................................... 17
3.3.4 Direction............................................................ 18
3.4 Software keyboard......................................................... 18
3.5 Lists............................................................................. 19
3.6 Options ........................................................................ 20
3.7 Menus.......................................................................... 20
3.8 Starting the navigation system for the first time................. 20
4 Navigation ................................................................23
4.1 General information on navigation.................................... 24
4.1.1 Safety and other information................................ 24
4.2 Starting Mobile Navigator................................................ 25
4.2.1 Initializing the GPS receiver.................................. 25
4.2.2 Main screen........................................................ 26
4.3 Specifying a new destination ........................................... 27
4.3.1 Destination address............................................. 28
4.3.2 Points of interest................................................. 29
4.3.3 Quick access to points of interest .......................... 34
4.3.4 Specifying the destination country or state ............. 34
4.4 Selecting a stored destination.......................................... 35
Page 4

User Manual NAVIGON Mobile Navigator
ii Table of Contents User Manual
4.4.1 Last Destinations ................................................ 35
4.4.2 Favorites ........................................................... 36
4.5 Navigating home ........................................................... 37
4.6 Navigation "upon command" ........................................... 37
4.7 Specifying a destination on the map................................. 38
4.8 Starting navigation ........................................................ 39
5 Managing Destinations..............................................41
5.1 Favorites ...................................................................... 42
5.1.1 Storing a destination ........................................... 42
5.1.2 Creating a voice command ................................... 43
5.1.3 Changing the name of the destination.................... 43
5.1.4 Deleting a destination from the Favorites list........... 44
5.1.5 Defining a destination as your home address .......... 44
5.1.6 How to start planning a route ............................... 44
5.2 Last Destinations........................................................... 45
5.2.1 Saving destinations as favorites............................ 45
5.2.2 Deleting a destination from the Last Destinations
list....................................................................
45
5.2.3 Deleting all destinations from the Last
Destinations list..................................................
46
5.2.4 How to start planning a route ............................... 46
6 Routes with legs .......................................................47
6.1 Route planning.............................................................. 48
6.1.1 Specifying the starting point................................. 49
6.1.2 Entering route stops............................................ 50
6.1.3 Changing route stops........................................... 51
6.2 Managing routes............................................................ 52
6.2.1 Storing routes .................................................... 52
6.2.2 Loading routes.................................................... 52
6.2.3 Renaming routes................................................. 53
6.2.4 Deleting routes................................................... 53
6.3 Navigation.................................................................... 54
6.3.1 Calculating and displaying the route ...................... 54
6.3.2 Simulating the route............................................ 54
6.3.3 Starting navigation.............................................. 55
7 Working with the Map...............................................57
7.1 Map material................................................................. 58
7.1.1 Copying a navigation map to the memory card........ 58
7.2 Map in the Preview mode................................................ 58
7.3 Map in the Navigation mode............................................ 61
7.4 Map in the Destination search mode ................................. 65
8 Useful Functions .......................................................69
8.1 Information about the destination .................................... 70
8.2 GPS status.................................................................... 70
8.3 Inserting an interim destination ....................................... 72
8.4 Skipping a leg ............................................................... 73
Page 5

User Manual NAVIGON Mobile Navigator
User Manual Table of Contents iii
8.5 Blocking off a section of the route .................................... 73
8.6 POI on Route ................................................................ 74
8.7 Turn-by-Turn List........................................................... 74
8.7.1 Blocking route sections........................................ 75
8.7.2 Canceling blocked routes and restoring the
original route......................................................
76
8.8 TMC (Traffic Information)................................................ 76
8.8.1 Configuring the message display........................... 78
8.8.2 TMC Settings...................................................... 78
8.8.3 Managing TMC information................................... 79
8.8.4 Tuning Mode ...................................................... 80
9 Configuring Mobile Navigator....................................83
9.1 Opening the Settings window .......................................... 84
9.2 Basic Settings ............................................................... 85
9.3 Current Map.................................................................. 89
9.4 POI.............................................................................. 90
9.4.1 Categories for quick link and for POI on Route......... 90
9.4.2 Indications on the map ........................................ 90
9.5 Route Profile ................................................................. 91
10 Index ........................................................................93
Page 6

User Manual NAVIGON Mobile Navigator
iv Table of Contents User Manual
Page 7

User Manual NAVIGON Mobile Navigator
Introduction - 5 -
1 Introduction
Topics covered in this chapter:
1.1 About this manual page 6
Arrangement
Conventions
Symbols
1.2 Legal notice page 7
Warranty
End User License Agreement ("EULA")
Trademarks
1.3 Support page 8
1.4 Terms used page 9
Page 8
User Manual NAVIGON Mobile Navigator
- 6 - About this manual
1.1 About this manual
1.1.1 Arrangement
If you are looking for specific information or the explanation of a
specific term, you can refer to the following sections in the
manual:
Ù As of page
9 in the list "Terms used" you'll find an explanation
of terms used in this manual.
Ù As of page
93 in the Index you'll find page references.
1.1.2 Conventions
The following styles are used in this manual for better legibility
and clarification:
Style Use
Bold
Highlighting important parts in the text.
Bold italic
Registered names, company and product
descriptions.
S
MALL CAPITALS
Window and dialog box titles.
Underlined
Descriptions of buttons, input fields and other
elements in the user interface.
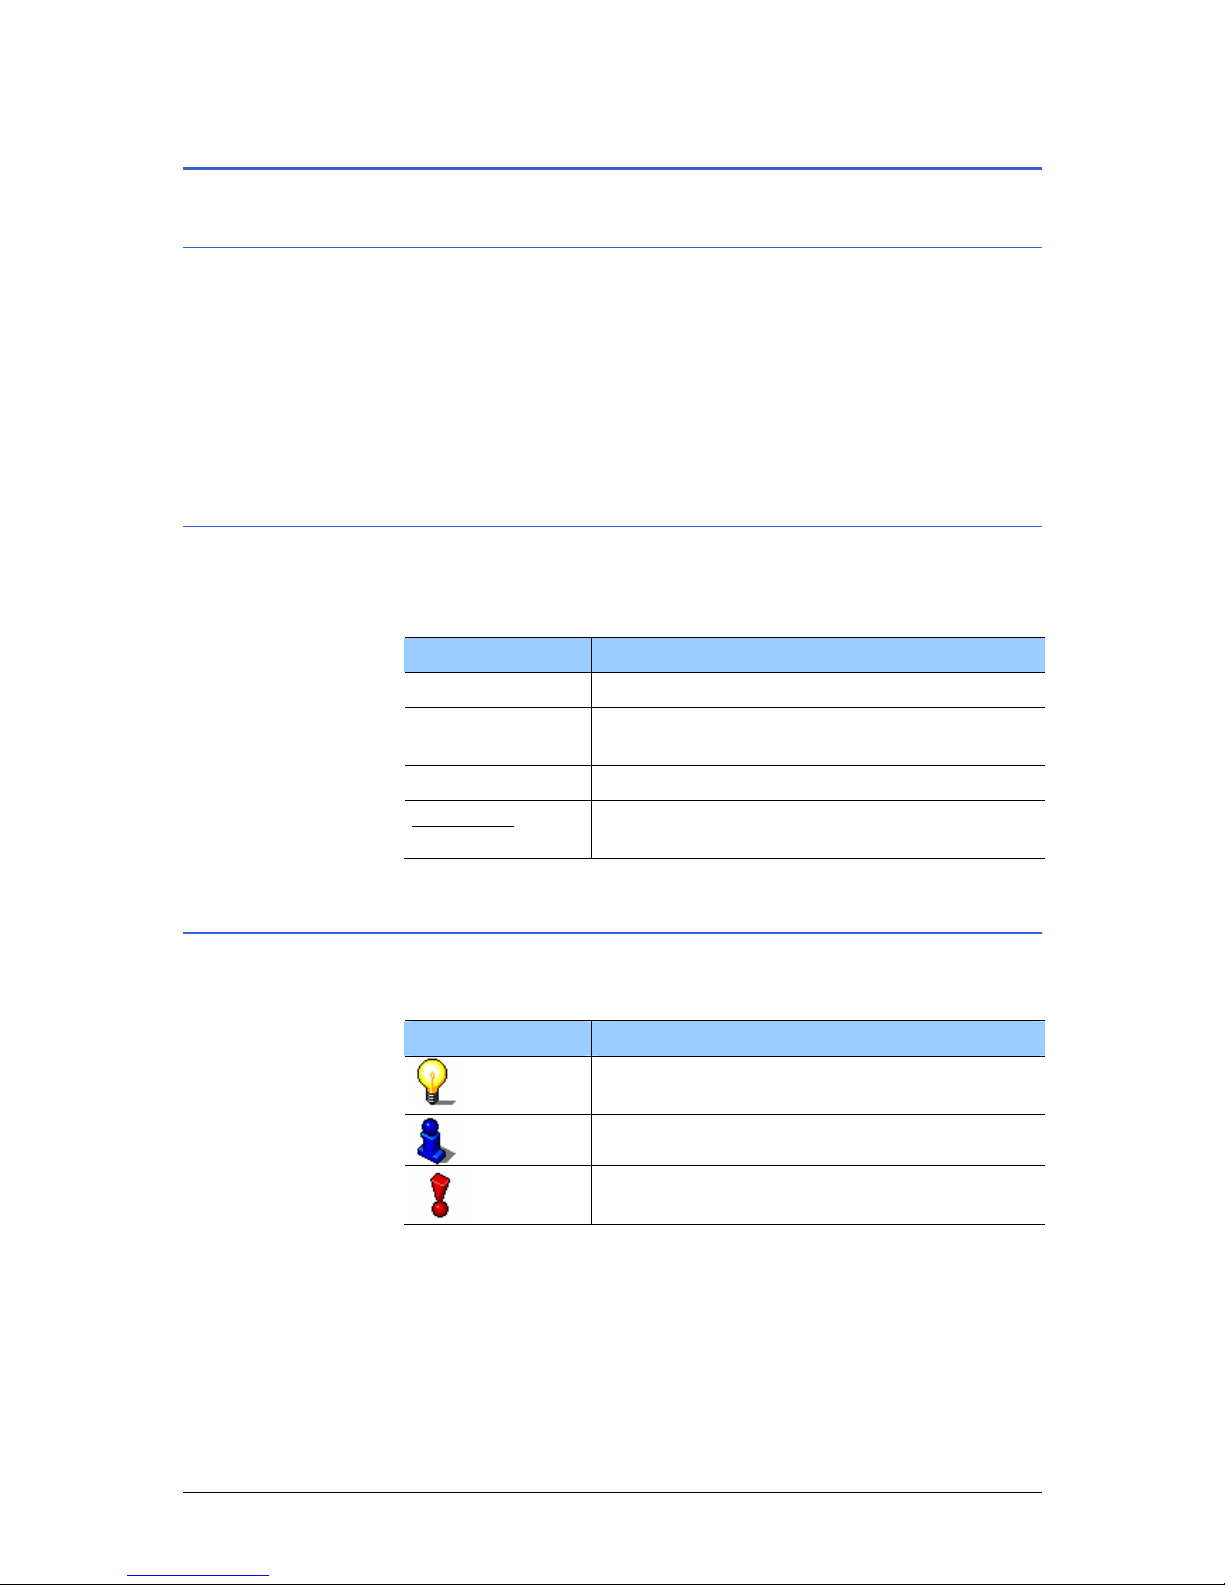
1.1.3 Symbols
The following symbols refer to specific text passages:
Symbol Use
Information and tips to facilitate operating the
software
Additional information and explanations.
Warnings
Page 9

User Manual NAVIGON Mobile Navigator
Introduction - 7 -
1.2 Legal notice
1.2.1 Warranty
The software and documentation are subject to change without
notice. NAVIGON Inc. is not liable for the accuracy of the
information contained in this manual or for damages resulting
from the use of this manual.
To improve the quality of our products and our services, we
appreciate all suggestions for improvement.
1.2.2 End User License Agreement ("EULA")
This is a legal agreement between you, the end user, and
NAVIGON Inc. By using all or any portion of the Software you are
agreeing to be bound by the terms of this agreement. This EULA
applies to the use of software, pre-installed software on any of
our hardware devices and accompanying items, including on CDROM, floppy disc, memory card, download package or any other
data carriers, and all contents and contents programs
("Software").
Please read this Contract carefully. By using this software you
agree that this agreement is enforceable like any written
negotiated agreement signed by you. This agreement is
enforceable against you and any legal entity that obtained the
software.
GRANT OF LICENSE: Navigon grants you the right to use one
copy of the Software, provided it is used on only one computer or
hardware device at any time. The Software is in "use" on a
computer or hardware device when it is loaded into temporary
memory (e.g., hard disk, CD-ROM, or other storage device) of
that computer. This license does not grant any right to obtaining
future upgrades, updates or supplements ("upgrades") of the
Software. Any updates are similarly governed by this EULA and
any accompanying amendments. Updates may be subject to
additional costs and provisions.
OTHER RESTRICTIONS: You may not rent or lease, broadcast,
present, transfer, or distribute the Software and accompanying
written materials. You may not reverse engineer, decompile,
reverse engineer or disassemble the Software. If Software is an
upgrade, any transfer must include the upgrade and all prior
version. All rights not specifically granted in this EULA are
reserved by NAVIGON Inc. You may make one backup copy of
the software, provided your backup copy is not installed or used
on any Computer.
CONFIDENTIALITY: You acknowledge that the Software contains
proprietary trade secrets and you hereby agree to maintain the
confidentiality of Software and not to disclose or provide access
thereto to any person.
Page 10

User Manual NAVIGON Mobile Navigator
- 8 - Support
THIRD PARTY SOFTWARE LICENSES: Navigon products may
make use of third party software. The official copyright notices
and license conditions of such may be found on the CD-ROM hard
disk. You hereby agree to the terms and conditions for such third
party software.
TERMINATION: This Agreement automatically terminates if you
fail to comply with the terms hereof or if you attempt to assign
the Agreement or transfer the Software to a third party except as
expressly permitted in this Agreement. If such should occur, you
must destroy all copies of the Software and all of its component
parts. All provisions of this Agreement, except for the license
grant above, survive the termination of this Agreement.
ENTIRE AGREEMENT: The terms and conditions of this
Agreement, including any addendum or agreement to it which
may be included with the accompanying package of the Software
and/or Hardware), plus the Limited Warranty, if applicable,
reflect the entire agreement between You and Navigon with
respect to the subject matter hereof and will supersede and
replace all prior understandings and agreements, in whatever
form, regarding the subject matter.
1.2.3 Trademarks
All brands and trademarks mentioned in this document are
possibly registered by third parties and are subject to the current
legislation and to the rights of their respective owners without
reservation. All mentioned names of products, societies, or
brands may be registered trademarks of their respective owners.
Every right that is not explicitly accorded is reserved.
The absence of an explicit labeling of registered trademarks does
not suggest that this brand is not subject to third party rights.
Ù Windows and ActiveSync are registered trademarks of the
Microsoft Corporation.
Ù NAVIGON is a registered trademark of the NAVIGON Inc..
1.3 Support
Our service team members are available via telephone.
Additional information can also be found on the Internet website
NAVIGON Inc. (
www.navigon.com) under "Service & Support".
1.3.1 Telephone Support
USA/Canada
Telephone: 1-888-848-0701
Page 11

User Manual NAVIGON Mobile Navigator
Introduction - 9 -
1.4 Terms used
A specific terminology is used in this manual to designate
elements of the product, operating elements of the navigation
devices and user actions.
Term Use
Display The physical display unit of the navigation
device.
Screen A functional software operating unit that
occupies the entire display.
Dialog window Includes warnings, error messages or
information. Queries whether a specific action
should really be executed.
Button An element of the user interface that can be a
focal point and if touched activates the
software. Buttons can be labeled and / or
imposed with graphics.
Icon Small graphics on the user interface that
represent information. An example of this is
the symbol for GPS reception.
Icons cannot be operated.
Entry field A field in which data can or must be input.
Input fields are generally labeled either above
or in front of the field.
Page 12

User Manual NAVIGON Mobile Navigator
- 10 - Terms used
Page 13

User Manual NAVIGON Mobile Navigator
Before You Start - 11 -
2 Before You Start
Topics covered in this chapter:
2.1 How your navigation system works page 12
2.2 Important safety instructions page 12
Safety instructions for navigation
Safety instructions for a switch-on in the vehicle
Page 14

User Manual NAVIGON Mobile Navigator
- 12 - How your navigation system works
2.1 How your navigation system works
The days of searching for the correct route through thick folding
maps are over. Now your navigation software Mobile Navigator
can guide you to your destination quickly and reliably – without
leafing through maps.
The American military developed the Global Positioning System
(GPS) in the 70s to be used as a guided weapons system.
GPS is based on a total of 24 satellites that circle the earth. They
constantly transmit their position and time. The GPS receiver
tracks this data and calculates its own geographical position
based on the different position and time data broadcast by the
various satellites.
Data from at least three satellites is required to indicate position
with a sufficient degree of accuracy. The altitude above sea level
can also be determined if data from 4 or more satellites can be
obtained. The position can be indicated within 3 meters.
The position can be used as a starting point for calculating a
route after Mobile Navigator has determined your position.
Your navigation device maps contain the geographical
coordinates for points of interest, streets, and cities that are
digitally acquired. This allows the navigation device to calculate a
route from a given starting point to a given destination.
The calculation and depiction of the current position on the map
is repeated every second. In this way you can always see where
you are moving on the map.
2.2 Important safety instructions
It is in your own best interest to carefully read the following
safety instructions and warnings before starting your navigation
system.
2.2.1 Safety instructions for navigation
The navigation system is used at the users own risk.
Caution: Do not operate the navigation system while driving.
This will reduce the risk of having an accident!
Caution: Do not look at the display unless the traffic situation
allows you to do so!
Page 15

User Manual NAVIGON Mobile Navigator
Before You Start - 13 -
Caution: Traffic regulations have priority over any instructions
that the navigation system may give.
Caution: Only follow the instructions of the navigation system
when the circumstances and the road traffic regulations allow for
doing so! The navigation system will guide you to your
destination even if you deviate from the calculated route.
Caution: The United States government operates the Global
Positioning System (GPS) and is solely responsible for its
accuracy and maintenance. Changes by the United States
government may affect the accuracy and performance of all GPS
equipment, including your personal navigation device.
Caution: Ordinances or laws may restrict use of certain abilities
of your navigation device on public or private land.
Note: Look at the map and the direction of the arrow if you have
not understood the spoken instructions or you are not sure where
to turn at the next intersection.
2.2.2 Safety instructions for a switch-on in the vehicle
Caution: Do not attach the cradle for the navigation device in an
area that would obstruct an air bag.
Caution: NOTICE TO DRIVERS IN CALIFORNIA AND MINNESOTA:
State law prohibits drivers in California and Minnesota from using
mounts on their windshields while operating motor vehicles.
Navigon does not take any responsibility for any fines, penalties,
or damages that may be incurred as a result of disregarding this
notice. (See California Vehicle Code Section 26708(a);
Minnesota Statutes 2005, Section 169.71)
Caution: When installing the cradle, ensure that it does no t
represent a risk in the event of an accident.
Page 16

User Manual NAVIGON Mobile Navigator
- 14 - Important safety instructions
Page 17

User Manual NAVIGON Mobile Navigator
Operating the Navigation Software - 15 -
3 Operating the Navigation
Software
Topics covered in this chapter:
3.1 Navigation device keys page 16
3.2 Volume page 16
3.3 Information page 16
GPS
Energy
TMC (Traffic Information)
Direction
3.4 Software keyboard page 18
3.5 Lists page 19
3.6 Options page 20
3.7 Menus page 20
3.8 Starting the navigation system for the first time page 20
Page 18
User Manual NAVIGON Mobile Navigator
- 16 - Navigation device keys
3.1 Navigation device keys
Two keys are located on the right side of your navigation device.
(On/Off)
You switch the device on and off with the top key.
(HOLD)
Use the bottom key to switch the touch sensitivity of the touch
screen on and off. If the touch screen is switched to HOLD it no
longer reacts to touch.
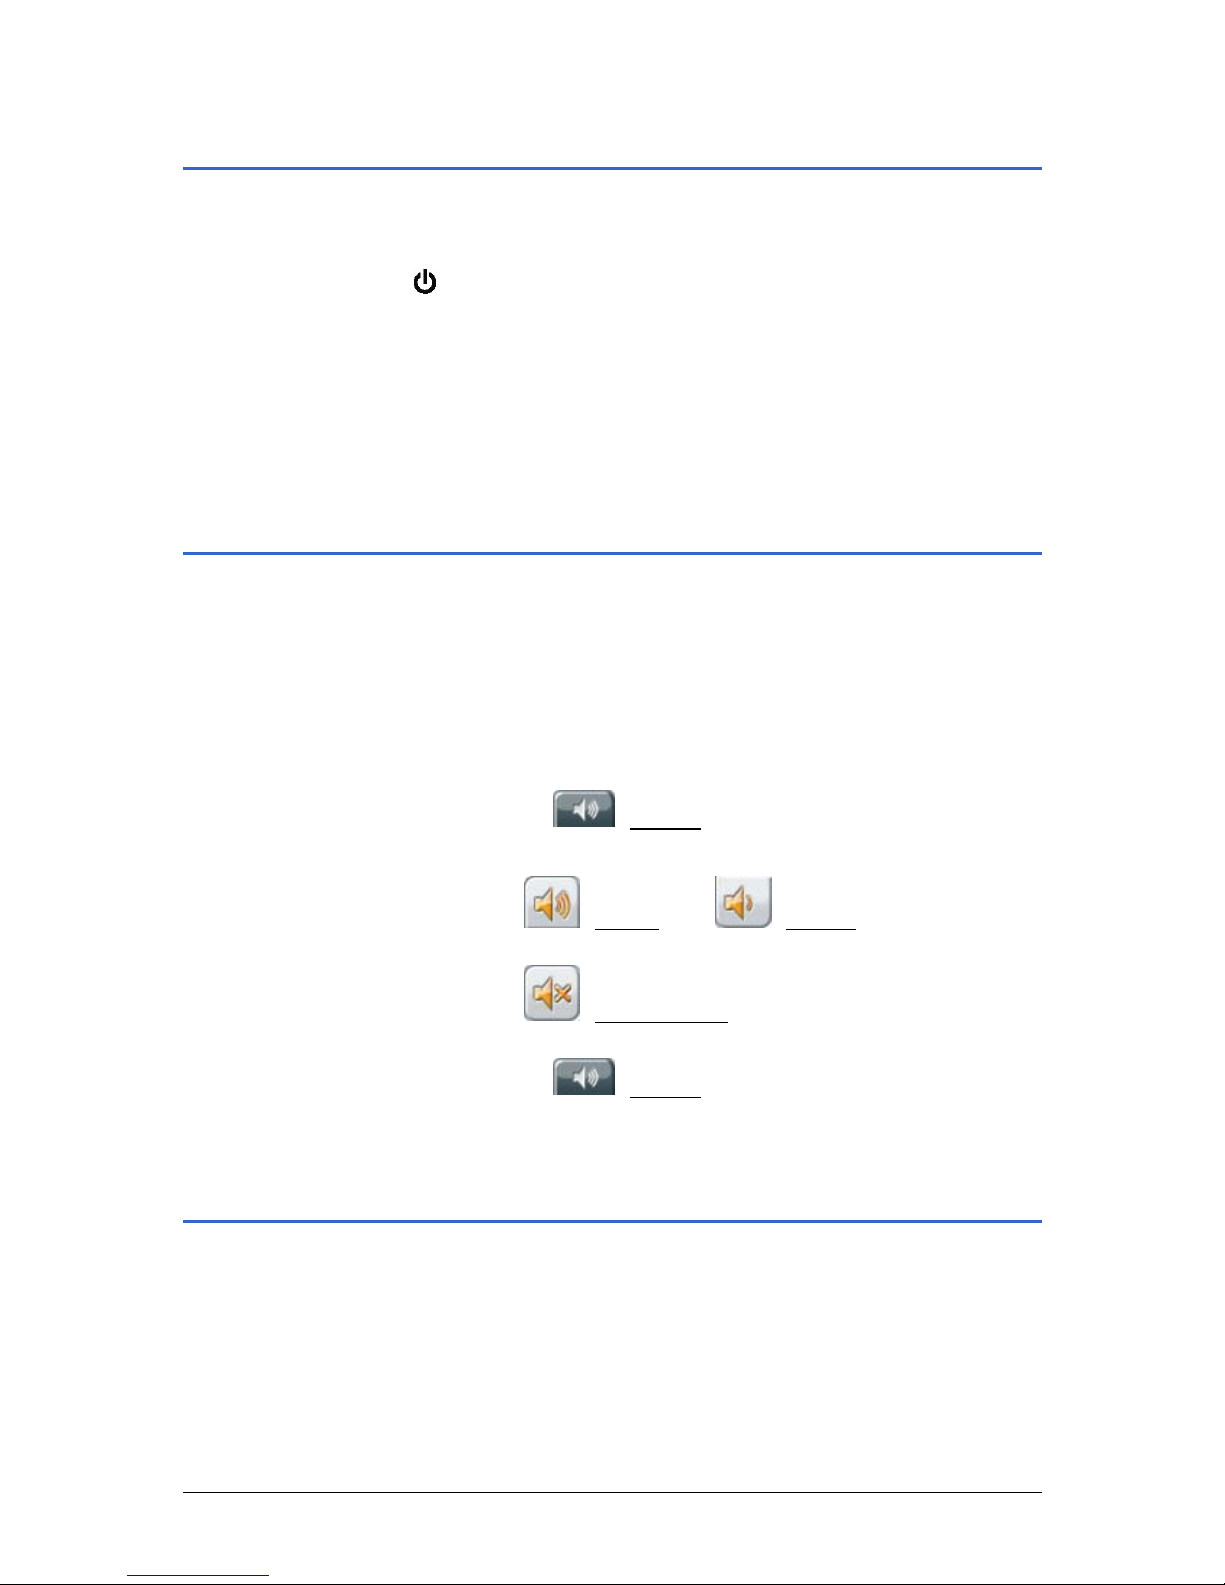
3.2 Volume
Refer to your navigation device user manual to find out how to
adjust the volume.
The volume of the spoken driving instructions from the Mobile
Navigator can be adjusted during navigation.
You have started navigating. The map is open in the Navigation
or Destination search mode.
1. Tap on the
(Volume) button.
The volume bar opens.
Ù Use the
(Louder) and (Quieter) buttons to adjust
the volume to your needs.
Ù Use the
(Volume on/off) button to switch the spoken
driving instructions on or off.
2. Tap on the
(Volume) button again.
The volume bar closes.
3.3 Information
Symbols located at the top of the screen are used to display
information.
Page 19
User Manual NAVIGON Mobile Navigator
Operating the Navigation Software - 17 -
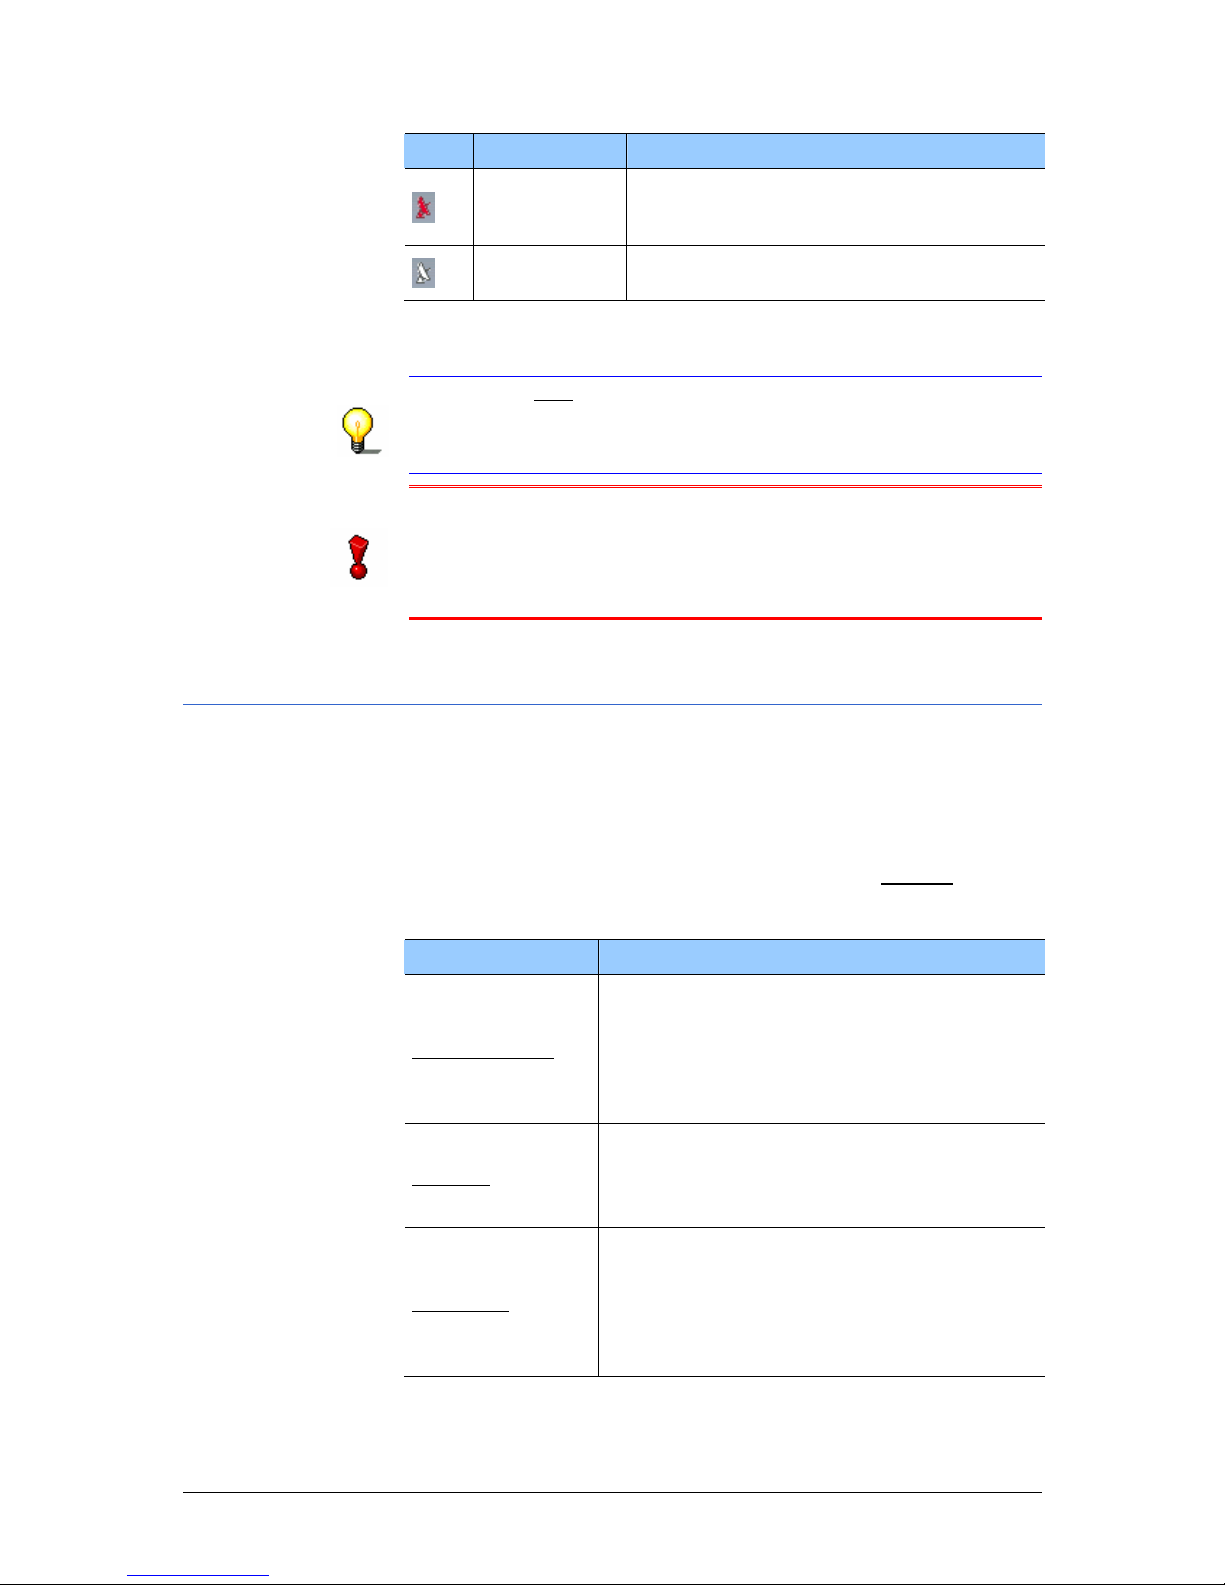
3.3.1 GPS
The GPS symbol can show the following GPS-reception status:
Icon Meaning Explanation
No GPS
The built-in GPS receiver is not
operational. Contact customer service if
the problem persists.
No Signal
Data is being received from less than
three satellites. The position cannot be
calculated.
GPS ready
Data is being received from at least three
satellites. The position can be calculated.
Refer to chapter "
GPS status" on page 70 for detailed information
regarding the GPS-status.
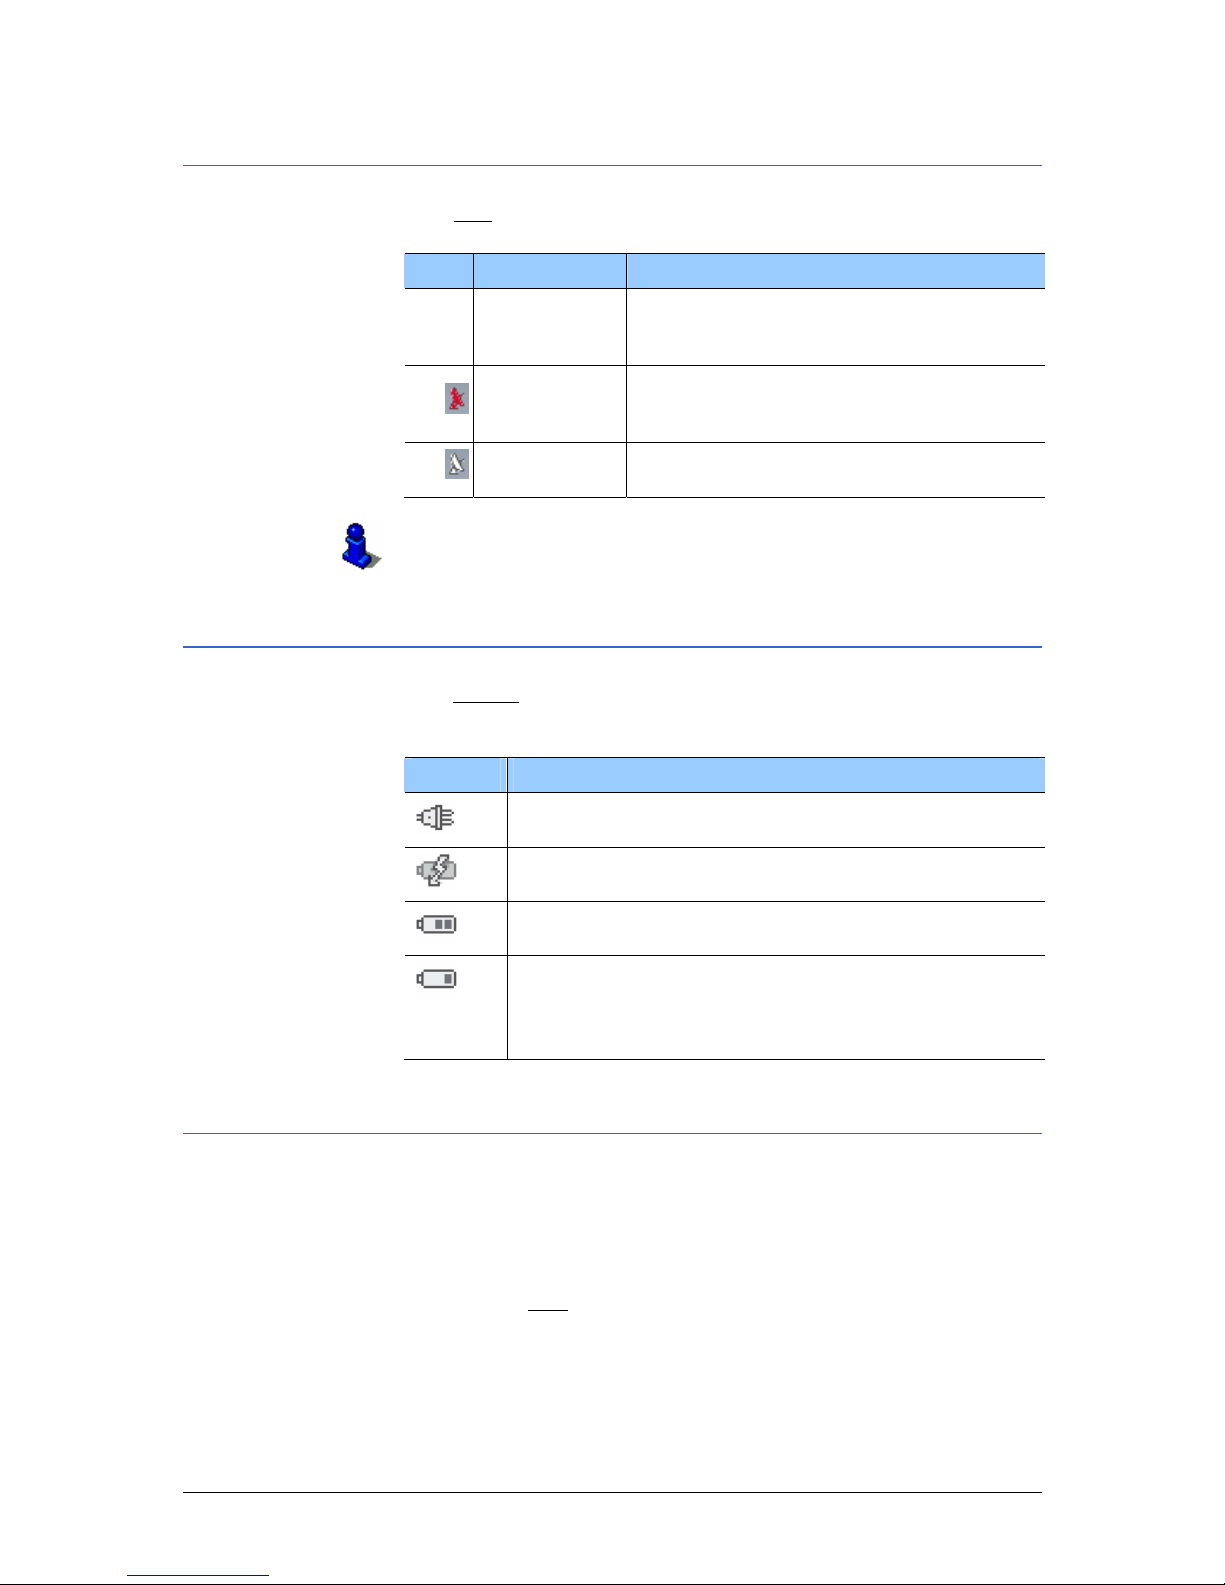
3.3.2 Energy
The Energy icon can display the following conditions of the built-
in battery:
Icon Meaning
The device is being supplied by an external power
source. The battery is completely recharged.
The device is being supplied by an external power
source. The battery is being charged.
The device is powered by its internal battery. The
battery is insufficiently charged.
The device is powered by its internal battery. The
battery charge is low.
A warning will notify you if the charge of the battery is
weak.
3.3.3 TMC (Traffic Information)
If your device has an integrated TMC receiver, or if you have
connected an external TMC receiver, the navigation system it has
access to up-to-date traffic information and can dynamically
change the route if necessary in order to avoid a traffic jam.
The symbol TMC
can be found in the center of the top bar on the
screen. It can depict the following TMC-reception conditions:
Page 20
User Manual NAVIGON Mobile Navigator
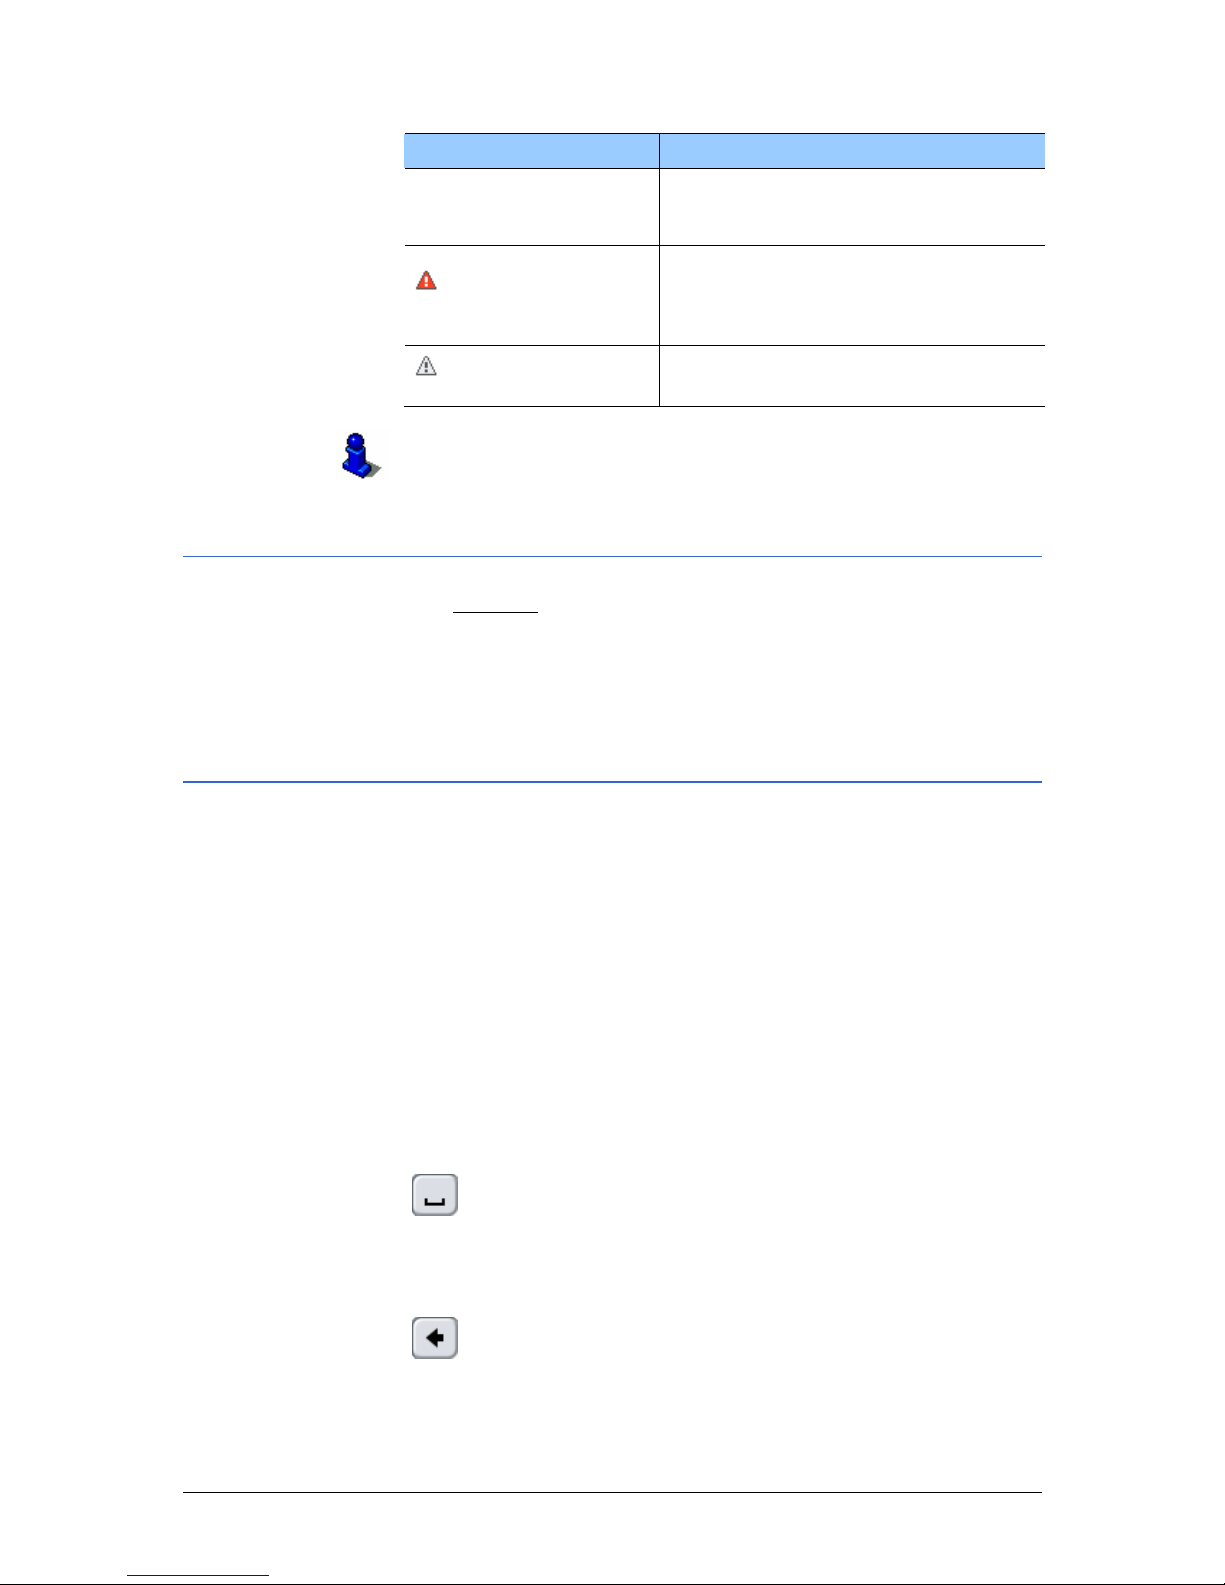
- 18 - Software keyboard
Symbol Explanation of symbols
No Symbol
There is no TMC receiver connected,
or the connected or installed TMC
receiver is not working.
Tuning
The TMC receiver is ready but cannot
receive TMC signals. This is the case,
for example, when you are in an area
where TMC is not available.
TMC on Standby
Traffic messages can be received.
For a description of the TMC-functions please refer to chapter
"
TMC (Traffic Information)" on page 76.
3.3.4 Direction
The Direction symbol in the top, right corner of the screen
indicates in which direction you are currently moving. Any one of
the following directions can be indicated:
N, NE, E, SE, S, SW, W, NW
3.4 Software keyboard
A software keyboard appears on the screen when text entries
become necessary.
You can use your finger to make all the entries on the software
keyboard. Only capital letters can be entered.
It is not necessary to enter umlauts or special characters when
entering a destination city or street name. Mobile Navigator
enters these characters for you automatically. If you are
searching for the city of "Würzburg," then simply enter
"WURZBURG".
Inserting spaces
To enter a space tap on the key
.
Deleting individual characters
To delete the character in front of the cursor, tap on the key
.
Page 21

User Manual NAVIGON Mobile Navigator
Operating the Navigation Software - 19 -
Entering numbers
To enter numbers, e.g. a postcode, tap on the key
.
To return to characters, tap on the key
.
Special characters
To enter a special character, tap on the key
.
The special character keyboard appears.
As soon as you have entered a special character the character
keyboard appears again automatically.
You do not have to use special characters when entering address
data, but it can be useful to do so when naming destinations or
routes that are to be saved.
3.5 Lists
There are many cases where you will have to select an entry
from a list. This is the case if you enter a city.
As soon as you enter the first letter, the largest city (of the given
country) beginning with this letter appears.
As soon as you enter the second letter, a list appears with all
locations that begin with the letters you have entered.
The list adapts to the letters as you enter them. The list only
contains entries that begin with the letters entered or contain
those letters in the name of the location. The list becomes
shorter as you enter more letters.
Then accept an entry from the list. Therefore you cannot enter a
place that is not listed in the map you are currently using.
Such lists include 3 buttons:
(Up): Tap on this button to move up in the list.
(Down): Tap on this button to move down in the list.
(OK): Tap on this button to accept the entry that appears
right at the top of the list.
To accept a different entry in the list, simply tap on this entry.
The list will close as soon as you have selected an entry.
Page 22

User Manual NAVIGON Mobile Navigator
- 20 - Options
3.6 Options
The list will close as soon as you have selected an entry.
1. Tap on the Options
button to open the options list.
2. Tap on the option you would like to carry out.
If you would like to close the options list without selecting an
option, tap on the Options
button again.
3.7 Menus
Some buttons have menus that appear if the element is actuated.
Tap on one of the menu items to execute its function.
Tap the button again that was used to open the menu if you
would like to close that menu without executing a function.
3.8 Starting the navigation system for the first time
1. Switch on your navigation device.
2. Tap on the navigation software icon.
The following message appears:
"WARNING!
DANGER OF ACCIDENT
You understand that you should not operate the navigation
system while driving. Do not use the navigation system if it
presents a risk to you or any other person or if it is a
distraction.
OBEY ALL TRAFFIC LAWS
You understand that you must always obey the local traffic
laws and observe all road signs. Local traffic laws and actual
traffic signs always have priority over the information and
directions you receive from NAVIGON Mobile Navigator. The
navigation instructions might be inaccurate or incorrect due to
detours or construction."
3. Tap on the OK
button after you have read and fully
understood the text.
4. Tap on the Cancel
button in order to exit the navigation
software again if you do not wish to accept these instructions.
Page 23

User Manual NAVIGON Mobile Navigator
Operating the Navigation Software - 21 -
The WELCOME WINDOW is opened.
Ù Tap on the Show Product Demo
button if you would like to
view a brief introduction to operating the navigation
software (a brief overview of the NAVIGON Mobile
Navigator features). Thereafter the
WELCOME WINDOW is
opened again.
Ù Tap on the Basic Settings
button in order to set-up the
navigation software according to your personal
preferences.
Ù Make the desired settings. Then tap on the Done
button in
order to save the settings. The
WELCOME WINDOW is
opened again.
Note: You can make these settings at a later time.
For more detailed information, please refer to chapter
Basic Settings on page 85
Ù Tap on the Start NAVIGON Mobile Navigator
button to
open the navigation software.
The
MAIN WINDOW is opened.
Page 24

User Manual NAVIGON Mobile Navigator
- 22 - Starting the navigation system for the first time
Page 25

User Manual NAVIGON Mobile Navigator
Navigation - 23 -
4 Navigation
Topics covered in this chapter:
4.1 General information on navigation page 24
Safety and other information
4.2 Starting page 25
Initializing the GPS receiver
Main screen
4.3 Specifying a new destination page 27
Destination address
Points of interest
Quick access to points of interest
Specifying the destination country or state
4.4 Selecting a stored destination page 35
Last Destinations
Favorites
4.5 Navigating home page 37
4.6 Navigation "upon command" page 37
4.7 Specifying a destination on the map page 38
4.8 Starting navigation page 39
Page 26
User Manual NAVIGON Mobile Navigator
- 24 - General information on navigation
4.1 General information on navigation
4.1.1 Safety and other information
The navigation system is used at the users own risk.
Caution: Do not operate the navigation system while driving.
This will reduce the risk of having an accident!
Caution: Do not look at the display unless the traffic situation
allows you to do so!
Caution: Traffic regulations have priority over any instructions
that the navigation system may give.
Caution: Only follow the instructions of the navigation system
when the circumstances and the road traffic regulations allow for
doing so! The navigation system will guide you to your
destination even if you deviate from the calculated route.
Navigation will be stopped if GPS tracking becomes impaired. The
navigation software remains on.
As soon as GPS signals are received again the navigation system
will calculate any change in position that may have occurred.
Then simply continue with the navigation.
If you end the navigation prior to reaching your destination, the
M
AIN SCREEN opens. You can then enter a different destination.
You can also resume navigation to the original destination by
choosing L
AST DESTINATIONS from the list.
A corresponding message will be displayed once you have
reached the specified destination.
Only your current position (triangle in orange) will no w be shown
on the map.
Tap on the
(Back) button. This takes you to MAIN SCREEN.
Tap on the
(Quit) button in the main window if you would
like to exit the navigation software.
Page 27

User Manual NAVIGON Mobile Navigator
Navigation - 25 -
4.2 Starting Mobile Navigator
1. Switch on your navigation device.
2. Tap on the navigation software icon.
Each time you start the navigation software, the following
message will appear:
"WARNING!
DANGER OF ACCIDENT
You understand that you should not operate the navigation
system while driving. Do not use the navigation system if it
presents a risk to you or any other person or if it is a
distraction.
OBEY ALL TRAFFIC LAWS
You understand that you must always obey the local traffic
laws and observe all road signs. Local traffic laws and actual
traffic signs always have priority over the information and
directions you receive from NAVIGON Mobile Navigator. The
navigation instructions might be inaccurate or incorrect due to
detours or construction."
3. Tap on the button OK
after you have read and fully
understood the text.
4. Tap on the Cancel
button in order to exit the navigation
software again if you do not wish to accept these instructions.
The M
AIN WINDOW opens.
4.2.1 Initializing the GPS receiver
Note: It may require 20 minutes to initialize the integrated GPS
receiver for the first time.
Thereafter, GPS-tracking begins within one minute after the
navigation device is switched back on.
Initialization can take up to 10 minutes if the navigation device
has been idle for over a week.
Initialization of the GPS receiver will begin as soon as the
navigation device is switched on.
The GPS
symbol appears in the right upper corner of the display.
It can show three different states:
Icon Meaning Explanation
No GPS
The GPS receiver is switched off.
- OR –
An external GPS receiver has not been
connected properly.
Page 28
User Manual NAVIGON Mobile Navigator
- 26 - Starting Mobile Navigator
Icon Meaning Explanation
No Signal
Data is being received from less than
three satellites. The position cannot be
calculated.
GPS ready
Data is being received from at least three
satellites. The position can be calculated.
As soon as data from at least 3 satellites is received, the symbol
changes to GPS ready.
Note: If the GPS
symbol displays the condition GPS ready in a
time significantly less than 20 minutes then leave the receiver
switched on for a minimum of 15 minutes. This will ensure that
the receiver is functioning properly.
Caution: If you have connected the navigation device to the
power supply using a cigarette lighter, remove the cable before
you park the vehicle for an extended period of time.
The GPS-receiver could drain the battery of the vehicle since it
requires a permanent supply of current.
4.2.2 Main screen
You can access any of the navigation software functions via the
M
AIN WINDOW.
Options of the main window
While the MAIN WINDOW is displayed, tap on the Options button,
in order to open a list with the following options:
Option Description
Route Planning
Opens the R
OUTE PLANNING window. Here
you can plan routes, manage planned
routes, and start navigating to a planned
route.
For detailed information, please refer to
chapter "
Routes with legs" on page 47.
Settings
Opens the S
ETTINGS window. Here you can
configure the navigation system.
Refer to chapter "
Configuring Mobile
Navigator" on page
83 for more information.
Show Map
Opens the map in Destination search
mode. Here you can specify a navigation
destination directly on the map.
For detailed information, please refer to
chapter "
Specifying a destination on the
map" on page
38.
Page 29

User Manual NAVIGON Mobile Navigator
Navigation - 27 -
Option Description
MP3 Player
Launches the integrated MP3 player of your
navigation device. If you close the MP3
player, Mobile Navigator appears again.
The MP3 player remains on during a
navigation instruction.
Traffic
Opens the T
RAFFIC INFORMATION window.
Here you can follow up-to-date traffic
information and plan an alternative route if
necessary.
For detailed information, please refer to
chapter
TMC (Traffic Information)" on page
76.
GPS status
Opens the GPS
STATUS window. Here you
can view the details regarding GPS-tracking.
You can also store data regarding your
current location.
For detailed information, please refer to
chapter "
GPS status" on page 70.
Tap on an option in order to execute its function.
Tap on the Options
button to close the list without executing a
function.
Opening the main window
The MAIN WINDOW opens when the navigation software is
started.
If a different software window is open, tap on the
(Back)
button. This will return you to the wind ow that was previously
opened.
Tap on the
(Back) button repeatedly until the MAIN
WINDOW is open.
4.3 Specifying a new destination
New destinations for Mobile Navigator are all un-navigated
destinations or destinations that have not been stored.
You can specify an address here, select a special destination, or
select a destination using the quick access button.
Specifying a new destination for the first time will open the
C
OVERED COUNTRIES list. (Refer to chapter "Specifying the
destination country or state" on page
34).
Tap on the country of your destination.
Page 30

User Manual NAVIGON Mobile Navigator
- 28 - Specifying a new destination
4.3.1 Destination address
Any address details entered will be continuously compared with
the addresses in the navigation systems database. Below your
entry you will always find a list of cities (or streets, house
numbers, intersections) that match the data entered by you and
are displayed on the map currently loaded.
This list will be up-dated each time a character is entered.
Note: It is not necessary to enter all address data.
The navigation device will calculate a route to the center of the
city if only the name of a city has been entered. The navigation
system will calculate a route to the center of the street if you
only specify country / state, city, and street but do not enter a
house number or a side street.
1. In the M
AIN WINDOW tap on the New Destination button.
The N
EW DESTINATION menu opens.
2. Tap on the Enter an Address
menu item.
The I
NPUT SEQUENCE menu opens if you would like to enter an
address in the USA or Canada (and you have selected the
corresponding map).
2a Tap on the menu item Street First
, if you would like to first
enter the street and then the city.
- OR -
2b Tap on the menu item City First
, if you would like to first
enter the city and then the street.
Note: The following description assumes that you have
selected the City First sequence for entering the address.
The ADDRESS window opens.
The City or ZIP Code
entry field is selected, and the cursor
can be seen inside it.
Note: Ensure that the country in which your destination is
located is specified on the State or Country icon (above the
right margin of the input field City or ZIP Code
).
Refer to chapter "
Specifying the destination country or state"
on page
34 for information on specifying a different
destination country.
3. Enter the name of the city or zip code of your destination.
4. Enter the street name of your destination. If your destination
is a well-known building or place (e.g. "Eiffel Tower" or
"Olympic Stadium"), you can enter this name as well.
5. Enter the house number of your destination. If you don’t
know the house number or if you have entered a place in the
previous step, then leave this field empty.
Page 31

User Manual NAVIGON Mobile Navigator
Navigation - 29 -
6. If you don’t know the house number but the name of a
nearby intersection, enter this name in the
Intersection field.
The navigation system then calculates a route to the
intersection of both specified roads.
Note: Additional information is available and stored in the
navigation system database for many destinations that you
specify. Tap on the
(Destination Info) button.
This function is described in detail in chapter "
Information
about the destination" on page
70.
7. Tap on the Start Navigation
button.
Information about starting navigation can be found in chapter
"
Starting navigation" on page 39. Please read there further.
Options of the Address window
The options of the ADDRESS window offer the following functions:
Option Description
Save
Destination
Stores the specified address in the F
AVORITES
list.
For more information, please refer to chapter
"
Storing a destination" on page 42.
Show on Map
Displays the specified address on the map.
Add to Route
Opens the route planning. The specified
address will be entered as the first route stop
in a new route.
For more information, please refer to chapter
"
How to start planning a route" on page 44.
4.3.2 Points of interest
Special destinations, also called POIs (Points of Interest) are
useful addresses that are catalogued according to certain criteria.
Points of interest can be airports or ferry landings, restaurants,
hotels, gas stations, public facilities, doctor offices, hospitals,
shopping malls, etc.
Points of interest can be depicted on the map with a symbol.
Refer to chapter "
Indications on the map" on page 90 for more
information.
Points of interest can also be specified as navigation destinations.
Nearby points of interest
Nearby points of interest are special destinations that are located
within a certain radius of your current location. This means you
can always find the nearest gas station no matter where you are.
Page 32

User Manual NAVIGON Mobile Navigator
- 30 - Specifying a new destination
Note: GPS-tracking must be sufficient to determine the position.
Adequate GPS-tracking can be recognized by the (GPS ready)
symbol.
Refer to chapter "
GPS status" on page 70.
Note: There are three categories of points of interest that are
available in the immediate vicinity using the quick access
function. They can be located quickly and without making any
additional entries. For more detailed information, please refer to
chapter "
Quick access to points of interest" on page 34.
1. In the M
AIN WINDOW tap on the New Destination button.
The New Destination
menu opens.
2. Tap on the Search for POI
menu item.The POI menu opens.
3. Tap on the Nearby
menu item.
The POI
NEARBY window opens.
4. Specify a category from which you would like to select a point
of interest.
If subcategories exist for the selected category, the Sub
Category list will open.
5. Specify a subcategory from which you would like to select a
point of interest.
The Name of the Destination
list opens. It contains the
nearest points of interest in the specified category, sorted by
distance.
If the list is long, you can move within it using the
(Up)
and
(Down) buttons.
6. Tap on the name of the destination.
Note: Additional information is available and stored in the
navigation system database for many destinations that you
specify. Tap on the
(Destination Info) button.
Please refer to chapter "
Information about the destination" on
page
70 for detailed information.
7. Tap on the Start Navigation
button.
This function is described in detail in chapter "
Starting
navigation" on page
39. Please read on there.
Page 33

User Manual NAVIGON Mobile Navigator
Navigation - 31 -
Options of the POI nearby window
The options of the POI
NEARBY window offer the following
functions:
Option Description
Save
Destination
Stores the specified address in the F
AVORITES
list.
For more information, please refer to chapter
"
Storing a destination" on page 42.
Show on Map
Displays the specified address on the map.
Add to Route
Opens the route planning. The specified
address will be entered as the first route stop
in a new route.
For more information, please refer to chapter
"
How to start planning a route" on page 44.
Nationwide points of interest
Nationwide points of interest are airports, tourist attractions,
national monuments, large sea ports, etc. This enables you to
find well-known tourist attractions without knowing exactly which
city they are in.
1. In the M
AIN WINDOW tap on the New Destination button.
The New Destination
menu opens.
2. Tap on the Search for POI
menu item.
The POI menu opens.
3. Tap on the Nationwide
menu item.
The POI
OF NATIONAL SIGNIFICANCE window opens.
4. Specify a category from which you would like to select a point
of interest.
Note: Ensure the country / state in which your destination is
located is specified on the State or Country icon (above the
right margin of the Category
input field).
Refer to chapter "
Specifying the destination country or state"
on page
34 for information on specifying a different
destination country.
The Name of the Destination list opens. It contains the
nearest points of interest in the specified category, sorted by
distance.
If the list is long, you can move within it using the
(Up)
and
(Up) buttons.
5. Tap on the name of the destination.
Page 34

User Manual NAVIGON Mobile Navigator
- 32 - Specifying a new destination
Note: Additional information is available and stored in the
navigation system database for many destinations that you
specify. Tap on the
(Destination Info) button.
This function is described in detail in chapter "
Information
about the destination" on page
70.
6. Tap on the Start Navigation
button.
Information about starting navigation can be found in chapter
"
Starting navigation" on page 39. Please read there further.
Options of the POI of national significance window
The options of the POI
OF NATIONAL SIGNIFICANCE window offer
the following functions:
Option Description
Save
Destination
Stores the specified address in the F
AVORITES
list.
For more information, please refer to chapter
"
Storing a destination" on page 42.
Show on Map
Displays the specified address on the map.
Add to Route
Opens the route planning. The specified
address will be entered as the first route stop
in a new route.
For more information, please refer to chapter
"
How to start planning a route" on page 44.
Point of interest in a particular city
Points of interest in a particular location can be useful when
navigating in an unfamiliar city.
1. In the M
AIN WINDOW tap on the New Destination button.
The New Destination
menu opens.
2. Tap on the Search for POI
menu item. The POI menu opens.
3. Tap on the in a City
menu item.
The POI
IN A CITY window opens.
The City or ZIP Code
entry field is selected, and the cursor
can be seen inside it.
Note: Ensure that the country in which your destination is
located is specified on the State or Country icon (above the right
margin of the input field State or Country
).
Refer to chapter "
Specifying the destination country or state" on
page
34 for information on specifying a different destination or
state.
4. Enter the name or the zip code for your destination city.
Page 35

User Manual NAVIGON Mobile Navigator
Navigation - 33 -
5. Specify a category from which you would like to select a point
of interest.
If sub-categories exist for the selected category the Sub
Category list will open.
6. Specify a subcategory from which you would like to select a
point of interest.
The Name of the Destination
list opens. The list contains
points of interest from the specified category, alphabetically
sorted.
If the list is long, you can move within it using the
(Up)
and
(Up) buttons.
7. Tap on the name of the destination.
Note: Additional information is available and stored in the
navigation system database for many destinations that you
specify. Tap on the
(Destination Info) button.
This function is described in detail in chapter "
Information
about the destination" on page
70.
8. Tap on the Start Navigation
button.
Information about starting navigation can be found in chapter
"
Starting navigation" on page 39. Please read there further.
Options of the POI in a city window
The options of the POI
IN A CITY window offer the following
functions:
Option Description
Save
Destination
Stores the specified address in the F
AVORITES
list.
For more information, please refer to chapter
"
Storing a destination" on page 42.
Show on Map
Displays the specified address on the map.
Add to Route
Opens the route planning. The specified
address will be entered as the first route stop
in a new route.
For more information, please refer to chapter
"
How to start planning a route" on page 44.
Page 36

User Manual NAVIGON Mobile Navigator
- 34 - Specifying a new destination
4.3.3 Quick access to points of interest
The quick access system contains three categories of points of
interest. Destinations in your vicinity that correspond to these
categories can be listed quickly without the need for making
additional entries.
You can configure which categories of points of interest are
available for quick access. Refer to chapter "
Categories for quick
link and for POI on Route" on page
90 for more information.
Note: GPS-tracking must be sufficient to determine the position.
Adequate GPS-tracking can be recognized by the (GPS ready)
symbol.
For more detailed information, please refer to chapter "
GPS
status" on page
70.
1. In the M
AIN WINDOW tap on the New Destination button.
The New Destination
menu opens.
The categories that are selected for quick access are depicted
as symbols at the bottom of the menu.
2. Tap on the category from which you would like to select a
point of interest.
The Name of the Destination
list opens. It contains the
nearest points of interest in the specified category, sorted by
distance.
If the list is long, you can move within it using the
(Up)
and
(Up) buttons.
3. Tap on the name of the destination. The map opens in
Preview mode. You can start navigating here.
4.3.4 Specifying the destination country or state
Over the right upper hand corner of the uppermost input field of
the windows A
DDRESS, POI IN A CITY, and POI OF NATIONAL
SIGNIFICANCE
you will find the State or Country button. It shows
the abbreviation of the country/state that is currently used for
planning navigation destinations.
If your destination is in a different country, then proceed as
follows:
1. Tap on the State or Country
button.
The Covered Countries
list opens.
You can move within the list using the buttons
(Up) and
(Down).
Page 37

User Manual NAVIGON Mobile Navigator
Navigation - 35 -
2. Tap on the country of your destination.
The Covered Countries
list closes again.
The abbreviation of the destination country will appear on the
symbol.
Note: Countries cannot be selected unless they are least
partially covered by the map that is currently loaded.
4.4 Selecting a stored destination
The following lists of destinations and addresses are availa ble for
selection under My Destinations
in Mobile Navigator:
Ù L
AST DESTINATIONS: Destinations that were previously
navigated to.
Ù F
AVORITES: All destinations that you stored in Mobile
Navigator.
4.4.1 Last Destinations
Mobile Navigator saves the last 30 destinations that were
navigated to in the L
AST DESTINATIONS list. These destinations
can be selected quickly and easily as navigation destinations
without having to enter the information again.
1. In the M
AIN WINDOW tap on the My Destinations button.
The M
Y DESTINATIONS menu opens.
2. Tap on the Last Destinations
menu item.
The L
AST DESTINATIONS list opens.
If the list is long, you can move within it using the
(Up)
and
(Up) buttons.
3. Tap on the destination you would like to navigate to.
4. Tap on the Start Navigation
button.
Information about starting navigation can be found in chapter
"
Starting navigation" on page 39. Please read there further.
Options of the Last Destinations window
The options of the LAST DESTINATIONS window offer the following
functions:
Page 38
User Manual NAVIGON Mobile Navigator
- 36 - Selecting a stored destination
Option Description
Save as
Favorite
Stores the specified destination in the list
F
AVORITES.
For more detailed information, please refer to
chapter "
Storing a destination" on page 42.
Delete
Destination
Deletes the selected destination from the L
AST
DESTINATIONS list. A dialog box prompts you to
confirm the deletion.
Delete All
Deletes all destinations in the L
AST
DESTINATIONS list. Thereafter, the list is
empty. A dialog box prompts you to confirm
the deletion.
Add to Route
Opens the route planning. The specified
address is inserted as the first route stop in a
new route.
For more detailed information, please refer to
chapter "
How to start planning a route" on
page
46.
4.4.2 Favorites
Destinations to which you want to drive time and again can be
stored in the F
AVORITES list. These destinations can be selected
quickly and easily without having to enter the information again.
Up to 300 destinations can be stored in the F
AVORITES list.
Refer to chapter "
Storing a destination" on page 42 for
information on saving a destination.
1. In the M
AIN WINDOW tap on the My Destinations button.
The M
Y DESTINATIONS menu opens.
2. Tap on the Favorites
menu item.
The F
AVORITES list opens.
If the list is long, you can move within it using the
(Up)
and
(Up) buttons.
3. Tap on the destination you would like to navigate to.
4. Tap on the Start Navigation
button.
Information about starting navigation can be found in chapter
"
Starting navigation" on page 39. Please read there further.
Options of the Favorites window
The options of the FAVORITES window offer the following
functions:
Page 39

User Manual NAVIGON Mobile Navigator
Navigation - 37 -
Option Description
Rename
Opens a window that can be used to change the
name of the selected destination.
Store a Voice
Command
Opens the dialog box that prompts you to speak
the voice command into the navigation device
for the selected destination. You may then start
navigating to this destination "by command", by
tapping on the Voice Command
button in the
M
AIN WINDOW.
Home
Address
Stores the selected address as your home
address. Go to the M
AIN WINDOW and tap on the
Take Me Home
button. This will always allow you
to start navigating to this destination quickly.
Delete
Deletes the specified destination from the
F
AVORITES list. A dialog box prompts you to
confirm the deletion.
Add to Route
Opens the route planning. The specified address
will be entered as the first route stop in a new
route.
For more detailed information, please refer to
chapter "
How to start planning a route" on page
44.
4.5 Navigating home
In Mobile Navigator you can save one address as a home
address. Navigating to your home address can be started
anytime by tapping a single preset button.
You will be requested to enter your address the first time you tap
on the Take Me Home
button.
Additional information about entering your home address can be
found in chapter "
Defining a destination as your home address"
on page
44.
1. In the M
AIN WINDOW tap on the Take Me Home button.
A dialog box will notify you if you have not entered an
address.
Information about starting navigation can be found in chapter
"
Starting navigation" on page 39. Please read there further.
4.6 Navigation "upon command"
You can assign a voice command to any destination on your
F
AVORITES list. You may then start navigating to this destination
"by command" You can create a voice command when you store
the destination or at a later time.
Page 40

User Manual NAVIGON Mobile Navigator
- 38 - Specifying a destination on the map
Refer to chapter "
Creating a voice command" on page 43 for
how to set up a speech command.
1. In the M
AIN WINDOW tap on the Voice Command button.
2. After being prompted, speak into the navigation device to
activate the voice command that you have stored for the
desired destination.
The name of the designation appears in a dialog box.
3. Tap on the Start Navigation
button.
Information about starting navigation can be found in chapter
"
Starting navigation" on page 39. Please read there further.
4.7 Specifying a destination on the map
You may specify a navigation destination directly on the map. In
addition to cities and streets, you can also quickly select points of
interest.
1. In the M
AIN WINDOW tap on the Options button.
The options list opens.
2. Tap on the Show Map
button.
The map opens in Destination search mode.
3. Tap on the point that you would like to navigate to.
Note: Refer to chapter "
Map in the Destination search mode"
on page 65 for information on how to change the map section
so that your destination can easily be seen.
The destination that you have selected appears in the cross
hairs.
The geographical coordinates of the destination and the
corresponding address are shown in the Selected Destination
field in the lower third of the screen.
4. Tap on the
(OK) button.
The D
ESTINATION ON MAP window opens. The detailed address
data of the selected destination is displayed in the upper lefthand corner.
5. Tap on the Take Me There
button.
The map opens in the Preview mode.
Information about starting navigation can be found in chapter
"
Starting navigation" on page 39. Please read there further.
Page 41

User Manual NAVIGON Mobile Navigator
Navigation - 39 -
4.8 Starting navigation
You have specified a new destination (refer to chapter "Specifying
a new destination" on page
27) and tapped on the Start
Navigation button,
- OR –
You have specified a destination (refer to chapter "
Selecting a
stored destination" on page
35) and tapped on the Start
Navigation button,
- OR –
In the M
AIN WINDOW you have tapped on the Take Me Home
button (refer to chapter "
Navigating home", page 37),
- OR –
You have defined a destination on the map (refer to chapter
"
Specifying a destination on the map" on page 38) and tapped on
the Take Me There
button.
The map opens in Preview mode.
The navigation destination is depicted by a small flag. The route
and the estimated time of the trip are displayed.
The route is calculated based on the so called route profile.
1. Tap on the Options
button and select the Route Profile option
if you would like to view this route profile or change it.
Note: The changes made to the route options will also affect
any subsequent navigation.
Information about changing the route profile can be found in
chapter "
Route Profile" on page 91.
2. Tap on the Show Turn-by-Turn List button if you would like to
display and view a detailed description of the calculated route.
For more detailed information please refer to "
Turn-by-Turn
List" on page
74.
3. Tap on the Start Navigation
button or simply start driving.
No GPS tracking
The following message appears if the GPS-signal is not sufficient:
"No GPS signal available at present. Would you like to use the
last known position?"
You have the following options:
Ù Tap on the OK
button. The route will be calculated using the
last known position as a starting point. As soon as GPStracking is sufficient for determining the position, the route
will be recalculated and you can begin navigation.
Ù Tap on the Cancel
button. The MAIN SCREEN opens. Your
destination is stored in the L
AST DESTINATIONS list.
Page 42

User Manual NAVIGON Mobile Navigator
- 40 - Starting navigation
Page 43

User Manual NAVIGON Mobile Navigator
Managing Destinations - 41 -
5 Managing Destinations
Topics covered in this chapter:
5.1 Favorites page 42
Storing a destination
Creating a voice command
Changing the name of the destination
Deleting a destination from the Favorites list
Defining a destination as your home address
How to start planning a route
5.2 Last Destinations page 45
Saving destinations as favorites
Deleting a destination from the Last Destinations list
Deleting all destinations from the Last Destinations list
How to start planning a route
Page 44

User Manual NAVIGON Mobile Navigator
- 42 - Favorites
There are two lists of destinations in which the individual
destinations are saved:
Ù In the F
AVORITES list
Ù In the L
AST DESTINATIONS list
Every destination that you specify plus the destinations from the
L
AST DESTINATIONS list can be stored in the FAVORITES list. This
makes good sense if you frequently navigate to these
destinations.
You can rename destinations from the F
AVORITES list.
You can also delete individual destinations from both lists.
5.1 Favorites
In the FAVORITES list you will find all the destinations that you
have saved with Mobile Navigator.
Information about selecting a destination for navigation from the
F
AVORITES list can be found in chapter "Favorites" on page 36.
5.1.1 Storing a destination
1. Specify a destination as described in chapter "Specifying a
new destination" on page
27. Do not tap on the Start
Navigation button!
2. Tap on the Options
button.
The options list opens.
3. Tap on the Save Destination
option.
- OR -
1. Select a destination from the L
AST DESTINATIONS list, as
described in chapter "
Last Destinations" on page 35. Do not
tap on the Start Navigation
button!
2. Tap on the Options
button.
The options list opens.
3. Tap on the Save as Favorite
option.
The S
AVE DESTINATION AS... dialog window opens. The cursor
flashes in the Name
field.
4. Enter a name for the destination.
5. If you would like to assign a voice command for the
destination, then tap on the
(Voice Command) button.
Page 45

User Manual NAVIGON Mobile Navigator
Managing Destinations - 43 -
You will be prompted by a dialog box to speak the voice
command into the navigation device for the selected
destination.
5a Speak the command for the chosen destination into the
navigation device.
The dialog box closes again.
6. Tap on the
(Toggle) button, if you would like to designate
the destination as your home address. This will darken the
value Yes
in black.
7. Tap on the Save
button.
The destination is now stored in the F
AVORITES list. The dialog
box closes again.
5.1.2 Creating a voice command
1. Select the destination from the FAVORITES list that you want
to assign a voice command (see chapter "
Favorites", page 36)
2. Tap on the Options button.
The list opens.
3. Tap on the Store a Voice Command
option.
You will be prompted by a dialog box to speak the voice
command into the navigation device for the selected
destination.
4. Enter the voice command for the selected destination by
speaking into the navigation device.
The dialog box closes again. This destination is now assigned
a symbol in the F
AVORITES list.
5.1.3 Changing the name of the destination
1. In the FAVORITES list, select the destination the name of which
you wish to change. (see chapter "
Favorites", page 36)
2. Tap on the Options
button.
The options list opens.
3. Tap on the Rename
option.
The S
AVE DESTINATION AS... dialog window opens.
4. Enter a new name for the destination.
5. Tap on the Save
button.
The destination is now stored under the new name in the
F
AVORITES list.
Page 46

User Manual NAVIGON Mobile Navigator
- 44 - Favorites
5.1.4 Deleting a destination from the Favorites list
1. In the FAVORITES list, select the destination you wish to
delete. (see chapter "
Favorites", page 36)
2. Tap on the Options
button.
The options list opens.
3. Tap on the Delete
option.
The following message appears in a dialog box:
"Do you really want to delete this destination?"
4. Tap on the Yes
button.
The destination is deleted from the F
AVORITES list.
5.1.5 Defining a destination as your home address
Only one destination from the FAVORITES list can be defined as
your home address.
Go to the M
AIN WINDOW and tap on the Take Me Home button.
This will always allow you to start navigating to this destination
quickly.
1. Select the destination which you want to define as your home
address from the F
AVORITES list. (see chapter "Favorites",
page
36)
2. Tap on the Options
button.
The options list opens.
3. Tap on the Home Address
option.
The selected destination is now saved as your home address.
A small house symbol is assigned to your home address in the
F
AVORITES list.
5.1.6 How to start planning a route
If you have selected a destination from the F
AVORITES list, then
you can start planning a route with this. The selected destination
is inserted as the first route point of a new route.
1. Select the destination from the F
AVORITES list as described in
chapter "
Favorites", page 36.
2. Tap on the Options
button.
The options list opens.
3. Tap on the Add to Route
option.
The R
OUTE PLANNING window opens. The specified address will
be entered as the first route stop in a new route.
Page 47

User Manual NAVIGON Mobile Navigator
Managing Destinations - 45 -
Information about planning a route can be found in chapter
"
Routes with legs" on page 47.
5.2 Last Destinations
Mobile Navigator saves the last 30 destinations that were
navigated to in the L
AST DESTINATIONS list.
Information about selecting a destination for navigation from the
L
AST DESTINATIONS list can be found in chapter
"
Last Destinations" on page 35
5.2.1 Saving destinations as favorites
1. Select the destination from the LAST DESTINATIONS list as
described in chapter "
Last Destinations" on page 35.
Do not tap on the Start Navigation
button!
2. Tap on the Options
button.
The options list opens.
3. Tap on the Save as Favorite
option.
The S
AVE DESTINATION AS... dialog box opens. The cursor
flashes in the Name
field.
4. Enter a name for the destination.
5. Tap on the Save
button.
The destination is now stored in the F
AVORITES list. The dialog
box closes again.
5.2.2 Deleting a destination from the Last Destinations list
1. In the LAST DESTINATIONS list, select the destination you wish
to delete. (See chapter "
Last Destinations", page 35.)
2. Tap on the Options
button.
The options list opens.
3. Tap on the Delete Destination
option.
The following message appears:
"Do you really want to delete this destination?"
4. Tap on the Yes
button.
The destination is deleted from the L
AST DESTINATIONS list.
Page 48

User Manual NAVIGON Mobile Navigator
- 46 - Last Destinations
5.2.3 Deleting all destinations from the Last Destinations
list
1. Select any destination from the LAST DESTINATIONS list as
described in chapter "
Last Destinations" on page 35.
2. Tap on the Options
button.
The options list opens.
3. Tap on the Delete All
option.
The following message appears:
"Do you really want to delete all destinations?"
4. Tap on the Yes
button.
The L
AST DESTINATIONS list is empty.
5.2.4 How to start planning a route
If you have selected a destination from the L
AST DESTINATIONS
list, then you can start planning a route with this. The selected
destination is inserted as the first route point of a new route.
1. Select the destination from the L
AST DESTINATIONS list as
described in chapter "
Last Destinations" on page 35.
2. Tap on the Options
button.
The options list opens.
3. Tap on the Add to Route
option.
The R
OUTE PLANNING window opens. The specified address will
be entered as the first route stop in a new route.
For more detailed information, please refer to chapter "
Routes
with legs" on page
47.
Page 49

User Manual NAVIGON Mobile Navigator
Routes with legs - 47 -
6 Routes with legs
Topics covered in this chapter:
6.1 Route planning page 48
Specifying the starting point
Entering route stops
Changing route stops
6.2 Managing routes page 52
Storing routes
Loading routes
Renaming routes
Deleting routes
6.3 Navigation page 54
Calculating and displaying the route
Simulating the route
Starting navigation
Page 50

User Manual NAVIGON Mobile Navigator
- 48 - Route planning
It is possible to plan routes in the comfort of your home without
GPS-tracking. Created routes can be stored. This allows you to
plan as many routes as you like, for example, when planning
your vacation.
6.1 Route planning
1. In the MAIN WINDOW tap on the Options button.
The options list opens.
2. Tap on the Route Planning
option.
The R
OUTE PLANNING window opens.
Options of the Route Planning window
The options of the ROUTE PLANNING window offer the following
functions:
Option Description
Save Route
Opens a window where you can store the
name of the planned route under a
specific name.
Saved Routes
Opens a window that can be used to load
a stored route.
New Route
Deletes the starting point and all route
legs from the R
OUTE PLANNING window so
that you can plan a new route.
Show Map
Opens the map in Destination search
mode. Here you can define your
navigation destination directly on the
map.
For more detailed information, please
refer to chapter "
Specifying a destination
on the map" on page
38.
GPS status
Opens the GPS
STATUS window. Here you
can view the details regarding GPStracking.
For more detailed information, please
refer to chapter "
GPS status" on page 70.
Traffic
Opens the T
RAFFIC INFORMATION window.
Here you can follow up-to-date traffic
information and plan an alternative route
if necessary.
For more detailed information, please
refer to chapter "
TMC (Traffic
Information)" on page
76.
Page 51

User Manual NAVIGON Mobile Navigator
Routes with legs - 49 -
6.1.1 Specifying the starting point
The starting point of a route is the point where you would like to
start your trip. This does not always have to be your current
location: You may want to use a hotel as a starting point for
planning an excursion during your vacation. This can be done
from the comfort of your home.
The starting point is only important if you want to see a planned
route on the map but do not have GPS-tracking or you are not
yet at the planned starting point. The starting point that you
enter therefore has the sequence number “0”.
Your current location will be used as the basis for calculating t he
route as soon as you begin navigating.
The first stage is therefore the trip to the route stop with the
sequence number “1”.
1. Tap on the 0
button or on the Specify Starting Point field.
The S
TARTING POINT menu opens.
If you would like to enter a specific address as the starting point:
2. Tap on the Enter an Address
menu item.
3. Enter the address of the starting point. (refer to chapter
"
Destination address", page 28)
4. Tap on the Set Starting Point
button.
If you would like to specify a point of interest as the starting
point:
2. Tap on the Search for POI menu item.
3. Enter the address of the starting point. (Refer to chapter
"
Points of interest", page 29)
4. Tap on the Set Starting Point button.
If you would like to specify a saved destination as the starting
point:
2. Tap on the My Destinations menu item.
3. Select a destination. (refer to chapter "Selecting a stored
destination", page
35)
4. Tap on the Set Starting Point button.
If you would like to specify your home address as the starting
point:
2. Tap on the My Address menu item.
Refer to chapter "
Defining a destination as your home
address" on page
44 for information on saving your home
address.
Page 52

User Manual NAVIGON Mobile Navigator
- 50 - Route planning
If you would like to specify your current location as the starting
point:
2. Tap on the Current Location menu item.
The selected starting point will now be displayed next to the 0
(S
TARTING POINT) button.
Changing the starting point
1. Tap on the 0 button or on the Specify Starting Point field.
The S
TARTING POINT menu opens. Now you can specify a
different starting point. Proceed in the manner described
above.
6.1.2 Entering route stops
Route stops are points within the route that you want to navigate
to.
The sequence number is located on a button to the left of each
route stop.
1. Tap on the +
button or on the Add Route Point field.
The R
OUTE POINT menu opens.
If you want to enter a specific address as a route stop:
2. Tap on the Enter an Address
menu item.
3. Enter the address of the route point. (refer to chapter
"
Destination address", page 28)
4. Tap on the Add
button.
If you would like to specify a point of interest as a route stop:
2. Tap on the Search for POI menu item.
3. Enter the address of the starting point. (Refer to chapter
"
Points of interest", page 29)
4. Tap on the Add button.
If you would like to specify a saved destination as a route stop:
2. Tap on the My Destinations menu item.
3. Select a destination. (refer to chapter "Selecting a stored
destination", page
35)
4. Tap on the Add button.
If you would like to specify your home address as a route stop:
2. Tap on the My Address menu item.
Page 53
User Manual NAVIGON Mobile Navigator
Routes with legs - 51 -
Refer to chapter "
Defining a destination as your home
address" on page
44 for information on saving your home
address.
The selected route stop will now be indicated next to its
number in the sequence.
Repeat this step for each additional destination that you want to
add to your route.
6.1.3 Changing route stops
Route stops can be deleted from a route. The route stop
sequence can be changed as often as you like.
The R
OUTE PLANNING is open. At least one route stop has already
been specified. (see chapter "
Route planning", page 48)
Note: The starting point (sequence number "0") can not be
moved or deleted.
1. Tap on the route stop you would like to change.
If the list of route points is long, you can move within it using
the
(Up) and (Up) buttons.
The route stop pop-up menu opens. To the left of this you can
see the consecutive number of the selected route stop.
The pop-up menu contains the following buttons:
Ù
Route Point Up: Moves the selected route stop
forward. (Example: route stop 2 becomes route stop 1)
Ù
Route Point Down: Moves the selected route stop
backward. (Example: route stop 2 becomes route stop 3)
Ù
Delete: Deletes the selected route stop. A dialog
box prompts you to confirm the deletion.
2. Tap on one of the buttons to execute the respective function.
- OR –
Tap on the consecutive number alongside the buttons. The
pop-up menu then closes without performing a function.
Page 54

User Manual NAVIGON Mobile Navigator
- 52 - Managing routes
6.2 Managing routes
You can store each planned route under a special name.
Note: Only the route starting points and the route stops will be
stored but not the calculated route. Stored routes must be
recalculated prior to navigation after they are loaded.
Stored routes can be loaded, renamed, or deleted.
6.2.1 Storing routes
The ROUTE PLANNING is open. You have specified the starting
point and at least one route stop. (refer to chapter "
Route
planning", page
48)
1. Tap on the Options
button.
The options list opens.
2. Tap on the Save Route
option.
The S
AVE ROUTE AS: dialog box opens.
3. Enter a name for the route.
4. Tap on the Save
button.
The route has now been added to the S
AVED ROUTES list. The
dialog box closes.
6.2.2 Loading routes
The ROUTE PLANNING is open. (refer to chapter "Route planning",
page
48)
1. Tap on the Options
button.
The options list opens.
2. Tap on the Saved Routes
option.
The S
AVED ROUTES list opens.
If the list is long, you can move within it using the
(Up)
and
(Up) buttons.
3. Tap on the route that you want to load.
4. Tap on the Load Route
button.
The R
OUTE PLANNING window opens. The starting point and
the route stops for the loaded route are entered.
Page 55

User Manual NAVIGON Mobile Navigator
Routes with legs - 53 -
6.2.3 Renaming routes
The ROUTE PLANNING is open. (refer to chapter "Route planning",
page
48)
1. Tap on the Options
button.
The options list opens.
2. Tap on the Saved Routes
option.
The S
AVED ROUTES list opens.
If the list is long, you can move within it using the
(Up)
and
(Up) buttons.
3. Tap on the route that you want to rename.
4. Tap on the Rename
option.
The S
AVE ROUTE AS: dialog box opens.
5. Enter the new name for the route.
6. Tap on the Save
button.
The dialog box closes. The route is now stored under the new
name in the S
AVED ROUTES list.
6.2.4 Deleting routes
The ROUTE PLANNING is open. (refer to chapter "Route planning",
page
48)
1. Tap on the Options
button.
The options list opens.
2. Tap on the Saved Routes
option.
The S
AVED ROUTES list opens.
If the list is long, you can move within it using the
(Up)
and
(Up) buttons.
3. Tap on the route that you want to delete.
4. Tap on the Delete
option.
The following message appears:
"Would you really like to delete the entire route?"
5. Tap on the Yes
button.
The route is deleted from the S
AVED ROUTES list.
Page 56

User Manual NAVIGON Mobile Navigator
- 54 - Navigation
6.3 Navigation
The route must first be calculated. Thereafter, you may begin
navigating or just simulate the route.
6.3.1 Calculating and displaying the route
In order to receive an overview it is possible to calculate the
route and display it on the map even without GPS-tracki ng.
The R
OUTE PLANNING window is open. You have specified the
starting point and at least one route stop (refer to chapter "
Route
planning", page
48) or load a route (refer to chapter "Loading
routes", page
52).
1. Tap on the Show Route
button.
The map opens in Preview mode.
The starting point and the route stops are marked with flags.
The distance and the estimated time of the trip are indicated
for each leg of the route. This data is also indicated for the
entire trip.
6.3.2 Simulating the route
You can also just simulate navigation.
Note: GPS-tracking is not required for simulating the route. Only
routes up to maximum distance of 60 mi can be simulated.
You have calculated and displayed a route. (see chapter
"
Calculating and displaying the route", page 54)
1. Tap on the Options
button.
The options list opens.
2. Tap on the Simulation
option.
The route is recalculated for the simulation. Simulation is
started after the calculation.
Exit simulation
Route simulation can be terminated at any time.
1. Tap on the
(Back) button.
A dialog box will prompt you to confirm your exit from the
navigation.
The M
AIN WINDOW then opens.
Page 57

User Manual NAVIGON Mobile Navigator
Routes with legs - 55 -
6.3.3 Starting navigation
You have calculated and displayed a route. (see chapter
"
Calculating and displaying the route", page 54)
The route is calculated based on the so called route profile.
1. Tap on the Options
button and select the Route Profile option
if you would like to view this route profile or change it.
Note: The changes made to the route options will also affect
any subsequent navigation.
Information about changing individual route profile settings
can be found in chapter "
Route Profile" on page 91.
2. Tap on the Show Turn-by-Turn List button if you would like to
display and view a detailed description of the calculated route
in the form of a list.
For more detailed information please refer to "
Turn-by-Turn
List" on page
74.
3. Tap on the Start Navigation
button or simply start driving.
No GPS tracking
The following message appears if the GPS-signal is not sufficient:
"No GPS signal available at present. Would you like to use the
last known position?"
You have the following options:
Ù Tap on the OK
button. The route will be calculated using the
last known position as a starting point. As soon as GPStracking is sufficient for determining the position, the route
will be recalculated and you can begin navigation.
Ù Tap on the Cancel
button. The MAIN SCREEN opens. Your
destination is stored in the L
AST DESTINATIONS list.
Page 58

User Manual NAVIGON Mobile Navigator
- 56 - Navigation
Page 59

User Manual NAVIGON Mobile Navigator
Working with the Map - 57 -
7 Working with the Map
Topics covered in this chapter:
7.1 Map material page 58
Copying a navigation map to the memory card
7.2 Map in the Preview mode page 58
7.3 Map in the Navigation mode page 61
7.4 Map in the Destination search mode page 65
Page 60
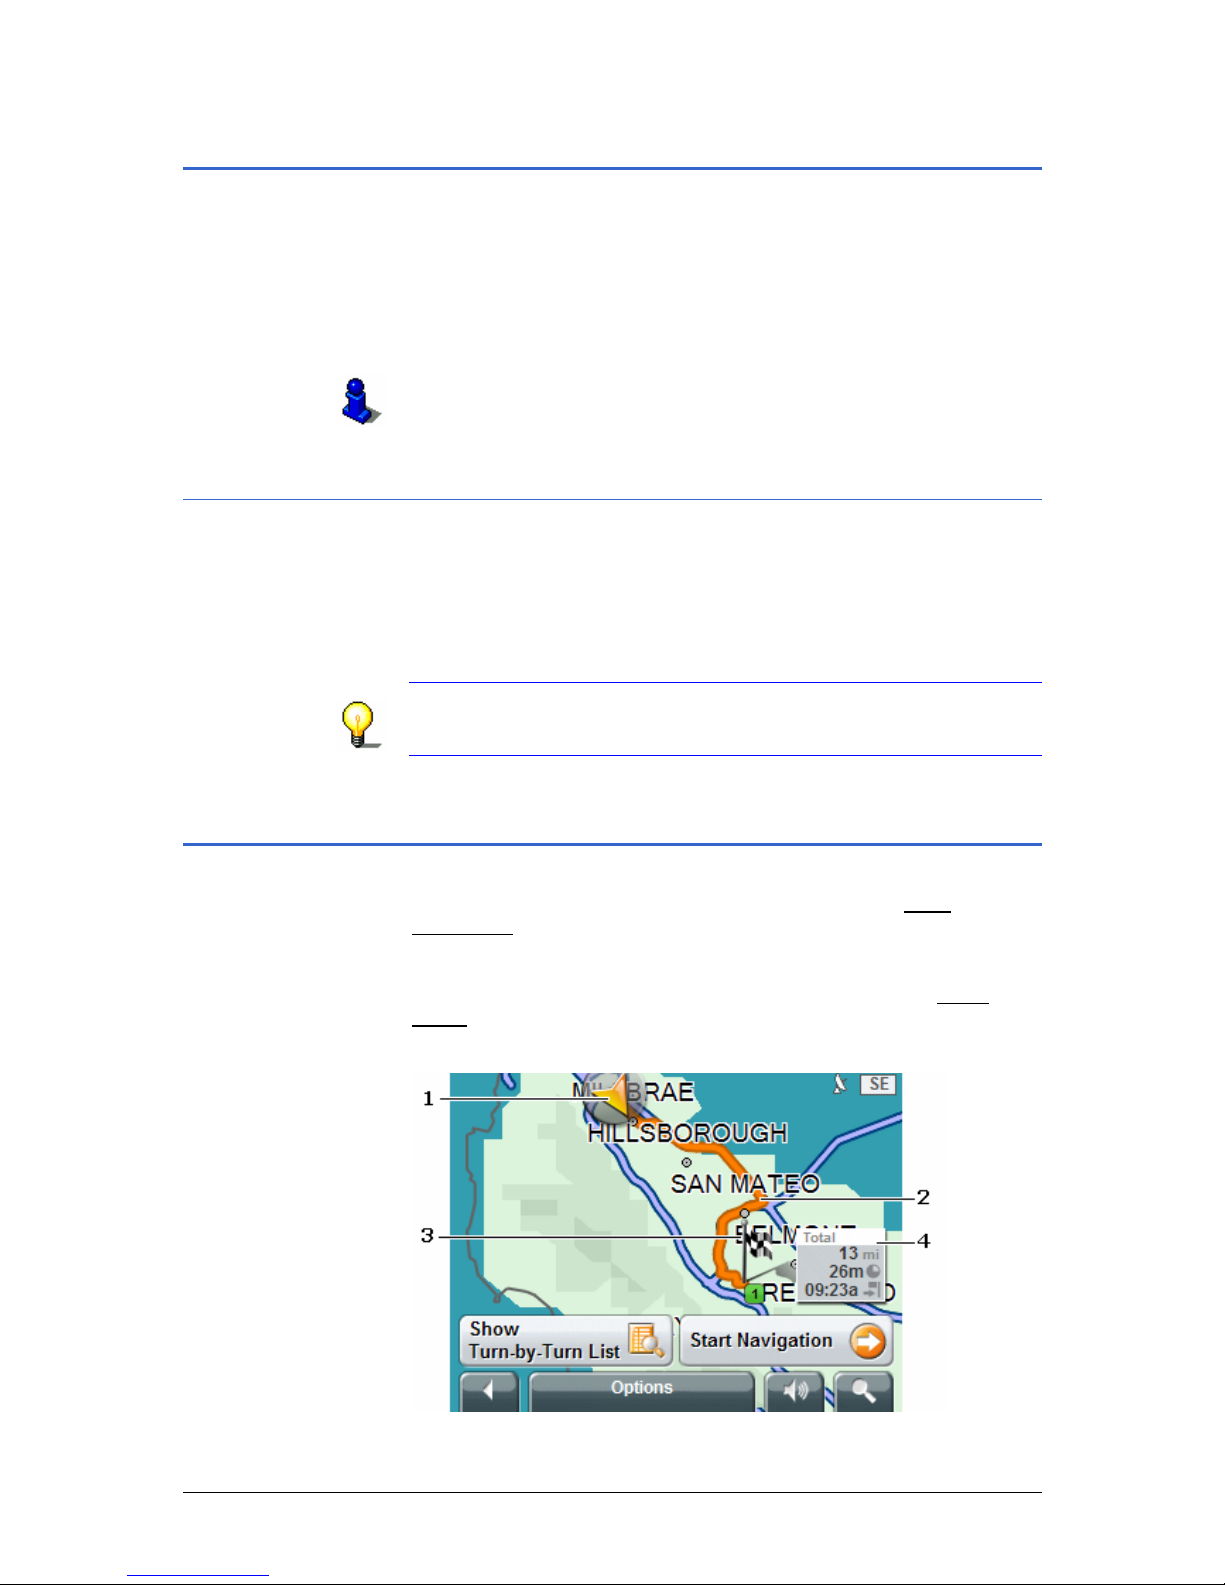
User Manual NAVIGON Mobile Navigator
- 58 - Map material
7.1 Map material
Mobile Navigator can only work with one map at a time even if
you have stored several navigation maps on the memory card of
your device.
You can see which map you are currently using from the C
URRENT
MAP settings window. There it is also possible to select a different
map.
Refer to chapter "
Current Map" on page 89 for more information.
7.1.1 Copying a navigation map to the memory card
You will find more navigation maps on the product DVD of
NAVIGON Mobile Navigator. If you would like to copy one of
these maps to the memory card, then proceed as follows:
Insert the product DVD into the DVD drive of your computer.
The Installer Tool opens. Follow the program’s instructions.
Note: If the Installer Tool doesn’t start, open Windows
Explorer. Select the DVD drive directory and double click on the
"Start.exe" file.
7.2 Map in the Preview mode
You have specified a destination and tapped on the Start
Navigation button.
- OR –
You have planned or loaded a route and tapped on the Show
Route button.
The map opens in Preview mode. The entire route is displayed.
Page 61

User Manual NAVIGON Mobile Navigator
Working with the Map - 59 -
Description
1
A triangle in orange depicts the current position.
If you display a planned or loaded route and the
designated starting point is not the same as your
current position, then the current position may not be
displayed in the preview.
2
The route is highlighted in orange.
3
The destination is marked with a small flag.
The starting point and each stop on the route will be
marked with a little flag if you display a planned or
loaded route.
4
You will see the entire route in a small info box
including the estimated trip time and the estimated
time of arrival.
If you display a route this information is displayed for
each stop on the route.
Note: This information can be faded in or out. Refer to chapter
"Configuring Mobile Navigator" on page 83.
Tap on the Show Turn-by-Turn List
button if you would like to
display and view a detailed description of the calculated route.
For more detailed information please refer to "
Turn-by-Turn List"
on page
74.
Tap on the Start Navigation
button to start the trip.
Displaying planned or loaded routes may result in the route being
recalculated. Your current location will be used as the starting
point for the calculation. The navigation will initial ly guide you to
the first designated stop on the route.
Tap on the
(Volume) button to adjust the volume of the
navigation instructions. (refer to chapter "
Volume", page 16)
Tap on the
(Destination search) button to display the map
in the Destination search mode.
Refer to chapter "
Map in the Destination search mode" on
page
65 for more information.
Tap on the
(Back) button to return to the window that was
previously open.
Page 62

User Manual NAVIGON Mobile Navigator
- 60 - Map in the Preview mode
Options of the map in the Preview mode
The options of the map in the Preview mode offer the following
functions:
Option Description
Simulation
Simulates a navigation based on the
displayed route. This simulation can also
be carried out without GPS-tracking.
However, simulation is restricted to
routes with a max. distance of 60 mi.
Save Route
Opens a window where you can store the
name of the planned route under a
specific name.
Refer to chapter "
Storing routes" on page
52 for more information.
This option is then only available if a
planned route is shown on the map.
Settings
Opens the S
ETTINGS window. This is
where you can configure the navigation
system. Refer to chapter "
Configuring
Mobile Navigator" on page
83 for more
information.
GPS status
Opens the GPS
STATUS window. Here you
can view the details regarding GPStracking. You can also store data
regarding your current location.
Refer to chapter "
GPS status" on page 70
for more information.
Traffic
Opens the T
RAFFIC INFORMATION window
where the available messages are listed.
For more detailed information, please
refer to chapter "
TMC (Traffic
Information)" on page
76.
Route Profile
Opens the
ROUTE PROFILE window. There
you can view the options for route
planning and if necessary change them.
Refer to chapter "
Route Profile" on
page
91 for more information.
Page 63

User Manual NAVIGON Mobile Navigator
Working with the Map - 61 -
7.3 Map in the Navigation mode
After the route was displayed in the Preview mode, the
navigation is started.
The map opens in the Navigation mode.
The size of the map section you are viewing depends on the
settings and on your speed. Refer to chapter "
Configuring Mobile
Navigator", page
83)
The map changes continuously. Your position can always be seen
at the same place on the screen. Your direction of driving is
always upwards (north).
Description
1
This is where all relevant traffic signs are indicated.
2
This is where any speed limits are indicated.
3
The maneuver following the next maneuver is
displayed in the small arrow field for quick maneuvers
that are carried out in succession.
4
The large arrow field is a schematic depiction of the
next intersection where you must turn. The distance
to this intersection is indicated below.
As you approach the intersection a spot diagram
replaces the distance value:
The closer you get to the intersection the more yellow
points will appear.
Only the arrow indicating the forward direction
appears if no turns are anticipated. Below the arrow is
the distance that indicates how long the route should
be followed.
5
The route is depicted in the color orange.
Page 64
User Manual NAVIGON Mobile Navigator
- 62 - Map in the Navigation mode
Description
6
The height above sea level and the current speed are
shown here.
7
If you navigate a route with various legs, the following
information is shown in the Next field:
Ù Estimated time of arrival at the next route stop
Ù Remaining distance up to the next route stop
Ù Estimated remaining driving time until the next
route point.
8
A triangle in orange depicts your current position on
the map. The section of the map displayed changes
continually. This ensures that your current position
remains centered on the map.
9
The following information is shown in the Total field:
Ù Estimated time of arrival at the destination
Ù Remaining distance up to the destination
Ù Estimated remaining driving time unt il the
destination.
10
The traffic lanes that lead to your destination are
depicted in the color orange.
11
The name of the next route section you will enter is
indicated in the upper street field.
12
The name of the route section where you are currently
located can be seen in the lower street field.
Note: Displaying many of the above mentioned areas can be
configured. A number of displays only work when the
corresponding information is available on the map. Refer to
chapter "
Configuring Mobile Navigator" on page 83 for more
information.
Note: If you tap on the large arrow field then the current route
instruction will be repeated.
Tap on the
(Volume) button in order to adjust the volume
of the navigation instructions. (refer to chapter "
Volume",
page
16)
Tap on the
(Destination search) button to see the map in
the Destination search
mode.
Refer to chapter "
Map in the Destination search mode" on
page
65 for more information.
Exit navigation
Tap on the
(Back) button to exit navigation. A dialog box
will prompt you to confirm.
Page 65

User Manual NAVIGON Mobile Navigator
Working with the Map - 63 -
Map functions in the Navigation mode
Tap on spot on the map when it is in the Navigation mode.
Buttons with various functions are faded in.
Function Description
2D/3D
Switches between 2D and 3D modes. The
mode that is currently set is displayed
with an orang e symbol.
Day/Night
Switches between the display modes
"day" and "night." The mode that is
currently set is displayed with an orange
symbol. (Refer also to chapter "
Basic
Settings", page
85).
Interim Destination
Opens the menu for entering an interim
destination.
The navigation system will then guide you
to this interim destination first.
Thereafter, you can simply continue
navigating to your original destination.
Refer to chapter "
Inserting an interim
destination" on page
72 for more
information.
Skip Route Point
Tap on this button in order to omit the
next route point. The button becomes
inactive if less than 2 route points
remain.
Refer to chapter "
Skipping a leg" on
page
73 for more information.
Block
Tap on this button to ignore the next
route stop on the list. This button is
inactive if less than 2 more route stops
are planned.
Tap on this button again to restore the
blocked off section.
Refer to chapter "
Blocking off a section of
the route" on page
73 for more
information.
POI on Route
Tap on this button if you would like to
display points of interest on your route.
This enables you to find out quickly how
far the next wayside is. Here you may
add one of the displayed destinations as
an interim destination.
Refer to chapter "
POI on Route" on
page
74 for more information.
Page 66

User Manual NAVIGON Mobile Navigator
- 64 - Map in the Navigation mode
Options of the map in the Navigation mode
The options of the map in Navigation mode offer the following
functions:
Option Description
Settings
Opens the S
ETTINGS window. This is
where you can configure the navigation
system. Refer to chapter "
Configuring
Mobile Navigator" on page
83 for more
information.
Route Profile
Opens the
ROUTE PROFILE window. There
you can view the options for route
planning and if necessary change them.
Refer to chapter "
Route Profile" on
page
91 for more information.
GPS status
Opens the GPS
STATUS window. Here you
can view the details regarding GPStracking. You can also store data
regarding your current location.
Refer to chapter "
GPS status" on page 70
for more information.
MP3 Player
Launches the integrated MP3 player of
your navigation device. If you then close
the MP3 player, Mobile Navigator
appears again.
The MP3 player remains on during the
navigation instruction.
Traffic
Opens the T
RAFFIC INFORMATION window
where the available messages are listed.
For more detailed information, please
refer to chapter "
TMC (Traffic
Information)" on page
76.
Page 67

User Manual NAVIGON Mobile Navigator
Working with the Map - 65 -
7.4 Map in the Destination search mode
The map is then always in Destination search mode when the
cross hairs appear on it.
The map does not change while you are driving. North is always
the upward direction.
Description
Zoom Out
: he map section becomes larger but less
detailed.
Zoom In
: The map section becomes smaller but more
detailed.
Zoom Mode
: You can use a pen or your finger to draw
a section of map if this button is active.
Draw the map section from upper left to bottom right.
Thereafter, it will be zoomed on to fit the size of your
screen.
Draw the map section from bottom right to top left to
zoom out of the map.
Pan Mode
: You can use a pen or your finger to change
the displayed section of map if this button is active.
Simply push the map in the desired direction.
Entire Route
: Zooms in on the map to display the
entire route.
Current Position
: Positions the displayed map section
so that the current location is in the center.
1. Tap on the point that you would like to navigate to.
The destination that you have selected appears in the cross
hairs.
The geographical coordinates of the destination and the
corresponding address are shown in the Selected Destination
field in the lower third of the screen.
Page 68

User Manual NAVIGON Mobile Navigator
- 66 - Map in the Destination search mode
2. Tap on the
(OK) button.
The D
ESTINATION ON MAP window opens. The detailed address
data of the selected destination is displayed in the upper lefthand corner.
Buttons with various functions are displayed.
Function Description
Take Me There
Starts the navigation from the selected
stop. If a different navigation is running it
will be aborted. You can start navigating
to your original destination however via
the L
AST DESTINATIONS list.
Interim Destination
Places the selected stop as an interim
destination. The navigation system will
then guide you to this interim destination
first. Thereafter, you can simply continue
navigating to your original destination.
This function is only active when you are
currently navigating.
Refer to chapter "
Inserting an interim
destination" on page
72 for more
information.
Set as Destination
This function is only available if you are
currently navigating.
Tap on this button if you would like to
add the selected point as the last point on
the route.
The system will start navigating to this
point once you have reached your current
destination and no other route has been
planned.
Save
Opens the S
AVE DESTINATION AS...
window. You can enter a name for storing
the designated point in the F
AVORITES
list.
Refer to chapter "
Storing a destination"
on page
42 for more information.
Search Nearby
Opens the POI
NEARBY window. Here you
can search for destinations near the
designated point.
Refer to chapter "
Nearby points of
interest" on page
29 for more
information.
Tap on the
(Volume) button to adjust the volume of the
navigation instructions. (refer to chapter "
Volume", page 16)
Tap on the
(Destination search) button to exit the
Destination search mode. This will return you to the window
that you started from.
Page 69

User Manual NAVIGON Mobile Navigator
Working with the Map - 67 -
Tap on the
(Back) button in order to return to the MAIN
WINDOW. You will be prompted to confirm exiting navigation if
one is currently in progress.
Options of the map in the Destination search mode
The options of the map in the Destination search mode offer
the following functions:
Option Description
Settings
Opens the S
ETTINGS window. This is
where you can configure the navigation
system. Refer to chapter "
Configuring
Mobile Navigator" on page
83 for more
information.
Route Profile
Opens the
ROUTE PROFILE window. There
you can view the options for route
planning and if necessary change them.
Refer to chapter "
Route Profile" on
page
91 for more information.
GPS status
Opens the GPS
STATUS window. Here you
can view the details regarding GPStracking. You can also store data
regarding your current location.
Refer to chapter "
GPS status" on page 70
for more information.
MP3 Player
Launches the integrated MP3 player of
your navigation device. If you then close
the MP3 player, Mobile Navigator
appears again.
The MP3 player remains on during the
navigation instruction.
Traffic
Opens the T
RAFFIC INFORMATION window
where the available messages are listed.
For more detailed information, please
refer to chapter "
TMC (Traffic
Information)" on page
76.
Page 70

User Manual NAVIGON Mobile Navigator
- 68 - Map in the Destination search mode
Page 71

User Manual NAVIGON Mobile Navigator
Useful Functions - 69 -
8 Useful Functions
Topics covered in this chapter:
8.1 Information about the destination page 70
8.2 GPS status page 70
8.3 Inserting an interim destination page 72
8.4 Skipping a leg page 73
8.5 Blocking off a section of the route page 73
8.6 POI on Route page 74
8.7 Turn-by-Turn List page 74
Blocking route sections
Canceling blocked routes and restoring the original route
8.8 TMC (Traffic Information) page 76
Configuring the message display
TMC Settings
Managing TMC information
Tuning Mode
Page 72

User Manual NAVIGON Mobile Navigator
- 70 - Information about the destination
Most of the functions described here are only practical when GPS-
tracking is sufficient to determine your current position. This is
indicated by the
(GPS ready) symbol.
8.1 Information about the destination
Additional information is available and stored in the navigation
system database for destinations that you specify.
A telephone number is stored for many of the restaurants. You
can use this number to call the restaurant and reserve a table.
1. Specify a destination as described in chapter "
Specifying a
new destination" on page
27.
- OR -
Specify a destination as described in chapter "
Selecting a
stored destination" on page
35.
Do not tap on the Start Navigation
button!
2. Tap on the
(Destination Info) button.
The D
ESTINATION INFO window opens. It contains all
information about the specified destination that is stored in
the navigation system database.
Tap on the
(Show on Map) button to show the destination on
the map.
Tap on the Cancel
button to close the DESTINATION INFO window
again.
8.2 GPS status
You will find an overview of the data that was calculated by the
navigation system from the received GPS-signals on the GPS
STATUS
window.
The M
AIN WINDOW is opened.
- OR –
The map is opened.
3. Tap on the Options
button.
The options list opens.
4. Tap on the GPS status
option,
The GPS
STATUS window opens.
Page 73

User Manual NAVIGON Mobile Navigator
Useful Functions - 71 -
The following information are displayed:
Field Meaning
GMT:
Greenwich Mean Time: The time of day
in London. If you are in another time zone,
the time at your current location will not
correspond with GMT.
Longitude:
Latitude:
The coordinates of your current position.
The letters have the following definitions:
W: Western longitude
E: Eastern longitude
N: Northern latitude
S: Southern latitude
Altitude:
Altitude above sea level. The signals from
at least 4 GPS-satellites are required in
order to calculate the altitude.
Direction:
Shows the direction in which you are
currently traveling.
Satellites:
The number of GPS-satellites whose signals
are currently being received. The signals
from at least 3 satellites are required for
calculating the current location.
Speed: Indicates your current speed.
Current Position
Shows your current location. If no address
can be detected, then the geographical
coordinates will be shown.
Storing the current location
The current location can be stored in the FAVORITES list.
1. Tap on the Save Position
button.
The S
AVE DESTINATION AS... dialog box opens. The cursor
blinks in the Name
field.
2. Enter a name for the destination.
3. Indicate whether you would like to designate the current
position as your home address.
4. Tap on the Save
button.
The destination is now stored in the F
AVORITES list. The dialog
box closes.
Page 74

User Manual NAVIGON Mobile Navigator
- 72 - Inserting an interim destination
8.3 Inserting an interim destination
You can add an interim destination at any time during the
navigation. The navigation system will then guide you to this
interim destination first. Thereafter, you can simply continue
navigating to your original destination.
If the map is opened in the Navigation mode, then proceed as
follows:
1. Tap any spot on the map.
2. Tap on the Interim Destination
button.
The I
NTERIM DESTINATION menu opens.
3. Specify a destination as described in chapter "
Specifying a
new destination" on page
27.
4. Tap on the Add
button.
The route is recalculated. The interim destination is activated
as the next stop on the route.
If you are navigating and the map is opened in Destination
search mode, then proceed as follows:
1. Tap on the point on the map that you would like to specify as
an interim destination.
Note: Please refer to chapter "
Map in the Destination search
mode" on page 65 for information on how to change the map
view so that your destination can easily be seen.
The destination that you have selected appears in the cross
hairs.
The geographical coordinates of the destination and the
corresponding address are shown in the Selected Destination
field in the lower third of the screen.
2. Tap on the
(OK) button.
The D
ESTINATION ON MAP window opens. The detailed address
data of the selected destination is displayed in the upper lefthand corner.
3. Tap on the Interim Destination
button.
The route is recalculated. The interim destination is activated
as the next stop on the route.
Page 75

User Manual NAVIGON Mobile Navigator
Useful Functions - 73 -
8.4 Skipping a leg
This function is only available when you are navigating and have
at least 2 stops on the route ahead of you.
The map is opened in Navigation mode.
Use this function if you want to skip the next stop on the route.
Example: You have planned a route from your office to:
"Company A" and then to "Company B" and are already on your
way. Before you arrive at "Company A," you are informed that
the visit has been canceled.
Tap on the Skip Route Point
button.
The route is recalculated. The second route stop (in this example
"Company B") will be the next destination navigated to. .
8.5 Blocking off a section of the route
Tap this button to block off a section of the route. For example,
you have heard about a traffic jam in this area on the radio and
now would like to calculate a route around this area.
Note: Blocking off a section of the route only applies to the
current navigation.
The map is opened in Navigation mode.
1. Tap on any point on the map.
2. Tap on the Block
button.
The B
LOCK menu opens.
3. Enter the number of kilometers/miles you would like to block
off starting from your current position.
The route is recalculated. The blocked off section will be
avoided. It's marked on the map in red.
Unblocking the route section
1. Tap on any point on the map.
2. Tap on the Cancel Block
button.
The route section is reactivated. The route is recalculated. The
unblocked route section can be used again during navigation.
Page 76

User Manual NAVIGON Mobile Navigator
- 74 - POI on Route
8.6 POI on Route
At any time during the navigation process it is possible to display
points of interest located on your route from three specific
categories. The enables you to quickly find out how far the next
wayside is. Then you can add this wayside to your route as an
interim destination.
Note: Points of interest from the same categories that are also
available in the Direct Access will be shown. You can configure
these categories.
Refer to chapter "
Categories for quick link and for POI on Route"
on page
90 for more information.
The map is opened in Navigation mode.
1. Tap on any point on the map.
2. Tap on the POI on Route
button.
The POI
ON ROUTE window opens. It shows from each of the
three categories the two next points of interest that are
located on or in the vicinity of your route.
The points of interest are arranged according to distance.
Specifying one of the points of interest as an interim destination
If you wish to drive to one of the displayed points of interest,
then tap on the
(Interim Destination) button to the right
alongside its entry in the list.
The route is recalculated. The specified point of interest is taken
as the next route point.
8.7 Turn-by-Turn List
You can view a detailed description of the route prior to starting
navigation. This list displays all of the driving instruction s in table
form. Here it is also possible to block out individual route
sections. In this case a different route will be calculated.
You have specified a destination and tapped on the Start
Navigation button.
- OR You have planned or loaded a route and tapped on the Show
Route button.
Page 77

User Manual NAVIGON Mobile Navigator
Useful Functions - 75 -
1. Tap on the Show Turn-by-Turn List button.
2. The T
URN-BY-TURN LIST window opens.
The following information is displayed for each driving instruction.
Function
1
Schematic depiction of the next intersection where you
must turn
2 Distance up to the intersection
3
Name of the next route section that must be driven /
name of the route section you are currently in
4
The Allow / Forbid
button is located next to each route
section. It indicates whether you would like to drive the
next route section or not.
(Allow): The respective section may be included in
the route.
(Forbid): The respective section may not be included
in the route.
8.7.1 Blocking route sections
1. Tap on the route section that you do not want to drive.
The Evade / Ignore
button shows the symbol (Forbid).
2. Tap on the button
(Modify Route).
The navigation system calculates an alternative route in order
to drive around the route sections. The new driving
instructions are shown in the T
URN-BY-TURN LIST window.
3. Tap on the button
(Back), to close the TURN-BY-TURN
LIST window again.
The alternate route is shown on the map.
Page 78

User Manual NAVIGON Mobile Navigator
- 76 - TMC (Traffic Information)
4a Tap on the Start Navigation button if you would like to use
the alternate route.
- OR –
4b Tap on the Show Turn-by-Turn List
button if you would like to
undo the changes or block off other sections of the route.
8.7.2 Canceling blocked routes and restoring the original
route
1. Go to the TURN-BY-TURN LIST window and tap on the Options
button.
The list of options opens.
2. Tap on the Calculate the original route
option.
The following message appears in a dialog box:
"Would you like to discard the changes?"
3. Tap on the Yes
button.
The blocked route is canceled. The route is recalculated. The
original driving instructions are displayed in t he T
URN-BY-
T
URN LIST window.
4. Tap on the button
(Back) to close the TURN-BY-TURN
LIST window again.
The route is shown on the map.
5. Tap on the Start Navigation
button to start driving on the
original route.
8.8 TMC (Traffic Information)
Note: TMC can not be used in the Americas. Please login to our
website at www.navigonusa.com for information about updates.
If your device has an integrated TMC-receiver, or if you have
connected an external TMC receiver, the navigation sy stem will
have the latest traffic information available, and can, where
necessary, dynamically change your route in order to avoid a
traffic jam, for example. The current valid traffic reports can be
displayed.
1. Tap the Options
button in the MAIN WINDOW.
The options list opens.
2. Tap the Traffic
button.
Page 79

User Manual NAVIGON Mobile Navigator
Useful Functions - 77 -
The TRAFFIC INFORMATION window opens.
Explanation of symbols
c
The Traffic information button shows what kinds of traffic
messages are listed and the number of messages
received.
Tap the button to select which traffic messages should be
displayed.
For detailed information, please refer to chapter
"
Configuring the message display", page 78.
d
The following information is displayed for each traffic
message on the list.
Ù On route
: distance from current location.
Not on Route
: message number.
Ù Country (in North America; state or province) in which
the reported traffic hindrance occurs.
Ù Street in which the hindrance occurs.
Ù At least one traffic symbol which depicts the type of
traffic hindrance.
Tap a message to display detailed information.
e
The Evade / Ignore button next to each message shows
whether or not an alternative route is being calculated
which will avoid the relevant traffic obstruction.
(Activated: Evade): An alternative route avoiding the
traffic obstruction is being calculated.
(Deactivated: Ignore): The traffic obstruction will be
ignored by the navigation system when calculating the
route.
If the list is long, you can toggle using the
(Up) and
(Down
) buttons.
Tap the
(Back) button to close the TRAFFIC INFORMATION
window.
Page 80

User Manual NAVIGON Mobile Navigator
- 78 - TMC (Traffic Information)
Options of the Traffic Information window
The options of the TRAFFIC INFORMATION screen offer the
following functions:
Option Description
TMC Settings
Opens the I
NFORMATION SELECTION
window in which you can configure the
reception of messages and their influence
on the route calculation.
For detailed information, please refer to
chapter "
TMC Settings", page 78.
GPS status
Opens the GPS
STATUS window. Here you
can see details regarding GPS reception.
You can also save data regarding your
current location.
For detailed information, please refer to
chapter "
GPS status" on page 70.
8.8.1 Configuring the message display
1. Tap the TRAFFIC INFORMATION button in the Traffic
information window.
A list with various options opens.
The following options are available:
Ù On route
: shows all messages concerning your route. If
navigation is not in operation, no message will be shown.
Ù Not on route: all
: shows all the messages that do not
concern the calculated route.
Ù Not on route: obstructions
: shows messages about traffic
obstructions which are not on the calculated route.
Ù Not on route: traffic jams
: shows messages about traffic
jams which are not on the calculated route.
Ù Not on route: weather warnings
: shows messages about
storms which are not on the calculated route.
2. Tap your desired option.
3. Tap the OK
button.
8.8.2 TMC Settings
1. Tap the Options button in the TRAFFIC INFORMATION window.
The options list opens.
2. Tap the TMC Settings
button.
The TMC
SETTINGS window opens.
Page 81

User Manual NAVIGON Mobile Navigator
Useful Functions - 79 -
In the TMC SETTINGS window you can set and configure the
TMC-sender, this will determine the effect that the reception
of a message concerning your route will have on its
calculation.
Setting Description and possible settings
Tuning Mode
Determine the settings of the station
chosen to receive traffic messaging.
Automatically
Hold station
Hold frequency
For detailed information, please refer to
chapter "
Tuning Mode", page 80.
Factory-setting is Automatically
.
Recalculate Route
Determine how new messages concerning
your route should be managed.
Automatically
: An alternative route avoiding
the traffic obstruction will be calculated.
On request
: The message is displayed. In
this window you can determine whether
or not an alternative route should be
calculated. For detailed information,
please refer to chapter "
Managing TMC
information", page
79.
This setting only takes effect if the route
profile has been set to consider traffic
jams. See "
Route Profile", on page 91).
Factory-setting is Automatically
.
3. Select your desired settings.
4. Tap the Done
button to close the TMC SETTINGS window.
8.8.3 Managing TMC information
You can configure the TMC settings to determine how TMC
information concerning your route should be managed.
For information on how to determine the settings, please refer to
"
TMC Settings", page 78.
Note: This setting only takes effect if the route profile h a s been
set to consider traffic jams. For detailed information, please refer
to chapter "
Route Profile", page 91.
Page 82

User Manual NAVIGON Mobile Navigator
- 80 - TMC (Traffic Information)
Recalculate Route: Automatically
If a reported obstruction concerns your route, the system will
calculate an alternative route automatically. The following
message appears while the system is calculating the deviation.
"The route is being recalculated due to traffic information
update."
You can reset the alternative to the original route at any time. To
do this, open the T
RAFFIC INFORMATION window and tap the
(Ignore) symbol next to the relevant message.
Recalculate Route: On request
If a reported obstruction concerns your route, the MESSAGE
window opens. It displays the full message.
Ù Tap the Evade / Ignore
button in order to take traffic
obstructions on your route into consideration.
The navigation system calculates an alternative route in order
to avoid the obstruction.
Ù Tap the same button again to ignore the obstruction reported
on your route.
8.8.4 Tuning Mode
1. Tap the Options button in the TRAFFIC INFORMATION window.
The options list opens.
2. Tap the TMC Settings
button.
The TMC
SETTINGS window opens. The name, frequency, and
the reception quality of the current station are displayed at
the top of the screen.
3. In the Tuning Mode field, select one of the following settings
Automatically
, Hold station or Hold frequency.
In Automatically
mode, the system searches for a station with
good reception.
4. Tap the arrows in the Station field if you want to receive an
alternative station.
As soon as an alternative station has been found, its name
and frequency will be displayed.
In Hold station
mode, the TMC-receiver will try to find better
reception of the station on another frequency.
4. Tap the arrows next to the Station field if you want to
receive an alternative station.
As soon as an alternative station has been found, its name
and frequency will be displayed. The station will now be held.
Page 83

User Manual NAVIGON Mobile Navigator
Useful Functions - 81 -
In Hold frequency mode, the TMC-receiver will not try to find
another station or another frequency.
4. Tap the arrows next to the Station field in order to alter the
frequency in steps of 0.1 MHz.
If a station can be received on the frequency currently tunedin, its name will be displayed.
5. Tap the Done
button to close the TMC SETTINGS window.
Page 84

User Manual NAVIGON Mobile Navigator
- 82 - TMC (Traffic Information)
Page 85

User Manual NAVIGON Mobile Navigator
Configuring Mobile Navigator - 83 -
9 Configuring Mobile Navigator
Topics covered in this chapter:
9.1 Opening the Settings window page 84
9.2 Basic Settings page 85
9.3 Current Map page 89
9.4 POI page 90
Categories for quick link and for POI on Route
Indications on the map
9.5 Route Profile page 91
Page 86

User Manual NAVIGON Mobile Navigator
- 84 - Opening the Settings window
9.1 Opening the Settings window
The SETTINGS window is the starting point for all adaptations that
you can use to set up Mobile Navigator in accordance with your
personal requirements.
The M
AIN SCREEN is open (refer to chapter "Opening the main
window", page
27).
1. Tap on the Options
button.
The options list opens.
2. Tap on the Settings
option.
The S
ETTINGS window opens.
The S
ETTINGS window has several buttons. Tap on a button in
order to open the respective settings window.
There are four settings windows: C
URRENT MAP, POI, BASIC
SETTINGS and ROUTE PROFILE.
The settings of the individual windows are distributed over
several screens. You can leaf through them by using the
(To
the Left) and (To the Right) buttons.
Some settings can only accept two or three different values. You
can see which settings these are from the
(Toggle) button.
All possible values are visible. The currently valid value is
highlighted in black.
1. Tap on the
(Toggle) button in order to toggle between
the possible values.
Some settings can accept lots of different values. You can see
which settings these are from the
(List) button. The
currently valid value is visible.
1. Tap on the
(List) button.
A list of possible values opens. The currently valid value is
selected.
If the list is long, you can move within it using the
(Up)
and
(Down) buttons.
2. Tap on the desired value. It is now selected.
3. Tap on the OK
button.
The list closes. The new value is displayed.
Page 87

User Manual NAVIGON Mobile Navigator
Configuring Mobile Navigator - 85 -
You can close settings windows in two ways:
Ù Tap on the Done
button. Any changes you have made will be
accepted.
Ù Tap on the Cancel
button. Any changes you have made will
not be accepted.
The S
ETTINGS window opens again.
Options of the Settings window
The options of the SETTINGS window offer the following functions:
Option Description
Product Information
Opens a window in which you obtain
information about the installed software
version. You can also see the navigation
system's time here.
Factory Settings
Opens a window in which you can reset
all the settings back to the factory
settings.
9.2 Basic Settings
In the BASIC SETTINGS window, settings are carried out that
influence the appearance and the functionality of the map and
the navigation software.
You can carry out the following settings on the B
ASIC SETTINGS
window:
Setting Meaning and possible values
Navigation View
Select your default map view for
navigation.
2D
: Traditional map view.
3D
: Driver's view.
The factory default is 3D
.
3D Autozoom
Determine if autozoom should (Yes
) or
shouldn't (No
) be activated for the map in
3D view.
With autozoom, the map scale changes
depending upon your speed: If you drive
slowly, gets smaller. If you drive faster, the
scale is larger.
The factory default is Yes
.
Page 88

User Manual NAVIGON Mobile Navigator
- 86 - Basic Settings
Setting Meaning and possible values
2D Autozoom
Determine if autozoom should (Yes
) or
shouldn't (No
) be activated for the map in
2D view.
With autozoom, the map scale changes
depending upon your speed: If you drive
slowly, gets smaller. If you drive faster, the
scale is larger.
The factory default is Yes
.
Zoom Factor
Determine how autozoom should be
activated by default for the map in 2D
view.
Smaller Map Section
Standard
Larger Map Section
With autozoom the zoom changes
depending upon your speed: If you drive
slowly, the scale gets smaller. If you drive
faster, the scale is larger.
The more intense the autozoom, the
smaller the scale of the map.
The factory default is Standard
.
3D Map: Show
Street Names
Determine whether you want street names
displayed (Yes
) or not (No) when the map
is in 3D view.
The factory default is No
.
2D Map: Show
Street Names
Determine whether you want street names
displayed (Yes
) or not (No) when the map
is in 2D view.
The factory default is Yes
.
2D Map:
Orientation
Determine the default map orientation
when the map is in 3D view.
In Direction of Travel
: The direction in which
you're driving appears at the top of the
screen. This view is very suitable for
navigation.
Always North
: Magnetic north appears at
the top of the screen. This alignment
corresponds to a printed map. This view
is suitable to get an overview of a
specific area.
The factory default is In Direction of Travel
.
Show Altitude and
Speed
Determine whether you want details like
altitude and current speed displayed on the
map (Yes
) or not (No).
The factory default is No
.
Display Compass
Determine whether a small compass should
(Yes
) or shouldn't (No) be displayed during
navigation.
The factory default is Yes
.
Page 89

User Manual NAVIGON Mobile Navigator
Configuring Mobile Navigator - 87 -
Setting Meaning and possible values
Show Remaining
Distance
Determine whether you want remaining
distance to destination and, if applicable,
interim destination(s) displayed on the map
(Yes
) or not (No).
The factory default is Yes
.
Show Duration of
Journey
Determine whether you want remaining
travel time to destination and, if applicable,
interim destination(s) displayed on the map
(Yes
) or not (No).
The factory default is No
.
Show Time of
Arrival
Determine whether you want arrival time at
destination and, if applicable, interim
destination(s) displayed on the map (Yes
)
or not (No
).
The factory default is Yes
.
Info When
Crossing Borders
Determine whether you want local speed
restrictions displayed (Yes
) or not (No)
when crossing a national or country border.
The factory default is Yes
.
Show Signs
Determine whether during a navigation you
want highway signposts displayed on the
map (Yes
) or not (No).
The factory default is Yes
.
Note: This display depends on the
information being available in the map
material that is currently being used. This is
not always the case on all streets.
Show Lanes
Determine whether during a navigation, the
preferred lane should (Yes
) or shouldn't
(No
) be displayed.
The factory default is Yes
.
Note: This display depends on the
information being available in the map
material that is currently being used. This is
not always the case on all streets.
Page 90

User Manual NAVIGON Mobile Navigator
- 88 - Basic Settings
Setting Meaning and possible values
Show Speed Limits
Select if or how you want highway speed
limits displayed.
Yes
: Speed limits will be shown.
Only if exceeding
: Speed limits will only be
shown if they are exceeded.
No
: Speed limits will not be shown.
The factory default is Yes
.
Note: This display depends on the
information being available in the map
material that is currently being used. This is
not always the case on all streets.
Attention! The information in the map
material could be incorrect on account of
sudden changes (construction sites etc.)!
The traffic situation and the signposts on
site have priority over the information given
by the navigation system.
Warnings Within
Urban Areas
Determine the excess speed at which you
would like to be warned in populated areas.
The factory default is 5 mph too fast
.
Warnings Outside
Urban Areas
Determine the excess speed at which you
would like to be warned outside populated
areas.
The factory default is 10 mph too fast
.
Warn Against
Certain Speed
Limits
Determine whether you should (Yes
) or
shouldn't (No
) be warned of speed
restrictions that apply in special
circumstances (rain, snow, certain times of
day, etc.).
The factory default is Yes
.
Menu Animation
Determine whether opening and closing
menus should (Yes
) or shouldn't (No) be
animated.
The factory default is Yes
.
Distance Unit
Determine whether distances should be
shown Kilometers
or in Miles.
The factory defaults depend on the
language in which you are operating the
software.
Time Format
Determine whether times should be shown
in 12h (am/pm)
or in 24h format.
The factory defaults depend on the
language in which you are operating the
software.
Coordinate Format
Specify whether decimal coordinates (e.g.
16,5425°) or coordinates in minutes and
seconds (e.g. 16°32'33'') should be
displayed.
Page 91

User Manual NAVIGON Mobile Navigator
Configuring Mobile Navigator - 89 -
Setting Meaning and possible values
Brightness Day
Select a degree of brightness (1
to 8) for
the display in "day" mode.
The factory default is 8
.
Brightness Night
Select a degree of brightness (1
to 8) for
the display in "night" mode.
The factory default is 1
.
Speed-Dependent
Volume
Determine whether you want the volume to
automatically increase as your speed
increases.
No
: The volume is not controlled in
dependence on the speed.
Low amplification
: The volume increases
slightly in accordance with an increase in
speed.
High amplification
: The volume increases
considerably in accordance with an
increase in speed.
The factory default is No
.
Delayed Speech
Output
If you have connected the navigation
device to the radio mute input of your car
radio, your radio may not reduce its volume
quickly enough. Delay speech output
slightly to avoid audio overlap.
The factory default is No
.
Show Demo
Specify the time interval after which a
product demo appears in cases where the
navigation system is not being used.
The factory default is After 30 sec.
9.3 Current Map
The CURRENT MAP window shows which map the navigation
system is currently using.
If several navigation maps are available on the currently inserted
memory card, then you can select a different map.
1. Tap on the map's name.
A list of all the available maps opens. If the list is long, you
can move within it using the
(Up) and (Down)
buttons.
2. Tap on the map you wish to use.
3. Tap on the OK
button.
The C
URRENT MAP window opens again. The new map is
entered.
Page 92

User Manual NAVIGON Mobile Navigator
- 90 - POI
Ù Tap on the Done button. Any changes you have made will be
accepted.
Ù Tap on the Cancel
button. Any changes you have made will
not be accepted.
9.4 POI
The POI window shows which categories are available on the
three buttons of the quick link in the N
EW DESTINATION menu .
These categories are also shown if you execute the POI on Route
function during navigation.
Also, you can set which categories of points of interest are to be
displayed on the map.
9.4.1 Categories for quick link and for POI on Route
1. Tap on the category you wish to change. (Direct Access 1,
Direct Access 2
, Direct Access 3)
The list of categories opens. You can move through them by
using the
(Up) and (Down) buttons buttons.
2. Tap on the category that should be available in the quick link
and for the POI on Route
function.
3. Tap on the OK
button.
The POI window opens again. The new category is entered in
the respective field.
Note: The following categories are already set as factory
defaults:Gas station, Parking, Restaurant.
9.4.2 Indications on the map
1. Tap on the Categories Shown button.
The list of categories opens. You can move through them by
using the
(Up) and (Down) buttons.
2. Select the categories that you want to be displayed on the
map.
3. Tap on the OK
button.
The POI window opens again.
Page 93

User Manual NAVIGON Mobile Navigator
Configuring Mobile Navigator - 91 -
9.5 Route Profile
In the ROUTE PROFILE window, settings are carried out that
influence the appearance and the functionality of the map and
the navigation software.
You can carry out the following settings on the R
OUTE PROFILE
window:
Setting Meaning and possible values
Speed Profile
Determine your means of transport. This
setting is important for calculating route
and arrival times.
Fast car
Standard car
Slow car
Motorcycle
: Bendy routes are preferred.
Truck
: Avoid through streets as much as
possible.
Bicycle
: One-way streets are often
inapplicable to cyclists.
Pedestrian
: Traffic regulations that apply
only to vehicles are not taken into
consideration.
Type of Route
Establish which sort of route should be
calculated.
Fast route
: calculates the quickest route for
the set speed profile.
Optimum route
: Calculates the quickest
route if the detour to be driven is sensible
in terms of the time saved.
Short route
: calculates the shortest route.
Scenic route
: prefers winding streets that
are nice to drive.
Consider Traffic
Information
Determine if the traffic messages are to be
considered in the route calculation (Yes
) or
(No
).
If necessary, you can determine how traffic
messages are to be considered separately.
For detailed instructions, please refer to
chapter "
Managing TMC information", page
79.
Factory-setting is Yes
.
Note: In order to receive traffic messages
(TMC) you will need a TMC-receiver. TMC
may not be available everywhere!
Page 94

User Manual NAVIGON Mobile Navigator
- 92 - Route Profile
Highways
Ferries
Toll Roads
Specify whether you wish to use these
types of roads.
Allow
: Can be used.
Avoid
: Only use if there’s no other option
(e.g. driving to islands).
Forbid
: Cannot be used.
Calculate the Next
Stage
This setting is only effective if you are
navigating a route with several stages.
Specify whether, after reaching a route
point, the next stage should be calculated
automatically (Automatically
) or only upon
request (On request
).
U-turns
Not following a navigation instruction may
result in the route being recalculated.
Specify whether U-turns are allowed in this
case.
Allow
: You will be guided back to the
original route after making a U-turn.
Avoid
: A new route will be calculated to the
destination where hopefully no U-turn will
be required. This route may be
considerably longer than the original route
Page 95

User Manual NAVIGON Mobile Navigator
Index - 93 -
10 Index
2
2D Autozoom.................................. 86
2D Map
Orientation.................................. 86
Show Street Names ...................... 86
3
3D Autozoom.................................. 85
3D Map
Show Street Names ...................... 86
A
Avoid Traffic Jam .......................77, 79
B
Basic Settings................................. 85
Block............................................. 73
Brightness Day ............................... 89
Brightness Night ............................. 89
Button............................................. 9
C
Calculate the Next Stage.................. 92
Cancel Block................................... 73
Consider Traffic Information ............. 91
Conventions followed in this manual .... 6
Coordinate Format .......................... 88
Current Location
Save........................................... 71
Current Location ............................. 71
Current Map................................... 89
D
Data entry ..................................... 19
Delayed Speech Output.................... 89
Destination
Direct Access ............................... 34
Enter an Address.......................... 28
Favorites..................................... 36
From Map.................................... 38
Last Destinations.......................... 35
My Destinations............................ 35
New Destination........................... 27
Search for POI.............................. 29
in a City ................................... 32
Nationwide................................ 31
Nearby..................................... 29
Voice Command ........................... 37
Destination Info .............................. 70
Destinations
Delete.............................. 44, 45, 46
Destination Info............................ 70
Home Address.............................. 44
Manage..................................42, 45
Rename ...................................... 43
Route Planning........................44, 46
Save......................................42, 45
Voice Command ........................... 43
Dialog window ..................................9
Direct Access.................................. 90
Display ............................................9
Display Compass............................. 86
Distance Unit.................................. 88
E
End User License Agreement...............7
Entering data.................................. 19
Entry field ........................................9
EULA ...............................................7
F
Factory Settings.............................. 85
Ferries........................................... 92
G
GPS
Faulty reception............................ 24
Initialize...................................... 25
Signals........................................ 12
GPS status
Current Location........................... 71
GPS status ..................................... 70
H
Highways ....................................... 92
Home address................................. 37
Hotline.............................................8
Page 96

User Manual NAVIGON Mobile Navigator
- 94 - Index
I
Icon ................................................ 9
Info When Crossing Borders.............. 87
Interim Destination ......................... 72
K
Keyboard ....................................... 18
L
License Agreement............................ 7
M
Main screen.................................... 25
Manual
Conventions...................................6
Structure....................................... 6
Symbols........................................ 6
Map
Destination search........................ 65
Navigation................................... 61
Preview....................................... 58
Menu............................................. 20
Menu Animation.............................. 88
Mobile Navigator
Basic Settings.............................. 21
Quit............................................ 24
Show Product Demo...................... 21
Start......................................20, 25
My Destinations .............................. 35
N
Navigation
Block .......................................... 73
Cancel Block................................ 73
Interim Destination....................... 72
No GPS reception ....................39, 55
POI on Route ............................... 74
Skip route point ........................... 73
Skip stage................................... 73
Start........................................... 55
Start Navigation........................... 39
Navigation View.............................. 85
New Destination.............................. 27
O
Options.......................................... 20
P
POI
Direct Access ............................... 34
in a City ...................................... 32
Nationwide .................................. 31
Nearby........................................ 29
POI on Route ............................... 74
Show .......................................... 90
POI on Route.................................. 74
Product Information......................... 85
R
Recalculate Route............................ 79
Route Planning................................ 48
Route points
Delete......................................... 51
Indicate....................................... 50
Order.......................................... 51
Route Profile................................... 91
Routes
Calculate..................................... 54
Delete......................................... 53
Load ........................................... 52
Manage....................................... 51
Planning...................................... 48
Rename ...................................... 53
Route points ................................ 50
Save........................................... 52
Show Turn-by-Turn List...... 39, 55, 59
Simulation................................... 54
Start Navigation ........................... 55
Starting Point............................... 49
S
Safety information........................... 12
Screen.............................................9
Search for POI
Direct Access ............................... 34
in a City ...................................... 32
Nationwide .................................. 31
Nearby........................................ 29
Service ............................................8
Settings
2D Autozoom............................... 86
3D Autozoom............................... 85
Basic Settings .........................21, 85
Brightness Day............................. 89
Brightness Night........................... 89
Calculate the Next Stage................ 92
Consider Traffic Information........... 91
Coordinate Format........................ 88
Current Map................................. 89
Delayed Speech Output ................. 89
Page 97

User Manual NAVIGON Mobile Navigator
Index - 95 -
Direct Access ............................... 90
Display Compass.......................... 86
Distance Unit............................... 88
Factory Settings........................... 85
Ferries ........................................ 92
Highways .................................... 92
Info When Crossing Borders........... 87
Interim Destination....................... 85
Menu Animation ........................... 88
POI ............................................ 90
Product Information...................... 85
Recalculate Route......................... 79
Route Profile................................ 91
Show Altitude and Speed............... 86
Show Demo................................. 89
Show Duration of Journey.............. 87
Show Lanes................................. 87
Show Remaining Distance.............. 87
Show Signs.................................. 87
Show Speed Limits ....................... 88
Show Time of Arrival..................... 87
Speed Profile ............................... 91
Speed-Dependent Volume ............. 89
Time Format................................ 88
TMC............................................ 78
Recalculate Route...................... 79
Tuning Mode............................. 79
Toll Roads ................................... 92
Traffic Information........................ 78
Tuning Mode................................ 79
Type of Route .............................. 91
U-turns....................................... 92
Volume ....................................... 16
Warn Against Certain Speed Limits.. 88
Warnings Outside Urban Areas ....... 88
Warnings Within Urban Areas......... 88
Zoom Factor................................ 86
Show Altitude and Speed.................. 86
Show Demo.................................... 89
Show Duration of Journey................. 87
Show Lanes.................................... 87
Show Product Demo ........................ 21
Show Remaining Distance ................ 87
Show Signs .................................... 87
Show Speed Limits.......................... 88
Show Time of Arrival ....................... 87
Show Turn-by-Turn List.................... 74
Simulation
Quit ............................................ 54
Start........................................... 54
Skip route point.............................. 73
Skip stage...................................... 73
Software keyboard .......................... 18
Speed Profile.................................. 91
Speed-Dependent Volume ................ 89
Structure of the manual ..................... 6
Support ........................................... 8
Symbols used in this manual...............6
T
Take Me Home................................ 37
Terminology
Button ..........................................9
Dialog window................................9
Display..........................................9
Entry field......................................9
Icon..............................................9
Screen ..........................................9
Terms..............................................9
Time Format................................... 88
TMC
Avoid Traffic Jam.....................77, 79
Follow Traffic Information .........77, 79
Information Selection...............77, 78
Recalculate Route......................... 79
Symbols...................................... 18
TMC Settings................................ 79
Tuning Mode...........................79, 80
Toll Roads ...................................... 92
Trade marks.....................................8
Traffic Information
Avoid Traffic Jam.....................77, 79
Follow Traffic Information .........77, 79
Information Selection...............77, 78
Recalculate Route......................... 79
TMC Settings................................ 79
Tuning Mode...........................79, 80
Tuning Mode................................... 79
Turn-by-Turn List
Block .......................................... 75
Cancel Block ................................ 76
Type of Route ................................. 91
U
U-turns.......................................... 92
V
Voice Command.............................. 37
Volume.......................................... 16
W
Warn Against Certain Speed Limits .... 88
Warnings Outside Urban Areas .......... 88
Warnings Within Urban Areas............ 88
Warranty..........................................7
Z
Zoom Factor................................... 86
 Loading...