

Page 1
INSTALLATION INSTRUCTIONS
W W W .NA TIVETR A ILS. NET
W W W .NA TIVETR A ILS. NET
W W W .NA TIVETR A ILS. NET
W W W .NA TIVETR A ILS. NET
2” JR. BASKET STRAINER, DR220
INSTALLATION INSTRUCTIONS
2” JR. BASKET STRAINER, DR220
1
2
3
4
5
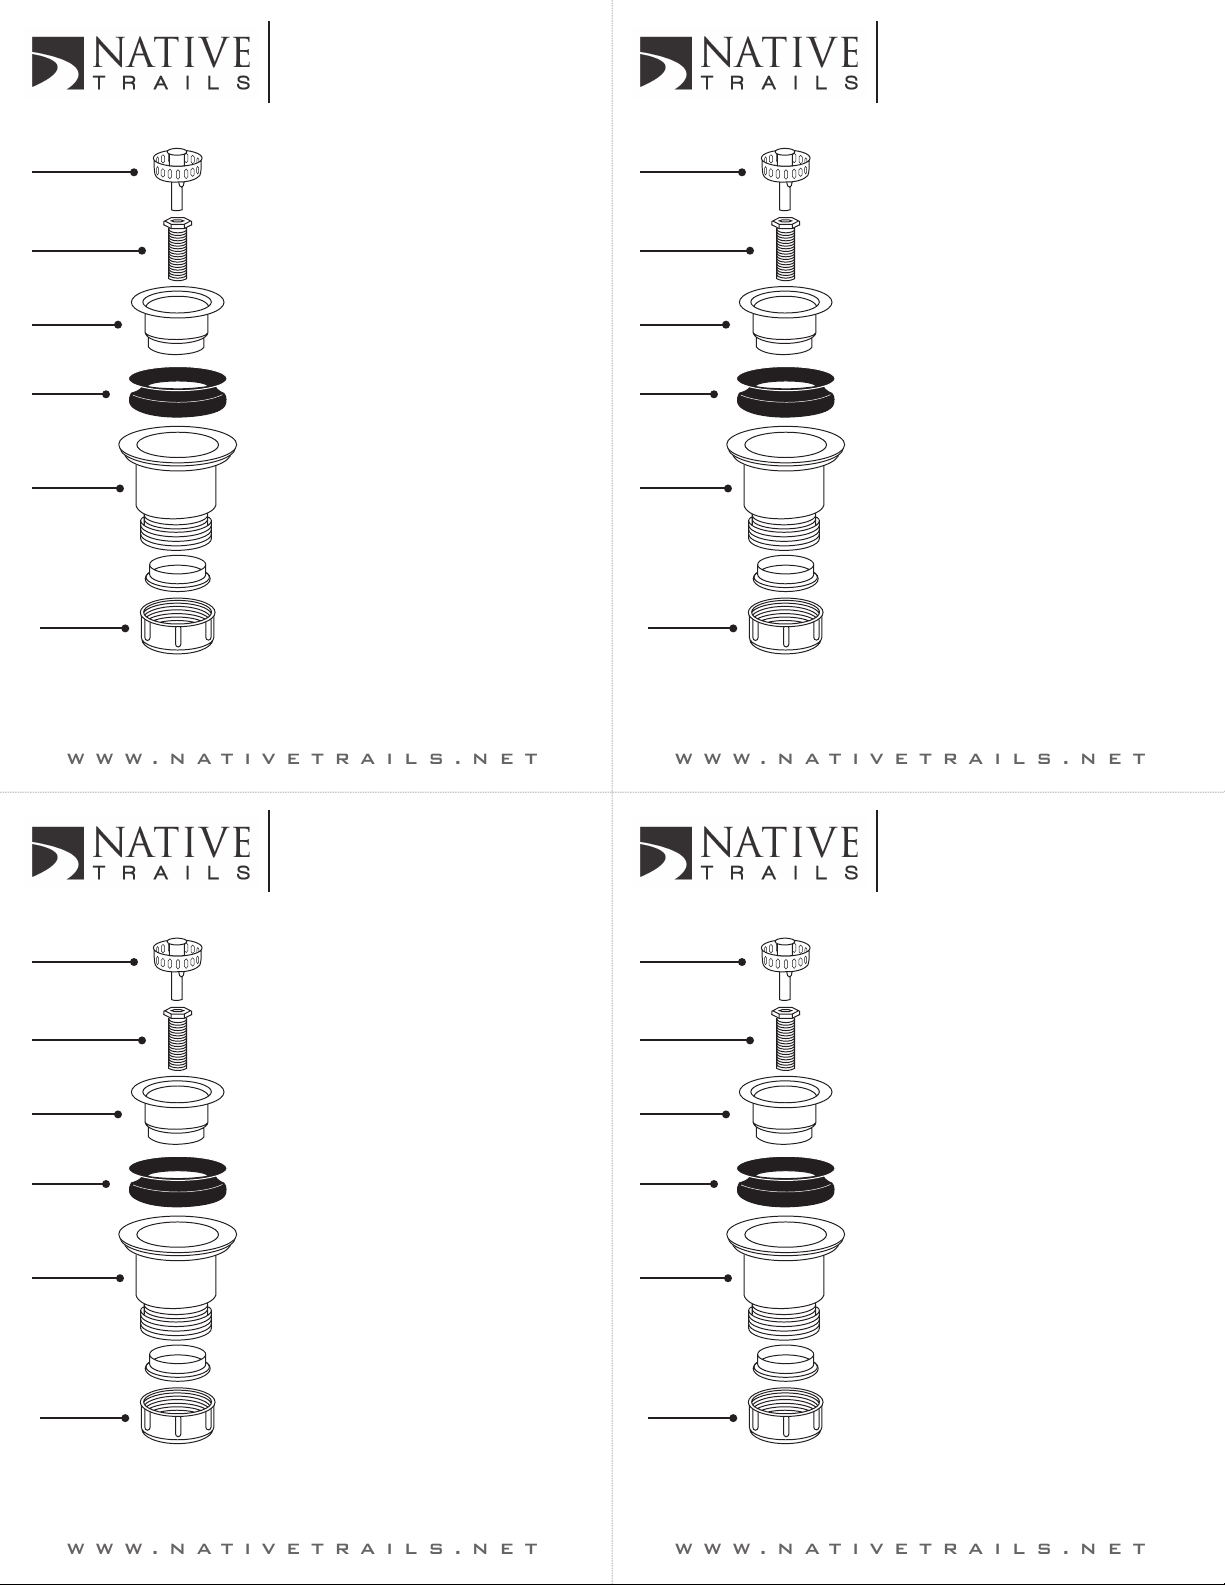
1. Apply a small bead of
100% Silicone (non-water based)
to the
body
2. Place strainer body (3)
into sink.
3. Place rubber seal (4) on
top of drain cup (5).
4. Place tightening screw
(2) into center of strainer
body (3) and secure
5. Lubricate (1) with liquid
soap. Place strainer
basket (1) into strainer
body (3).
underside of strainer
flange (3).
6
6. Attach drainpipe (not
shown) to drain cup (5)
using nut (6)
Remove all excess silicone around the drain after the drain has been installed
1
2
3
4
5
1. Apply a small bead of
100% Silicone (non-water based)
to the
body
2. Place strainer body (3)
into sink.
3. Place rubber seal (4) on
top of drain cup (5).
4. Place tightening screw
(2) into center of strainer
body (3) and secure
5. Lubricate (1) with liquid
soap. Place strainer
basket (1) into strainer
body (3).
underside of strainer
flange (3).
6
6. Attach drainpipe (not
shown) to drain cup (5)
using nut (6)
Remove all excess silicone around the drain after the drain has been installed
INSTALLATION INSTRUCTIONS
2” JR. BASKET STRAINER, DR220
1
2
3
4
5
6
1. Apply a small bead of
100% Silicone (non-water based)
to the
body
2. Place strainer body (3)
into sink.
3. Place rubber seal (4) on
top of drain cup (5).
4. Place tightening screw
(2) into center of strainer
body (3) and secure
5. Lubricate (1) with liquid
soap. Place strainer
basket (1) into strainer
body (3).
6. Attach drainpipe (not
shown) to drain cup (5)
using nut (6)
underside of strainer
flange (3).
1
2
3
4
5
6
INSTALLATION INSTRUCTIONS
2” JR. BASKET STRAINER, DR220
1. Apply a small bead of
100% Silicone (non-water based)
to the
body
2. Place strainer body (3)
into sink.
3. Place rubber seal (4) on
top of drain cup (5).
4. Place tightening screw
(2) into center of strainer
body (3) and secure
5. Lubricate (1) with liquid
soap. Place strainer
basket (1) into strainer
body (3).
6. Attach drainpipe (not
shown) to drain cup (5)
using nut (6)
underside of strainer
flange (3).
Remove all excess silicone around the drain after the drain has been installed
Remove all excess silicone around the drain after the drain has been installed
 Loading...