


USER GUIDE AND SPECIFICATIONS
NI PMA-1115
Portable Monitor Accessory
This document includes an overview and specifications for the
NI PMA-1115 Portable Monitor Accessory.
Overview
The National Instruments PMA-1115 is a monitor and keyboard accessory
for use with NI 8-slot PXI chassis. It includes the following features:
• 15 in. high-brightness TFT LCD touch screen panel
• 105-key English keyboard and touchpad
• Hardware for mounting to NI 8-slot PXI chassis
• Anti-glare tempered glass for LCD protection
• VGA and DVI connectivity to the LCD
• USB connectivity to the touch screen, keyboard, and touchpad
• Sheetmetal construction
• Universal AC/DC power supply with Y-cable for single wall
connection
• RoHS compliance
For complete PXI system configuration information, refer to
pxiadvisor
Shipping Components
The NI PMA-1115 kit includes the following items:
• NI PMA-1115
• Adapter plate and mounting hardware
• Y-splitter power cable
• 12 V DC/AC power adapter
ni.com/
.
Mounting
• Video cabling to connect PMA-1115 to PXI controller
• Right-angle-to-vertical USB cable
•Driver CD
• Cable ties to organize power cabling
• Interlocking fastener to secure power adapter
The NI PMA-1115 includes a complete mounting kit for attachment to any
NI 8-Slot PXI chassis. This kit contains an adapter plate with provisions to
relocate the carrying handle as well as all required fasteners.
Complete the following instructions to install the NI PMA-1115.
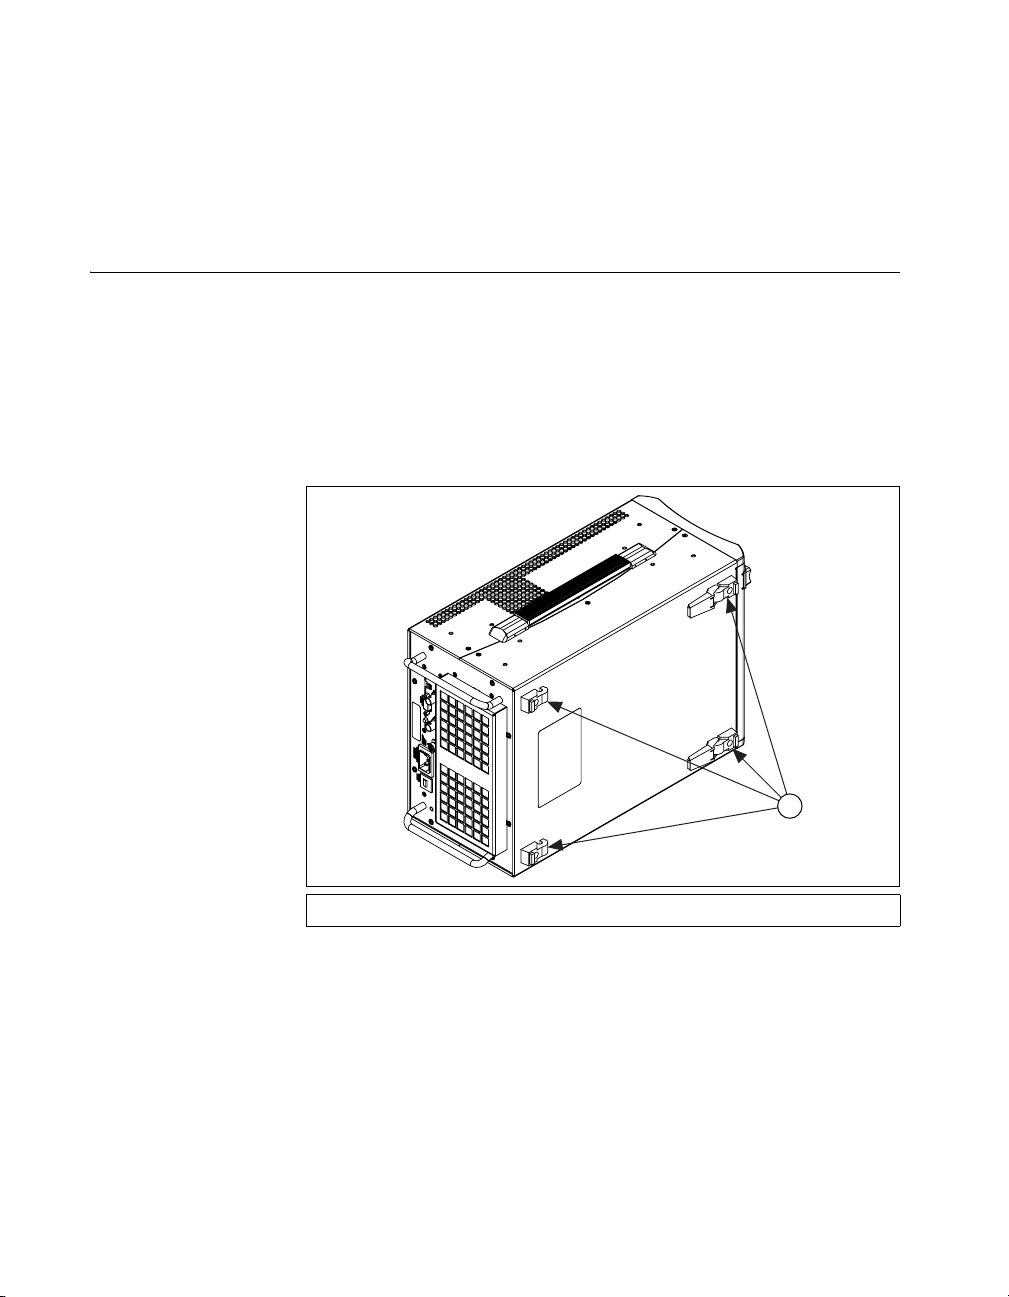
1. Place chassis on its left side, as shown in Figure 1. Remove and discard
the bottom feet and screws.
1
1 Bottom feet
Figure 1. PXI 8-Slot Chassis On Left Side
2. Using a small flat-head screwdriver, carefully remove the handle
covers, as shown in Figure 2.
NI PMA-1115 User Guide and Specifications 2 ni.com
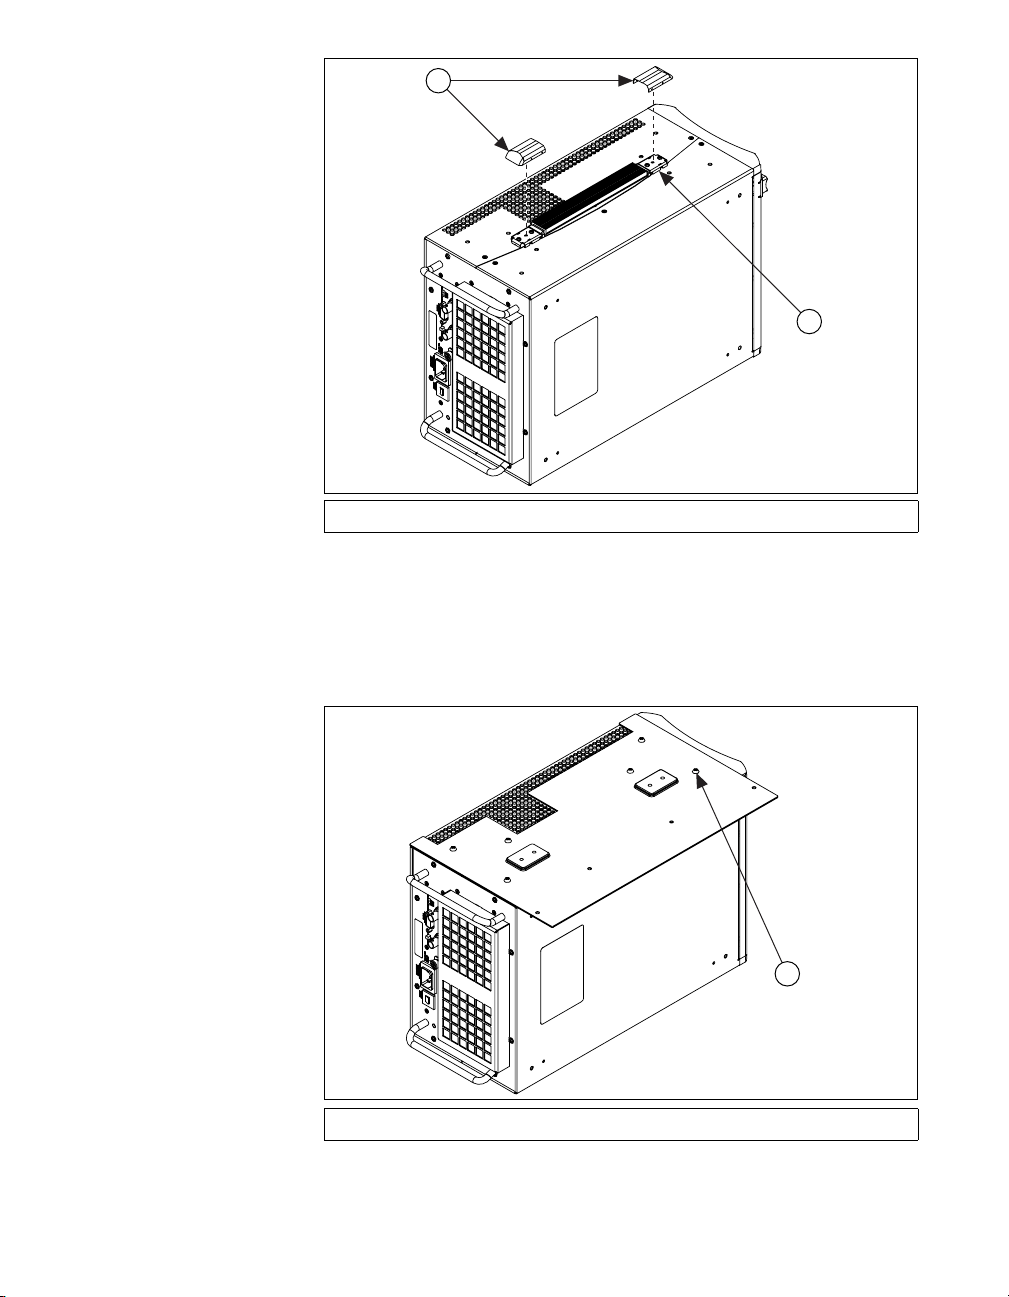
1
2
1 Handle covers 2 Handle assembly
Figure 2. Removing the Handle
3. Remove the handle from the chassis. Retain the handle. Discard the
screws.
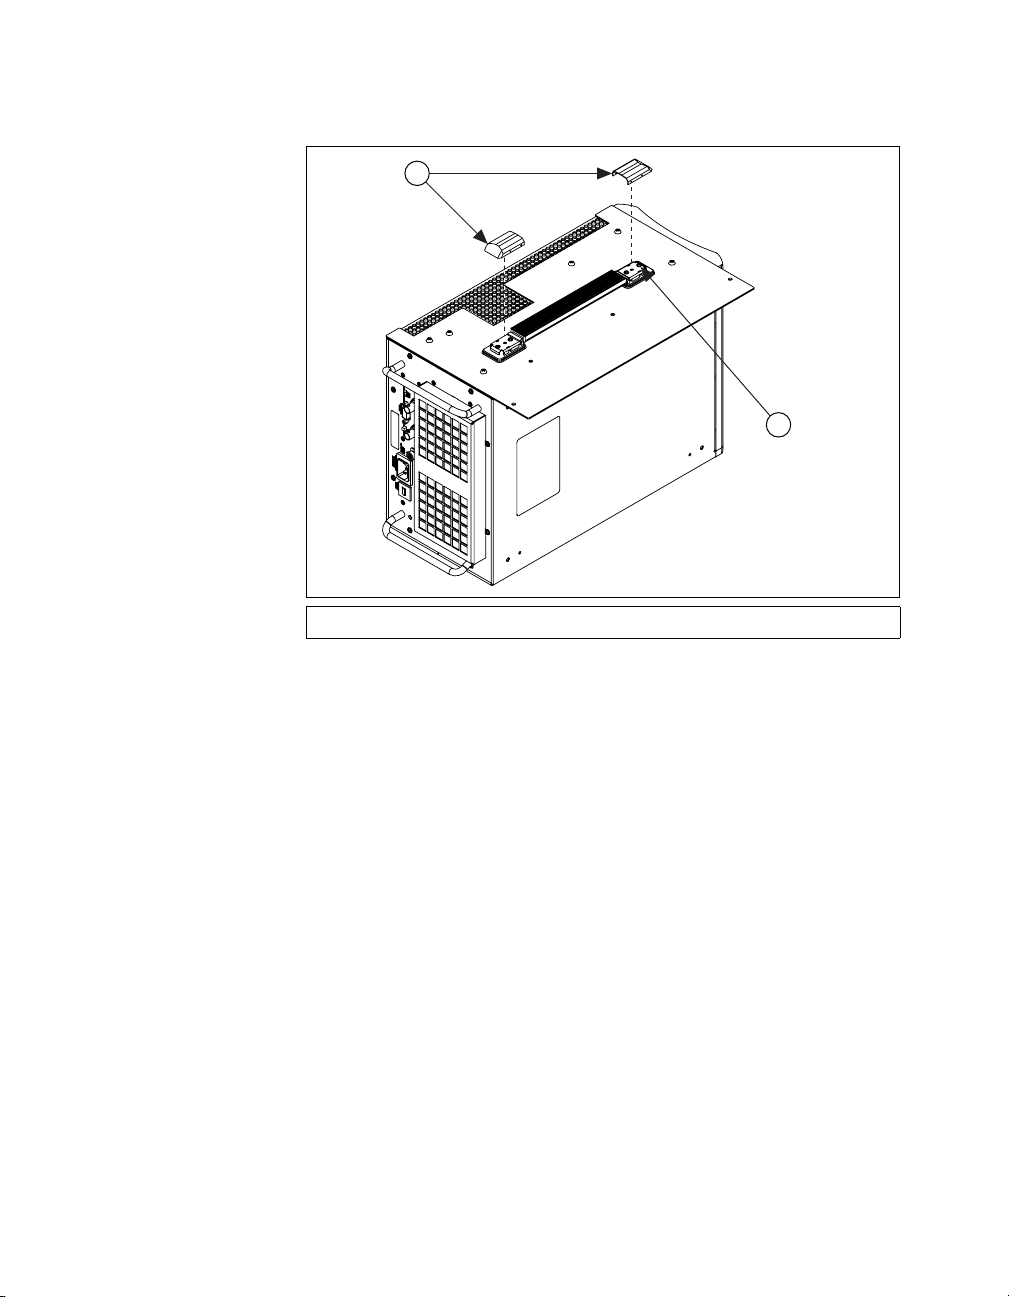
4. Attach the adapter plate to the chassis using the supplied M4 × 8
pan-head screws, as shown in Figure 3.
1
(6x)
1M4× 8 pan-head screws
Figure 3. Installing the Adapter Plate
© National Instruments Corporation 3 NI PMA-1115 User Guide and Specifications
5. Reinstall the handle using the supplied 4-40 × 5/16 pan-head screws,
as shown in Figure 4. Reinstall the handle covers by snapping them
over the handle mounting plates.
1
(4x)
2
1 Handle covers 24-40× 5/16 pan-head screws
Figure 4. Reinstalling the Handle and Handle Covers
NI PMA-1115 User Guide and Specifications 4 ni.com
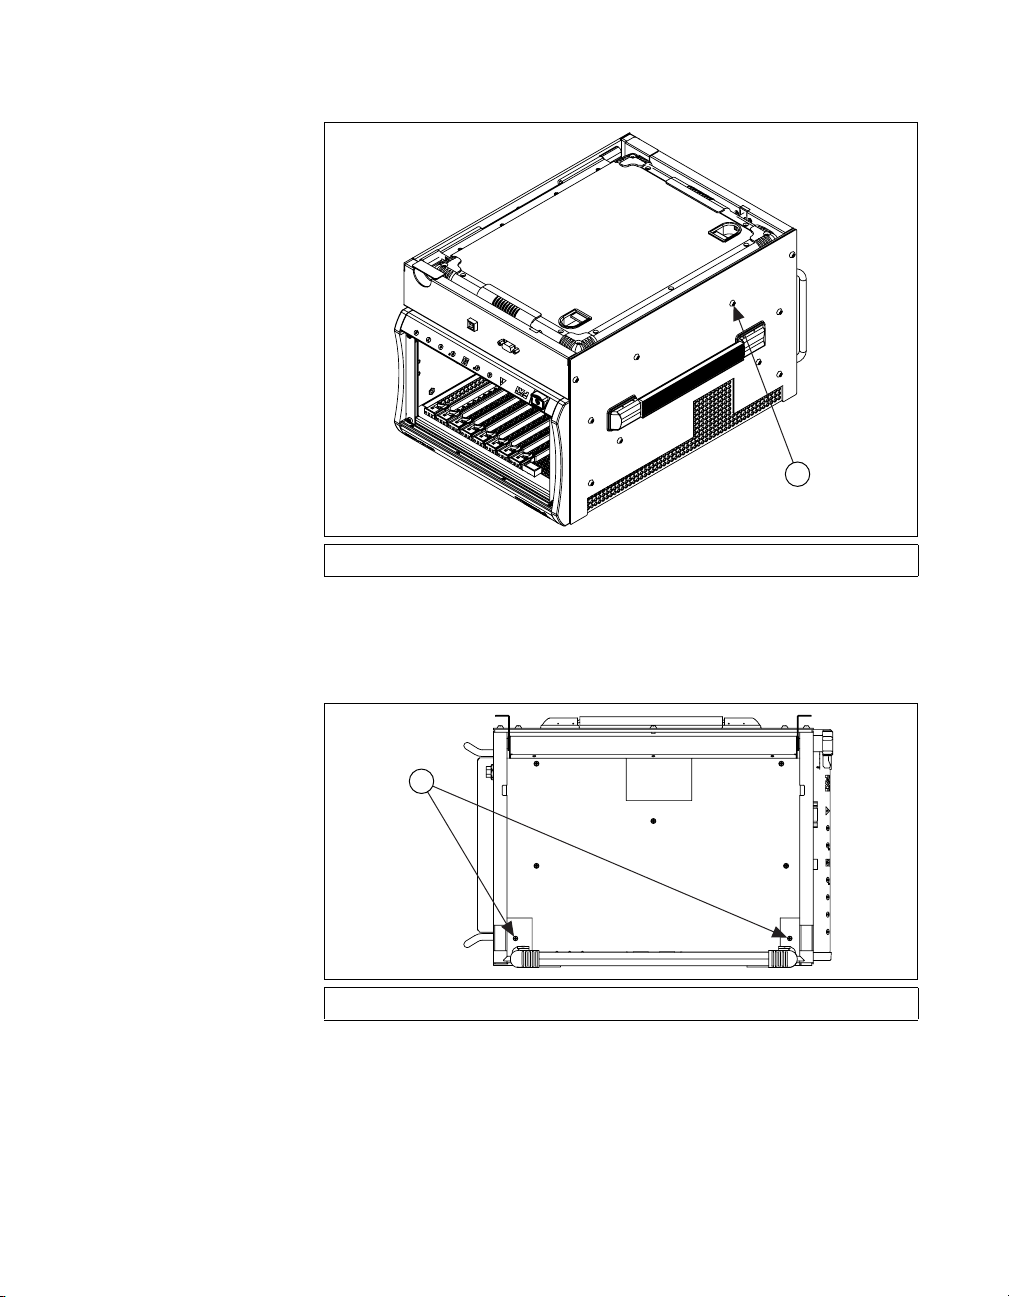
6. Orient the chassis and PMA-1115 as shown in Figure 5. Install the
remaining M4 × 8 pan-head screws.
(4x)
1
1M4× 8 pan-head screws
Figure 5. Installing the PMA-1115
7. Open the keyboard and LCD, as shown in Figure 6. Install the supplied
6-32 × 3/8 flat-head screws in the lower corners of the PMA-1115.
1
16-32× 3/8 flat-head screws
Figure 6. Installing the Lower Mounting Screws
© National Instruments Corporation 5 NI PMA-1115 User Guide and Specifications
 Loading...