

Page 1
GETTING STARTED GUIDE
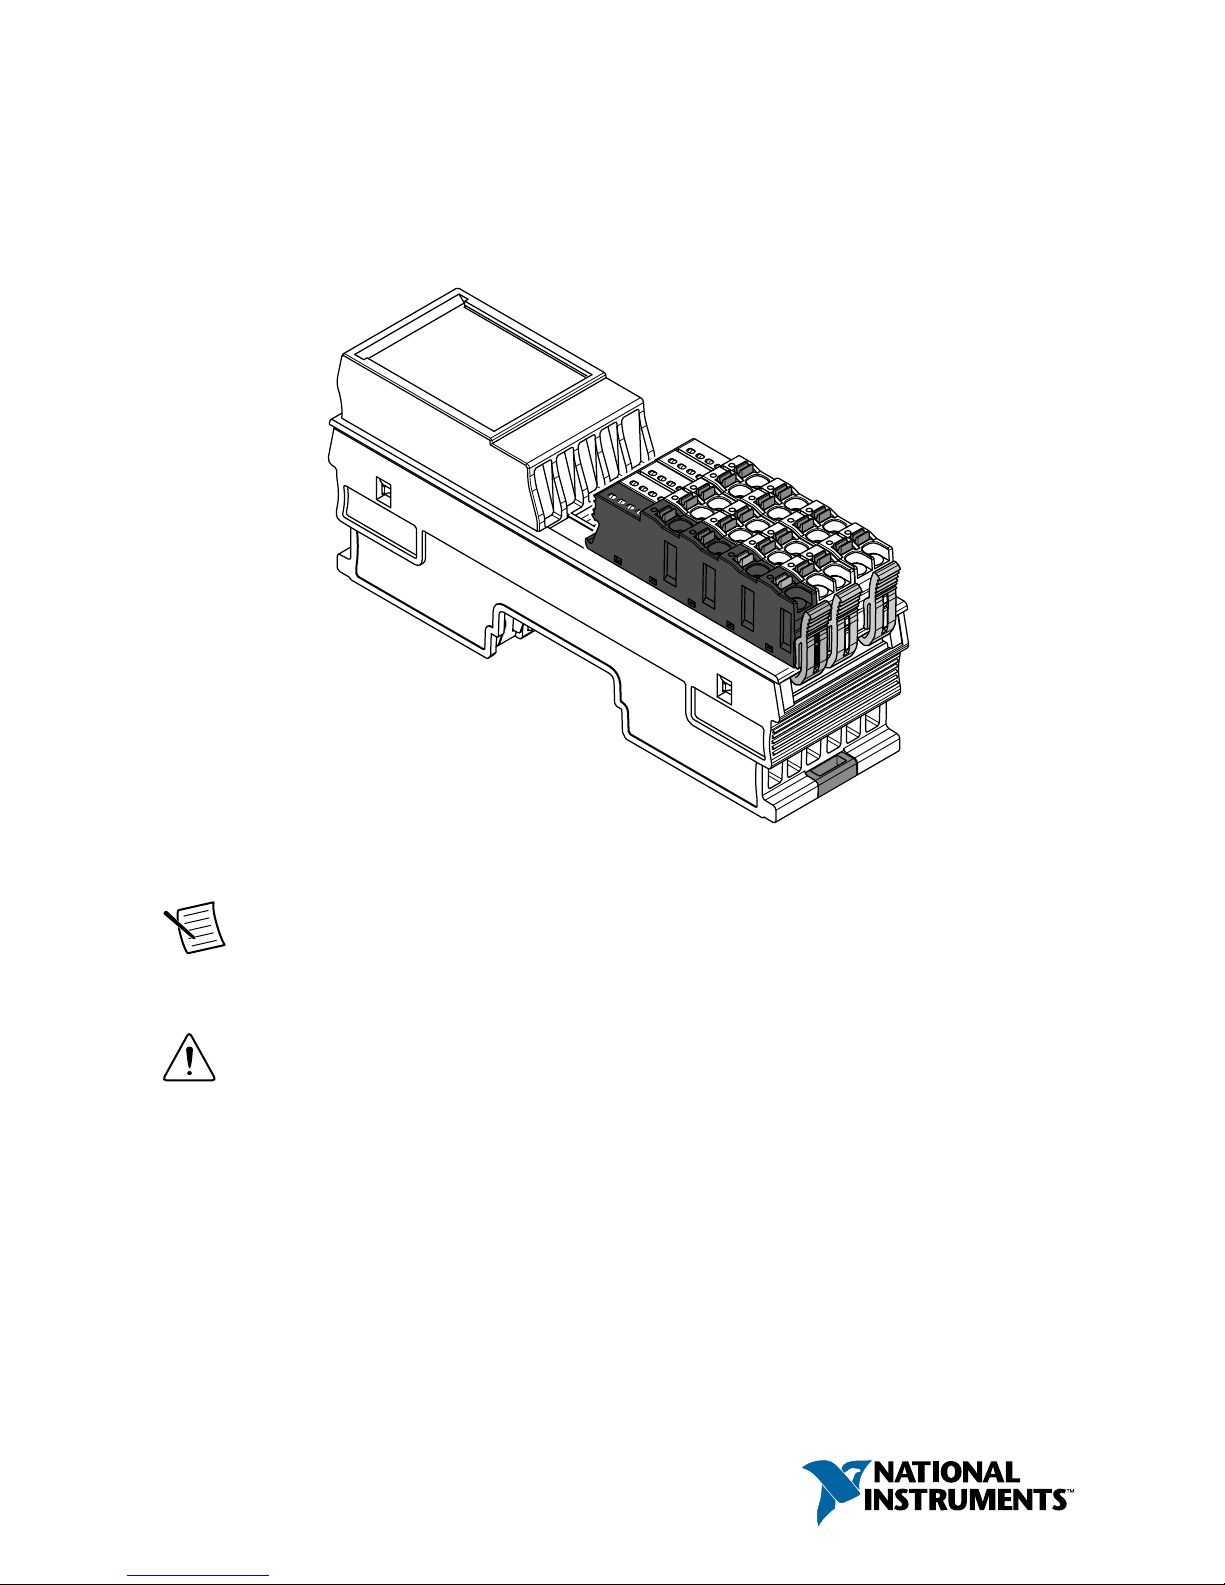
NI REM-11100
Voltage Input Module for Remote I/O
This document explains how to connect to the REM-11100.
Note The guidelines in this document are specific to the REM-11100. The other
components in the system might not meet the same safety ratings. Refer to the
documentation for each component in the system to determine the safety and EMC
ratings for the entire system.
Caution Do not operate the REM-11100 in a manner not specified in this
document. Product misuse can result in a hazard. You can compromise the safety
protection built into the product if the product is damaged in any way. If the product
is damaged, return it to NI for repair.
Page 2

Isolation Withstand Voltages
Test section Test voltage
5 V communications power (logic), 24 V supply (I/O) 500 VAC, 50 Hz, 1 min.
5 V supply (logic) / analog inputs 500 VAC, 50 Hz, 1 min.
5 V supply (logic) / functional earth ground 500 VAC, 50 Hz, 1 min.
24 V supply (I/O) / analog inputs 500 VAC, 50 Hz, 1 min.
24 V supply (I/O) / functional earth ground 500 VAC, 50 Hz, 1 min.
Analog inputs / functional earth ground 500 VAC, 50 Hz, 1 min.
Electromagnetic Compatibility Guidelines
This product was tested and complies with the regulatory requirements and limits for
electromagnetic compatibility (EMC) stated in the product specifications. These requirements
and limits provide reasonable protection against harmful interference when the product is
operated in the intended operational electromagnetic environment.
This product is intended for use in industrial locations. However, harmful interference may
occur in some installations, when the product is connected to a peripheral device or test object,
or if the product is used in residential or commercial areas. To minimize interference with
radio and television reception and prevent unacceptable performance degradation, install and
use this product in strict accordance with the instructions in the product documentation.
Furthermore, any changes or modifications to the product not expressly approved by National
Instruments could void your authority to operate it under your local regulatory rules.
Preparing the Environment
Ensure that the environment in which you are using the REM-11100 meets the following
specifications.
Operating temperature -25 °C to 60 °C
Operating humidity 5% RH to 95% RH, noncondensing
Pollution Degree 2
Maximum altitude 3,000 m
2 | ni.com | REM-11100 Getting Started Guide
Page 3
Indoor use only.
Note Refer to the device datasheet on ni.com/manuals for complete specifications.
Verifying the Kit Contents
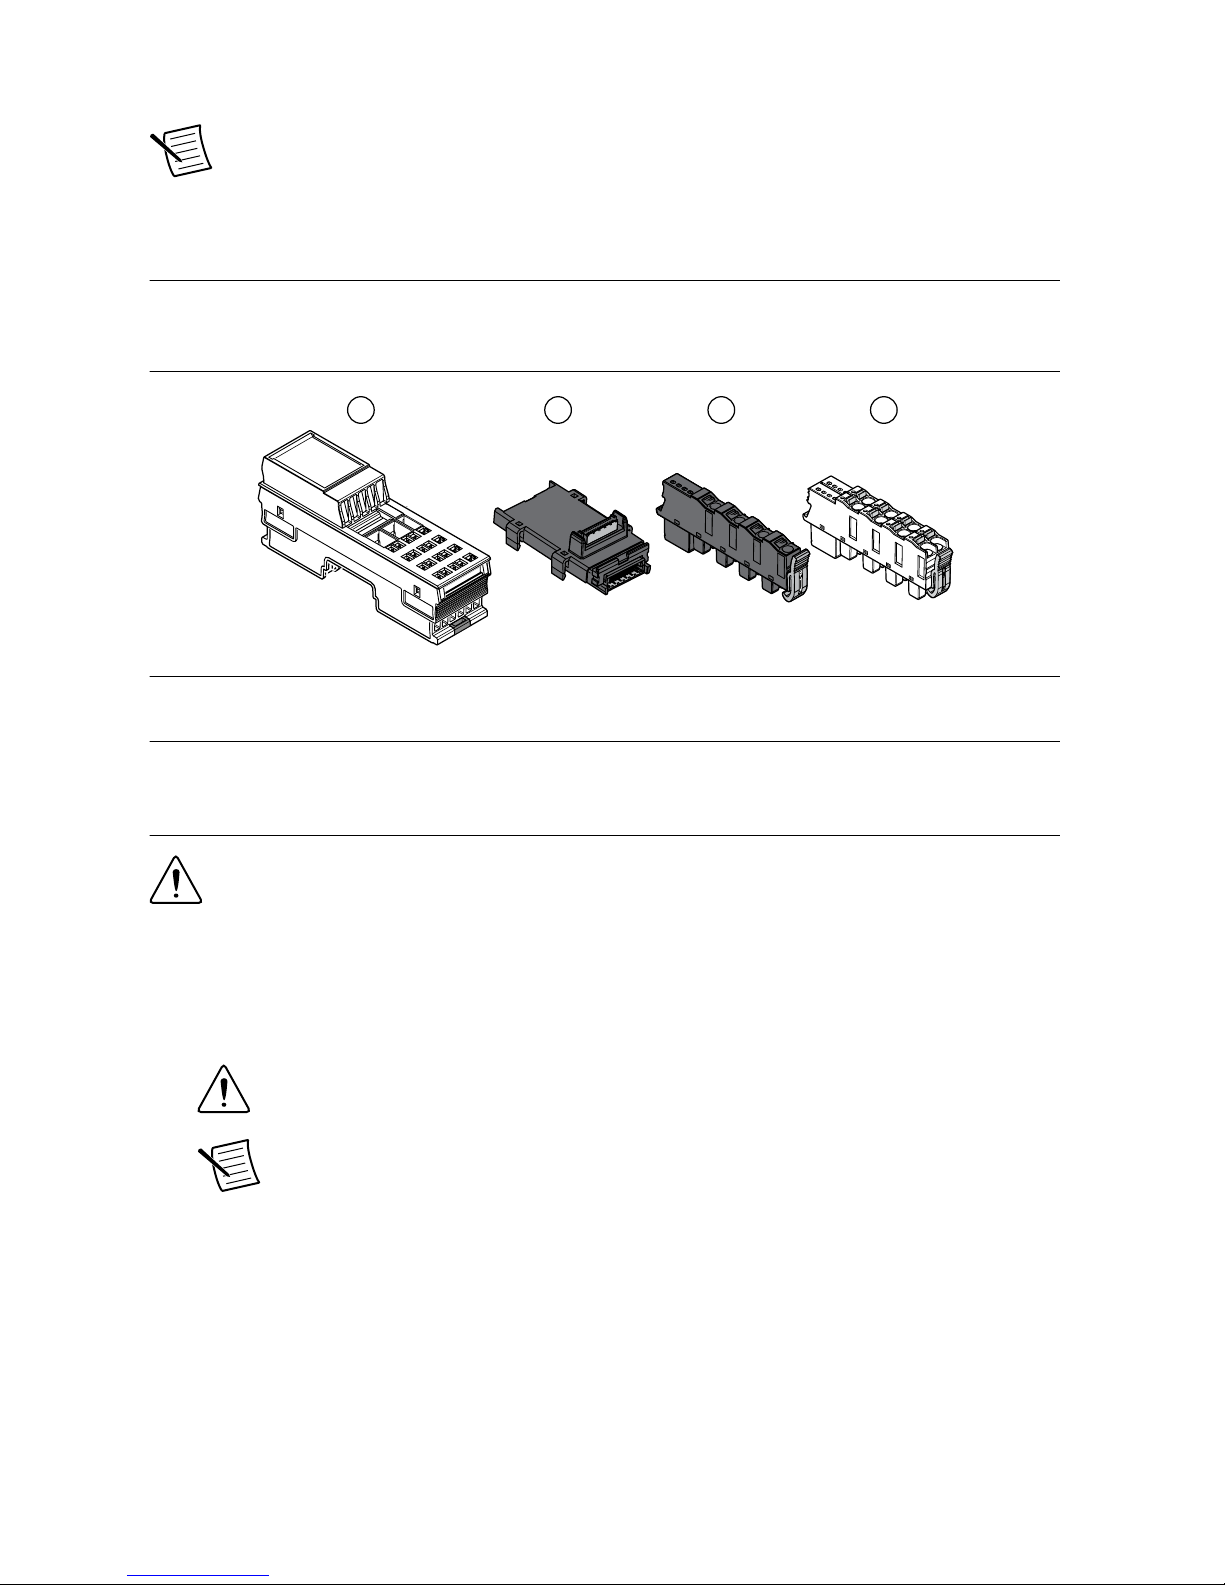
Verify that the following items are included in the REM-11100 kit.
Figure 1. REM-11100 Kit Contents
1
2 3 4
1. NI REM-11100
2. Bus connector
3. Supply voltage connector
4. Spring-terminal block (x2)
Unpacking the Kit
Caution To prevent electrostatic discharge (ESD) from damaging the device,
ground yourself using a grounding strap or by holding a grounded object, such as
your computer chassis.
1. Touch the antistatic package to a metal part of the computer chassis.
2. Remove the device from the package and inspect the device for loose components or any
other sign of damage.
Caution Never touch the exposed pins of connectors.
Note Do not install a device if it appears damaged in any way.
3. Unpack any other items and documentation from the kit.
Store the device in the antistatic package when the device is not in use.
REM-11100 Getting Started Guide | © National Instruments | 3
Page 4

Installing the REM-11100
Figure 2. Structure of the REM-11100
1
3
4
6
5
2
1. Bus connector
2. REM-11100
3. Module function label
4. Supply voltage connector
5. Spring-terminal block
6. LED indicators
Table 1. Module Function Labels
Label Color Module Function
Blue Digital input
Red Digital output
Green Analog input, thermocouple
Yellow Analog output
White Bus coupler, power module
Installing Bus Connectors
What to Use
• Bus connector
• DIN rail
What to Do
Complete the following steps to install bus connectors on the DIN rail.
4 | ni.com | REM-11100 Getting Started Guide
Page 5
1
2
1. Insert the bus connector for the REM-11100 into the DIN rail.
Caution Verify that you are using the correct bus connector for the module
width.
2. Slide the bus connector along the DIN rail until it connects to the preceding bus
connector.
Note A bus connector will not attach to a preceding bus connector with a
mounted module. Remove the preceding module before installing additional
bus connectors.
3. Repeat Steps 2 and 3 for additional bus connectors.
Installing the Module
What to Use
• REM-11100
• Mounted bus connector
What to Do
Complete the following steps to install the REM-11100 on the DIN rail.
REM-11100 Getting Started Guide | © National Instruments | 5
Page 6

Note When using the Remote I/O Shield Set, install the shield rail supports before
mounting the module.
1. Align the REM-11100 over the appropriate bus connector.
Note Verify that the bus connector socket aligns with the socket on the
underside of the module.
2. Press the REM-11100 directly onto the bus connector and DIN rail until it clicks into
place.
Caution Tilting the module when mounting it on the DIN rail will damage the
contacts.
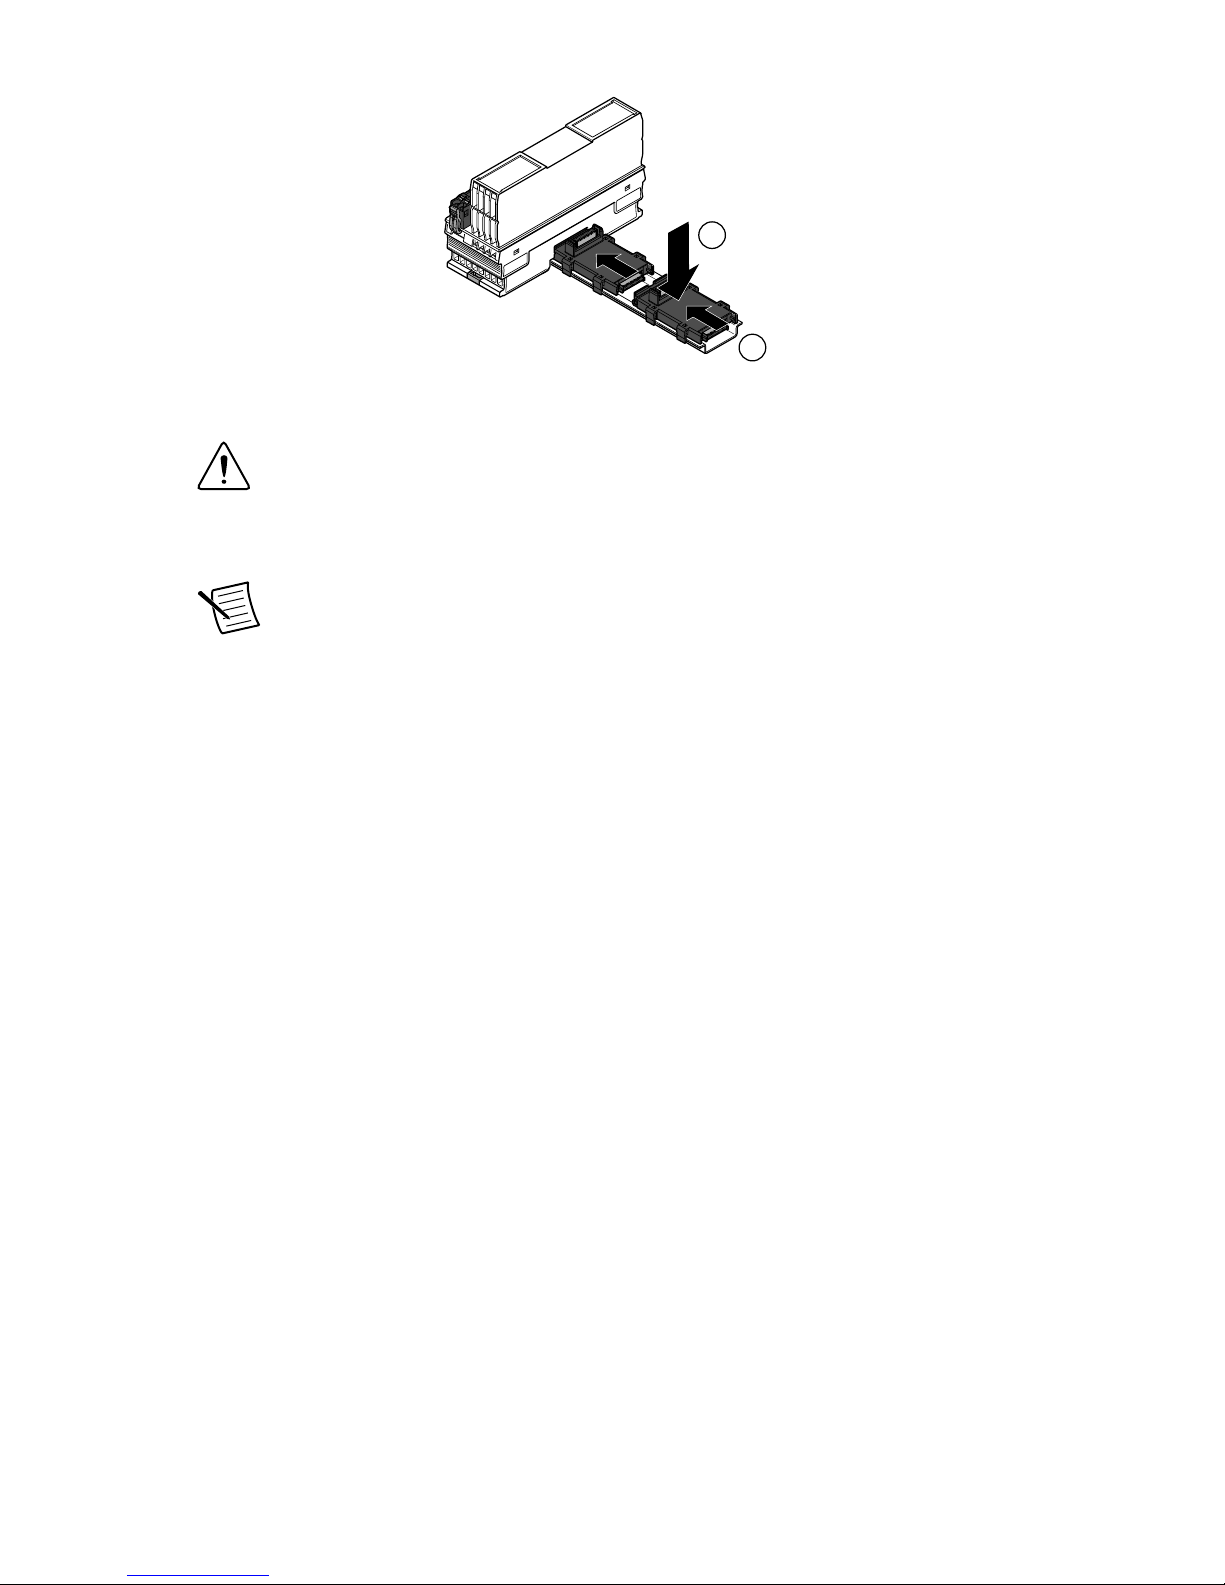
Installing Spring-Terminal Blocks
What to Use
• REM-11100
• Spring-terminal block
What to Do
Align the spring-terminal block over the REM-11100 and press until it clicks into place.
6 | ni.com | REM-11100 Getting Started Guide
Page 7

REM-11100 Pinout
AI0+ to AI3+
AI0– to AI3–
GND
00
10
20
30
01
11
21
31
02
12
22
32
03
13
23
33
24 VDC
24 VDC
GND
GND
a1
a2
b2
b1
UIS0 to UIS3
Table 2. REM-11100 Signal Descriptions
Signal Color Description
a1, a2 Red 24 VDC (UA) Supply for analog modules (internally jumpered)
b1, b2 Blue GND Reference potential of the supply voltage (internally
jumpered)
00 to 03 Orange AI0+ to AI3+ Positive voltage connection for channel 0 to 3
10 to 13 AI0- to AI3- Negative voltage connection for channel 0 to 3
20 to 23 UIS0 to UIS3 24 V sensor supply for channel 0 to 3
30 to 33 GND Reference potential of sensor supply
REM-11100 Getting Started Guide | © National Instruments | 7
Page 8

Figure 3. REM-11100 LEDs
30
20
10
00
32
22
12
02
31
21
11
01
33
23
13
03
D
UA
E1
E2
Table 3. LED Indicators
LED LED Color LED Pattern Indication
D
Green
Solid The REM-11100 is ready for operation.
Flashing Data is invalid or unavailable.
Green/Yellow Flashing
The REM-11100 cannot communicate with the
connected devices.
D
Yellow
Solid
The REM-11100 did not detect a valid cycle after poweron.
Flashing The REM-11100 is not part of the configuration.
Red
Solid The REM-11100 has lost connection to the Bus Coupler.
Flashing
The REM-11100 has lost connection to the preceding
adjacent module.
— Off The REM-11100 is in reset mode.
UA
Green Solid Supply for analog modules UA present.
— Off No Supply for analog modules UA.
E1
Red Solid Supply for analog modules UA is faulty.
— Off Supply for analog modules UA is OK.
E2
Red Solid I/O or channel error has occurred.
— Off No error
8 | ni.com | REM-11100 Getting Started Guide
Page 9

Table 4. Error Status of E1 and E2 LEDs
Error E1 LED E2 LED
No error Off Off
Underrange Off On
Overrange Off On
Supply voltage faulty (supply for analog modules UA) On On
Parameter table invalid Off On
Device error Off On
Flash format error Off On
Note The reported error depends on the measuring range. For information about
input scaling, refer to the device datasheet on ni.com/manuals.
Connecting the REM-11100
Figure 4. REM-11100 Voltage Measurement Connection
24 VDC
AI+ (0:3)
AI– (0:3)
UIS (0:3)
GND
24 VDC
Sensor
GND
x4
REM-11100
+
–
+
–
a1
a2
b1
b2
UIS and GND are optional, sensor-dependent connections.
Note For information about fuse ratings for the REM-11100, refer to the device
datasheet on ni.com/manuals.
Connection Guidelines
• Always connect analog signals using shielded, twisted pair cables. Unshielded cables
may lead to values outside the specified tolerance limits in environments subject to heavy
noise.
• Connect the cable shield to functional earth ground immediately after the cables enter the
control cabinet.
• Connect the cable shield to a shield bus if you are not using a closed control cabinet.
REM-11100 Getting Started Guide | © National Instruments | 9
Page 10

• NI recommends using the NI Remote I/O Shield Set for optimal shield connection.
• Make sure that devices you connect to the REM-11100 are compatible with the module
specifications.
• Push the wire into the terminal when using a solid wire or a stranded wire with a ferrule.
• Open the terminal by pressing a screwdriver into the spring lever when using a stranded
wire without a ferrule.
Removing Components
Removing Spring Terminal Blocks
Complete the following steps to remove a spring-terminal block from the REM-11100.
1
3
2
1. Press the locking latch to release the spring-terminal block.
2. Tilt the block toward the center of the module.
3. Remove the connector from the module.
Removing the REM-11100
Remove all connections before removing the REM-11100, either by disconnecting the cables
or removing the spring-terminal block.
What to Use
• Flathead Screwdriver
What to Do
Complete the following steps to remove the REM-11100 from the DIN rail.
10 | ni.com | REM-11100 Getting Started Guide
Page 11

1
1
2
1. Insert the screwdriver and loosen the base latches on either end of the module.
2. Remove REM-11100 perpendicular to the DIN rail.
Caution Tilting the module when removing it from the DIN rail will damage
the contacts.
Removing Bus Connectors
Complete the following steps to remove bus connectors from the DIN rail.
What to Use
• Flathead Screwdriver
What to Do
Note You must remove the preceding module before removing the bus connector.
1
3
2
1. Slide the bus connector away from the preceding bus connector at least 5.0 mm (0.20 in.).
2. Insert the screwdriver and loosen both latches on one side of the DIN rail.
3. Rotate the bus connector to remove it from the DIN rail.
Note If you want to remove a bus connector in the middle of the system, you
must remove any modules or bus connectors following the desired connector or
slide them along the DIN rail at least 15.0 mm (0.60 in.).
REM-11100 Getting Started Guide | © National Instruments | 11
Page 12

Where to Go Next
APPLICATION
SUPPORT
Services
ni.com/services
NI Community
ni.com/community
Support
ni.com/support
SOFTWAREHARDWARE
Software Support
ni.com/info swsupport
Remote I/O Examples
NI Example Finder
Learn LabVIEW Basics
ni.com/gettingstarted
NI-Industrial Communication
for EtherCAT Help
ni.com/info ecat16help
Remote I/O Vendor
Configuration Guide
ni.com/manuals
Remote I/O Sample
Projects
LabVIEW Create Project
EtherCAT Driver Support
ni.com/info ecatdriver
Setting Up EtherCAT
on NI Programmable
Automation Controllers
ni.com/info ecatsetup
Worldwide Support and Services
The NI website is your complete resource for technical support. At ni.com/support, you have
access to everything from troubleshooting and application development self-help resources to
email and phone assistance from NI Application Engineers.
Visit ni.com/services for NI Factory Installation Services, repairs, extended warranty, and
other services.
Visit ni.com/register to register your NI product. Product registration facilitates technical
support and ensures that you receive important information updates from NI.
A Declaration of Conformity (DoC) is our claim of compliance with the Council of the
European Communities using the manufacturer’s declaration of conformity. This system
affords the user protection for electromagnetic compatibility (EMC) and product safety. You
can obtain the DoC for your product by visiting ni.com/certification. If your product supports
calibration, you can obtain the calibration certificate for your product at ni.com/calibration.
NI corporate headquarters is located at 11500 North Mopac Expressway, Austin, Texas,
78759-3504. NI also has offices located around the world. For telephone support in the United
States, create your service request at ni.com/support or dial 1 866 ASK MYNI (275 6964). For
12 | ni.com | REM-11100 Getting Started Guide
Page 13

telephone support outside the United States, visit the Worldwide Offices section of ni.com/
niglobal to access the branch office websites, which provide up-to-date contact information,
support phone numbers, email addresses, and current events.
REM-11100 Getting Started Guide | © National Instruments | 13
Page 14

Refer to the NI Trademarks and Logo Guidelines at ni.com/trademarks for information on NI trademarks. Other product and
company names mentioned herein are trademarks or trade names of their respective companies. For patents covering NI
products/technology, refer to the appropriate location: Help»Patents in your software, the patents.txt file on your media, or the
National Instruments Patent Notice at ni.com/patents. You can find information about end-user license agreements (EULAs)
and third-party legal notices in the readme file for your NI product. Refer to the Export Compliance Information at ni.com/
legal/export-compliance for the NI global trade compliance policy and how to obtain relevant HTS codes, ECCNs, and other
import/export data. NI MAKES NO EXPRESS OR IMPLIED WARRANTIES AS TO THE ACCURACY OF THE INFORMATION
CONTAINED HEREIN AND SHALL NOT BE LIABLE FOR ANY ERRORS. U.S. Government Customers: The data contained in
this manual was developed at private expense and is subject to the applicable limited rights and restricted data rights as set forth
in FAR 52.227-14, DFAR 252.227-7014, and DFAR 252.227-7015.
© 2016 National Instruments. All rights reserved.
376557A-01 Oct16
 Loading...