

Page 1

RELEASE NOTES
ABWINDOWS
L
ELEASE
R
N
Contents
Introduction to LabWindows/CVI...................................................................................4
LabWindows/CVI Installation for Windows...................................................................4
Minimum System Requirements for Windows 95/NT......................................4
Minimum System Requirements for Windows 3.1...........................................4
Installing LabWindows/CVI on a Computer.................................................. ...5
Installing the Run-Time Engine on a Computer................................................5
Installing the VISA Library...............................................................................6
Installing the IVI Engine...................................................................................6
What’s New and Different in LabWindows/CVI 5.0......................................................6
New Features.....................................................................................................6
Changes to System Requirements.....................................................................7
Toolslib Instrument Drivers ..............................................................................7
New Sample Programs......................................................................................7
Changes to the LabWindows/CVI Development Environment.......................................9
Debugging DLLs in Windows 95/NT...............................................................9
DLL Debugging Menu Item (Windows 95/NT Only) ......................................9
Select External Process......................................................................................10
Automatic Generation of Object Files...............................................................10
Create Dynamic Link Library Dialog Box........................................................11
Breakpoints/Tags in Non-Project Files Are Saved in Project...........................11
New Control in Watch Expression Dialog Box................................................11
Activate Panels When Resuming: Clarification................................................ 11
New Print Dialog Box.......................................................................................12
New Options for Source File Printing.......................... ..... ................................12
Edit Menu............................. .................................. ...... ..... ................................12
Code Menu .................................................. ...... ..... .................................. ...... ...12
New Tools Menu...............................................................................................12
/CVI V
OTES FOR
Multithreading Limitations on Toolslib Instruments..........................7
Create ActiveX Automation Controller (Windows 95/NT only)........13
Update ActiveX Automation Controller (Windows 95/NT only) ......13
Create IVI (Intelligent Virtual Instruments) Instrument Driver..........13
ERSION
INDOWS
W
5.0
CVI™, National Instruments™, NI_DAQ™, NI-VISA™, the National Instruments logo, and The Software is the Instrument™ are trademarks of National
Instruments Corporation. Product and company names are trademarks or trade names of their respective companies.
320689E-01
©
Copyright 1994, 1998 National Instruments Corp. All rights reserved. February 1998
Page 2

Edit Instrument Attributes............................................ ......................13
Edit Function Tree.............................................................. ..... ...........14
Edit Function Panel ..................................... ...... .................................14
Generate Source for Instrument Driver Functions..............................14
Go To Definition ................................................................................14
Go To Declaration..............................................................................14
Enable Auto Replace..........................................................................14
Generate IVI C++ Wrapper................................................................15
Context Menus....................................................................................15
User-Defined Entries in Tools Menu................................................................15
Tools Menu Options..........................................................................................15
New Configuration Option................................................................................15
Mouse Wheel Support.......................................................................................16
Changes to the User Interface Library.............................................................................16
Change to Default Value of SetSleepPolicy.....................................................16
Clarifications and Corrections ..........................................................................17
Direct Windows Printing ..................................................................................17
Revised Print Dialog Boxes on Windows.........................................................18
Interaction between Print Dialog Boxes and Programmatic Attributes............ 18
Using Windows System Printer Settings..........................................................19
Obsolete Value for X and Y Resolution...........................................................20
Warning of Modified Behavior.........................................................................20
Revised Constant Names ..................................................................................20
Application of Attributes to Text Printing........................................................21
New Print Attributes .........................................................................................21
New Panel Attributes........................................................................................22
New Control Attributes.....................................................................................22
New System Attribute.......................................................................................22
Resolution Adjustment.......................................................................23
User Interface Editor Changes..........................................................................23
Changes to Existing Functions..........................................................................24
Details on Loading Panels and Menubars from .tui Files.................................24
Warning of Change to Text Format (.tui) Files ................................................25
New Functions ..................................................................................................25
New Error Codes...............................................................................................26
Using the User Interface Library in a Multithreaded Executable
under Windows 95/NT...................................................................................26
Mouse Wheel Support.......................................................................................26
Changes to the Programmer Reference Manual..............................................................26
Stack Size..........................................................................................................26
Details of User Protection.................................................................................27
Linking Objects and Static Libraries in External Compilers............................27
Use of DllMain: Clarification...........................................................................27
Releasing Resources when a DLL Unloads: Clarification................................27
Use of Run State Change Callbacks: Clarification...........................................28
LabWindows/CVI Release Notes for Windows 2
©
National Instruments Corporation
Page 3

Changes to the ANSI C Library.......................................................................................28
Time and Date Functions.................................................................... ...... ...... ...28
Time Zone Bugs Fixed on Windows 95/NT.................................... ...28
Modifying the DST Rules String: Clarification..................................29
Changes to the RS-232 Library .......................................................................................29
More COM Ports Allowed ................................................................................29
New Error Code.................................................................................................29
Unknown System Error on Windows 95/NT....................................................29
Input Queue Size: Clarification.........................................................................29
Multithreading and RS-232 Error Information..................................................29
Multithreading Limitations.................................................................30
Changes to the DDE Library ...........................................................................................30
Corrections ........................................................................................................30
Obsolete Error Codes ........................................................................................30
New Error Codes...............................................................................................31
Multithreading...................................................................................................31
Changes to the TCP Library............................................................................................ 31
Multithreading...................................................................................................31
New TCP Library Functions .............................................................................31
Changes to Existing TCP Library Functions.....................................................32
Changes to the Utility Library.........................................................................................32
Multithreading...................................................................................................32
Corrections and Clarifications to the Documentation.......................................32
New Utility Library Functions..........................................................................33
Changes and Clarifications to Existing Utility Library Functions....................33
Changes to the Easy I/O for DAQ Library...................................................................... 34
New ActiveX Automation Library..................................................................................34
Active X Automation Library Function Overview...........................................34
Using ActiveX Automation Object Handles from Mul tiple Threads
on Windows 95...............................................................................................35
Additions to the ActiveX Automation Library Function Reference.................35
New IVI Library ..............................................................................................................36
New Advanced Analysis Library Functions....................................................................36
Function Tree Layout for New Functions.........................................................37
General Information.........................................................................................................38
Using LabWindows/CVI Utility Library in the Borland Compiler...................38
Using NetDDE on Windows.............................................................................38
Special Instructions to LabWindows/CVI 5.0 Beta Testers..............................38
No Support for Multiple Monitor Systems........................................................38
Dynamically Loading DLL Created in Third-Party Compiler
Might Lose Handles........................................................................................38
©
National Instruments Corporation 3 LabWindows/CVI Release Notes for Windows
Page 4

Introduction to LabWindows/CVI
These release notes contain installation instructions, system requirements, new features, and
updated information to help you begin using LabWindows/CVI, version 5.0.
LabWindows/CVI Installation for Windows
Before working o n your data acqui sition and instrumen t control appli cations, you mus t install
LabWindo ws/CVI on your com puter . The LabW indo ws/CVI setup p rogram does this for y ou
in a process that lasts approximately 10 minutes.
Minimum System Requirements for Windows 95/NT
To run LabWindows/CVI for Windows 95/NT, you must have the following:
• Windows 95 or Microsoft Windows NT operating system, version 4.0 or higher
• Personal computer using at least a 33 MHz 486 or higher microprocessor
• VGA resolution (or higher) video adapter
• Minimum of 16 MB of memory
• 50 MB free hard disk space
• Microsoft-compatible mouse
Note
The dialog box the Edit Instrument Attributes command displays requires an
800-by-600 video adapter resolution.
Minimum System Requirements for Windows 3.1
To run LabWindows/CVI for Windows 3.1, you must have the following:
• MS-DOS, version 3.1 or higher
• Windows operating system, version 3.1 or higher
• Personal computer using at least a 33 MHz 386 or higher microprocessor
• VGA resolution (or higher) video adapter
• Math coprocessor or one of the following coprocessor emulation programs:
– WEMM387.386 from Watcom
– Q387 from Quickware
• Minimum of 8 MB of memory
• 30 MB free hard disk space
• Microsoft-compatible mouse
Note
The dialog box the Edit Instrument Attributes command displays requires an
800-by-600 video adapter resolution.
LabWindows/CVI Release Notes for Windows 4
©
National Instruments Corporation
Page 5
Installing LabWindows/CVI on a Computer
1. Make sure that your computer and monitor are on and that Windows is installed.
2. If installing fro m disket te, make back-up copi es of your LabWindo ws/CVI di skette s and
store the originals in a safe place.
3. Close all open Windows applications and leave the operating system in Windows.
4. Insert the installation CD into the CD-ROM drive or insert Disk 1 into drive A or drive B
and close the drive door, if necessary.
5. For Windows 95 or Windows NT version 4.0 or higher, choose the Run option from the
desktop taskbar. For Windows 3.1, choose Run from the File menu in the Program
Manager.
6. Type
7. Follow the instructions that appear in the dialog boxes.
x
:setup (where
on OK.
x
is the drive you are using) in the command line box and click
Note
When you install LabWindows/CVI for Windows 95/NT, you must choose your
compatible compiler. If sometime later you want to change your choice, run the
installation progra m again and select the option that allows you to choose a new
compatible compiler. This method is much faster than changing your compiler
choice by reinstalling LabWindows/CVI.
Note
You must choose the Custom Installation option to install the complete
Windows SD K fro m the CD-ROM version of the LabWindows/CVI FDS (Full
Development System). Some Windows SDK header and import library files are
installed with the disk version and the CD-ROM version for the LabWindows/CVI
Base Package. The Windows SDK help file is available only with the CD-ROM
version of the LabWindows/CVI FDS.
National Instruments suggests you install the complete LabWindows/CVI program to take
full advantage of all the LabWindows/CVI capabilities. If you choose to install with options,
select the options you want and follow the directions on the screen. You can run the setup
program again and install additional files, if necessary.
Refer to the
readme.cvi file for installat io n instr uctions , program ming con siderat ions, and
changes that are too recent to be included in the printed LabWindows/CVI documentation.
Installing the Run-Time Engine on a Computer
The Run-time Engine is installed during the LabWindows/CVI installation.
LabWindows/CVI includes a separate Run-time Engine distribution disk, or a directory on
the CD-ROM, that has its own installation program so you can make copies for distribution
as your license agreement permits.
To install the Run-time Engine from the Run-time Engine distribution disk, follow the
directions in the Installing LabWindows/CVI on a Computer section earlier in this document.
Refer to Chapter 7, Creating and Distributing Standalone Executables and DLLs, of the
©
National Instruments Corporation 5 LabWindows/CVI Release Notes for Windows
Page 6

LabWindows/C VI Pro gramme r Refe rence M anual for a descript ion of the LabW indo ws/CVI
Run-time Engine.
Note The LabWindows/CVI 5.0 Run-time Engine for Windows 95/NT overwrites
previous versions of the Run-time Engine. Thus, LabWindows/CVI 4.x-generated
executables and DLLs use the new LabWindows/CVI 5.0 Run-time Engine. In
addition, the LabWindows/CVI 4.x Create Distribution Kit feature includes the
LabWindows/CVI 5.0 Run-time Engine instead of the LabWindows/CVI 4.x
Run-time Engine in genera ted distribution kits.
Installing the VISA Library
You need the VISA Library to use the new instrument driver standard the VXIplug&play
Systems Alliance accepts. VISA stands for Virtual Instrument Software Architecture.
NI-VISA is installed as part of the LabWindows/CVI disk and CD-ROM installations for
Windows 95/NT. NI-VISA must be installed separately for LabWindows/CVI for
Windows 3.x.
Installing the IVI Engine
You need the IVI Engine to use IVI (Intelligent Virtual Instruments) drivers on a system. The
IVI Engine is installed as part of LabWindows/CVI for Windows 95/NT and Windows 3.x.
LabWindows/CVI for Windows 95/NT includes a separate set of IVI Engine distribution
disks or a directory on the CD-ROM that has its own installation program so you can make
copies for distrib uti on with you r appl icati o n. On Windows 3.x, the IVI Engine is a static
library that is linked into your application.
What’s New and Different in LabWindows/CVI 5.0
This section includes inf ormatio n about changes an d enhancement s in LabW ind ows/C VI 5.0
that have been made since LabWindows/CVI 4.0.1.
New Features
• IVI (Intelligent Virtual Instruments) driver wizard and support library
• ActiveX Automation Server instrument driver wizard and support library
• DLL debugging in the LabWindows/CVI development environment
• Multithread-safe libraries on Windows 95/NT ; refer to the discussion of each library for
any restrictions
• Direct printing replaces bitmap printing on all Windows platforms
• Ability to scale panels and contents to different screen resolutions and when you resize
the panels
• New Advanced Analysis functions for Vector & Matrix Algebra
LabWindows/CVI Release Notes for Windows 6
©
National Instruments Corporation
Page 7
Changes to System Requirements
If you want to run LabWindows/CVI 5.0 on Windows NT, you must have Windows NT 4.0
or higher. LabWindows/CVI 5.0 does not run on Windows NT 3.51.
Note
Version 5.0 is the fin al r e lease of LabWindows/CVI for Windows 3.1.
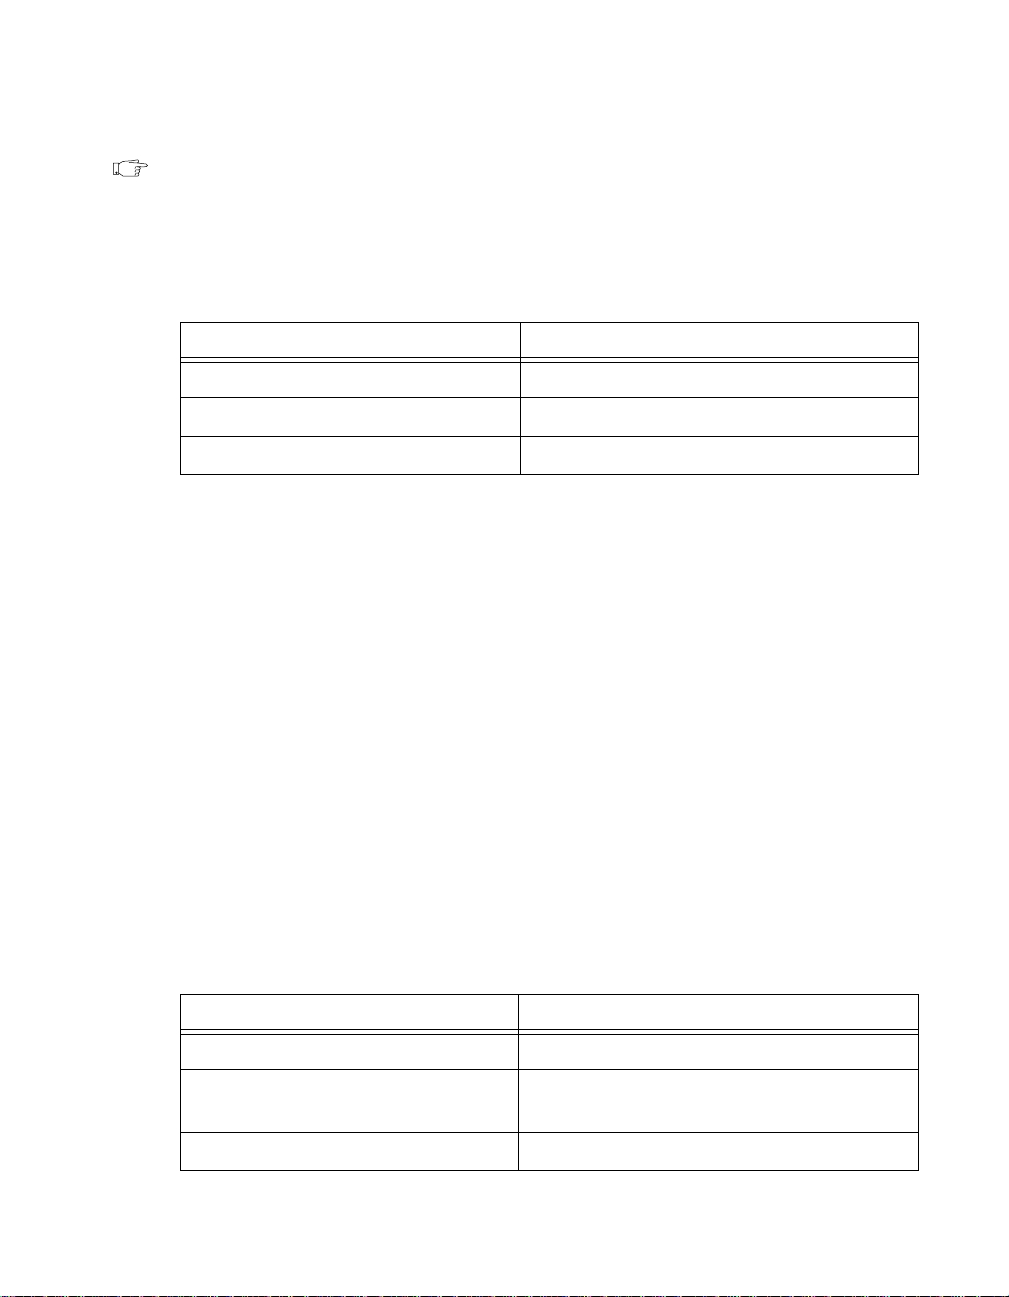
Toolslib Instrument Drivers
Table 1 lists new instrument drivers.
Filename Description
toolslib\
custctrl\cviogl.fp
toolbox\asynctmr.fp
Multithreading Limitations on Toolslib Instruments
The following instruments under the \toolslib\ subdirectory are not multithread safe:
•
custctrl\animate.fp
• custctrl\daqchart.fp
• custctrl\easytab.fp
• custctrl\movectrl.fp
• custctrl\pwctrl.fp
• custctrl\scroll.fp
• custctrl\toolbar.fp
• toolbox\regexpr.fp
• toolbox\toolbox.fp
Table 1.
New Toolslib Instrument Drivers
3D OpenGL plotting control
Asynchronous timer control
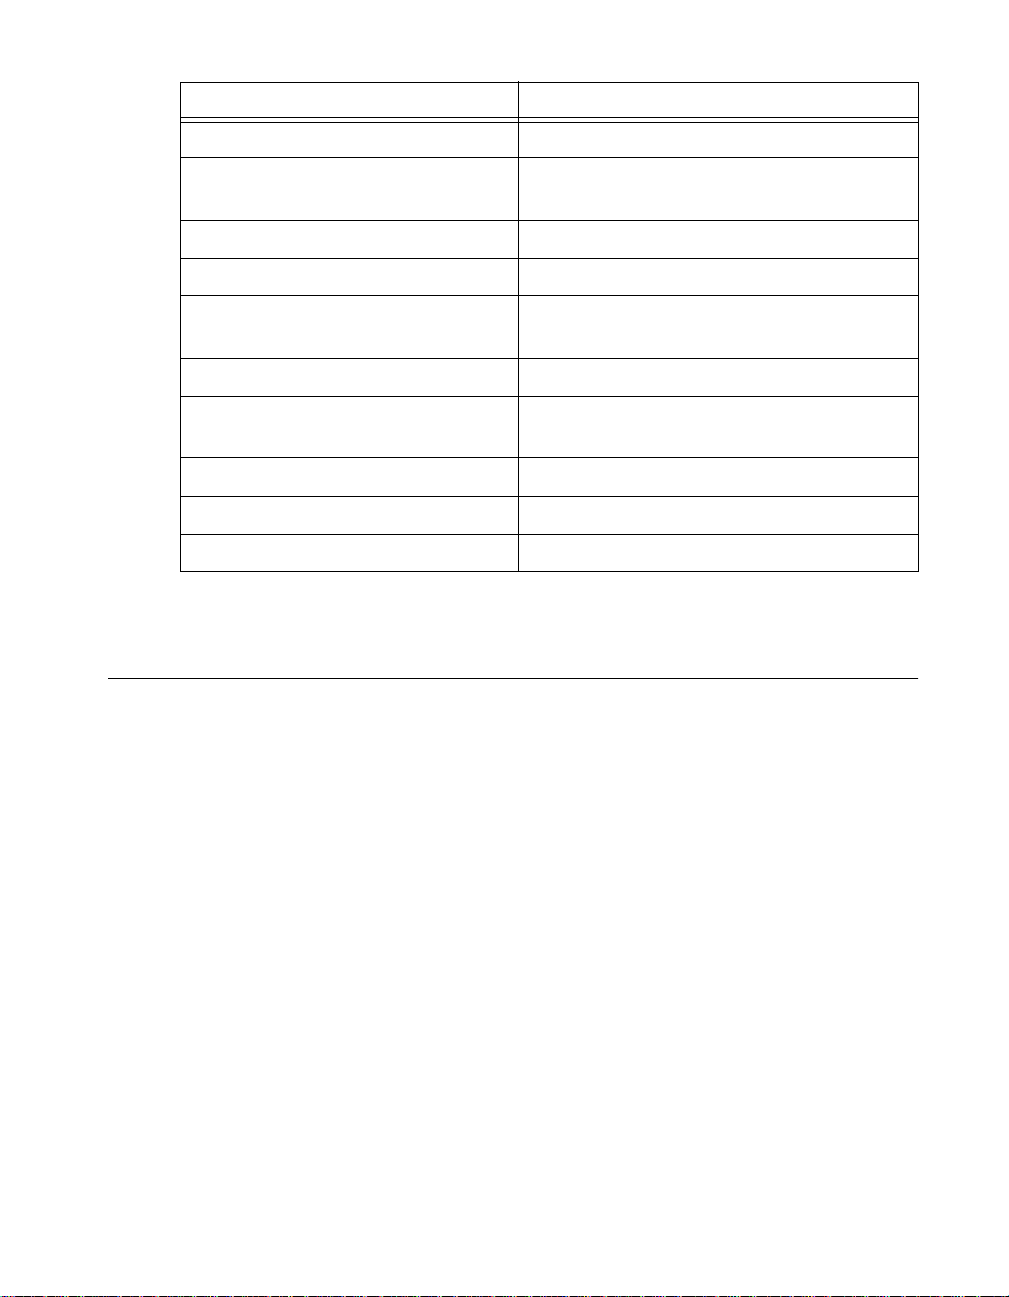
New Sample Programs
Table 2 lists new samples.
Table 2.
Filename Description
samples\activex\
cvi\cvidemo.prj
excel\exceldem.prj
©
National Instruments Corporation 7 LabWindows/CVI Release Notes for Windows
New Sample Projects
ActiveX Automation of LabWindows/CVI 5.0
to build and run projects
ActiveX Automation of Microsoft Excel 97
Page 8

Table 2.
New Sample Projects (Continued)
Filename Description
hiq\report.prj
hiq\xferdta.prj
ie\iedemo.prj
labview\lvdemo.prj
word\worddemo.prj
samples\analysis\
2dfft.prj
nlinfit.prj
parsevls.prj
polyfit1.prj
transmit.prj
thd.prj
stat.prj
ActiveX Automation of HiQ 3.1/4.0 to generate
a report
ActiveX Automation of HiQ 3.1/4.0 to
transfer data
ActiveX Automation of Microsoft Internet
Explorer 4.0
ActiveX Automation of LabVIEW 5.0
to run VIs
ActiveX Automation of Microsoft Word 97
Demonstrates using FFT to do a 2D FFT
NonLinearFit using the
Levenberg-Marquardt method
Demonstrates Parseval’s theorem
Demonstrates data conditioning for PolyFit
Simulates a transmission and receiver system
Total Harmon ic Distortion
Simple statistics example
stability.prj
samples\custctrl\cviogl
ogldemo.prj
ogldraw.prj
simple.prj
samples\dlldebug
scope.prj and usescope.prj
samples\toolbox
asyncdem.prj
LabWindows/CVI Release Notes for Windows 8
Evaluates the stability of the system
3D graph plotting using CVIOGL
instrument driver
Uses CVIOGL instrument driver for OpenGL
rendering
3D graph plotting using CVIOGL
instrument driver
Demonstrates creating and debugging a DLL
Asynchronous timer example
©
National Instruments Corporation
Page 9
samples\sdk\
Table 2.
Filename Description
New Sample Projects (Continued)
stdio\demo.prj
taskbar\taskbar.prj
printlst\printlst.prj
glaux\glauxdem.prj
samples\sdk\threads\
multipnl\multipnl.prj
onepanel\onepanel.prj
samples\userint\
scaling.prj
Uses SDK to change Standard Input/Output
window appearance
Creates icon on system taskbar
Queries system for available printers
Demonstrates using OpenGL Glaux library
for 3D rendering
Demonstrates using UIR panels in
multiple threads
Demonstrates using non-UIR threads
Demonstrates UIR panel scaling
Changes to the LabWindows/CVI Development
Environment
This section contains information on several enhancements to the LabWindows/CVI
development environment.
Debugging DLLs in Windows 95/NT
You can now debug DLLs in the LabWindows/CVI development environment. Refer to the
DLL Debugging (Windows 95/NT Only) section in Chapter 3, Project Window, of the
LabWindows/CVI User Manual for more information on different ways to debug DLLs,
location of files required for debugging DLLs, and what restrictions apply.
DLL Debugging Menu Item (Windows 95/NT Only)
This command applies only when you set the Target item in the Build menu to
Dynamic Link Library. If the DLL Debugging command is enabled when you create a
DLL, LabWindows/CVI includes debuggable code in your DLL and generates an extra file
that contains a symbol table and source position information necessary for debugging. The
extra file has the same pathname as the DLL except that its extension is
©
National Instruments Corporation 9 LabWindows/CVI Release Notes for Windows
.cdd.
Page 10

In the LabWind ows/CVI development environment, you can debug only DLLs you create in
LabWindows/CVI with the DLL Debugging command enabled. Other development
environments cannot debug DLLs you create in LabWindows/CVI.
When you debug a DLL in LabWindows/CVI, you can use all the standard debugging
features, but the run-time checking features are not available. Thus, you can use
single-stepping, conditional breakpoints, watch expressions, and the Variables window, but
there is no interactive r epor ting of library errors and no protection ag ainst o v erwriting arrays
or misuse of pointers. When you create a DLL with the DLL Debugging command disabled,
LabWindows/CVI forces the debugging level to None. When you create a DLL with the
DLL Debugging comma nd enabled, LabWindows/CVI forces the debugging level to
No Run-Time checking. You can access the deb ugging level fr om the Run Options command
in the Options menu of the Project window.
Select External Process
This command applies only when you set the Target item in the Run menu to
Dynamic Link Library. The Select External Process command allows you to specify a
standalone executable that uses your DLL. When you execute the command, a dialog box
appears in which you enter the pathname and command line arguments to an external
program. The Run Project item in the Run menu then changes to Run xxx.exe, where
xxx
.exe is the filename of the ex ternal program. When you execute the Run xxx.exe
command, LabWindows/CVI starts the external process and attaches to it for debugging. If
you have s et an y br eakpoi nts in the sour ce f il es for t he DLL, LabWindows/CVI honors th em.
LabWindows/CVI stores external program pathname and command line arguments in
the project.
Automatic Generation of Object Files
The new O icon in the Pro ject windo w applies on ly to source ( .c) files and indicates that you
enabled the Compile into Object option. If this option is enabled when you compile the source
file, LabWindows/CVI creates an object (
non-debuggable code rather than generating debuggable code in memory. Double click on
this icon to toggle the option.
When you open a project, LabWindows/CVI marks each source file with the
compilation only if one of the following conditions applies:
• The object file does not exist on disk.
• The source file or any of the include files on which it depends has a date later than the
date of the object file.
As you work, LabWindows/CVI marks source files for recompilation whenever they or any
of their include files are modified, regardless of the state of the
Build Project or Run Project command, LabWindows/CVI co mpiles all source files marked
for recompilation. For source files with the
corresponding object files.
.obj or .o) file on disk that contains
O icon for
O icon. When you select the
O icon, LabWindows/CVI also generates the
LabWindows/CVI Release Notes for Windows 10
©
National Instruments Corporation
Page 11

This feature is useful if you do not want to recompile all your source files each time you load
your project. Debu gging is no t av ailab le for f iles wit h the
when you want to suppress debugging on a source file.
O icon, so this feature also is useful
Create Dynamic Link Library Dialog Box
The ring control Where to Copy DLL allows you to instruct LabWindows/CVI to copy the
DLL to a different directory after you create it. Your choices are the following:
• Do not copy
• Windo ws System directory
• VXIplug&play directory (the
directory)
If you choose to include a type library when yo u create a DLL, LabWindows/CVI now saves
the GUID for the type library in the project. Previous versions of LabWindows/CVI do not
generate a new GUID each time you build the DLL. If you also choose the Include File
Symbols for the exports option, LabWindows/CVI now adds to the type library the integer and
floating-point constants and enums from the header file you specify for the exports.
bin
directory under the VXIplug&play framework
Breakpoints/Tags in Non-Project Files Are Saved in Project
Previous versions of LabWindows/CVI do not sav e breakpoints or tags you set in files that are
not in the project. Also, when you unload the project, b reakpoints and tags in non-project f iles
remain in effect.
T o accomm odate DLL debugg ing, LabWindows/CVI 5.0 now saves all breakpoints and tags
in the project, regardless of whether the f iles to which they apply are in the pr oject. When you
unload the project, LabW in dows/ CVI remov es all br eakpoints and t ags from any non-p roject
files you might hav e open. Ho wev er , LabW indo ws/CVI does n ot sav e breakpoi nts and tags in
the Interactive E x ecu tio n window in the project and does not remove them when yo u unload
a project.
New Control in Watch Expression Dialog Box
Project/DLL is a new control in the Add/Edit Watch Expression dialog box. You use this
control when you debug a DLL but do not have the project for the DLL open. The control
indicates whether the watch expression applies to the current project or to a separate DLL.
The default value for the control is Current Project.
If you want the watch expression to app ly to a DLL that is no t the target of th e current project,
you must supply the name of the DLL. A menu ring to the right of the control contains the
current project value and the names of all currently loaded DLLs.
Activate Panels When Resuming: Clarification
When you enable the Activate Panels When Resuming option in the Run menu of the
Source window, LabWindows/CVI activates your most recently active panel upon resuming
©
National Instruments Corporation 11 LabWindows/CVI Release Notes for Windows
Page 12

execution only if it was the active window at the time execution was suspended. If a
LabWindows/CVI window, such as a Source window, was active at the time execution was
suspended, LabWindows/CVI does not reactivate a window.
For instance, if you suspend execution by selecting the Break Execution option from the
Run menu in a Source window, LabWindows/CVI does not reactivate a window when you
resume execution.
New Print Dialog Box
For more information on printing graphics and text on Windows using the reorganized Print
dialog box, refer to the Revised Pri nt Dialog Boxes on Windows section in the Chan ges to the
User Interface Library section later in this document.
New Options for Source File Printing
New options fo r printin g source f iles i nclude addi ng the date , time, and f il ename at th e top of
each page, adding page numbering, and choosing various text style options. The text style
options apply to Windows platforms only. The new options on the dialog box correspond to
the new text printing attributes in the User Interface Library. Refer to the Application of
Attributes to Text Printing and New Print Attributes sections in the Changes to the User
Interface Li brary section later in this document.
Edit Menu
The Find and Replace commands of the Edit menu of the Function T ree Editor win dow and
the Function Panel Editor window open dialog boxes similar to the Find and Replace dialog
boxes in the Source window , which allo w you to search and replace text in the entire function
.fp).
panel (
Code Menu
In certain cases, the Select Attribute Constant command in the Code menu replaces the
Select UIR Constant command. This occurs in panels for functions that set or get attribute
values. The User Interface Library, the VISA Library, and IVI dri vers include such functions,
for example,
SetPanelAttribute in the User Interface Library. The panels for these functions each
contain an Attribute ring control and a corresponding Value input control. When you use
either of these two controls, the Select Attribute Constant command appears in the Code
menu. The action of the command differs based on whether you use the Attribute or
Value control.
GetCtrlAttribute, SetCtrlAttribute, GetPanelAttribute, and
New Tools Menu
This section describes the commands in the Tools menu of the Project, Source, Function
Panel, Function Tree Editor, and Fun ction Panel Editor windows.
LabWindows/CVI Release Notes for Windows 12
©
National Instruments Corporation
Page 13

Create ActiveX Automation Controller (Windows 95/NT only)
Use the Create ActiveX Automation Controller command to generate a new instrument
driver for an Acti veX Automation Server. When you select the Create ActiveX Automation
Controller command, the Select ActiveX Automation Server dialog box appears, which
contains a list of the ActiveX Automation Servers on the current computer. After you select
an ActiveX Automation Server, a wizard guides you through creating an instrument dri v er to
control the ActiveX Automation Server. The wizard lets you select the property constants,
method functions, and creation functions for the objects to include in the instrument driver.
Refer to the Create ActiveX Automation Controller (Wind ow s 95/NT Only) section in
Chapter 3, Project Window, of the LabWindows/CVI User Manu al for more information on
how to use this feature.
Update ActiveX Automation Controller (Windows 95/NT only)
Use the Update ActiveX Automation Controller command to add new objects to an existing
ActiveX Automation controller instrument driver. The command opens the Browse ActiveX
Automation Server dialog box for the ActiveX Automation Server the instrument driver
controls. Refer to the Create ActiveX Automation Controller (Windows 95/NT Only) section
in Chapter 3, Project Window , of the LabWindows/CVI User Manual for more information o n
how to use this feature.
Create IVI (Intelligent Virtual Instruments) Instrument Driver
Use the Create IVI Instrument Driver command and the IVI wizard to create the source
file, include f il e, and fun ct ion panel file for controlling an instrument. You can base the new
instrument driver on one of the following:
• An existing driver for a similar instrument
• The core IVI driver template
• A template for a particular type of instrument
The IVI wizard copies the template or existing driver files and replaces all instances of the
original instrument prefix with the prefix you select for your new driver.
Refer to the LabWindows/CVI Instrument Driver Developers Guide for more in formation on
IVI drivers.
Edit Instrument Attributes
Use the Edit Instrument Attributes command to add, delete, or edit attributes for an IVI
driver . You can inv oke this command only if the file in the Source window has the same path
and base filename as an instrument driver function panel (
file. The command is useful only if the instrument driver files were generated using the
Create IVI Instrument Driver command.
This command analyzes the instrument driver files to find all the attributes the driver uses. It
then opens a dialog box that displays the attributes and information about them. In the dialog
©
National Instruments Corporation 13 LabWindows/CVI Release Notes for Windows
.fp) file and its associated .sub
Page 14

box, you can add or delete attributes, modify their properties, and enter help text for them.
When you apply the changes, the command modifies the source, include, and function pan el
files for the instrument driver.
If you use this command when the text cursor is over the defined constant name or callback
function name for one for the attrib utes, the dialog box appears with that attrib ute selected in
the list box.
Refer to the LabWindows/CVI Instrument Driver Developers Guide for more in formation on
IVI drivers.
Edit Function Tree
Use the Edit Function Tree command to display the F unctio n Tree window for the functio n
.fp) file associated with the file in the Source window. The functi on panel file must
panel (
have the same path and base filename as the file in the Source window.
Edit Function Panel
Use the Edit Function Panel command to display the Function Panel Editor window for a
function defined in an instr ument driv er source f ile. You can use this command only if the f ile
in the Source window has the same path and base filename as an instrument driver function
.fp) file. The text curs or must be ov er the name of a function that has a function panel
panel (
.fp file.
in the
Generate Source for Instrument Driver Functions
LabWindows/CVI 5.0 includes two new menu items for generating source for instrument
driver functions: Generate Source for Function Panel in the Function Panel Editor win dow
and Generate New Source for Function Tree in the Function Tree Editor window.
Go To Definition
Use the Go To Definition command to display the function in the source (.c) file associated
with the specified function in the Function Panel Editor window . The function panel file must
have the same path and base filename as the file in the Source window.
Go To Declaration
Use the Go To Declaration command to display the function prototype in the header (.h) file
associated with the specified function in the Function Panel Editor window. The function
panel file must have the same path and base filename as the file in the Source window.
Enable Auto Replace
Use the Enable Auto Replace command to enable automatic updating of all definitions and
declarations for function names when LabWindows/CVI updates the instrument pref ix or t he
function name in the Function Tree Editor window or Function Panel Editor window.
LabWindows/CVI Release Notes for Windows 14
©
National Instruments Corporation
Page 15

Generate IVI C++ Wrapper
Use the Generate IVI C++ Wrapper command to generate a C++ wrapper for an IVI driv er .
Refer to the LabWindows/CVI Instrument Driver Developers Guide for more in formation on
IVI drivers.
Context Menus
You can access a context menu in the Function Tree Editor window by pressing the right
mouse button. The context menu contains a selection of the most commonly used menu
commands from the Function Tree Editor window menubar. The Function Tree Editor
window now includes the following context menu items:
•Edit Node
• Edit Function Pan el Wind ow
• Edit He lp
• Generate Source For Function Node
• Go To Declaration
• Go To Definition
The Source window now includes the following new context menu items:
• Edit Function Tree
• Edit Function Pan el
• Edit Instrument Attributes
User-Defined Entries in Tools Menu
You can install your own entries in the Tools menu. Each entry invokes an executable with
optional command line arguments. Use the Tools Menu Options command from the
Options menu of the Project window to add your own entries to the Tools menu.
Tools Menu Options
The new Tools Me nu Option s comm and in the Op tions menu of the Project window allows
you to add your own menu items to the Tools menu that appears in the Project, Source,
Function Panel, Function Tree Editor, and Function Panel Editor windows. Eac h entry
consists of a menu item name and an associated command line to execute. Each command
line consists of a program name and optional arguments. When you execute an item from
the Tools menu, LabWindows/CVI calls a system function to start another process, passing
the command line as a parameter.
New Configuration Option
The DST rules string allows you to specify the periods of the year in which daylight savings
time is in effect. The time and date functions in the LabWindows/CVI ANSI C Library use
©
National Instruments Corporation 15 LabWindows/CVI Release Notes for Windows
Page 16

this information. In previous versions of LabWindows/CVI, you can specify the daylight
savings time period only by modifying the
For information on the format of the DST rules string and how the time and date functions use
it, refer to the Time and Date Functions section in Chapter 1, ANSI C Library, of the
LabWindows/CVI Standard Libraries Reference Manual.
For instructions on setting the configuration options, refer to the How to Set the Configuration
Options section in Chapter 1, Configuring LabWindows/CVI, of the LabWindows/CVI User
Manual.
cvimsgs.txt file in the cvi\bin directory.
Mouse Wheel Support
The LabWindows/CVI environment windows now support mouse pointing devices with
wheels, such as the Microsoft IntelliPoint Mouse. The mouse wheel allows you to scroll up
or down in any window, listbox control, or textbox control that contains a vertical scrollbar.
Changes to the User Interface Library
This section contains information on the various changes in the User Interface Library,
including the following:
• Direct printing replaces bitmap printing on all Windows platforms.
• The print dialog boxes change on all Windows platfo rms.
• You can now use the Window system settings for some print attributes.
• Two new attributes keep track of the current printer.
• Six attributes that previously applied only to graphics prin ting now also apply to
text printing.
• Thirteen new attributes apply to printing text files and buffers.
• A new attribute allows scaling of panels to different screen resolutions.
• New attributes allow the scaling of panel contents when you resize the panels.
• Nine new functions exist.
• Five new error codes exist.
• The User Interface Library is now multithread safe when used in standalone executables.
Note
Be sure to read the Warning of Modified Behavior and Warning of Change to Text
Format (.tui) Files sections later in th is document.
Change to Default Value of SetSleepPolicy
Starting with LabWindows/CVI 5.0, the default value for SetSleepPolicy is
VAL_SLEEP_MORE. In earlier versions of LabWindows/CVI, the default sleep policy is
VAL_SLEEP_NONE. SetSleepPolicy sets the degree to which your program “sleeps” when
LabWindows/CVI Release Notes for Windows 16
©
National Instruments Corporation
Page 17

checking for events. Use this function if you require LabWindows/CVI to use more CPU
resources so that other applications are given less processor time.
Clarifications and Corrections
The previous version of the manual incorrectly states that values for ATTR_XOFFSET and
ATTR_YOFFSET are expressed in inches. In fact, they are expressed in tenths of millimeters.
SetSystemPopupsAttribute and GetSystemPopupsAttribute do not apply to
Windows dialog boxes the User Interface Library uses. For example, you cannot use
SetSystemPopupAttribute to make the Windows file select dialog box movable.
The top-level panel callback receives the
EVENT_CLOSE message when the user executes th e
Close command from the Syst em m enu or cli cks on the X button at the right end of the panel
titlebar.
The main callback receives the
EVENT_END_TASK message when the user tries to shut down
Windows or when the user tries to terminate your application, for example, by executing
the Close command from taskbar button of the ma in thread.
When using the new function
SetBitmapData on a bitmap that already has
a mask, you can either supply the same mask array, supply a new mask array,
or pass
REMOVE_TRANSPARENCY_MASK, the color of the pixels that were transparent under the
REMOVE_TRANSPARENCY_MASK to remove the mask. W h en you use
old mask are unpredictable. You can set the value of these pixels in the bits parameter.
The following text is incorrect in the Using Callback Functions to Respond to User
Interface Events section of Chapter 3, Programming with the User Interface Library,
in the LabWindows/CVI User Interface Reference Manual: “A panel callback receives the
EVENT_SIZE and EVENT_MOVE messages when the user resizes or moves the panel. The
panel callback does not receive these messages when you programmatically resize or move
a panel.”
LabWindows/CVI posts the events
EVENT_PANEL_MOVE and EVENT_PANEL_SIZE when
you programmatically move or resize a panel. The panel callback receives the events
when the application processes events.
The manual incorrectly defines the return value description for
InsertSeparator.
The returned integer parameter is defined as follows:
menuItemID Returns the ID that LabWindows/CVI uses to specify this menu item
in subsequent function calls. Negative values indicate that an error
occurred. Refer to Appendix A for error codes.
Direct Windows Printing
On all Windows platforms, the User Interface Library now uses direct Windows printing
by default. Previously, the library used only bitmap printing. The new print attribute
ATTR_BITMAP_PRINTING specifies whether to use bitmap printing or direct printing.
©
National Instruments Corporation 17 LabWindows/CVI Release Notes for Windows
Page 18

By using direct Windows printing, you can take full advantage of the higher resolution
printers have over computer screens. This allows panels and controls to be scaled optimally
to the printer coordinates, thus eliminating the aliasing that causes blocky text and graph
plots. On the other hand, certain printers do not support the raster operations necessary for
printing certain kinds of objects. Specifically, many printers are not capable of printing
transparent bitmaps.
Revised Print Dialog Boxes on Windows
For programmatic printing and printing from the File menu, a common, unified print dialog
box allows you to do the following:
• Select a printer.
• Specify printing options that are specific to LabWindows/CVI. Different sets of options
appear for graphics printing as opposed to text printing.
• Open the standard Windows dialog box for the selected printer. You set options that are
specific to the printer in this dialog box.
You can programmatically set all the options th at are specific to LabWindows/CVI by using
SetPrintAttribute in LabWindows/CVI. In addition, you can programmatically set some
of the attributes in the printer-specific dialog box using
SetPrintAttribute.
Interaction between Print Dialog Boxes and Programmatic Attributes
LabWindows/CVI 5.0 modifies the way the print dialog boxes interact with attributes when
used in a program.
Previously, if you selected a different printer in the dialog box, the User Interface Library
did not retain the name of the selected printer. Every time the print dialog box appeared,
the printer selection was reset to the curren t system printer. Now, the library stores the
name of the printer you select in a new attribute,
dialog box appears, LabWindows/CVI sets the printer selection to the current value of
ATTR_PRINTER_NAME. If ATTR_PRINTER_NAME is NULL, the empty string, or the name of a
printer that is not currently known by Windows, the next call to a printing function uses the
current system printer and stores its name as the
Normally, when the user invokes the common print dialog box or the printer-specific dialog
box, LabWindows/CVI initializes the controls that correspond to programmatic attributes to
the current attribute values. The new value
initialize the printer-specific dialog box to the current system values for the printer rather
than the current values of the User Interface Library attributes. You can access the system
values for the printer in the Control Panel. When the user clicks on OK in the dialog box,
LabWindows/CVI copies the current values in the controls to the attributes.
LabWindows/CVI does not retain the
VAL_USE_PRINTER_SETTING value.
Refer to the following Using Windows System Printer Settings section for more information
VAL_USE_PRINTER_SETTING.
on
LabWindows/CVI Release Notes for Windows 18
ATTR_PRINTER_NAME. Whenever the print
ATTR_PRINTER_NAME value.
VAL_USE_PRINTER_SETTING allows you to
©
National Instruments Corporation
Page 19

Using Windows System Printer Settings
VAL_USE_PRINTER_SETTING applies to all print attributes for which corresponding
Windows system settings exist. Y ou can view and modify the Windows system settings for a
printer in the Control Panel. The
current settings of the operating system instead of the current values of the User Interface
Library attributes.
VAL_USE_PRINTER_SETTING value allows you to use the
If you call one of the printing functions
PrintTextFile and an attribute v alue is VAL_USE_PRINTER_SETTING, LabW indows/CVI
PrintCtrl, PrintPanel, PrintTextBuffer, or
changes the attribute value to the current system setting. The exact behavior depends on
whether you instruct the printing function to invoke the print dialog box. Notice that only
PrintCtrl and PrintPanel give you the option to open the dialog box:
• If the function invokes the common print dialog box and the user invokes the
printer-specific dialog box, LabWindows/CVI initializes the control that corresponds to
the attribute to the current system setting. The user can modify the v alue. When the user
clicks on OK in the printer-specific dialog box, LabWindows/CVI stores the current
value of the control as the attribute value.
• If the function invokes the common print dialog box but the user never invokes the
printer-specific dialog box, LabWindows/CVI stores the system setting as the attribute
value when the user clicks on OK in the common dialog box.
• If you suppress the dialog boxes, the print function uses the current system setting and
stores it as the attribute value.
Notice that LabWindows/CVI does not retain
VAL_USE_PRINTER_SETTING as the attribute
value after you call a printing function. If, throughout the life of your program, you want to
use the system settings that are in effect the first time you call a printing function, set the
attributes to
VAL_USE_PRINTER_SETTING at the beginning of your program and do not
modify them programmatically thereafter. If, on the other hand, you always want to use the
most recent system settings, you must set the attributes to
VAL_USE_PRINTER_SETTING
before each call to a printing function.
You can use
•
ATTR_DUPLEX
VAL_USE_PRINTER_SETTING with the following attributes:
• ATTR_NUMCOPIES
• ATTR_ORIENTATION
• ATTR_XRESOLUTION
• ATTR_YRESOLUTION
Note
The User Interface Library never changes the current system printer or the
current system settings for a printer.
©
National Instruments Corporation 19 LabWindows/CVI Release Notes for Windows
Page 20

Obsolete Value for X and Y Resolution
For the ATTR_PRINT_XRESOLUTION and ATTR_PRINT_YRESOLUTION attributes,
VAL_USE_PRINTER_SETTING replaces VAL_USE_PRINTER_DEFAULT, which is obsolete.
The actual value, –1, remains the same.
In previous v ersions o f LabW indo ws/CVI, the
have the same behavior that
VAL_USE_PRINTER_DEFAULT , the attrib ute retains that value. This has two consequences.
to
First, you cannot use
VAL_USE_PRINTER_SETTINGS does now . If you set an attribute
GetPrintAttribute to find out the actual value that was used.
Second, LabWindows/CVI uses the most recent printer setting each time you call a print
function, even if you set the attribute to
Now that
VAL_USE_PRINTER_SETTING causes LabWindows/CVI to save the current
system setting as the attribute value, there is no reason to overwrite that value with the
current system setting on the next print function call. If the user changes the setting in
the printer-specific dialog box, most likely , you should use the modified v alue in subsequent
print calls.
Warning of Modified Behavior
When the Run-time Engine for LabWindows/CVI 5.0 is installed, it overwrites previous
versions of the Run-time Engine. Thus, executables on a computer with the new Run-time
Engine use the new print dialog box.
In addition, any executable that used
ATTR_PRINT_XRESOLUTION or ATTR_PRINT_XRESOLUTION has the modified behavior
VAL_USE_PRINTER_SETTING, as described in the Using Windows System Printer
of
Settings section earlier in this document.
Revised Constant Names
The constant names for several attributes and values have changed, but the actual values
remain the same. The obsolete constant names remain in the
do not have to change your source code.
VAL_USE_PRINTER_DEFAULT valu e does not
VAL_USE_PRINTER_DEFAULT only once.
VAL_USE_PRINTER_DEFAULT for
userint.h include file, so you
The changes to attribute constant names are as follows:
•
ATTR_PRINT_AREA_HEIGHT replaces ATTR_PAPER_HEIGHT.
•
ATTR_PRINT_AREA_WIDTH replaces ATTR_PAPER_WIDTH.
•For
•For
•For
LabWindows/CVI Release Notes for Windows 20
ATTR_PRINT_AREA_HEIGHT and ATTR_PRINT_AREA_WIDTH,
VAL_USE_ENTIRE_PAPER replaces VAL_USE_PRINTER_DEFAULT.
ATTR_XOFFSET and ATTR_YOFFSET, VAL_CENTER_ON_PAPER replaces
VAL_USE_PRINTER_DEFAULT.
ATTR_XRESOLUTION and ATTR_YRESOLUTION, VAL_USE_PRINTER_SETTING
replaces
VAL_USE_PRINTER_DEFAULT.
©
National Instruments Corporation
Page 21

Refer to the Using Windows System Printer Settings and Warning of Modified Behavior
sections earlier in this document for more information.
Application of Attributes to Text Printing
The following existing attributes now apply to text printing and to graphics printing:
•
ATTR_DUPLEX
• ATTR_EJECT_AFTER
• ATTR_NUMCOPIES
• ATTR_ORIENTATION
• ATTR_XRESOLUTION
• ATTR_YRESOLUTION
New Print Attributes
The following new print attributes apply to text and graphics printing:
ATTR_PRINTER_NAME
ATTR_PRINTER_NAME_LENGTH
ATTR_SYSTEM_PRINT_DIALOG_ONLY
Currently selected printer
Number of characters in currently selected
printer
Specifies to display only the Windows
printer-specific dialog box; do not show the
LabWindows/CVI print dialog box
The following new print attributes apply only to printing text files and buffers:
ATTR_PRINT_BOLD
ATTR_PRINT_FONT_NAME
ATTR_PRINT_FONT_NAME_LENGTH
ATTR_PRINT_ITALIC
ATTR_PRINT_POINT_SIZE
ATTR_PRINT_STRIKEOUT
ATTR_PRINT_UNDERLINE
ATTR_SHOW_DATE
ATTR_SHOW_FILE_NAME
ATTR_SHOW_LINE_NUMBERS
ATTR_SHOW_PAGE_NUMBERS
ATTR_SHOW_TIME
ATTR_TAB_INTERVAL
Text is bold
Name of current font
Number of characters in current font value
Text is in italics
Point size of text
Text has strikeout
Text is underlined
Display current date on first line of each page
Display filename on first line of each page
Display line numbers
Display page numbers
Display current time on first line of each page
Number of spaces represented by a
<Tab> character
©
National Instruments Corporation 21 LabWindows/CVI Release Notes for Windows
Page 22

New Panel Attributes
LabWindows/CVI 5.0 adds the following panel attributes:
ATTR_SCALE_CONTENTS_ON_RESIZE
ATTR_MIN_HEIGHT_FOR_SCALING
ATTR_MIN_WIDTH_FOR_SCALING
ATTR_RESOLUTION_ADJUSTMENT
ATTR_HAS_TASKBAR_BUTTON
LabWindows/CVI scales panel contents
when panel is resized
Smallest panel height for which
LabWindows/CVI allows scaling
Smallest panel width for which
LabWindows/CVI allows scaling
Panel scaled when displayed on different
screen resolutions (read-only)
Panel has its own taskbar button
Note
When you use ATTR_SCALE_CONTENTS_ON_RESIZE and
ATTR_RESOLUTION_ADJUSTMENT to scale panels and controls, use
True Type fonts for optimal res ult s.
New Control Attributes
LabWindows/CVI 5.0 adds the following control attributes:
ATTR_AUTO_SIZING
ATTR_PLOT_AREA_LEFT
ATTR_PLOT_AREA_TOP
ATTR_PLOT_THICKNESS
Specifies whether LabWindows/CVI resizes
command button when text is changed; valid
values:
VAL_ALWAYS_AUTO_SIZE VAL_GROW_ONLY
VAL_NEVER_AUTO_SIZE
VAL_SHRINK_ONLY
Offset in pixels of the left edge of the plot area
from the left edge of the graph control
Offset in pixels of the top of the plot area from
the top of the graph control
Thickness of the plot line, in pixels; applies
only when
VAL_SOLID; if ATTR_PLOT_STYLE is
ATTR_FAT_LINE or ATTR_FAT_STEP,
ATTR_LINE_STYLE is
LabWindows/CVI draws the plot with three
times the thickness specified in this attribute
New System Attribute
The ATTR_RESOLUTION_ADJUSTMENT system attribute specifies to what extent
LabWindows/CVI scales panels and their con tents when displayed on scre ens with different
resolutions.
LabWindows/CVI Release Notes for Windows 22
©
National Instruments Corporation
Page 23

Resolution Adjustment
When a panel is displayed on a screen with a different resolution than the screen on which
you edited the panel, the panel might appear too large or too small. The Edit Panel dialog
box in the User Interface Editor contains an option to scale the panel to the resolution of
the screen. You can choose to make no adjustment or an adjustment of up to 100 percent.
LabWindows/CVI saves your value for this option for each panel in the
LabWindows/CVI scales the panel and its contents when you call
LoadPanelEx in your program.
.uir file.
LoadPanel or
You can use the
.uir file. To override the setting for a panel, call SetSystemAttribute to set the
in the
ATTR_RESOLUTION_ADJUSTMENT attribute before you call LoadPanel or LoadPanelEx.
After calling
ATTR_RESOLUTION_ADJUSTMENT to obtain the setting that LabWindows/CVI saved in the
.uir file.
ATTR_RESOLUTION_ADJUSTMENT system attribute to override the settings
LoadPanel or LoadPanelEx, you can call GetPanelAttribute with
User Interface Editor Changes
Changes in the User Interface Editor accommodate the new panel and system attributes.
The Other Attributes dial og box th at you can invoke from the Edit Panel dialog box no w has
controls for the following items:
• Scale Contents on Resize
• Minimum Height for Rescaling
• Minimum Width for Rescaling
• Resolution Adjustment
The Floating Window option on the Other Attributes dialog box is renamed to Floating Style.
The Floating Style ring control contains the following choices:
•Never
• When App is Active
•Always
All controls in the Color Preferences section of the Preferences dialog box, except for the
Default Editor Background Color, are now in a new section called Preferences for New
Panels. The Preferences for New Panels section also includes a new Resolution Adjustment
control.
A new Preferences for New Controls section specifies the def ault control and label text styles
for a new control.
A Default command button in the Color Preferences section allows you to return to the
original editor background color. On Windows, this is your system background color.
©
National Instruments Corporation 23 LabWindows/CVI Release Notes for Windows
Page 24

Changes to Existing Functions
For GetPrintAttribute and SetPrintAttribute, the last parameter is the attribute
value. In previous versions of LabWindows/CVI, this is an integer. Now the parameter is a
variable type argument. This change does not require any modifications to yo ur source code.
The attribute
0 VAL_FLOAT_NEVER
1 VAL_FLOAT_APP_ACTIVE
–50 VAL_FLOAT_ALWAYS
The constant
only when the application is active. The constant
ATTR_FLOATING has the following new constants:
VAL_FLOAT_APP_ACTIVE specifies to make the panel floating, or topmost,
VAL_FLOAT_ALWAYS maintains the panel
as floating or topmost even when the application is not active.
When LabWi ndo ws/C VI displ ays a p opup panel , such as when you call
InstallPopup, all LabWindows/CVI panels with the ATTR_FLOATING attribute set to
or
VAL_FLOAT_APP_ACTIVE or VAL_FLOAT_ALWAYS do not float while the popup is
either
displayed. In pre vious vers ions of La bW indo ws/ CVI, a floati ng windo w can co ver t he popup
window, preventing an interaction with th e popup window.
LoadPanel, LoadPanelEx, LoadMenuBar , and LoadMenuBarEx now work on .tui files
.uir files. Whereas .uir files are in binary format and load quickly, .tui files are
and on
in text format and load slowly. You can save a
.tui file by using the Save in Text Format
command in the Options menu of the User Interface Editor. Because text format files load
slowly, National Instruments recommends that you continue to use
.tui files makes it possible for user -written wizards to generate user inter face f iles that
load
.uir files. The ability to
you can load programmatically.
Details on Loading Panels and Menubars from .tui Files
When you call LoadPanel or LoadPanelEx on a .tui file, the panel resour ce ID parameter
must be the header number of the
if the section header for the desired panel is
.tui file section in which the panel is defined. For example,
[Panel003], pass 3 as the panel resource ID.
FileSelectPopup
LoadPanel or LoadPanelEx loads all the controls in the .tui file with section headers in
the form
[Panel
NNN
_Control
YYY
], where
greater. The control numbers must start at 001 and be consecutive. To pass a control ID to
other User Interface Library functions, pass
[Panel003_Control001] for a control on which you w ant to set an attr ib ut e v alue, pas s 2
as the control ID parameter to
When you call
LoadMenuBar or LoadMenuBarEx on a .tui file, the menu bar ID parameter
must be the header number of the
SetCtrlAttribute.
.tui file section in which the panel is defined. For example,
if the section header for the desired menubar is
LoadMenuBar or LoadMenuBarEx loads all the menus and menu items in the .tui file with
section headers in the form
LabWindows/CVI Release Notes for Windows 24
[MenuBar
NNN
NNN
is the panel resource ID and
YYY
+ 1. For instance, if the section header is
[MenuBar003], pass 3 as the menubar ID.
_...], where
NNN
is the menubar ID passed to
©
National Instruments Corporation
YYY
is 001 or
Page 25

the function. The menu ID or menu item ID that you pass to User Interface Library functions
is based on a depth-first traversal of all the items in the menu tree, starting at 2. For submenu
items, the submenu itself has an ID that is one greater than the item ID of submenu entry in
the parent menu.
If you sav e a
have an up-to-date include (
.tui file in the User Interface Editor in LabW indo ws/CVI 5.0 or higher and you
.h) file the User Interface Editor generates, you can use the panel,
control, menubar , menu, submenu , and menu item co nstants in the include f ile as parameters
to User Interface Library functions.
Warning of Change to Text Format (.tui) Files
The order in which panel and menubar sections are written has changed to allow you to use
user interface include file constants in conjunction with
number has changed from 101 to 102.
If you use
generated
to create new baseline
.tui files to find differences between versions of your .uir files and your
.tui files in previous version of LabWindows/CVI, use LabWindows/CVI 5.0
.tui files for all your .uir files.
New Functions
The following nine new functions in the User Interface Library are listed in alphabetical
order:
•
GetScaledCtrlDisplayBitmap creates a bitmap object that contains a snapshot
image of the current appearance of the specified control.
•
GetScaledPanelDisplayBitmap creates a bitmap object that contains a snapshot
image of the current appearance of the specified panel.
•
GetTextBoxLineIndexFromOffset returns the zero- based index of t he line on which
the character at a specified byte offset is contained in a textbox control.
•
GetTextBoxLineOffset returns the zero-based index of the line on which the
character at a specified byte offset is contained in a textbox control.
•
MakeApplicationActive activates your application and brings its topmost panel to
the front.
•
MinimizeAllWindows hides all panels created in the current thread, other than panels
with their own taskbar buttons. You can restore the panels by clicking on the taskb a r
button for the thread.
•
PostDeferredCallToThread has the same capabilities as PostDeferredCall
except that you can specify the thread in which the callback function is to be called.
•
SetBitmapData changes the image contents of an existing bitmap.
•
SetPanelSize sets the height and width of the panel.
.tui files. In addition, the version
©
National Instruments Corporation 25 LabWindows/CVI Release Notes for Windows
Page 26

New Error Codes
Table 3 lists the new User Interface Library error codes.
Table 3.
Code Error Message
–129
–130
–131
–132
–133
The specified operation can b e per for med o nly in the thread in which
the top-level panel was created.
The specified panel was not found in the .tui file.
The specified menubar was not found in the .tui file.
The specified control style was not found in the .tui file.
A tag or value is missing in the .tui file.
New User Interface Library Error Codes
Using the User Interface Library in a Multithreaded Executable
under Windows 95/NT
The User Interface Library is now multithread safe when used on Windows 95/NT in a
standalone executable or in a DLL called from a standalon e executable. Fo r more information
on ways you can use the User Interface Library in a mu ltithreaded program and various
behaviors, r ules, and restriction s, refer to t he Multithreading in a Windows 95/NT Executable
section in Chapter 3, Progra mming w ith the User Inter face Libr ary, in the LabWindows/CVI
User Interface Reference Manual.
Mouse Wheel Support
The LabWindows/CVI User Interface panels now support mouse pointing devices with
wheels, such as the Microsoft IntelliPoint Mouse. The mouse wheel allows you to scroll up
or down in any panel, listbox control, or textbox control that contains a vertical scrollbar.
Changes to the Programmer Reference Manual
This section contains several additions to the LabWindows/CVI Programmer Reference
Manual.
Stack Size
The maximum stack size on Windows 3.1 has increased to 40 KB.
After you install the LabWindows/CVI development env iron m ent, the default stack size for
program execution increases to 40 KB on Windows 3.1 and 250 KB on all other platforms.
LabWindows/CVI Release Notes for Windows 26
©
National Instruments Corporation
Page 27

Details of User Protection
The Avoid Unassigned Dynamic Allocation in Function Parameters section is new to the
Details of User Protection discussion in Chapter 1, LabWindows/CVI Compiler, of the
LabWindows/CVI Programmer Reference Manual.
Linking Objects and Static Libraries in External Compilers
When you use an external compiler to link a project that contains object or static library
files created in LabWindows/CVI, there are several points to remember. Refer to the Using
Object and Library Files in External Compilers section in Chapter 3, Windows 95/NT
Compiler/Linker Issues, of the LabWindows/CVI Programmer Reference Manual for more
information.
Use of DllMain: Clarification
Each DLL can have a DllMain function, except that the Borland compiler uses
DllEntryPoint as the name. The operating system calls DllMain with various
messages. To generate the template for
in the Edit menu of the Source window.
DllMain, use the Insert Constructs command
Use caution when inserting code in the
In particular, avoid calling into other DLLs in these two cases. The order in which
Windows 95/NT initializes DLLs at startup and unloads them at process termination is
not well defined. Thus, the DLLs you want to call might not be in memory when your
DllMain receives the PROCESS_ATTACH or PROCESS_DETACH message.
It is always safe to call into the LabWindows/CVI Run-time Engine in a run state change
callback as long as you do so before calling
PROCESS_ATTACH and PROCESS_DETACH cases.
CloseCVIRTE.
Releasing Resources when a DLL Unloads: Clarification
When a program terminates, the operating system releases resources your DLL allocates.
If your DLL remains loaded throughout program execution, it does not need to release
resources explicitly when the system unloads it at program termination. However, if the
program unloads your DLL during program execution, it is a good idea to have your DLL
release any resources it allocates. The DLL can release resources in
PROCESS_DETACH message. Alternatively, the DLL can release resources in a function
the
that it registers with the ANSI C
when the DLL receives the
If your DLL calls into the LabWindows/CVI Run-time Engine DLL, it can allocate resources,
such as user interface panels. If a program unloads your DLL during execution, you might
want to release these resources by calling functions such as
LabWindo ws/CVI R un-tim e Engine. On the ot her hand, as e xplaine d in the pre viou s section,
it is generally unsafe to call into other DLLs in response to the
atexit function. The system calls the function you register
PROCESS_DETACH message.
DiscardPanel in the
DllMain in response to
PROCESS_DETACH message.
©
National Instruments Corporation 27 LabWindows/CVI Release Notes for Windows
Page 28

To solve this dilemma, you can use CVIRTEHasBeenDetached in the Utility Library. It is
always safe to call
until the main Run-time Engine DLL,
message. Consequently , if
call functions in the LabWindows/CVI Run-time Engine to release resources.
Note The Run-time Engine DLL contains the ANSI C, DDE, Formatting and I/O,
RS-232, TCP, User Interface, and Utility libraries.
CVIRTEHasBeenDetached. CVIRTEHasBeenDetached returns FALSE
cvirte.dll, receives the PROCESS_DETACH
CVIRTEHasBeenDetached returns F ALSE, your DLL can safely
Use of Run State Change Callbacks: Clarification
You can include run state change callbacks in DLLs you build in LabWindows/CVI. When
running a program in LabWindows/CVI, a run state change callback receives notification
when the program starts, suspends, resumes, and stops. If you include a run state change
callback in a DLL, you must take special care. Refer to the Notificati on of Changes in Run
State section in Chapter 2, Using Loadable Compiled Modules, in the Programmer Reference
Manual for a detailed discussion of run state change callbacks.
Changes to the ANSI C Library
This section contains information on changes to the ANSI C Library and corrections to the
documentation.
Time and Date Functions
The time and date functions of the ANSI C Library include several changes.
Time Zone Bugs Fixed on Windows 95/NT
In the pre vious v ersion of LabW indo ws/ CVI, funct ions su ch as local time that require time
zone information operate incorrectly in some cases on Windows 95/NT.
The LabWindows/CVI ANSI C Library incorrectly interprets the Windows time zone
information in time zones east of Greenwich Mean T ime. Th is problem o ccurs only if the
environment variable is not available. LabWindows/CVI 5.0 corrects this problem.
The library incorrectly determined that daylight savings time was in effect in areas that do not
observe daylight savings time. The library now honors the Windows time zone information
when it indicates that daylight savings time is not observed. For e xample, there is an Arizona
time zone shown in the Time Zone tab of the Windows Date/Time Properties dialog box.
The system information for the Arizona time zone indicates that daylight savings time is not
observed.
LabWindows/CVI Release Notes for Windows 28
©
National Instruments Corporation
TZ
Page 29

Modifying the DST Rules String: Clarification
The LabWindows/CVI ANSI C Library uses the DST rules string to determine the period of
each year in which daylight savings time is in effect. The Time and Dat e Functions section of
Chapter 1, ANSI C Library, of the LabWindows/CVI Standard Libraries Reference Manual
contains an improv ed discussion of the DST rules string and how you can mo dify t h e stri n g.
Changes to the RS-232 Library
This section contains information on changes to the RS-232 Library.
More COM Ports Allowed
The maximum valid value for the COMPort parameter to RS-232 Library functions increases
from 32 to 1,000.
New Error Code
Table 4 shows the new RS-232 Library error code.
Table 4.
Code Error Message
–1 Unable to allocate system resources
New RS-232 Library Error Code
Unknown System Error on Windows 95/NT
If you pass GetRS232ErrorString an error code of –1 (Unknown System Error) on
Windows 95/NT, the function calls the Windows SDK
translates the return value into a Windows message string.
Input Queue Size: Clarification
If you pass an odd number for inputQueueSize on Windows NT when calling
OpenComConfig, LabWindows/CVI rounds it to the next highest even number. The
Microsoft serial driver for Windows NT requires an even number for the input queue size.
On all Windo ws platfo rms, LabW indo ws/CVI pass es inputQueueSize to the Windows serial
driver, which might use a different number. For example, the Windows NT serial driver
imposes a minimum input queue size of 4,096.
Multithreading and RS-232 Error Information
The rs232err global vari ab le is not multithread safe. It reflects the error value (zero if
successful) of the last RS-232 function call in the appli cation, regardless of thread.
GetLastError function and
©
National Instruments Corporation 29 LabWindows/CVI Release Notes for Windows
Page 30

The ReturnRS232Err function is multithread safe. It returns the error value (zero if
successful) from the most recent RS-232 activity in the same thread.
Because
a write error can occur after
it returns a value that reflects the write error. The
the write error.
For these reasons, National Instru ments recommends that y ou alway s use
instead of the
If you want to know the error associated with a particular function call, save the return value
from the function call in a variable.
ComWrt can return before all bytes in the output queue have been written to the port,
ComWrt returns successfully. If ReturnRS232Err is then called,
rs232err global variable.
Multithreading Limitations
Do not use XModemReceive or ComToFile in two threads at the same time if the target file
in both calls is the Standard Output.
Changes to the DDE Library
This section contains information on changes to the DDE Library and corrections to the
documentation.
Corrections
In the previous ve rsion of t he manual, the order of topicName and itemName parameters in
BroadcastDDEDataReady function pr ototype is incorr ect. The topicName is the second
the
parameter, and the itemName is the third parameter.
rs232err global variable does not reflect
ReturnRS232Err
Obsolete Error Codes
Table 5 lists obsolete DDE Library error codes that are removed from ddesupp.h.
Table 5.
Obsolete Code Defin e d Constant
–6 –kDDE_ReadFailed
–7 –kDDE_WriteFailed
–8 –kDDE_ExecutionFailed
–11 –kDDE_TimeOutErr
–13 –kDDE_FailedToSetUpHotLink
–14 –kDDE_FailedToSetUpWarmLink
LabWindows/CVI Release Notes for Windows 30
Obsolete DDE Library Error Codes
©
National Instruments Corporation
Page 31

Obsolete Code Define d Constant
–15 –kDDE_GeneralIOErr
–29 –kDDE_Reentrancy
New Error Codes
Table 6 lists new DDE Library error codes.
Table 5.
Obsolete DDE Library Error Codes (Continued)
Table 6.
New Code Defined Constant
–13 –kDDE_NotThreadOfServer
–14 –kDDE_NotThreadOfClient
New DDE Library Error Codes
Multithreading
The DDE Library is now multithread safe when used on Windows 95/NT in a standalone
executable or in a DLL called from a standalone executable. A fe w restrictions exist, howev er,
that you must observe. These restrictions stem from limitations of the Windows DDE:
• After you call
make all subsequent function calls that apply to the server in the same thread in which
you called
• After you call
subsequent functions calls that apply to the connection in the same thread in which you
ConnectToDDEServer.
called
RegisterDDEServer to register your program as a server, you must
RegisterDDEServer.
ConnectToDDEServer to create a client connection, you must make all
Changes to the TCP Library
This section contains information on enhancements to the TCP Library.
Multithreading
The TCP Library is now multithread safe when used on Windows 95/NT in a standalone
executable or in a DLL called from a standalone executable.
New TCP Library Functions
The following seven new functions in the TCP Library are listed in alphabetical order:
•
GetHostTCPSocketHandle obtains the system socket handle that corresponds to a
TCP Library connection.
•
GetTCPHostAddr obtains the IP address of the computer on which your program
is running.
©
National Instruments Corporation 31 LabWindows/CVI Release Notes for Windows
Page 32

• GetTCPHostName obtains the name of the com puter o n which your p rog ram is runnin g.
•
GetTCPPeerAddr obtains the IP address of the computer on which a remote client or
server is running.
•
GetTCPPeerName obtains the name of the computer on which a remote client or server
is running.
•
GetTCPSystemErrorString obtains a system message that describes the error that
caused a TCP Library function to fail.
•
SetTCPDisconnectMode sets the method used to close the local conversation handle
when a remote client or server terminates a connection.
Changes to Existing TCP Library Functions
LabWindows/CVI 5.0 now enforces the timeout parameter for ServerTCPRead and
ClientTCPRead. The functions now wait for the specified interval when they receive
less than the maximum number of data bytes to be read. In previous versions of
LabWindows/CVI, when the functions receive data, they return without waiting for the
timeout interval. This change might require modifications to your source code.
Changes to the Utility Library
This section contains information on two new functions in the Utility Library and corrections
and clarifications to the documentation.
Multithreading
The Utility Library is now multithread safe when used on Windows 95/NT in a standalone
executable or in a DLL called from a standalone executable. No restrictions exist.
Corrections and Clarifications to the Documentation
GetCurrentPlatform returns kPlatformWin16 when called from a program that is
running on Windows 95 but that was built using LabWindows/CVI for Windows 3.1.
If you configure Windows 95 to hide the taskbar, calling
the user from using the mouse to bring the taskbar back up.
The documentation for
use on Windows NT to arrange for your application to be brought up in place of the
Windows NT Task Manager. The registry key name in the previous version of the manual is
incorrect. The correct name is
Windows NT\CurrentVersion\Winlogon
When you call
assign the return value to a function pointer. If the function has a calling convention that
differs from the default calling convention, you must include the calling convention in the
LabWindows/CVI Release Notes for Windows 32
GetExternalModuleAddr to obtain the addr ess of a fu nction, you normally
DisableTaskSwitching contains a re gi stry k e y n ame th at yo u can
HKEY_LOCAL_MACHINE\Software\Microsoft\
.
DisableTaskSwitching prevents
©
National Instruments Corporation
Page 33

declaration of the function pointer. For example, if you declare the function in the external
module as
int __stdcall SetADouble (double d);
and the default calling convention is __cdecl, declare the function pointer as
int (__stdcall * SetADouble_FnPtr)(double d) = NULL;
Use the Compiler Options command in the Options menu of the Project window to
determine the default calling convention.
If you launch a 16-bit executable on Windows NT,
ExecutableHasTerminated
cannot determine whether the executable process has terminated. The value
ExectuableHasTerminated returns is always 1. In addition, TerminateExecutable
cannot attempt to terminate the launched executable process.
New Utility Library Functions
LabWindows/CVI 5.0 adds three new functions to the Utility Library.
MapPhysicalMemory maps a physical address to a pointer that can be used in your program
like any other C pointer. For example, you can read or write an area of physical memory by
incrementing the pointer after each access.
UnMapPhysicalMemory unmaps an address that w as mapp ed using MapPhysicalMemory.
CVIRTEHasBeenDetached indicates whether Windows 95/NT has detached the
LabWindows/CVI Run-time Engine from your standalone executable process.
Changes and Clarifications to Existing Utility Library Functions
For Delay and SyncWait on Windows 95/NT and UNIX, the respective delay and interval
parameters might now suspend the execution of the current thread while waiting for the
specified interval to expire. In previous versions of LabWin dows/CVI, the functions wait
without releasing control to other threads, unnecessarily using CPU cycles. This change
should not require any modifications to your source code.
For W indows 9 5/NT ,
CheckForDuplicateAppInstance determines if another copy of the
same executable is running. This fu nction kno ws if anoth er copy of t he ex ecutable is runn ing
only if:
• The other copy has already called this function.
• The other copy of the executable was the only one running when that copy of the
executable called this function.
• The other copy of the executable has the same path as the current executable.
In previous versions of LabW indows/C VI, the
Timer function returns an invalid result if your
program runs for more than 49.71 days. At some point between 49.71 days and 99.42 days
after your first call to
©
National Instruments Corporation 33 LabWindows/CVI Release Notes for Windows
Timer, the function returns a value 4,294,967.297 seconds less than it
Page 34

should be. Thereafter, the value loses another 4,292,967 .296 seconds for each 49.71-day
period that passes. LabWindows/CVI, version 5.0 corrects this invalid result.
Changes to the Easy I/O for DAQ Library
The Analog Input functions that have high limit and low limit parameters are modified to
allow you to make use of the default limits set in the DAQ Chan nel Wizard or the NI-DAQ
Configuration Utility. These functions are
AISampleChannels, and AIStartAcquisition.
If you set both highLimit and lowLimit to 0.0, these functions use the default limits , which
are defined as follows:
• For channels configured in the DAQ Channel Wizard, the default limits are set in the
Physical Quantity section of the DAQ Channel Wizard.
• For hardware channels, the default limits are set in the AI section of the NI-DAQ
Configuration Utility.
AIAcquireWaveforms, AISampleChannel,
New ActiveX Automation Library
The ActiveX Automatio n Library co ntains func tions that cont rol ActiveX Automation
servers. Use the ActiveX Automation Library in conjunction with the instrument drivers
the ActiveX Automation Controller Wizard generates. You can invoke this wizard with
the Create ActiveX Automation Controller command in the Tools menu.
Note
This library is available only on Windows 95/NT.
Active X Automation Library Function Overview
ActiveX Automation (formerly called OLE Automation) allows applications to make their
unique features available to scripting tools and other applications. An ActiveX Automation
server is the application that exposes its features. An ActiveX Automation controller is the
application that uses the features of an ActiveX Automation server. An ActiveX Automation
server exports its features as a set of Acti veX Objects. F or exam ple, Microsoft Excel e xposes
its workbooks, worksheets, and charts as ActiveX Objects. Each ActiveX Object provides
methods and properties that other applications can access. F or example, the Microsoft Excel
worksheet object provides a calculate method that calculates the values in a worksheet.
The ActiveX Automation Library contains functions that facilitate calling into ActiveX server
interfaces. Use the ActiveX Automation Library in conjunction with the instrument drivers
the ActiveX Automation Controller Wizard generates. The ActiveX Automation Controller
Instrument Drivers contain C functions to create ActiveX Objects, to call ActiveX Object
methods, and to get and set ActiveX Object properties. Select Tools»Create Acti veX
Automation Controller to start the wizard.
LabWindows/CVI Release Notes for Windows 34
©
National Instruments Corporation
Page 35

The ActiveX Automation Library conta i ns functions tha t do the following:
• Help you work with the
VARIANT parameters, SAFEARRAY parameters, and return values
of the functions in the generated instrument drivers
• Free resources dynamically allocated by the generated instrument drivers or by other
ActiveX Automation Library functions
• Display error information the library functions or the Automation server methods return
The ActiveX Automati on Library also contains lo w-le vel fu nctions that the generated dri vers
use. These low-le v el functions in v oke meth ods of serv er objects and get and set properties of
server objects.
If you want to use the lo w-le v el functions, y ou shou ld know ActiveX concepts. In particular ,
you should know how to browse through an ActiveX Automation server type library.
Using ActiveX Automation Object Handles from Multiple Threads
on Windows 95
On Windo ws 95, without DCOM for W indows 95 , you can use an Activ eX Automation object
handle only in the thread that created it. This limitation does not exist if you install DCOM
for Windows 95. You can find DCOM for Windows 95 in the DCOM directory on your
LabWindows/CVI CD. You also can download DCOM for Windows 95 from Microsoft’s
We b or FTP site.
Additions to the ActiveX Automation Library Function Reference
For the functions CA_VariantDispatch, CA_VariantIUnknown, CA_VariantBSTR,
CA_VariantSetDispatch, CA_VariantSetIUnknown, CA_VariantSetBSTR, and
CA_VariantSetSafeArray, add the fo llowing text to the fun c tion parameter discussion:
Note
For the functions
The value stored in the VARIANT parameter is a reference to the origina l value.
Calling
CA_VariantClear frees the original value.
CA_VariantSet1DArray and CA_VariantSet2DArray, add the
following text to the function parameter discussion:
Note
For the function
Use CA_VariantClear to free the safe array stored in the VARIANT. Refer to
CA_VariantClear for more information.
CA_VariantSetCString, add the following text to the function parameter
discussion:
Note
©
National Instruments Corporation 35 LabWindows/CVI Release Notes for Windows
Use CA_VariantClear to free the BSTR stored in the VARIANT. Refer to
CA_VariantClear for more information.
Page 36

For the functions CA_VariantGetSafeArray, CA_Array1DToSafeArray, and
CA_Array2DToSafeArray, add th e following text to the function parameter discu ssion:
CA_SafeArrayDestroy to free the returned safe array.
Use
For the function
with the following:
Although this function can be called on a
resources only when the variant contains a string (
LPDISPATCH), an unknown interface (LPUNKNOWN), or a safe array (SAFEARRAY).
(
For the function
parameter disc ussion:
CA_DiscardObjHandle to free the returned CAObjHandle.
Use
For the functions
following text to the function parameter discussion:
CA_FreeMemory to free the returned array.
Use
CA_VariantClear, update the text to the function parameter discussion
CA_VariantGetObjHandle, add the following text to the function
New IVI Library
The IVI (Intelligent V irtual Instruments) Library gi v es dev elopers a stru ctured frame work for
creating VXIplug&play instrument drivers with advanced features such as state caching,
simulation, and p roduction and development modes. The library is supple mented by the
IVI wizard, which automatically creates the skeleton of an IVI driver for you, including
source code and function panels. The LabWindows/CVI Instrument Driver Developers Guide
contains the IVI Library function reference and instructions on how to create IVI drivers.
VARIANT that contains a value of any type, it frees
BSTR), an automation object interface
CA_VariantGet1DArray and CA_VariantGet2DArray, add the
New Advanced Analysis Library Functions
LabWindows/CVI 5.0 adds 40 new functions to the Advanced Analysis Library.
LabWindows/CVI Release Notes for Windows 36
©
National Instruments Corporation
Page 37

Function Tree Layout for New Functions
The following shows the new functions under their function tree classes.
Class/Panel Name Function Name
Vector & Matrix Algebra
Real Matrices
Create Special Matrix SpecialMatrix
Determinant (General) GenDeterminant
Invert Matrix (General) GenInvMatrix
Solution of Linear Eqs (General) GenLinEqs
Outer Product OuterProduct
Rank MatrixRank
Norm MatrixNorm
Condition Number ConditionNumber
Eigenvalues & Eigenvectors (Symmetric) SymEigenValueVector
Eigenvalues & Eigenvectors (General) GenEigenValueVector
Singular Values of a Matrix SVDS
SVD Factorization SVD
QR Factorization QR
Cholesky Factorization Cholesky
PseudoInv erse Matrix PseudoInverse
Test Positive Definiteness CheckPosDef
Create Special Complex Matrix CxSpecialMatrix
Complex Dot Product CxDotProduct
Complex Transpose CxTranspose
Complex Determinant CxDeterminant
Complex PseudoInverse Matrix CxPseudoInverse
Complex Trace CxTrace
Complex Invert Matrix CxGenInvMatrix
Solution of Complex Linear Eqs CxGenLinEqs
Complex Multiply Matrices CxMatrixMul
Complex Outer Product CxOuterProduct
Complex Rank CxMatrixRank
Complex Norm CxMatrixNorm
Complex Condition Number CxConditionNumber
Complex Eigenvalues & Eigenvectors CxEigenValueVector
Complex Singular Values CxSVDS
Complex SVD Factorization CxSVD
Complex QR Factorization CxQR
Complex Cholesky Factorization CxCholesky
Complex Test Positive Definite CxCheckPosDef
Complex LU Factorization CxLU
Additional Numerical Methods
Complex Polynomial Roots CxPolyRoots
Numeric Integration NumericIntegration
Peak Detector PeakDetector
Free Analysis Memory FreeAnalysisMem
©
National Instruments Corporation 37 LabWindows/CVI Release Notes for Windows
Page 38

General Information
Using LabWindows/CVI Utility Library in the Borland Compiler
When you use the LabWindows/CVI libraries with the Borland compiler, the utility.h
header file in the Borland
the LabWindo ws/CVI
files through one of the following methods:
• Place the LabWindo ws/CVI include directory before the Borland include directory in the
Borland Project Options directory search paths.
• In your source code, refer to the explicit path to the header file, for example,
"c:\cvi\include\utility.h"
• Rename the Borland
Using NetDDE on Windows
Refer to the LabWindows/CVI readme.cvi file for information on using NetDDE on
Windows 3.1, Windows 95, and Windows NT.
Special Instructions to LabWindows/CVI 5.0 Beta Testers
A debuggable DLL built with LabWindows/CVI 5.0 Beta 1 is not compatible with the final
release of LabWindows/CVI 5.0. You must rebuild the DLL before you try to debug the DLL
inside the LabWindows/CVI development environment.
include subdirectory might be referenced incorrectly instead of
utility.h header file. You can control the search order for the header
.
utility.h file.
#include
No Support for Multiple Monitor Systems
LabWindows/CVI 5.0 does not support systems with multiple monitors, incl uding
Windows 98, Windows NT 5.0, and third-party solutions for Windows 95/NT 4.0.
Dynamically Loading DLL Created in Third-Party Compiler
Might Lose Handles
If a DLL created in a third-party compiler/linker is dynamically loaded and unloaded from a
process and if that DLL uses the hardware static libraries located in the LabWindows/CVI
\extlib subdirectory, the process loses Windows handles. The external compiler support
libraries that exhibit this behavior are
visa.lib. The loss of W indows handles occurs when the hardware static libraries of the
and
calling DLL do not release the internal handles used to load the hardware libraries. A
workaround is to use the import libraries that come with the DAQ, GPIB, VXI, and VISA
software instead of using the static libraries from the LabWindows
drawback to this solution is that some additional functions unique to the LabWindows/CVI
versions of these libraries are not available.
LabWindows/CVI Release Notes for Windows 38
dataacq.lib, easyio.lib, gpib.lib, nivxi.lib,
\extlib directory. A
©
National Instruments Corporation
Page 39

 Loading...