

Page 1
OpenCPI
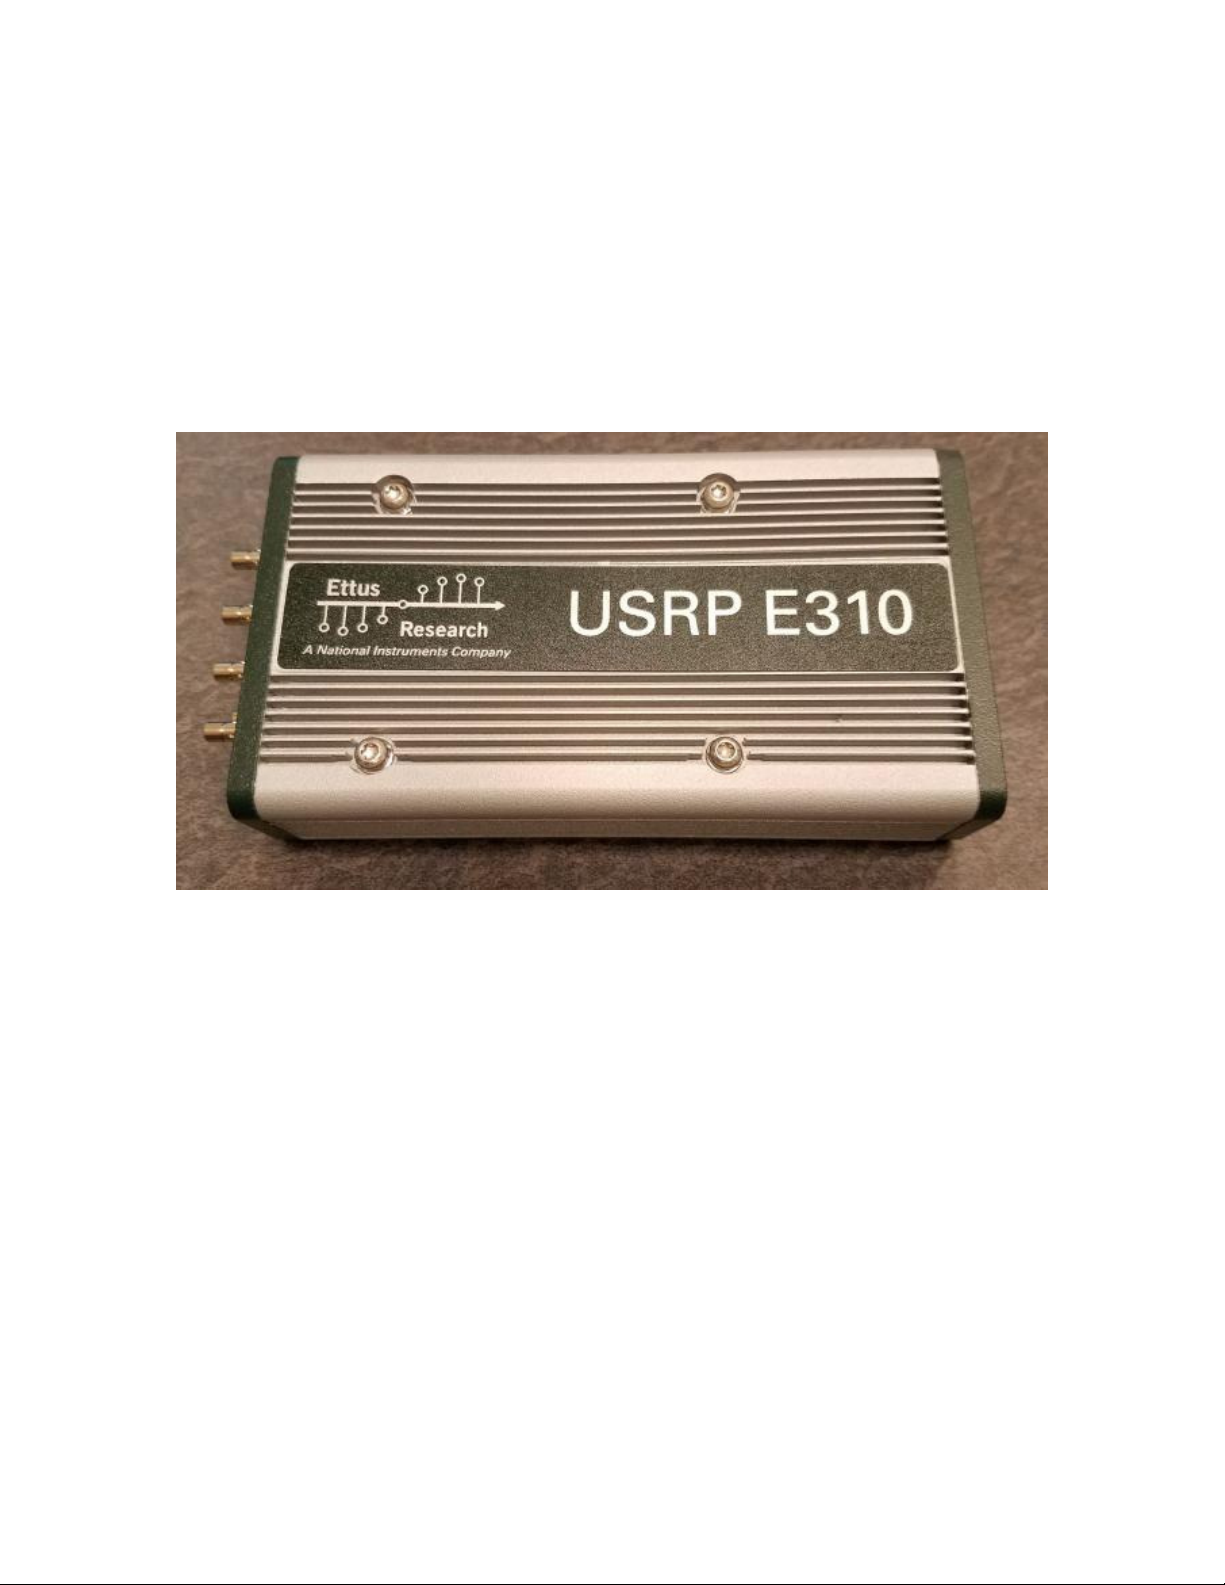
Ettus E3XX Getting Started Guide
Version 1.5
Figure 1: Top View (E310)
1
Page 2

Ettus E3XX Getting Started Guide ANGRYVIPER Team
Revision History
Revision Description of Change Date
v1.3.1-E3XX Initial Release 3/2018
v1.4 Updated for Release 9/2018
v1.5 Version bump only 4/2019
2
Page 3

Ettus E3XX Getting Started Guide ANGRYVIPER Team
Table of Contents
1 References 4
2 Overview 5
3 Prerequisites 5
3.1 Installation of provided projects: core, assets and bsp_e310 . . . . . . . . . . . . . . . . . . . . . . . . 5
3.2 Vendor Software Setup . . . . . . . . . . . . . . . . . . . . . . . . . . . . . . . . . . . . . . . . . . . . . 6
3.3 Building Required Projects . . . . . . . . . . . . . . . . . . . . . . . . . . . . . . . . . . . . . . . . . . 6
3.4 Hardware Setup . . . . . . . . . . . . . . . . . . . . . . . . . . . . . . . . . . . . . . . . . . . . . . . . . 6
4 SD Card Setup 8
4.1 Make a backup image of factory SD card (assumes Linux host) . . . . . . . . . . . . . . . . . . . . . . 8
4.2 Format the SD card . . . . . . . . . . . . . . . . . . . . . . . . . . . . . . . . . . . . . . . . . . . . . . 8
4.3 Copy OpenCPI files to SD card . . . . . . . . . . . . . . . . . . . . . . . . . . . . . . . . . . . . . . . . 8
4.3.1 Copy Standalone Mode specific files to SD card . . . . . . . . . . . . . . . . . . . . . . . . . . . 8
4.3.2 Copy Network Mode specific files to SD card . . . . . . . . . . . . . . . . . . . . . . . . . . . . 8
4.3.3 SD Card Source . . . . . . . . . . . . . . . . . . . . . . . . . . . . . . . . . . . . . . . . . . . . 8
5 Script Setup 9
5.1 Setting up the Network and Standalone Mode scripts . . . . . . . . . . . . . . . . . . . . . . . . . . . . 9
5.1.1 Network Mode . . . . . . . . . . . . . . . . . . . . . . . . . . . . . . . . . . . . . . . . . . . . . 9
5.1.2 Standalone Mode . . . . . . . . . . . . . . . . . . . . . . . . . . . . . . . . . . . . . . . . . . . . 9
5.2 Setup system time reference . . . . . . . . . . . . . . . . . . . . . . . . . . . . . . . . . . . . . . . . . . 10
5.3 “rsync” provided binary . . . . . . . . . . . . . . . . . . . . . . . . . . . . . . . . . . . . . . . . . . . . 10
6 Development Host Setup - Network Mode ONLY 10
6.1 Network Mounting Mode . . . . . . . . . . . . . . . . . . . . . . . . . . . . . . . . . . . . . . . . . . . 10
6.1.1 CentOS 6 . . . . . . . . . . . . . . . . . . . . . . . . . . . . . . . . . . . . . . . . . . . . . . . . 10
6.1.2 CentOS 7 . . . . . . . . . . . . . . . . . . . . . . . . . . . . . . . . . . . . . . . . . . . . . . . . 11
7 Configuring the runtime environment on the platform 12
7.1 Network Mode . . . . . . . . . . . . . . . . . . . . . . . . . . . . . . . . . . . . . . . . . . . . . . . . . 12
7.2 Standalone Mode . . . . . . . . . . . . . . . . . . . . . . . . . . . . . . . . . . . . . . . . . . . . . . . . 13
8 Build an application 14
9 Run an Application 14
9.1 Network Mode . . . . . . . . . . . . . . . . . . . . . . . . . . . . . . . . . . . . . . . . . . . . . . . . . 14
9.2 Run an Application in Standalone Mode . . . . . . . . . . . . . . . . . . . . . . . . . . . . . . . . . . . 17
10 Running Reference Applications 17
Appendices 18
A Generating Boot Artifacts 18
A.1 BOOT.bin and u-bo ot.img . . . . . . . . . . . . . . . . . . . . . . . . . . . . . . . . . . . . . . . . . . . 18
A.2 devicetree.dtb . . . . . . . . . . . . . . . . . . . . . . . . . . . . . . . . . . . . . . . . . . . . . . . . . . 18
A.3 uImage and uramdisk.image.gz . . . . . . . . . . . . . . . . . . . . . . . . . . . . . . . . . . . . . . . . 18
B Copying only required files to SD card 19
B.1 Copy embedded OS and boot files to SD card . . . . . . . . . . . . . . . . . . . . . . . . . . . . . . . . 19
B.2 Files needed for Standalone Mode . . . . . . . . . . . . . . . . . . . . . . . . . . . . . . . . . . . . . . . 19
B.3 Files needed for Network Mode . . . . . . . . . . . . . . . . . . . . . . . . . . . . . . . . . . . . . . . . 19
3
Page 4

Ettus E3XX Getting Started Guide ANGRYVIPER Team
1 References
This document assumes a basic understanding of the Linux command line (or “shell”) environment. The reference(s)
in Table 1 can be used as an overview of OpenCPI and may prove useful.
Title Published By Link
Getting Started ANGRYVIPER Team Getting_Started.pdf
Installation Guide ANGRYVIPER Team RPM_Installation_Guide.pdf
Acronyms and Definitions ANGRYVIPER Team Acronyms_and_Definitions.pdf
Overview OpenCPI http://opencpi.github.io/
Overview.pdf
Table 1: References
4
Page 5

Ettus E3XX Getting Started Guide ANGRYVIPER Team
2 Overview
This document provides steps for configuring a factory provided Ettus USRP E310 with the OpenCPI runtime
environment for executing applications, configuring a development system to build OpenCPI bitstreams targeting
the e3xx platform, and examples of executing applications on the OpenCPI configured E310.
3 Prerequisites
This guide assumes that, at a minimum, the following RPMs are installed:
RPM Name Description
All prerequisite RPMs These packages have OpenCPI-specific patches and are provided
as RPMs. This packaging ensures they will not conflict with
other installed copies by using a nonstandard installation location of /opt/opencpi/prerequisites.
angryviper-ide-*.x86 64.rpm The ANGRYVIPER IDE (Eclipse with plugins). See RPM
Installation Guide.pdf, Appendix D for an alternative method
to set up the IDE using an existing Eclipse installation.
opencpi-*.x86_64.rpm Base installation RPM includes the runtime portion of the
Component Development Kit (CDK) and the source for the
ocpi.core and ocpi.assets Projects containing framework essential components, workers, platforms, etc.
opencpi-devel-*.x86_64.rpm Additional header files and scripts for developing new assets as
HDL and/or RCC.
opencpi-sw-platform-xilinx13_4-*.noarch.rpm Additional files necessary to build the framework targeting spe-
cific RCC/software platforms, independent of the final deployed
hardware.
opencpi-hw-platform-e3xx-*.noarch.rpm Additional files necessary to build the framework targeting spe-
cific hard-ware platform "X" when running RCC platform "Y"
("Y" can be "no sw"). This RPM also includes hardware-specific
SD Card images when applicable.
3.1 Installation of provided projects: core, assets and bsp_e310
This guide assumes the user has executed ocpi-copy-projects, accepting the default settings, to copy and register the
core, assets, and bsp_e310 projects from the /opt/opencpi/projects for building bitstreams for the E310. Reference
the Getting Started Guide for details on ocpi-copy-projects. Although the projects are registered by
ocpi-copy-projects, changes to the registry can be made via ocpidev un/register project or the ANGRYVIPER
GUI.
$ ocpi-copy-projects
...
$ ls ~/ocpi_projects
assets bsp_e310 core
$ ocpidev show registry
Project registry is located at: /opt/opencpi/cdk/../project-registry
---------------------------------------------------------------------------------------| Project Package-ID | Path to Project | Valid/Exists |
| ------------------ | --------------- | ------------ |
| ocpi.core | /home/<user>/ocpi_projects/core | True |
| ocpi.assets | /home/<user>/ocpi_projects/assets | True |
| ocpi.bsp.e310 | /home/<user>/ocpi_projects/bsp_e310 | True |
----------------------------------------------------------------------------------------
5
Page 6

Ettus E3XX Getting Started Guide ANGRYVIPER Team
3.2 Vendor Software Setup
The platform that is expected to be used is the Ettus Research/National Instruments Universal Software Radio
Peripheral (USRP) E310 (or E3XX) SDR (e.g. e3xx). This OpenCPI-enabled platform provides the capability of
deploying hardware and software workers while using Xilinx’s 13.4 distribution of Linux.
The synthesizers and cross-compilers required to build HDL and RCC Workers for this Platform are installed by
following the instructions found in the OpenCPI FPGA Vendor Tools Installation Guide. This document assumes
that the user has installed the appropriate versions of Vivado and the Xilinx SDK.
3.3 Building Required Projects
The core, assets, and bsp_e310 projects must be built in a specific order for this platform. This section outlines
how to build the relevant projects and provides the commands to do so.
For this document, the projects should be built as follows:
1. Build core for the xilinx13_4 RCC Platform and the e3xx HDL Platform, but omit assemblies
2. Build assets for the xilinx13_4 RCC Platform and the e3xx HDL Platform, but omit assemblies
3. Build the bsp_e310 project for these same platforms
4. Build the testbias assembly from the assets project. This will be used later in this guide.
Once the HDL Platform is built in the BSP project, assemblies can be built for that HDL platform
$ cd /home/<user>/ocpi_projects/ && \
$ ocpidev build -d core --rcc-platform xilinx13_4 --hdl-platform e3xx --no-assemblies && \
$ ocpidev build -d assets --rcc-platform xilinx13_4 --hdl-platform e3xx --no-assemblies && \
$ ocpidev build -d bsp_e310 --rcc-platform xilinx13_4 --hdl-platform e3xx && \
$ ocpidev build -d assets hdl assembly testbias --hdl-platform e3xx;
Note: replace “<user>” with your username in the commands above.
Each of these build commands can also be performed via the ANGRYVIPER IDE as follows:
To perform this operation within the IDE:
1. Open the ANGRYVIPER Perspective
2. Select the asset from OpenCPI Project View
3. Import to AV Operations Panel using “>” button
4. Select the RCC and/or HDL platforms for the build (use
5. Click “Build”
See the ANGRYVIPER Team’s Getting Started Guide for additional information concerning the use of ocpidev
and the ANGRYVIPER IDE to build OpenCPI assets.
Ctrl for multiple selection)
3.4 Hardware Setup
• Ettus USRP E3XX
It is expected that this SDR package includes a power supply, micro-USB to USB cable and standard SD card
(4GB or larger).
OpenCPI has been tested on the Ettus USRP E310.
The micro-USB serial port located on the back E310 labeled CONSOLE (Figure 2) can be used to access the
serial connection with the processor.
6
Page 7

Ettus E3XX Getting Started Guide ANGRYVIPER Team
Figure 2: Back Panel
• Ethernet cable: An Ethernet port is available on the E310 (Figure 2) and is required when the Network
mode (discussed later) environment is used. The OpenCPI BSP for the E310 is configured for DHCP.
Figure 3: Front Panel
• Access to a network which supports DHCP. (Network Mode)
• SD card: As mentioned earlier, a 4GB or larger SD card should come with the SDR. The bootable SD card
slot is located on the front of the unit (Figure 3) and ejects by gently pushing it in and releasing.
• SD card reader
• Further information on front panel: Also found on the front panel of the SDR are six labeled SMB (50
Ohm) connectors: TRX-A, RX2-A, RX2-B, TRX-B, GPS, and SYNC (Figure 3). The upper connections are
7
Page 8

Ettus E3XX Getting Started Guide ANGRYVIPER Team
split into two individual channels referred to as “Front End A” and “Front End B.” Specific details can be
found in the vendor manuals.
4 SD Card Setup
4.1 Make a backup image of factory SD card (assumes Linux host)
This section provides the steps for creating an SD card backup image. The subsequent subsections assume the SD
card is empty.
• Determine the device file name for the SD card by executing dmesg command below. It will likely be something
like /dev/sdb or /dev/mmcblk0.
$ dmesg | tail -n 15
• Run the following dd command to make a backup image, where DEVICENAME was determined above. This
step should take ∼ 15 minutes depending on the card size.
$ dd if=DEVICENAME of=backup.image
To restore the card back to the original contents, run the command “dd of=DEVICENAME if=backup.image” (Do
not do this step unless you want the original contents back on the SD card.)
4.2 Format the SD card
• Format the SD card with a single FAT32 partition.
4.3 Copy OpenCPI files to SD card
This section provides the simplest instructions for copying files over to the SD card. Appendix B contains more
involved instructions for copying only the necessary files to the SD card for each mode.
WARNING: The user must ensure that the contents of the SD, match the version of the OpenCPI release that the
artifacts were built against.
When using the factory SD card, all files can be ignored or deleted. Any files/directories copied to SD card will
appear at /mnt/card on the E310.
Copy the following directory onto the SD card:
$ cp -rL /opt/opencpi/cdk/e3xx/sdcard-xilinx13_4/* /run/media/<user>/<partition>/
4.3.1 Copy Standalone Mode specific files to SD card
Copy the testbias bitstream into the artifacts directory:
$ cp /home/ocpi_projects/assets/hdl/assemblies/testbias/container-testbias_e3xx/\
target-zynq/testbias_e3xx_base.bit.gz /run/media/<user>/<partition>/opencpi/xilinx13_4/artifacts
4.3.2 Copy Network Mode specific files to SD card
No additional files required for Network Mode.
4.3.3 SD Card Source
The final SD Card artifacts are distributed in /opt/opencpi/cdk/e3xx/ via RPM as noted previously. The end user
is not required nor expected to generate the files, but the process is documented below in Appendix A.
8
Page 9

Ettus E3XX Getting Started Guide ANGRYVIPER Team
5 Script Setup
There are two type of setups or modes for running applications on any embedded radio: Network and Standalone.
In Network mode, a development system hosts the OpenCPI tree as an NFS server to the E310 which is an NFS
client. This configuration provides quick and dynamic access to all of OpenCPI, and presumably any applications,
components and bitstreams. In Standalone mode, all the artifacts are located on the SDR’s local storage (e.g. SD
card) and no network connection is required. This may be more suited for deployment scenarios in which network
connection is not possible or practical. Network mode is generally preferred during the development process.
5.1 Setting up the Network and Standalone Mode scripts
For each mode, a startup script is used to configure the environment of the embedded system. The OpenCPI
framework provides a default script for each mode. The default scripts are to be copied and modified per the user’s
requirements.
5.1.1 Network Mode
1) Make a copy of the default script for editing.
$ cp /run/media/<user>/<partition>/opencpi/default_mynetsetup.sh \
/run/media/<user>/<partition>/opencpi/mynetsetup.sh
2) Edit the copy
1. In mynetsetup.sh, uncomment the following lines which are necessary for mounting core and assets project:
mkdir -p /mnt/ocpi_core
mount -t nfs -o udp,nolock,soft,intr $1:/home/user/ocpi_projects/core /mnt/ocpi_core
mkdir -p /mnt/ocpi_assets
mount -t nfs -o udp,nolock,soft,intr $1:/home/user/ocpi_projects/assets /mnt/ocpi_assets
2. Edit /home/user/ocpi_projects/core and /home/user/ocpi_projects/assets to reflect the paths to the
core and assets project on the host, e.g.:
mkdir -p /mnt/ocpi_core
mount -t nfs -o udp,nolock,soft,intr $1:/home/johndoe/ocpi_projects/core /mnt/ocpi_core
mkdir -p /mnt/ocpi_assets
mount -t nfs -o udp,nolock,soft,intr $1:/home/johndoe/ocpi_projects/assets /mnt/ocpi_assets
5.1.2 Standalone Mode
In this mode, all OpenCPI artifacts that are required to run any application on the E310 must be copied onto the
SD card. Building the provided projects to obtain such artifacts is discussed in Section 3.3. Once the artifacts have
been created, they must be copied to the SD card in Section 4. In general, any required .so (RCC workers),
.bit.gz (hdl assemblies), and application XMLs or executables must be copied to the ATLAS partition of the SD
card.
1) Make a copy of the default script for editing
$ cp /run/media/<user>/<partition>/opencpi/default_mysetup.sh \
/run/media/<user>/<partition>/opencpi/mysetup.sh
2) Edit the copy
Unlike Network mode, there is no required modifications to this script.
3) Copy any additional artifacts to SD card’s opencpi/xilinx13_4/artifacts/ directory
9
Page 10

Ettus E3XX Getting Started Guide ANGRYVIPER Team
5.2 Setup system time reference
If Linux system time is not required to be accurate, this step may be skipped.
For either Network or Standalone mode, the following settings that are passed by mynetsetup.sh/mysetup.sh to
the zynq_net_setup.sh/zynq_setup.sh scripts may require modification:
• Identify the system that is to be used as a time server, where the default is “time.nist.gov” and is set in
/mnt/card/opencpi/ntp.conf. A valid time server must support ntp.
• Identify the current timezone description, where the default is “EST5EDT,M3.2.0,M11.1.0”. Change this if
required for the local timezone. See man tzset on the host PC for more information.
• If a time server is not required, or cannot connect to a time server, the user is required to manually set the
time at start up. Use the date command to manually set the Linux system time. See man date on the host
PC for more information.
5.3 “rsync” provided binary
An ARM-compiled version of “ rsync” is provided in the included SD card image for xilinx13_4. This tool allows
the use of standalone mode while shortening the required developer time to synchronize the artifacts being
developed. For command-line usage, see the rsync home page. The easiest usage is to have the radio “pull” from the
developer’s workstation; this does not need any additional command-line arguments.
Implementation Details
Unfortunately, the “rsync” executable is not in the default path because when called remotely, it requests a
non-interactive shell. For this reason, a “pull” approach is recommended. If a user for some reason requires a “push”
from the workstation to the radio, the local “rsync” executable must be told the remote location of the rsync
executable to call, e.g. rsync –rsync-path=/mnt/card/opencpi/xilinx13_4/bin/rsync
6 Development Host Setup - Network Mode ONLY
6.1 Network Mounting Mode
The NFS server needs to be enabled on the host in order to run the SDR in Network Mode. The following sections
are directions on how to do this for both CentOS 6 and CentOS 7 host operating systems.
6.1.1 CentOS 6
From the host, install the necessary tools using yum:
% sudo yum install nfs-utils nfs-utils-lib
% sudo chkconfig nfs on
% sudo service rpcbind start
% sudo service nfs start
From the host, add the following lines to the bottom of /etc/exports and change “XX.XX.XX.XX/MM” to a valid
netmask for the DHCP range that the SDR will be set to for your network (e.g. 192.168.0.0/16).
% sudo vi /etc/exports
/opt/opencpi XX.XX.XX.XX/MM(rw,sync,no_root_squash,no_subtree_check)
<host core project location> XX.XX.XX.XX/MM(rw,sync,no_root_squash,no_subtree_check)
<host assets project location> XX.XX.XX.XX/MM(rw,sync,no_root_squash,no_subtree_check)
% sudo exportfs -av
From the host, restart the services that have modified for the changes to take effect:
% sudo service nfs start
10
Page 11

Ettus E3XX Getting Started Guide ANGRYVIPER Team
6.1.2 CentOS 7
From the host, install the necessary tools using yum:
% sudo yum install nfs-utils
1
From the host, allow NFS past SELinux2:
% sudo setsebool -P nfs_export_all_rw 1
% sudo setsebool -P use_nfs_home_dirs 1
From the host, allow NFS past the firewall:
% sudo firewall-cmd --permanent --zone=public --add-service=nfs
% sudo firewall-cmd --permanent --zone=public --add-port=2049/udp
% sudo firewall-cmd --permanent --zone=public --add-service=mountd
% sudo firewall-cmd --permanent --zone=public --add-service=rpc-bind
% sudo firewall-cmd --reload
Define the export by creating a new file that has the extension “exports”. If it does not have that extension, it
will be ignored. Add the following lines to that file and replace “XX.XX.XX.XX/MM” with a valid netmask for the
DHCP range that the SDR will be set to for your network (e.g. 192.168.0.0/16).
% sudo vi /etc/exports.d/user_ocpi.exports
/opt/opencpi XX.XX.XX.XX/MM(rw,sync,no_root_squash,crossmnt)
/home/user/ocpi_projects/core XX.XX.XX.XX/MM(rw,sync,no_root_squash,crossmnt)
/home/user/ocpi_projects/assets XX.XX.XX.XX/MM(rw,sync,no_root_squash,crossmnt)
If the file system that you are mounting is XFS, then each mount needs to have a unique fsid defined. Instead, use:
% sudo vi /etc/exports.d/user_ocpi.exports
/opt/opencpi XX.XX.XX.XX/MM(rw,sync,no_root_squash,crossmnt,fsid=33)
/home/user/ocpi_projects/core XX.XX.XX.XX/MM(rw,sync,no_root_squash,crossmnt,fsid=34)
/home/user/ocpi_projects/assets XX.XX.XX.XX/MM(rw,sync,no_root_squash,crossmnt,fsid=35)
Restart the services that have modified for the changes to take effect:
% sudo systemctl enable rpcbind
% sudo systemctl enable nfs-server
% sudo systemctl enable nfs-lock
% sudo systemctl enable nfs-idmap
% sudo systemctl restart rpcbind
% sudo systemctl restart nfs-server
% sudo systemctl restart nfs-lock
% sudo systemctl restart nfs-idmap
* Note: Some of the “enable” commands may fail based on your package selection, but should not cause any problems.
NOTE: You will need to add the ocpi.bsp.e310 project to your list of exports (in /etc/exports.d/user_ocpi.
exports).
1
nfs-utils-lib was rolled into nfs-utils starting with CentOS 7.2, if using eariler versions of CentOS 7, nfs-utils-lib will need
to be explicitly installed
2
You can use getsebool to see if these values are already set before attempting to set them. Some security tools may interpret the
change attempt as a system attack.
11
Page 12

Ettus E3XX Getting Started Guide ANGRYVIPER Team
7 Configuring the runtime environment on the platform
7.1 Network Mode
1. Plug in an Ethernet cable to a network configured for DHCP
2. Ensure a micro-USB to USB cable is connected between the E310’s serial port and development host
3. Apply power to the E310
4. Use a serial terminal application to establish a serial connection, for example:
$ sudo screen /dev/ttyUSB0 115200
5. After a successful boot to PetaLinux, login to the system, using “ root” for user name and password
6. Setup the OpenCPI environment on remote system
Each time the SDR is booted, the OpenCPI environment must be setup. By sourcing the mynetsetup.sh
script, the remote system’s environment is configured for OpenCPI and NFS directories are mounted for
Network mode.3. The user must provide the network address of the development system to the script as its
only argument:
$ . /mnt/card/opencpi/mynetsetup.sh XX.XX.XX.XX
where XX.XX.XX.XX is the IP address of the NFS host (i.e. that development host, e.g. 192.168.1.10). A
successful run should output the following:
An IP address was detected.
Setting the time from time server: time.nist.gov
My IP address is: XX.XX.XX.XX, and my hostname is: zynq
Running login script. OCPI_CDK_DIR is now /mnt/net/cdk.
Executing /home/root/.profile
No reserved DMA memory found on the linux boot command line.
The mdev config has no OpenCPI rules. We will add them to /etc/mdev.conf
NET: Registered protocol family 12
Driver loaded successfully.
OpenCPI ready for zynq.
Discovering available containers...
Available containers:
# Model Platform OS OS-Version Arch Name
0 hdl e3xx PL:0
1 rcc xilinx13_4 linux x13_4 arm rcc0
Note: If the output includes:
Attempting to set the time from time server
Alarm clock
ntp was unable to set time using servers in ntp.conf. For more information see Section 5.2
3
This script calls the zynq_net_setup.sh script, which should not be modifiable by the user.
12
Page 13

Ettus E3XX Getting Started Guide ANGRYVIPER Team
7.2 Standalone Mode
1. (Not required for OpenCPI in this mode) Plug in an Ethernet cable to a network configured for DHCP
2. Ensure a micro-USB to USB cable is connected between the E310’s serial port and development host
3. Apply power to the E310
4. Use a serial terminal application to establish a serial connection, for example:
$ sudo screen /dev/ttyUSB0 115200
5. After a successful boot to PetaLinux, login to the system, using “ root” for user name and password
WARNING: Applications (including XML-only ones) fail if there is not an IP address assigned to the platform,
6.
even when in “standalone mode.” When the Ethernet port is not connected to a network configured with
DHCP, a temporary IP address must be set:
$ ifconfig eth0 192.168.244.244
7. Setup the OpenCPI environment on remote system
Each time the SDR is booted, the OpenCPI environment must be setup. By sourcing the mysetup.sh script,
the remote system’s environment is configured for OpenCPI4. There are no arguments for this script.
$ . /mnt/card/opencpi/mysetup.sh
A successful run should output the following:
Attempting to set the time from time server: time.nist.gov
Setting the time from time server: time.nist.gov
Running login script. OCPI_CDK_DIR is now /mnt/card/opencpi.
Executing /home/root/.profile
No reserved DMA memory found on the linux boot command line.
The mdev config has no OpenCPI rules. We will add them to /etc/mdev.conf
NET: Registered protocol family 12
Driver loaded successfully.
OpenCPI ready for zynq.
Discovering available containers...
Available containers:
# Model Platform OS OS-Version Arch Name
0 hdl e3xx PL:0
1 rcc xilinx13_4 linux x13_4 arm rcc0
Note: If the output includes:
Attempting to set the time from time server
Alarm clock
ntp was unable to set time using servers in ntp.conf. For more information see Section 5.2
4
This script calls the zynq_setup.sh script, which should not be modifiable by the user.
13
Page 14

Ettus E3XX Getting Started Guide ANGRYVIPER Team
8 Build an application
The setup of the platform can be verified by running an application that uses both RCC and HDL workers. A
simple application that requires two RCC and one HDL worker is located in assets/applications/bias.xml, but
only the RCC artifacts are provided with the installation of RPMs, and are availble on the SD card (Standard
Mode) or mounted CDK directory (Network Mode). The remaining task is to build an assembly, or bitstream for
loading the FPGA, which contains the HDL worker.
9 Run an Application
9.1 Network Mode
The default setup script sets the OCPI_LIBRARY_PATH variable to include the RCC workers that are required to
execute the application, but it must be updated to include to the assembly bitstream that was built. After running
the mynetsetup.sh script, navigate to /mnt/ocpi_assets/applications, then update the OCPI_LIBRARY_PATH
variable using the following command:
$ export OCPI_LIBRARY_PATH=/mnt/ocpi_assets/artifacts:/mnt/ocpi_core/artifacts
Run the application using the following command:
$ ocpirun -v -t 1 -d -m bias=hdl bias.xml
The output should be similar to:
Available containers are: 0: PL:0 [model: hdl os: platform: e3xx], 1: rcc0 [model: rcc os: linux
֒→ platform: xilinx13_4]
Actual deployment is:
Instance 0 file_read (spec ocpi.core.file_read) on rcc container 1: rcc0, using file_read in /
֒→ mnt/ocpi_core/artifacts/ocpi.core.file_read.rcc.0.xilinx13_4.so dated Fri Sep 28
֒→ 18:18:26 2018
Instance 1 bias (spec ocpi.core.bias) on hdl container 0: PL:0, using bias_vhdl/a/bias_vhdl in
֒→ /mnt/ocpi_assets/artifacts/ocpi.assets.testbias_e3xx_base.hdl.0.e3xx.gz dated Tue Oct
֒→ 2 11:59:53 2018
Instance 2 file_write (spec ocpi.core.file_write) on rcc container 1: rcc0, using file_write
֒→ in /mnt/ocpi_core/artifacts/ocpi.core.file_write.rcc.0.xilinx13_4.so dated Fri Sep 28
֒→ 18:18:31 2018
Application XML parsed and deployments (containers and artifacts) chosen
Application established: containers, workers, connections all created
Communication with the application established
Dump of all initial property values:
Property 0: file_read.fileName = "test.input" (cached)
Property 1: file_read.messagesInFile = "false" (cached)
Property 2: file_read.opcode = "0" (cached)
Property 3: file_read.messageSize = "16"
Property 4: file_read.granularity = "4" (cached)
Property 5: file_read.repeat = "<unreadable>"
Property 6: file_read.bytesRead = "0"
Property 7: file_read.messagesWritten = "0"
Property 8: file_read.suppressEOF = "false"
Property 9: file_read.badMessage = "false"
Property 10: file_read.ocpi_debug = "false" (parameter)
Property 11: file_read.ocpi_endian = "little" (parameter)
Property 12: bias.biasValue = "16909060" (cached)
Property 13: bias.ocpi_debug = "false" (parameter)
Property 14: bias.ocpi_endian = "little" (parameter)
Property 15: bias.test64 = "0"
Property 16: file_write.fileName = "test.output" (cached)
Property 17: file_write.messagesInFile = "false" (cached)
14
Page 15

Ettus E3XX Getting Started Guide ANGRYVIPER Team
Property 18: file_write.bytesWritten = "0"
Property 19: file_write.messagesWritten = "0"
Property 20: file_write.stopOnEOF = "true" (cached)
Property 21: file_write.ocpi_debug = "false" (parameter)
Property 22: file_write.ocpi_endian = "little" (parameter)
Application started/running
Waiting up to 1 seconds for application to finish
Application finished
Dump of all final property values:
Property 3: file_read.messageSize = "16"
Property 5: file_read.repeat = "<unreadable>"
Property 6: file_read.bytesRead = "4000"
Property 7: file_read.messagesWritten = "251"
Property 8: file_read.suppressEOF = "false"
Property 9: file_read.badMessage = "false"
Property 15: bias.test64 = "0"
Property 18: file_write.bytesWritten = "4000"
Property 19: file_write.messagesWritten = "250"
Run the following command to view the input:
$ hexdump test.input | less
The output should look like the following:
0000000 0000 0000 0001 0000 0002 0000 0003 0000
0000010 0004 0000 0005 0000 0006 0000 0007 0000
0000020 0008 0000 0009 0000 000a 0000 000b 0000
0000030 000c 0000 000d 0000 000e 0000 000f 0000
0000040 0010 0000 0011 0000 0012 0000 0013 0000
0000050 0014 0000 0015 0000 0016 0000 0017 0000
0000060 0018 0000 0019 0000 001a 0000 001b 0000
0000070 001c 0000 001d 0000 001e 0000 001f 0000
0000080 0020 0000 0021 0000 0022 0000 0023 0000
0000090 0024 0000 0025 0000 0026 0000 0027 0000
00000a0 0028 0000 0029 0000 002a 0000 002b 0000
00000b0 002c 0000 002d 0000 002e 0000 002f 0000
00000c0 0030 0000 0031 0000 0032 0000 0033 0000
00000d0 0034 0000 0035 0000 0036 0000 0037 0000
00000e0 0038 0000 0039 0000 003a 0000 003b 0000
00000f0 003c 0000 003d 0000 003e 0000 003f 0000
0000100 0040 0000 0041 0000 0042 0000 0043 0000
0000110 0044 0000 0045 0000 0046 0000 0047 0000
0000120 0048 0000 0049 0000 004a 0000 004b 0000
0000130 004c 0000 004d 0000 004e 0000 004f 0000
0000140 0050 0000 0051 0000 0052 0000 0053 0000
0000150 0054 0000 0055 0000 0056 0000 0057 0000
0000160 0058 0000 0059 0000 005a 0000 005b 0000
Run the following command to view the output:
$ hexdump test.output | less
The output should look like the following:
0000000 0304 0102 0305 0102 0306 0102 0307 0102
0000010 0308 0102 0309 0102 030a 0102 030b 0102
0000020 030c 0102 030d 0102 030e 0102 030f 0102
0000030 0310 0102 0311 0102 0312 0102 0313 0102
15
Page 16

Ettus E3XX Getting Started Guide ANGRYVIPER Team
0000040 0314 0102 0315 0102 0316 0102 0317 0102
0000050 0318 0102 0319 0102 031a 0102 031b 0102
0000060 031c 0102 031d 0102 031e 0102 031f 0102
0000070 0320 0102 0321 0102 0322 0102 0323 0102
0000080 0324 0102 0325 0102 0326 0102 0327 0102
0000090 0328 0102 0329 0102 032a 0102 032b 0102
00000a0 032c 0102 032d 0102 032e 0102 032f 0102
00000b0 0330 0102 0331 0102 0332 0102 0333 0102
00000c0 0334 0102 0335 0102 0336 0102 0337 0102
00000d0 0338 0102 0339 0102 033a 0102 033b 0102
00000e0 033c 0102 033d 0102 033e 0102 033f 0102
00000f0 0340 0102 0341 0102 0342 0102 0343 0102
0000100 0344 0102 0345 0102 0346 0102 0347 0102
0000110 0348 0102 0349 0102 034a 0102 034b 0102
0000120 034c 0102 034d 0102 034e 0102 034f 0102
0000130 0350 0102 0351 0102 0352 0102 0353 0102
0000140 0354 0102 0355 0102 0356 0102 0357 0102
0000150 0358 0102 0359 0102 035a 0102 035b 0102
0000160 035c 0102 035d 0102 035e 0102 035f 0102
16
Page 17

Ettus E3XX Getting Started Guide ANGRYVIPER Team
9.2 Run an Application in Standalone Mode
The default setup script sets the OCPI_LIBRARY_PATH variable to include the all of the artifacts that are required to
execute the application. Specifically, all three of the artifacts that are located on the SD card are mounted at
/mnt/card/opencpi/xilinx13_4/artifacts. After running mysetup.sh, navigate to /mnt/card/opencpi/xml.
Run the application using the following command:
$ ocpirun -v -t 1 -d -m bias=hdl bias.xml
The output should be similar to the output shown in Section 9.1.
Run the following commands to view the input and output, and reference Section 9.1 for the expected results:
$ hexdump test.input | less
$ hexdump test.output | less
10 Running Reference Applications
Now that you have set up OpenCPI and the E310 radio, you can run one of the reference applications. Navigate to
bsp_e310/applications/FSK or bsp_e310/applications/rx_app and follow the instructions in the corresponding
documents (FSK_App_Getting_Started_Guide_E3XX.pdf and FSK_app_e3xx.pdf, or RX_app_e3xx.pdf ).
17
Page 18

Ettus E3XX Getting Started Guide ANGRYVIPER Team
Appendices
A Generating Boot Artifacts
In normal use cases, the SD card should be createdable and usable via the simple steps in Section 4. This section
outlines the steps required to regenerate the artifacts used in previous sections for solely informational purposes and
is not expected for users to have to complete these steps.
A.1 BOOT.bin and u-boot.img
The original first and second stage bootloader artifacts that come installed on the E310 SD card are not suitable
for the Petalinux build OpenCPI uses for its software platform as those artifacts are expecting a uImage kernel with
a separate filesystem partition, while the Petalinux build uses a separate ramdisk image file. The BOOT.bin and
u-boot.img files were rebuilt in order to support booting into this style of Linux images from Ettus’s and Xilinx’s
repositories. In summary, the repositories were cloned and checked out to the proper branch, according to the release
for the e310 and the bitbake recipe, and subsequently cross-compiled for ARM using the Xilinx toolchain. The steps
are shown below.
$ git clone https://github.com/EttusResearch/meta-ettus.git
$ cd meta-ettus && git checkout e300-daisy && cd ..
$ git clone https://github.com/Xilinx/u-boot-xlnx.git
$ cd u-boot-xlnx && git checkout 664820b231b129552e963e1a96b45ac7196ccc81 && cd ..
$ cp meta-ettus/e300-bsp/recipes-bsp/u-boot/ettus-e300/* u-boot-xlnx/
$ cd u-boot-xlnx
$ mv ps7_init.{c,h} board/xilinx/zynq/
$ git apply 0001-E300-Uses-UART0-for-console.patch
$ git apply 0002-E300-Disable-QSPI.patch
$ git apply 0003-Read-mac-address-from-i2c-EEPROM.patch
$ git apply 0001-e300-Added-memory-test.patch
$ source {xilinx-install-dir}/Xilinx/SDK/2013.4/settings64.sh
$ make zynq_zc70x_config CROSS_COMPILE=arm-xilinx-linux-gnueabi$ make CROSS_COMPILE=arm-xilinx-linux-gnueabi-
A.2 devicetree.dtb
The device tree needed to be modified in order to register the hardware devices with the correct hardware device
driver in the Petalinux kernel. In summary, the device tree provided by Ettus was decompiled to a device tree source
(dts) file using the device tree compiler (dtc), modified the text file by adding the proper "compatible" strings to
the devices, and subsequently compiled back into a device tree blob (dtb). The steps shown below assume dtc is in
your $PATH and the original device tree blob is in the current working directory.
$ dtc -I dtb -O dts -o devicetree.dts uImage-zynq-e31x-3.dtb
$ vim devicetree.dts
$ dtc -I dts -O dtb -o devicetree.dtb devicetree.dts
Note: The full source for the modified devicetree.dts can be found at <BSPproject>/hdl/platforms/e3xx/sd_
card_source/devicetree.dts
A.3 uImage and uramdisk.image.gz
The uImage and uramdisk.image.gz image files come directly from the default 13_4 OpenCPI software platform.
The 13_3 software platform could not be used due to the SD card driver in 13_3 not supporting the E310’s SD card
device.
18
Page 19

Ettus E3XX Getting Started Guide ANGRYVIPER Team
B Copying only required files to SD card
B.1 Copy embedded OS and boot files to SD card
Copy the following files/directories onto the SD card:
$ cp /opt/opencpi/cdk/e3xx/sdcard-xilinx13_4/boot.bin /run/media/<user>/<partition>/
$ cp /opt/opencpi/cdk/e3xx/sdcard-xilinx13_4/devicetree.dtb /run/media/<user>/<partition>/
$ cp /opt/opencpi/cdk/e3xx/sdcard-xilinx13_4/u-boot.img /run/media/<user>/<partition>/
$ cp /opt/opencpi/cdk/e3xx/sdcard-xilinx13_4/uImage /run/media/<user>/<partition>/
$ cp /opt/opencpi/cdk/e3xx/sdcard-xilinx13_4/uramdisk.image.gz /run/media/<user>/<partition>/
B.2 Files needed for Standalone Mode
After performing the steps from B.1, copy the entire opencpi directory to the SD card, then copy the relevant
bitstreams, artifacts into the artifacts directory and application XMLs into the applications directory. For this
getting started guide, only one bitstream is required to be copied onto the SD cards, where as the required artifacts
and application XML where copied to the SD along with the entire opencpi directory.
$ cp -rL /opt/opencpi/cdk/e3xx/sdcard-xilinx13_4/opencpi /run/media/<user>/<partition>/
$ cp /home/<user>/ocpi_projects/assets/hdl/assemblies/testbias/container-testbias_e3xx_base/\
target-zynq/testbias_e3xx_base.bit.gz /run/media/<user>/<partition>/opencpi/xilinx13_4/artifacts
B.3 Files needed for Network Mode
After performing the steps from B.1, create a directory on the partition named "opencpi" and copy the following
files into the this directory:
$ mkdir /run/media/<user>/<partition>/opencpi
$ cp /opt/opencpi/cdk/e3xx/sdcard-xilinx13_4/opencpi/default_mynetsetup.sh \
/run/media/<user>/<partition>/opencpi/
$ cp /opt/opencpi/cdk/e3xx/sdcard-xilinx13_4/opencpi/zynq_net_setup.sh \
/run/media/<user>/<partition>/opencpi/
19
 Loading...