

National RQ-702 Operation Manual

/
4
Mtionat
THREE - SPEED HI -
FI
TAPE RECORDER
MODEL RQ-702
OPERATION MANUAL
NATIONAL
MATSUSHITA
MATSUSHITA ELECTRIC INDUSTRIAL CO., LTD.
OSAKA
JAPAN

Tone control
On-off switch
& volume control
Instant stop button
External speaker jack
Earphone socket
Micro phone jack
Recording button
Playback but ton
Fast forward button
S top button
Rewind button
Supply reel table
Recording tape
Panel
Take-up reel
Take-up reel table
Speed selector knob
Tape counter
Operational Parts
Head cover

Cover lock
Voltage adaptor
Accessory compartment
Motor cover
Rubber leg piece
Name plate

How to connect the tape recorder with the power source:
Set the voltage adaptor at the bottom of this tape recorder at your mains voltage before plugging it into
the AC mains. Setting can be easily done with a screw driver. Proper setting is shown in the table below.
Mains Voltage
Setting of Vcltage Adaptor
100V
105V
100V
110V
115V
117V
115V
120V
127V
124V
133V
125V
135V
125V
185V
200V
210V
200V
215V
220V
225V
230V
230V
240V
247V
250V
254V
250V
—1—

50.,,capstan stand (A)
How to convert the 50
set into a 60
set :
Model RQ - 702 has been made to operate from 50 AC
mains. To operate it from 60
AC mains a little modifi-
cation is necessary, which is very easy.
Take the head cover off by pulling it up. Then take the
50
capstan off and place it on the 50
capstan stand.
Secure the capstan with the screw. By removing the 50
capstan, the tape is adapted to play from 60
mains.
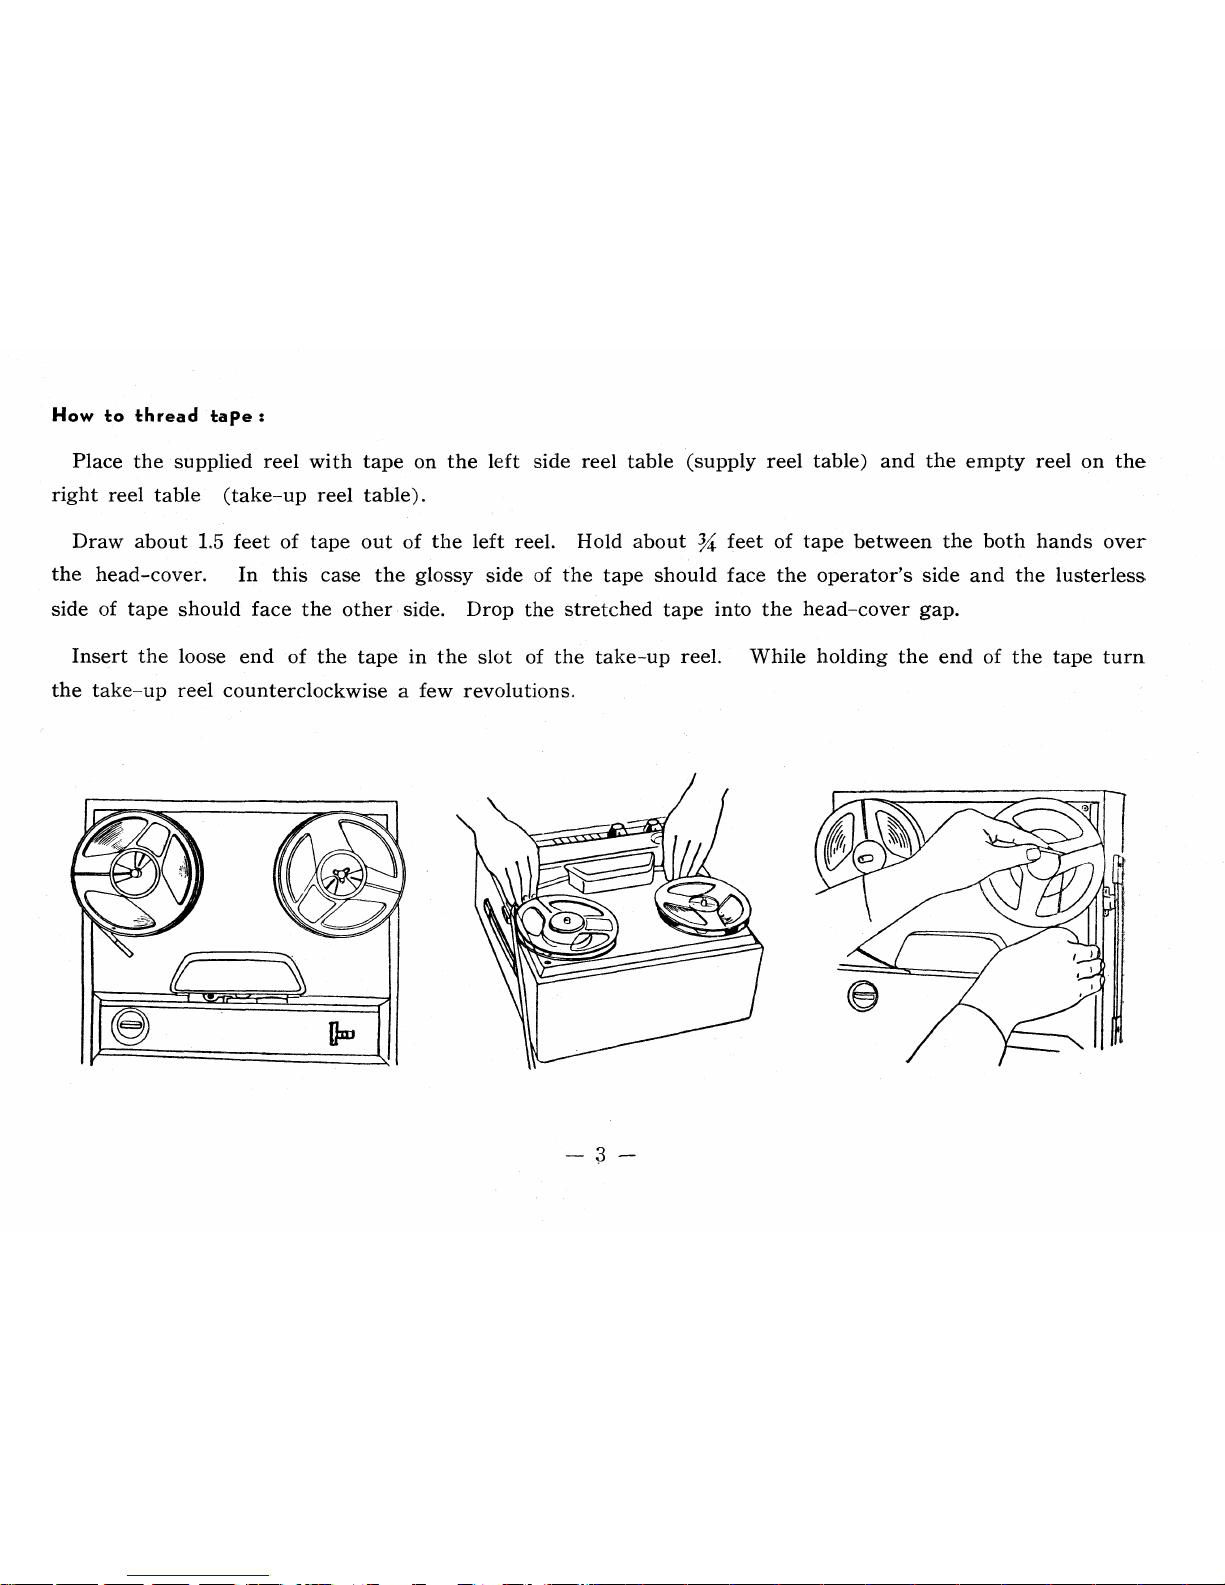
How to thread tape:
Place the supplied reel with tape on the left side reel table (supply reel table) and the empty reel on the
right reel table (take-up reel table).
Draw about 1.5 feet of tape out of the left reel. Hold about
3/4
. feet of tape between the both hands over
the head-cover.
In
this case the glossy side of the tape should face the operator's side and the lusterless,
side of tape should face the other side. Drop the stretched tape into the head-cover gap.
Insert the loose end of the tape in the slot of the take-up reel. While holding the end of the tape turn
the take-up reel counterclockwise a few revolutions.
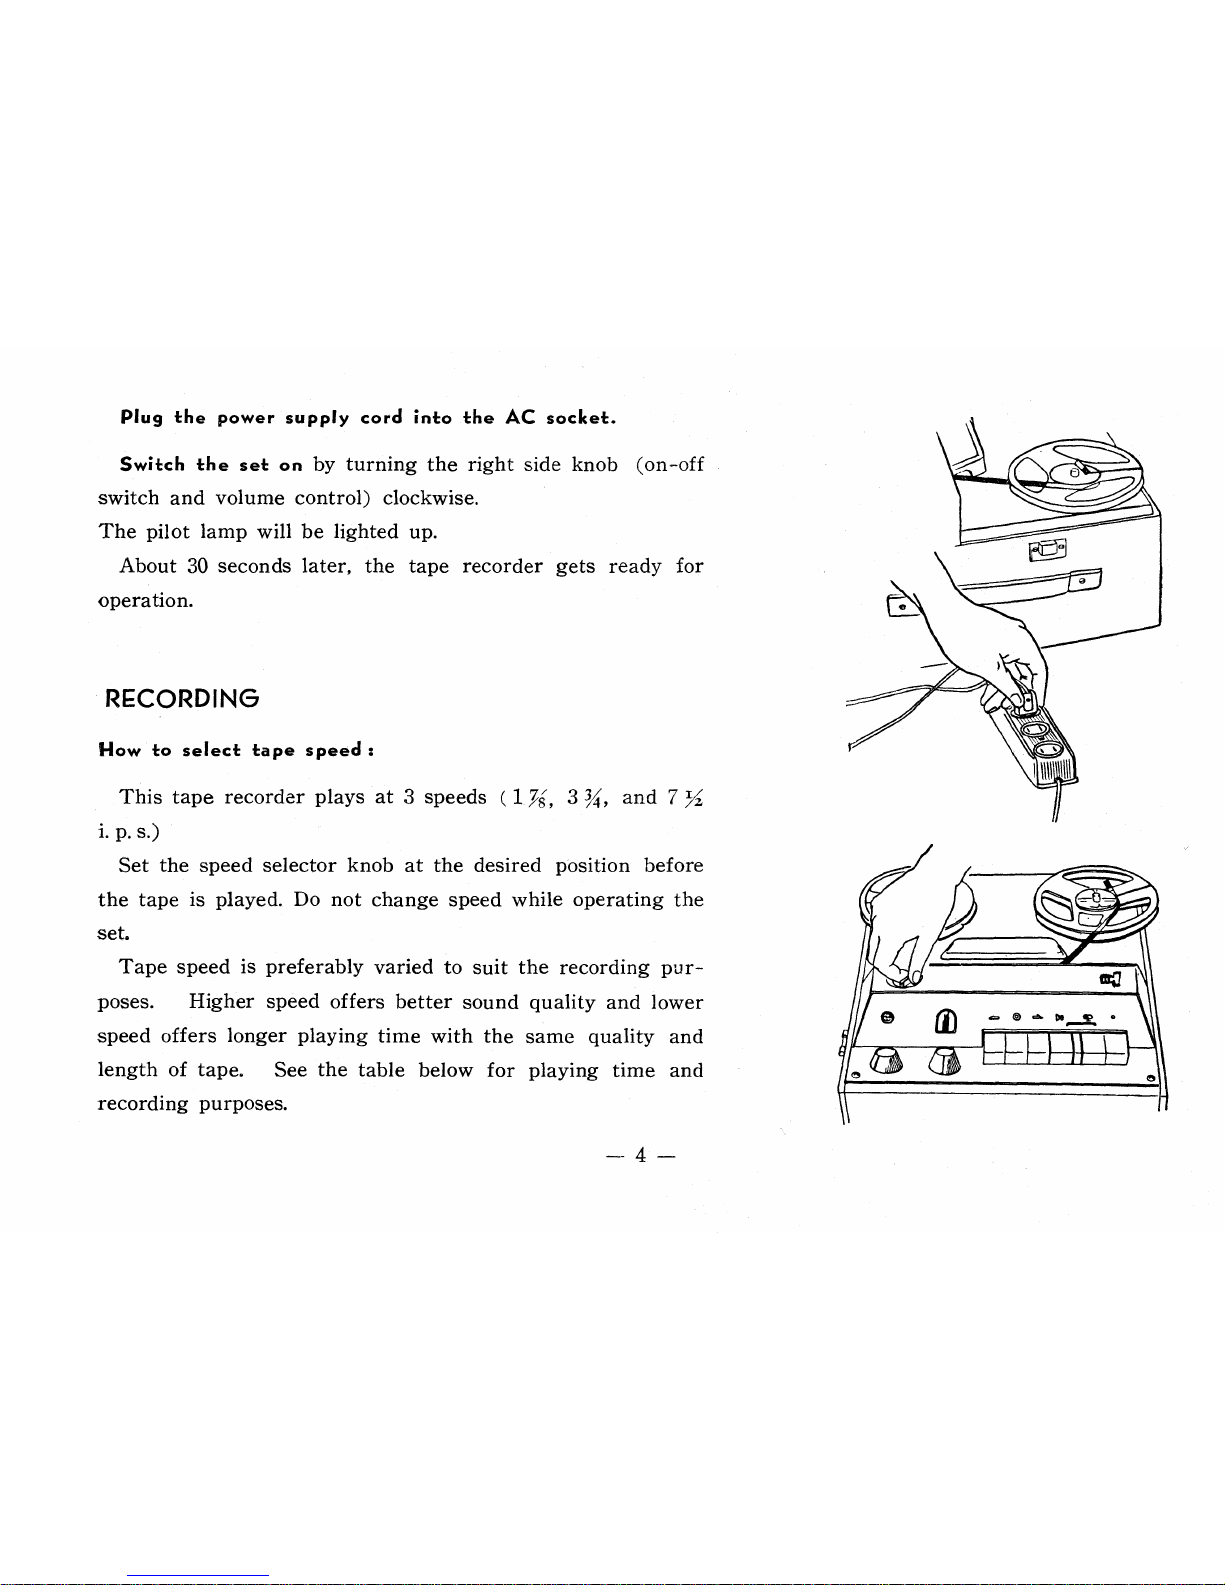
Plug the power supply cord into the AC socket.
Switch the set on
by turning the right side knob (on-off
switch and volume control) clockwise.
The pilot lamp will be lighted up.
About 30 seconds later, the tape recorder gets ready for
operation.
RECORDING
How to select tape speed :
This tape recorder plays at 3 speeds ( 1
Vis,
3
3
%,
and 7 zz
i. p. s.)
Set the speed selector knob at the desired position before
the tape is played. Do not change speed while operating the
set.
Tape speed is preferably varied to suit the recording purposes. Higher speed offers better sound quality and lower
speed offers longer playing time with the same quality and
length of tape. See the table below for playing time and
recording purposes.
Tape
length
Playing time
Recording Purposes
1,200 ft.
(7" reel)
600 ft.
(5" reel)
300 ft.
( 3 reel LP tape)
Tape speeds
-
\
7 % i.p.s.
30min. X 2
15min. >< 2
7.5min. X 2
Hi-Fi recording and reproduction of
FM, LP phono or actual music
3% i.p.s.
1 hour X 2
30min. x 2
15min. X 2
Music—instrumental or vocal
1
PA
i.p.s.
2 hour X 2
1 hour x 2
30min x 2
Long hour lecture, conference, lin-
guistic studies
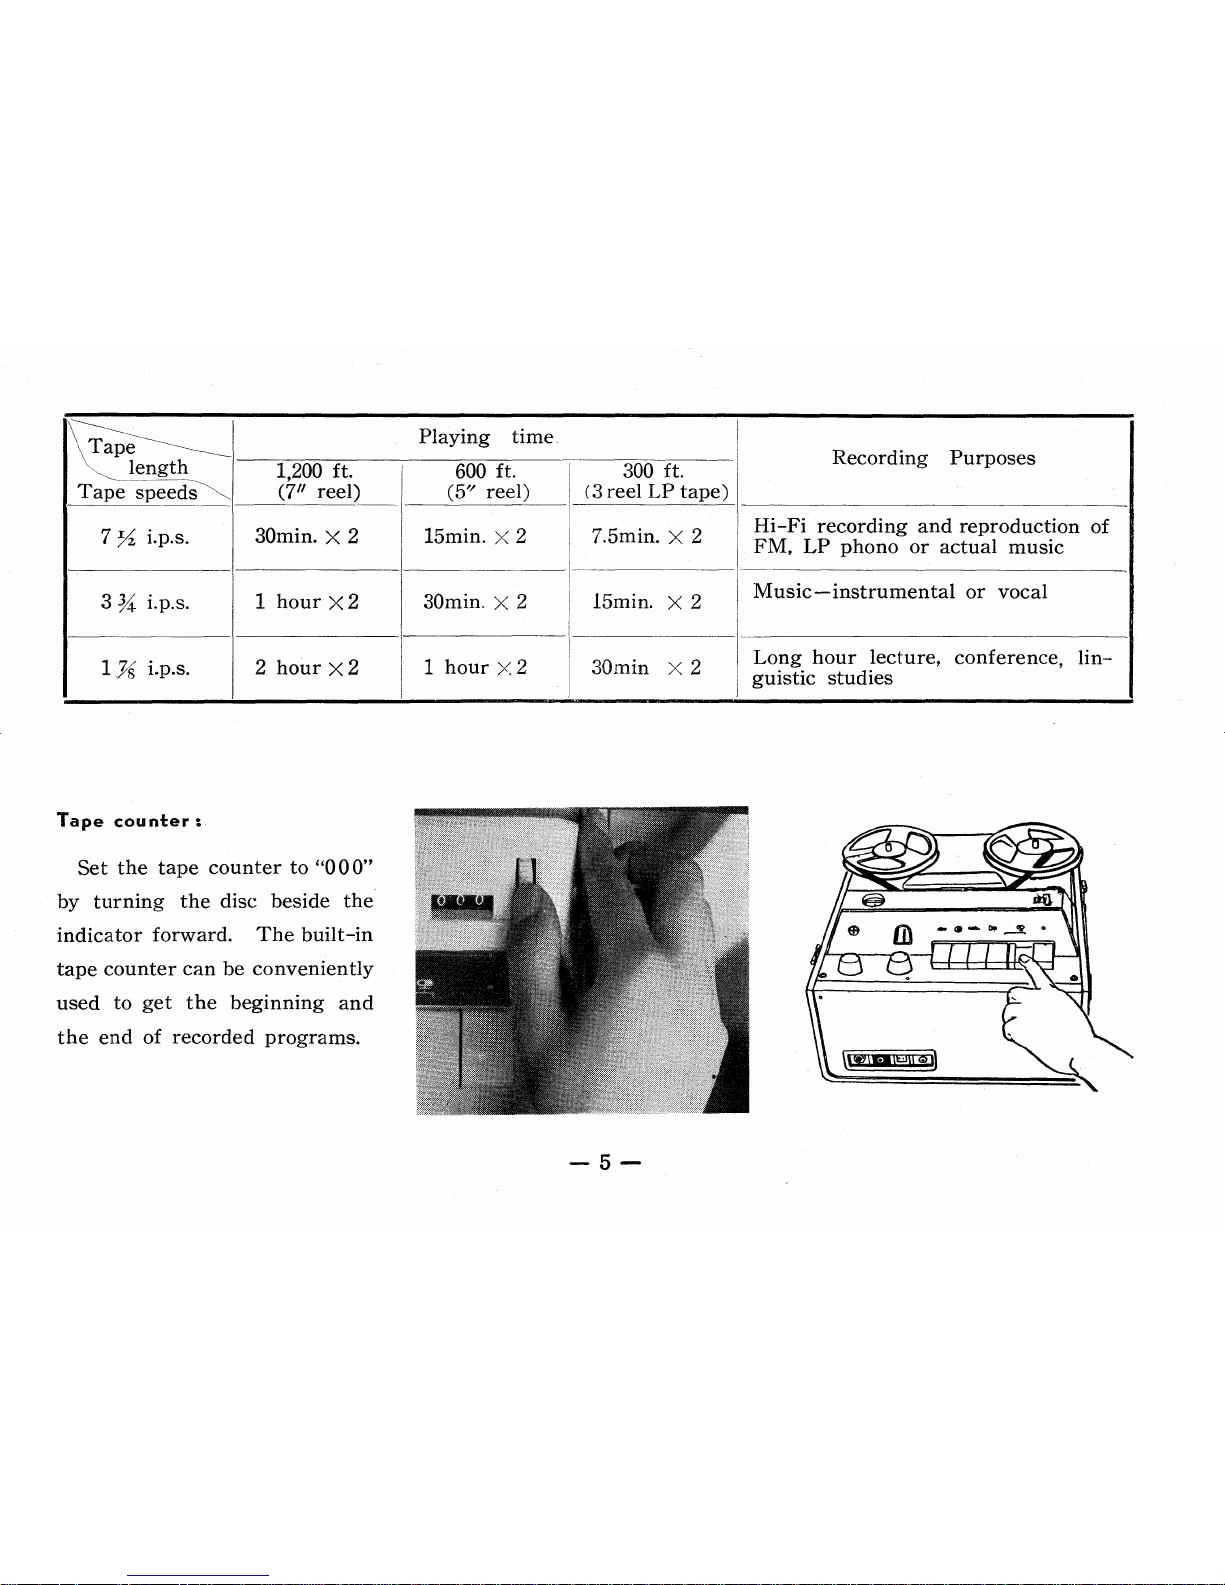
Tape counter
Set the tape counter to "0 0 0"
by turning the disc beside the
indicator forward. The built-in
tape counter can be conveniently
used to get the beginning and
the end of recorded programs.
—5—
 Loading...