

National Captivate Assembly Instructions Manual
Assembly Instructions
Captivate™ Series
Bridge Assembly
Proper product installation, in accordance with these instructions, is the responsibility of the installing agent. If you
have any questions concerning these instructions, please call National Customer Service.
CASEGOODS
1
Figure A
Telephone 800.482.1717
Fax 812.482.8800
www.nationalonline.com
Part #2040765
Printed in U.S.A
© 2007 Kimball International, Inc.
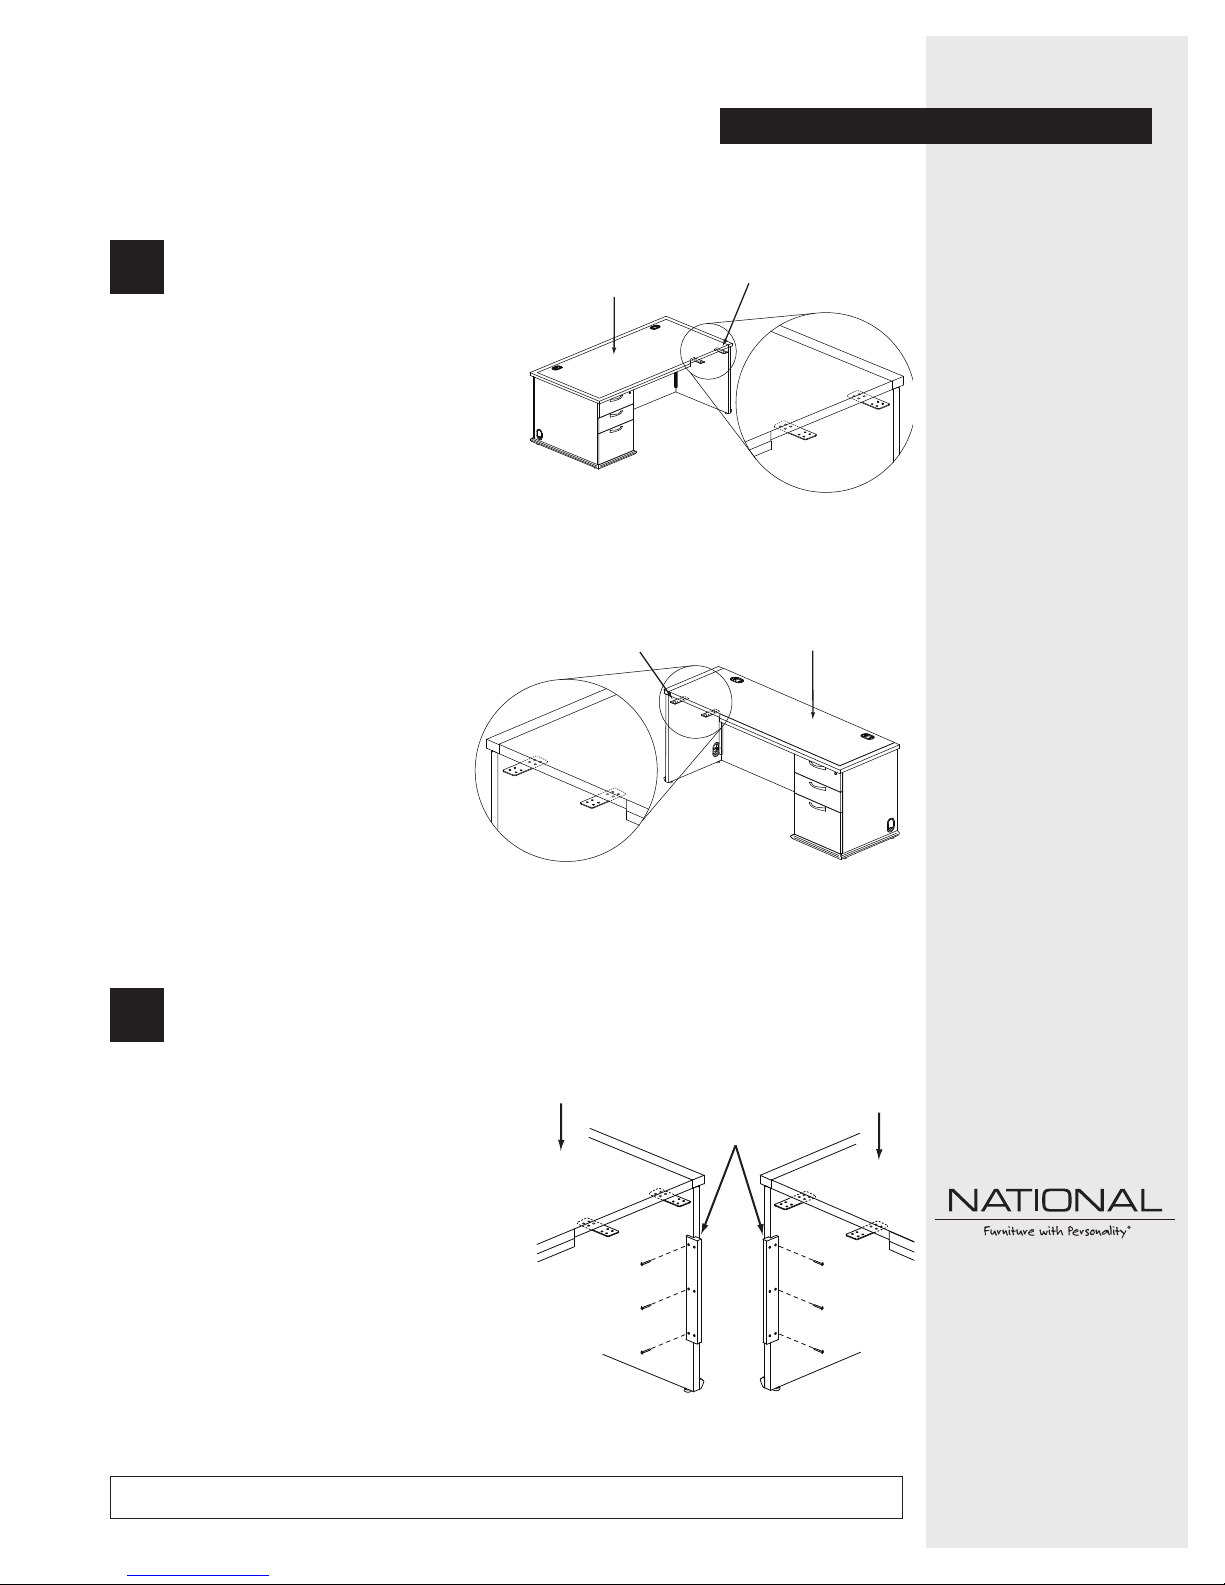
Attach mounting brackets to underside
of desk and credenza worksurfaces where
they will attach to the bridge worksurface.
Center the brackets with the edge of the
worksurfaces. Attach brackets to desk and
credenza using the provided #10 x 3/4”
panhead screws, four (4) per bracket
(Figure A and Figure B).
2
Center wood mounting bracket on desk
and credenza end panel and attach using
three (3) #8 x 1 1/4” panhead screws
provided (Figure C).
Recommended Tools
• Screw Gun
• Phillips Head Bit
• Level
Figure B
NOTE: The bridge can be attached between a desk and credenza or return. A desk and
credenza are used as examples in this instruction.
Package Contents Qty.
• Bridge 1
• Modesty Panel 1
• Mounting Brackets 4
• Wood Mounting Rails 2
• #10 x 3/4” Panhead Screws 32
• #8 x 1 1/4” Panhead Screws 12
• #8 x 1 1/2” Panhead Screws 6
Desk
Figure C
Center brackets
on edge of desk
Credenza
Desk
Wood
Mounting
Brackets
Credenza
Center brackets
on edge of credenza
Assembly Instructions
Captivate™ Series
Bridge Assembly
Proper product installation, in accordance with these instructions, is the responsibility of the installing agent. If you
have any questions concerning these instructions, please call National Customer Service.
CASEGOODS
4
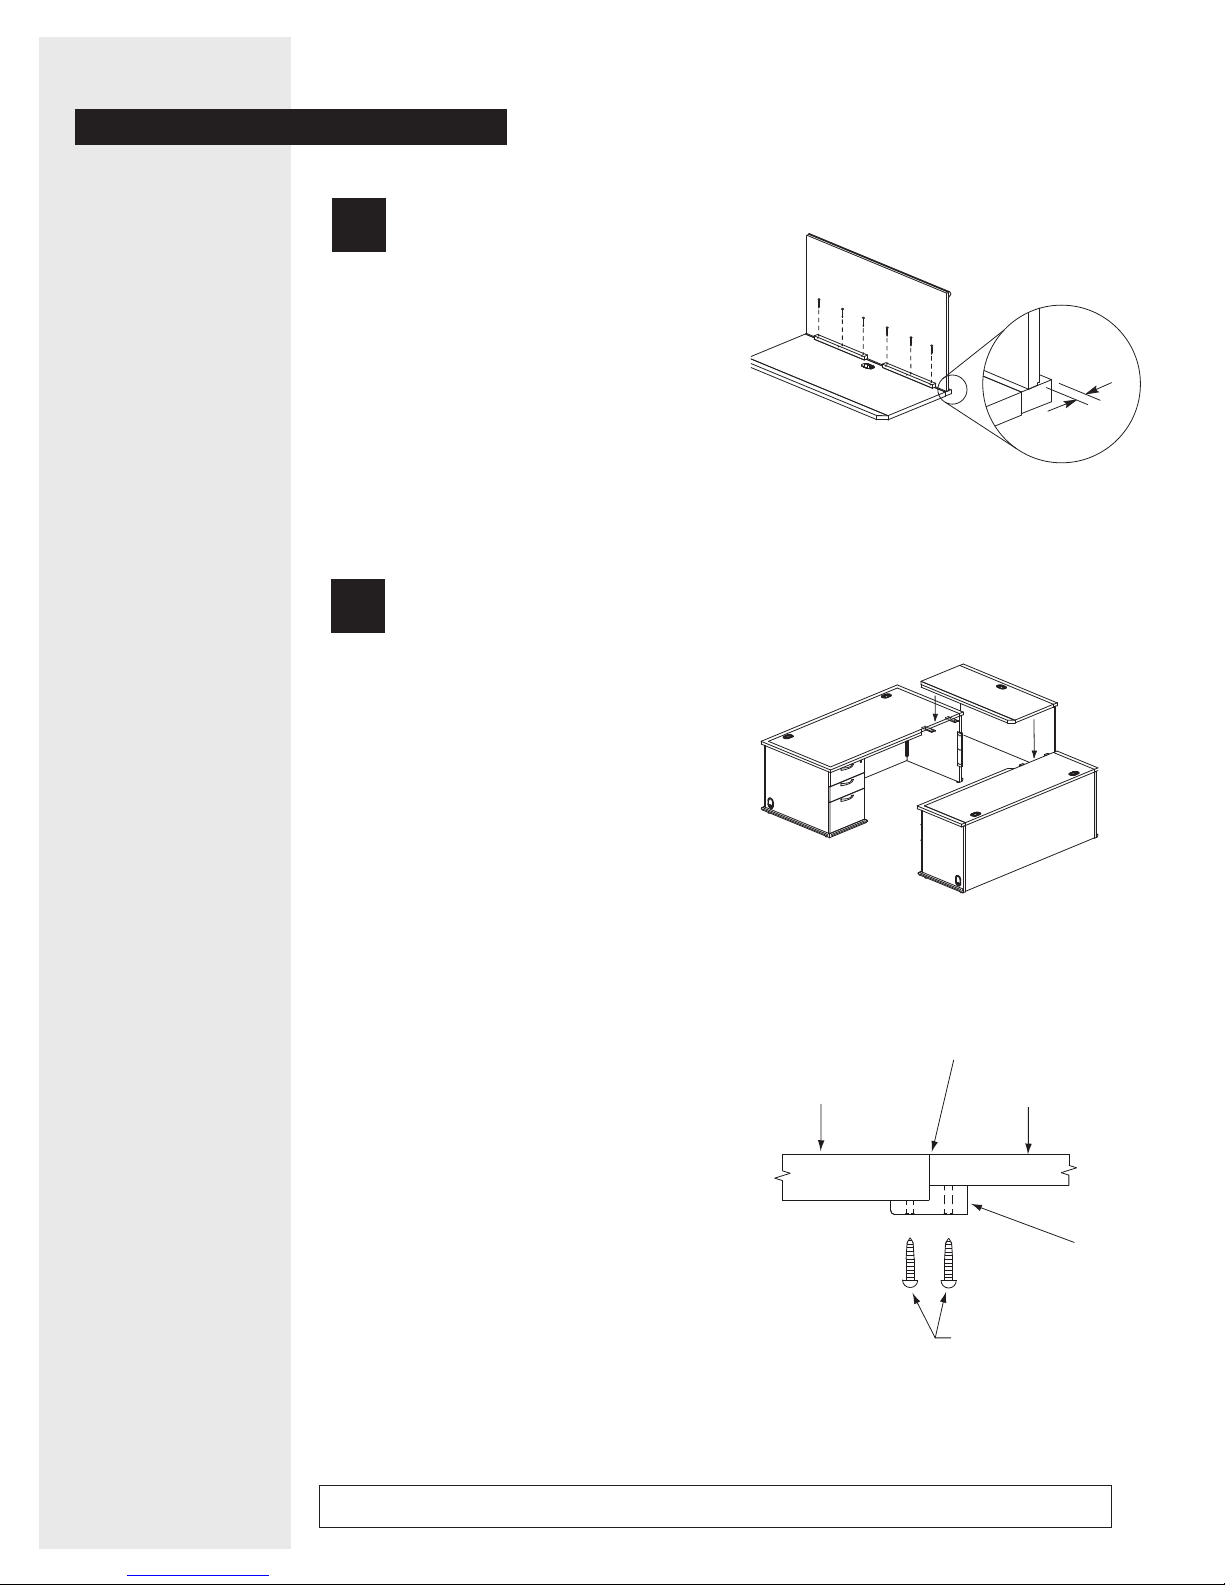
Move desk and credenza into desired
positions. Level units. Place bridge
worksurface with modesty attached
on mounting brackets. Adjust units so
all worksurfaces are flush with no gaps,
and that modesty panel is flush with no
gaps with end panels of desk and
credenza.
Attach bridge worksurface to all
mounting brackets with provided
#10 x 3/4” panhead screws, four
(4) per bracket.
Attach bridge modesty panel to
wood mounting rails using three (3)
of the provided #8 x 1 1/4” panhead
screws in each mounting rail
(Figures E & Figure F).
3
Figure D
Place bridge worksurface face down on a
smooth, clean, soft surface. Align modesty
panel cleat holes with predrilled holes on
edge of worksurface rim. This will leave an
offset of approximately 25/32”. Attach
modesty panel cleats to worksurface using
six (6) #8 x 1 1/2” panhead screws
(Figure D).
Figure E
Attach bridge to
mounting brackets
Bridge
Modesty Panel
Flush
Desk or Credenza
End Panel
Figure F
25/32”
Wood
Mounting Rail
#8 x 1 1/4”
Panhead Screws
 Loading...