

National 409TBL Binocular Stereo, 410TBL Binocular Stereo, 411TBL Binocular Stereo Instructions Manual

National Optical & Scientific Instruments Inc.
Phone (210) 590-9010 Fax (210) 590-1104
INSTRUCTIONS FOR STEREOSCOPIC MICROSCOPES
6508 Tri-County Parkway
Schertz, Texas 78154
409TBL Binocular Stereo
410TBL Binocular Stereo
411TBL Binocular Stereo
Copyright © 1/2/01
National Optical & Sc i ent i fic Instruments , Inc.
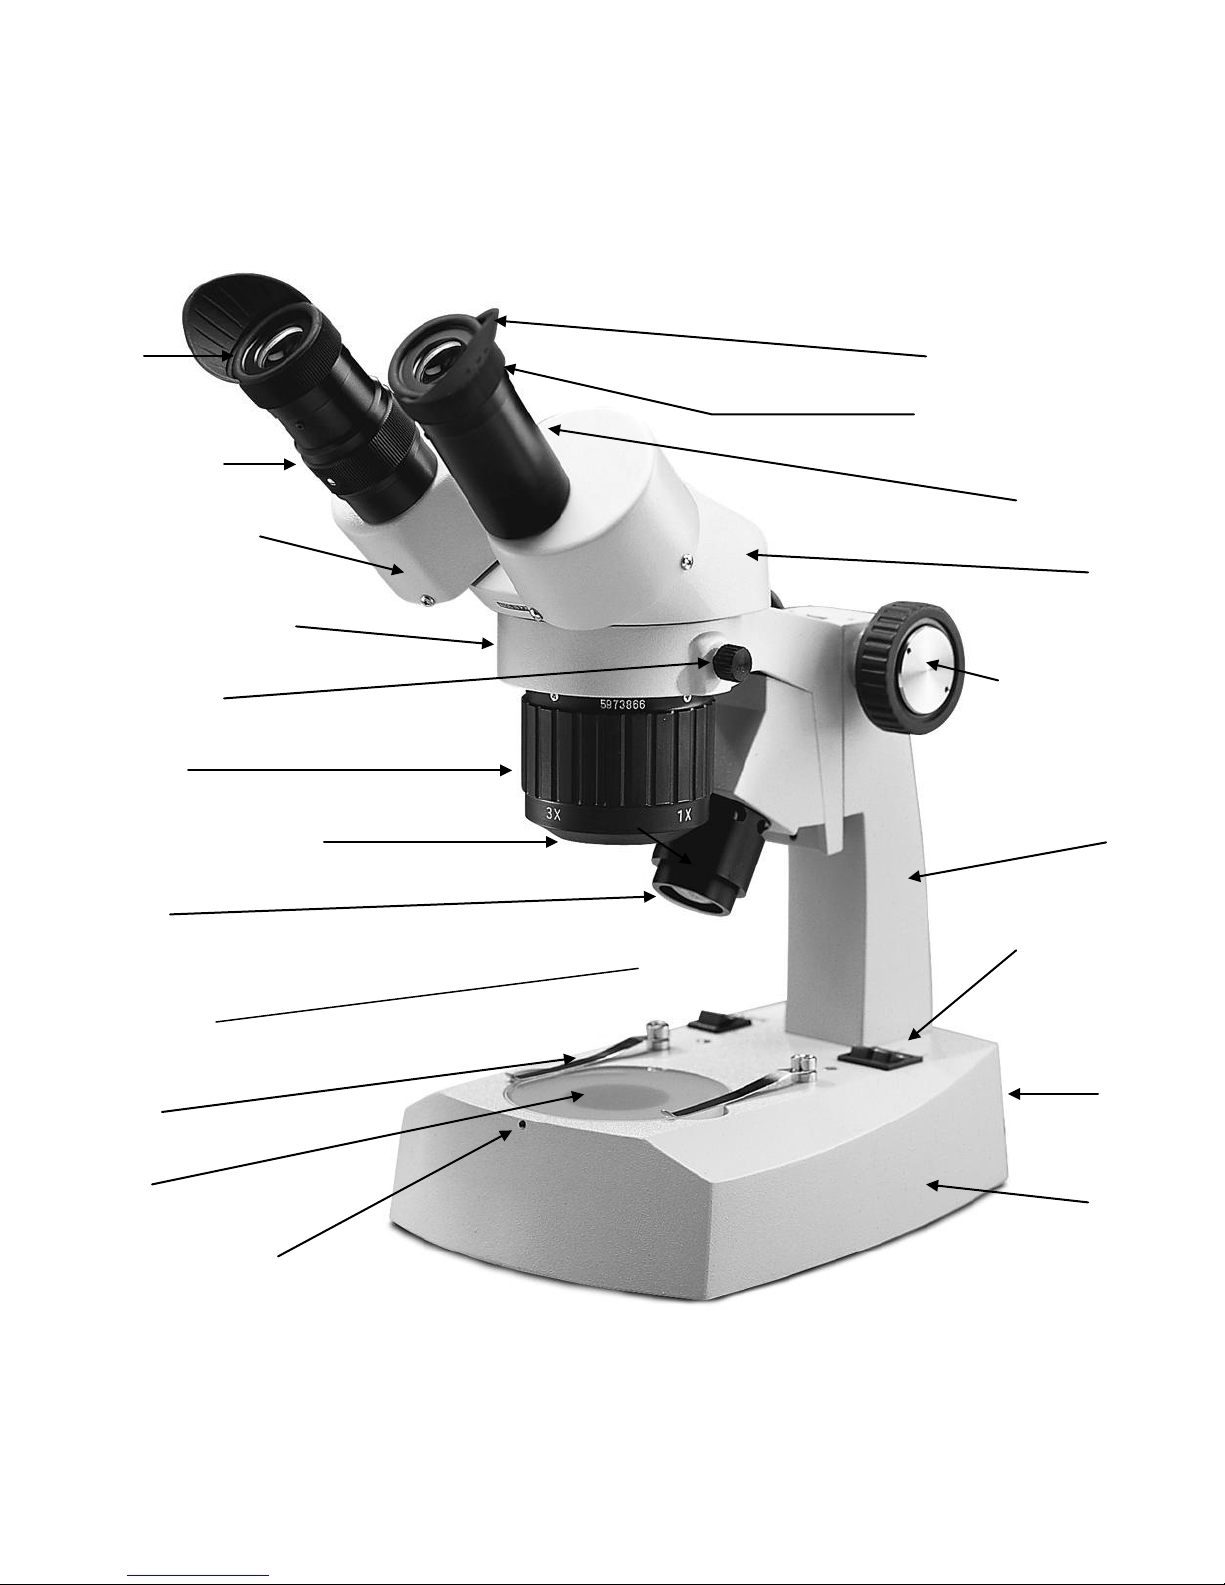
Eyepiece
Eyepiece tube
Eyepiece tube housing
Head locking screw
Objective turret
Separate top
switches
Base
Stage plate locking screw
Stage plate
Fuse
Top light
Arm
Focusing knob
Head
Diopter adjustment
Eyepiece locking screw
Main power switch
Stage clips
Rubber eyepiece shield
Slotted head retaining screw
(located on side)
Glass objective lens pr otector
(tension
adjustment collar
behind knob on
this side)
(incidental illumination)
& bottom light

Stereoscopic microscopes are used for viewing 3-dimensional objects, inspection or assembly of small parts,
and for dissection of biological specimen. They provide an upright, unreversed image which permits easy
manipulation of the object being viewed while looking through the microscope. They are designed for viewing
solid objects at low magnification, but they will also permit viewing of some transparent specimen slides.
For optimum viewing satisfaction, follow these simple procedures. Nomenclature used to describe components
and controls can be identified by referring to the diagram at left.
UNPACKING
1. Your microscope is packed with the following components, all of which have been checked at the factory.
Carefully remove all components and check against this list. Make certain not to touch any of the lens
surfaces while handling the microscope. Dust, dirt or fingerprints can damage the delicate lens surfaces or
adversely affect image quality. Retain Styrofoam container in case microscope must be transported or
returned to factory for any reason.
A. Microscope, with pair of eyepieces.
B. Instruction manual.
C. Rubber eyecups (pair).
D. Two 80mm O.D. stage plates: plastic black/white & frosted glass (one installed).
E. Frosted 35.6mm blue filter.
F. “L” hex wrench (for changing stage plate).
G. Dustcover.
2. Examine packing material before you discard it. Retain the styrofoam container in case you need to
transport, store, or return the microscope for service. If it becomes necessary to ship the microscope for any
reason, pack it in the styrofoam container, and then pack the styrofoam in another corrugated shipping
container for optimum protection. Use of the styrofoam alone will not provide adequate protection in transit,
and will void your warranty.
DESCRIPTION OF COMPONENTS
1. EYEPIECE: Group of lenses closest to the eye, they magnify image formed by the objectives.
2. RUBBER EYEPIECE SHIELDS: These help block out undesired light reflections, and to position your eyes at
the proper point above the eyepieces.
3. DIOPTER: Knurled diopter adjustment permits user to adjust for differences in eyesight between left and
right eyes.
4. EYEPIECE TUBE HOUSING: Permits each user to adjust spacing between eyepieces in order to
accommodate distance between their eyes. Adjusts interpupillary distance from 55mm to 75mm.
5. OBJECTIVE TURRET: Changes objective magnification by rotating objective turret 90 degrees.
6. LENS COVER: Glass protective cover protects objective lenses from damage. Glass cover can be removed
so that model no. 932-409 ring-light adapter can be installed.
7. LIGHT SHADE: Helps block out undesired light from incidental illuminator.
8. MAIN POWER SWITCH: Main power switch supplies power to incidental and transmitted control switches.
3
 Loading...